

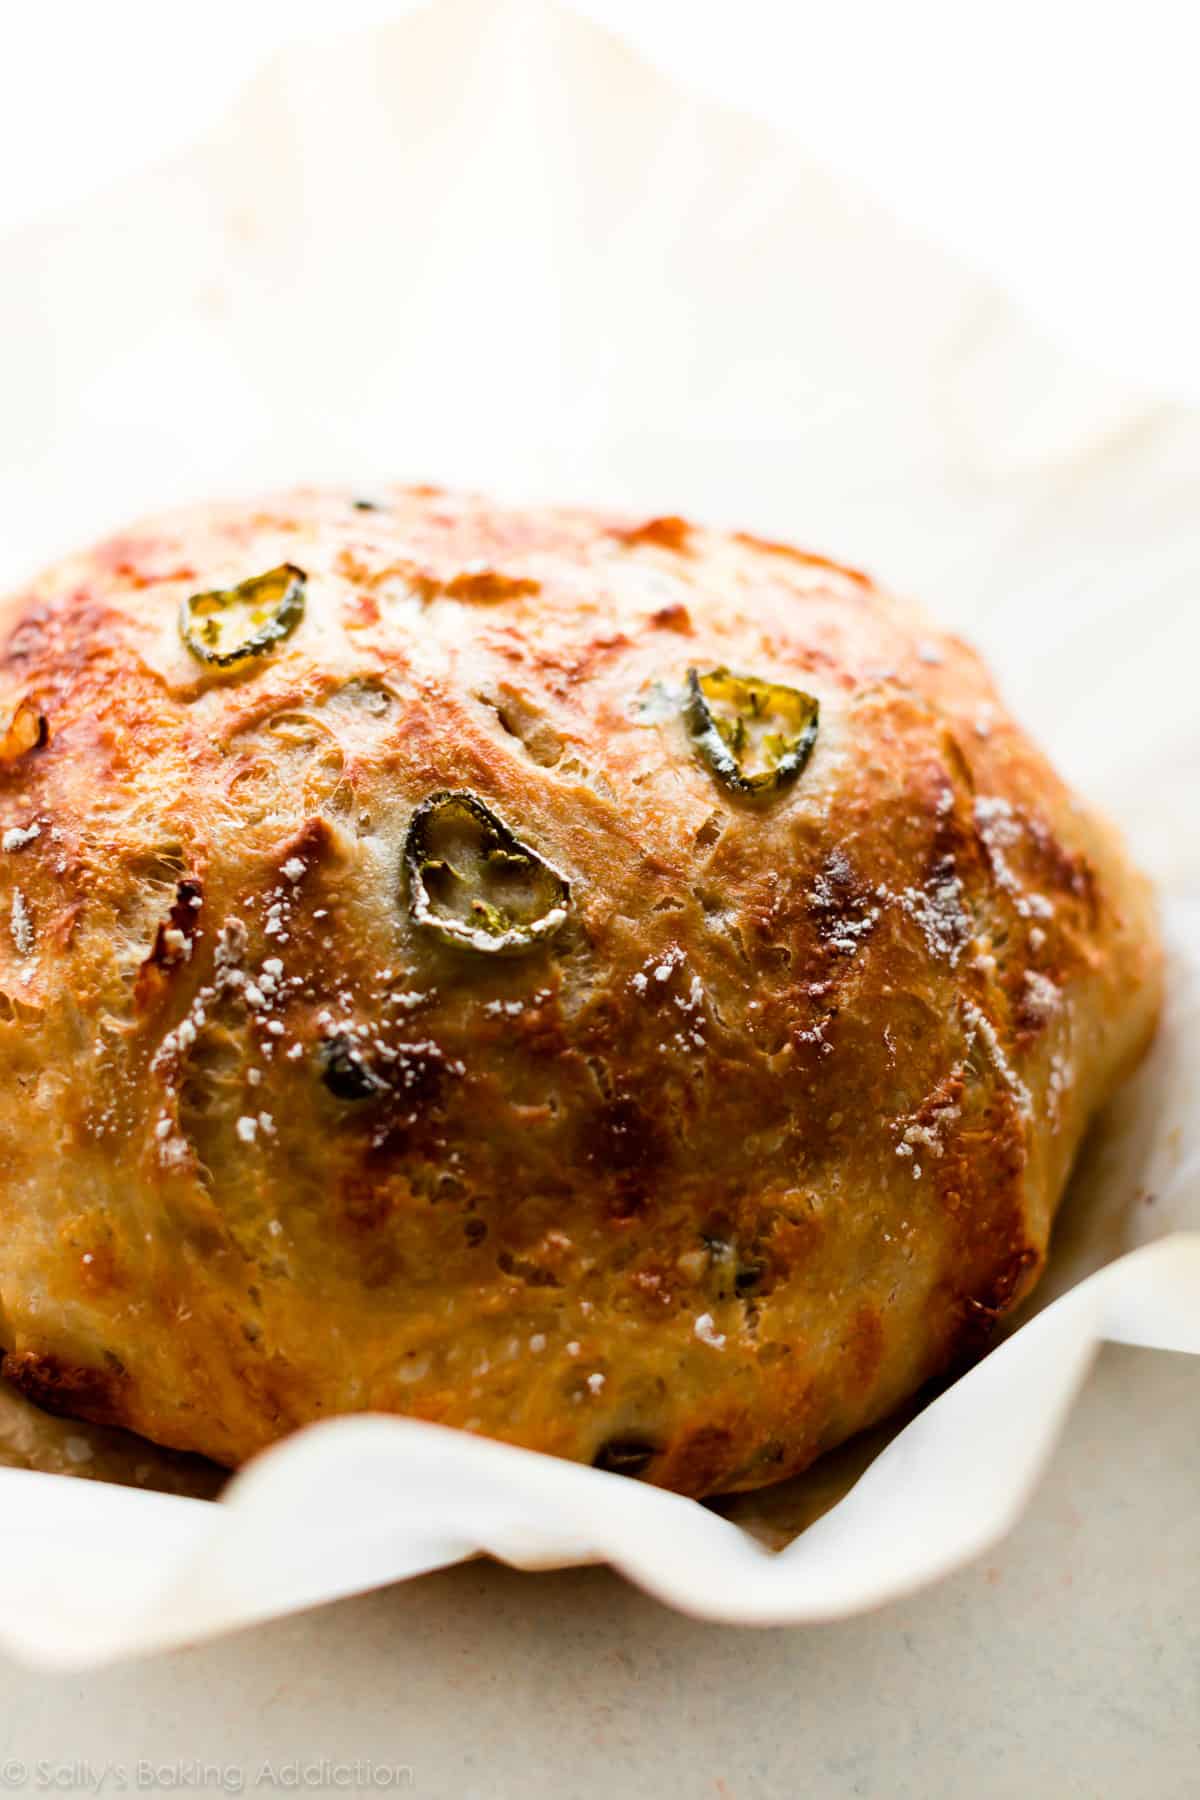
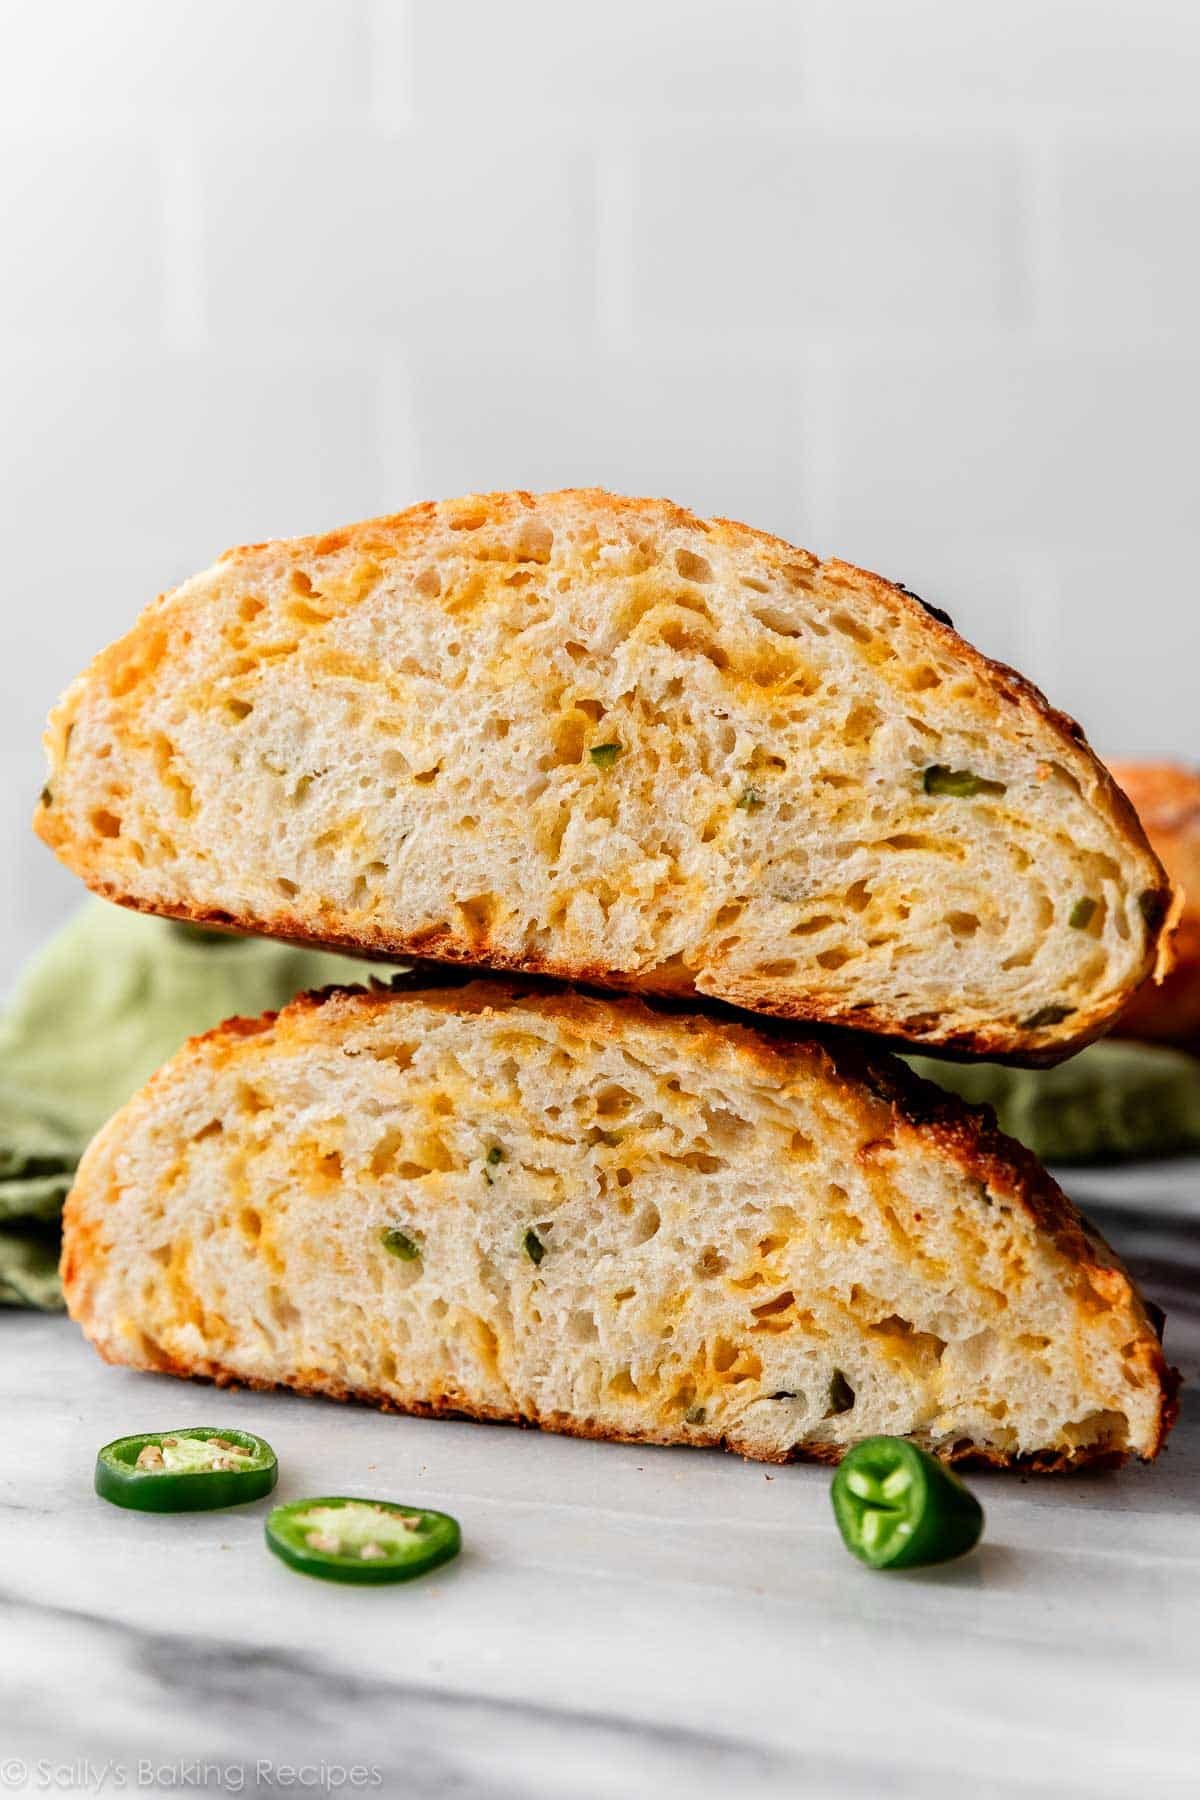
Homemade bakery-style bread has never been easier. This super crusty no knead jalapeño cheddar bread is baked in a dutch oven and requires practically zero hands-on work from you!
I originally published this recipe in 2018 and have since added new photos and a video tutorial, as well as simplified instructions.
One reader, Tina, commented: “One of my favorite bread recipes from you. I’ve made it multiple times over the the past couple of years. Every time it comes out crusty and delicious! The honey butter recipe pairs perfectly with this bread. In fact, I have the dough resting on my counter right now. Can’t wait to eat it! ★★★★★“
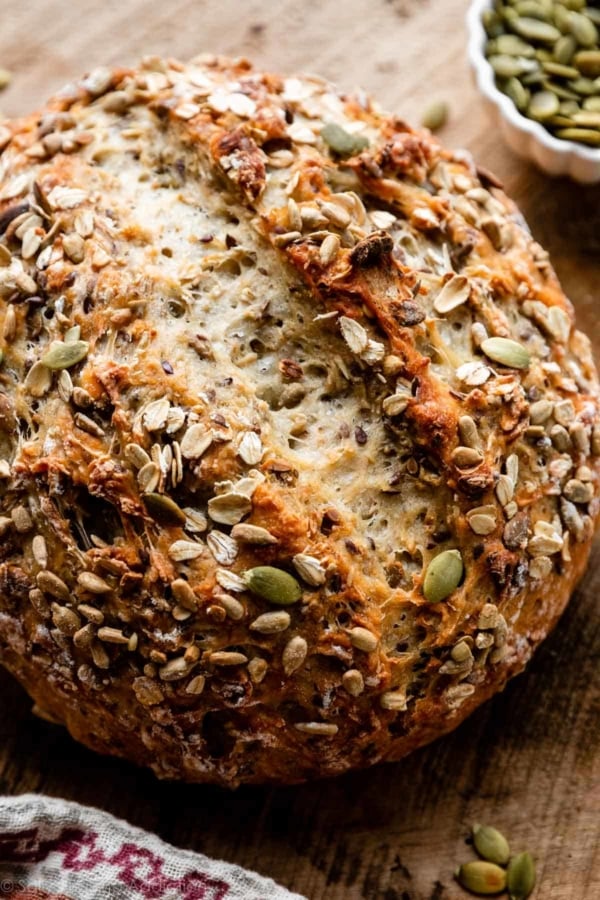
After sharing this cranberry nut no-knead bread, many readers asked for another flavor variation. Since then, I’ve also published no-knead olive bread, super seeded oat bread, this “plain” homemade artisan bread (anything but plain, so flavorful!), no-knead asiago-crusted skillet bread, crusty no-knead pizza bread, and today’s jalapeño cheddar bread. I’ve actually had today’s recipe published for a few years, and just added some new photos and simpler instructions.
Grab some spicy jalapeños, a block of sharp cheddar, and lots of self control.
What comes to mind when you think of homemade bread? Unless you’re a seasoned baker, it sounds a little scary, right? This recipe will completely change that thought. You can make bakery-style bread at home and besides stirring the ingredients together, the process requires zero work from you.

How to Make Jalapeño Cheddar No-Knead Bread
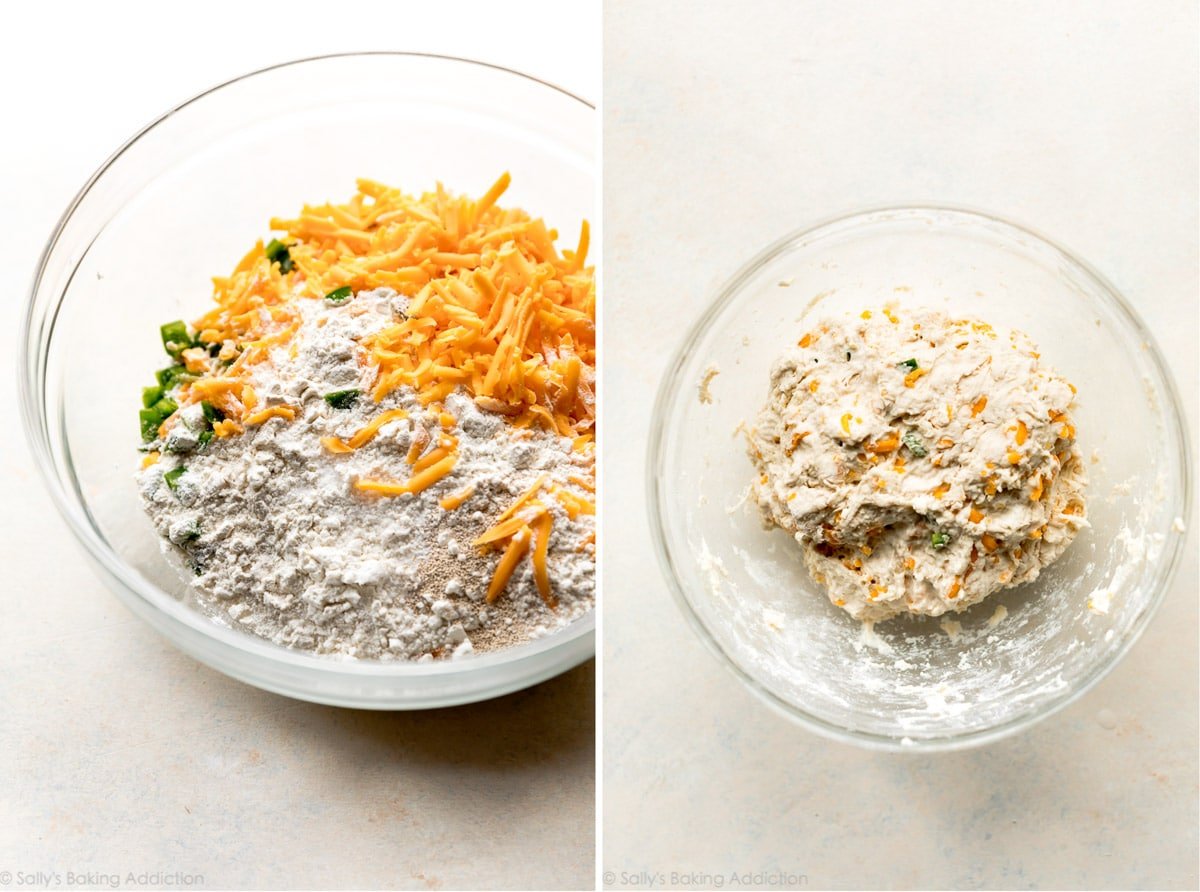
- Stir 6 ingredients together including flour, yeast, salt, cheddar cheese, chopped jalapeño, and water. Don’t even break out your mixer.
- Shape into a ball and leave it alone for a day.
- Score an X on top of the dough, let it rest, and then bake it in a dutch oven to obtain a super crisp crust.
- Eat it.
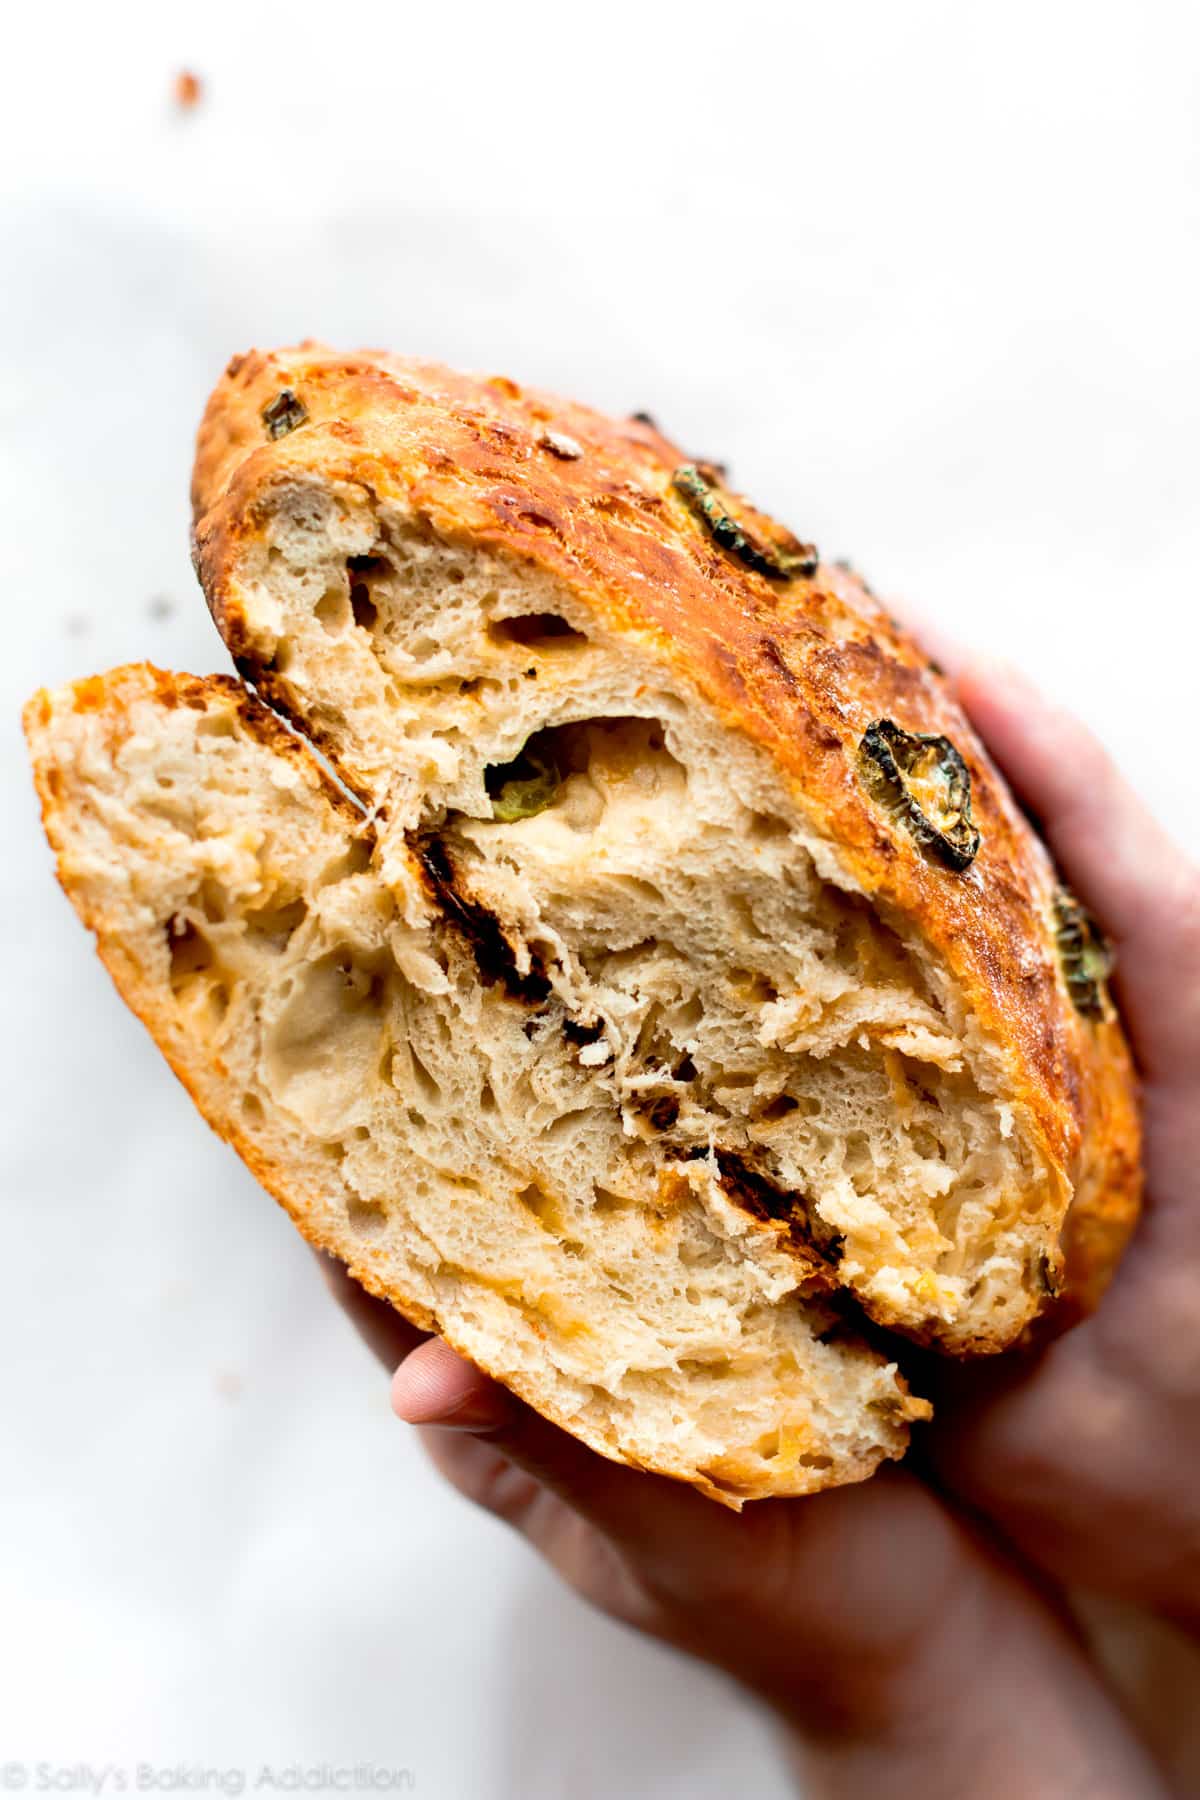
That’s all. This no knead, professional-bread-at-home method has swarmed the internet and kitchens all over the world. It originally came from Jim Lahey of Sullivan Street Bakery in NYC. It’s all very basic ingredients, but the method was groundbreaking and includes an 18 hour rise time. This overnight rest gives the dough a chance to ferment. Just set the dough on your counter and forget about it. The magic happens when you’re not looking! Forget how to knead dough; you don’t need to worry about that!
Let’s Talk Jalapeño & Cheddar
The bread’s base flavor comes from the fermentation over the 18 hour period. But to shake things up and make this a fancy-tasting specialty bread, add 1 diced jalapeño and some sharp cheddar cheese.
- Is this jalapeño cheddar bread spicy? Sort of. I can tolerate a little spice and I LOVE this bread. The pieces of dough without jalapeño helps to cool off your mouth. Feel free to adjust the amount of jalapeño based on your heat tolerance. And if you love this combination, make my jalapeño cheddar soft pretzels next.
- What is the best cheese to use? For the best flavor and texture, I recommend using a block of cheddar cheese and grating it at home with a box grater (affiliate link to the one I use and love), instead of purchasing a bag of the pre-shredded stuff. I recommend this if you’re making my homemade cheese bread, too.
What to Expect with This No Knead Dough
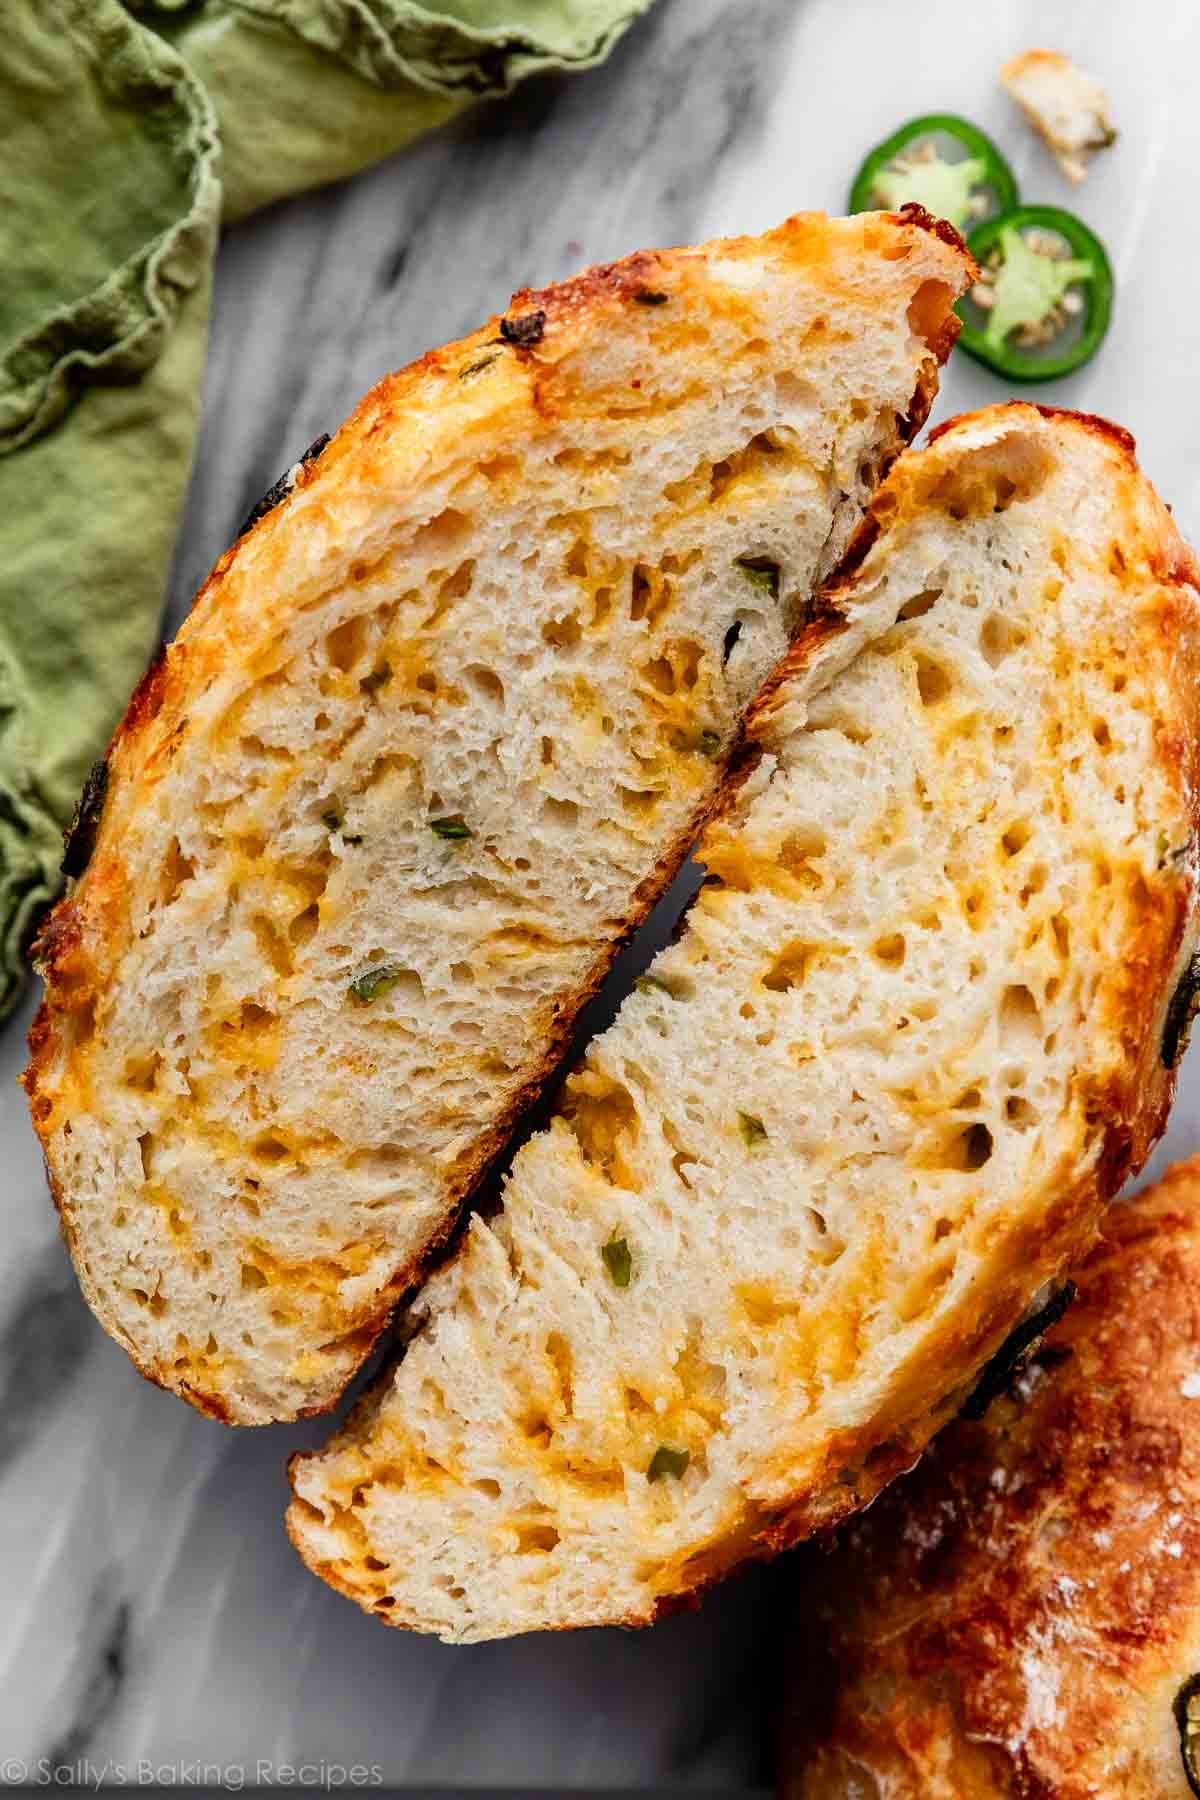
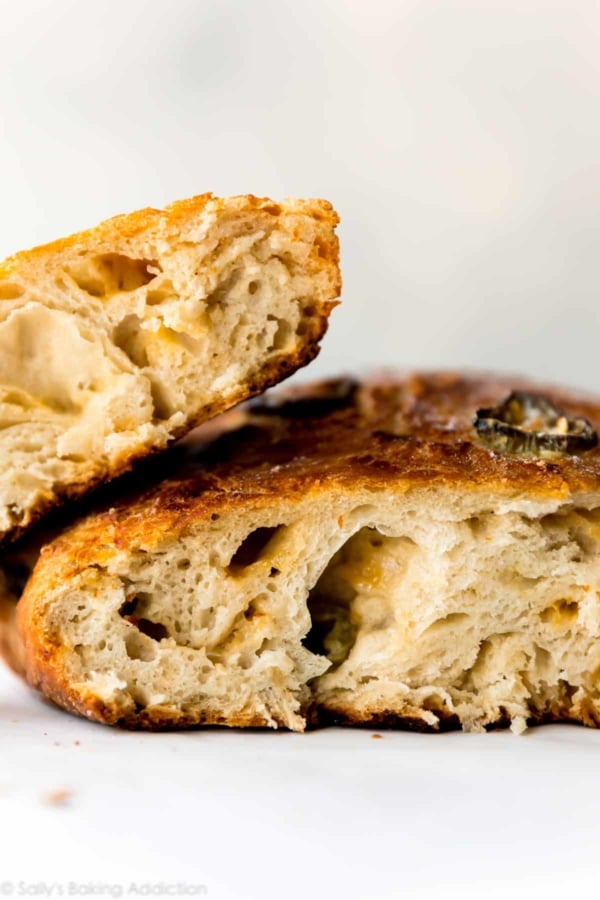
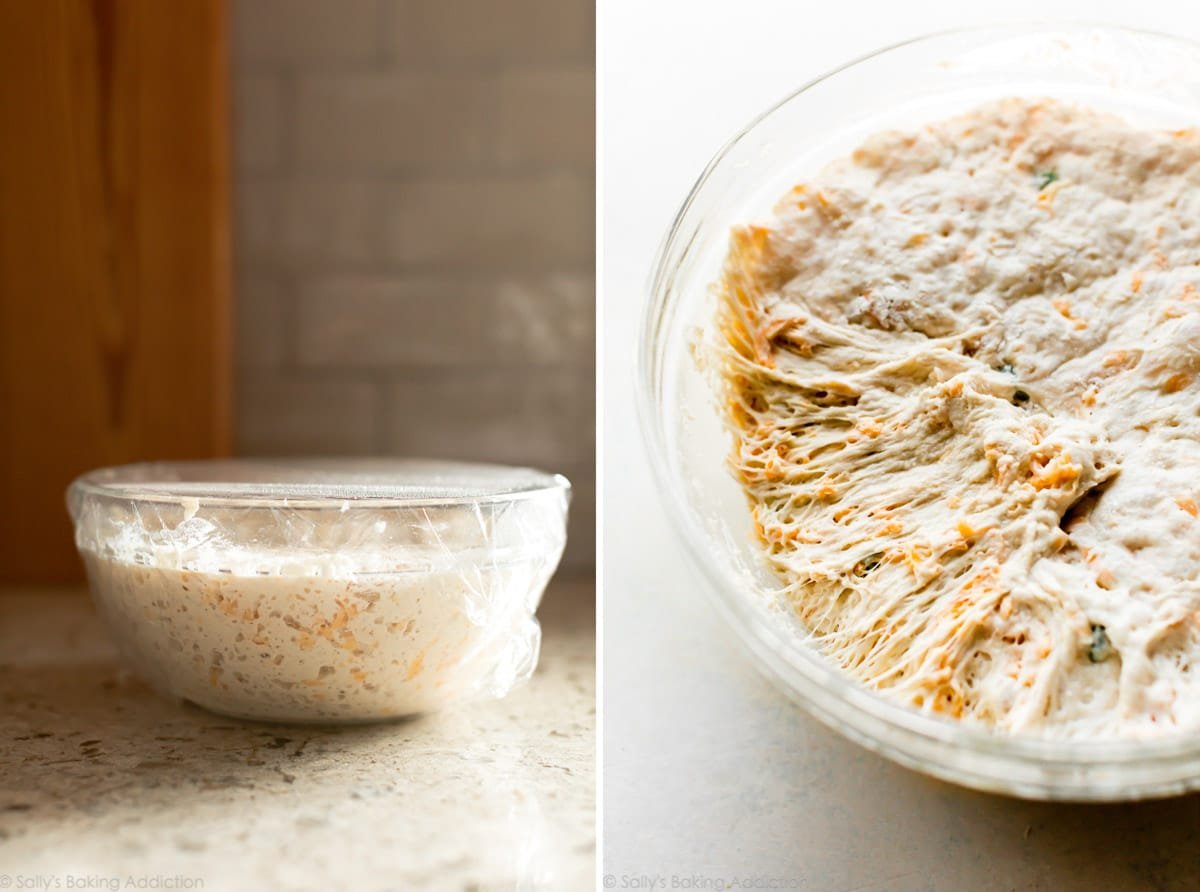
- Bubbles: The dough will rise for 12-18 hours and be very bubbly when it’s done.
- Strands: As you pull the risen dough off the sides of the bowl, you’ll notice a network of strands forming. See photo above. These strands are a good thing and will produce the chewiest bread ever.
- Stickiness: This will be a super sticky dough. It will stick to your hands, but that’s nothing a quick wash can’t fix!
You can expect the same in my artisan homemade bread dough, too.
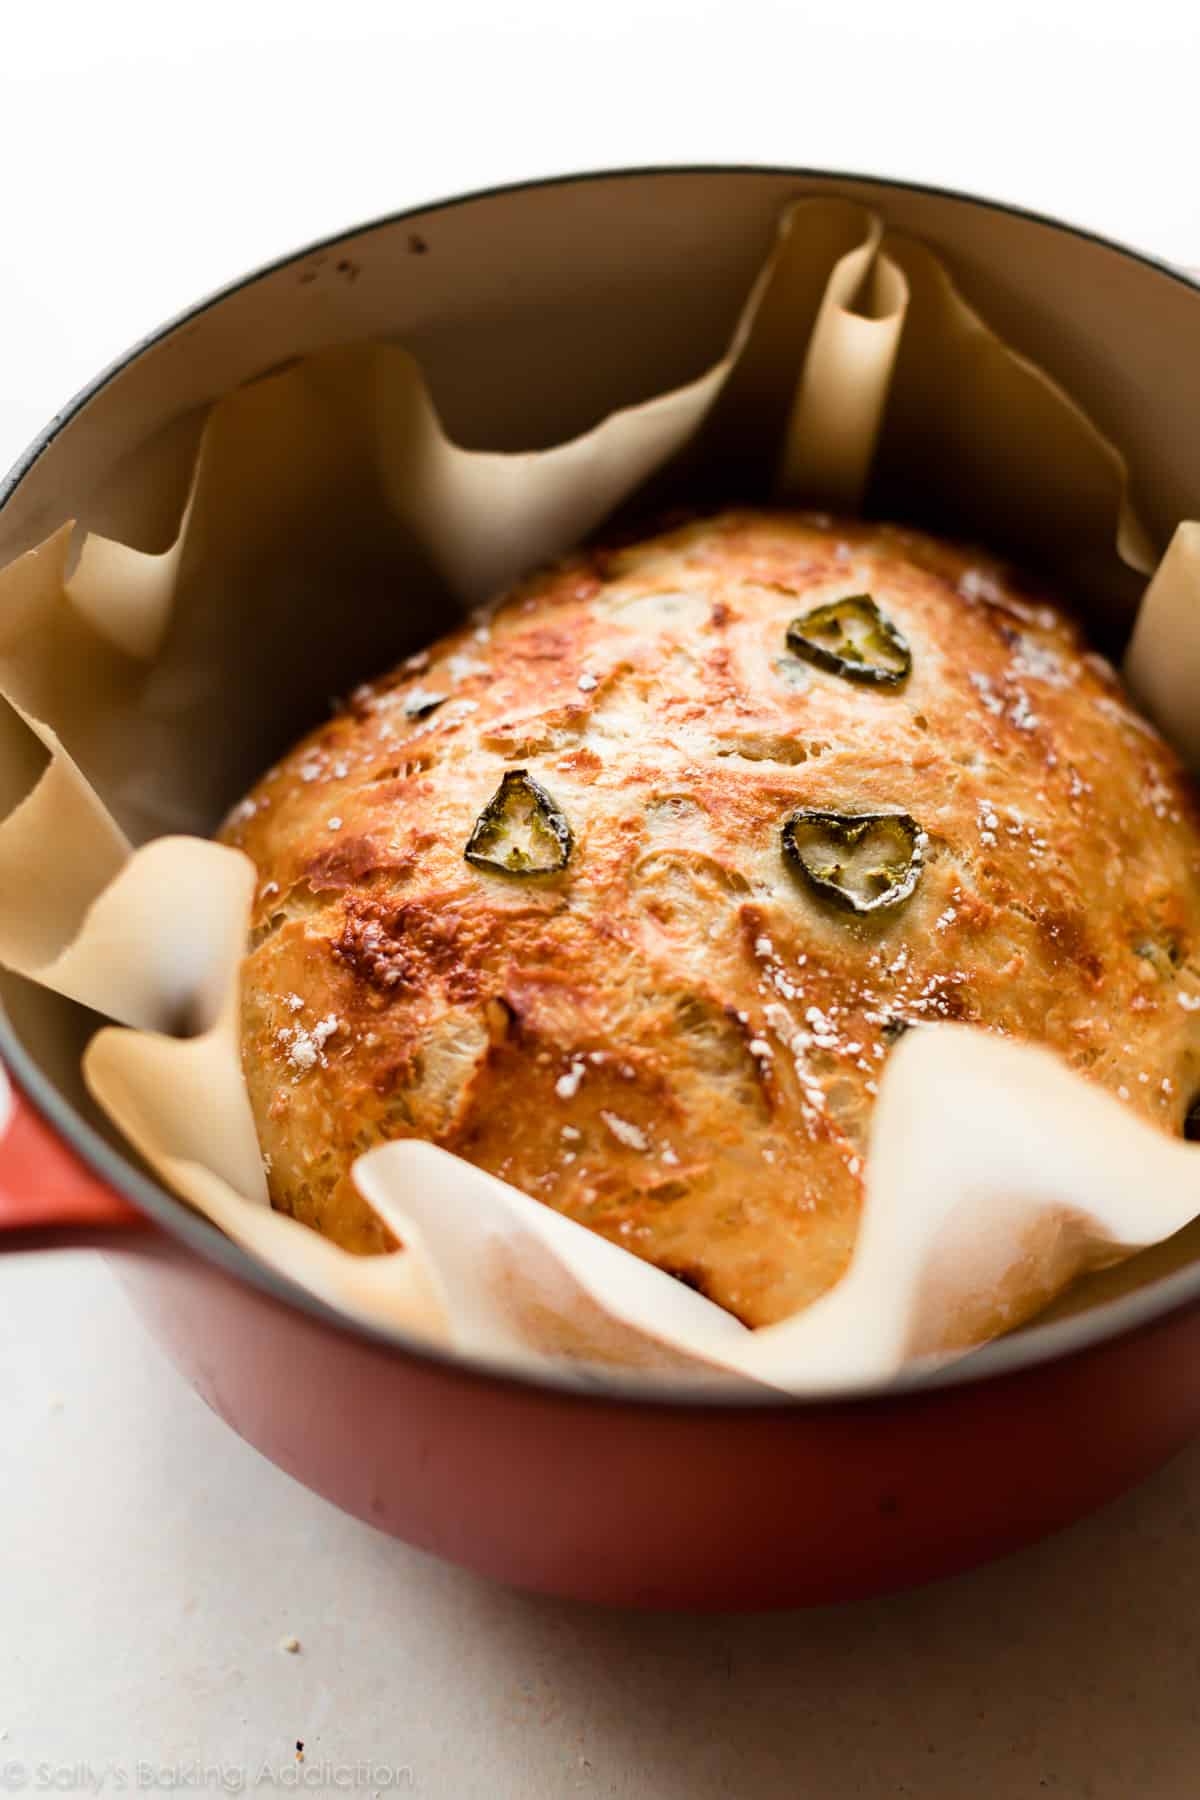
Bake the no knead bread at a very high oven temperature, which will produce a golden brown and crisp crust. The crisp on this crust is unparalleled to any bread I’ve ever baked.
No Dutch Oven? No Problem.
While baking the bread in a dutch oven is key to this bread’s texture, you can get around it. Instead, place the rounded dough on a parchment paper lined or generously floured nonstick baking pan. (No need to preheat the pan in the oven like you do the dutch oven.) Score the bread as noted in step 3 below. Preheat the oven (same oven temperature). After the oven is preheated, place scored dough/baking pan on the center rack. Then place a shallow metal or cast iron baking pan or skillet (I usually use a metal 9×13-inch baking pan; do not use glass) on the bottom oven rack. Carefully and quickly pour 3-4 cups of boiling water into it, and then quickly shut the oven door to trap the steam inside. The steam helps create a crispier crust. Bake for about 30 minutes. For a more accurate test, the bread is done when an instant read thermometer reads the center of the loaf as 195°F (90°C).
What to Serve with Jalapeño Cheddar Bread
Between dips, spreads, and main dishes, here are some serving suggestions for jalapeño cheese bread.
- Slather slices with homemade honey butter
- Tear apart pieces and dip in garlic & bacon spinach dip
- Serve alongside slow cooker chicken chili, creamy chicken noodle soup, or crab soup
- Dipped into your favorite hummus
- With a big bowl of mac & cheese
- Dunk those slices in spicy nacho cheese sauce! This is what I usually use for soft pretzel bites.
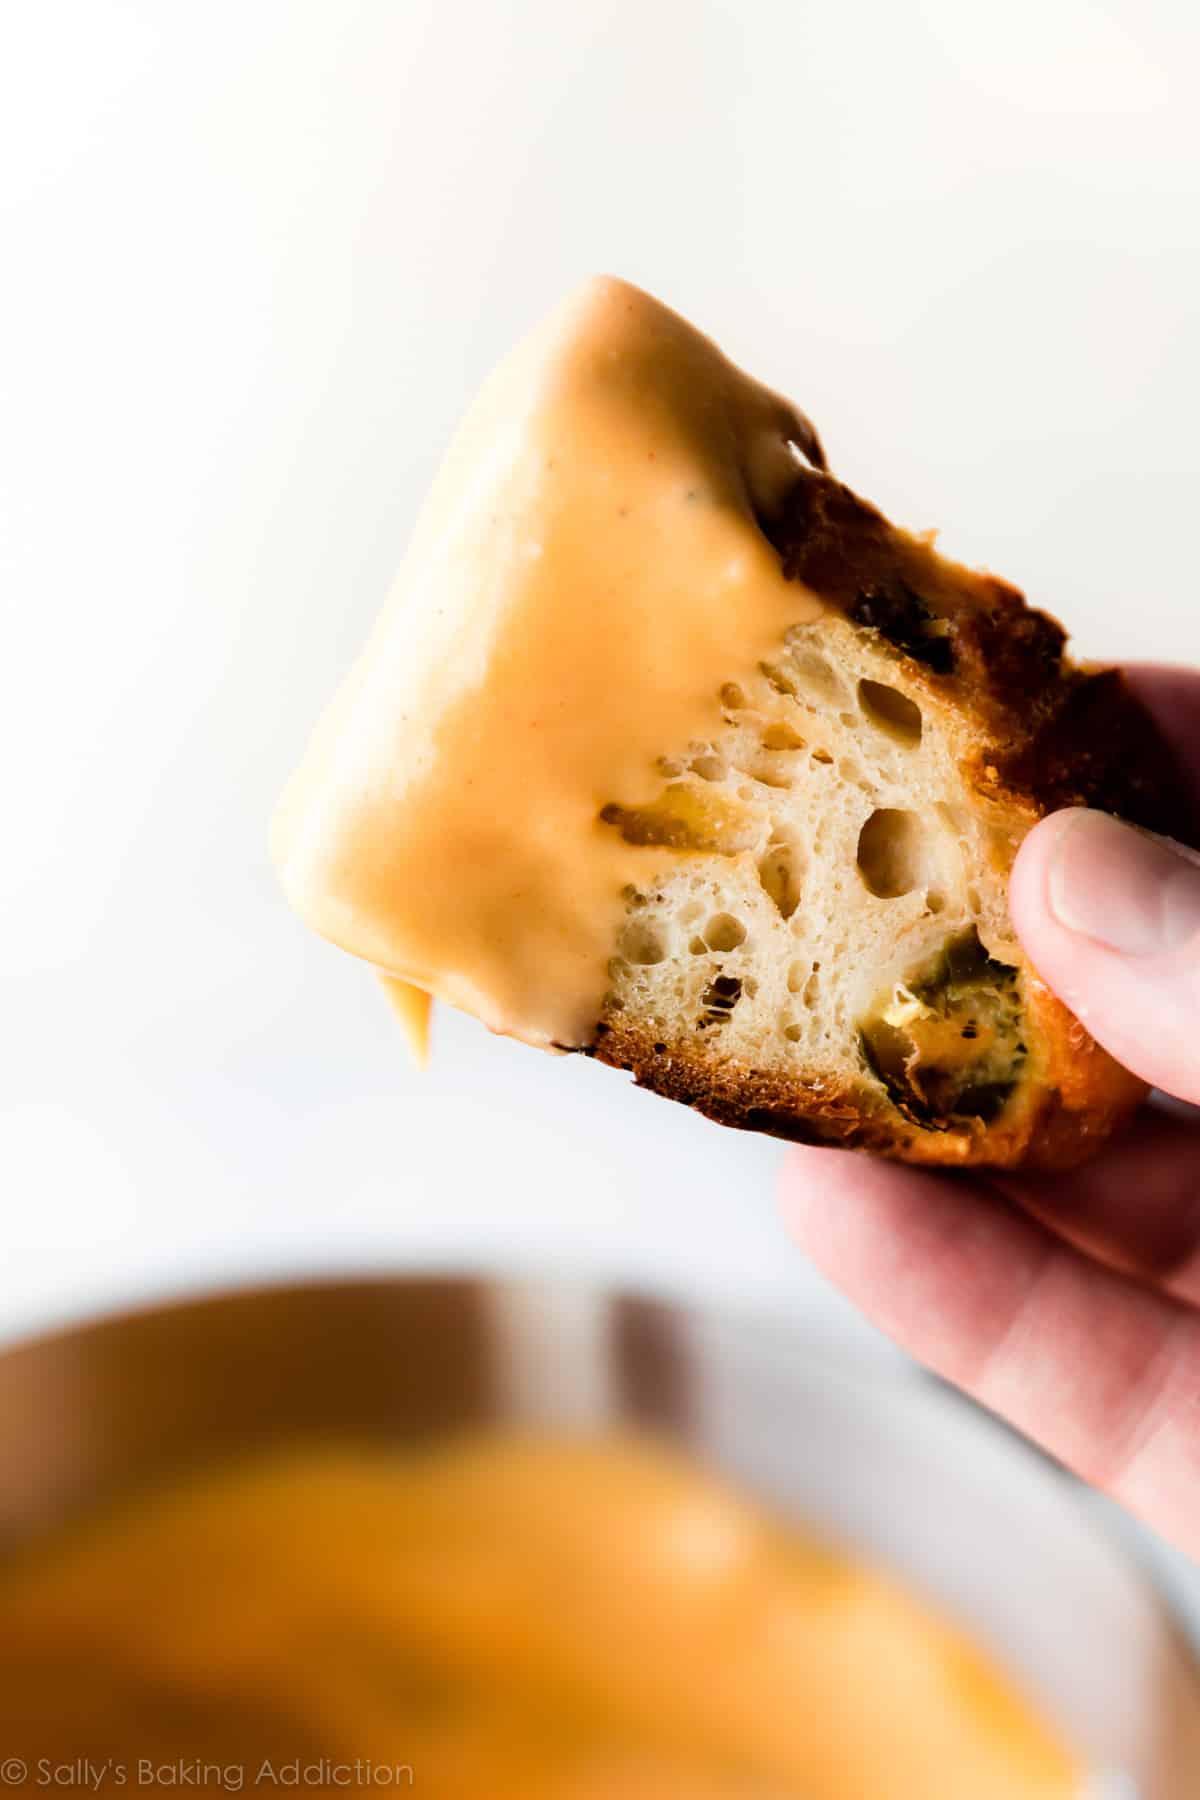
Honestly, just break out the warm loaf, a good hunk of cheese, and a bottle of wine. You’re all set for a satisfying snack!
Print
No Knead Jalapeño Cheddar Bread
- Prep Time: 20 minutes
- Cook Time: 35 minutes
- Total Time: 20 hours
- Yield: 1 loaf; 10-12 servings
- Category: Bread
- Method: Baking
- Cuisine: American
Description
Homemade bakery-style bread has never been easier. This super crusty no knead jalapeño cheddar bread is baked in a dutch oven and requires practically zero hands-on work from you! If you’re new to working with yeast, reference my Baking with Yeast Guide for answers to common yeast FAQs.
Ingredients
- 3 cups + 2 Tablespoons (390g) all-purpose flour (spooned & leveled), plus more for hands
- 2 teaspoons coarse sea salt (I find the flavor lacking using regular table salt)
- 1/2 teaspoon instant or active-dry yeast
- 1 jalapeño, diced
- 1 cup (125g) shredded cheddar cheese
- 1 and 1/2 cups (360ml) warm water (about 95°F (35°C))
Instructions
- *No need to grease the bowl, and do not use a mixer in this step because the dough is too sticky for a mixer.* Stir the first 5 ingredients together in a large bowl, and then stir in the warm water. The dough will be pretty sticky but if it’s extremely wet, add another 2 Tablespoons of flour. Gently shape the dough into a ball as best you can. Cover tightly. Set on the counter at room temperature (honestly any normal room temperature is fine!) and allow to rise for 12-18 hours. The dough will double in size, stick to the sides of the bowl, and have a lot of air bubbles.
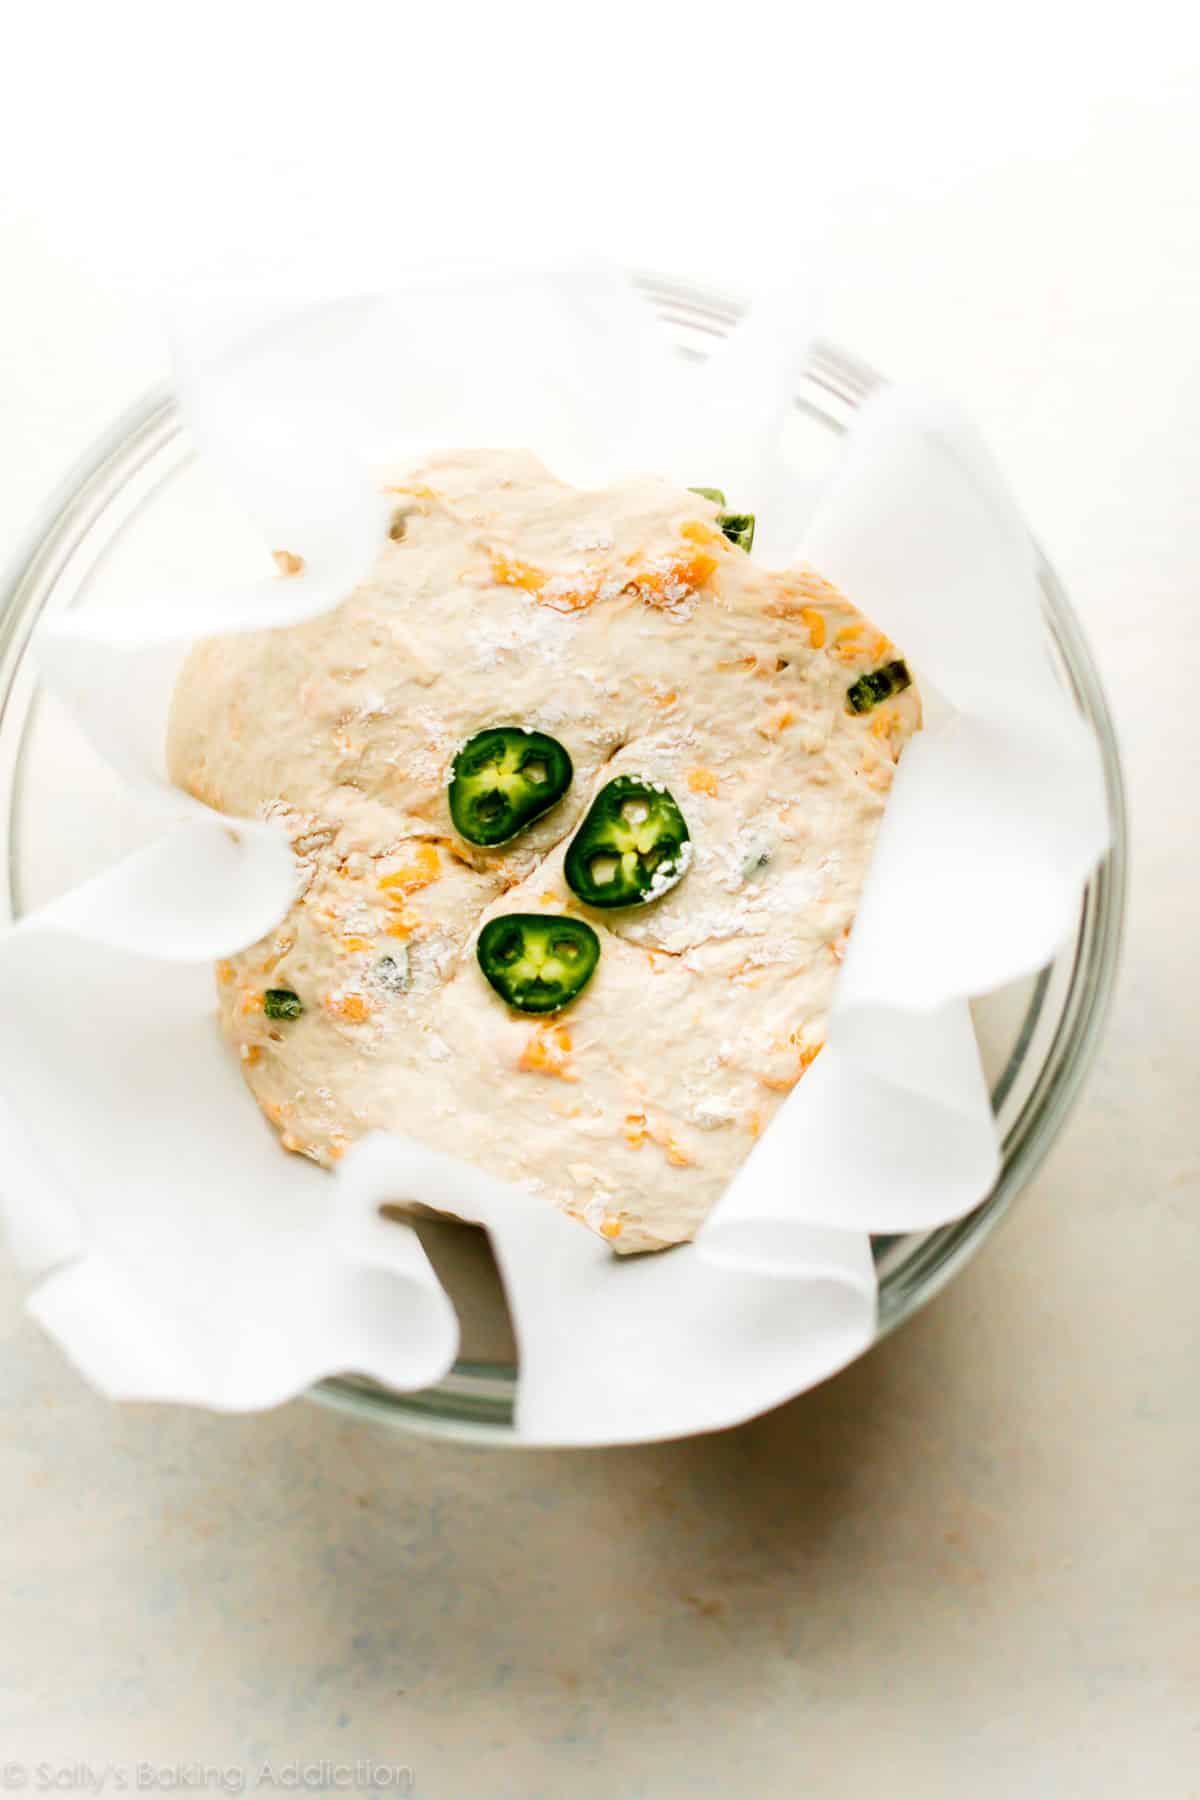
- Turn the dough out onto a lightly floured work surface and, using lightly floured hands, shape into a ball as best you can. Doesn’t have to be perfect. Transfer dough to a large piece of parchment paper, a piece large enough to fit inside your dutch oven and one that is safe under high oven heat. (I use this parchment and it’s never been an issue.) Place the ball of dough + parchment inside a bowl so the dough doesn’t spread out as it rests. See photo above.
- Using a very sharp knife or bread lame (you could even use kitchen shears), gently score an X into the top. Cover dough lightly with plastic wrap or a clean kitchen towel and let it rest for 30 minutes.
- During this 30 minutes, preheat the oven to 475°F (246°C). (Yes, very hot!) Place your dutch oven with the lid OR heavy duty pot inside for 30 minutes so that it’s extremely hot before the dough is placed inside. After 30 minutes, remove the dutch oven from the oven and carefully place the dough inside by lifting it up with the parchment paper and sticking it all—parchment paper included—inside the pot. Cover with the lid.
- Bake for 25 minutes with the lid on. Carefully remove the lid and continue baking for 8-10 more minutes until the bread is golden brown. How to test for doneness: Give the warm bread a light tap. If it sounds hollow, it’s done. For a more accurate test, the bread is done when an instant read thermometer reads the center of the loaf as 195°F (90°C).
- Remove pot from the oven, carefully remove the bread from the pot, and allow to cool on a wire cooling rack for 20 minutes before slicing.
- Cover and store leftover bread at room temperature for up to 2-3 days or in the refrigerator for up to 1 week.
Notes
- Make Ahead & Freezing Instructions: The dough takes up to 18 hours to rise, so this is a wonderful recipe to begin 1 day ahead of time. You can also bake the bread, allow it to cool, and freeze for up to 3 months. Thaw in the refrigerator and allow to come to room temperature before serving. You can also freeze the dough. Complete the recipe through step 2. Wrap in plastic wrap and place in a freezer-friendly container. To bake, allow dough to thaw completely at room temperature and then continue with step 3 and the rest of the recipe instructions.
- Special Tools (affiliate links): Box Grater | Glass Mixing Bowls | Wooden Spoon | Dutch Oven | Parchment Paper | Bread Lame | Instant Read Thermometer | Cooling Rack
- Dutch Oven: Use a 6 quart or larger dutch oven or any large oven-safe pot with an oven-safe lid. If your dutch oven is smaller than 6 quarts, you can halve the recipe (instructions remain the same, just halve each ingredient) or make the recipe as directed in step 1, shape the dough into 2 balls in step 2, and bake them one at a time in your smaller dutch oven. While the 2nd dough waits, lightly cover and keep at room temperature. The bake times in the recipe above (25 mins and then 8-10 mins) will both be a little shorter for smaller loaves.
- No dutch oven? See post above for alternative.
- Yeast: If you don’t have instant yeast, you can use active-dry. I’ve never had a problem using active dry yeast in this recipe—and with no other changes needed. Works wonderfully!
- Bread Flour or Whole Wheat Flour: I use all-purpose flour here since it’s more readily available to most bakers. However, I love baking bread with bread flour and it can definitely be substituted with no other changes needed to the recipe. You can also substitute 1 cup of the flour for whole wheat flour. Do not use all whole wheat flour, as the bread will taste quite dense and heavy.
- Parchment Paper: If your parchment paper can only be heated to a certain temperature, bake the bread at that temperature. Bake the bread a little longer to compensate for the lower temperature.
- Reference my Baking with Yeast Guide for answers to common yeast FAQs.
- Recipe adapted from Red Star Yeast, method originally from Jim Lahey.


Reader Comments and Reviews
Can i use sour dough starter instead of the yeast? What difference would that make to the bread?
Hi Lynette, we haven’t tested this recipe using sourdough discard, but let us know if you try anything.
Can I make jalapeño cheese bread and leave out the jalapeños?
Absolutely!
Sally
Your web sight is wonderful, I truly appreciate it.. Out of all of your artisan bread recipes I have yet to find one for Rye Bread with the seeds. This is one of my favorites. I do hope you have one and be willing to share it with us.
Thanking you very much for all your great recipes.
Hi Sue, we’re happy to help troubleshoot. Was the bread over-proofed by chance? That can often cause it bake up a bit dense. We use and love Red Star Yeast—you can use active dry yeast, but the rise time may be slightly longer. This baking with yeast guide may also be a helpful resource. Thank you for giving this recipe a try!
I will change up yeast next time. I didn’t reread the extra notes and just went by my recipe I had printed out. Thanks for the help!
So easy and tasty!
Amazing bread. I made it in a ceramic bread crock and it was so much easier than using the Dutch oven, it formed a perfect loaf.
Hi can you please share step by step directions for using a regular loaf pan instead since i don’t have a dutch oven.
Hi Sue! See the post above where it says “No Dutch Oven? No Problem.” for details on baking without a Dutch oven.
Do I need to also cover the loaf pan? For example with another loaf pan on top while baking since a dutch oven also has a lid. And then would the baking time be 30 minutes covered plus 10 more uncovered, Or just all together 30 mins?
Hi Sue, the instructions are for using a sheet pan instead of a loaf pan if you don’t have a Dutch oven – see the post above for details!
Sally, I love all of your recipes! I just retired and decided to learn how to bake breads… this recipe is a game changer! Everyone I know is asking me what I will try next for add- ins and they are my taste testers. I’ve tried things like sun dried tomatoes and basil, garlic cheddar, sunflower seed and Italian seasonings… the possibilities are endless! Thanks for sharing your recipes and for making us all happier in the kitchen!
It doesn’t say when to add the jalapeños & cheese unless I missed something. I normally use at least a full cup of pickled jalapeños. You just have to drain the jalapeños first
Hi Jackie, see step 1! Stir the first 5 ingredients together in a large bowl, and then stir in the warm water.
Hi there, thanks so much for the recipe! Question: would canned Hatch green chiles work as a substitute for jalapeños? Or would it be too wet?
Hi Lena, that should work, but be sure to blot as much moisture as you can from the chiles before adding to the dough. Let us know how it goes!
Absolutely love this recipe. Thank you once again!! Toasted with butter or even peanut butter is amazing.
I’m wondering if you ever put your dough in the fridge after the overnight rise? J. Kenji recommends this adjustment of Lahey’s No Knead recipe, and I’m wondering what (if any) others adjustments would be needed if you did that while mixing in other fillings to the dough.
Hi Matt, you certainly can. After a few hours rising at room temperature, you can let the bread rest/rise in the refrigerator for the remaining time. You can do this regardless of the type of mix-in you are using.
Why a 16 hrs rise with instant yeast? I normally do 1 to 2 hrs when using instant yeast. My apologies if I missed something but 16 hrs?
Hi Dee! This is a slow rise method for this no-knead dough. Let us know if you give it a try!
Hi Sally
This looks amazing, can’t wait to make it.
What size Dutch oven is best and what is the smallest size I can use (I am going to buy one for bread but they are expensive hence my question about the smallest size that works well)?
Thank you and kind regards
Carol
Hi Carol, We tend to use a 6 qt Dutch oven, but you can bake it without a Dutch oven–see the post for instructions, under the heading “No Dutch Oven? No Problem.”
I just made this bread. I followed the recipe exactly except that I added a tablespoon of sugar to the mix. It’s a delicious bread!
Great bread but it was in the oven almost hour to cook thoroughly and become golden. Def a keeper! Next time I’ll use different cheeses, add more chives, scallions, olives…etc… Thank you!!
I’m planning on making this for the first time. Are any changes needed for a cast iron Dutch oven?
Hi Lindsay, that’ll be perfect here.
My dough did not get sticky. Dry actually. I followed recipe to a tee. I doubled so 6 cups of flour and 3 cups water. Help!!
Hi Jeff, How did you measure the flour? Make sure to spoon and level (instead of scooping) to avoid packing in too much flour into your measuring cups – or use a kitchen scale. You can read more about properly measuring baking ingredients in this post. We do recommend making two batches instead of doubling as well!
Followed recipe to a t used kitchen scale for flower but did notice after 18 hours on counter the dough was still so wet that when I tried curing an x on top prior to second rise the dough came together and I couldn’t make an x ? Tasted great but the center did not rise and actually was slightly sinking in a bit
Can pickled jalapeños be used instead of fresh jalapeños? I can’t wait to try this recipe!
Hi Patti, that should work just fine, be sure to pat the jalapenos dry before adding to the batter.
This was so good! I left out the jalapeños and just did a cheese bread. So easy. Mixed the dough up yesterday and baked it this afternoon. Soft inside and perfect chewy crust. Instant read thermometer for bread baking is game changer!
Update: I decided to double the recipe since I had double cheese in it. I’ll let you know how it turns out.
Hi Toni, it’s hard to say, it might be extra dense, but we would bake it anyway!
Super easy and delicious! I would add extra jalapeños if you want it more spicy.
Easy and fantastic – I sprinkle some extra cheddar on top.
Is it possible to use a different kind of cheese? Like gouda?
Hi Erica, you can absolutely use another relatively harder cheese such as pepper jack, gouda, or colby cheese. Avoid very soft cheeses. Hope your family enjoys this bread!
I’m wanting to make this bread but use my regular loaf pans, with either another loaf pan or tented foil as a lid. Do you think it will make 2 loaves or 3?
Hi Jana, you could certainly try a loaf pan for this bread recipe. The edges should still crisp up, but not to the same extent as they do when baked in a dutch oven. The bake time may vary.
Is it normal for the dough to still be very sticky after letting it sit in room temperature for 16 hours? I am having trouble forming the dough into a ball. Thank you
Hi Deb, yes, this is a very sticky dough. Handle with care (with floured hands!) to avoid popping the air bubbles.
Love this bread! Is it possible to freeze it once it is baked? Thank you!
Hi Carol, definitely! See recipe Notes: You can also bake the bread, allow it to cool, and freeze for up to 3 months. Thaw in the refrigerator and allow to come to room temperature before serving.
I prepped this yesterday and baked today. It was cooler here (and winter) so I let it rise for 24 hours. I also added extra cheese and jalapeño 😀
Using a Dutch oven, for the temp and times suggested, yielded a soft, tender loaf with a satisfying chewy crust! I wish I could share pictures! It the best looking bread I’ve ever made!
Lovely recipe!
Just mixed up my 5th loaf! Love this bread. Super easy and comes out perfect every time!!