


2018 baking goal = let’s step outside our comfort zone. Let’s start with a favorite baking bucket list recipe of mine: madeleines.
Equipped with determination, I studied and tested and retested and retested some more until I figured out the big question that is madeleines. While their fancy appearance and classy name can be intimidating, these airy teacakes require the most basic ingredients. They aren’t difficult, but they do demand your attention, patience, and precision. And a solid (very detailed) recipe to produce the light texture doesn’t hurt either!
One reader, Debbie, commented: “I love the detailed instructions. That made a huge difference in the outcome. They are delicious and perfect! ★★★★★“
Another reader, Gayle, commented: “Superb! This pastry turned out well—light, delicious, and melts in the mouth. Directions and hints are outstanding. ★★★★★“
Another reader, Madeleine, commented: “This recipe is glorious! And even though it’s definitely a plus that the recipe and I have the same name, these cookies are amazing and very elegant for brunches and teatime… These cookies have been on my bucket list forever and I will definitely be making them again. Thanks, Sally!! ★★★★★“
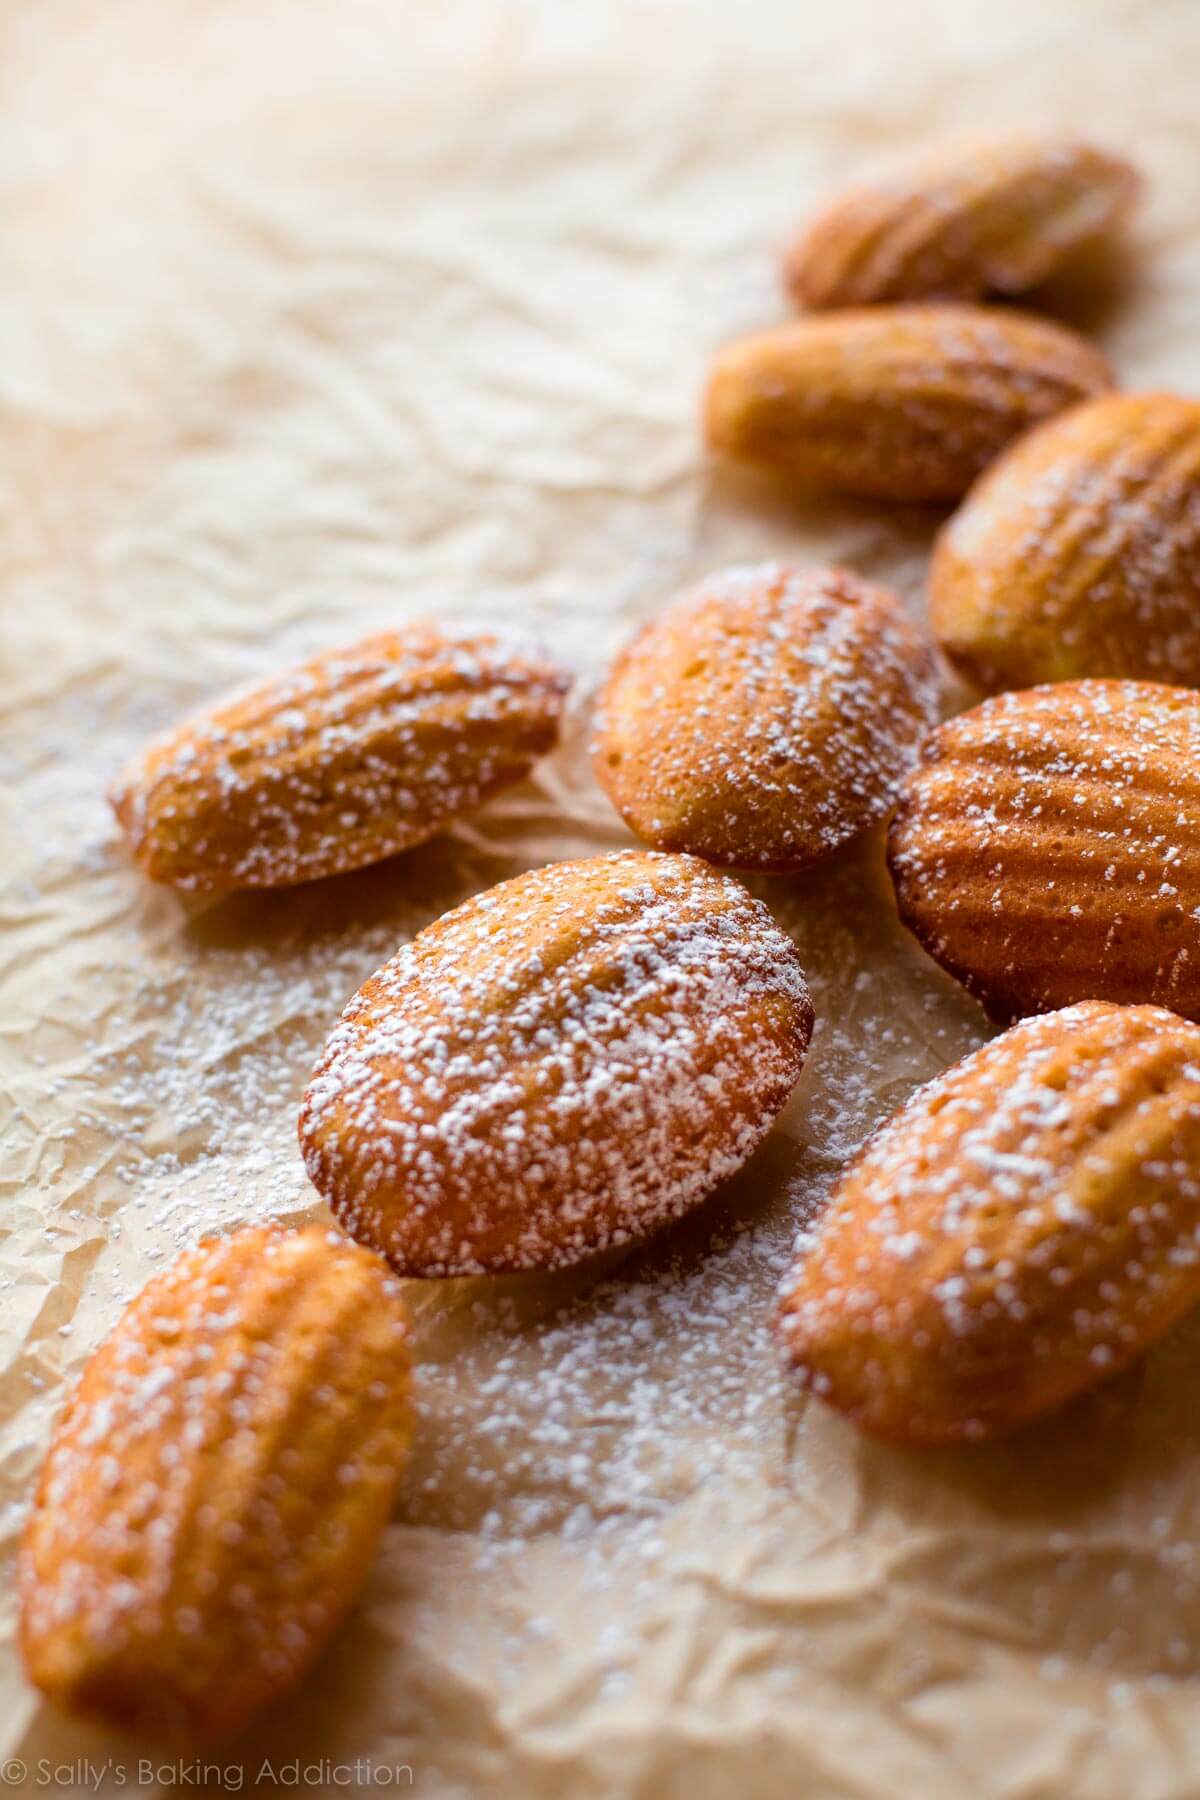
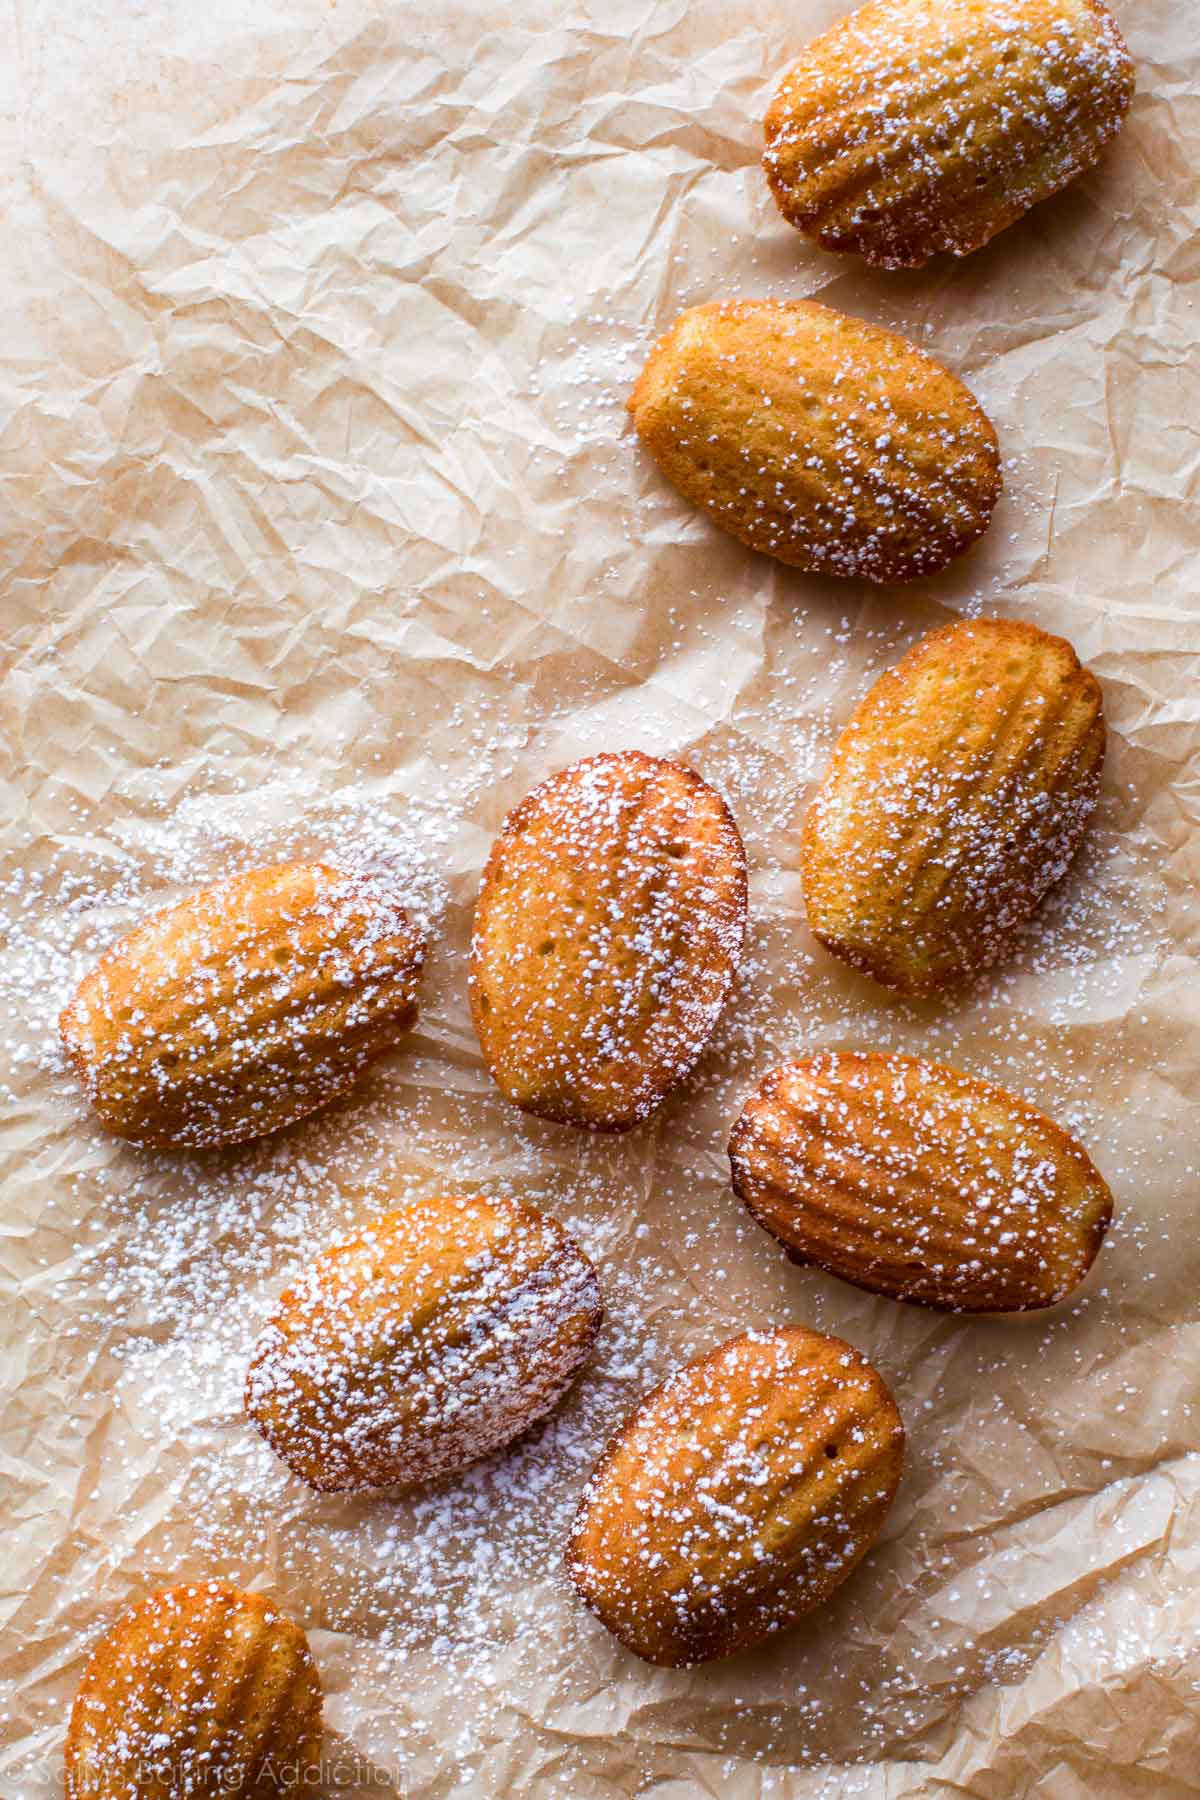
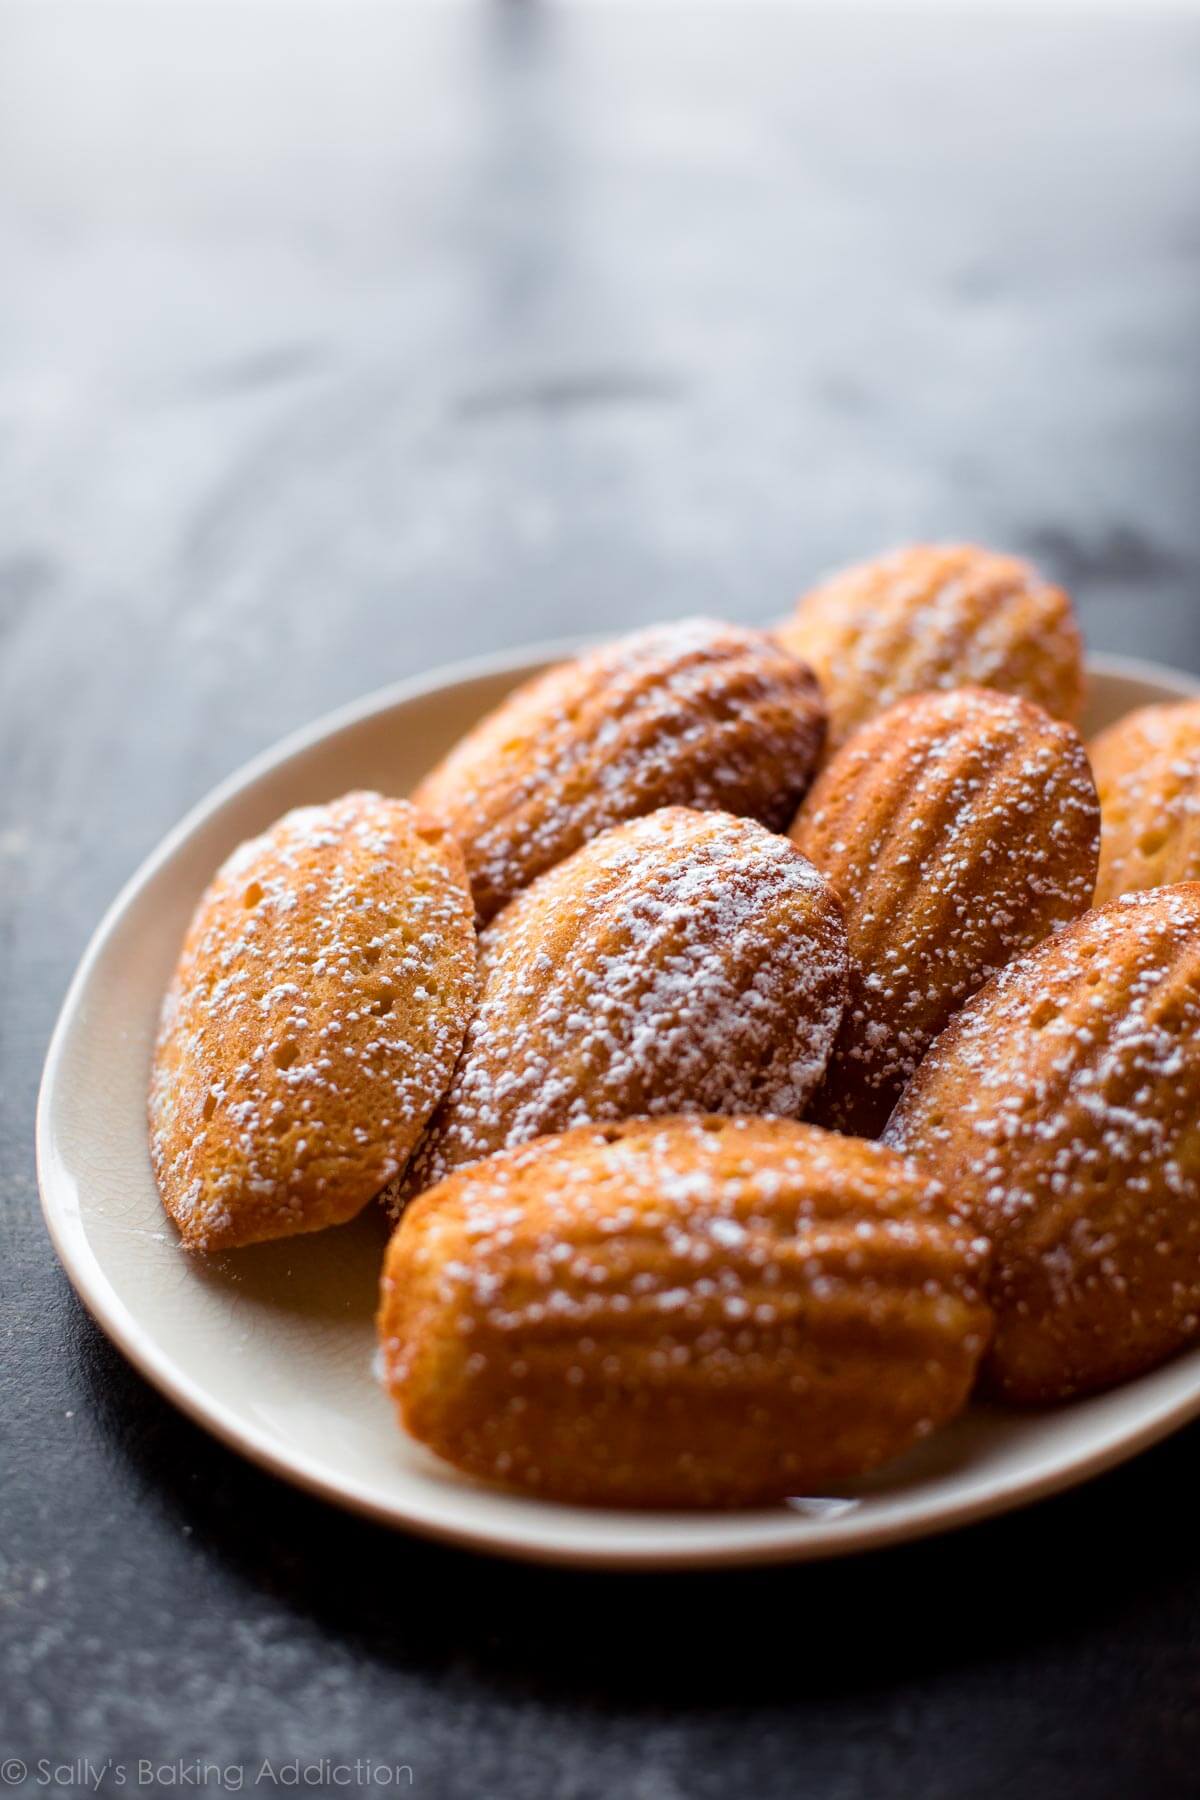
Let’s figure this out first: are madeleines cookies or itsy bitsy cakes? A big debate! They’re a delicate little butter cake that most people refer to as cookies. However you categorize them, madeleines are known for their beautiful and distinct scalloped shell shape and need nothing more than a sprinkle of confectioners’ sugar on top. Though a dunk in dark chocolate is nice too!!
Let’s dive in. This is a lengthy post, but I think it’s important to discuss what works and what doesn’t work so you can truly understand what you’re doing in the kitchen. We’re going to walk through the process together with step-by-step photos, detailed instructions, and then the madeleine recipe is at the bottom of this post. Break out your madeleine pan. We’re doing this!
Basic Process
In this great big world, there are MANY ways to make madeleines. This is how we’re doing it today, a recipe based off of Julia Child’s. Madeleines start with a sponge-like batter, called a genoise in European baking, and get most of their lift and volume from beaten eggs. The base of our desserts is usually creamed butter and sugar. With madeleines, however, beating the eggs and sugar together is the most crucial and particular step. We’ll beat them for 8 minutes to really whip in enough air. We’ll add a little flavoring to the madeleine batter: lemon zest and a little vanilla extract, both optional. Then in a separate bowl, we’ll toss a little flour, baking powder, and salt together. We will delicately fold the flour mixture into the beaten egg mixture. Why emphasis on the delicate? We don’t want to deflate the eggs we just beat, do we?? Finally, we’ll mix in some melted butter. So as not to deflate the airy batter with a whole mess of heavy melted butter, mix *some* of the madeleine batter into the melted butter, then add it all into the madeleine batter for final mixing. If that confused you, step pictures are coming. The melted butter gives mads their classic taste, as well as a lovely shiny appearance when they finish up in the oven. If you’re feeling confident, go ahead and brown the butter. Yum!
We’ll spoon the batter into a madeleine pan. And that’s the catch! You need a specific pan. I know what you’re thinking. Is it really worth buying a new pan for just 1 type of recipe? Yes. If you’re into mads, it’s worth it. And now you’ll have it to try these chocolate peppermint madeleines, next!
Can I bake madeleines in another pan? Sure! A mini muffin pan works, but the texture of the little cakes will be different, they will be similar to brown butter berry tea cakes. I found that you really need the scallop pan to produce the iconic crisp edges.
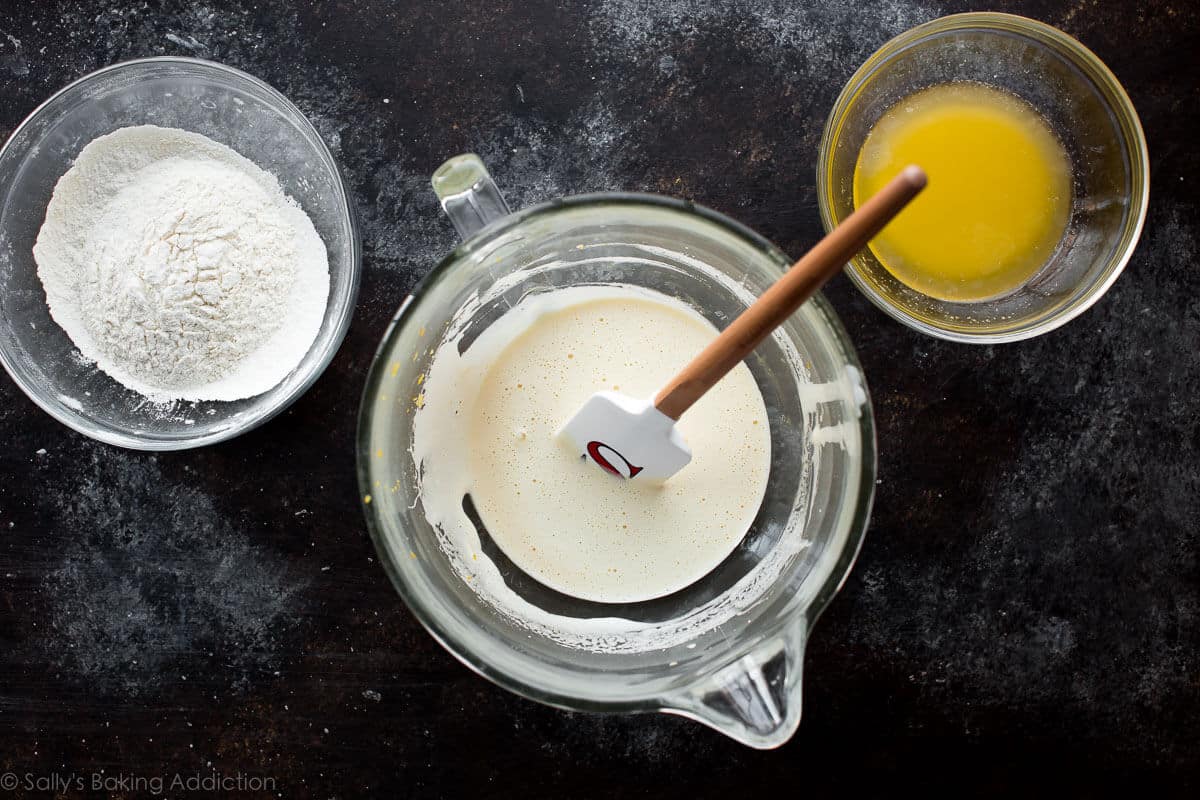
The Batter
You see the photo above? It shows that there are 3 components to the recipe. The flour mixture, beaten egg mixture, and melted butter. Tip: when you’re ready to begin, melt the butter first so it has at least 8 minutes to slightly cool before using. Remember, we are whipping the eggs for 8 minutes.
Like I mentioned, the most particular step in madeleine baking is whipping the eggs long enough. You’ll need room temperature eggs. Cold eggs won’t reach the volume we need for madeleines. You’ll know you whipped the eggs long enough when the mixture is thick and pale. And this might be the most helpful clue– when the beater is raised, a ribbon of batter will fall back into the bowl. Aka the ribbon stage!
So now that the eggs (+ sugar, lemon zest, and vanilla) are beaten… let’s continue.
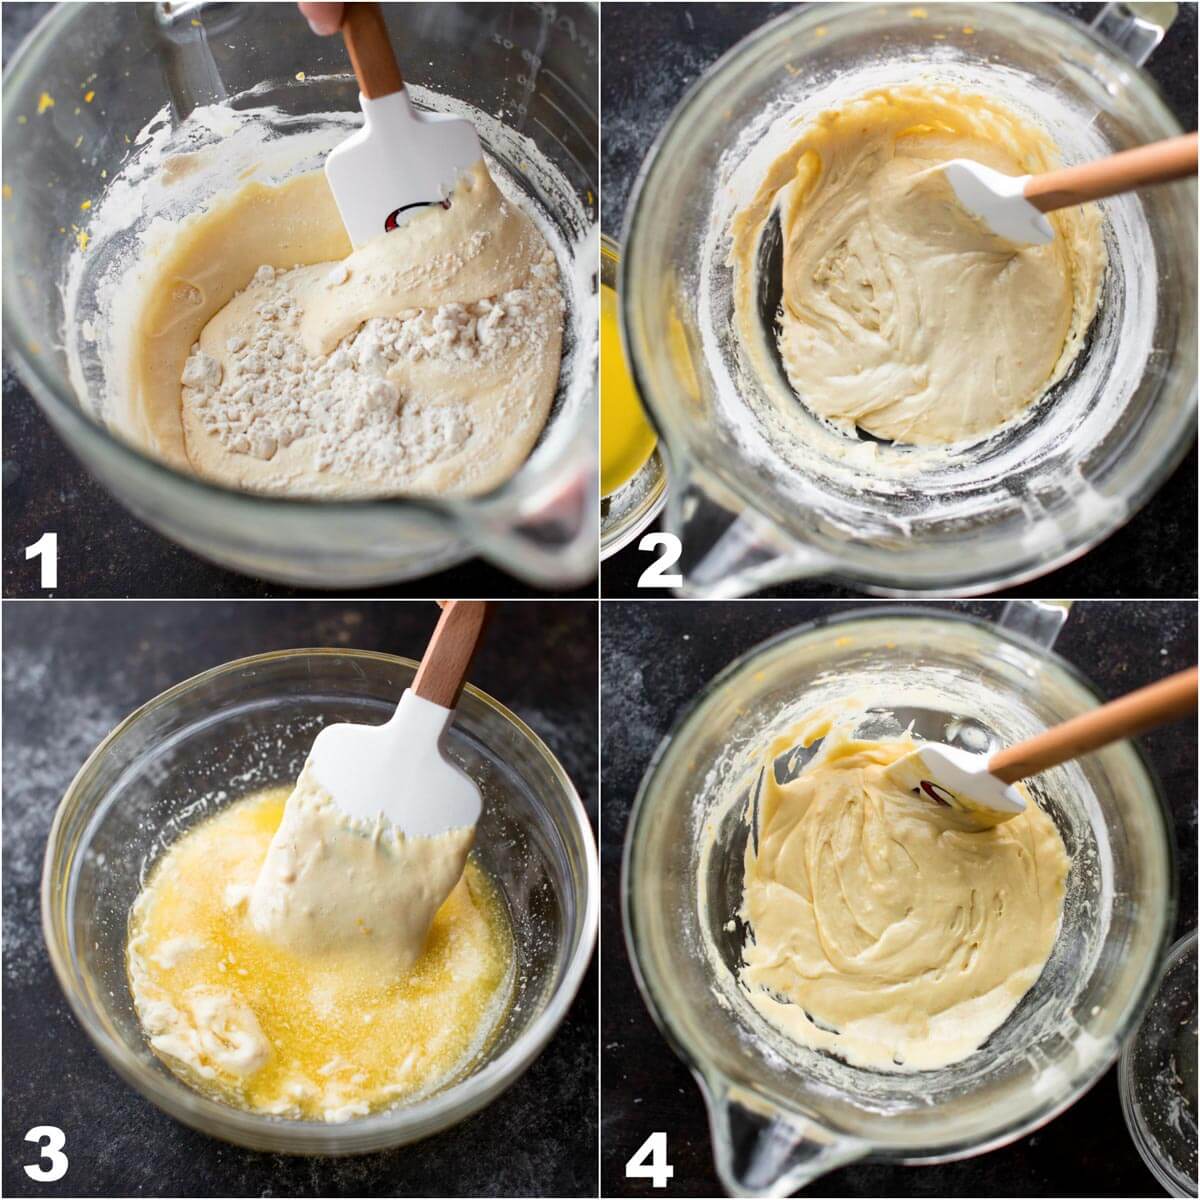
In the photo above, we are (1) folding the dry ingredients into the beaten egg mixture, making sure we aren’t deflating the eggs. When we’re all done, our batter will look like photo (2). Then (3) we’ll take some of that batter and mix it into the melted butter. Then (4) we’ll mix that into the rest of the batter.
We’re doing everything slowly and delicately.
Chilling the Batter
Just like most of the cookie doughs in our repertoires, madeleine batter needs to chill out before baking. Letting the batter rest in the refrigerator ultimately helps the mads rise up taller in the oven. Taller usually means fluffier, which is exactly what we’re shooting for. But don’t chill the batter for too long and here’s why: the butter will solidify again. And when baked, the madeleines won’t rise up as tall which negates the whole point of chilling the batter! Good thing madeleines are delicious because they sure do have lots of rules.
I find 30-60 minutes in the refrigerator is the sweet spot.
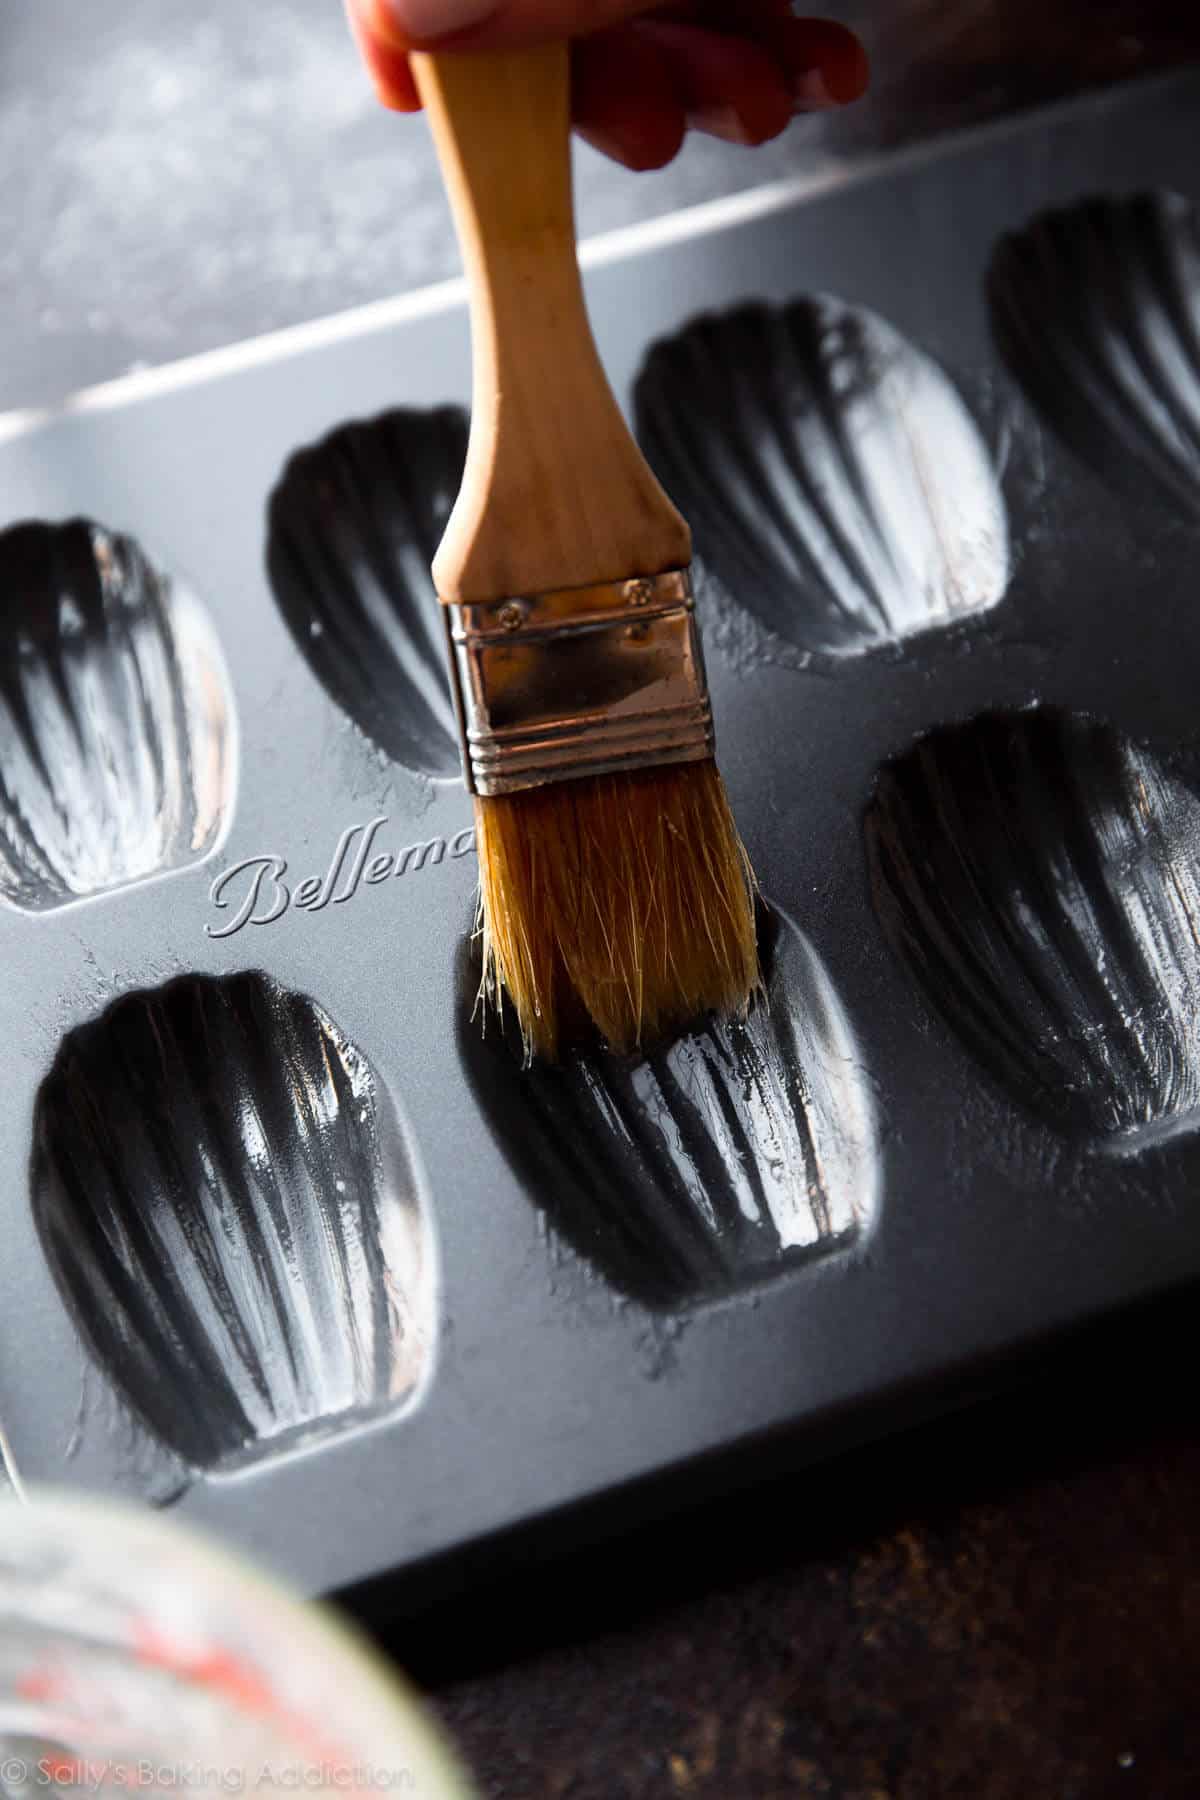
Preparing the Pan
Many madeleine recipes call for greasing the madeleine pan regardless if you’re using a nonstick madeleine pan or not. I tested a few ways: nonstick spray, buttering and flouring, and just buttering. Honestly, nonstick spray worked absolutely fine but brushing the pan with melted butter gave the mads a lovely crisp and buttery crust. I wasn’t fond of the butter + flour preparation because the flour either burned or left a residue on the baked cookies. Just my opinion.
A pastry brush comes in handy!
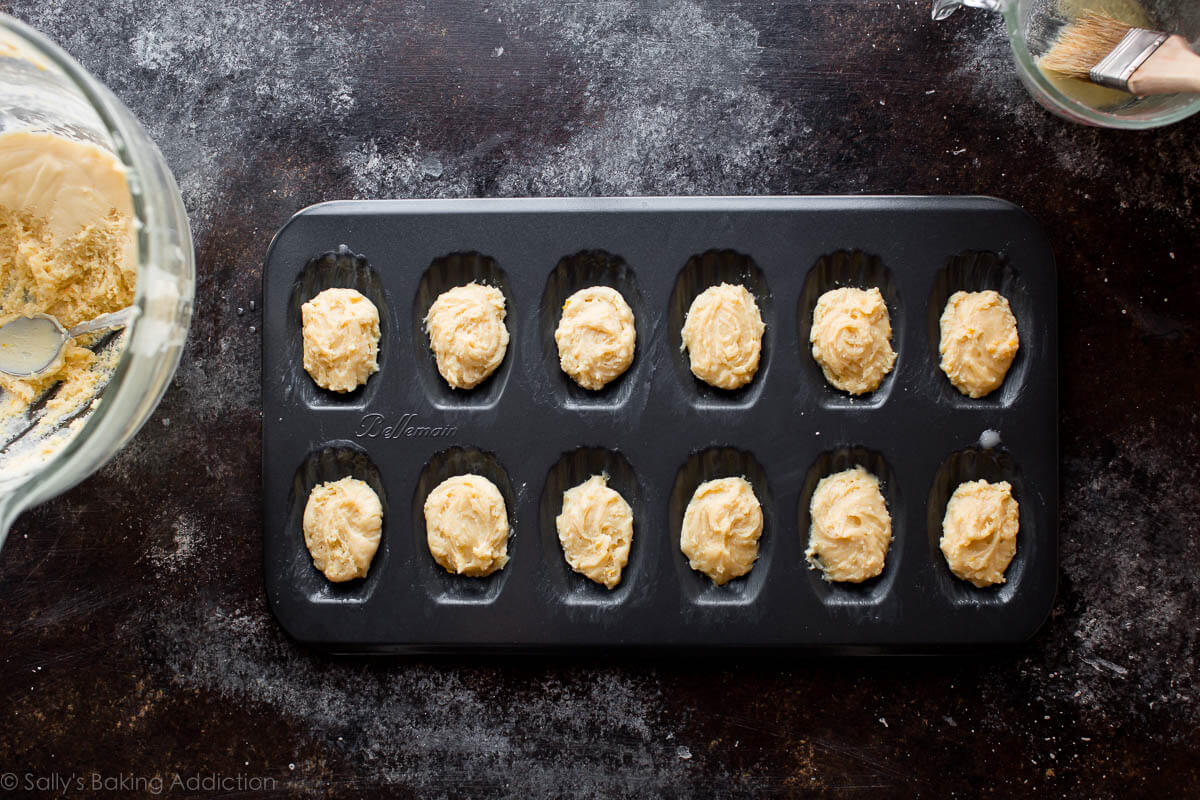
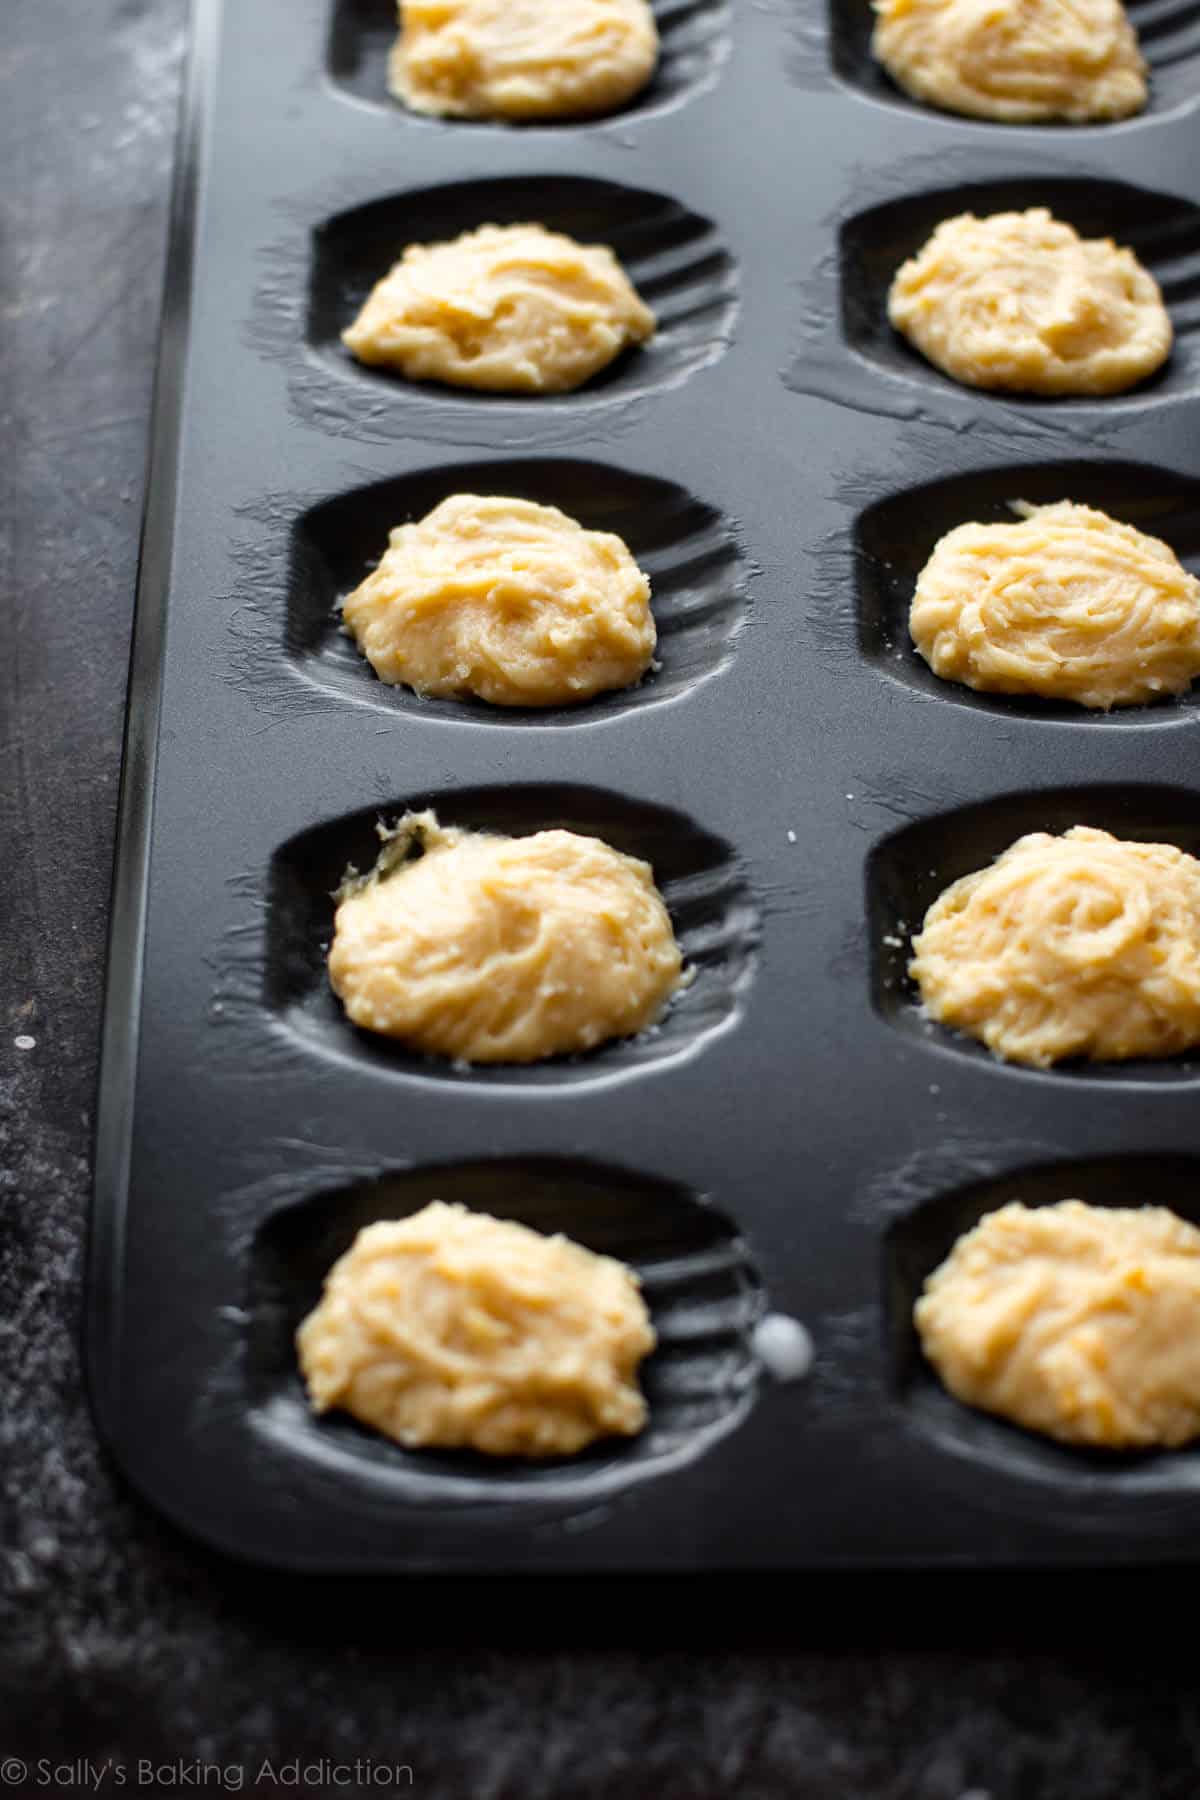
How much batter per cookie? I found 1 heaping Tbsp was plenty. Use a basic spoon and just plop it right into the center of the scallop shell, just like this:
I tested madeleines at varying oven temperatures and settled on 350°F (177°C). Anything higher than that burned the edges without properly cooking the centers.
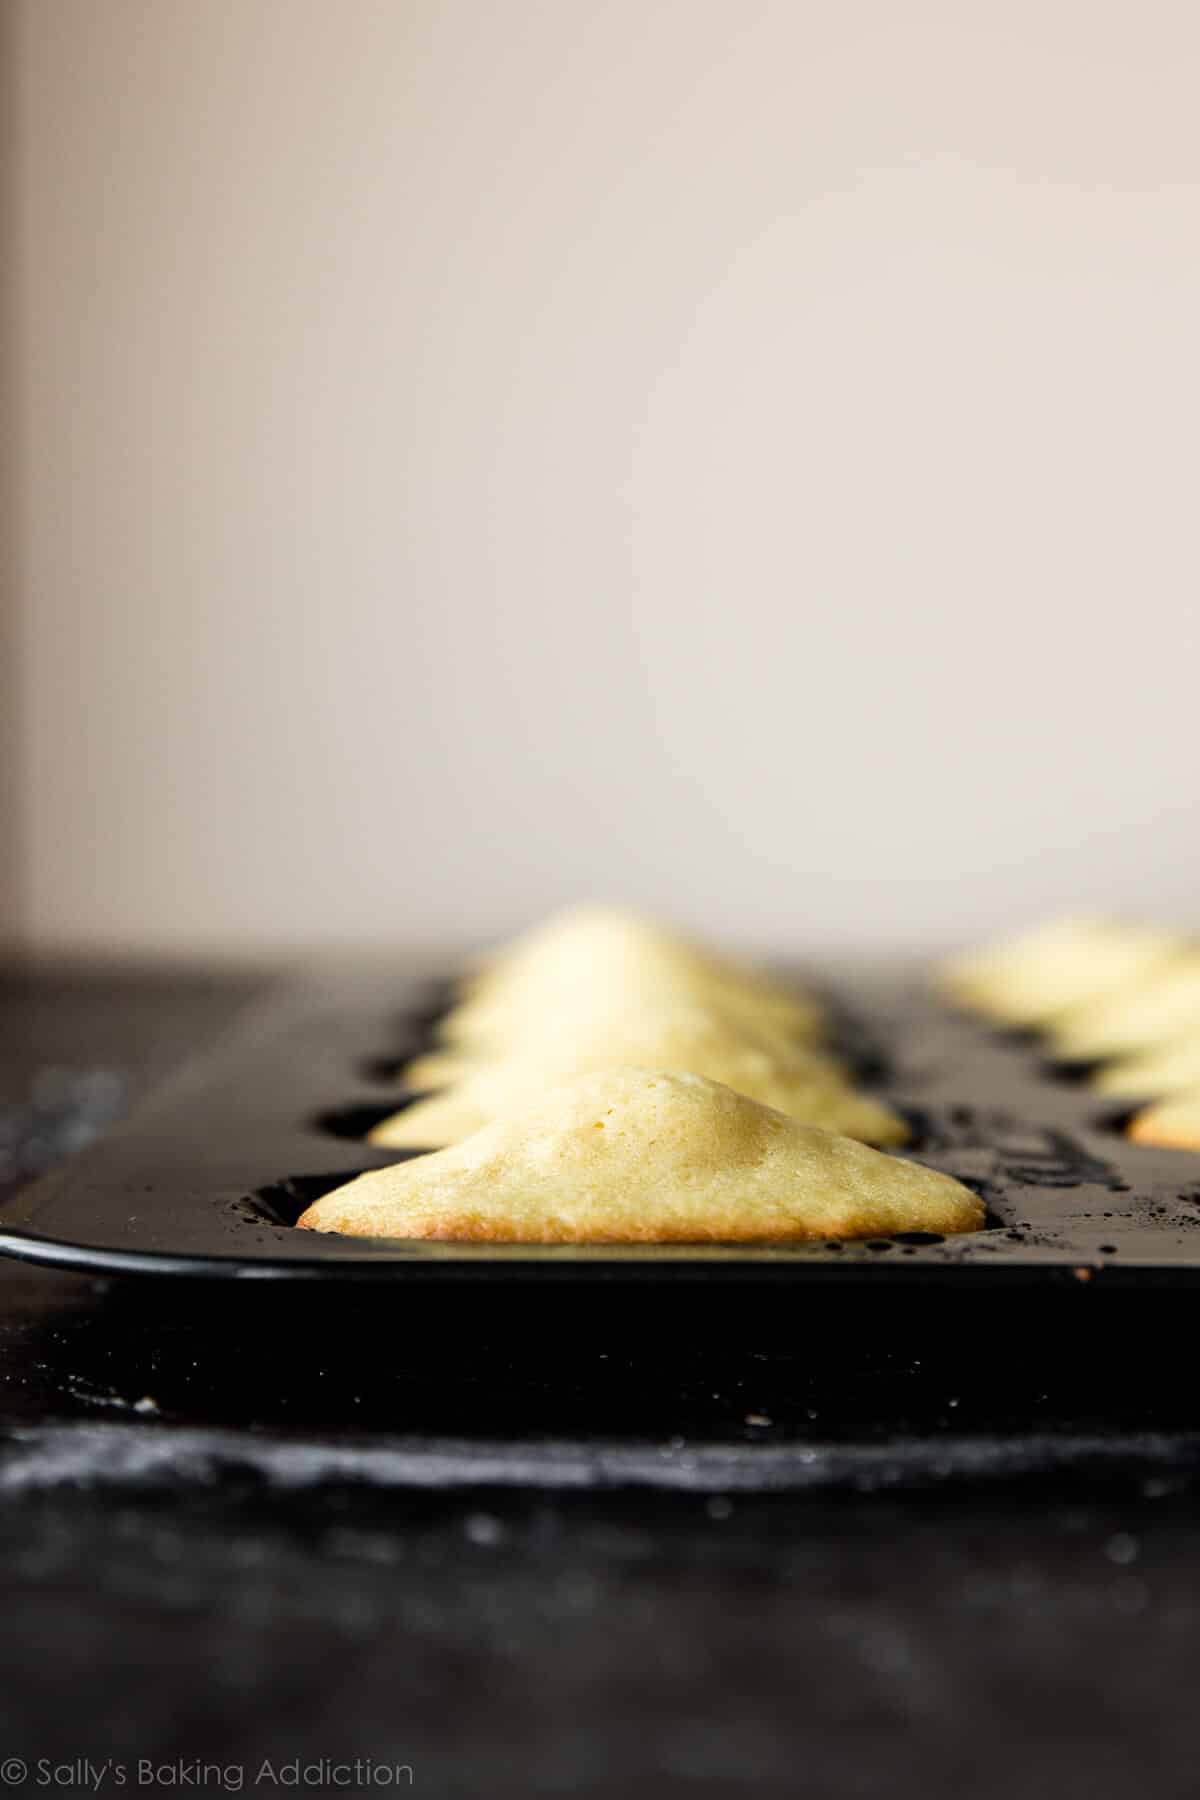
Look at that rise! This is called the belly, hump, or bump of a madeleine.
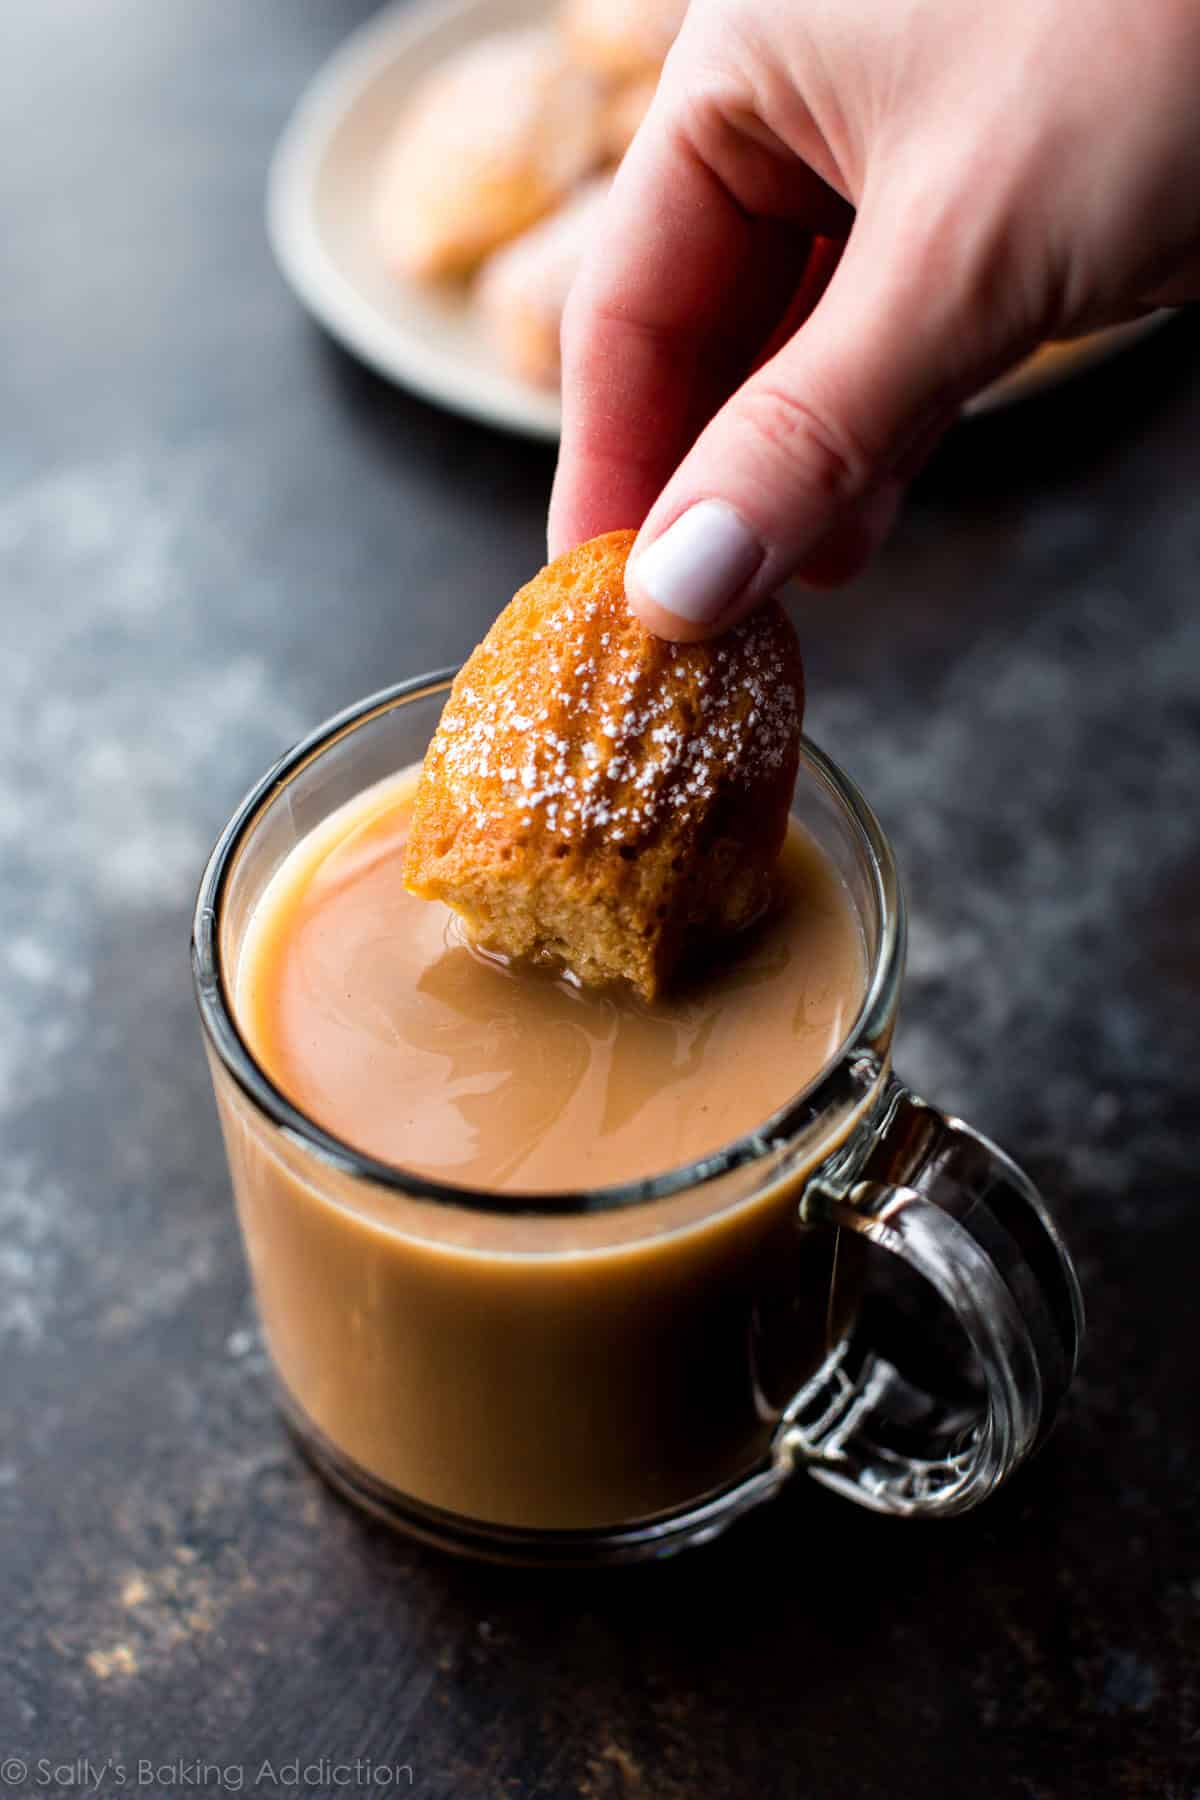
Madeleines are best right out of the oven. They’ll lose a lot of moisture overtime, so I suggest baking and enjoying them fresh. I had lots of madeleine rocks on my hands after a day or 2. (Dunk them in coffee… still good!)
So Are They Worth the Fuss?
Yes, I definitely think so! Laced with fresh lemon zest and finished with confectioners’ sugar, their texture is undoubtedly unique. Delightfully crisp edges, buttery scallops, and a subtly sweet airy teacake inside. To say they’re delicious is an understatement. They’re remarkable. A French pastry I never thought I could recreate in my own kitchen. They always on my list of Mother’s Day recipes and great for any type of shower, celebration or event. Invite some friends over, brew some coffee, pour some tea, and bake them together. It’s a fun baking experience!
If you read the recipe and use these pictures as your guide, you’ll be gifted with these fancy treats too. If, somewhere along the way, your batter gets a little too heavy—no fret. Your mads will taste more like poundcake, but they’ll still be worth it.
Do you have a favorite madeleine recipe? Or any other tips and tricks? I’m pretty happy with these, but would love learning from any madeleine experts!
By the way, I can’t finish this post without two more things:
- The history of madeleines. 🙂
- Ross: Oh really? Did she tell you he plays the recorder, recites poetry, and bakes madeleines? Monica: Ohhhh how are they? Ross: Lighter than air… but that’s not the point!

Madeleines
- Prep Time: 1 hour, 15 minutes
- Cook Time: 12 minutes
- Total Time: 1 hour, 30 minutes
- Yield: 18-20 cookies
- Category: Cookies
- Method: Baking
- Cuisine: French
Description
Light & airy homemade madeleines with delicious buttery lemon flavor.
Ingredients
- 1/2 cup (8 Tbsp; 113g) unsalted butter (plus another 2 Tbsp (28g) for the pan)
- 2 large eggs, at room temperature
- 1/2 cup (100g) granulated sugar
- 2 teaspoons lemon zest
- 1 teaspoon pure vanilla extract
- 1 cup (115g) sifted all-purpose flour* (spooned & leveled)
- 1/2 teaspoon baking powder
- 1/8 teaspoon salt
- optional: confectioners’ sugar for sprinkling on top
Instructions
- Read the post above for explanations and step-by-step pictures. It will help you!
- Melt the butter in a large bowl and set aside to slightly cool as you prepare the rest of the batter. You can melt it in the microwave or melt it/brown it on the stovetop then transfer to a large bowl.
- Using a handheld or stand mixer fitted with a whisk attachment (didn’t notice a difference using either one), beat the eggs and sugar together on high speed for at least 8 minutes. The mixture will be thick, pale, and form ribbons when you lift the beater(s). Beat in the lemon zest and vanilla extract until combined. (The remaining ingredients are mixed together by hand; you no longer need the mixer.)
- Whisk the flour, baking powder, and salt together in a small bowl. Using a silicone spatula, gently fold into egg mixture. I suggest carefully folding in half of the flour mixture, then folding in the other half. (Instead of dumping it all in at once.) Make sure you’re handling this batter with care. It’s very delicate.
- Stir 1/4 cup of the batter into the melted butter. It will take a minute to fully incorporate. Then stir it all into the rest of the batter. The batter will be thick, silky, and shiny.
- Cover the batter and chill in the refrigerator for 30-60 minutes. Try not to chill any longer than this as the butter in the batter will begin to solidify.
- During the last few minutes of chilling, preheat the oven to 350°F (177°C).
- Melt the remaining 2 Tablespoons butter. Using a pastry brush, lightly brush the madeleine pan with melted butter. I find that greasing the pan is necessary even if you’re using a nonstick pan. We want to avoid any chance of sticking.
- The batter will be quite airy and spongey after resting. This is good! Do not try to deflate it. Spoon 1 generous Tablespoon of batter into the center of each scalloped well. No need to spread it to the edges. Just plop it in the center. (Cover and refrigerate remaining batter if you do not have 2 madeleine pans to bake the batter all at once.)
- Bake for 10-12 minutes. The madeleines are done when the tops spring back after lightly pressed with your finger. Invert the pan onto the counter. Transfer the warm madeleines to a wire rack to lightly cool.
- Dust with confectioners’ sugar, if desired, before serving. Madeleines are best enjoyed right after baking, so I don’t have any make-ahead tips. They dry out very quickly; I find baked and covered madeleines lose their texture even after 1 day! For this reason, I don’t recommend freezing them either. You’ll lose a lot of texture.
Notes
- Special Tools (affiliate links): Citrus Zester | Glass Mixing Bowl | Electric Mixer (Handheld or Stand) | Whisk | Silicone Spatula | Pastry Brush | Madeleine Pan | Cooling Rack | Fine Mesh Sieve
- Flour: Sift flour before measuring.
- Adapted from From Julia Child’s Kitchen (I reduced the sugar, oven temperature, sifted the flour, added baking powder, and did not flour the pan)


Reader Comments and Reviews
This recipe works very well. My only additions/comments are:
1) To get the brown around the edges, leave a lot of melted butter around the edge of the scallop. Don’t worry about butter on top of the pan.
2)Baking works better for me at 350 degrees. Perhaps that is my stove.
Thank you for this!
This “hands down” the best Madeleine recipe I have found. I’ve made this twice now and both times….perfection. The first time I followed the recipe exactly. The second time, I used orange zest instead of lemon and the orange gives it an extra little sweetness. Also, the second time, I substituted vanilla bean paste to give it a little deeper flavor. I have tried numerous recipes (all so different, too!) and yours is the one I will keep! Thank you so very much!
I was so proud of my success in baking the perfect French madeleine following your recipe! Thank you for the beautiful layout and helpful instructions.
I even wrote about it on my newest blog – The French Californian. 🙂
I will surely continue to look at your recipes!
XO,
Emily
Hi Sally!
Can’t wait to try my hand at making these. I just bought the pan you suggested, because I’m throwing a tea party for some girlfriends for the holidays and thought the madeleines would make a lovely addition to my menu. Quick question: Do you think I could substitute GF flour and the recipe would still come out alright? One of my guests is GF and I wouldn’t want her to miss out. King Arthur’s GF flour is a really nice substitute, but I was wondering if you had any experience with this? Thanks so much! LOVE your site. Everything I’ve made from it has come out fabulously well.
Hi Kim, I wish I could help but I have not tested this recipe with gluten free flour. Let me know if you try it!
Thanks so much for the quick reply! Yes, I’m going to do a test batch, one exactly as written and one just substituting the AP with GF flour and see how they compare. Will absolutely let you know!! Thanks again and Happy Holidays!
Perfect! We have come back from Switzerland and had Madelines everywhere. The kids were very pleased i can now make them at home!
Do you think adding bicarbonate of soda would help preserve the fluffy texture of the batter?
Hi Sally, I really like your recipes and your detailed instructions. I have tried other madeleine recipes and yours is by far the best of all. Bravo. My only disappointment is the hump side doesn’t get brown. It stays white. I followed your instructions to a tee. They did have the spring back feel when I touched them. What am I doing wrong? Also the clamshell look isn’t formed deep like yours. Could it be the pans. If so, is there a brand you recommend? I got mine from Amazon.
I wonder if the stale madeleines would make a nice trifle or tiramisu… Might have to try that if there are any leftovers.
So, I tried this recipe and the taste was amazing but I’m not thrilled with the look. My madeleines were apparently too airy, with lots of holes, so the grooves don’t seem as well defined as I have seen in pictures and the store bought variety. What can I do differently?
I did make a few modifications, so please let me if any of these are the culprit:
1. I used cake flour
2. I used silicone molds (20 minis x 2)
3. I used lemon curd instead of zest
Thanks for any advice
Richard, the silicone mold should be fine to use but I highly recommend sticking to the recipe exactly as written for the best results!
A bit dry and not as flavorful as I hoped they would be. Something was off, but it was my first try so I’m sure I messed up. They were airy and spongy though, with decent, though not incredible humps. My family liked them and they disappeared fast so that’s what’s important. Thanks for teaching the techniques the way you do. It makes a big difference.
Loved it! I didn’t fold the batter they way you did just mixed it all very slowly with a spatula, I also didn’t refrigerate them prior and they still were perfectly puffy, crispy on the outside, perfect spongy puffy dough on the inside. Perfect belly. Best recipe I have used so far. Thank you so much for sharing your tips. I think the most important one I discovered thanks to you was that the eggs have to beaten 8min. I also used caster sugar.. thank you!
Recently moved and can’t find my Madeline recipe! My pans are from France and over 30 years old! This recipe looked interesting. I have always used Crisco to grease the pan with excellent results. I did the melted butter as the recipe called for. They stuck like glue! Tasted good, but presentation was not ideal. For a special occasion, so needed to make a second batch….
Hi Sally, I wanted to try this recipe but I don’t have a madeleine pan. Was thinking of using mini muffin pans. Any recommendations? 🙂
A mini muffin pan works, but the texture of the little cakes will be different. I found that you really need the scallop pan to produce the iconic crisp edges.
Love this recipe! Makes madeleines easy! If I add little crumbles of frozen raspberries to each cookie, do you think it would affect the baking time?
Bake time should remain the same. Sounds delicious!
I made these for the first time, using your step by step instructions. Am an accompished baker but was not afraid of all of the steps. They came out perfectly. My husband of 52 years said you can “teach an old dog New tricks”. Thank you for the step by step photos.
I made these for the first time, using your step by step instructions. Am an accompished baker but was not afraid of all of the steps. They came out perfectly. My husband of 52 years said you can “teach an old dog New tricks”. Thank you for the step by step photos.
Hey Sally
I tried your recipe today, the madeleines turned out super delicious. The first batch did not have a belly but the second batch was fluffier. Thanks forthe wonderful recipe.
Ooh forgot to mention- my first time baking madeleines
Hi Sally, thank you so much once again for this receipe. I finally tried it today and followed it to the T. I used a silicon Madeline baking tray. The Madelines turned out sift, spongy and very tasty. However, they are white in colour and didn’t brown much. (Infact, v v little browning). Can you please help advise what went wrong?
Thanks,
Greta
Hi Sally,
All your bakes look great and I can’t wait to try them out. This weekend I tried your madeleines – absolutely delicious, a winner amongst work colleagues and so easy with your step by step illustration. Thank you so much for sharing this recipe. X
Hi Sally,
Thank you for your simple, well descriptive and illustrated recipe. I have tried a few before – no baking power, place the pan in the freezer (quite difficult if you have only one), refrigerated the batter over an hour! But yours worked! I will definitely bake these again and strictly adhere to the beating of eggs and sugar for 8 minutes and refrigerated for at least 45 minutes.
I only have one pan. I let the batter chill for 30 minutes and then baked. They had a slight hump in the center. Then I baked the rest of the batter that had probably been in the fridge for 50 minutes. The hump was much bigger and they just looked better overall. I will definitely make these again, but I will start out giving the batter a 45-60 minute chill.
Hi Sally,
Just attempted this recipe today, was very excited to make these. I have a question, after I folded in the last remaining flour and then move on to adding the butter, my batter deflated, drastically and by time I was done combining the butter, my batter had reduced by probably half. Was I too rough with the egg mixture? Or did I not let the eggs and sugar beat for 8 mins? Help appreciated! Thanks.
Margeaux
Hi Margeaux! It sounds like the eggs and sugar weren’t beaten for long enough. Did you let the mixer run for 8 whole minutes? Always handle the batter with care to avoid deflating it.
Dear Sally, thank you very much for your recipe. My attempt this time around following your intructions yielded a very good result: crispy golden brown outside, a little plump in the middle and has the consistency of cookie borderline cake. I have tried and made Madeleines using other recipes and they were more like cake. I read an article that Madeleines are best eaten when dunk into tea. If this is the traditional way of eating it, then I need not worrie if the middle was not very moist like sponge cake. I replaced vanila with cinnamon paste and the result was delicious. Yes, I dunk them into my tea and they were yum. Thanks so much. Michelle
Hi Sally,
I made these madeleines tonight using orange zest instead of lemon. Thank you for laying out the recipe and making it so easy to follow. They turned out absolutely amazing! So incredible!
Hi Sally — If we decide to brown the butter, do we need to increase the amount of butter we start with, since the volume will reduce? Or is keeping the same amount of butter just fine?
Can’t wait to try these! 🙂 Thanks for the detailed explanation and gorgeous pics!
Hi Anna! You’d actually start with the same amount of butter, whether you are browning it or not. Let me know how they turn out!
Hi Sally —
I just made them yesterday with the brown butter, and they turned out WONDERFULLY. So light but flavorful. Thanks for another great recipe!
WOW! I made these today and they turned out amazing! I just have one question: can you replace the lemon zest for something else? And what would that something else be?
Orange zest would be great! Or you can use another flavor of extract besides vanilla. You can also brown the butter for a different flavor as well.
Hi Sally,
I just made the recipe today. They were delicious! The texture was perfect.
Thank you for your suggestion and taking the time to write a detailed recipe.
Would you dip these in ganache or drizzle? I adore Madeleines but have a partner who isn’t a fan of citrus in desserts….
Either! 🙂
I’m hosting a Bridal shower & she has only 1 request…Madeleine’s! I’ve never made them before. I’m going to do a couple practice runs to make sure I’ve got it down perfect. Do they freeze well?
See the last step of the recipe! Madeleines are best enjoyed right after baking, so I don’t have any make-ahead tips. They dry out very quickly; I find baked and covered madeleines lose their texture even after 1 day! For this reason, I don’t recommend freezing them either. You’ll lose a lot of texture.