

Another fresh and exciting recipe for you!
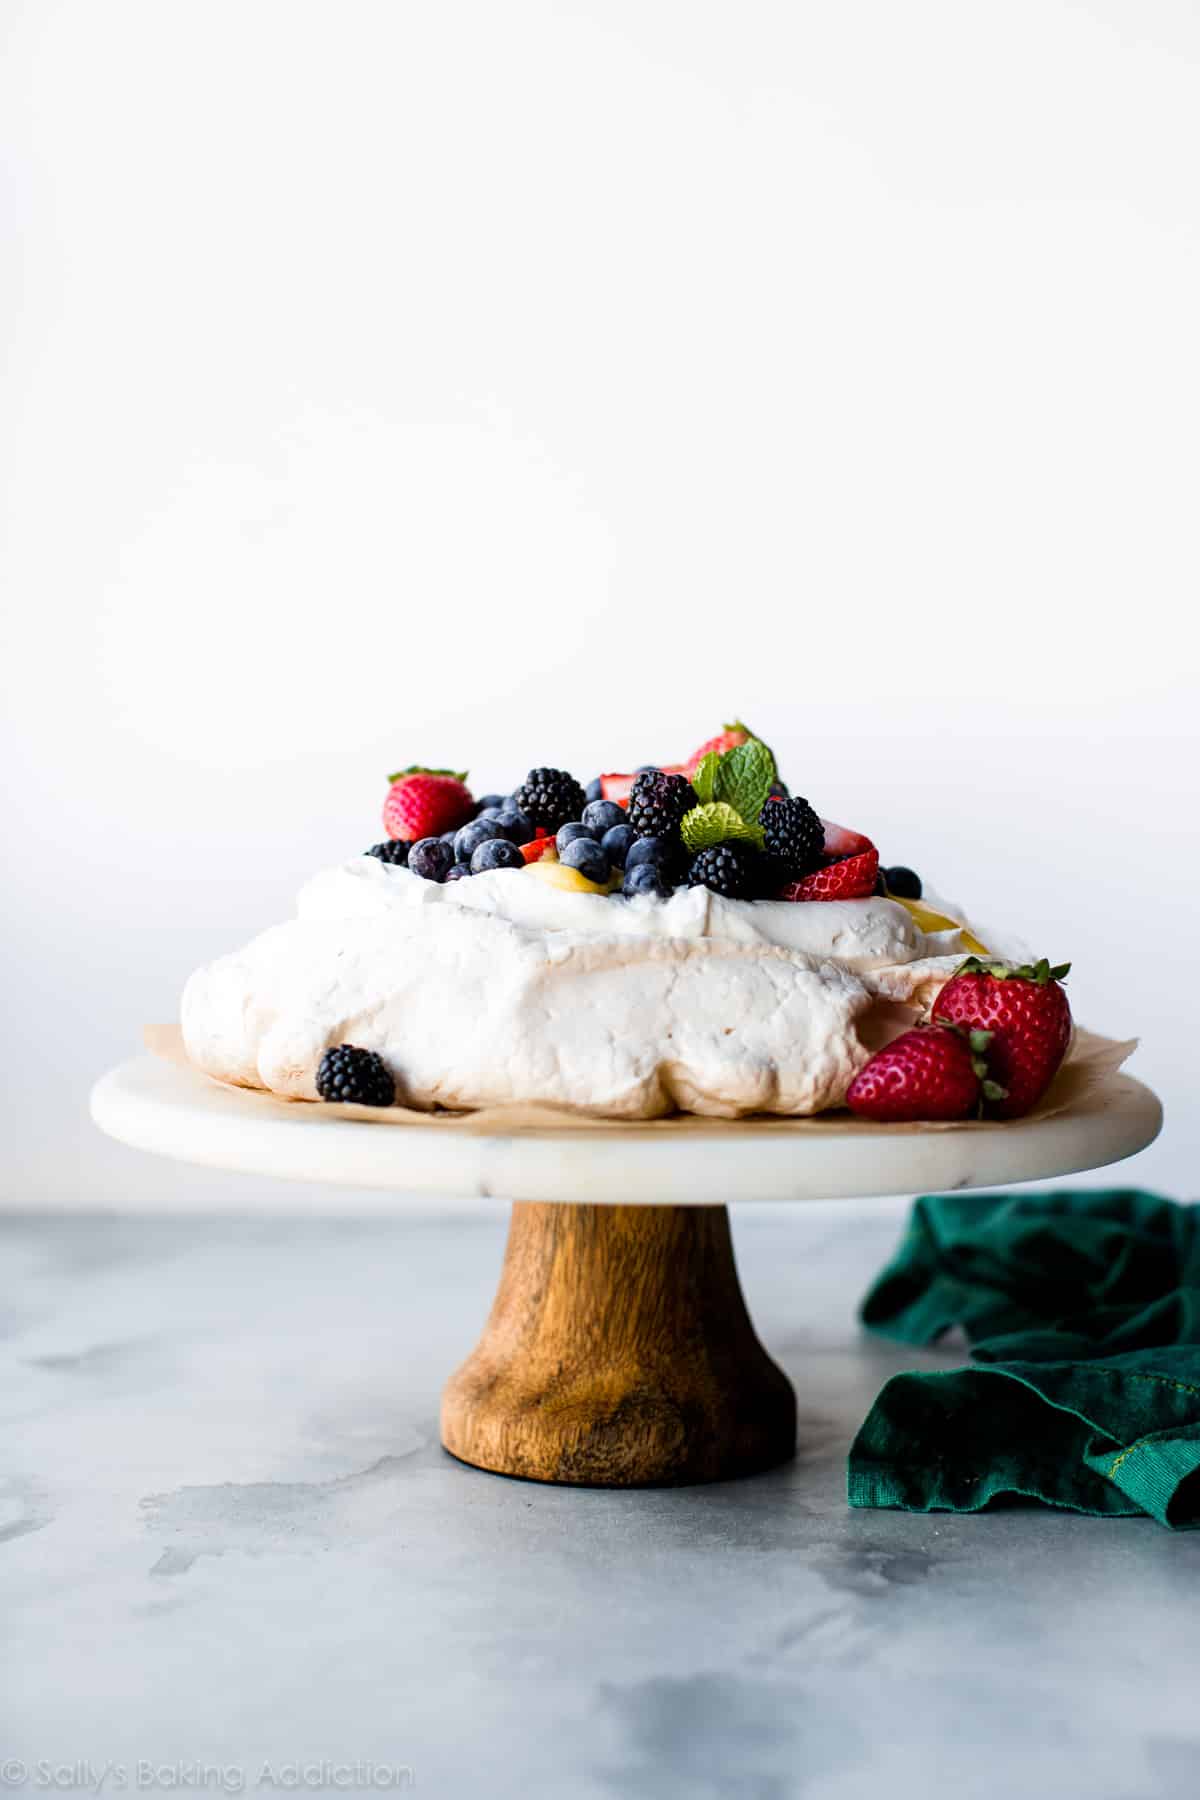
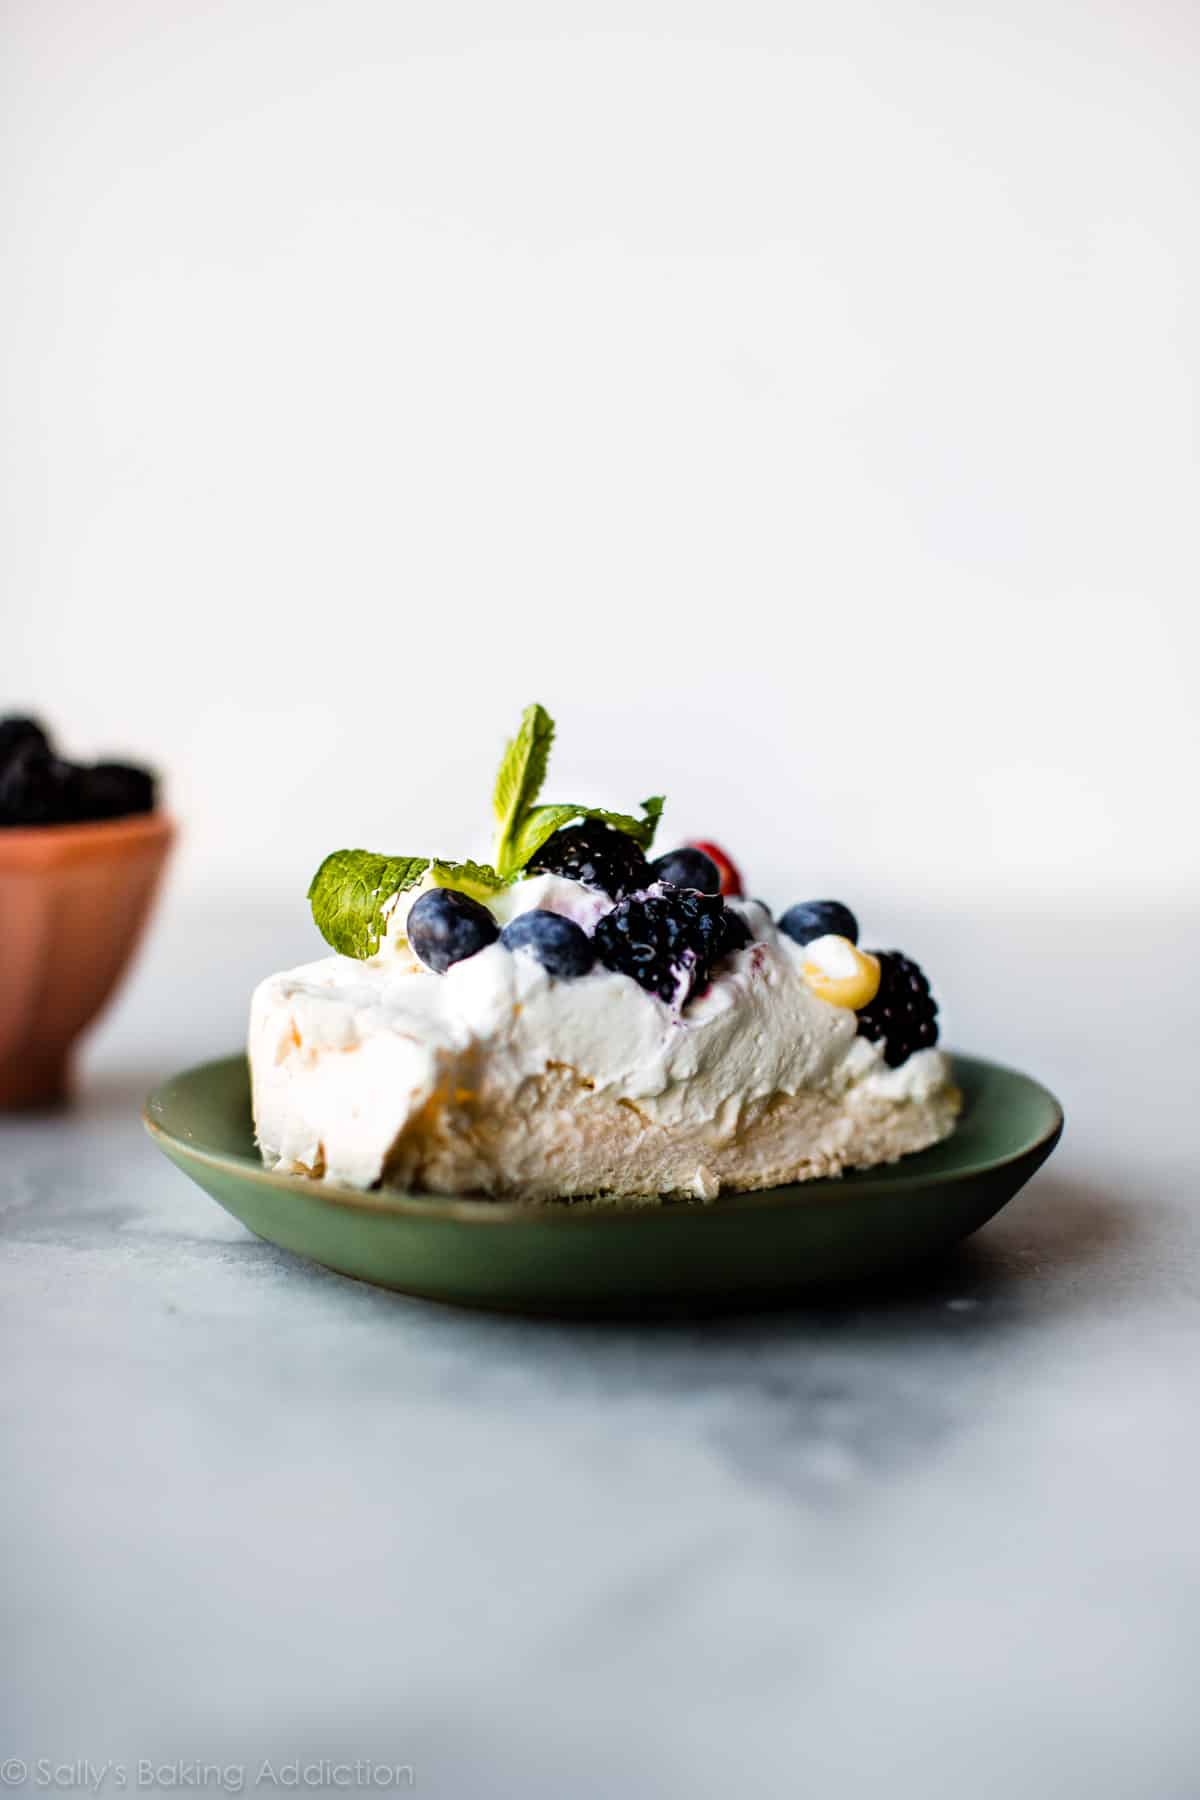
What is pavlova? Pavlova is a dessert popular in New Zealand and Australia. It’s not as common here in the states, but I hope to help change that! A texture lover’s dream come true, pavlova is made from egg whites that are slowly baked in a relatively cool oven. The egg whites take on a chewy-crisp texture on top, a soft marshmallow texture inside, and a crunchy crisp texture around the edges. That’s three completely different textures in one single bite. The crunchy edges are just like meringue cookies.
Pavlova loves to be dressed up with assorted toppings, mainly fresh whipped cream and piles of fresh fruit. Naturally gluten free, pavlova is light, sweet, and screams warm weather favorite. Happy spring, my friends, we’re making PAVLOVA!!
Video Tutorial: How to Make Pavlova
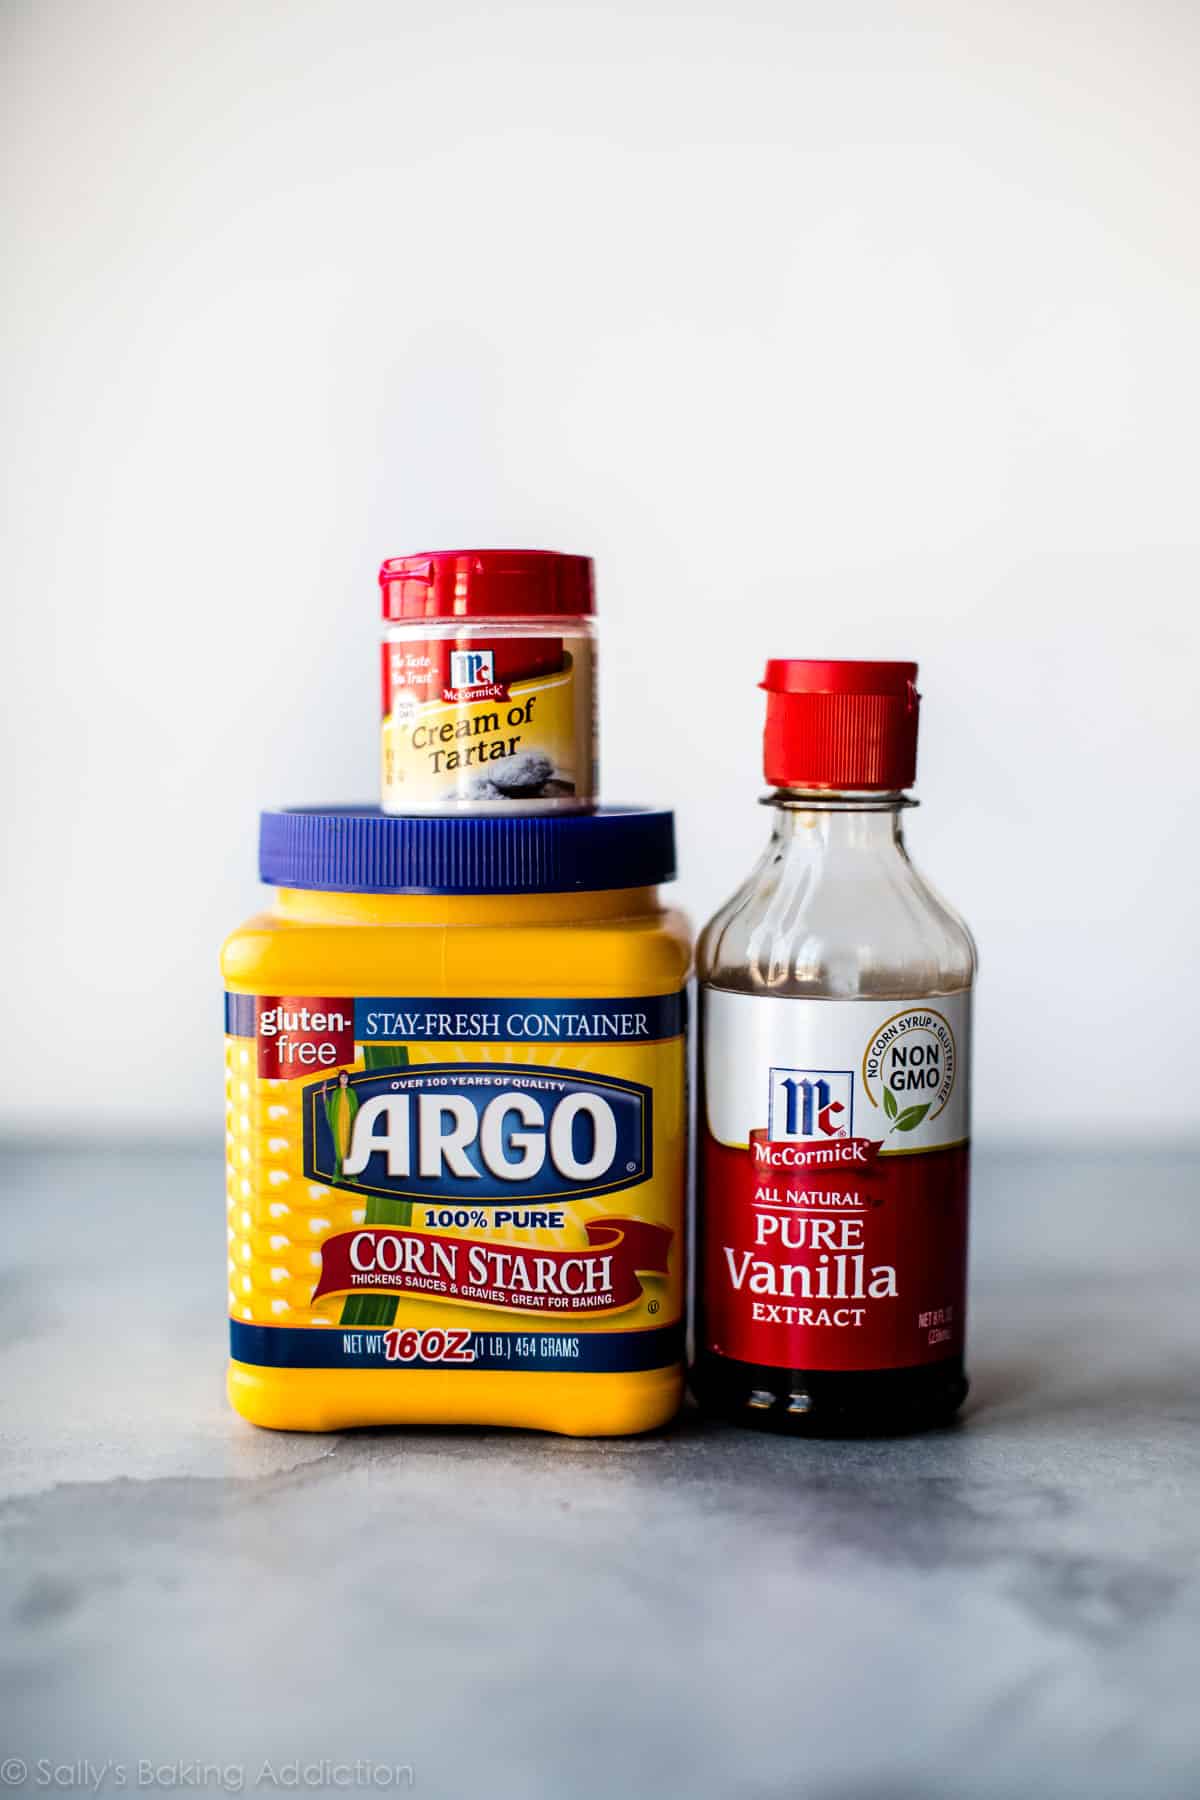
To obtain the unique pavlova texture, you must adhere to an exact recipe. While it’s fun to play around with ingredients, pavlova is not the time to stray from what’s listed. It’s picky, but picky doesn’t mean difficult. In fact, you only need 5 ingredients to make pavlova and I bet you have each in your kitchen right now:
- Egg whites
- Sugar
- An acid such as cream of tartar or vinegar
- Cornstarch
- Vanilla extract
Let me explain why these ingredients are used.
Pavlova Ingredients
- Egg whites – beaten into stiff peaks, egg whites are the base and volume of pavlova.
- Sugar – in addition to sweetening the dessert, sugar stabilizes the egg whites by holding them together both in the oven and as the whole pavlova cools. Without sugar, the protein molecules (science!) in egg whites will collapse. Additionally, sugar helps achieve the delightfully crisp texture. (Sugar is so much more than a sweetener in our baked goods.) Speaking of sugar, make sure that you use superfine or caster sugar. Just pulse sugar a few times in a food processor to reduce the size of the crystals.
- Acid – you can use 1/2 teaspoon of cream of tartar or 1 teaspoon white, apple cider vinegar, or even lemon juice. The pavlova will NOT taste like vinegar, I promise. The acid helps the egg whites hold onto air and, like the sugar, helps prevent the egg whites from collapsing. I tested with both and I actually prefer cream of tartar. I found that my pavlova spread a bit more when I used liquid acid.
- Cornstarch – I tested pav with and without cornstarch. I found that the center was fluffier and more marshmallow-y with cornstarch. Then I tested with 1 teaspoon cornstarch and 2 teaspoons cornstarch. I found it was a little chalky tasting with 2 teaspoons. I’m sticking to 1 teaspoon.
- Vanilla extract – purely for flavor!
(Not sponsored by any of these companies, but here’s exactly what I use.)
Ingredients are simple and method is effortless. There’s plenty of downtime when making pavlova. All you really have to do is watch it beat in your stand mixer then check on it in your oven. Kick your feet up!

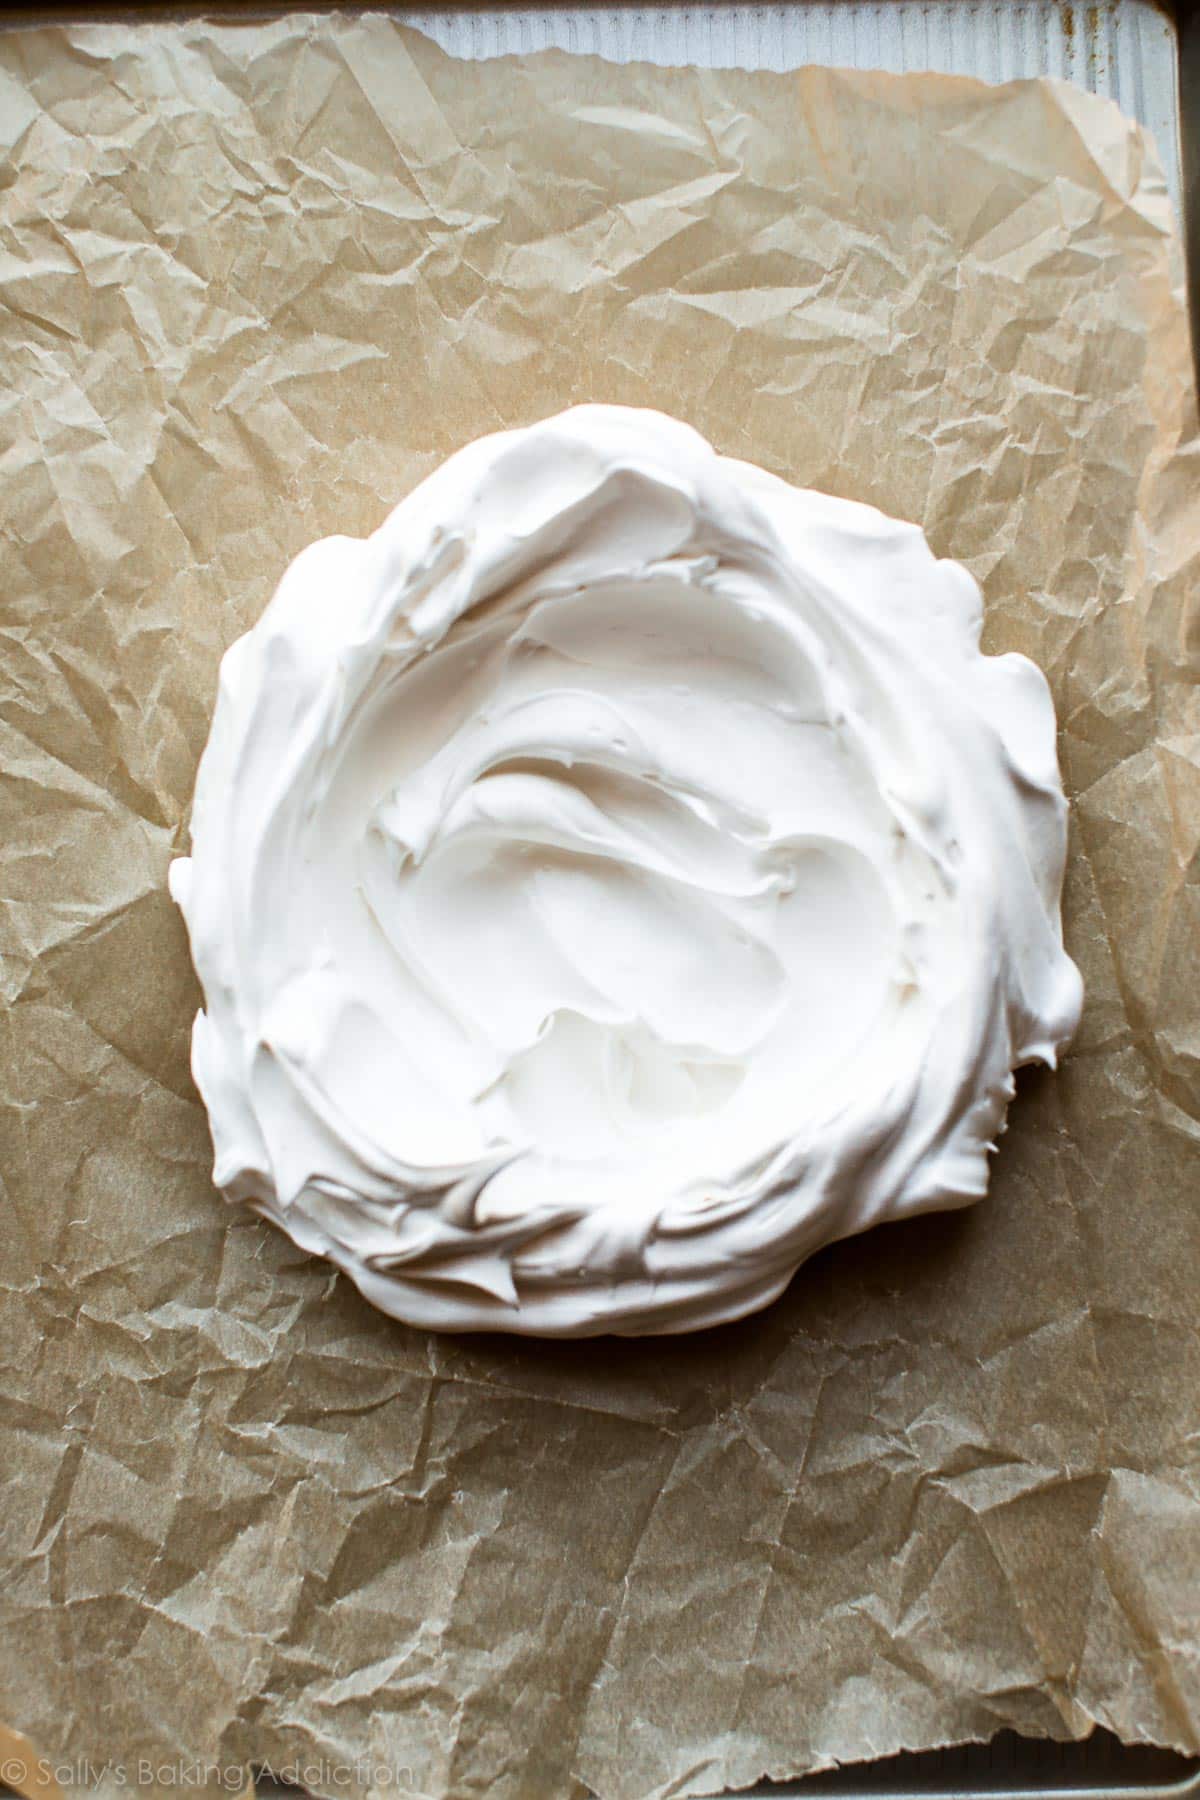
Just like our chocolate swirled meringue cookies and the meringue on our lemon meringue pie, whip the egg whites into super stiff peaks. Stiff enough that you can hold the whisk over your head and feel confident that the whipped egg whites won’t drop. 😉 Then you’ll spread the pavlova mixture onto your lined baking pan. You can use parchment paper or a silicone baking mat. Do not grease the baking pan—use a nonstick surface instead. Spread it into a circle, about 8-9 inches in diameter. You can eyeball it or trace one with a pencil. I just eyeball it. Like I did in the lemon meringue pie video, use the back of a spoon to create decorative peaks. Make sure the edges are tall and you have a nice dip in the center. That’s where we’ll pile our whipped cream and fruit!
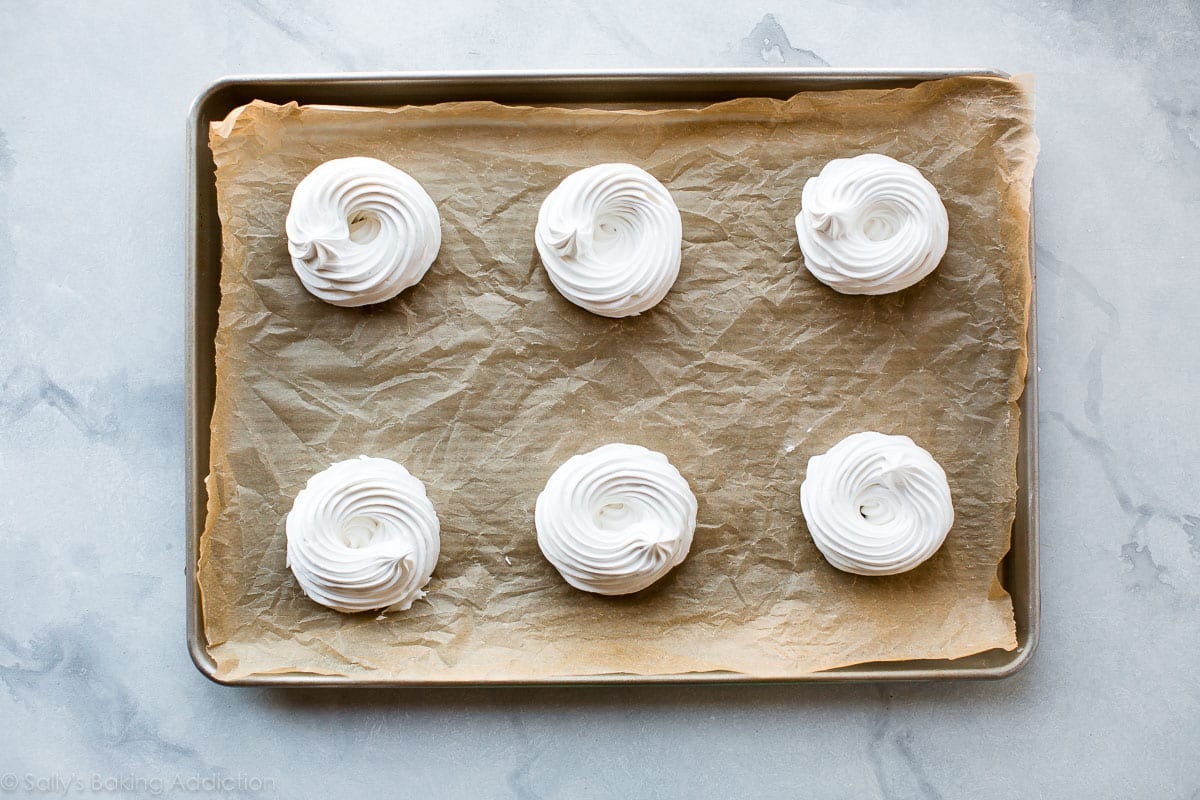
Alternatively, you can make mini pavlovas. Here I piped the mixture into 6 mini pavlovas using Ateco 849. A piping tip isn’t necessary—you can just spoon it on. Again, make sure you leave a dip in the center to hold the toppings.
A relatively cooler oven is imperative for properly cooking your pavlova, but let’s start the pavlova at 350°F (177°C) then reduce it down to 200°F (93°C). I do this to help “set” the outer crust quickly. This trick helps reduce spread.
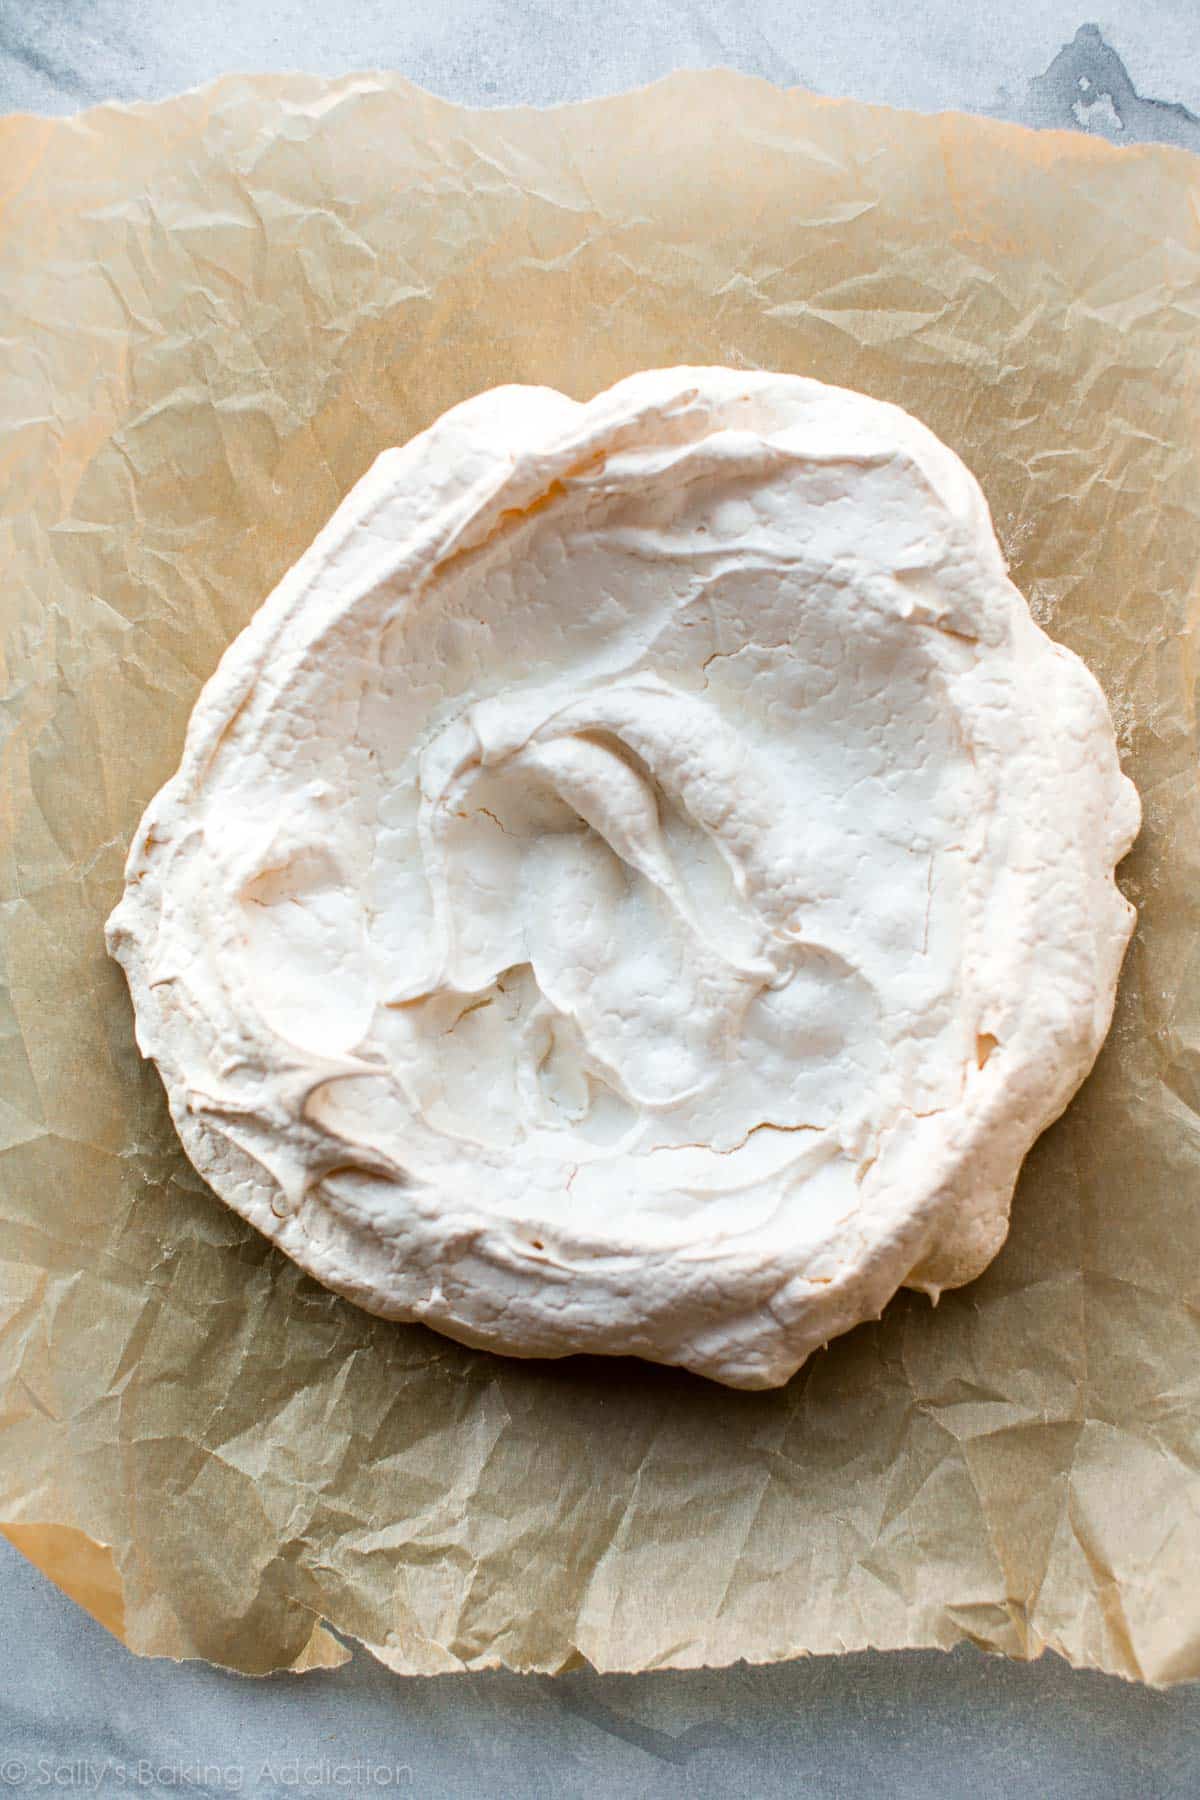
A properly cooked pav is pale in color. Cracks and bumps are par for the course, but the pavlova shouldn’t completely deflate. Especially if you follow the precise measurements and instructions in the recipe. You can help avoid too many cracks by cooling the pavlova in the oven. The sudden change of temperature (inside the oven to outside the oven) shocks the pavlova, so it’s best to cool inside the cooling oven.
Make sense?
You can top your pavlova or mini pavlovas any which way, but here are some of my topping suggestions:
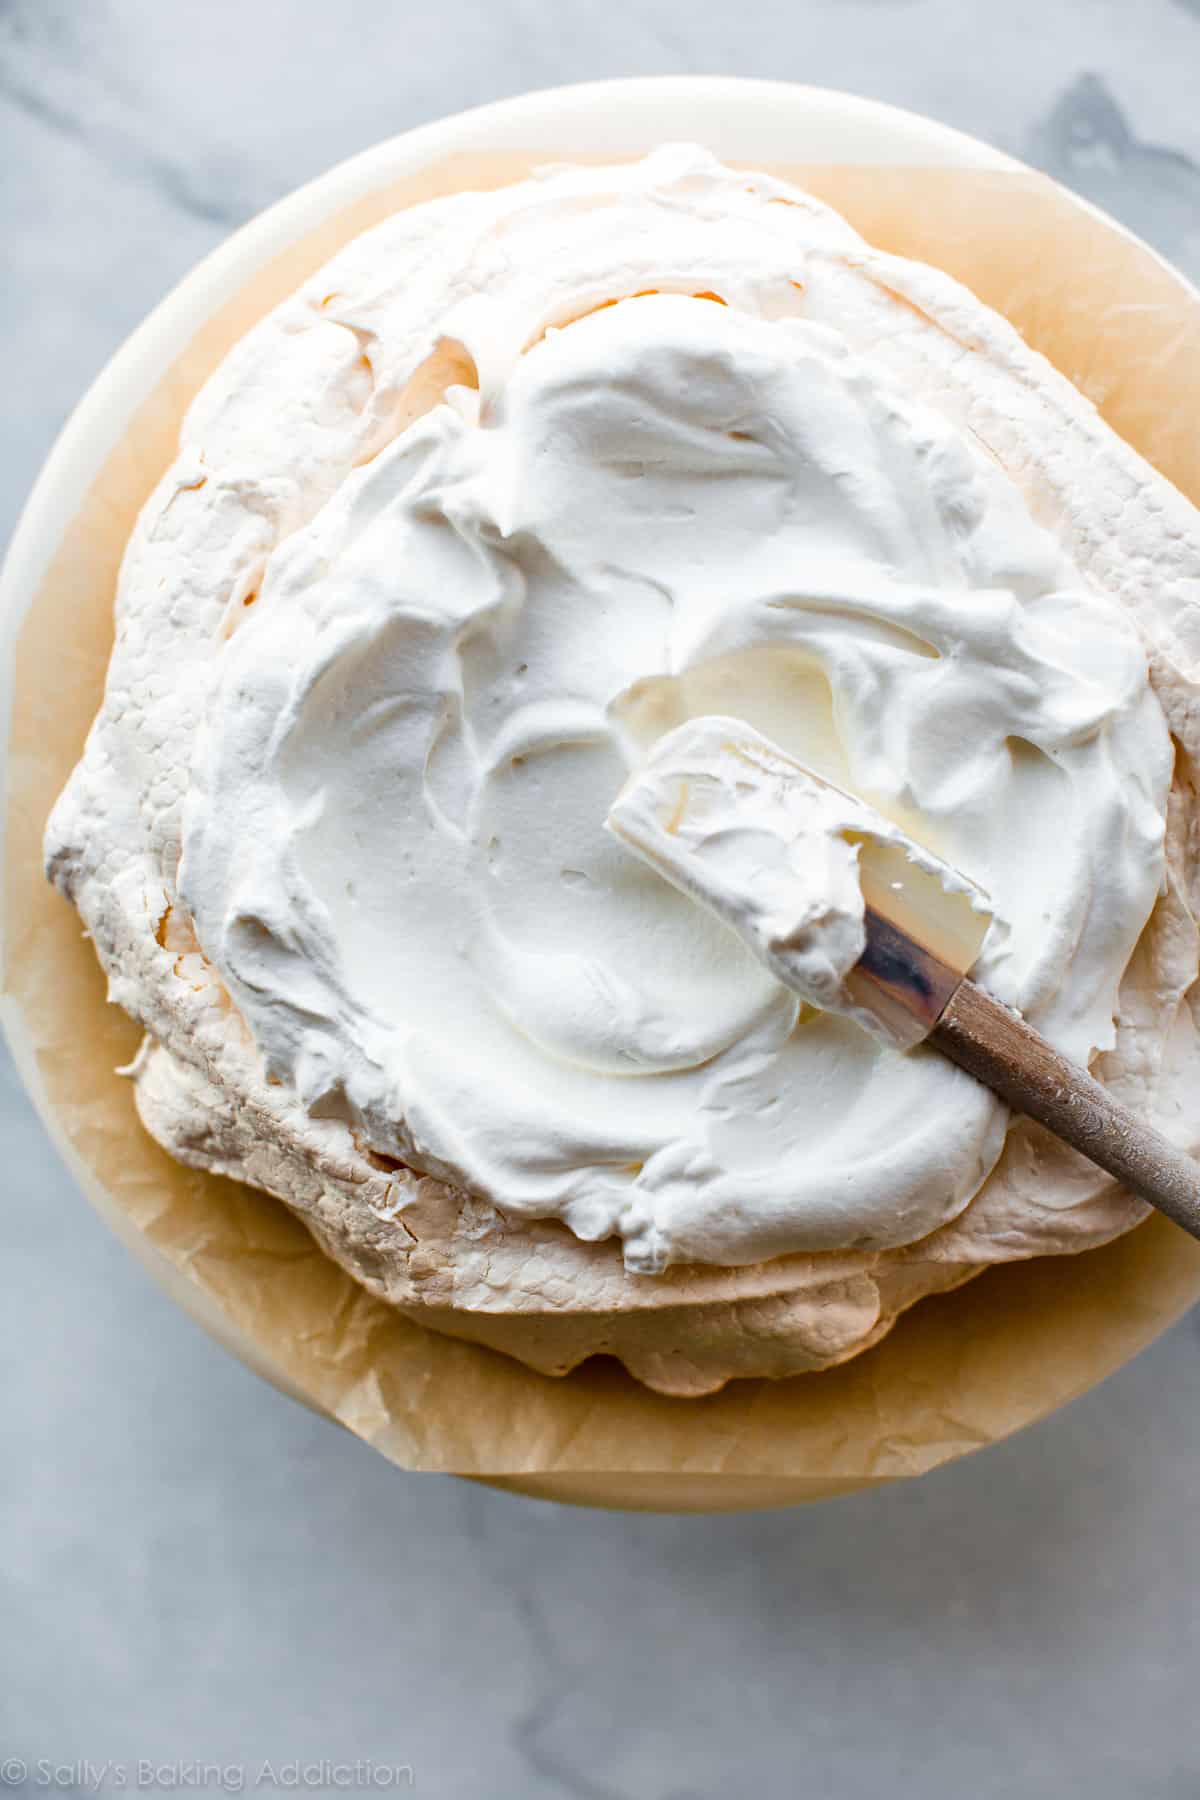
- Whipped cream is essential. You can get a little creative and flavor your whipped cream.
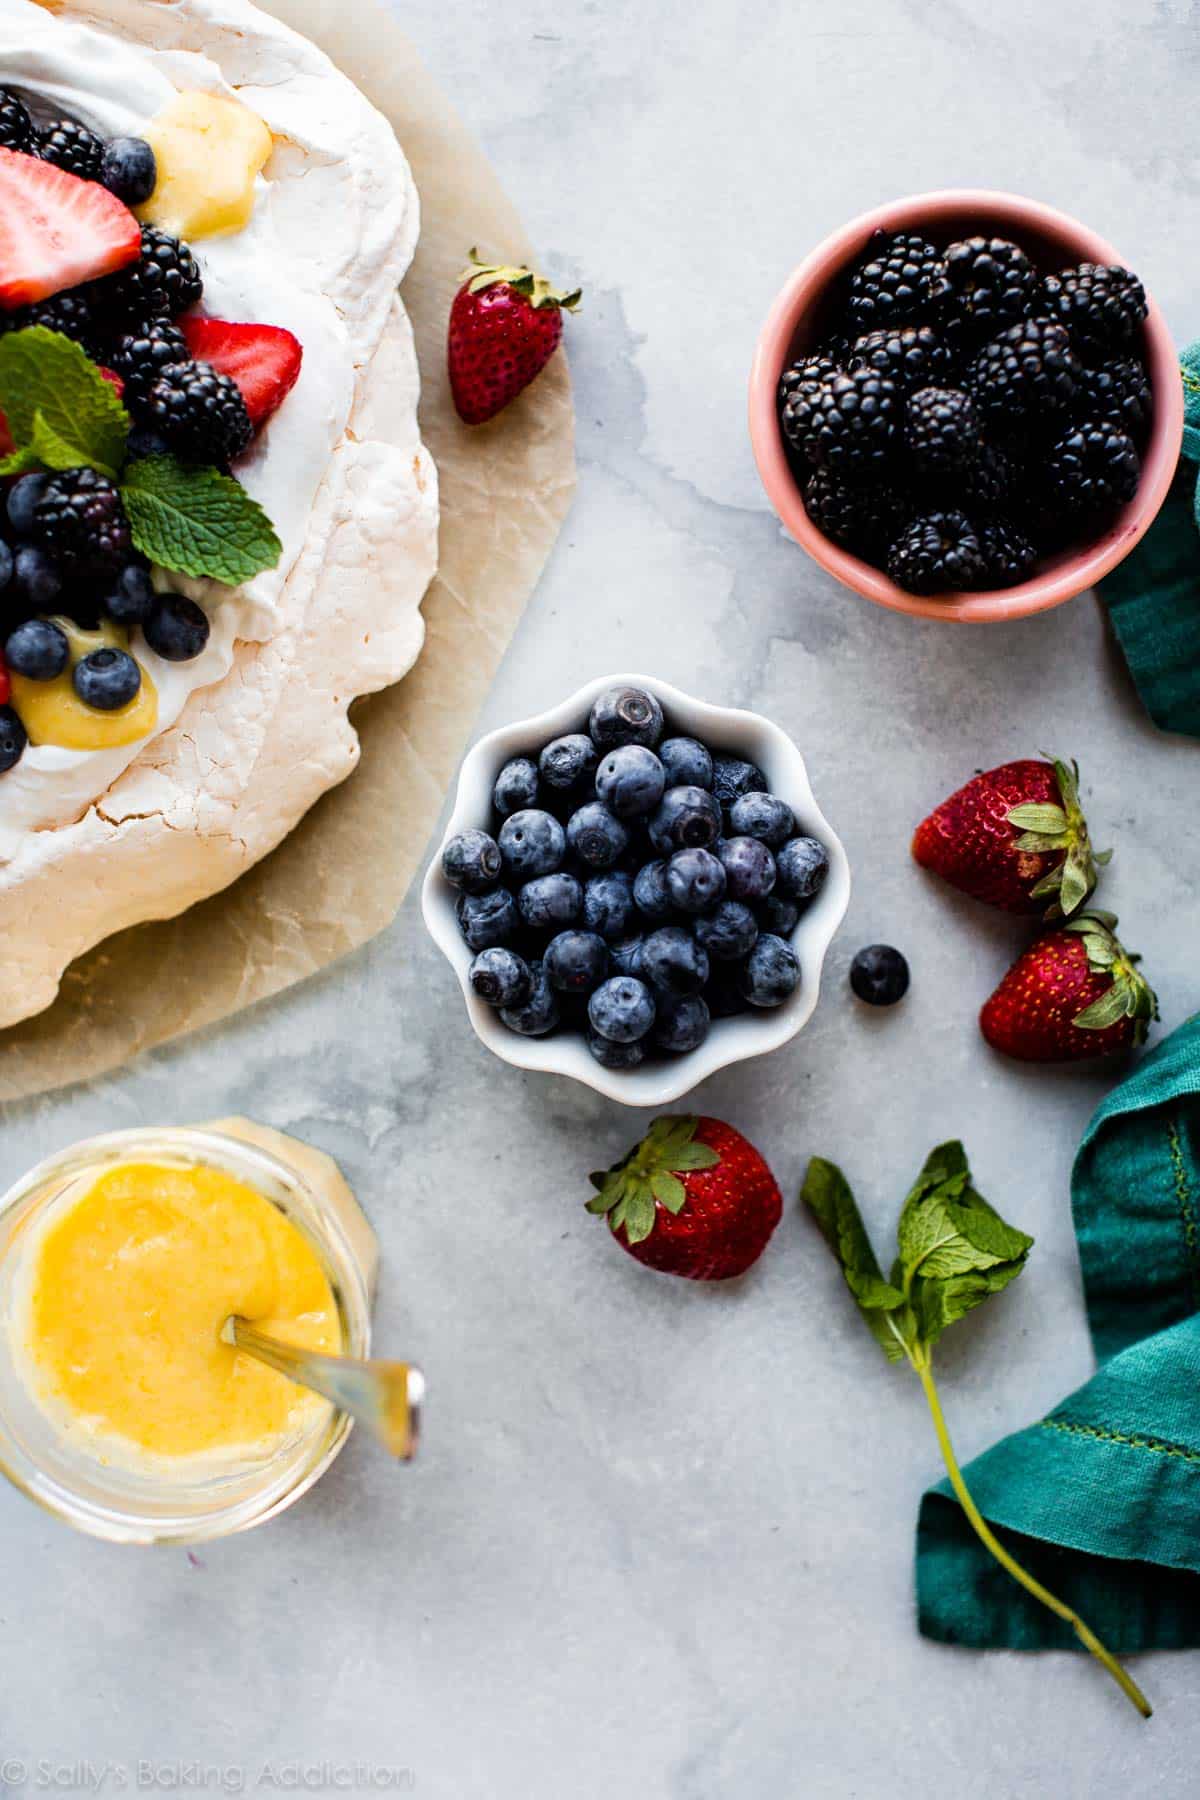
- Homemade lemon curd. You’ll have exactly 4 egg yolks left over anyway!
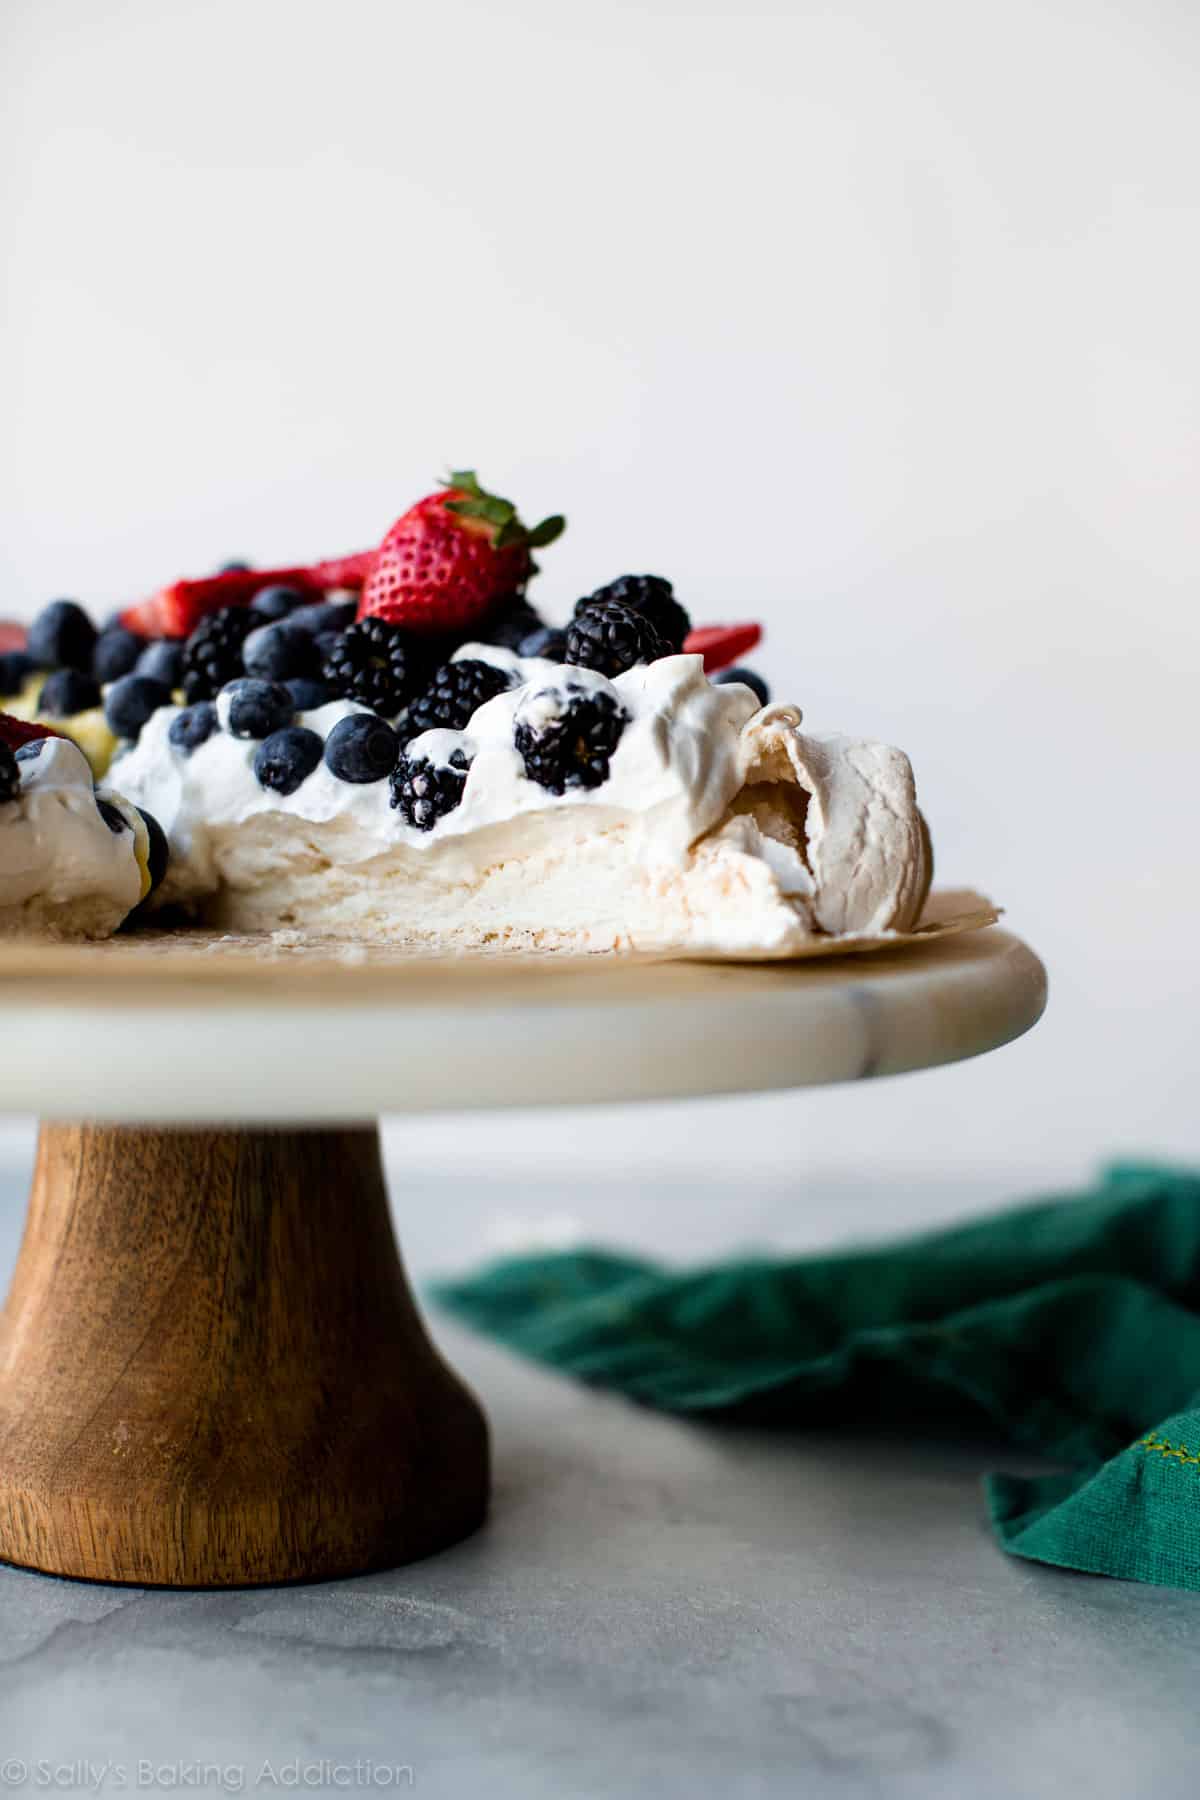
- A lot of fresh berries… enough to make a fruit pizza jealous!
- Edible florals and herbs
- Strawberry sauce, raspberry sauce, or blueberry sauce
- Chocolate shavings
- Seasonal fruits like mango, kiwi, passionfruit, blood oranges
No need to get artistic, just pile it all on top into a massive pavlova mountain.
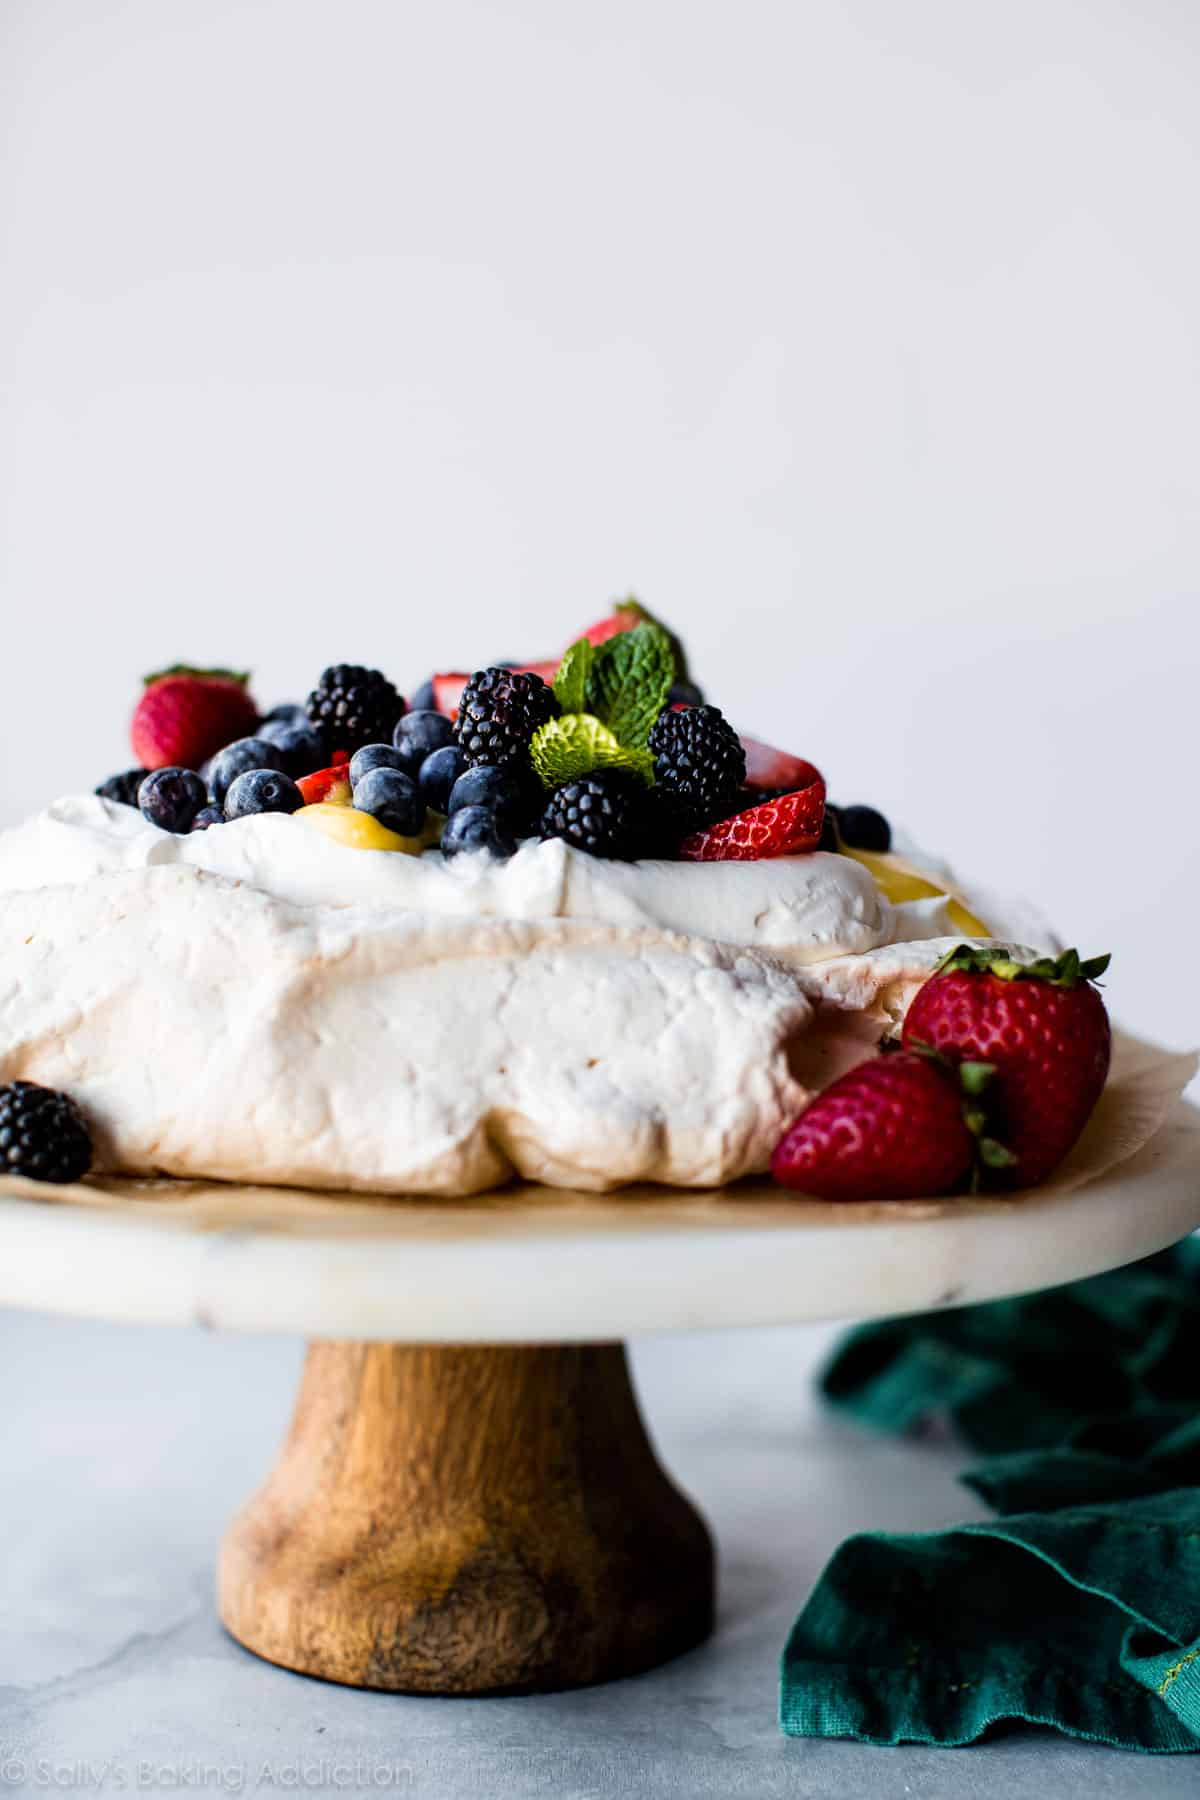
Things are bound to get a little messy when slicing, but if you cooked the pavlova long enough so that the bottom is crisp and the edges are set, it will hold a pie slice shape. This big thing serves about 8-10 people!
If you’re still on the fence about trying pavlova, might I remind you that the center tastes like marshmallows.
Have fun!
For more gluten-free baking inspiration, here are 40 gluten-free dessert recipes that are always a hit, including cranberry frangipane tart and flourless chocolate cake.
Print
Pavlova
- Prep Time: 20 minutes
- Cook Time: 90 minutes
- Total Time: 4 hours
- Yield: serves 8-10
- Category: Dessert
- Method: Baking
- Cuisine: New Zealand
Description
Pavlova is crisp on the edges, chewy on top, and marshmallow soft and creamy in the centers. Pile high with lemon curd, whipped cream, and fresh fruit to make a delicious, naturally gluten-free dessert!
Ingredients
- 4 large egg whites (use the yolks for lemon curd!)*
- 1 cup (200g) superfine sugar*
- 1 teaspoon pure vanilla extract
- 1/2 teaspoon cream of tartar*
- 1 teaspoon cornstarch
Toppings
- Homemade whipped cream, fresh fruit, strawberry topping, lemon curd, or any desired topping (see post for suggestions)
Instructions
- Preheat the oven to 350°F (177°C). Line a large baking sheet with parchment paper or a silicone baking mat. (Preliminary note: you will quickly reduce the oven to 200°F (93°C) in step 4.)
- With a handheld mixer or a stand mixer fitted with a whisk attachment, beat the egg whites on medium-high speed until soft peaks form, about 5 minutes. Add the sugar in 2 additions, beating for 30 seconds between. Once all of the sugar has been added, turn the mixer up to high speed and continue beating until glossy stiff peaks form, about 2 minutes. The peaks should be stiff enough that you can hold the whisk upright and the peaks won’t move. Add the vanilla extract and beat for 1 more minute. The peaks should still be very stiff. If not, keep on mixing on high speed. Using a rubber spatula, fold in the cream of tartar and cornstarch.
- Spread the pavlova mixture into an 8-9-inch circle (see note for mini size). You can make decorative peaks with the back of a large spoon if desired. Make sure the edges are relatively tall and there is a nice dip in the center.
- Place pavlova in the oven. As soon as you close the oven door, reduce heat to 200°F (93°C). The pavlova will stay in the oven as it cools down to 200°F (93°C). Bake until the pavlova is firm and dry, about 90 minutes total. Rotate the baking sheet if you notice some spots browning. Try to limit how many times you open the oven as the cool air will interrupt the baking.
- Turn the oven off and let the pavlova cool inside the oven. Once the pavlova is cool, you can store it covered at room temperature for up to 2 days. Or serve right away.
- Once cool, top the pavlova with whipped cream and assorted toppings. Slice and serve.
Notes
- Make Ahead Instructions: See step 5 for making the pavlova in advance. Pavlova is best enjoyed right after it’s garnished. It doesn’t freeze well.
- Special Tools (affiliate links): Electric Mixer (Handheld or Stand) | Baking Sheet | Silicone Baking Mat or Parchment Paper | Marble Cake Stand or Serving Platter
- Egg Whites: (1) Room temperature egg whites whip faster than cold egg whites. And (2) room temperature egg whites whip into a greater volume than cold egg whites. So make sure your egg whites are at room temperature before beginning.
- Sugar: Superfine sugar dissolves easier into egg whites. To avoid tasting sugar granules, pulse 1 cup granulated sugar a few times in a food processor. You now have superfine sugar to use in the recipe.
- Acid: You can use 1/2 teaspoon of cream of tartar or 1 teaspoon of white vinegar, apple cider vinegar, or lemon juice.
- Mini Pavlovas: Divide pavlova mixture up into individual portions instead of spreading into one large 8-9-inch circle. In the photos, I piped the mixture into 6 mini pavlovas using Ateco 849. A piping tip isn’t necessary—you can just spoon it on. Make sure you leave a dip in the center to hold the toppings. Bake time depends on size, see step 4 for what to look for. If making 6 mini pavlovas like I did, bake for 35-40 minutes at 200°F (93°C). Start them in a 350°F (177°C) oven, like I do in this written recipe.
- Pavlova base from reader Laurel. Thanks, Laurel!


Reader Comments and Reviews
PLease help! I have made this recipe 4 times because I am seeking perfection. Each time I make the pavlova, it turns a very light brown in the oven. I am following the recipe exactly. My goal is that my pavlova remains bright white when its taken from the oven. I have a new Bosch oven, it seems to cook perfectly. How do I have white Pavlova? My textures are correct, and it tastes great..
Hi Kimberly! That’s an easy fix– try lowering the oven rack and slightly lowering the oven temperature. No matter what, the baked pavlova will be slightly browned/beige. (Mine always is!)
I just asked this same question! Having the same issue! Thanks for clarifying Sally!
So I made this last night, and tried to stay as close as I could to the recipe/suggestions. Used 1 tsp of rice vinegar cause that’s what I had instead of cream of tartar. Also replaced a teaspoon of arrowroot for the cornstarch because my sister is allergic. Made it last night, left it in the oven to cool overnight. Added fresh whipping cream, raspberries, and blueberries. It was a huge success, only minimal cracking when cutting the slices. It was the perfect texture and did still hold its shape. This was my first attempt, and a major success thanks to your recipe and notes! Thank you!
I just made this recipe yesterday and it was a hit.
I topped it with coconut cream, fresh strawberries and homemade strawberry jam.
My guests literally licked the plate clean.
Absolutely yummy.
Can I put my pavlova together in advance of serving or should I do it immediately before serving?
Hi Lisa, Pavlova is best enjoyed right after it’s garnished. I hope you love it!
So wonderful and easy and with the directions it came out perfect the first time. Thank you for a new “go to” family favorite.
I topped mine with lemon curd, whipped cream and fresh berries. It was so good husband and I ate it straight from the tray in one sitting.
Can you double this recipe? This is by far one of my favorite things to make. It’s absolutely, insanely, delicious! Thank you for our new favorite holiday dessert!
Hi Kelley! For best taste and texture (and best success!) I highly recommend making two batters/two batches instead of doubling all at once.
What an amazing dessert! Thank you so much for the recipe, beyond delicious!
Last night I made this beautiful Pavlova for my mother-in-law‘s birthday and it turned out amazing. Just the previous night I tried to do a recipe for pavlova but it was a huge disappointment but this recipe is perfect. I baked it for 2 hours instead of 1h30 and stayed in the oven for at least 2 more. Thank you vary much
I made this recipe last week and topped it with mango, strawberry, and blueberry.
I followed the recipe exactly and it came out perfectly! It was delicious and just over the top. Thanks for the excellent recipe and pavlova info!
Hi Sally! Just found your recipe and can’t wait to try this. But I need to make a much bigger portion. Can I just double the recipe or better off making 2 separately?
Also, how can I make this into a chocolate version? Add cocoa powder?
Hi Cora! I haven’t experimented with a chocolate variation, but I can say that doubling isn’t ideal. Instead, I recommend making two separate batters and combining them or making two pavlovas.
So delicious and so easy! I couldn’t believe I made something that sounds and looks so fancy. You make me brave, Sally! 5 stars!
My pavlova tasted like pure sugar. I’m assuming that isn’t what we are going for, yes? The only thing I can think of is that I measured out the sugar first, then put it in the processor. After refining it I added without re-measuring. Could it be that due to the blending, it made more and thus I added too much sugar?
Hi Peggy! That could be part of the issue, yes. But this dessert will taste like sugar no matter what. It’s essentially meringue. Very sweet, not a complex flavor profile or anything like that.
Sally, once again, your recipes have proven to be the best! I made this pavlova (but as minis) for a dinner party, and our guests totally loved them! I made six minis like you did, but just formed them with a spoon, and they were a bit smaller than a hand. To use up the leftover egg yolks, I made pastry cream, and filled the pavlovas with it, then topped with chopped strawberries and blueberries, and then a cloud of whipped cream. They were absolutely delicious, and I’m so happy that they turned out! I love the crisp, melt-in-your-mouth edges and then that marshmallow-y middle! It was just perfect, and I’m so pleased to be adding pavlova to my recipe repertoire! 😀
Hi! I forgot to put vanilla extract into my pavlova. It is in the oven now. Is it a problem that I forgot?
Won’t be a problem at all– it will just be missing the vanilla flavor.
Crowd pleasers! Mine looked gorgeous & tasted fantastic- everyone loved it. However, it did not come out as marshmallow-y as yours looks. It had a lovely hard meringue shell, didn’t deflate, but when cut into cracked & seemed hallow- more air than than mallow. There were areas of marshmallow texture but not thick. So what did I do wrong or can do different? I followed you steps meticulously- even put my natural sugar though the food processor. Could it be that? Was it still too course & I should just stick to fine bakers sugar? I don’t think I over cooked it because I only had it in the oven for 80mins before turning it off to fully cool, and reduce the temp immediately. It still tasted wonderful & look great… but not in the middle. Would love to master the mallow. Suggestions?
Fabulous recipe! I’ve made Pavlova before but it never had quite the right consistency, this recipe does. Plus the use of the yolks to make lemon curd is brilliant. Thank you so much for this recipe, I’m hooked!
Thanks Sally!
This was AMAZING! I’d never even heard of a Pavlova until I asked a co-worker what her favorite dessert was (so I could make it for her for her last day at work with us). Your recipe and tips were so easy to follow. Once I put it in the oven and dropped the temp, I treated it like a cheesecake, just left it alone and let the magic happen, which is always the hardest part! I can’t wait to make it again!
Wish there was a way to add my Pavlova picture for you.
Hi, Wondering how much whipped cream is enough to satisfy the heaping lovliness.
I don’t want too much (I know how can there be such a thing as too much whipped cream) but I don’t want to little either. Wondering how much cream to whip to get the right effect on the Pavlova this size. Approx how much fruit works here? 1 cup 2 cups, just want it to be lush, but I really try not to waste food. THANKS!
What great questions, Sarah! 1 heaping cup of fruit is plenty. I usually top it with 2 cups of whipped cream, too! I find that’s the perfect amount.
I made the 9 inch version and the outside was perfect but the middle was wet and parts were liquid. Should I have cooked it longer?
Thanks!
p.s. I’m trying the mini version right now as I type. Hopefully they turn out!
Hi Mari! Yes, it sounds like the larger pavlova needed a little more time in the oven.
Hi Sally, I made the mini-version of your recipe for a dinner party of six last week, and it was a smashing success! I topped them with coconut whipped cream and fresh berries as one of our guests is dairy-free. I’m so excited to now have Pavlova in my repertoire! Thanks so much for sharing!
I made this for Easter dessert, and everyone loved it! My daughter wants pavlova at her birthday party so if I want to quadruple this recipe, could I bake all 4 pavlovas at once or how would you bake 4 pavlovas if you wanted them all to taste fresh?
Hi Amber! I would try to bake them all at once if you can. They’ll take a little longer in the crowded oven though. I’m unsure of the exact bake time.
Looking forward to trying this recipe. What is your opinion on using egg whites from a carton in recipes like this? Just curious.
I’ve never tried it, but from what I’ve read it’s completely fine. But, again, I’ve never tried it. Let me know if you do!
I have tried this using egg whites in the container. It does work, but it takes MUCH longer for the whites to whip up to the right consistency.
Hi Sally
I tried this beautiful recipe today. Unfortunately, the Pavlova stuck to the baking sheet so that when I tried to remove it, it was mostly destroyed. The centre was still moist – do I have to bake it fully through and how do I know when this is the case? I used more time than stated in the recipe, but probably that depends on the oven (we have an electric oven).
Hi Steffi! Did you use parchment paper or a silicone baking mat? The center will be a little moist and marshmallow-y. The outer edges will be set and won’t stick to your fingers.
I made this yesterday for Easter dessert and it was a hit. I topped it with homemade vanilla pudding and whipped cream, then with fresh berries. I had never heard of it before you posted the recipe, so thanks for giving me something new to try.
I made this yesterday and it turned out beautifully!! I topped it with almond whipped cream, raspberries and blackberries(cuz thats what i had on hand) my family was very impressed. I’ll definitely try it again!