

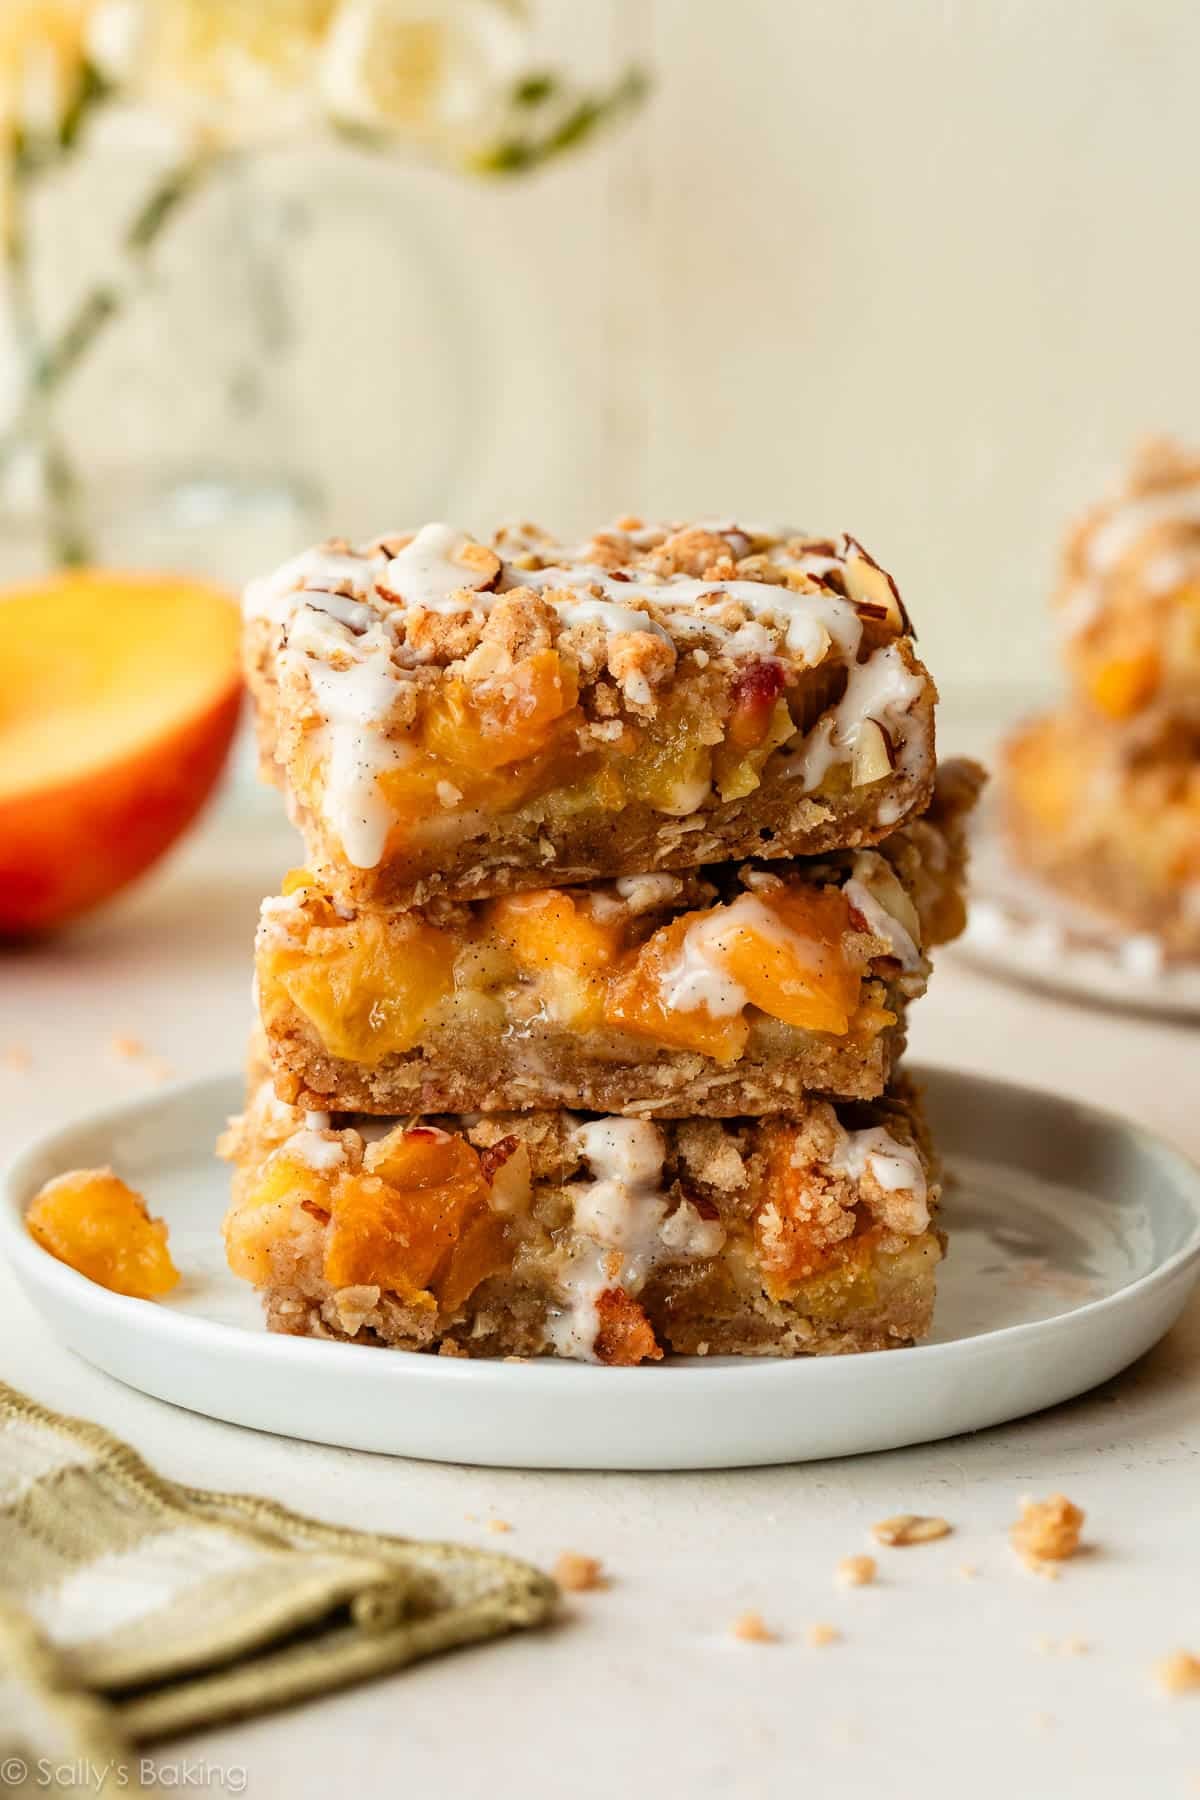
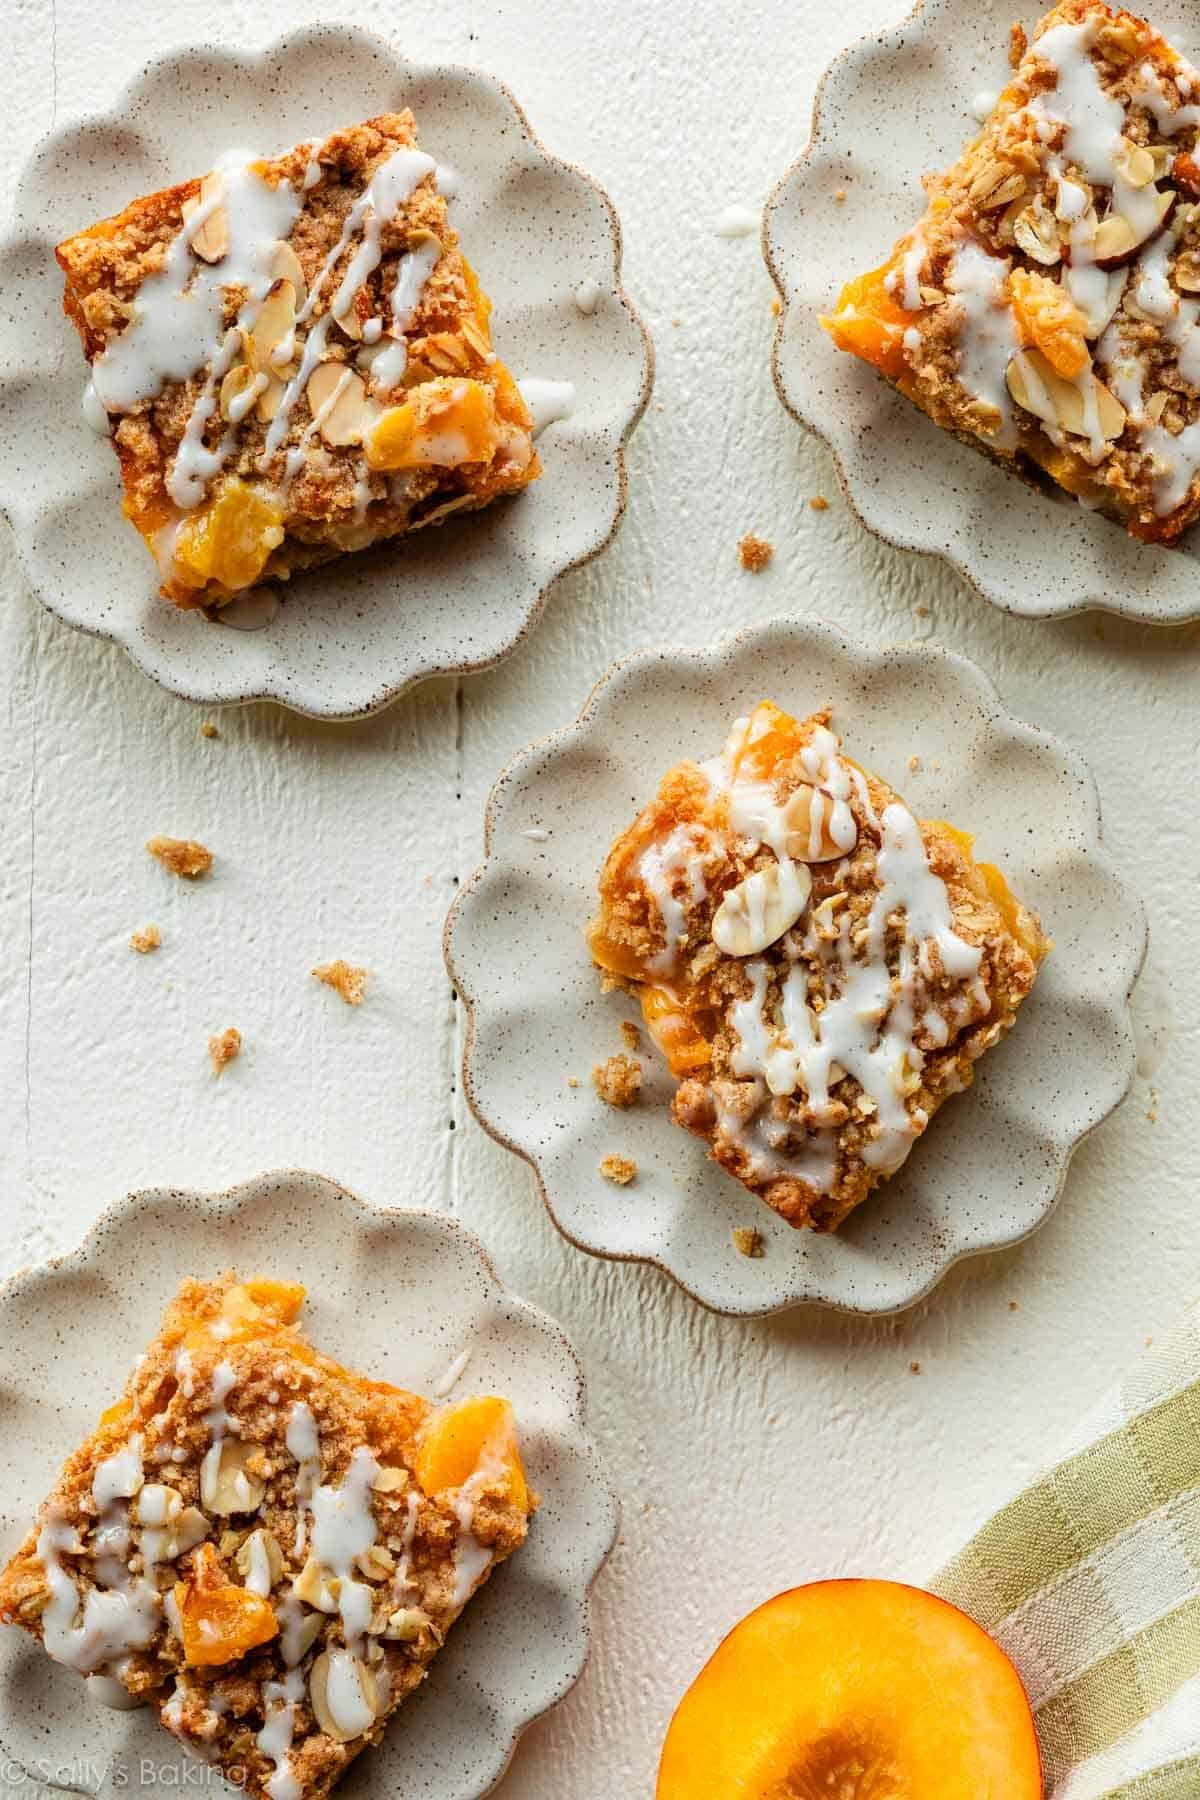
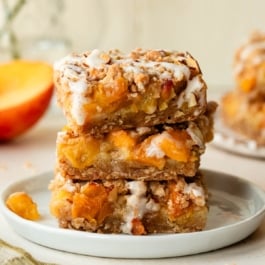
These peach pie crumb bars combine everything we love about a classic homemade peach crumble pie—juicy cinnamon-spiced peaches, buttery crust, and a crumbly topping—but in a much simpler, easier-to-serve form.
I originally published this recipe in 2013 and have since added new photos and additional success tips. My team and I also retested the recipe and made a few small tweaks so they’re better than ever!
These peach pie crumb bars combine several of the best things about summer baking: fresh seasonal peaches, simple ingredients, and a dessert that travels beautifully to cookouts, picnics, and other gatherings.
They’re also incredibly easy to make! There’s no pie dough rolling, crimping, or fussing. Just press the crust into the pan, pile on the peach filling, sprinkle with crumble topping, and bake.
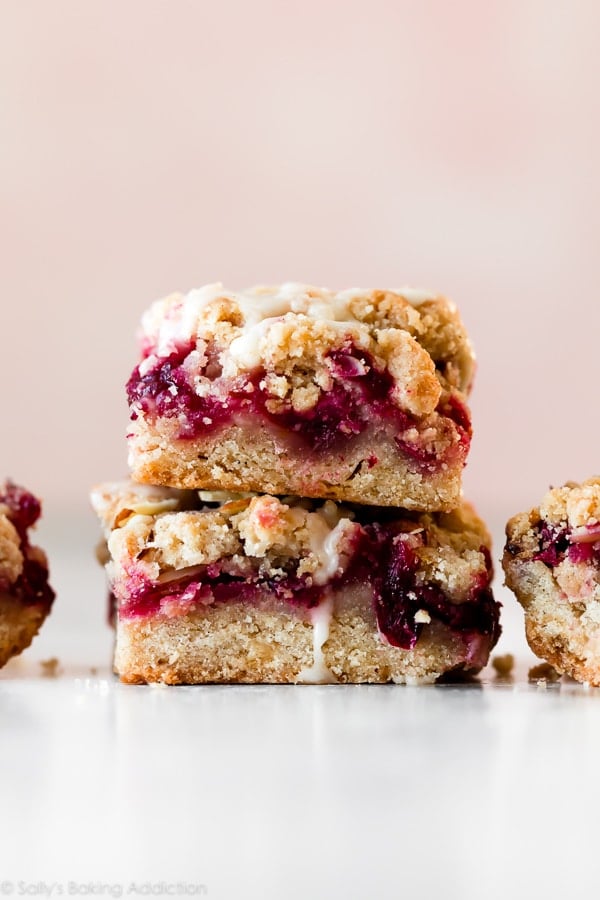
If you love my blueberry pie bars or cherry pie bars, you’ll love this peach version too!
Why You’ll Love These Peach Pie Bars
- Easier than making a traditional peach pie
- Buttery brown sugar oat crust and crumble topping
- Packed with juicy fresh peaches
- Soft, tender texture with crisp crumbly edges
- No special equipment required
- Perfect for summer parties, barbecues, and potlucks
- Make-ahead and freezer-friendly
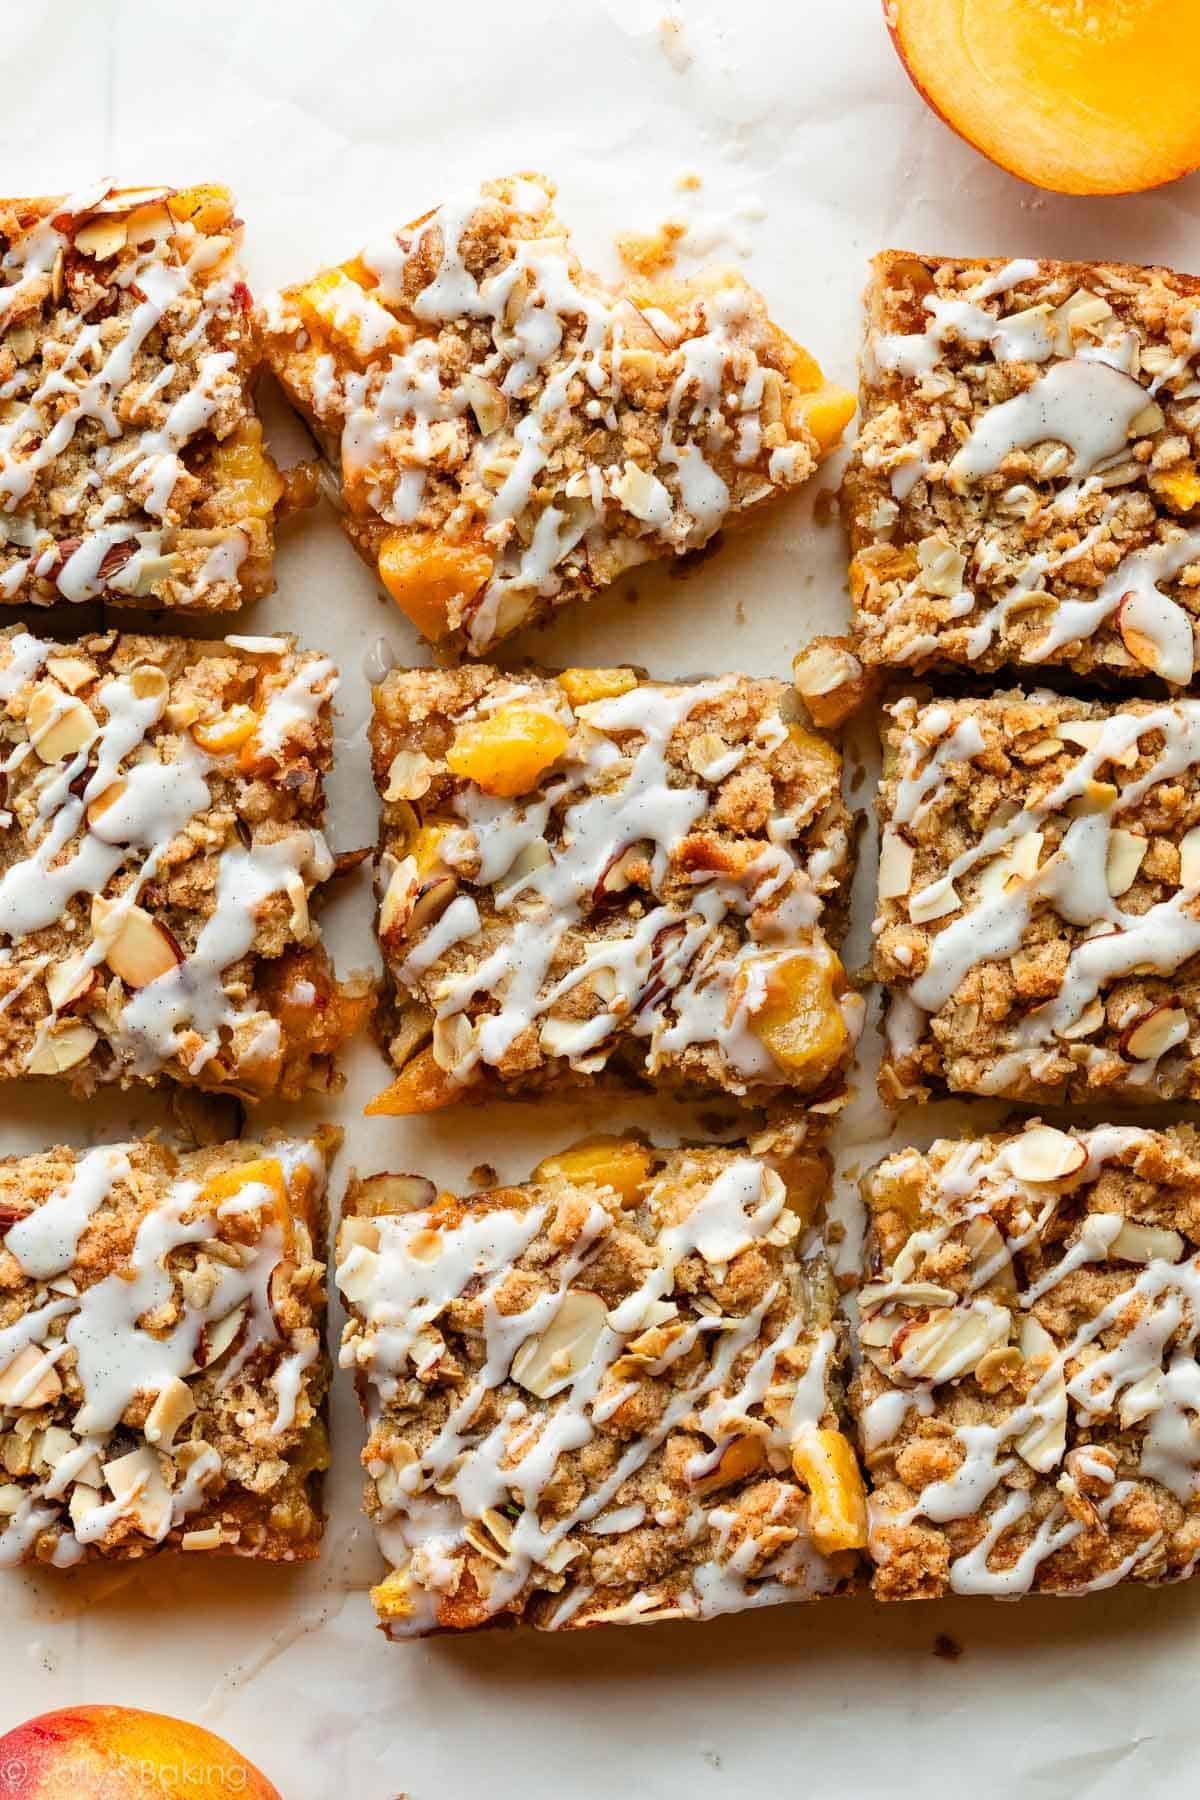
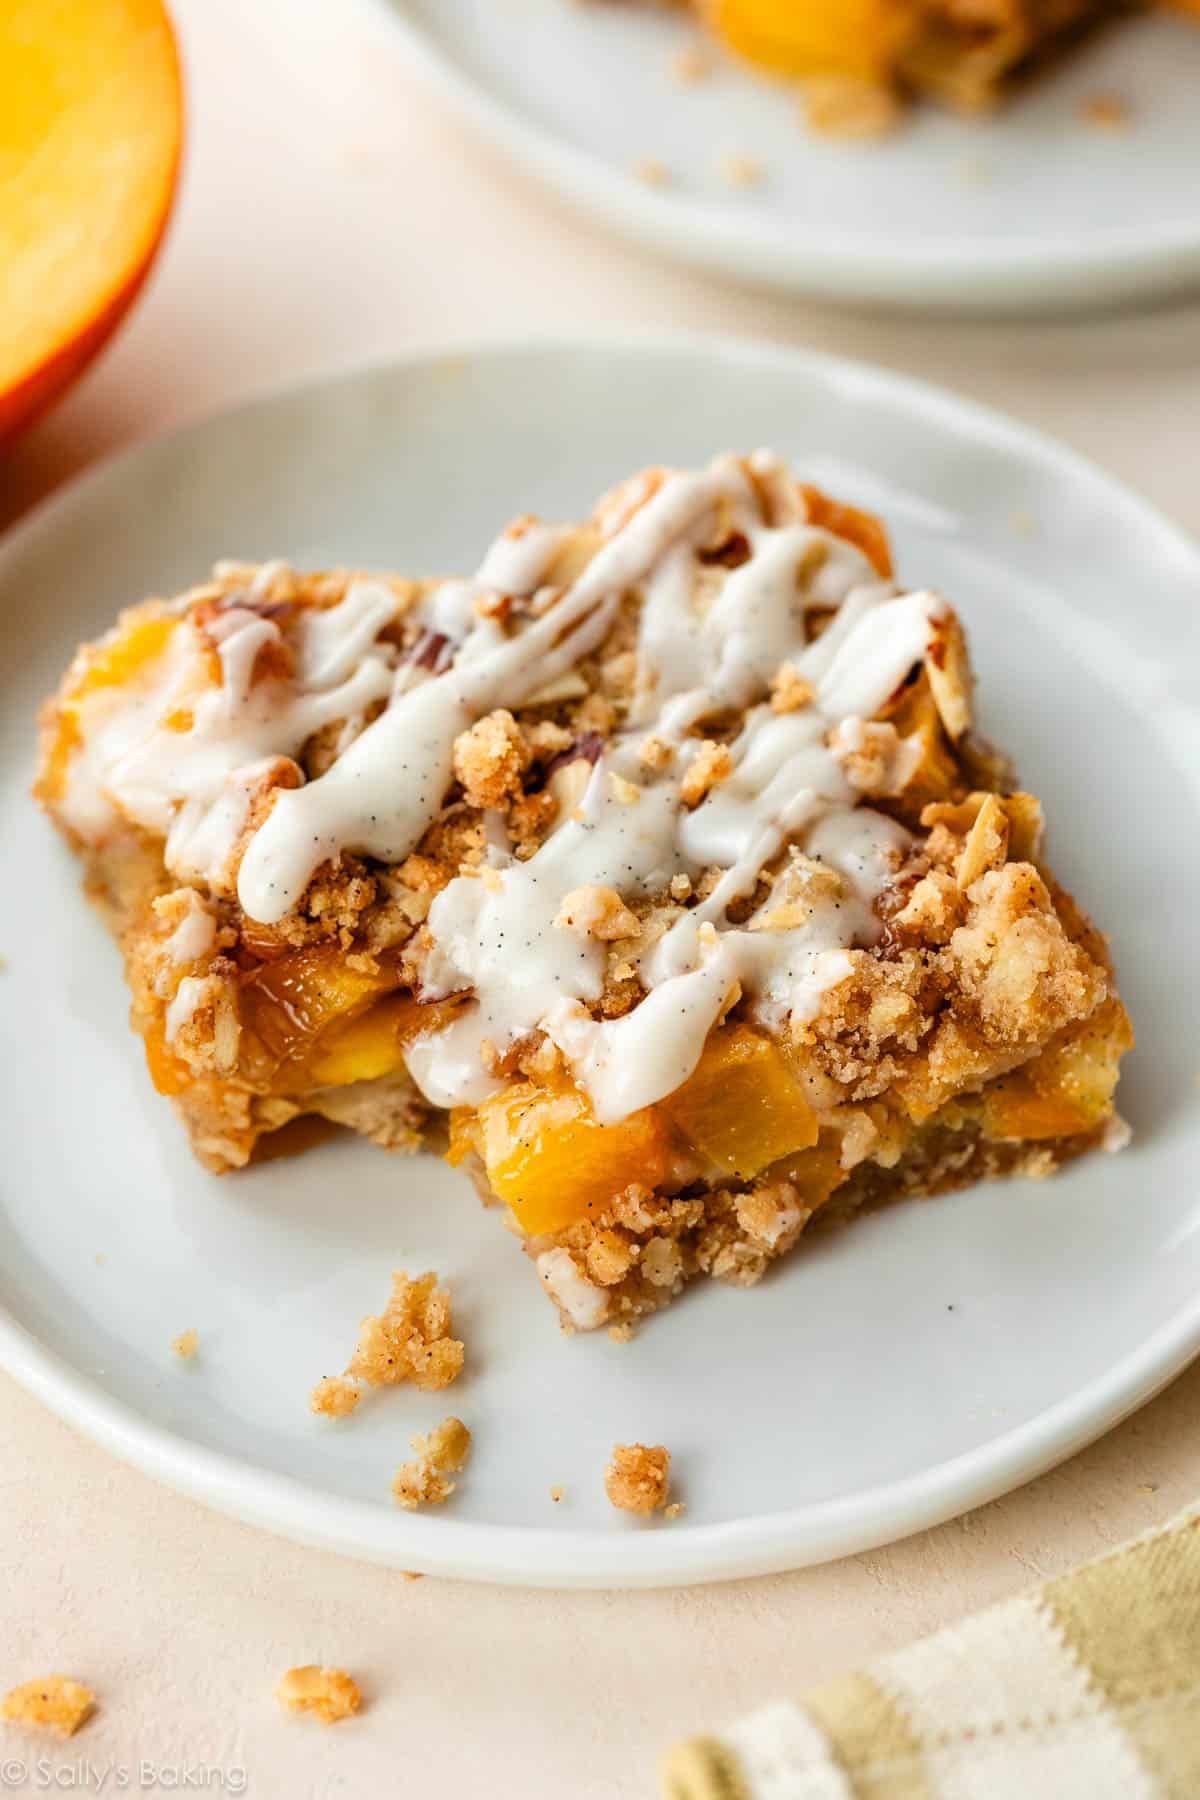
Layers of Peachy Perfection
These peach pie crumb bars may look impressive, but each layer is wonderfully simple.
Crust: The crust is buttery, soft, and sturdy enough to support the juicy peach filling. It comes together with flour, oats, brown sugar, cinnamon, and cold butter. Even better? The same mixture doubles as the crumble topping, which means fewer ingredients (and fewer dishes!).
Fresh Peach Pie Filling: Ripe summer peaches are the star of this recipe, bringing plenty of natural sweetness and flavor. As the bars bake, the peach juices mingle with the crust underneath, creating an incredibly tender texture that practically melts in your mouth.
Crumble Topping: Before baking, sprinkle the reserved crumble mixture over the peach layer. I often add sliced almonds for extra texture and flavor, but they’re completely optional. Chopped pecans or walnuts would work too! The crumble bakes up golden, buttery, and lightly crisp on top—providing the perfect contrast to the soft peach filling.
Vanilla Icing: A drizzle of simple vanilla icing makes these bars look and taste like they came from a bakery display case. It’s only 3 ingredients and takes barely any time to make. You’ll love it on peach streusel muffins, too!
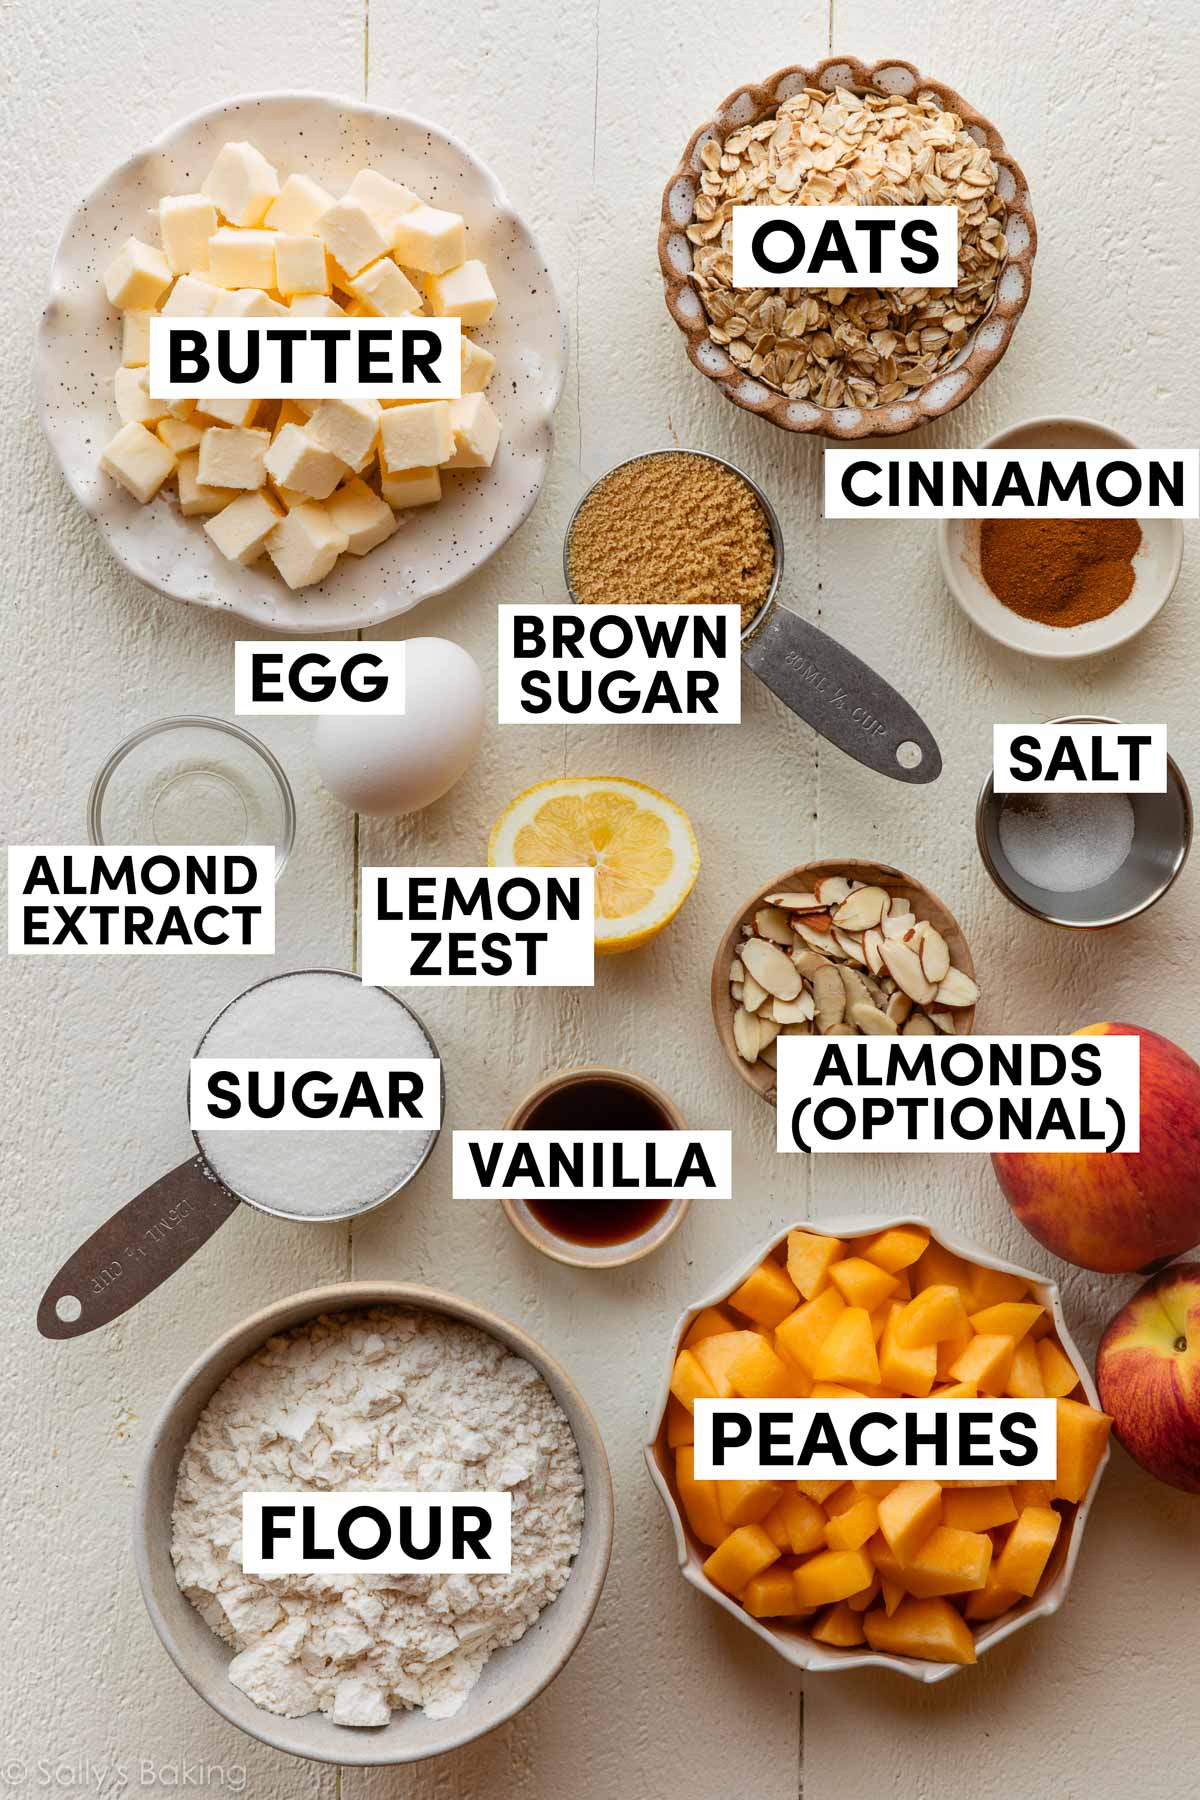
Key Ingredients for Peach Pie Bars
- Peaches: Fresh peaches are the star of the show. Look for ripe peaches that give slightly when gently pressed. They should smell fragrant and sweet. You can peel them or leave the skins on if preferred. I usually peel them for the softest texture.
- Sugar: You need granulated sugar for sweetening the peach filling, and brown sugar for the crust/topping. Brown sugar adds moisture and a subtle caramel flavor that pairs beautifully with peaches.
- Egg: Gives the filling a slightly custard-y texture and helps it to set. Trust me on this!
- Flour: All-purpose flour provides the structure.
- Oats: Rolled oats create a hearty, buttery crumble texture.
- Cinnamon: This warm spice pairs beautifully with peaches, without overpowering their natural flavor.
- Cold Butter: Cold butter is essential for creating those irresistible crumbly pockets throughout the crust and topping.
- Vanilla + Almond Extracts: For enhancing the peach flavor.
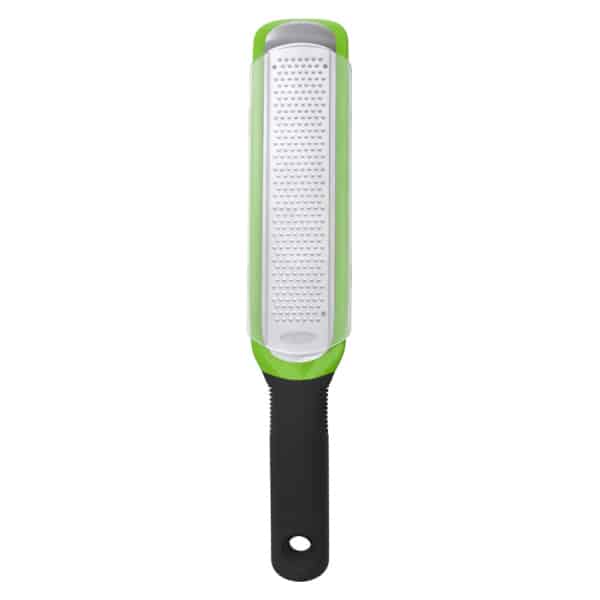
- Lemon Zest: To brighten up the peach flavor.
- Salt: To enhance and balance all the flavors.
Start by Making the Crust & Topping
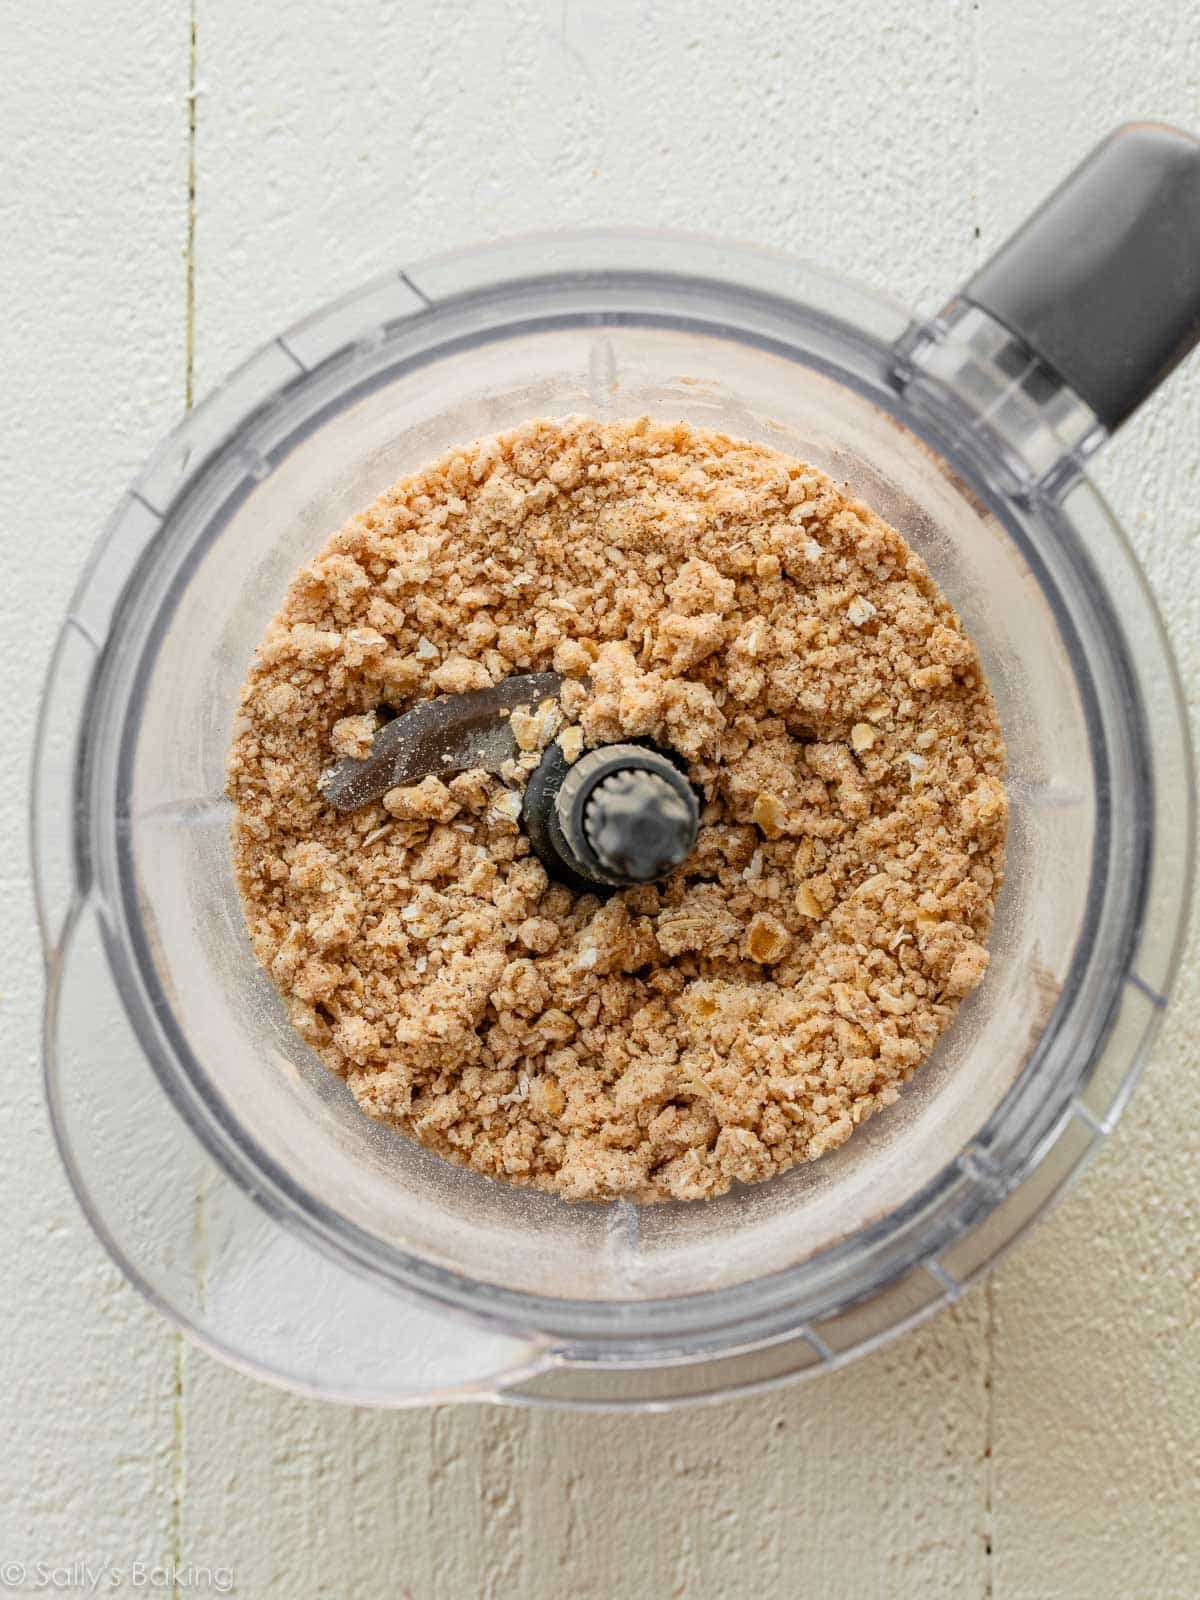
One mixture does double duty for the crust and topping. You can make it in a food processor or simply use a mixing bowl, a whisk, and a pastry cutter. Pulse or cut cubes of very cold butter into the dry ingredients until you have pea-sized crumbles.
Remove a cup of the mixture and transfer it to another bowl. Add another Tablespoon of oats—and if you’d like, a handful of sliced almonds—to the smaller bowl, and set it aside until you’re ready for the topping.
Pour the remaining mixture (in the food processor or larger bowl) into a lined baking pan and press it down to make a crust:
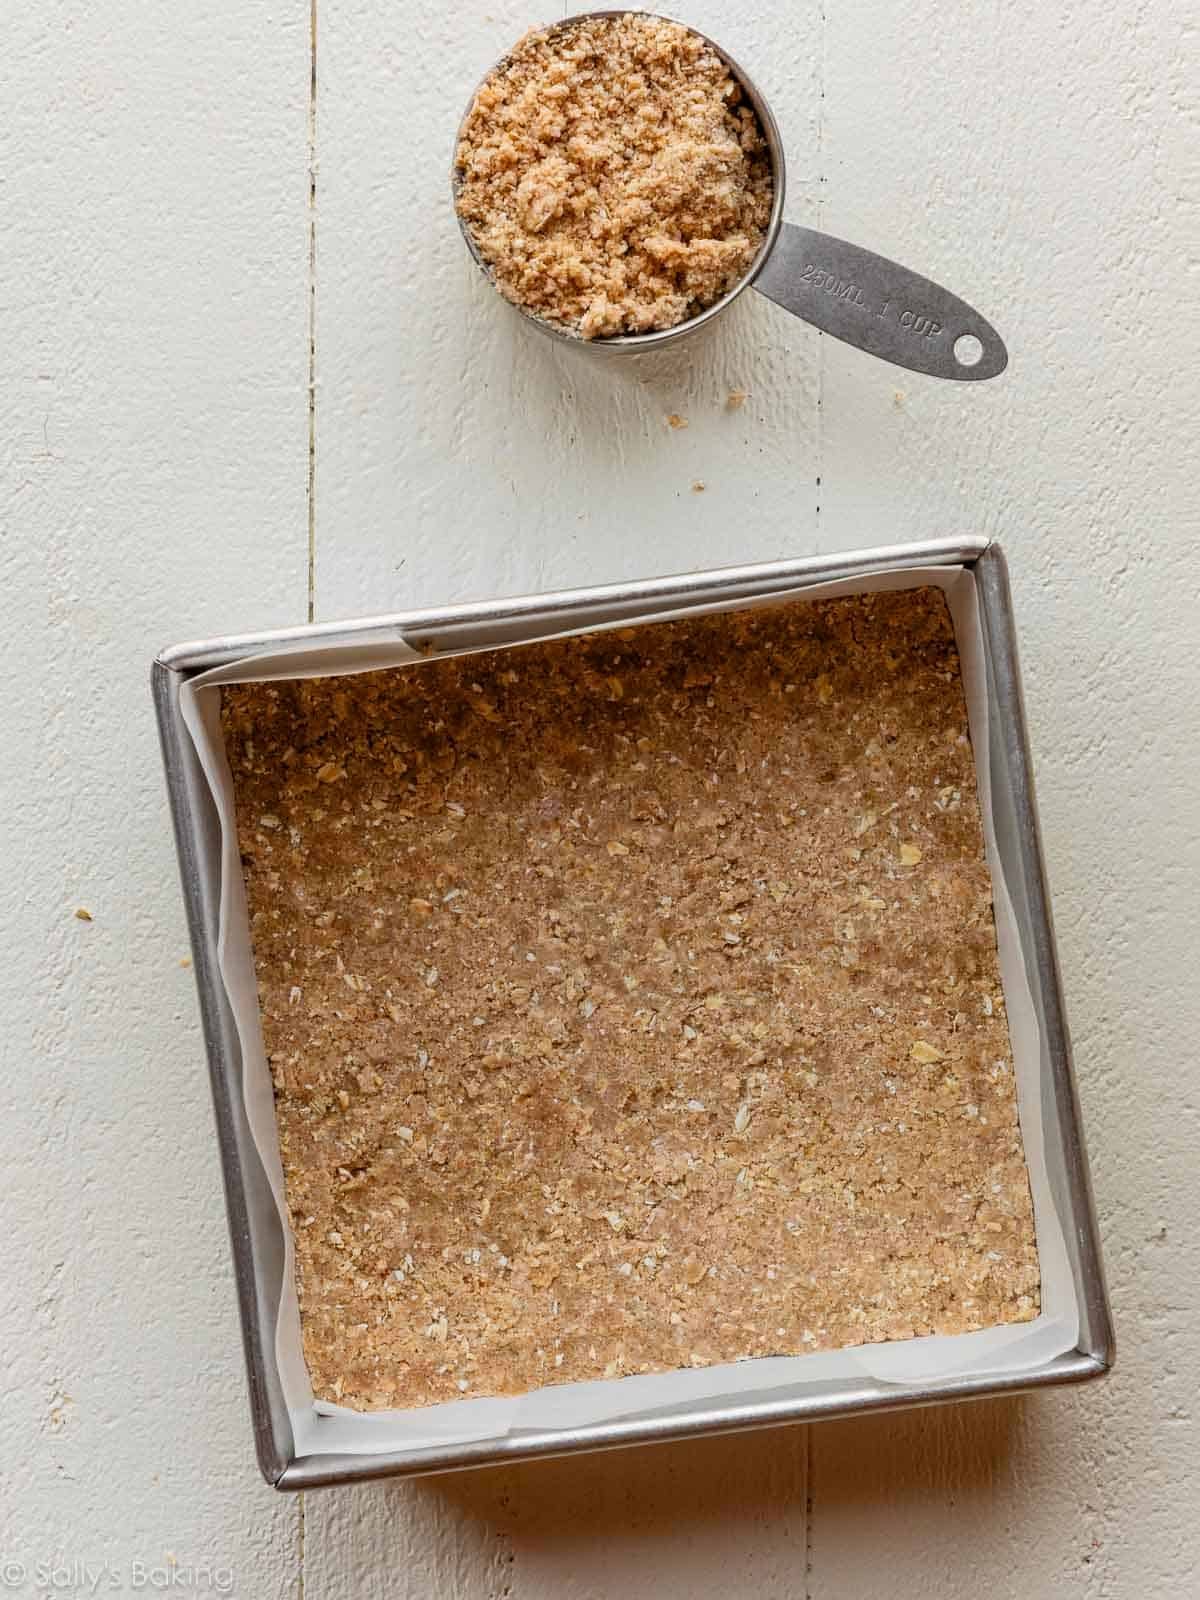
Success Tip: Pre-Bake the Crust
Don’t skip the pre-bake! Giving the crust a head start helps it stay sturdy beneath the juicy peach filling and ensures the finished bars hold their shape when sliced.
Fresh Peach Filling
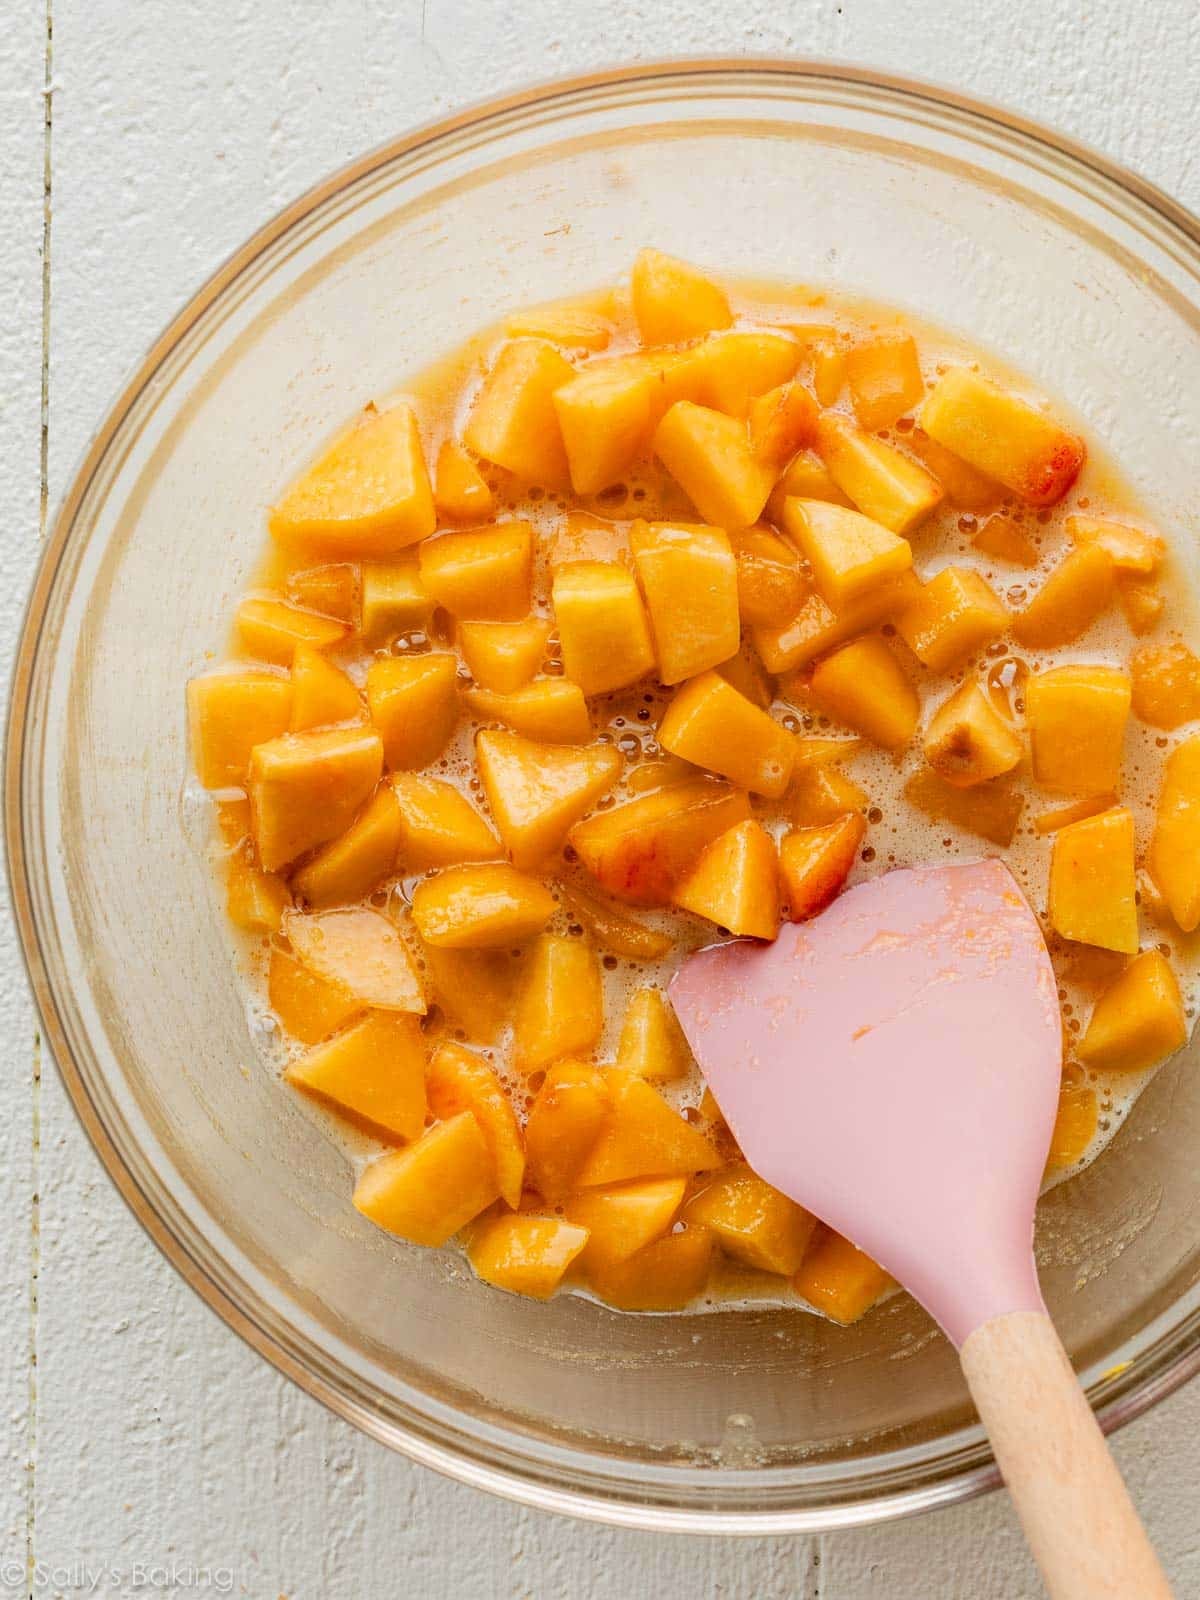
While the crust is in the oven, make the peach filling.
There’s no pre-cooking step needed here. Simply whisk together the ingredients, then fold in the chopped peaches. Easy peachy!
Make the peach filling immediately before using; if you let the filling sit for too long, the peaches will begin to break down and the filling will become too liquid-y.
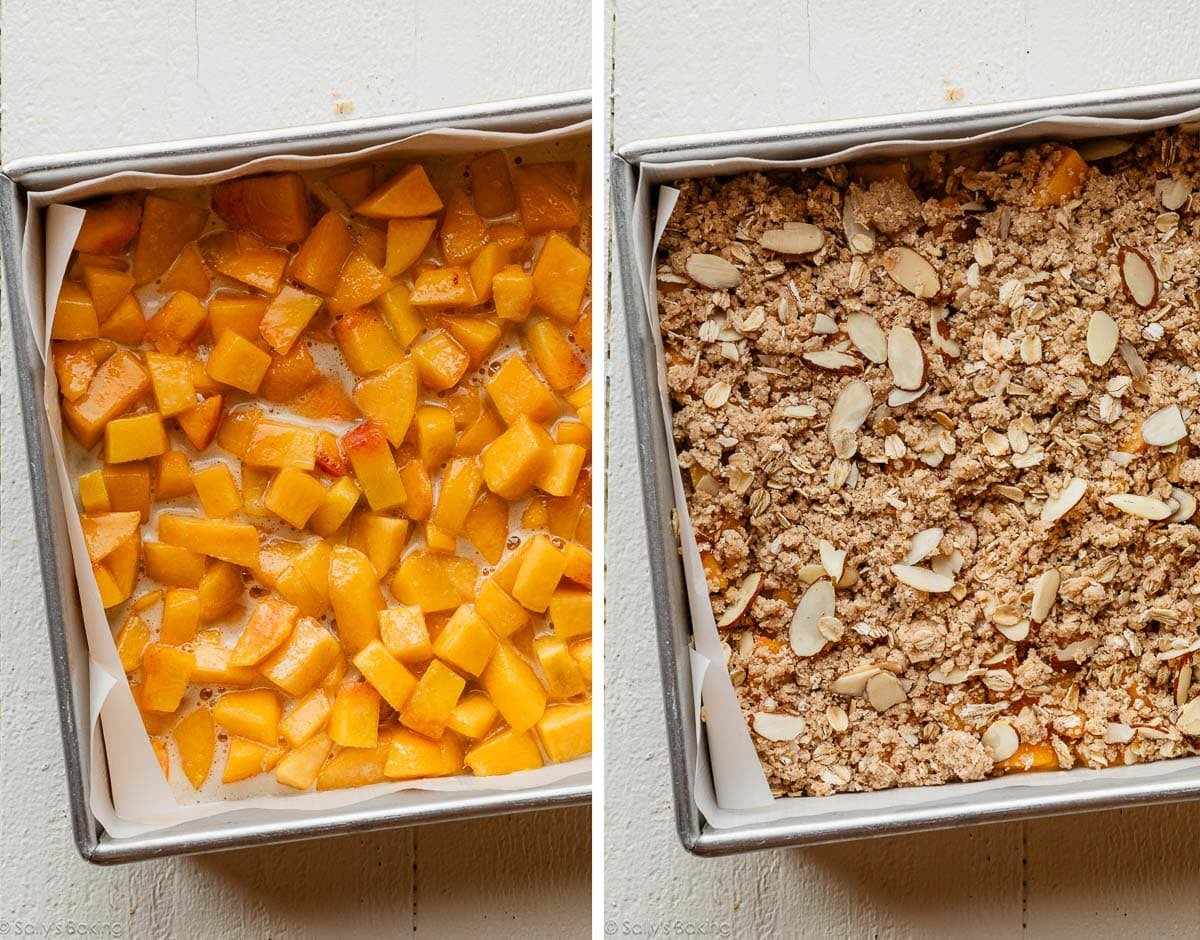
Spread the peach filling over the warm crust, then sprinkle on the crumble topping, and bake. Note that you’ll increase the oven temperature from 350°F (177°C) to 375°F (191°C) between pre-baking the crust and baking the layered peach pie bars.
The Best Texture Comes After Chilling
As tempting as it is to dig in immediately, these peach pie crumb bars slice much more cleanly after they’ve cooled completely. Let them cool at room temperature, then refrigerate for around 2 hours.
Why? The juicy filling sets up, so they’re much easier to cut into neat squares.
When you’re ready to serve, lift the bars out of the pan using the parchment paper lining, cut into squares, and drizzle with vanilla icing.
Yes. If fresh peaches aren’t available, frozen peaches work well. Thaw them completely and blot away excess moisture before using. We do not recommend using canned peaches.
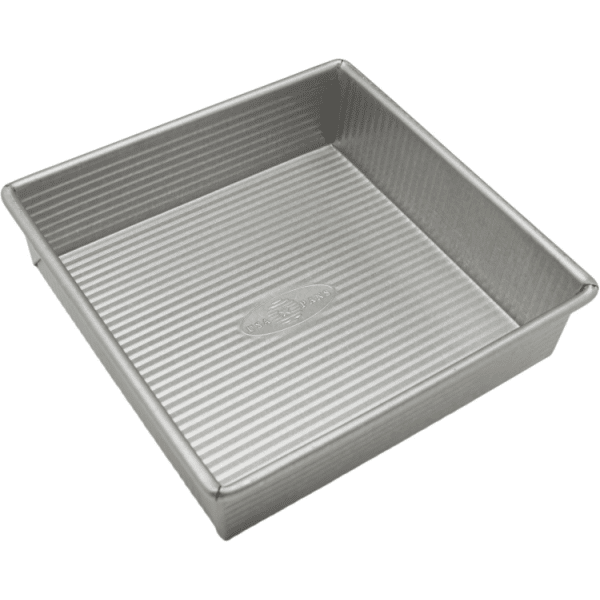
I don’t recommend using a 9-inch square pan for this recipe because it’s a little too large and the bars will turn out quite thin. For best results, use an 8-inch square baking pan. If that’s not available, a 9-inch round cake pan works well. After chilling, simply slice the bars into wedges instead of squares.
Yes, you can double this recipe to make a larger batch of peach pie crumb bars. The crust pre-bake time and temperature remain the same, but the total bake time increases. See detailed recipe Note below.
When peach season arrives, most of us immediately think of peach cobbler, peach crisp, and classic peach pie. These peach pie crumb bars deserve a place right alongside those favorites.
With their buttery oat crumble, juicy peach filling, and easy-to-serve bar format, they’re the perfect handheld dessert for summer gatherings, or simply making the most of peach season!
Peach Pie Crumb Bars Supplies


Peach Pie Crumb Bars
- Prep Time: 25 minutes
- Cook Time: 50 minutes
- Total Time: 4 hours, 30 minutes
- Yield: 9-12 bars
- Category: Bars
- Method: Baking
- Cuisine: American
Description
These peach pie crumb bars combine juicy fresh peaches, a buttery brown sugar oat crust, crumbly streusel topping, and sweet vanilla icing. Easier than peach pie and perfect for summer gatherings, potlucks, and peach season baking.
Ingredients
Crust & Topping
- 1 cup (125g) all-purpose flour (spooned & leveled)
- 1/2 cup (43g) + 1 Tbsp old-fashioned whole rolled oats, divided
- 1/3 cup (67g) packed light or dark brown sugar
- 1 teaspoon ground cinnamon
- 1/8 teaspoon salt
- 10 Tablespoons (142g) unsalted butter, cold and cubed
- optional: 1/4 cup (about 20g) sliced almonds
Peach Filling
- 1 large egg, cold
- 1/2 cup (100g) granulated sugar
- 1 and 1/2 Tablespoons (11g) all-purpose flour
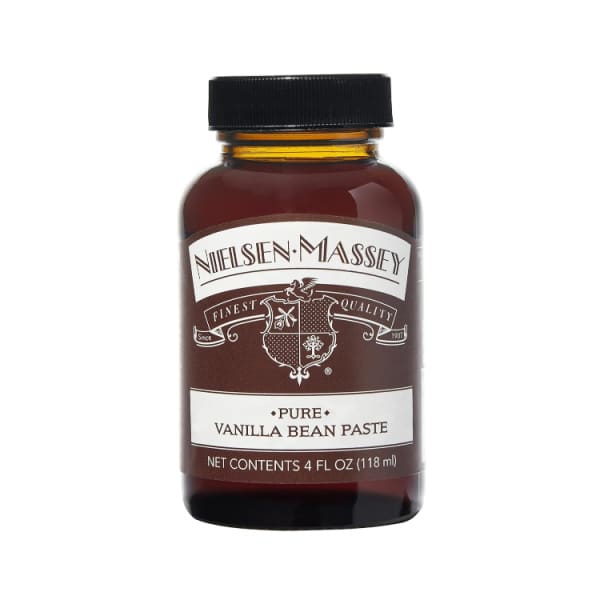
- 1 teaspoon pure vanilla extract or vanilla bean paste
- 1/4 teaspoon almond extract
- 1/2 teaspoon fresh lemon zest
- 2 and 1/2 cups (about 400g) chopped fresh peach chunks
Vanilla Icing
- 1/2 cup (60g) confectioners’ sugar
- 1 Tablespoon (15g/ml) heavy cream or milk
- 1/2 teaspoon pure vanilla extract or vanilla bean paste
Instructions
- Preheat the oven to 350°F (177°C). Line an 8-inch square baking pan with parchment paper, leaving an overhang on all sides to easily lift the bars out of the pan (makes cutting much easier). Set aside.
- Make the crust/topping: In the bowl of a food processor (or a large bowl), combine the flour, 1/2 cup of the oats, brown sugar, cinnamon, and salt and pulse or whisk to combine. Add the cold cubed butter and pulse the food processor or cut in with a pastry cutter until you have pea-sized crumbs. The mixture should hold together when pressed between your fingers; it shouldn’t look dry or overly crumbly, or the crust may not hold together after baking. Transfer 1 cup (about 125g) of the mixture to a small bowl and mix in the remaining 1 Tbsp oats and sliced almonds (if using). This will be the topping; set aside until needed in step 5.
- Press the remaining crust mixture into an even layer in the prepared baking pan. Bake the crust for 15 minutes; then, remove the crust from the oven and increase the oven temperature to 375°F (191°C).
- Make the peach filling immediately before using; if you let the filling sit for too long, the peaches will begin to break down and the filling will become too liquid-y. In a large bowl, whisk together the egg, sugar, flour, vanilla, almond extract, and lemon zest until combined. Fold in the peaches.
- Pour the filling over the hot crust. Sprinkle the reserved topping mixture evenly over the top.
- Bake for 40–42 minutes or until lightly browned on top. Allow to cool in the pan on a cooling rack for 1 hour, then transfer to the refrigerator and chill for at least 2 hours or up to 2 days. (Cover tightly if chilling longer than a few hours.)
- Once chilled, lift the bars out of the pan using the overhang on the sides and cut into squares. For neat squares, use a very sharp knife and wipe it clean with a paper towel after each cut.
- Make the vanilla icing: In a small bowl or liquid measuring cup, whisk together the confectioners’ sugar, cream/milk, and vanilla until smooth and pourable. Drizzle over peach pie bars.
- Store leftover peach pie bars tightly covered in the refrigerator for up to 5 days.
Notes
- Make Ahead & Freezing Instructions: Prepare the bars up to 2 days in advance and store covered tightly in the refrigerator until ready to serve. Bars can be frozen for up to 3 months. Thaw overnight in the refrigerator before serving.
- Special Tools (affiliate links): 8-inch Square Baking Pan | Glass Mixing Bowls | Food Processor or Pastry Cutter | Whisk | Citrus Zester | Vanilla Bean Paste | Cooling Rack
- Can I Use a 9-Inch Square Pan? I don’t recommend it; it’s a little too large and the bars will be quite thin.
- Double Batch: This recipe can be doubled and baked in a 9×13-inch pan. The crust pre-bake time and temperature remain the same. Increase the oven temperature to 375°F (191°C) as directed in step 3. In step 6, increase the bake time to about 50 minutes, or until the topping is lightly browned and the filling appears set. Be sure to chill the bars for at least 2 hours in the refrigerator before slicing.
- Can I Use Frozen Peaches? Yes. Thaw completely and pat dry before using. We do not recommend using canned peaches.
- Updated in 2026: Originally published in 2013, this longtime favorite received a few small improvements after years of baking and retesting. We added a touch of almond extract and fresh lemon zest to brighten and enhance the peach flavor, and slightly increased the amounts of peaches (from 2 cups) and flour (from 1 Tbsp) for a more substantial filling. The result is an even more flavorful, peach-packed bar while keeping everything readers have loved about this recipe for years.


Reader Comments and Reviews
I made these with nectarines instead of peaches and walnuts instead of the almonds, since that’s what I had in the house. They came out perfect. Several of my colleagues at the office had a happy Monday morning 🙂
Easy to make and the flavor is good. Lemon zest and almond extract. Yummy.
This is one of the best non-chocolate desserts I’ve ever had! I used apples and blueberries because I didn’t have peaches. And I cooled them for 30 min but didn’t refrigerate them because we wanted them warm. They still cut fine. Fantastic!!!
We’re so glad these were a hit, Mary Ellen!
This looks delicious! Can’t wait to try it.
Your comment is awaiting moderation.
I love your new book. I love that measurements are in both weight and volume. I hate doing dishes ( even with a dishwasher) and weighing the ingredients, not only makes it more precise but also saves on all those dirty measuring tools. Love this peach recipe YOU CREATED ANOTHER WINNER ❣️❣️❤️
Thank you so much, Norma! So glad they were hit.
Can these be made with oatmeal or almond flour for GF folks? They look delicious!
Hi Linda! We have not tested it ourselves, but we would try a 1:1 GF flour blend (like Cup4Cup) and certified GF oats for the crust and topping.
This looks delicious! Can’t wait to try it.
Crust got soggy after a day. Hard to get out of pan even when lined with parchment. Regular pie crust is way less work. Or better yet, the cake recipe with SLICED PEACHES on top is absolutely delicious and half the work.
Maybe I missed this detail but are the skins removed from the peaches before using? Thx!
Hi Jo, You can peel them or leave the skins on if preferred. We usually peel them for the softest texture.
I have a bunch of ripe plums from my tree. Could I substitute those for the peaches?
Absolutely.
Good morning, do U by chance have any videos to go with your Recipes? I sometimes have trouble understanding Recipes. It’s easier for Me to make Recipes with videos.
Hi Jodi! We don’t yet have a video for these peach pie crumble bars, but we do have videos for many of our recipes. You can browse all of them on our video page. We hope this helps!
Just curious, can you use canned peaches?
Hi Nana, If fresh peaches aren’t available, frozen peaches work well. Thaw them completely and blot away excess moisture before using. We do not recommend using canned peaches.
Looks amazing! Do you know approximately how many peaches are needed for this recipe?
Hi Stephanie, it depends on their size but usually 3 or 4 medium.
I would love to make these for an upcoming picnic. Fresh peaches are expensive in my area right now. Can I used drained canned peaches?
Hi Mama D, If fresh peaches aren’t available, frozen peaches work well. Thaw them completely and blot away excess moisture before using. We do not recommend using canned peaches.
I made these for a large family gathering last weekend and they were a huge hit! Family asking for them for July 4th get together.
One of the guests said they were the best thing she had ever put in her mouth!
They are best after resting a couple of hours, the flavors really meld. I made a double batch and I realize there will never be a single batch made in my oven.
Thank you for this wonderful treat!
Hi there! I am planning to make these as a gift. If I apply the icing to the squares and then refrigerate them, will the icing eventually set and sort of “harden” on the squares or will it always be on the liquidy side? Thanks!
Hi Mel, if you refrigerate the bars, the icing will soft-set, yes. Enjoy the bars!
Absolutely perfect summer dessert! I’ve made a few of your different fruit bars and they never fail! I followed the recipe exactly as is, with the happy mistake of including finely ground walnuts in the entire crust mixture and what a lovely, warm surprise it is! My husband and I loved them so much we HAD to have two servings each as soon as they cooled. I will be making these again to share with others, this first batch is not going anywhere!
Do these bars need the icing?
Certainly not! Icing is optional.
Can you advise how to make this gluten free please
Hi Janet, we haven’t tested this recipe using gluten free flours, but let us know if you do any experimenting.
I love this recipe it’s a little gooey I wonder if I cooked it long enough 32 min ?
I made these yesterday minus the vanilla frosting. They are excellent!
Just added a tsp.vanilla to the peach filling
I enjoyed the peaches and cream bars but omitted the icing. The bars taste delicious on their own and don’t need frosting. This way, it’s like peach crisp in bar form!
Wondering if you can use canned peach slices gif this?
Peaches are a bit expensive where I am right now. Would canned peaches work? Thanks.
These are just so good. I made them with nectarines because that’s what I had this time. I’ve made them with peaches before too. Just amazing !
If I use convection or air fry functions how would that change the time and temperature in my oven?
Hi Joanne, all of the recipes on this site are written for conventional settings. Convection ovens are fantastic for cooking and roasting. If you have the choice, we recommend conventional settings when baking cakes, breads, etc. The flow of air from convection heat can cause baked goods to rise and bake unevenly and it also pulls moisture out of the oven. If you do use convection settings for baking, lower your temperature by 25 degrees F and keep in mind that things may still take less time to bake. Hope this helps!
Could I leave the egg out? I was thinking of maybe just using peaches and sugar in the filling. Or is there a substitute you might recommend? Thanks.
Hi J, the egg plays an important role in binding the filling, so we don’t recommend leaving it out. We haven’t tried any replacements, but let us know if you do.
I went peach picking a few weeks ago, and accidentally might have picked too many peaches, so I have been making this on repeat since then. It’s absolutely delicious. My favorite peach recipe from all the different recipes I’ve tried this few weeks.