

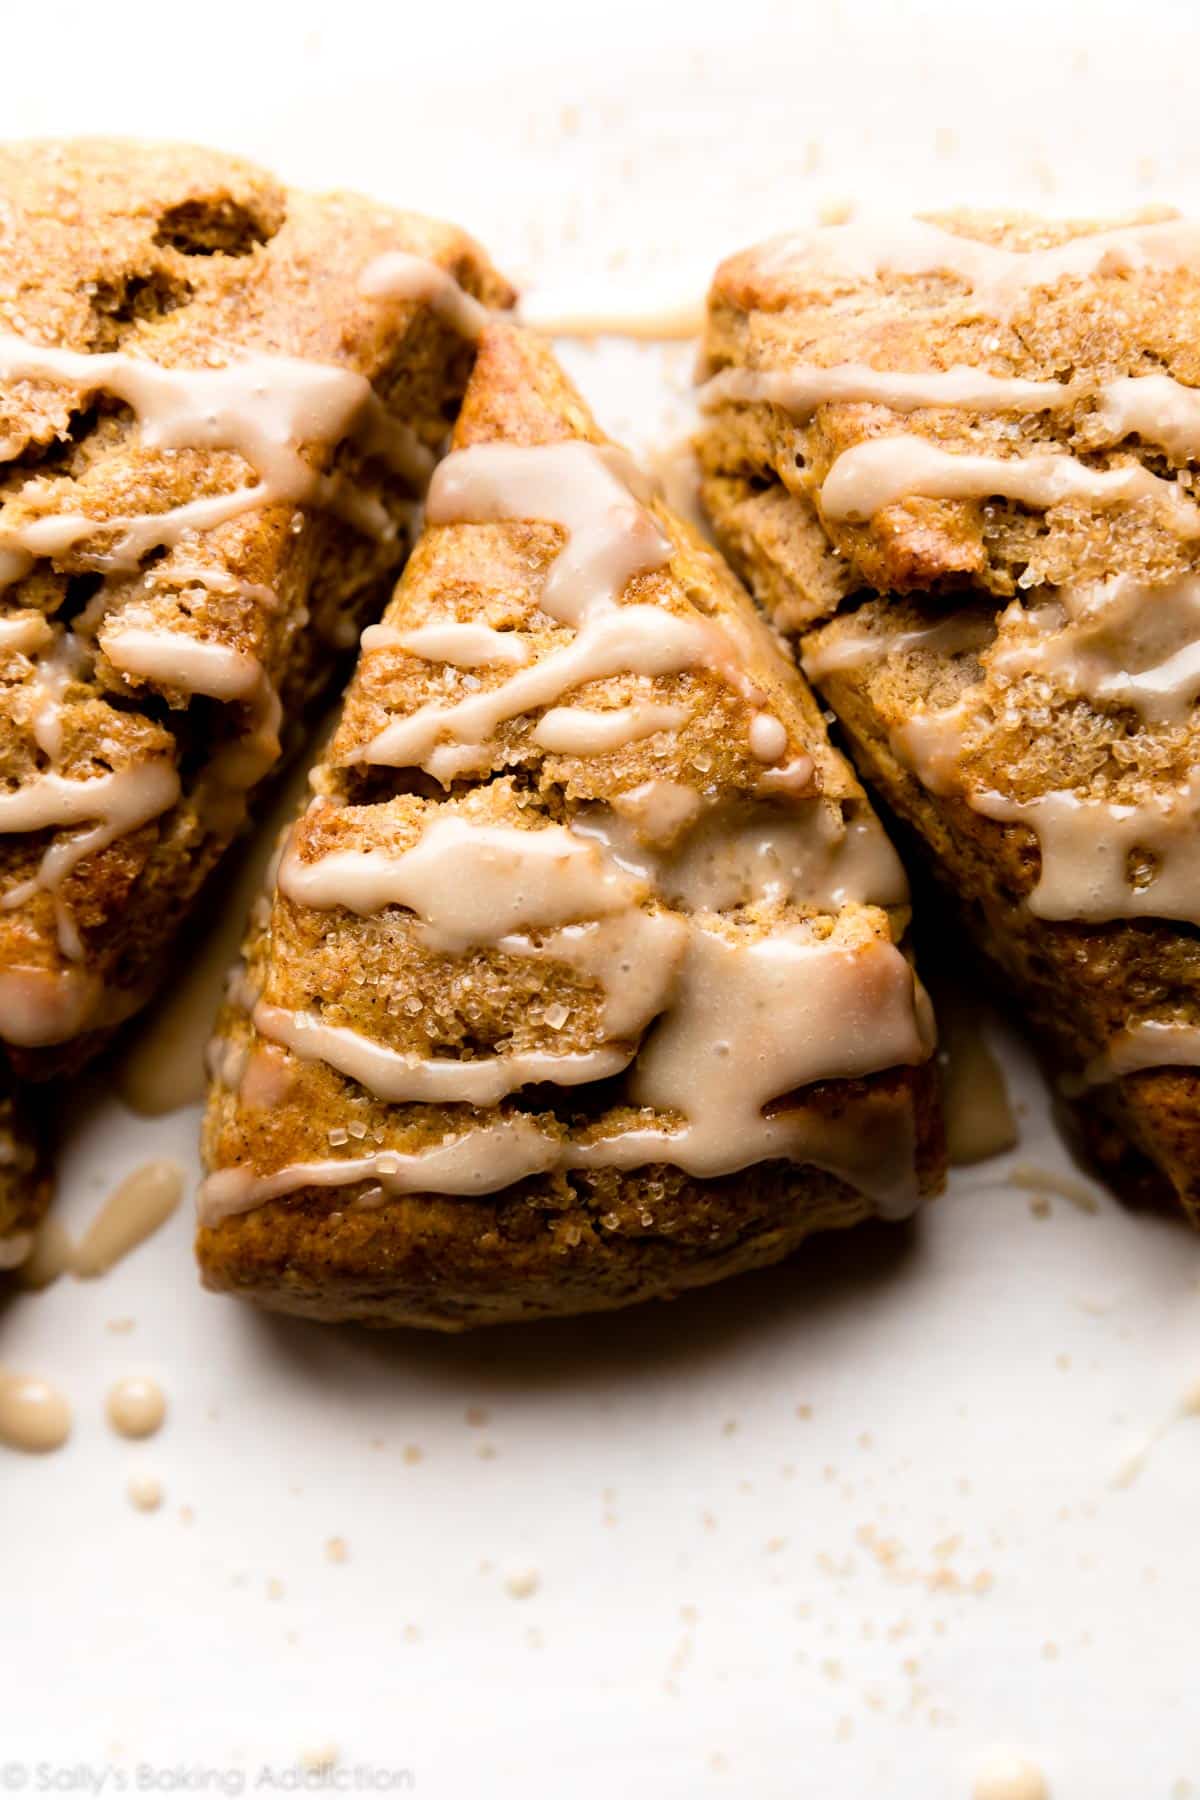
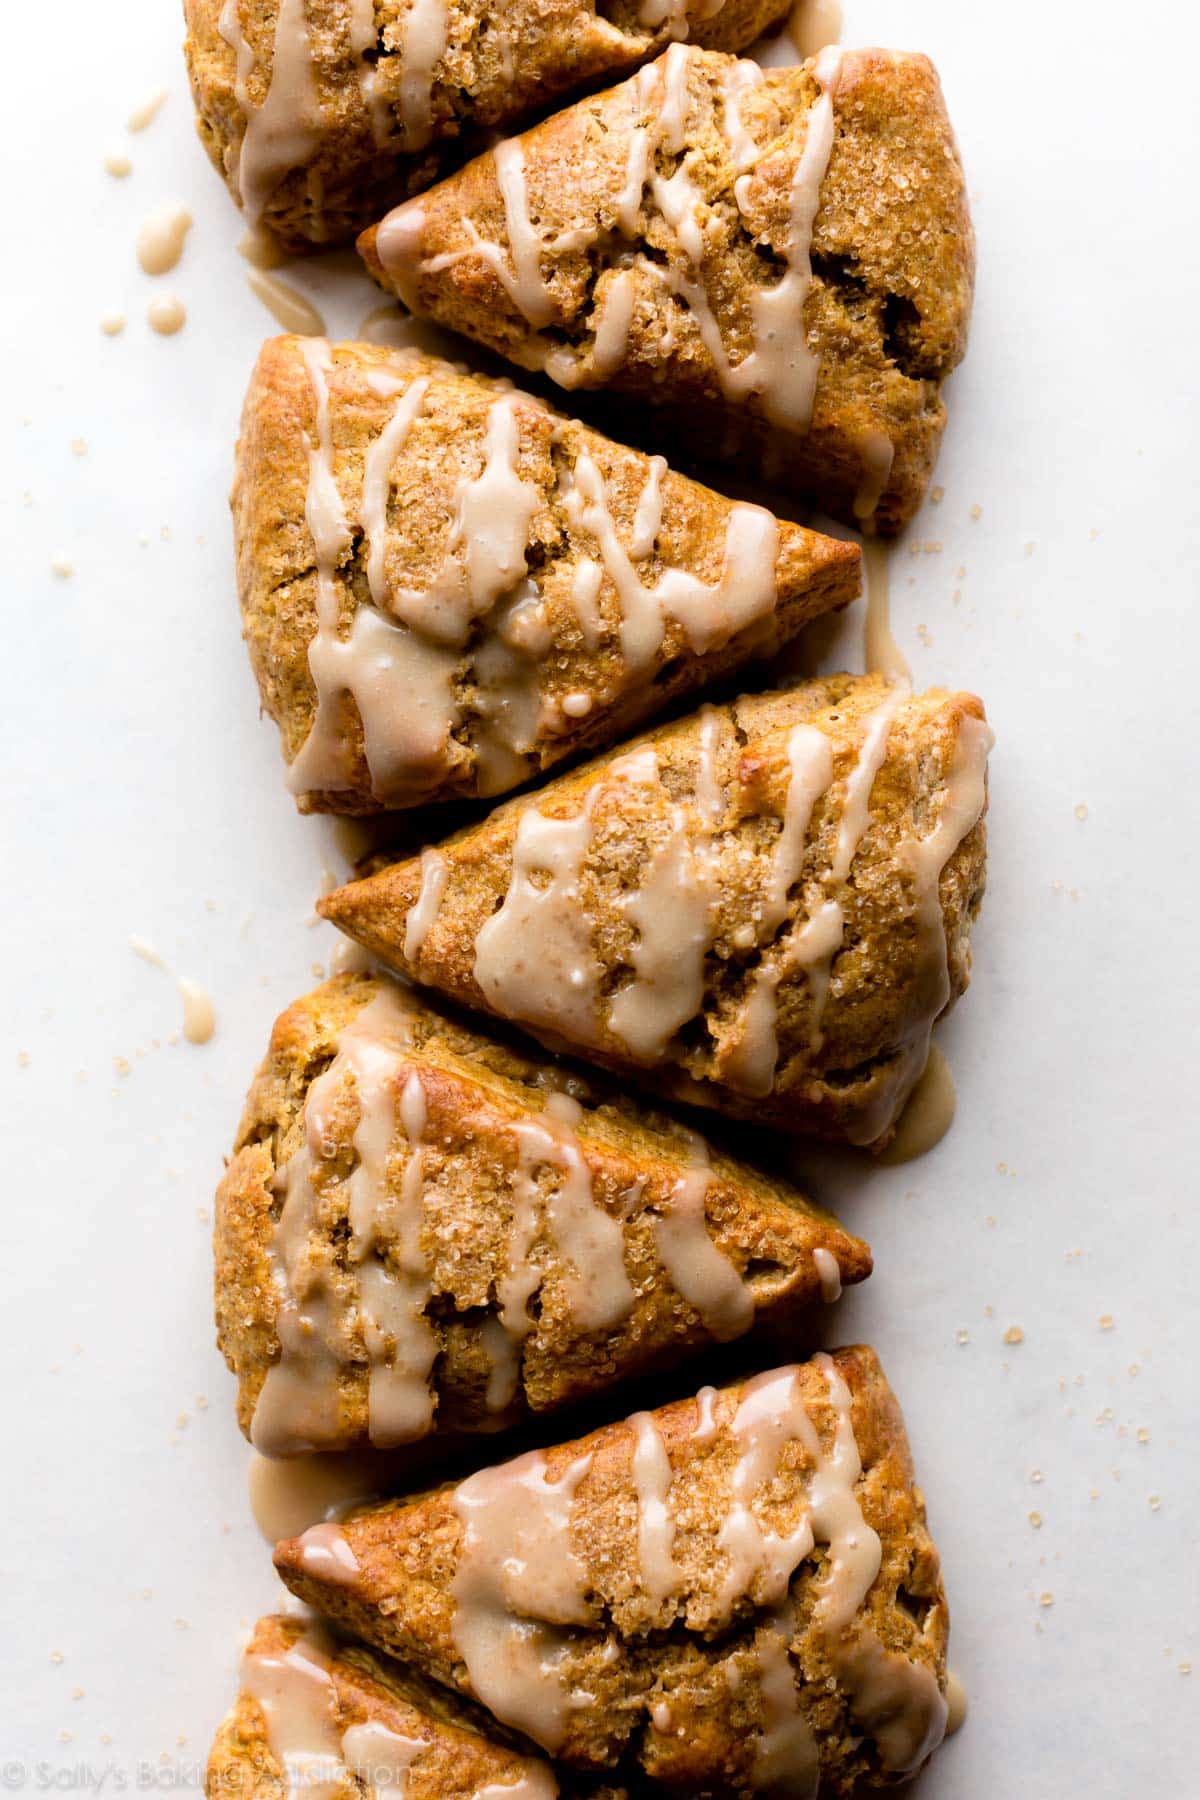
If you love to bake with pumpkin, then don’t go another minute without these flaky pumpkin scones topped with a decadent maple glaze. Perfect with a hot cup of coffee on a crisp fall morning.
Pumpkin: it’s not just for pumpkin pie anymore!
I’ve already made pumpkin coffee cake, pumpkin cream cheese muffins, pumpkin cinnamon rolls, pumpkin bread, pumpkin pancakes….even pumpkin coffee creamer. To be honest though, I was a little nervous to develop a recipe for classic pumpkin scones because the ones at the bakery are just so delicious. After a few tries, though, I created a buttery scone recipe that is perfectly spiced without being overly sweet. And did I mention maple icing?
Tell me About These Pumpkin Scones
- Texture: heavy cream helps produce a freshly-baked scone that is both soft and flaky in the center, crisp on top, and crumbly at the corners.
- Flavor: these buttery scones are the perfect blend of sweet and spice for the pumpkin obsessed. With every bite, you’ll get a delicious shot of pumpkin spice cut with sweet maple frosting. You can use homemade pumpkin pie spice here!
- Ease: if you follow the recipe closely, including my success tips below, this pumpkin recipe is quick and easy to make for breakfast, brunch, or anytime.
- Time: the scone dough comes together quickly in about 20 minutes and then just 25 minutes more in the oven to pumpkin perfection. Serve these scones warm right away for the best taste.
These classic pumpkin scones are inspired by my perfect, no-fail master recipe for scones. Use it to build a scone with your own favorite add-ins like lemon blueberry scones, ham & cheese scones, banana scones, apple cinnamon scones, and more! Here are all of my scone recipes.
Recipe Testing Pumpkin Scones: What Works & What Doesn’t
- Frozen butter = success. As your scone bakes, frozen butter will melt and release steam, creating tender flaky pockets in the middle with crisp and crumbly edges. Butter that hasn’t been frozen could melt before it makes it to the oven, and you’ll lose all that tender, flaky goodness.
- Grate the butter. Weird, right? Fine shreds of cold butter make for an even mix into the dry ingredients. If you don’t own a grater, you can also use a sharp knife to cut the butter into small chunks, but I prefer the teeny shreds.
- Blot the pumpkin. Trust me on this. Pumpkin puree is extremely wet and can cause spreading in your mixture. Blot the pumpkin for 15 seconds with a paper towel before you use it. For more details on blotting pumpkin, see my pumpkin oatmeal chocolate chip cookies or pumpkin snickerdoodles.
- Don’t over-mix the dough. After you add the wet ingredients to the dry, mix with ease until combined. Just like pie crust, over-mixing the scone dough will result in a tough texture.
Heavy Cream for the Win
There are some recipes where substituting similar ingredients is okay, but this isn’t one of them. Rich heavy cream or buttermilk is the secret to these delicious scones.
- Heavy cream or buttermilk is a must. Texture is crucial for the perfect scone, so don’t substitute milk or nondairy milk in this recipe. You’ll lose both the texture and flavor that make these scones irresistible.
- I swear by this trick. Brush the scones with the remaining heavy cream or buttermilk right before baking and sprinkle with a little coarse sugar if you have any. It will help ensure that sweet, crisp exterior.
Overview: How to Make Classic Pumpkin Scones
The full printable recipe is below, but let’s walk through it quickly so you understand each step before you get started.
- Whisk dry ingredients together.
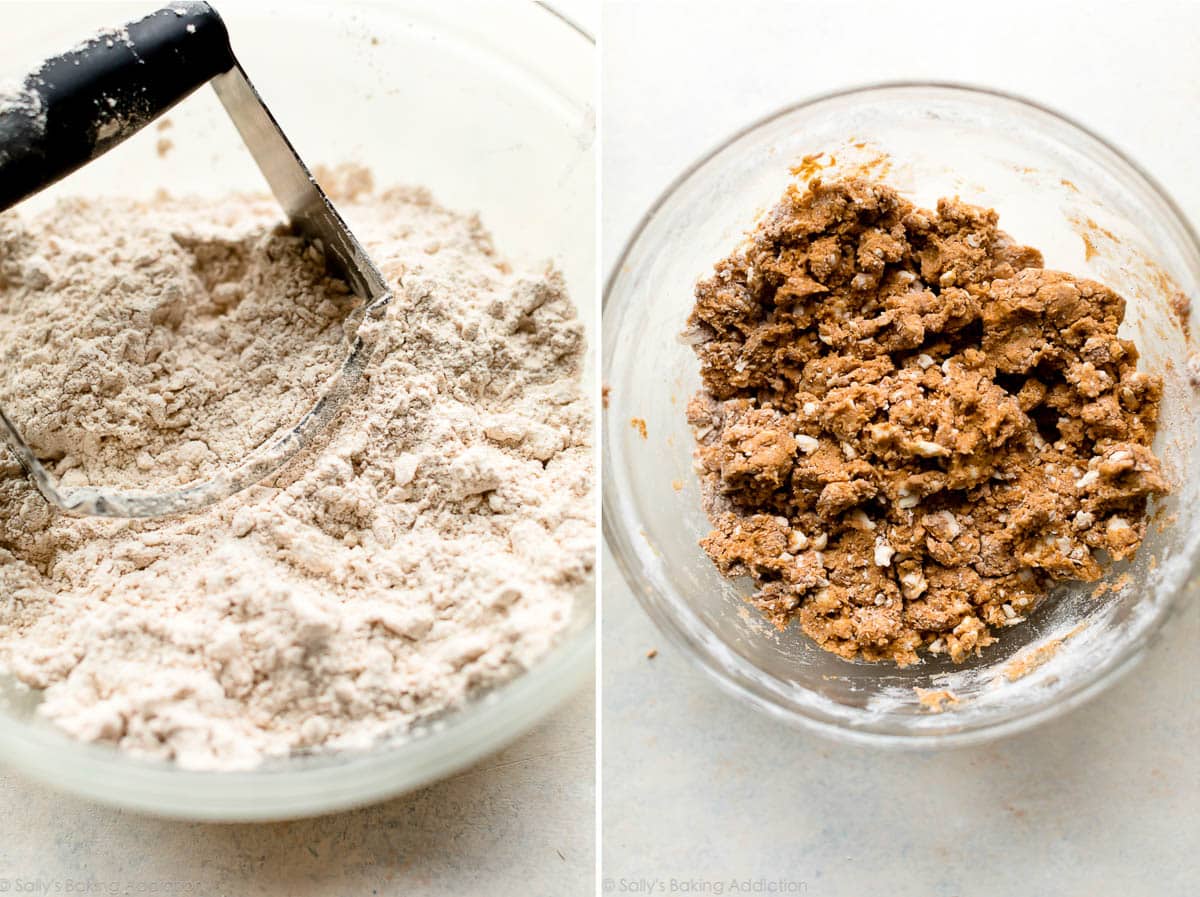
- Add frozen butter to the flour mixture. Grate your butter and add to the flour mixture using a pastry blender, a fork, or your fingers until the mixture comes together in pea-sized crumbs. Remember, you don’t want the butter to melt before you bake.
- Whisk the wet ingredients together. After they are combined, drizzle the wet ingredients into the dry ones and mix until moistened throughout.
- Flour up. Coat your hands in flour and work the mixture into a ball of dough. The dough should be thoroughly combined, but don’t overwork it which could result in a tough texture.
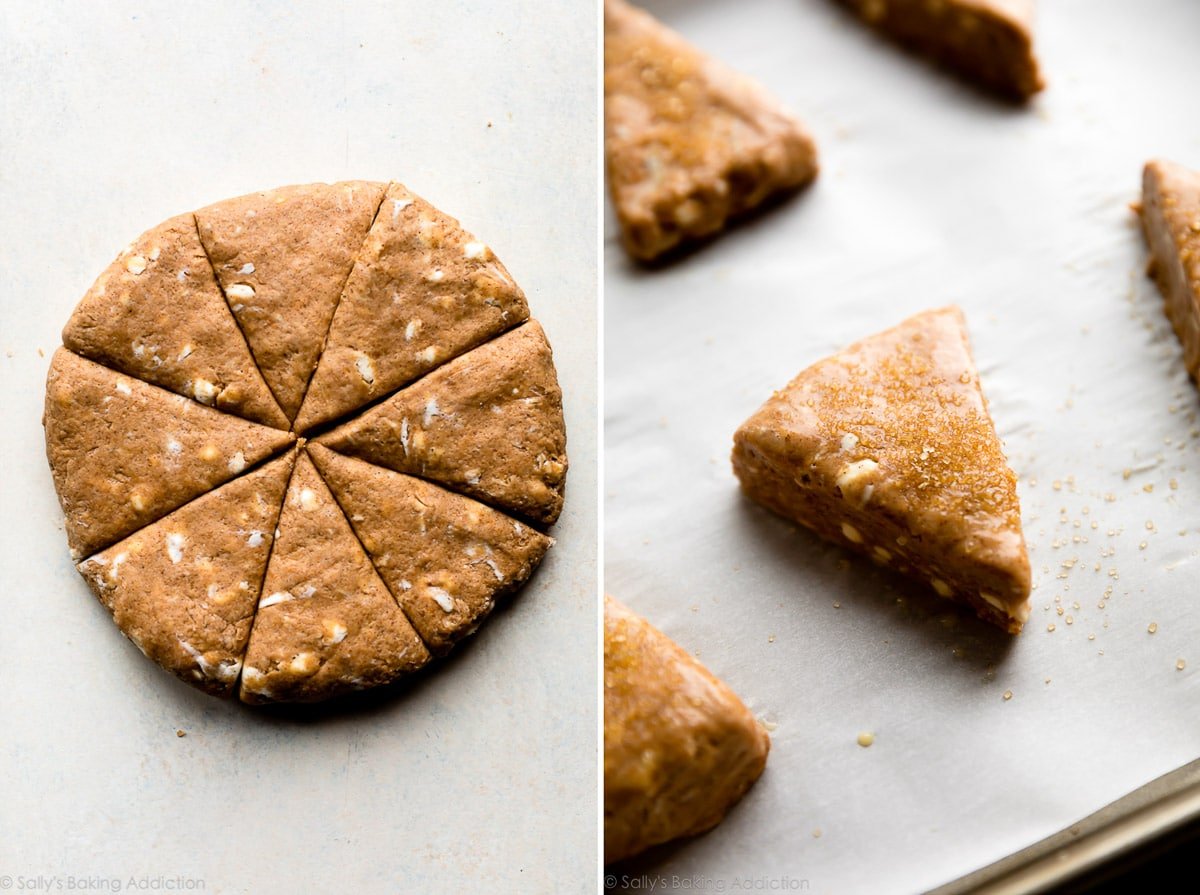
- Flatten dough ball into an 8-inch disc. Use a sharp knife to cut the disc into 8 equal wedges.
- Don’t forget the heavy cream wash. Brush the remaining heavy cream (or buttermilk) onto your scones using a pastry brush right before baking. Sprinkle with coarse sugar for a sweet textured crunch.
- Make the glaze. While the scones are baking, make the maple glaze over low heat by combining the butter and maple syrup until the mixture is completely melted. Remove from the heat and add the sifted confectioners’ sugar and a dash of salt to achieve the perfect glaze consistency.
- Drizzle over the scones. Add the maple icing while the scones are still warm so it melts into every flake, crack, and crevice. You’ll taste melty maple goodness with every bite.
More Fall Recipes
- Pumpkin French Toast Casserole
- Apple Cider Donuts & Mini Cinnamon Sugar Pumpkin Muffins
- Pumpkin Bars
- Snickerdoodles
- Pumpkin Cinnamon Rolls
- Maple Pecan Sticky Buns
- Pumpkin Spice Waffles or Pumpkin Pancakes
Classic Pumpkin Scones
- Prep Time: 20 minutes
- Cook Time: 25 minutes
- Total Time: 45 minutes
- Yield: 8 scones
- Category: Breakfast
- Method: Baking
- Cuisine: American
Description
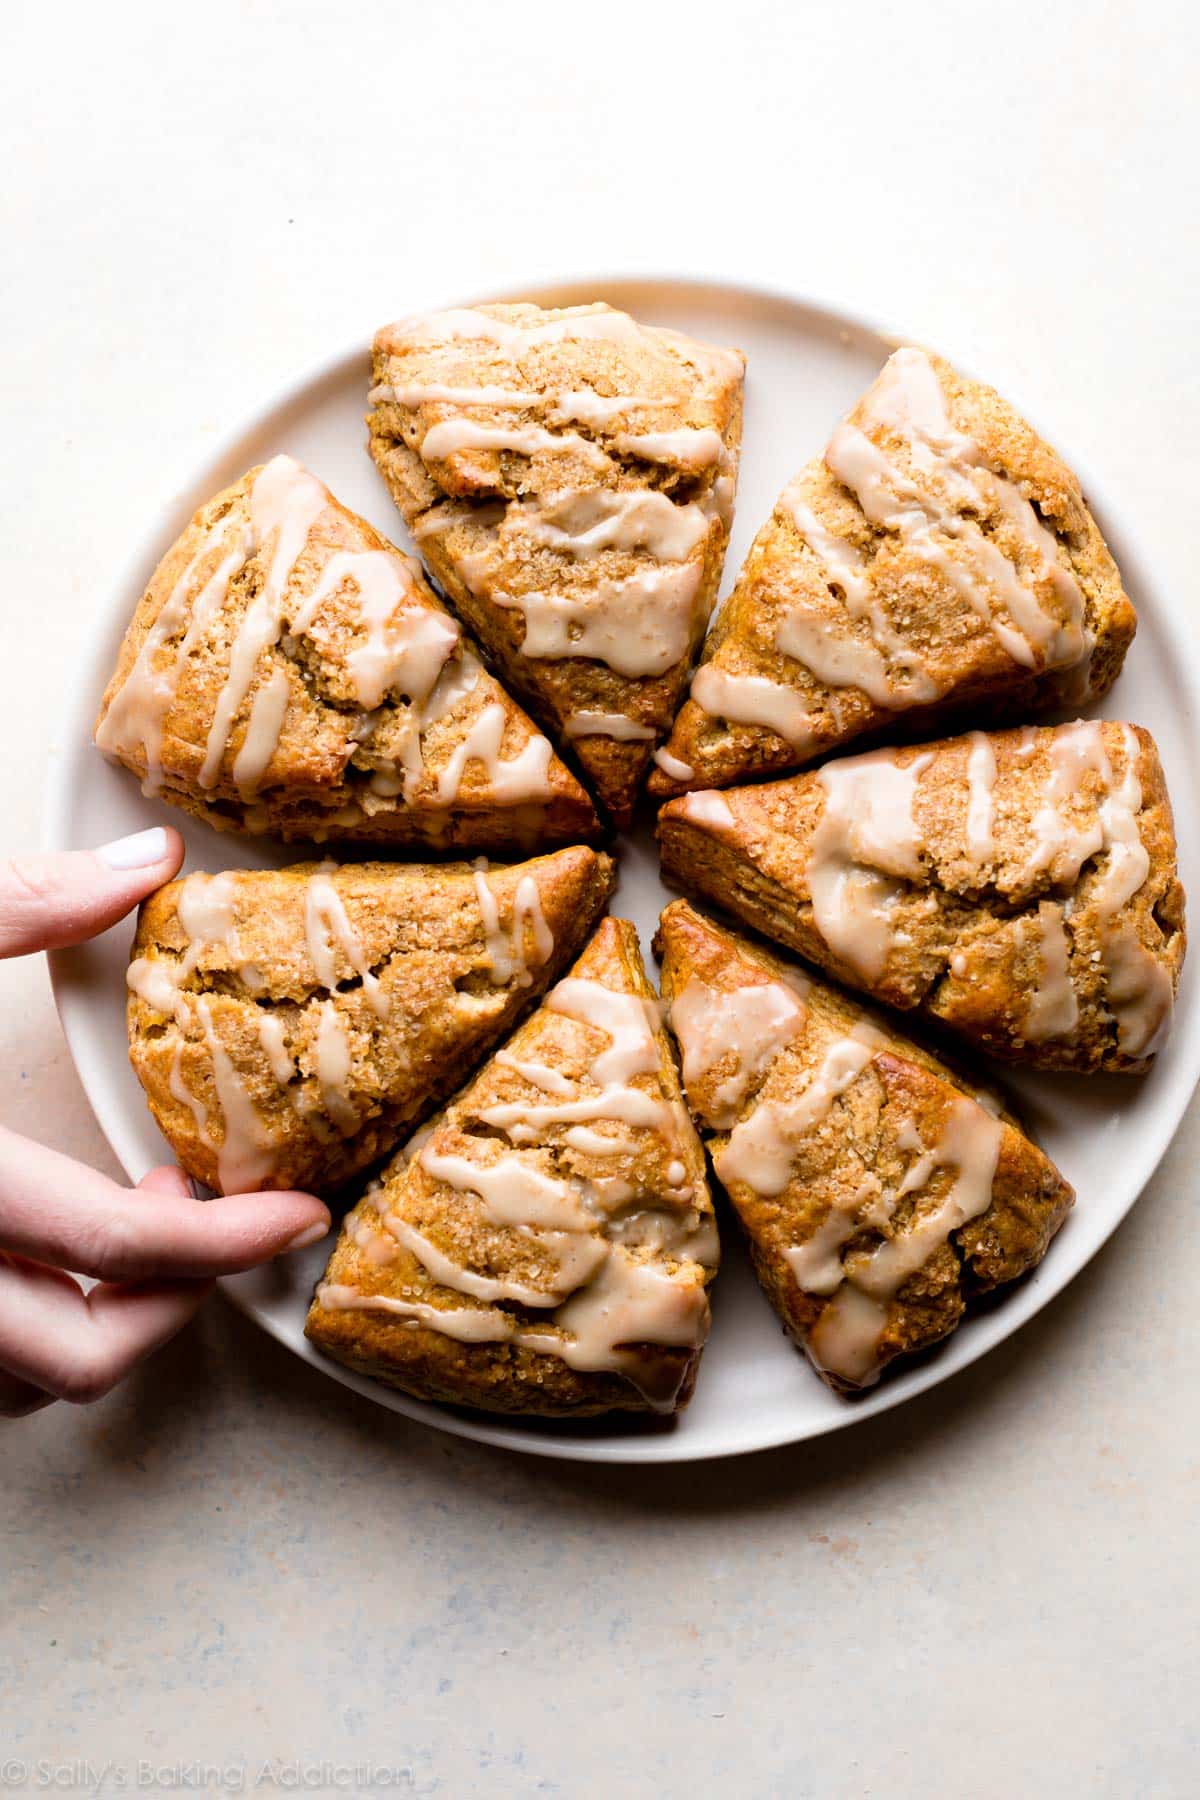
Deliciously spiced classic pumpkin scones are flaky and soft with perfectly crumbly edges. Top with coarse sugar for extra crunch and maple icing for extra decadence!
Ingredients
- 2 cups (250g) all-purpose flour (spooned & leveled)
- 2 and 1/2 teaspoons baking powder
- 1 teaspoon ground cinnamon
- 1 and 1/2 teaspoons pumpkin pie spice*
- 1/2 teaspoon salt
- 1/2 cup (8 Tbsp; 113g) unsalted butter, frozen
- 1/3 cup + 2 Tablespoons (105ml) heavy cream, divided
- 1 large egg
- 1/2 cup (115g) canned pumpkin puree, blotted*
- 1/2 cup (100g) light brown sugar
- 1 teaspoon pure vanilla extract
- optional: coarse sugar for sprinkling on top before baking
Maple Glaze
- 2 Tablespoons (28g) unsalted butter
- 1/3 cup (80ml) pure maple syrup
- 1 cup (112g) sifted confectioners’ sugar
- pinch salt, to taste
Instructions
- Preheat oven to 400°F (204°C). Adjust baking rack to the middle-low position. Line 1 or 2 large baking sheets with parchment paper or silicone baking mat(s). If making mini scones, I use 2 baking sheets. Set aside.
- Make the scones: Whisk the flour, baking powder, cinnamon, pumpkin pie spice, and salt together in a large bowl. Grate the frozen butter (I use a box grater). Add the grated butter to the flour mixture and combine it with a pastry cutter, a fork, or your fingers until the mixture comes together in pea-sized crumbs. Set aside.
- Whisk 1/3 cup (75ml) heavy cream, the egg, blotted pumpkin (see note), brown sugar, and vanilla extract together in a small bowl. Drizzle it over the flour mixture and then mix it all together until everything appears moistened.
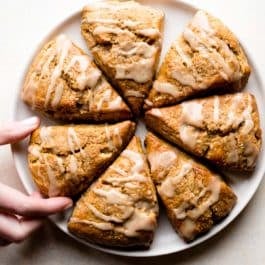
- With floured hands, work the dough into a ball as best you can and transfer onto a floured work surface. Press into a neat 8-inch disc and, with a very sharp knife, cut into 8 equal wedges. To make smaller scones, press dough into two 5-inch discs and cut each into 8 equal wedges. (Larger scones are pictured in this blog post.)
- Place scones at least 2 inches apart on the prepared baking sheet(s). Using a pastry brush, brush scones with remaining heavy cream and sprinkle with coarse sugar, if desired. (Gives a nice crunch!)
- Bake the larger scones for 20-25 minutes or until lightly browned. If you made 16 smaller scones, bake for 18-20 minutes or until lightly browned. Remove from the oven and allow to cool for a few minutes as you prepare the icing.
- Make the glaze: In a small saucepan over low heat, melt the butter and maple syrup together, whisking occasionally. Once the butter has melted, remove from heat and whisk in the sifted confectioners’ sugar. Taste and add a pinch of salt if desired. Drizzle over warm scones.
- Scones are best enjoyed right away, though leftover scones keep well at room temperature or in the refrigerator for 2 extra days.
Notes
- Make Ahead Instructions: Plain baked scones freeze well for up to 3 months. Thaw overnight in the refrigerator then heat up to your liking before icing and enjoying.
- Special Tools (affiliate links): Baking Sheets | Silicone Baking Mats or Parchment Paper | Glass Mixing Bowls | Box Grater | Pastry Cutter | Pastry Brush | Saucepan
- Pumpkin Pie Spice: You can use store-bought or homemade pumpkin pie spice here. If you don’t have either and want to use individual spices, use 1/2 teaspoon each: ground allspice and ground ginger AND 1/4 teaspoon each: ground nutmeg and ground cloves. This is in addition to the 1 teaspoon of cinnamon in the recipe—you will still add that.
- Blotting Pumpkin: Using a paper towel or clean kitchen towel, lightly blot the pumpkin puree to remove some of the moisture before using in the recipe. The more moisture removed, the less moist and muffin-like the scones will taste. We want the scones to be flaky and crumbly, not super moist or muffin-like. I prefer to squeeze lots of moisture out so the scones taste textured and delicious. Do what you prefer!


Reader Comments and Reviews
These were great, and I appreciate that they were a bit lighter than a traditional cream scone. The texture was good (though I was very careful to blot my pumpkin extensively) and it had a lovely pumpkin spice flavor. Would definitely make these again.
Just made these. I cut the glaze recipe in half and it was perfect. These scones really did it for my husband and I. I also used winter squash in place of the pumpkin, which was perfect because it’s quite dry to begin with. I put the wet ingredients into a small bowl with the cooked squash chunks and then used the immersion blender on the whole mixture. It was perfectly smooth. I will probably skip the frozen butter grating next time because it seemed to waste a lot of the butter, which got stuck in the box grater. I think cutting in refrigerator cold butter with the pastry blender would do the job, but that’s my opinion. Thanks for a truly delicious and classy recipe Sally! All your recipes are fabulous
I made these with regular flour a few wks ago, but used Bob’s Red Mill gluten free flour today for a Celiac daughter in law. I was really pleased with the results! The texture today was *slightly* different than with regular flour, but probably not enough that anyone else would notice. I love being able to make homemade GF treats for her. Thanks Sally!
Excellent!!! love everything about them!
I followed the recipe exactly (something I don’t usually do, but since this was the first time I was making pumpkin scones, I decided not to tinker with it!). If you like soft, cakey scones, this is a good recipe. I, however, like my scones much more biscuity. I knew that adding an egg and moist pumpkin (which I did blot, by the way, but perhaps should have squeezed) would make them cakier, so I wasn’t surprised. I would use salted butter next time and more spice, as the scones tasted a bit flat. I agree that just a drizzle of the glaze is enough, otherwise all you taste is the sweetness and not the pumpkin and spice. These taste better after they have cooled and sat awhile, and unlike biscuity scones, they’re ok to eat the next day.
Fantastic!
They taste delicious.
Made the whole house smell fantastic.
Great project to do with kids.
I agree with only using less of the glaze (which others commented on). I used all the glaze, per the directions. It’s great, but really took the sweetness up many notches and a drizzle would have done nicely. I’ll 1/2 the glaze part of the recipe when we make it the next time…and there most definitely will be a next time!
I’m making these right now! Just popped them into the oven; going to make the glaze now! I love your recipes! Can’t wait until their done!
I made this this morning (exactly as directed) and they were delicious. I have been making different types of scones for years. Not one recipe called for egg. I loved them and would make again, but they are not a usual scone. I did read all the reviews and wanted to try and make them less cakey and more scone like. I really dried out the pumpkin. Spread it out between towel paper, flipped, put clean one on top, repeating this step until almost all the moisture was blotted. Based on the amount of excess pumpkin moisture I got removed, there was no need for any extra flour and the mixture was perfect. I very gingerly patted into 8 inch disk and cut. Baked for 20 minutes in middle of oven, bottoms were lightly browned and perfect.
The glaze was fabulous – Do not skip. I think it sends the scones over the top. I made the full recipe and thought it thickened and set quicker then expected. work quickly once mixed. While I didn’t use the entire amount, I did use most. I would think that those saying they used so little had a much thinner glaze.
Many years ago when I was a novice baker, a scone recipe directed 425* on lower rack. Needless to say I learned the hard way not to do that again. As I saw others commented on burned bottoms, I didn’t see the need to bake lower in the oven.
To make this morning easy I measured and mixed the dry ingredients last night. I measured the liquid ingredients and had the blotted pumpkin wrapped in plastic wrap. All I had to do this morning was 1)grate the butter into the dry ingredients 2) whisk all the wet together 3) Gently incorporated wet into dry 4) shape/ cut / cook
It came together very quickly. Baking powder would not work the same if you completely made them at night and baked in the morning.
They looked like scones when they came out of the oven, but the texture was that of a fluffy muffin! I blotted the pumpkin a lot, so I’m not sure what happened. Still delicious though. Just a scone/muffin hybrid. A scuffin?
Just made these for the first time – doubled the batch which I admit was a bit of a gamble, but they came out great! Maybe it was the type of canned pumpkin I used, but I had to add in about 1/4 cup extra flour, and even then, the dough was still very sticky, but they came out wonderfully. I made maple drizzle with powdered sugar, Mapeleine (maple flavored extract), and some creamer.
Is the 115 grams of pumpkin the measurement before or after blotting?
Hi Julie! Before.
Made this recipe last night. I’m a big scone fan and have made nearly every kind you can think of over the years, but never tried pumpkin. These were the excellent. Tender, flaky and the glaze was a perfect complement to the pumpkin. I used Half&Half instead of heavy cream. I don’t believe heavy cream would have made the scones any better than they were. Because the recipe uses two cups of flour, I increased the baking powder to one tablespoon, given that all my scone recipes that use 1-1/2 cups of flour call for one tablespoon of baking powder. I didn’t brush tops with cream which seemed pointless since I was going to use the glaze. Speaking of the glaze, I used one Tbsp butter and 1/4 cup maple syrup along with more than a cup of powdered sugar to get the right consistency and had more than enough glaze for eight large scones and I slathered a lot of glaze on each scone! I believe using 2 Tbsp of butter and 1/3 cup maple will give you a lot of leftover glaze unless you are making two batches of the scones. I will definitely be making these lovely scone again!
In love! These are spectacular. Just enough pumpkin flavor, light and soft on the inside, crusty and flaky on the outside. I sprinkled some cinnamon on top of the glaze to add some color. Highly recommend this recipe.
can you make the dough the night before then bake in the AM? How do they hold up. I have done this with other scone recipes, but not one with pumpkin in it so I am not sure of the moisture will affect it overnight.
Hi Shanelle, You can shape this scone dough into wedges and refrigerate overnight before baking. Enjoy!
These scones turned out *almost* perfect both times I baked them. I chose the mini scone option and found that putting them a little higher in the oven, about halfway up, prevented the bottoms from burning. They only needed 18 minutes of bake time, whereas usually with my oven I need to add extra bake time to Sally’s recipes. The non burned scones were a perfect fall treat. I topped them with flaked maple sugar. Yum!
Quite likely the best scones I’ve ever had! AND sooo easy to make
We made these scones in the baking club I run on my university campus and they were very good! I did one batch with the glaze, and another with chocolate chips and no glaze. Both were absolutely amazing! I always love your recipes.
Can scones be made ahead of time? Possibly the day before and rolled out, cut and refrigerated, then bake in the morning? Or rolled and cut, then bake from frozen?
Hi Rebecca, You can shape this scone dough into wedges and refrigerate overnight before baking. Enjoy!
Do you use a scone pan? My scones always seem to spread and never have a uniform triangle shape, especially the mini scones which I prefer. I’ve seen some online but thought you might have one to recommend.
I don’t use a special scone pan. With this recipe my scones have never spread!
Sally, SALLY! These scones were superb. Perfect texture (crumbly, but moist without being too soft) and full of pumpkin flavor without being over the top. I had tried KAF scone recipes previously (the pumpkin and the apple cinnamon), and while they are wildly popular, I felt them lacking in flavor and texture (too muffin like). But, these are delightful. As is my custom with most recipes requiring the cutting in of fat, I made these up in the food processor, then finished them in a bowl and flash froze them before storing them in a freezer bag overnight. Baked them up (from frozen) at 375 degrees for about 20-23 minutes (I made the minis), and they were perfect. I didn’t sugar them because I’m wary of too-sweet scones, but I did use the icing, and they were such a marvelous morning treat with coffee on the porch. Thank you for an excellent recipe!
Can swert potato be substituted for the pumpkin?
You can use mashed sweet potato (or a thinner sweet potato puree) instead, yes.
Made these tonight and like many of your recipes was absolutely delicious! Didn’t change a thing and came out perfect.
So I just want to say that this is a really awesome recipe. I was craving a pumpkin scone after seeing them at Starbucks one day so I decided to make them.
To start, I royally messed up this recipe so many times throughout the 2 hours it took me to make these LOL. I was kind of tired and for some reason could not follow directions haha.
First, I added like 4x the amount of seasoning on accident. End taste was still yummy, not too “spice-y” or overpowering in my opinion.
Then, I added double the amount of pumpkin puree (added a full can instead). This resulted in the final mixture being sooooo wet and I couldn’t cut it. So it took me so long to add more flour I probably added around 1 more cup of flower to get the consistency relatively moldable. Even after I added more flour, it was still kind of wet but I was done af so I cut it and baked it (after brushing with milk and adding a little bit of coconut sugar on top. I was also scared I was kneading it too much while I added more flour but the end result consistency was still good (not too dense). Also, I only had soy milk but I couldn’t really tell the difference but it’s just my preference; it probably would have been better with heavy cream. I also used coconut sugar instead of brown sugar and the result was good.
10/10 recipe! I thought these scones were going to turn out so bad lol. So, even if you don’t follow the recipe correctly, like me lol, you’ll still get some delicious scones! 🙂
My first attempt at making scones,and they turned out really well.Pumpkin perfect!
This was my first time ever making scones and they came out perfectly!!! I squeezed as much liquid from the pumpkin as possible, checked them after 20 minutes and baked for two minutes longer! These are so dang good, I’m pretty sure I could eat them every day!! Thank you for such a fantastic and simple recipe to follow!!
made these for the first time today and let me say!!! I was really impressed with this recipe and myself lol, only because I’m not much of a baker. I was proud that I made scones from scratch and not from a box! we had them for dessert with family and friends and they really enjoyed them! also, I used pancake syrup cause I didn’t have maple but the icing turned out just as good! this is going in my recipe box for sure!
SO good! My 3 daughters (3, 5, and 8) love these sweet illustrated chapter books about Sophie Mouse, and her mom has a bakery, and I always end up craving the treats at this fictional mouse bakery. ♀️ They had pumpkin scones in the latest one we read and I had them on the brain for a couple of days (and your recipe pulled up!) before I finally had time to make them today. Everyone loved them so much! Thanks!
Can I use sour cream?
In place of the heavy cream? You can try, but the scones may taste a little dense.
This is the best! Blotting the pumpkin made all the difference. Thanks. I can’t wait to try some of your other recipes!
These scones are so enticing, I just might have to make them! I’ve never been a big fan of pumpkin (I KNOW). It rather irritates me, since pumpkin is such a big thing in North America. As a little child, I hated the taste and stringy texture of roasted pumpkin, and that dislike has stayed with me over the years. While I don’t like eating pumpkin as is, I actually have enjoyed a pumpkin scone I got from a local bakery. The texture was perfect, and the flavour was very good as well! I think I just don’t like regular pumpkin, but I loved it in those scones, so I’ll have to try these come the fall! The ones from the bakery were coated in a cream cheese icing, which was thicker than glaze but thinner than frosting. It was amazing, and paired beautifully with the pumpkin scones. I’ll have to try and create some cream cheese icing to top these lovely pumpkin scones!