

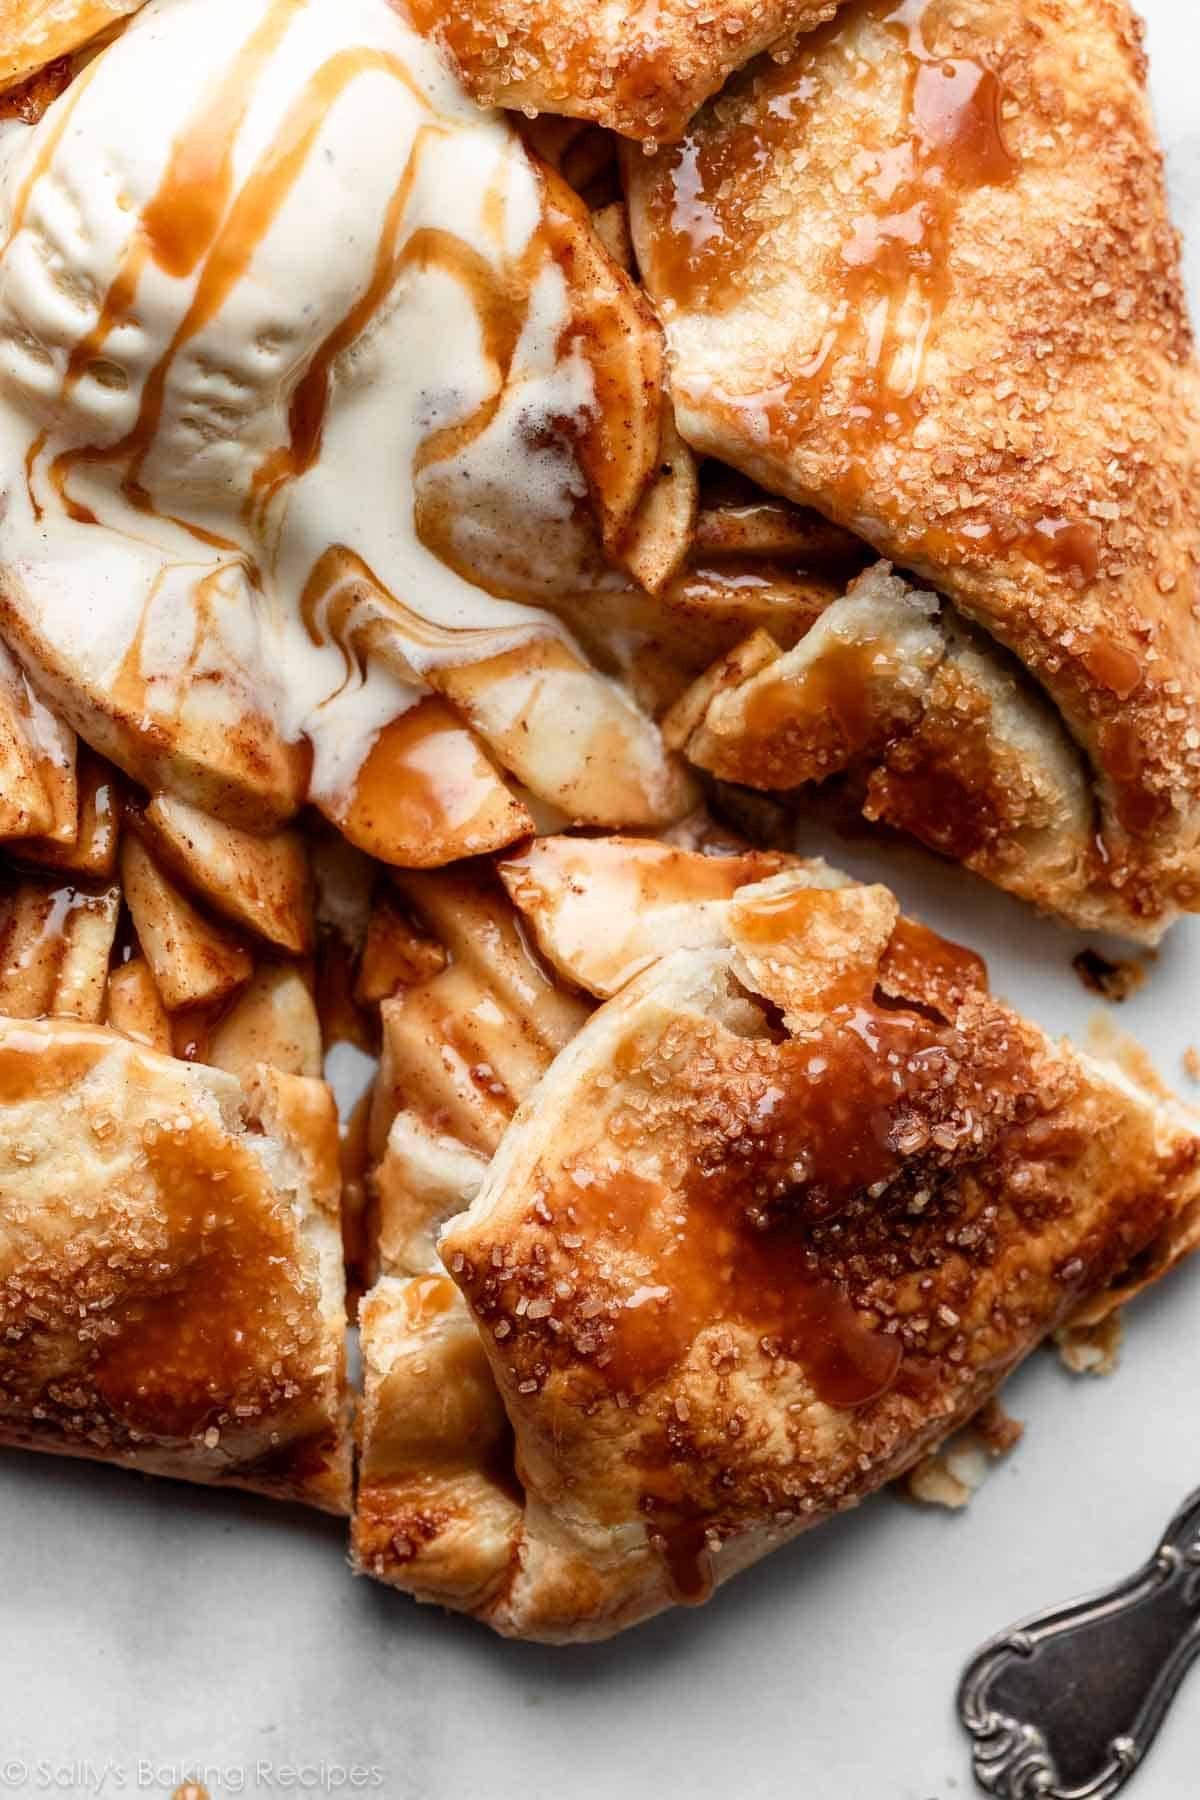
From-scratch apple galette is as delicious as apple pie, but half the time and work! This easy yet impressive fall dessert is complete with a thick and flaky homemade all-butter crust and a drizzle of salted caramel. Serve with a scoop of vanilla ice cream for the ultimate indulgence!
I originally published this recipe in 2016 and have since added new photos and more helpful success tips.

If you love my salted caramel apple pie, you’re in for a real treat today! We’re making a simple apple galette that’s exactly 97% easier than pie (I did the math ;)).
My galette crust, which is both flaky and buttery, makes a cozy bed for the warm and tender apple slices, which get tucked in nice and snug. The apples within are coated in brown-sugared, cinnamon-spiced goodness. Is this easy fall dessert enjoyment or what?!
There’s a lot to cover today, so let’s dive in.
One reader, Danica, commented: “Wow, this was extremely easy and just as delicious as your pies! Thank you for my new go-to recipe! Can’t get enough of your caramel sauce… so yummy! ★★★★★“

Why You Need to Make a Galette
Galettes are a wonderful alternative to pie when, you know, you don’t feel like making an actual pie. Have you ever made one before? Strawberry peach galette, berry galette, blueberry galette, apple brie phyllo galette, and ginger pear galette are some of my favorites.
Galettes are delicious, approachable, and best of all: low maintenance. I like to call them “lazy pies” because there’s no complicated shaping involved. Just as delicious and awesome as pie, but there’s no weaving, crimping, trimming, or any of that meticulousness business.
They’re essentially free-form pies, and you really can’t mess this up. If you can fold dough over filling, you can make a galette. The best part is that you’ll receive heart-eyed reactions anytime you serve an elaborate-looking galette, as if you spent all day creating something so beautifully scrumptious.
Same story with my mini fruit galettes, too!
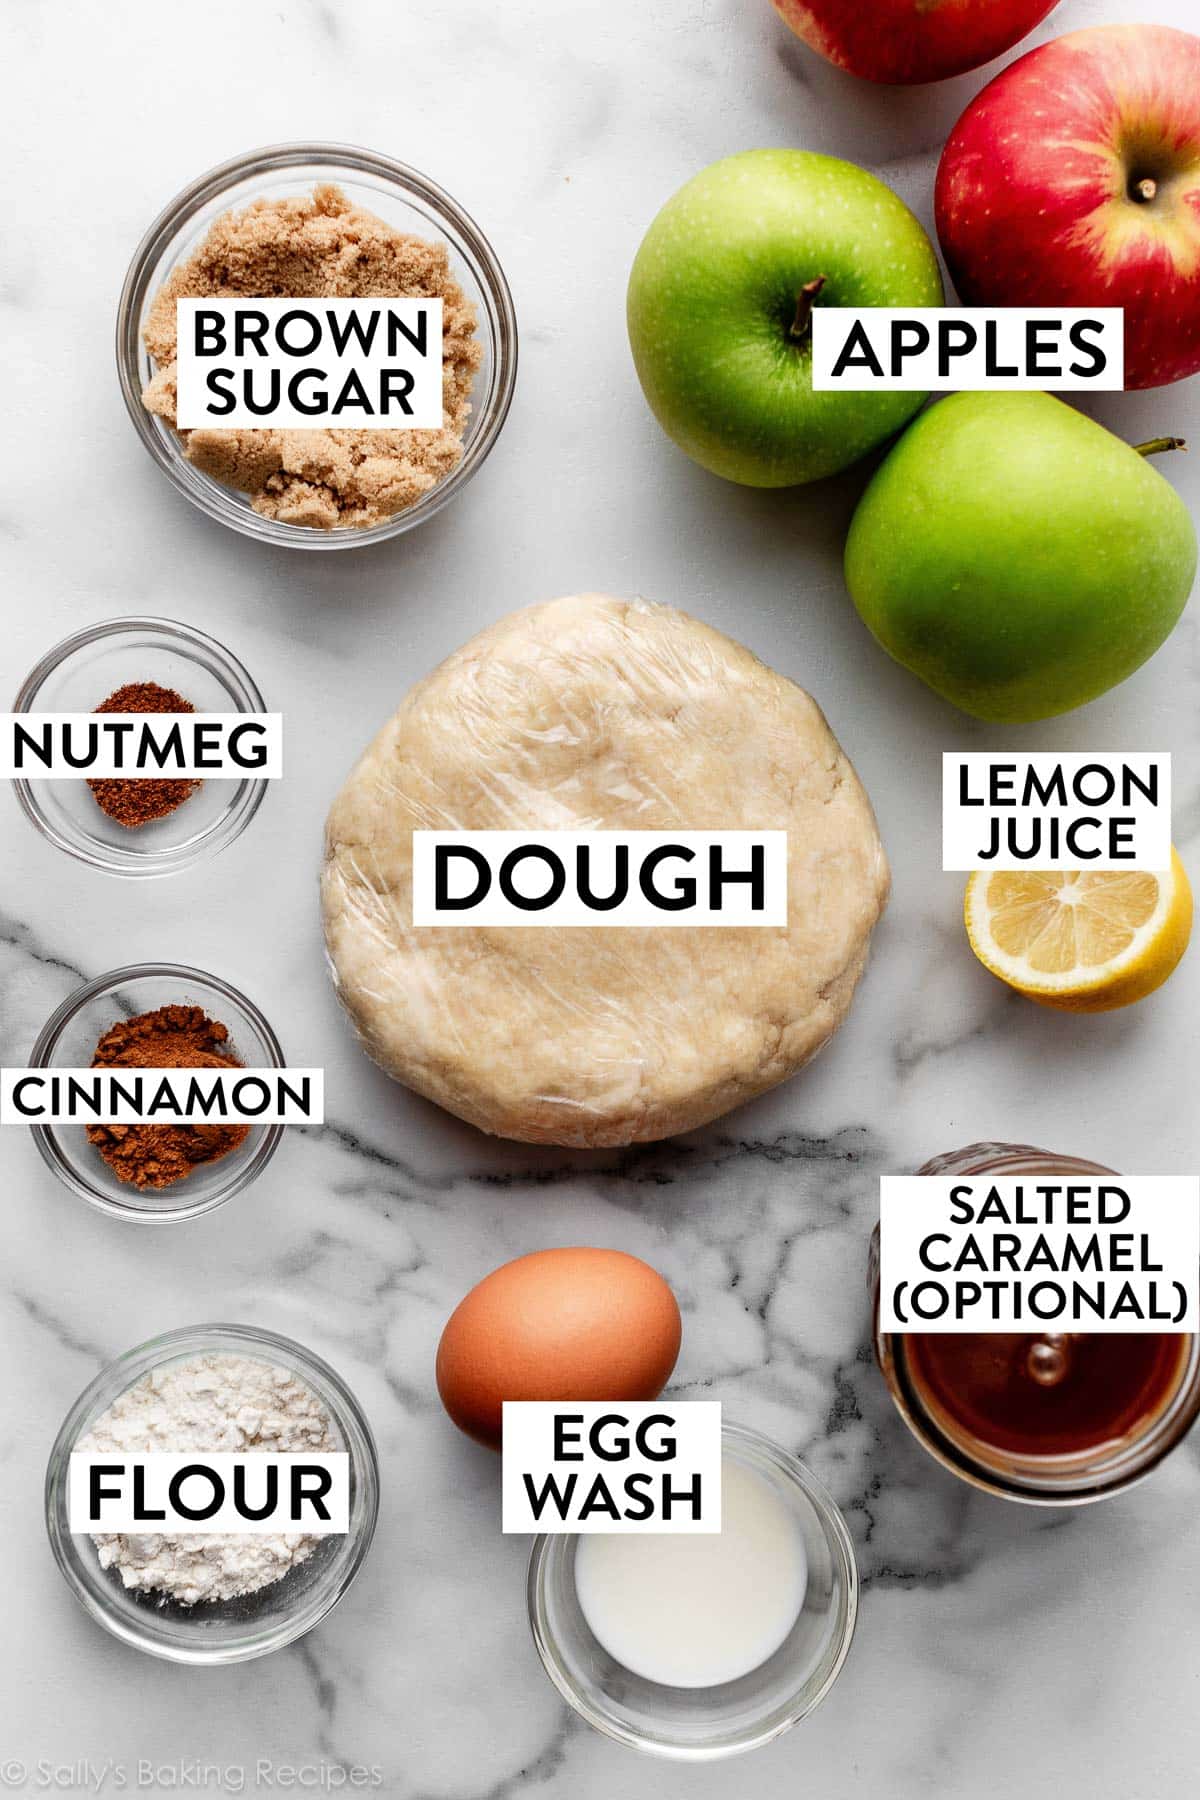
Here’s everything you need:
Here’s How to Make My BEST Apple Galette Dough
The base of today’s galette is a buttery, flaky crust made from simple ingredients like flour, butter, and ice-cold water. This is actually the same dough we use to make pear tarte tatin. Have you ever tried my all-butter pie crust recipe? This galette dough is similar, but it’s *slightly* sweeter and yields only 1 crust. You can also use 1 of the crusts from my flaky pie crust recipe instead (that recipe yields 2 crusts).
I love how thick today’s crust is… think multiple flaky, buttery layers of crust enveloping sweet, cinnamon-y apples. Perfectly delectable!
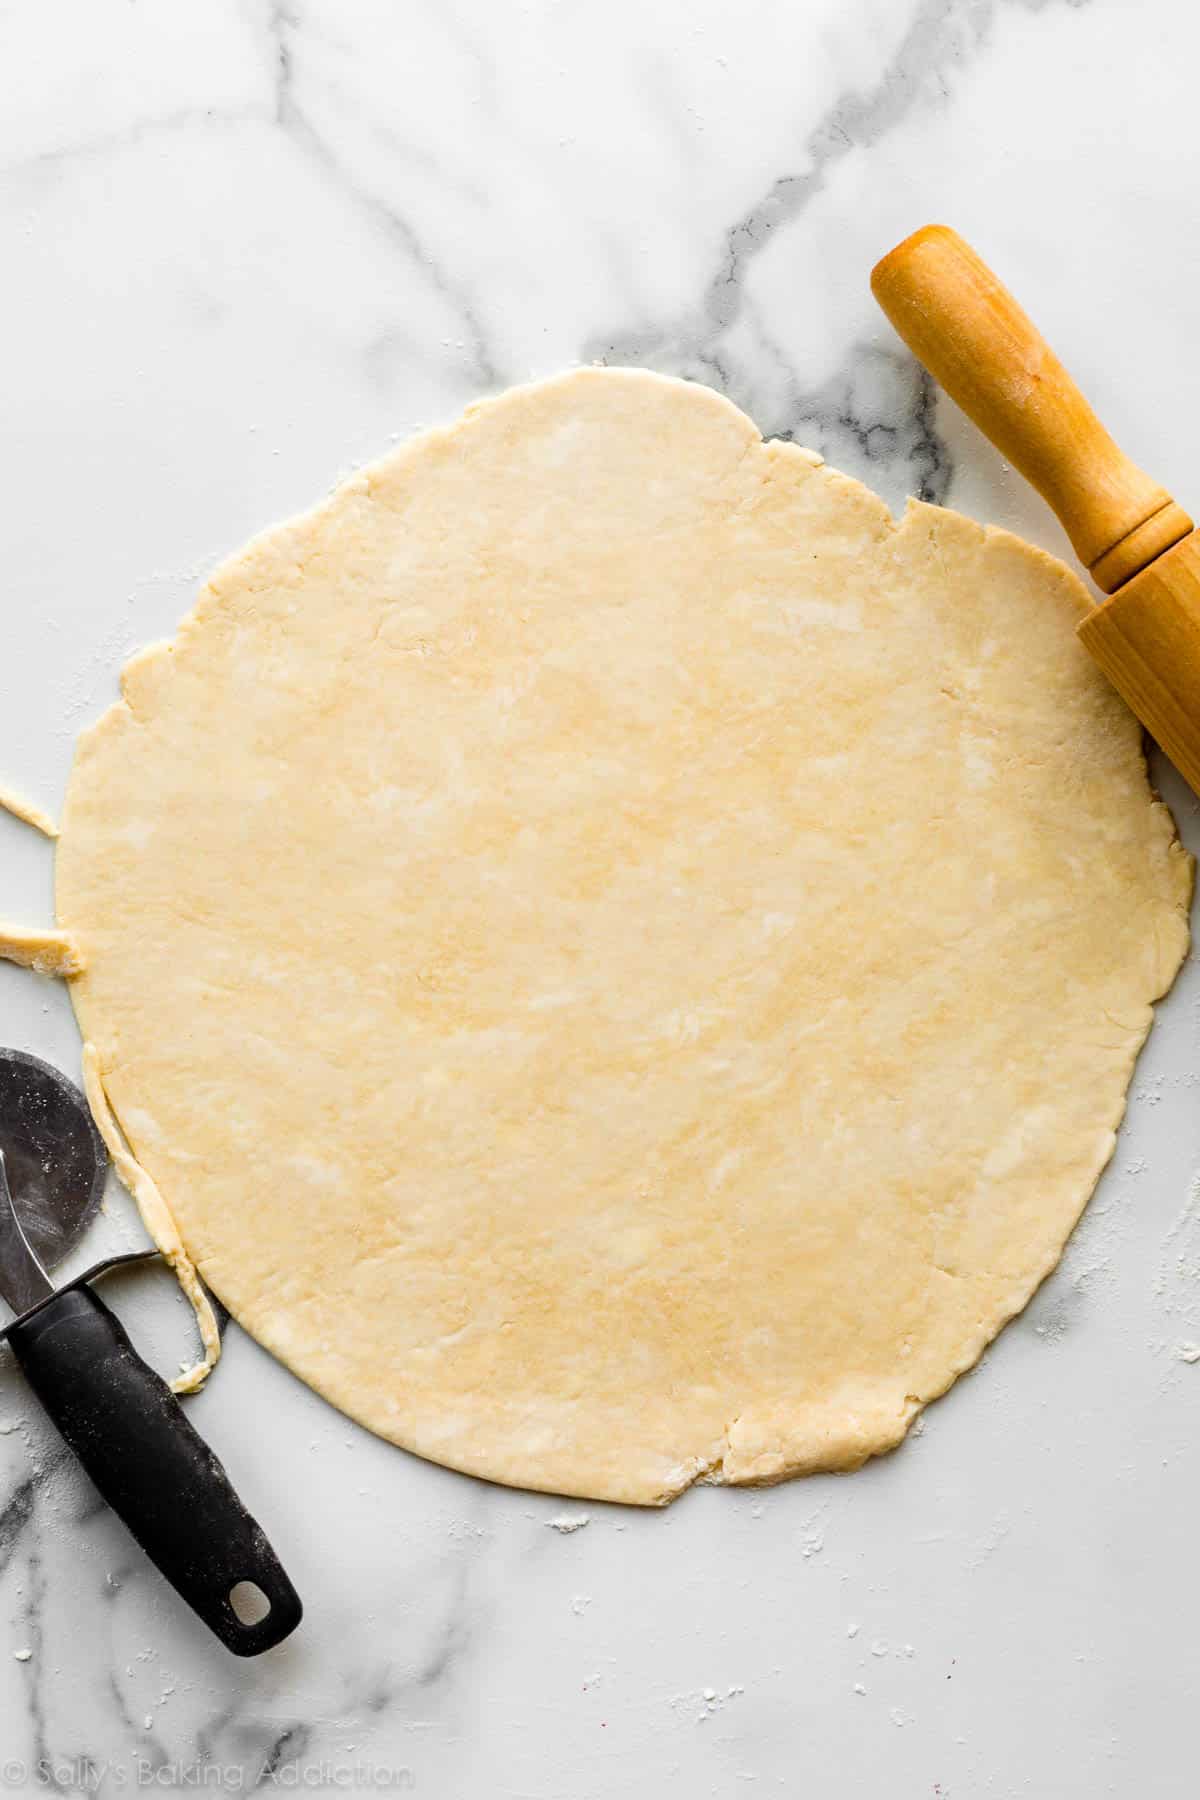
Make the dough, then chill it before rolling it out and adding the filling. When you roll out galette dough, don’t worry if it’s not a perfect circle. Leave whatever shape it rolls out to be.
(How fun is it to have so few baking rules today?!)
Refrigerate the dough for at least 1 hour before rolling it out.
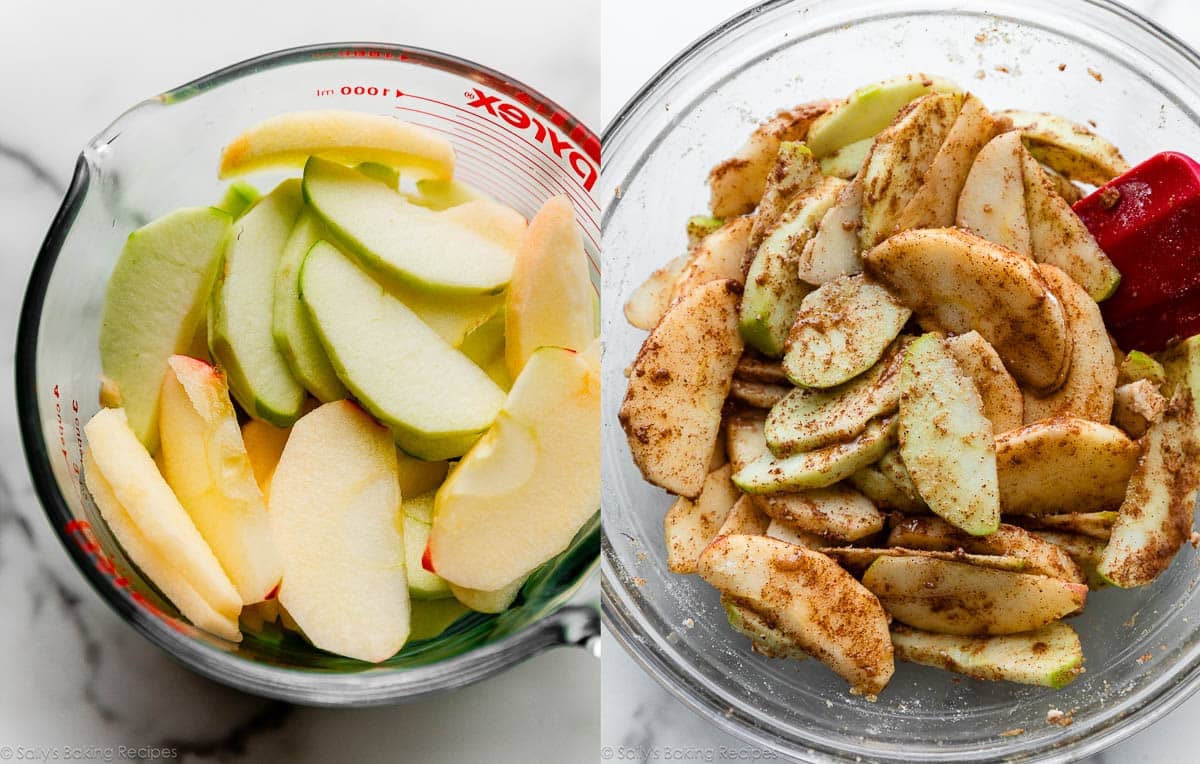
Apple Galette Filling
The filling for this apple galette combines fall’s favorite spices: cinnamon and nutmeg. You’ll also add brown sugar for sweetness, lemon juice for brightness (it tastes a little flat without it!), and 3–4 peeled, sliced apples. Unlike pies where you can pile the fillings super high, galettes don’t really like it when there’s too much filling. The crust will become mushy and no amount of oven time can save it. Plus, you won’t have enough pie dough to fold over an over-filled galette!
Whenever I make apple pie bars, apple pie, or even apple cake, I always use 2 different kinds of apples for more depth of flavor (half sweet, half tart). For a detailed list of my favorite apple varieties and when to use each, you can visit my post on The Best Apples for Baking.
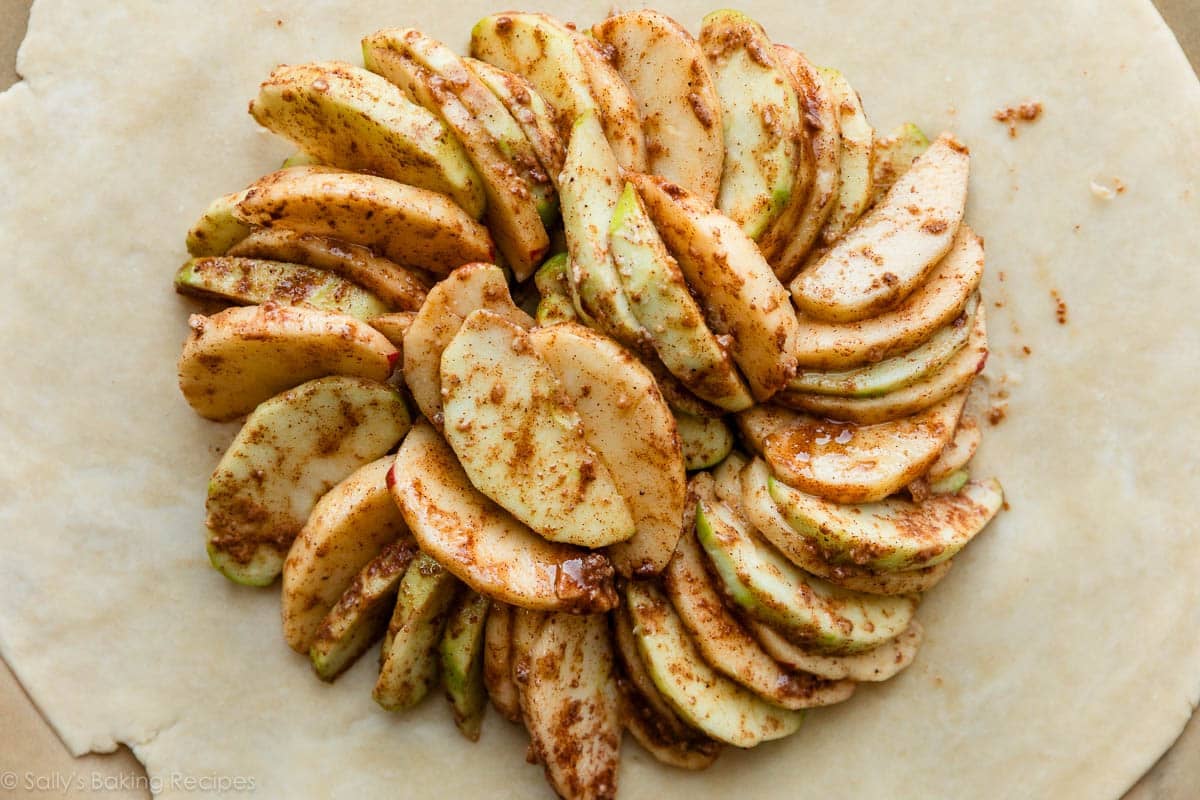
Success Tip: Keep the filling flat and compact, while leaving a 2–3-inch border so you can fold the edges over.
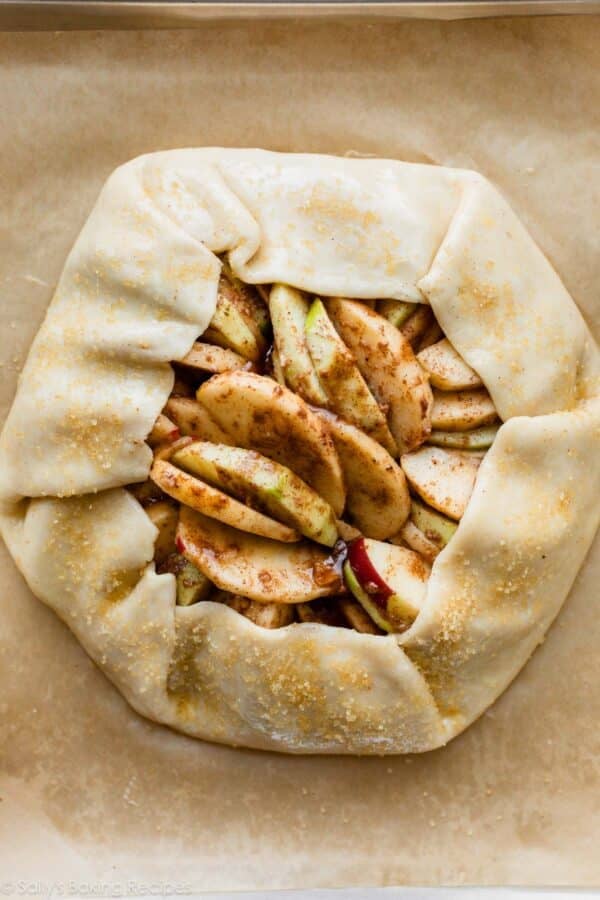
Brush the crust’s edges with egg wash and sprinkle with coarse sugar, such as Sugar in the Raw, or something like these coarse sugar sprinkles.
Success Tip: Chill the shaped galette for at least 15–20 minutes before baking to ensure it holds its shape. I usually do this while the oven preheats. It’s also plenty of time to whip up a batch of salted caramel!

Optional Salted Caramel
For an apple galette upgrade, drizzle homemade salted caramel on top of the apple filling before baking.
If you haven’t tried my salted caramel recipe before, now is the perfect opportunity. You need 4 easy ingredients and it takes about 10 minutes on the stove. No candy thermometer needed! You can also use it as a dip for apples, drizzle it on ice cream or pound cake, and more. In fact, here are 50+ ways to use salted caramel.
Today’s galette doesn’t take very long to bake and there’s no waiting for it to cool completely before serving. There’s only about 45 minutes between baking and eating. (Compare that to 5+ hours waiting for a pie to cook and cool!) Slice and serve with a scoop of ice cream and more salted caramel.
More Recipes With Apples
- Caramel Apple Upside Down Cake
- Baked Apples
- Apple Pie Bars (with Salted Caramel on top!)
- Apple Crumb Cake
- Apple Cinnamon Rolls
- Homemade Caramel Apples
- Apple Cobbler
- Apple Turnovers

Easy Apple Galette
- Prep Time: 1 hour, 20 minutes
- Cook Time: 35 minutes
- Total Time: 2 hours, 10 minutes
- Yield: 1 galette; about 8 servings
- Category: Pie
- Method: Baking
- Cuisine: American
Description
As delicious and impressive as pie, but half the time and work! This simple apple galette is a favorite fall dessert. Assembling it couldn’t be easier, and there’s no need to wait hours for it to cool before slicing. Prepare your dough at least 1 hour ahead of time, so it has time to chill in the refrigerator.
Ingredients
Crust
- 1 and 1/2 cups (188g) all-purpose flour (spooned & leveled), plus more for work surface
- 1 Tablespoon (12g) granulated sugar
- 1/4 teaspoon salt
- 1/2 cup (8 Tbsp; 113g) cold unsalted butter, cubed*
- 1/4 cup (60ml) ice-cold water, plus more as needed
- egg wash: 1 large egg beaten with 1 Tablespoon (15ml) milk
- optional: coarse sugar
Filling
- 3–4 apples, peeled and sliced into 1/4-inch slices (about 4–5 cups (500–600g) slices)*
- 1/4 cup (50g) packed light or dark brown sugar
- 1 and 1/2 Tablespoons (12g) all-purpose flour
- 2 teaspoons fresh lemon juice
- 1 teaspoon ground cinnamon
- 1/4 teaspoon ground nutmeg
- optional: salted caramel sauce
Instructions
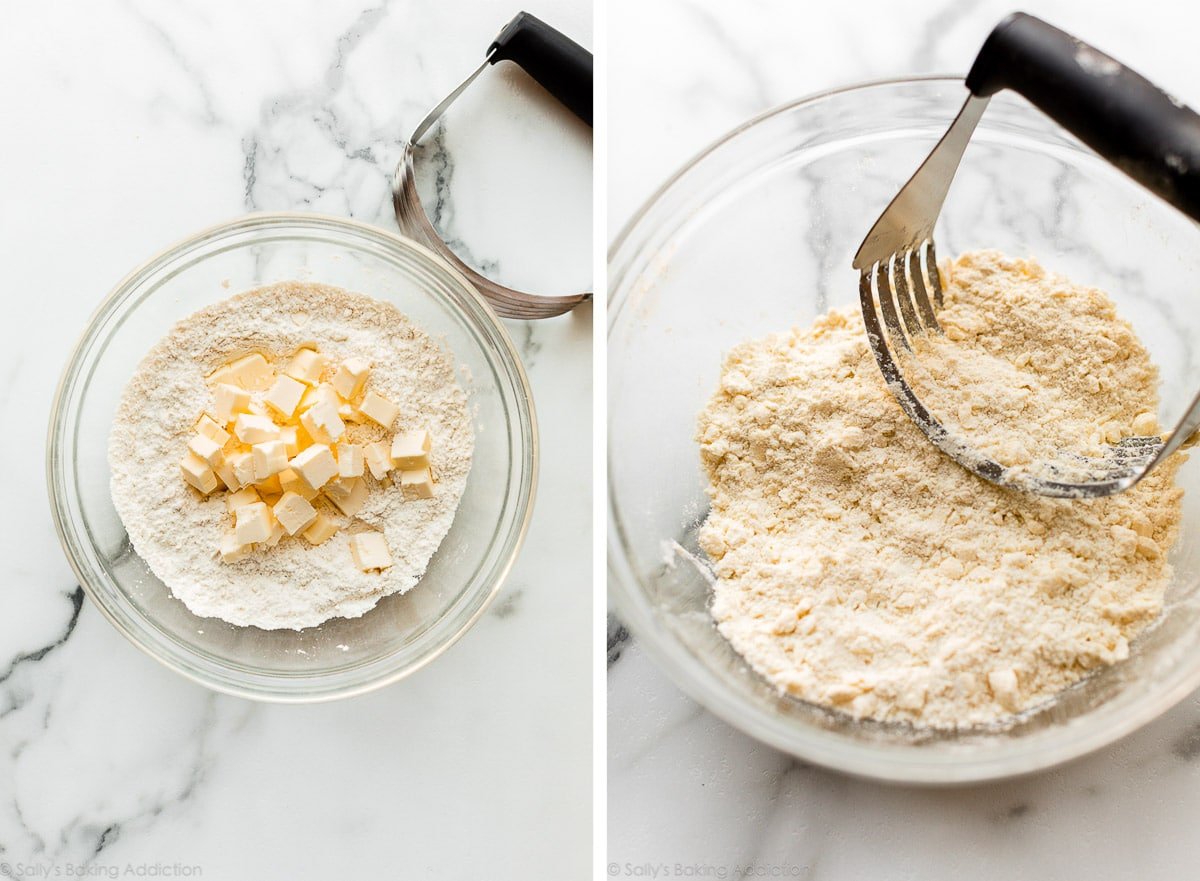
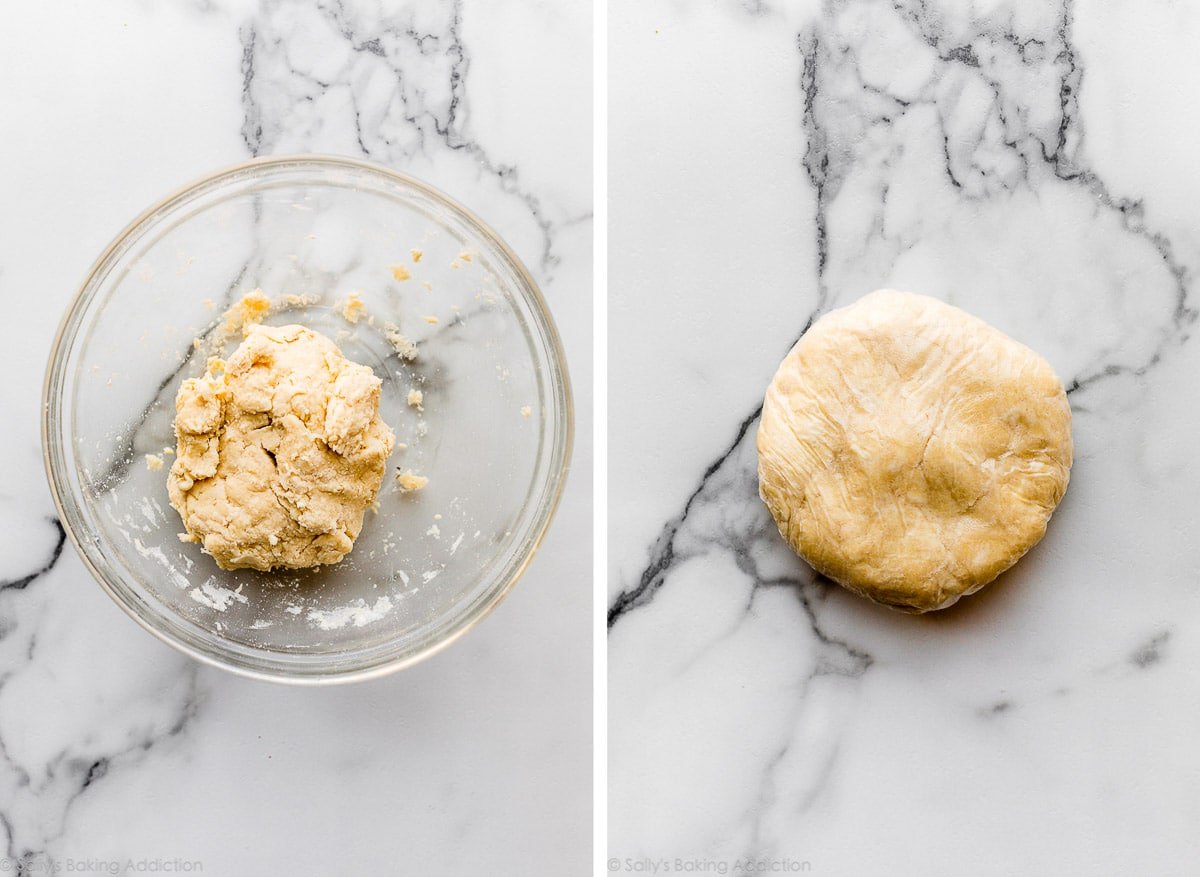
- Make the crust: Whisk the flour, sugar, and salt together in a medium bowl. Using a pastry cutter or 2 forks, cut in the butter until the mixture resembles coarse pea-sized crumbs. Add the water and stir until the flour is moistened. Add 1–2 more Tablespoons of water if the dough seems dry. Turn the dough out onto a lightly floured work surface and, using your hands, work the dough into a ball. Flatten it into a thick disc. Wrap the dough disc in plastic wrap or parchment paper and refrigerate it for at least 1 hour, and up to 3 days.
- As the dough chills, prepare the filling: Mix the apples, brown sugar, flour, lemon juice, cinnamon, and nutmeg together in a large bowl. Cover tightly and let sit until the dough is ready. I usually cover it and keep it in the refrigerator during this time.
- Line a large baking sheet with parchment paper or a silicone baking mat. Clear some shelf space in your refrigerator because the shaped galette must chill in step 6. (See recipe Note below.)
- On a lightly floured surface, roll the dough into a 12-inch circle—it doesn’t have to be perfect. Transfer dough to the prepared baking sheet. (You can also roll the dough out right on the parchment paper or silicone baking mat that you are using to line the baking pan. If doing so, lightly flour the parchment paper or baking mat.)
- Arrange the apples (and any juices from the bottom of the bowl) into the center of the dough, leaving a 2–3-inch border all around them. You can simply spoon the filling on, or arrange the apple slices in a more deliberate design, such as concentric circles. Gently fold the edges of the dough over the filling, overlapping the dough as necessary. Press gently to seal the edges. Brush the crust edges generously with egg wash and sprinkle the crust with coarse sugar, if desired. If desired, drizzle 3 Tablespoons of salted caramel over the filling (not the crust).
- Refrigerate the shaped galette for at least 15–20 minutes as the oven preheats (next step), and up to 8 hours. If refrigerating for longer than 1–2 hours, cover it lightly. The galette will lose its shape if it’s not cold when it hits the oven.
- Preheat oven to 400°F (204°C).
- Bake until the filling is bubbly and the crust is golden brown, about 35–36 minutes. Remove from the oven and allow to cool on the baking sheet for 10 minutes before slicing and serving. If desired, serve with vanilla ice cream and more salted caramel sauce drizzled on top.
- Cover and store leftover galette in the refrigerator for up to 4 days.
Notes
- Make Ahead & Freezing Instructions: Both the dough and filling can be made ahead of time and chilled in the refrigerator for up to 3 days. The dough can be frozen for up to 3 months after preparing it in step 1. Thaw overnight in the refrigerator before rolling out and filling.
- Special Tools (affiliate links): Glass Mixing Bowls | Pastry Cutter | Rubber Spatula | Baking Sheet | Silicone Baking Mat or Parchment Paper | Rolling Pin | Pastry Brush | Coarse Sugar Sprinkles
- Butter: Make sure your cubed butter is very cold. I like to chill it in the freezer for about 15 minutes ahead of time.
- Apples: You can use any apple variety, but here are my favorites for galettes: Granny Smith, Honeycrisp, Pink Lady, or Fuji. For a detailed list of my favorite apple varieties and when to use each, you can visit my post on The Best Apples for Baking.
- Chilling shaped galette before baking: Chilling the shaped galette in the refrigerator in step 6 helps it maintain its shape in the oven. I usually refrigerate it for 15 minutes as the oven preheats. If your refrigerator doesn’t have room for your baking sheet, or you’re nervous about transferring a cold metal baking sheet to a hot oven (which can cause warping), try this: Assemble the galette on parchment paper or a silicone baking mat, then lift the parchment/baking mat with galette as a whole directly onto a shelf in the refrigerator. After chilling, when ready to bake, carefully lift up and place the entire parchment/baking mat with galette onto the baking sheet.


Reader Comments and Reviews
O M G..I added gouda cheese slices between apple slices & slivered almonds on top..took great personal restraint to NOT e a t entire galette..A -MAZ -ING!!!!
i have made this numerous times and always have the same problem. Cook at the temp in the recipe, the crust cooks completely, but the apples remain hard. Next time I am going to saute the apples before putting them in the crust. Tomorrow when I have my dinner party I will put the gallette back in the oven- put foil around the crust and melt some butter on the apples so they won’t dry out. Or do you think putting a melted jelly on them would do the trick when the gallette comes out of the oven.
Hi Aline, I’m sorry the apples keep giving you trouble. If the crust is done but the apples are still firm, that usually points to the apple variety or the slice thickness. I recommend using a softer baking apple like Honeycrisp or Fuji and slicing them thinner so they have time to soften before the crust browns. Sautéing them lightly first can definitely work, but they should only be partially softened so they don’t turn mushy after baking. For today, tenting the crust edges with foil and returning the galette to the oven is a great plan. Brushing the apples with melted butter can help keep them moist, or your suggestion for a light glaze of warmed jelly (I recommend apricot preserves) after baking.
Hi I Sally,
Your thoughts on using almond paste on the crust before adding apples to Galette. You have a pie recipe that way. Possible to add some cranberries too? Thank you Cindy. I’ve made the pie and was amazing.
Hi Clo, that should work just fine to add some almond paste to the crust before adding the filling. Feel free to swap some of the apples for cranberries, too. Let us know how it goes!
I made this with almost zero baking experience (besides cookies and a couple of sourdough loaves) and it turned out amazing!
I love the all-butter pie crust recipe. I’m saving this to be my go-to fall/winter dessert recipe going forward, as someone who lives near hundreds of apple orchards. Thank you for taking the time to share this!
To make it so much easier I used Pillsbury pie crusts and made 2 of them for a party. They were a big hit, and no one was the wiser!
looks yummy.. I have a plethora of frozen apples sliced and ready for something like this. Would these be suitable?
Used my own recipe for the crust, almond flour based, but followed the recipe. For the apples and Carmel sauce. Excellent result. Surprised myself with the sauce , no problem at all. Perfect texture and taste. A keeper recipe for sure, many thanks.
Note sure how a newbie could mess the crust up but even adding additional water didn’t help. The mixture was just to dry to form into a disk. Dang.
Hi Janet! We would keep adding more water, a little at a time, until the dough comes together. How did you measure the flour? Make sure to spoon and level (instead of scooping) to avoid packing in too much flour into your measuring cups – or use a kitchen scale. You can read more about properly measuring baking ingredients in this post.
can you make this gluten free? Have you had any luck making pies with gluten free crusts?
Hi Stacey, we haven’t tested this recipe with gluten free flour, so we’re unsure of the results. Although some readers report using an all-purpose 1:1 gluten-free flour in many of our recipes with success, you should expect slightly different results anytime you substitute ingredients. Let us know if you give it a try!
Sally
I made this a couple of years ago and I noticed that there’s a difference between the current recipe and the old one of 1 tablespoon of granulated sugar for the crust versus the two in a previous recipe. Is this a typo or is it work just as well with the 1 tablespoon thank you.
Hi Lorraine! 1 Tbsp is what we use and prefer for this recipe now. Hope you love it!
So easy and delicious! I used your all-butter crust (which I always have on hand) and it was weeknight perfection
Can I make this 2 days before Turkey day ? If so , do I need to freeze or will it be ok still ?
Hi Jenifer! See Notes after the recipe for our recommended make-ahead instructions.
Thanks for this recipe! I’ve made this and other fruit variations several times now.
I’ve found that sliding a dinner plate under the parchment after transferring the dough works best.
When you add the filling, the plate helps keep the juices from leaking while you fold the edges. It also takes less room than a baking sheet in the fridge!
I then transfer to the baking sheet right before it goes in the oven.
Delicious and so easy-to-follow. I’ve made it 4 times the past week to rave reviews. Thank you, Sally, for yet another fabulous recipe. Your spot-on recipes, make people believe I’m a good baker!
Made it for the first time and it was a hit!!
Easy to follow guidance. And great tips along the way!
Perfect!!