

Using my perfected master scone recipe, build your own scones with a variety of add-ins like chocolate chips, berries, or cheese and herbs. These better-than-the-bakery treats are flaky, flavorful, and moist with crisp crumbly edges. There’s a lot of helpful information and step-by-step photos, but feel free to jump right to the recipe!
Scones are sweet or savory, perfect with coffee and tea, welcome at baby showers, bridal showers, brunch, snack time, bake sales, Mother’s Day, and wherever muffins or coffee are appropriate. (All the time!)
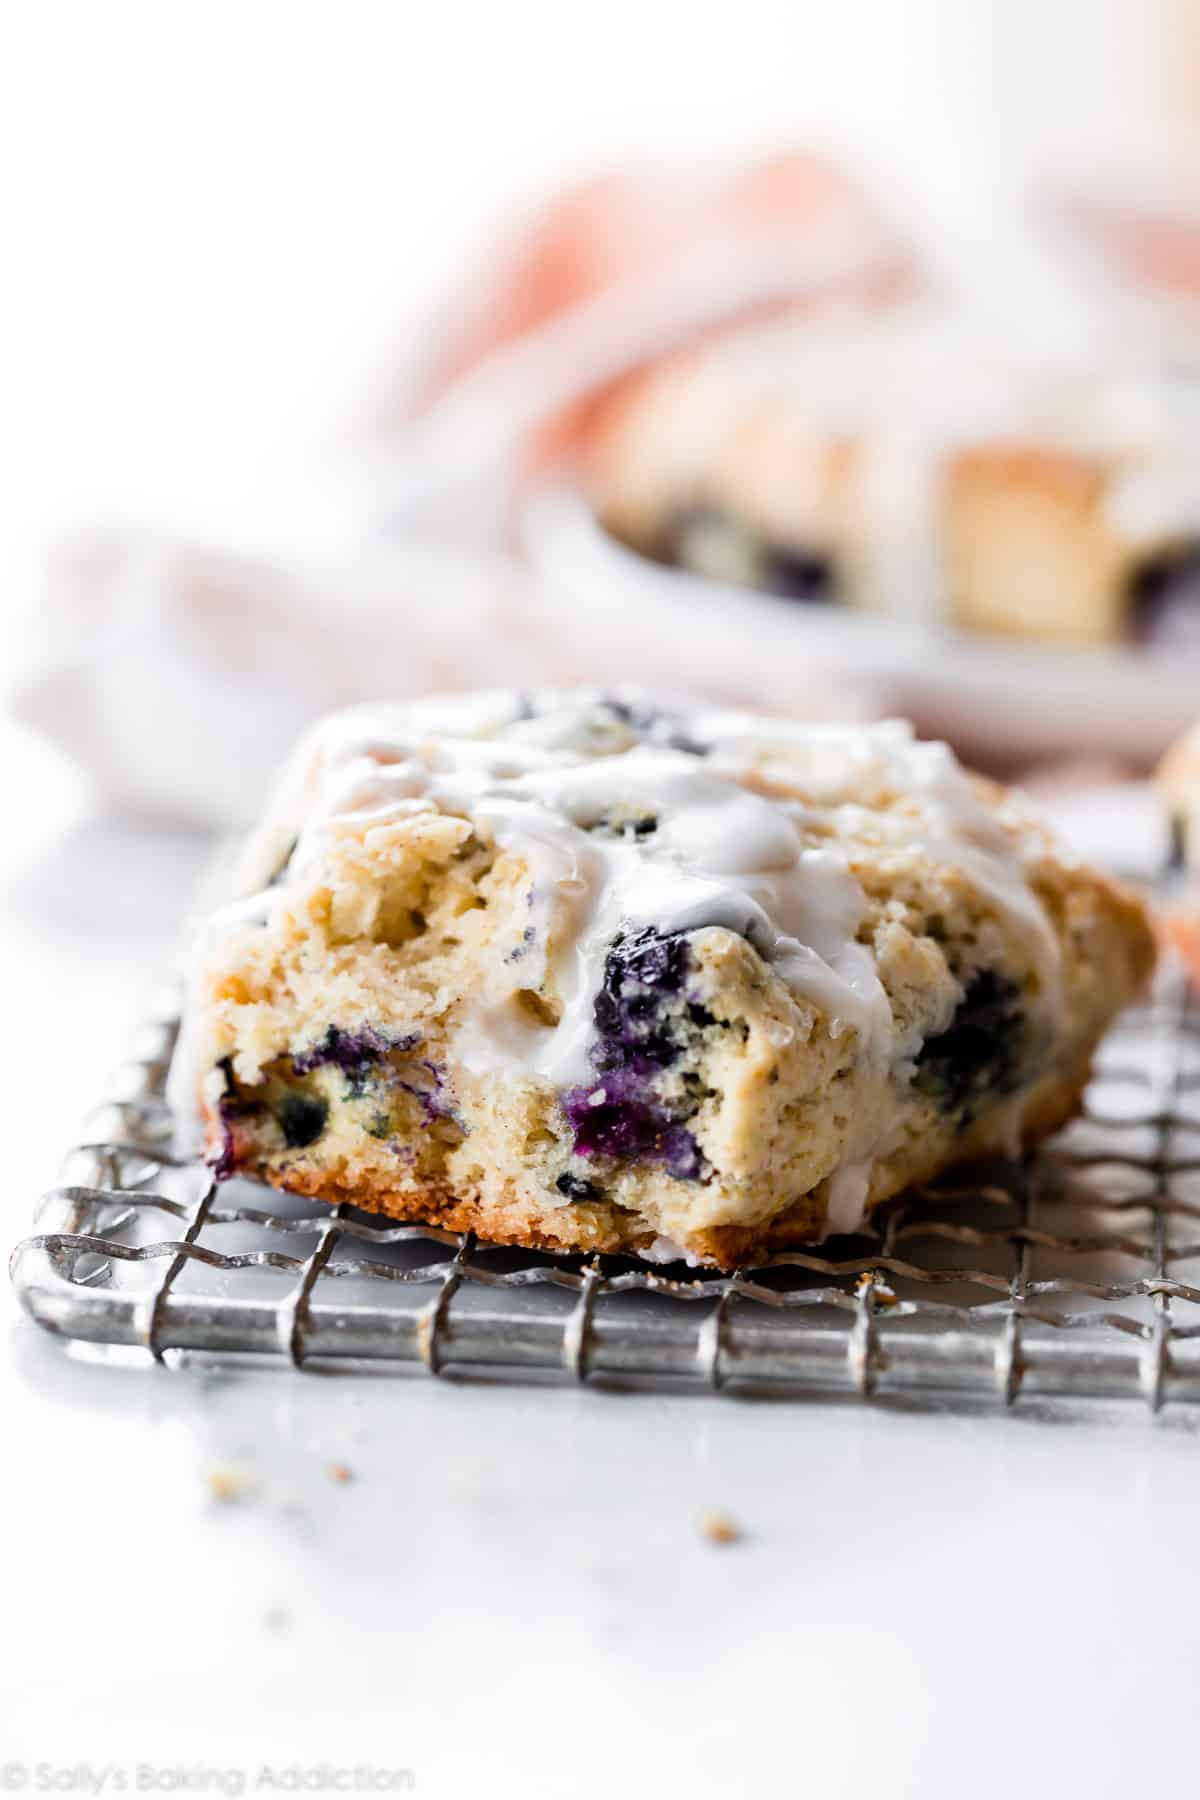
But depending on the recipe and technique, scones can be dry and sandpaper-y with flavor comparable to cardboard. They can also over-spread. My basic scone recipe promises uniquely crisp and buttery scones with crumbly corners and a soft, flaky interior.
I have several scone recipes that begin with the same basic formula. Let’s review the fundamentals so you can learn how to make the best scones. Sit back because there’s a lot to cover in this post!
What are Scones?
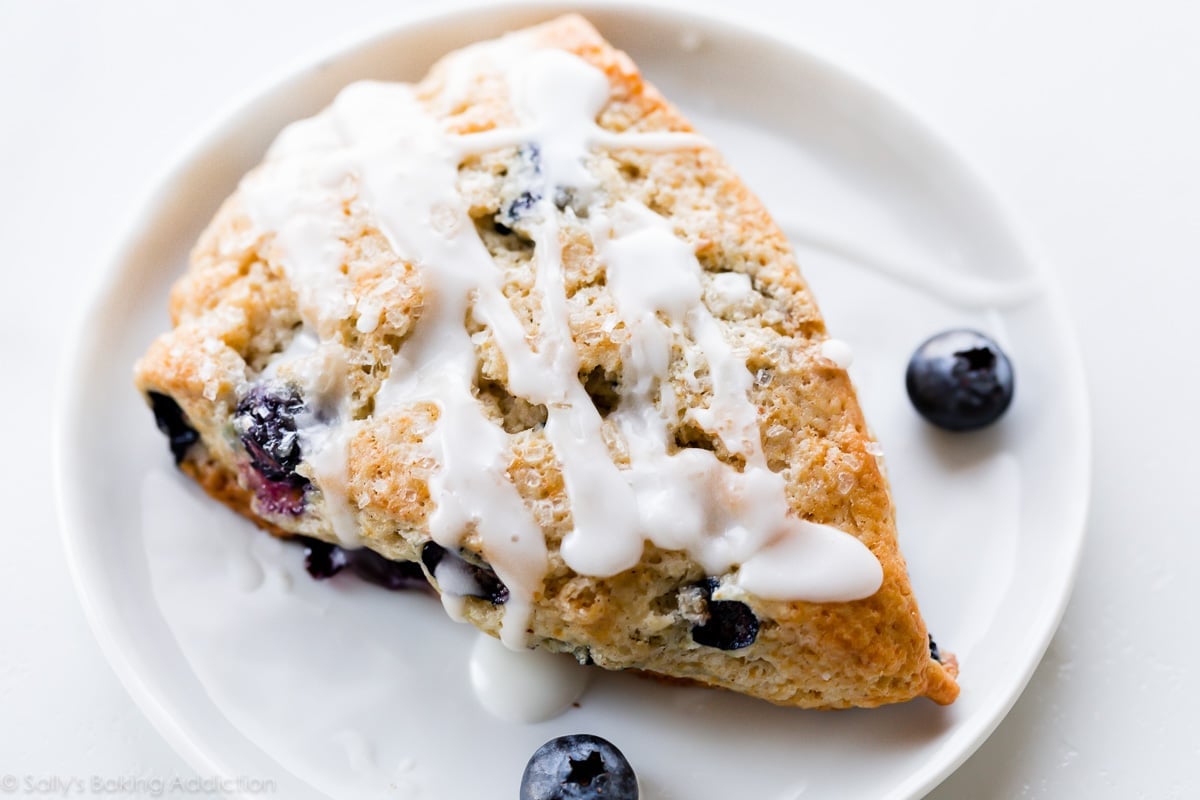
Depending where you live, the term “scone” differs. English scones are more similar to American biscuits and they’re often topped with butter, jam, or clotted cream. American scones are different, but different isn’t necessarily a bad thing! Today’s scones are sweeter, heavier, and aren’t usually topped with butter because there’s so much butter IN them. Sweetness aside, there’s still room for vanilla icing or a dusting of confectioners’ sugar on top. By the way, here’s my favorite recipe for traditional scones.
Scones are leavened with baking powder, so making them is generally quick. Blueberry scones are my favorite variety, but that quickly switches to pumpkin scones in the fall months! (Here are all my scone recipes.)
No matter which flavor you choose, these scones are:
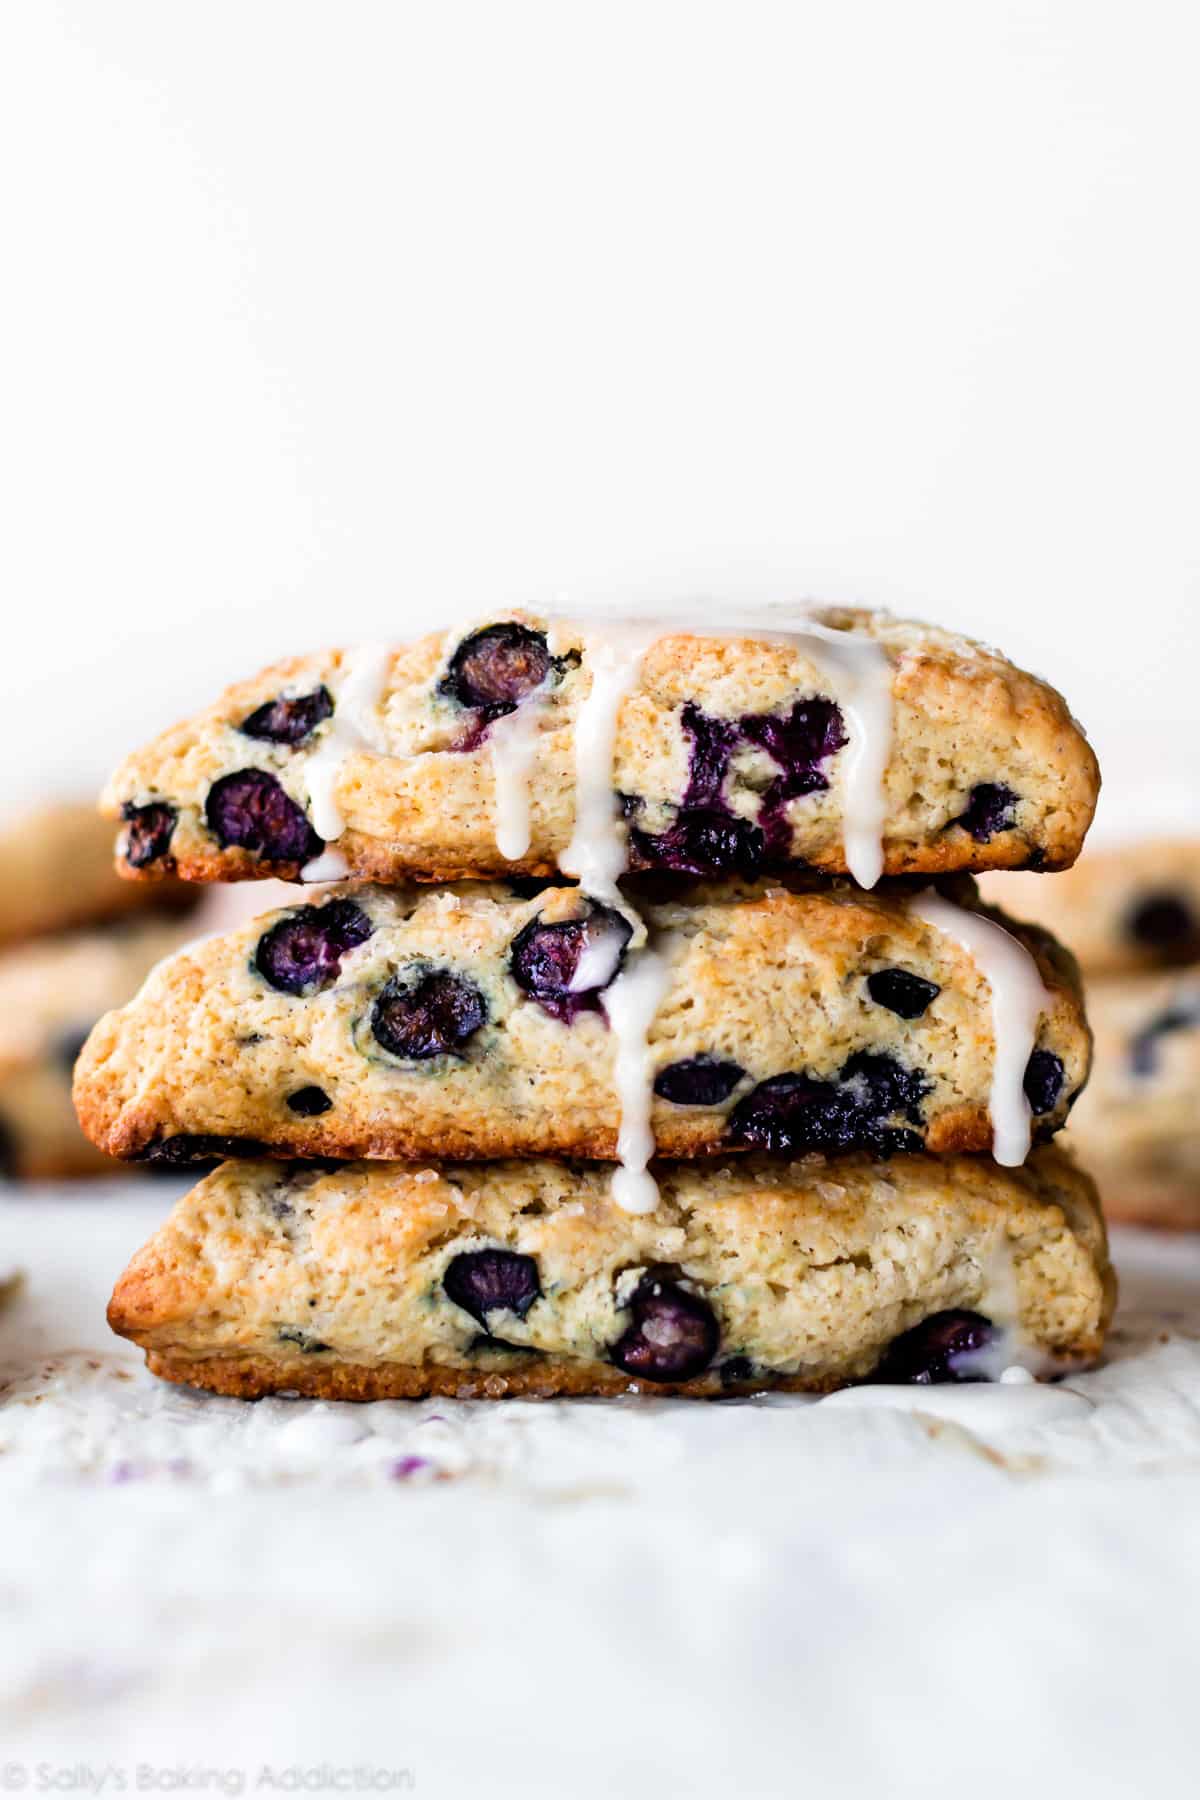
- Moist & soft inside
- Crumbly on the edges
- Buttery & flaky
- Not sandpapery 🙂
One reader, Wendy, commented: “Oh my gosh, I was so intimidated at the thought of making scones. I thought it was so much more complicated. I’ve made these scones twice already—once blueberry and once ham and cheese. SO GOOD! Thank you for an uncomplicated, fool-proof recipe! ★★★★★“
One reader, Yelena, commented: “Absolutely delicious! Easy to make, simple ingredients, and just perfect. ★★★★★“
One reader, Venessa, commented: “It’s my go-to scone recipe. They turn out moist for a scone and so very yummy. Easy to make, which I always appreciate. Thank you! ★★★★★“
One reader, Donna, commented: “This was my first attempt at making scones. The result was amazing! These scones are super easy and delicious! The perfect consistency and nice and moist. I received so many compliments! ★★★★★“
Video Tutorial: Scones
Let’s start with a video tutorial.
Only 7 Ingredients in this Basic Scone Recipe
You only need 7-9 ingredients for my master scone recipe.
- Flour: 2 cups of all-purpose flour is my standard amount, but set extra aside for the work surface and your hands.
- Sugar: I stick with around 1/2 cup of sugar for this scone dough. Feel free to slightly decrease, but keep in mind that the scone flavor and texture will slightly change. Reduce to about 2 Tablespoons for savory flavors. Brown sugar works too. However, if using brown sugar, whisk it into the wet ingredients to get out all the lumps. For example, see my caramel apple scones.
- Baking Powder: Adds lift.
- Salt: Adds flavor.
- Butter: Besides flour, butter is the main ingredient in scones. It’s responsible for flakiness, flavor, crisp edges, and rise.
- Heavy Cream or Buttermilk: For the best tasting pastries, stick with a thick liquid such as heavy cream or buttermilk. I usually use heavy cream, but if you want a slightly tangy flavor, use buttermilk. Thinner liquids change the flavor and appearance. You’ll be headed down a one way street to dry, bland, and flat scones.
- Egg: Adds flavor, lift, and structure.
- Optional: Vanilla extract adds necessary flavor to sweet scones, but skip it if you’re making savory scones. Depending on the flavor, cinnamon is another go-to ingredient.
And don’t forget about the add-ins! Scroll down to see all my favorite scone flavors.
How to Make Scones from Scratch
So now that you understand which ingredients are best, let’s MAKE SCONES!
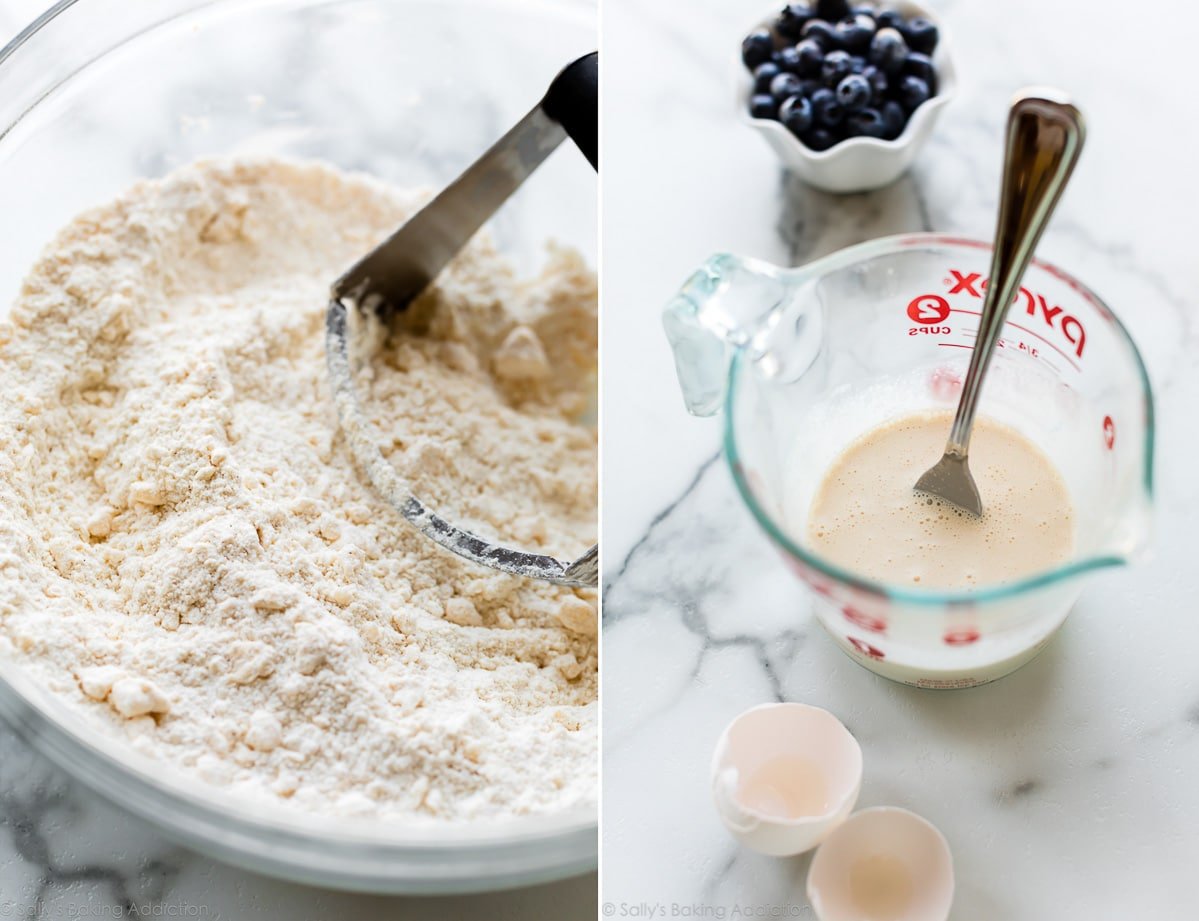
- Mix the dry ingredients together. Use a big mixing bowl because you want lots of room for the mixing process.
- Cut in the grated frozen butter. You can use a pastry cutter or 2 forks, like we do with pie crust, or your hands. A food processor works too, but it often overworks the scone dough. To avoid overly dense scones, work the dough as little as possible. Messy and crumbly is a good thing!
- Whisk the wet ingredients together.
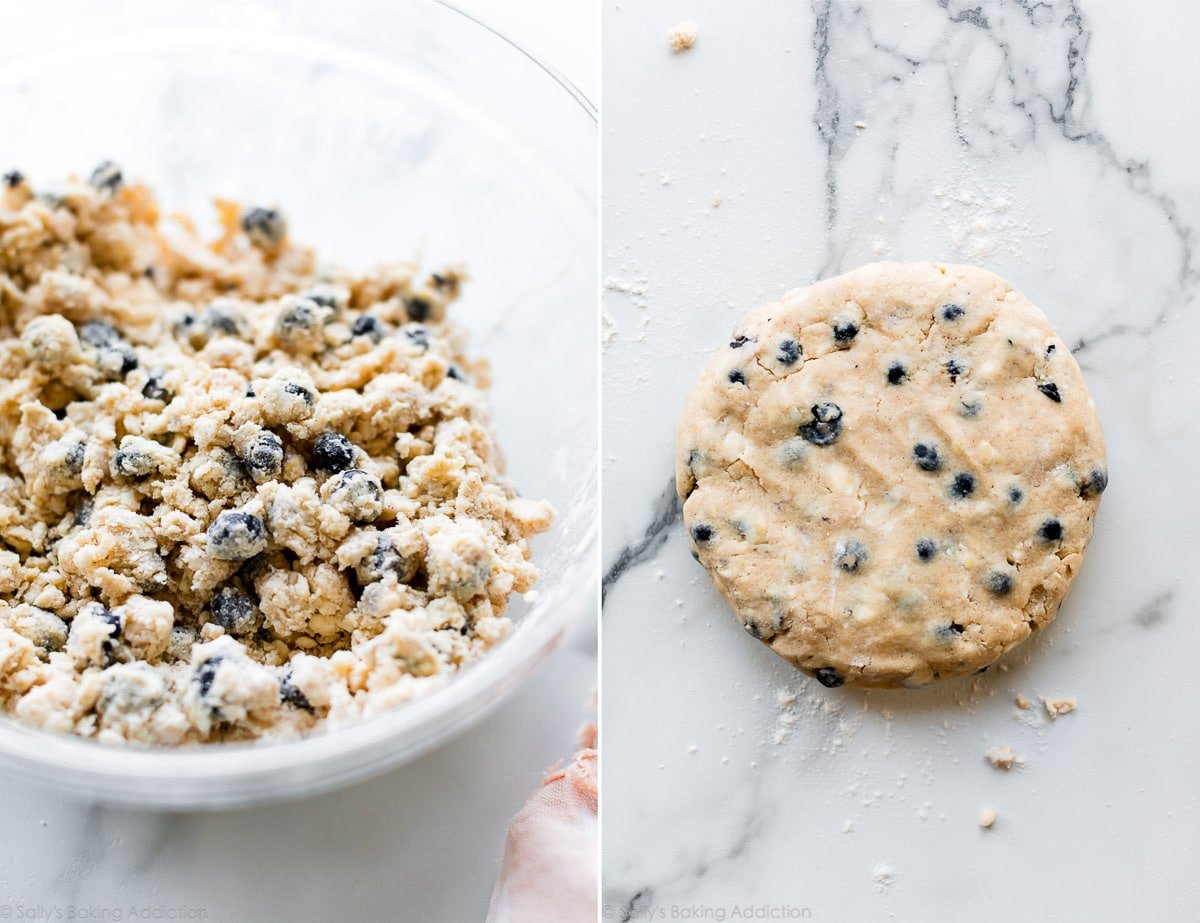
- Mix wet ingredients and dry ingredients. Mix together, then pour out onto the counter.
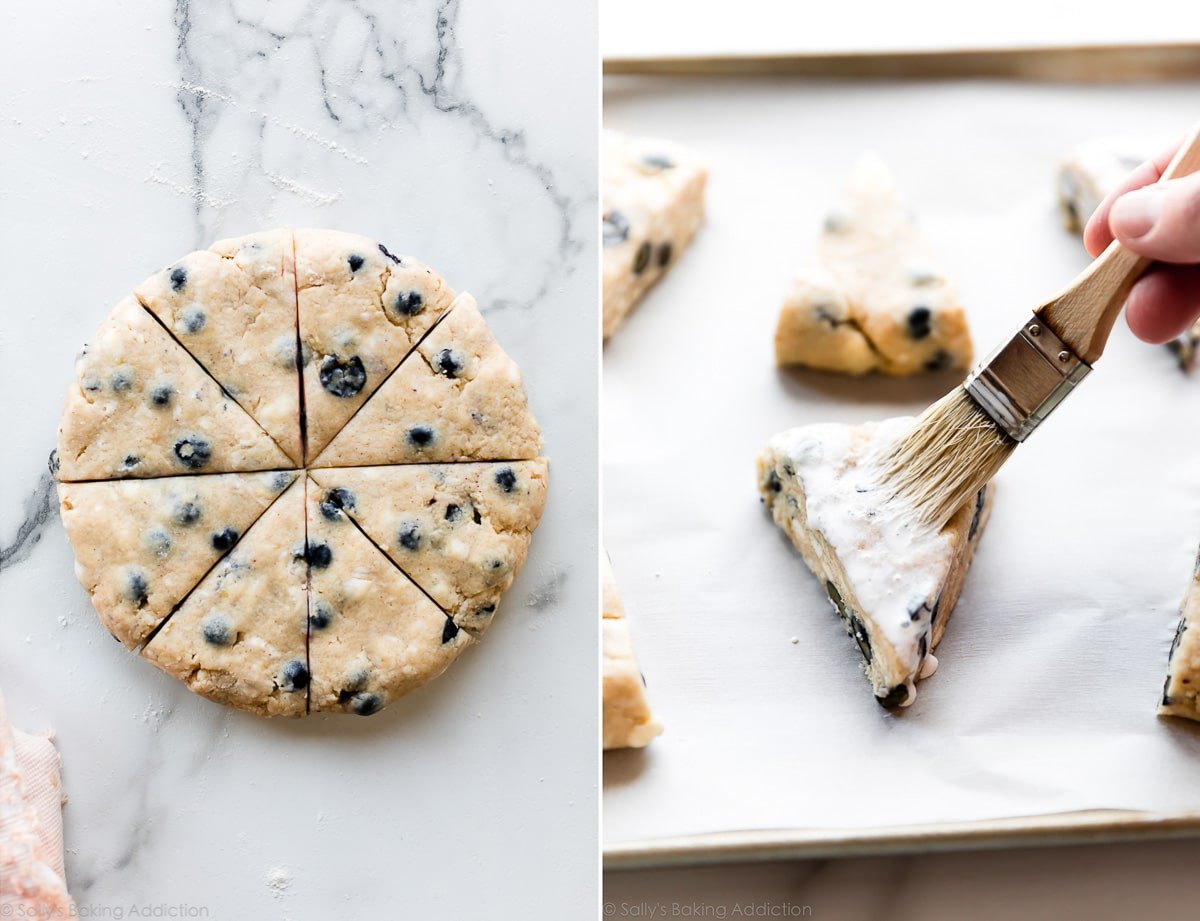
- Form into a disc and cut into wedges. Wedges are easiest, but you can make 10-12 drop scones like I do with my banana scones.
- Brush with heavy cream or buttermilk. For a golden brown, extra crisp and crumbly exterior, brush with liquid before baking. And for extra crunch, a sprinkle of coarse sugar is always ideal!
- Refrigerate for at least 15 minutes. Keep scone dough as cold as possible. To avoid over-spreading, I recommend chilling the shaped scones for at least 15 minutes in the refrigerator before baking. In fact, you can even refrigerate overnight for a quick breakfast in the morning!
- Bake until golden brown. Scones bake in a relatively hot oven for only 20-25 minutes.

Cold Ingredients & Frozen Grated Butter
Keeping scone dough as cold as possible prevents over-spreading. When scones over-spread in the oven, they lose the flaky, moist, and deliciously crumbly texture. In other words, they’re ruined. But the easiest way to avoid disaster is to use cold ingredients like cold heavy cream, egg, and butter.
But frozen grated butter is the real key to success.
Like with pie crust, work the cold butter into the dry ingredients to create crumbs. The butter/flour crumbs melt as the scones bake, releasing steam and creating air pockets. These pockets create a flaky center while keeping the edges crumbly and crisp. Refrigerated butter might melt in the dough as you work with it, but frozen butter will hold out until the oven. And the finer the pieces of cold butter, the less the scones spread and the quicker the butter mixes into the dry ingredients. Remember, you don’t want to over-work scone dough.
3 Tricks for Perfect Scones
If you take away anything from this post, let these be it!
- Heavy Cream or Buttermilk: Avoid thinner milks which yield a flatter, less flavorful scone. Canned coconut milk makes a wonderful nondairy option!
- Frozen Grated Butter: See above!
- Refrigerate Before Baking: Remember, cold dough is a successful dough. To avoid over-spreading, I recommend chilling the shaped scones for at least 15 minutes in the refrigerator before baking.
How to prevent flat scones: See #2 and #3. 🙂

How to Freeze Scones
I used to be totally against freezing scone dough. You see, the baking powder is initially activated once wet and if you hold off on baking, the scones won’t rise as much in the oven. However, the decrease in rise is so slight that it doesn’t make a noticeable difference. In fact, you can even shape this scone dough into wedges and refrigerate overnight before baking.
- Freeze Before Baking: Freeze scone dough wedges on a plate or baking sheet for 1 hour. Once relatively frozen, you can layer them in a freezer-friendly bag or container. Bake from frozen, adding a few minutes to the bake time in the recipe below. Or thaw overnight, then bake as directed.
- Freeze After Baking: Freeze the baked and cooled scones before topping with icing or confectioners’ sugar. I usually freeze in a freezer-friendly bag or container. To thaw, leave out on the counter for a few hours or overnight in the refrigerator. Warm in the microwave for 30 seconds or on a baking sheet in a 300°F (149°C) oven for 10 minutes.
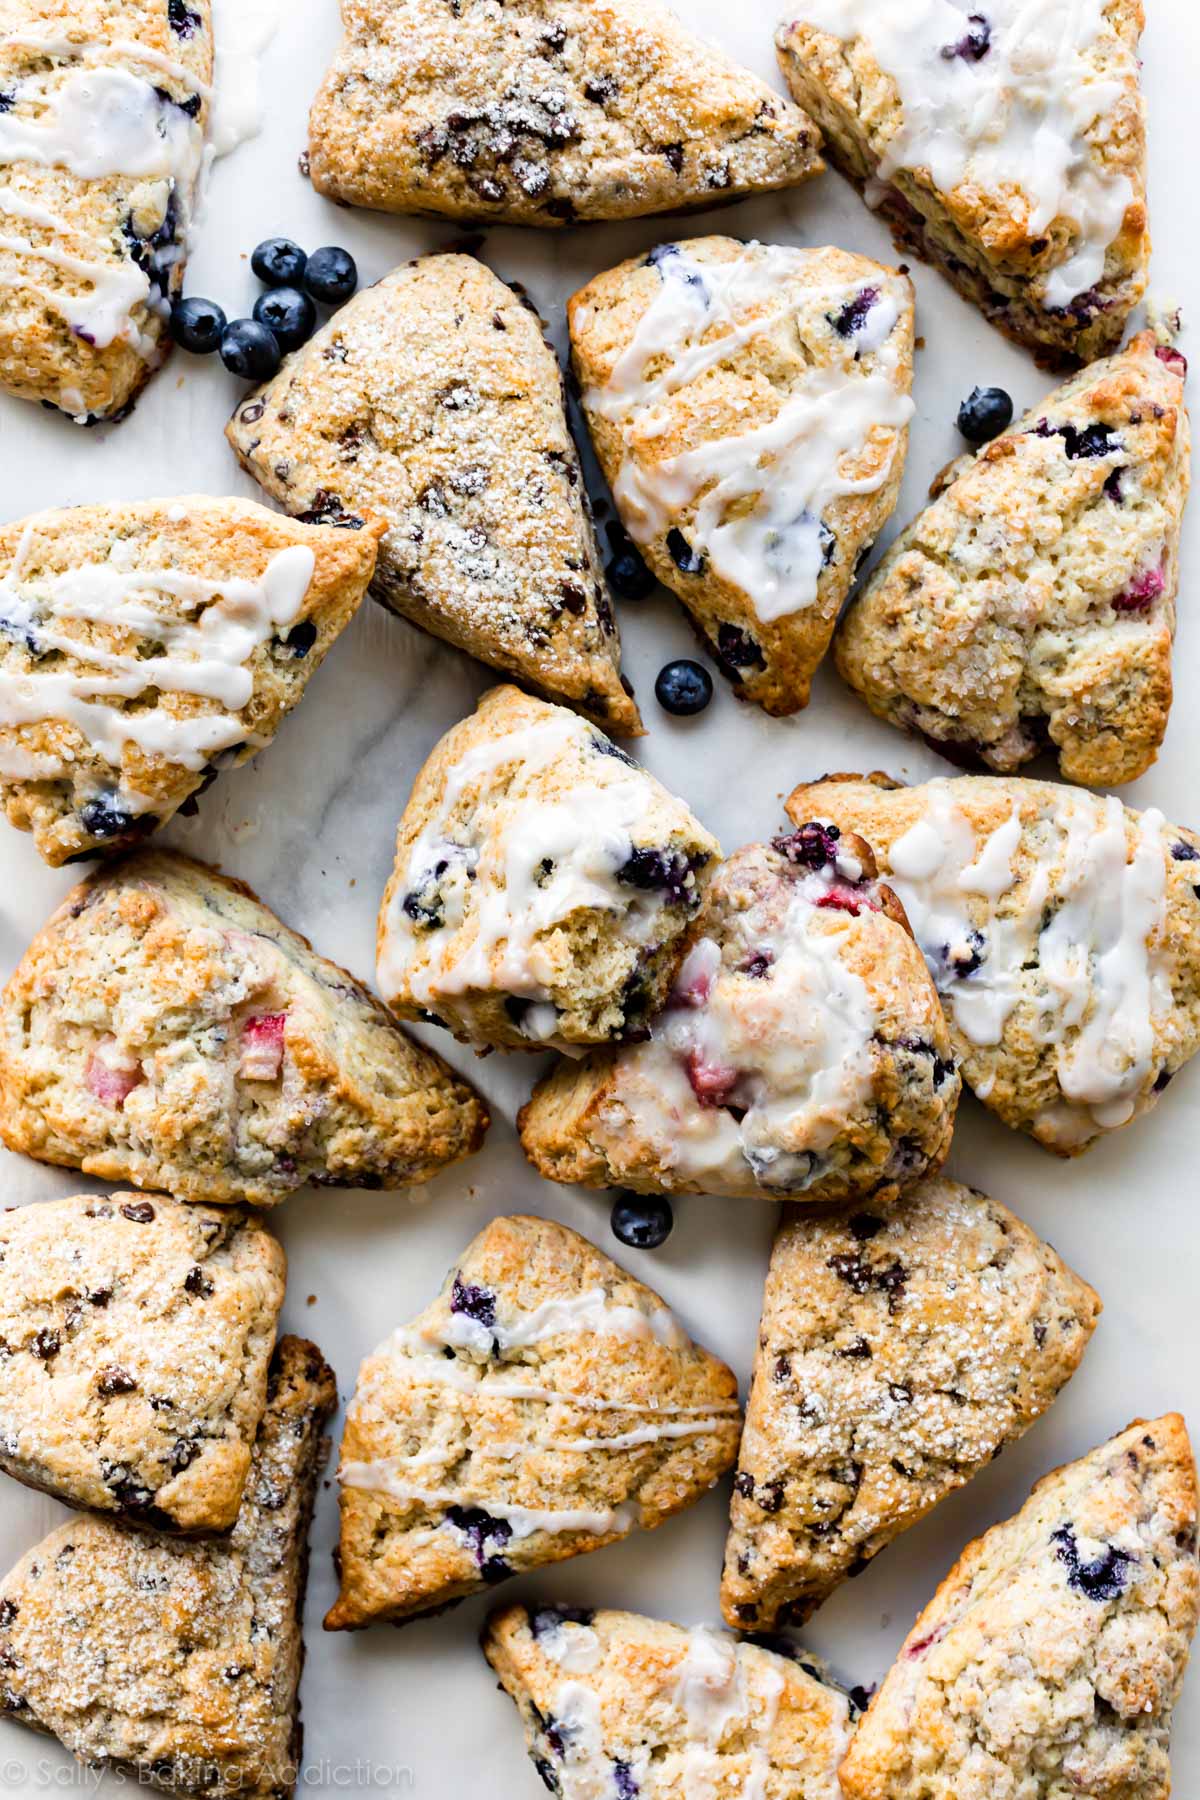
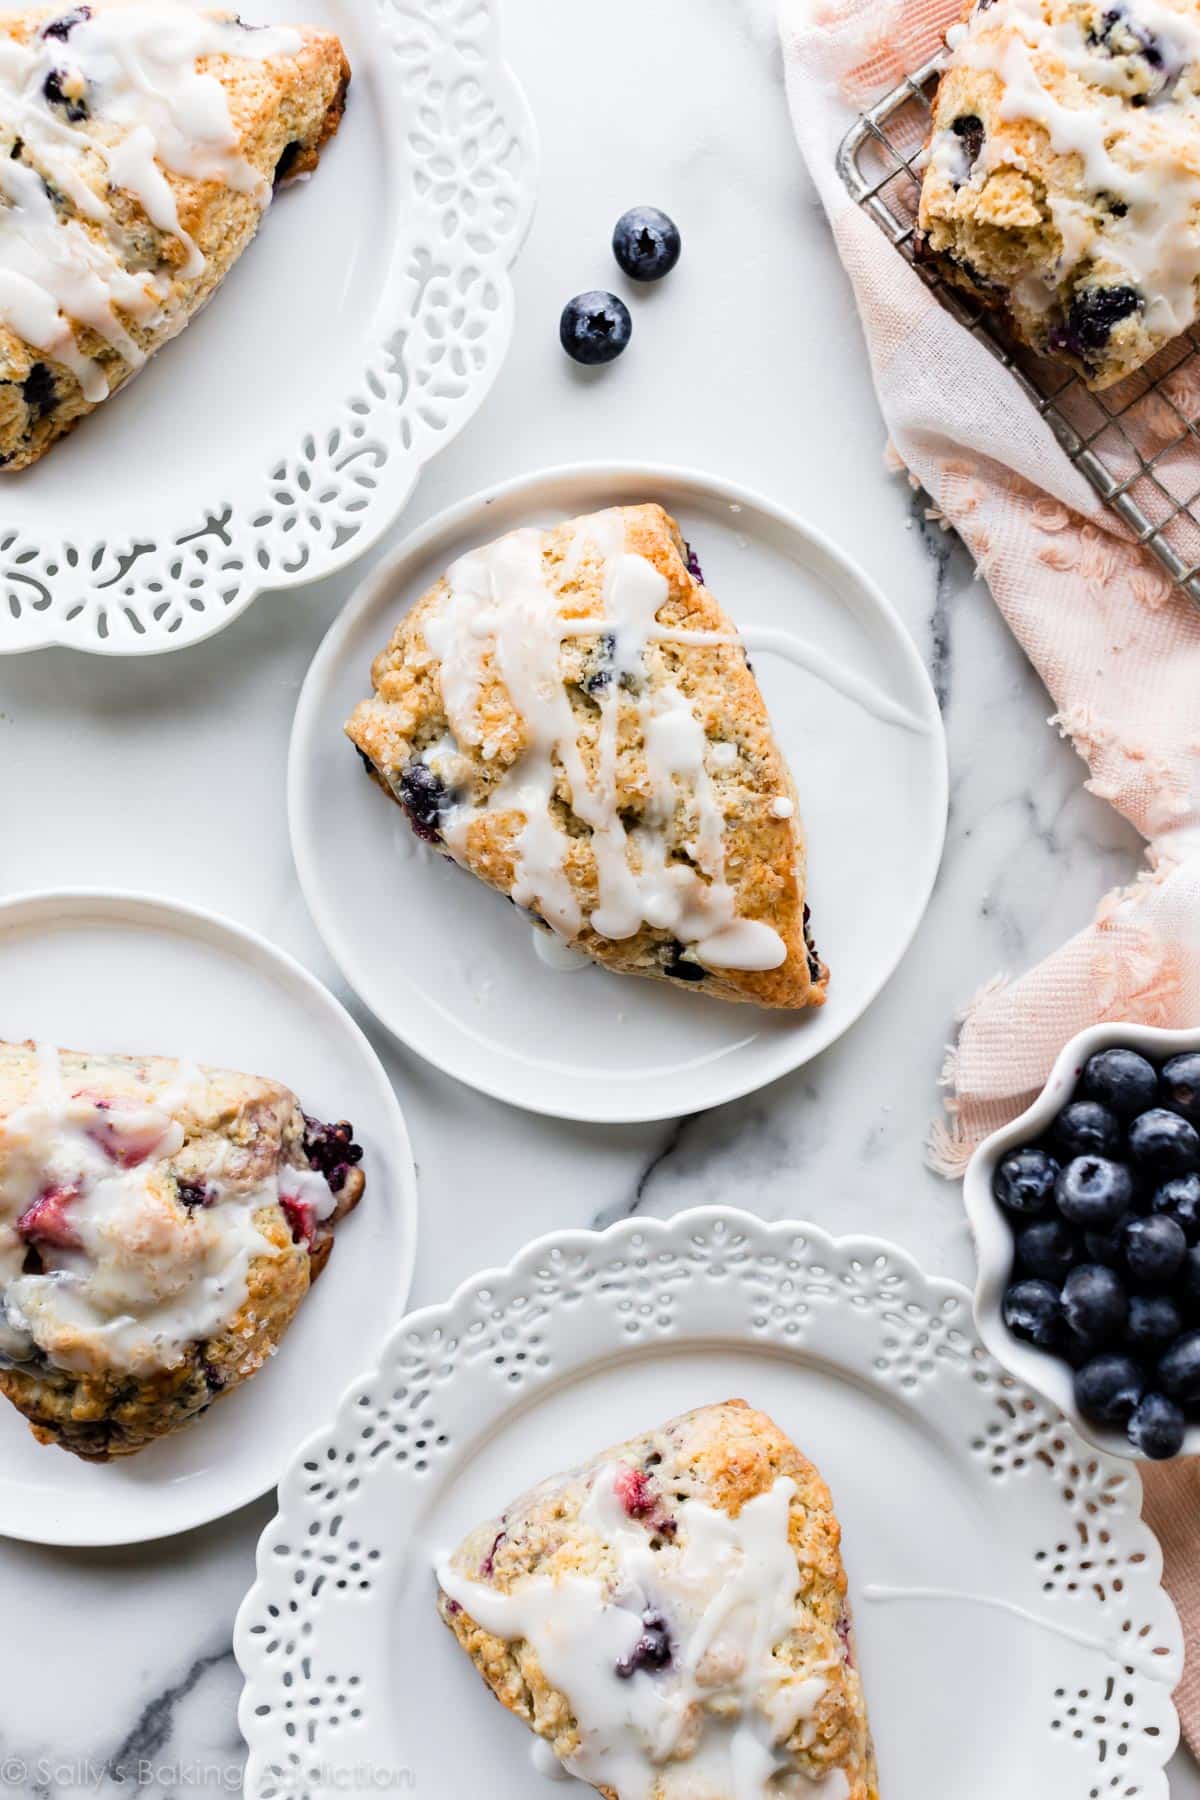
15+ Scone Flavors
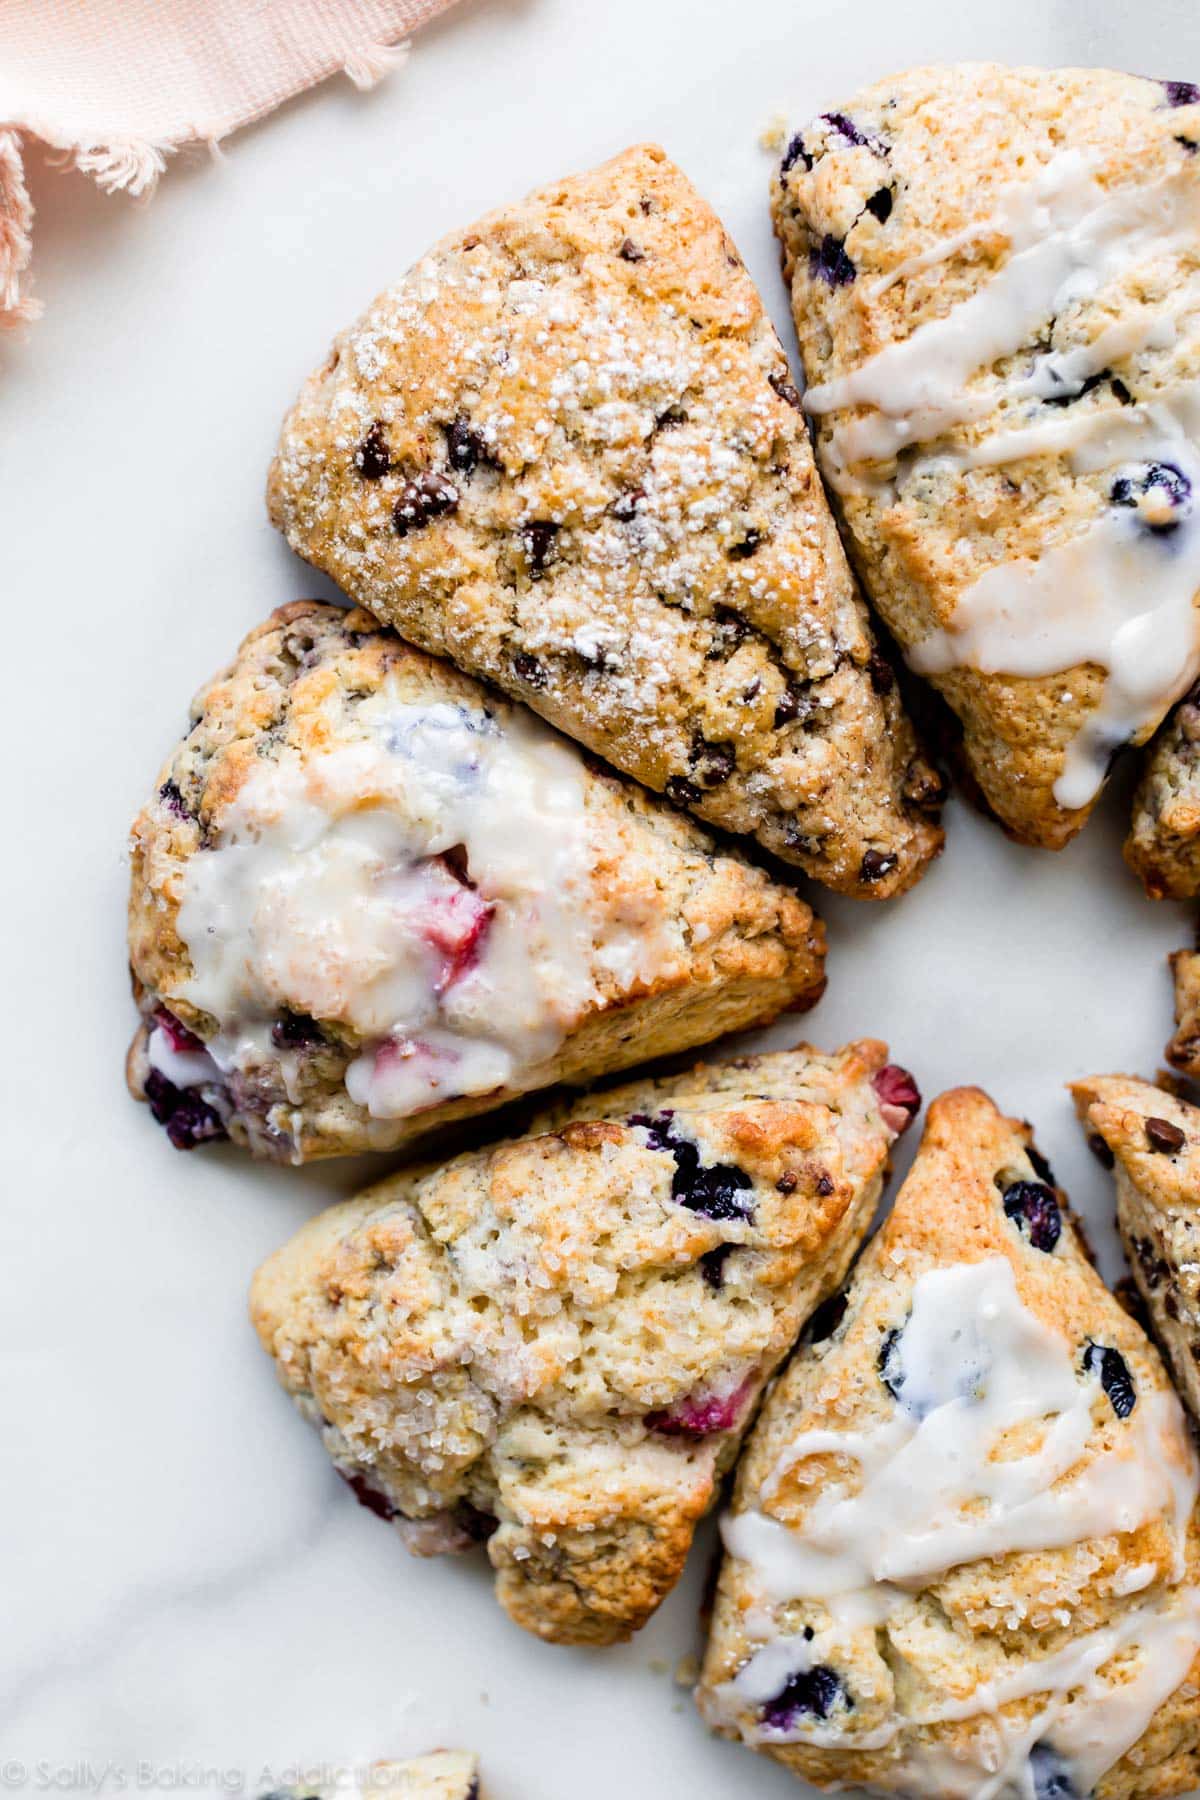
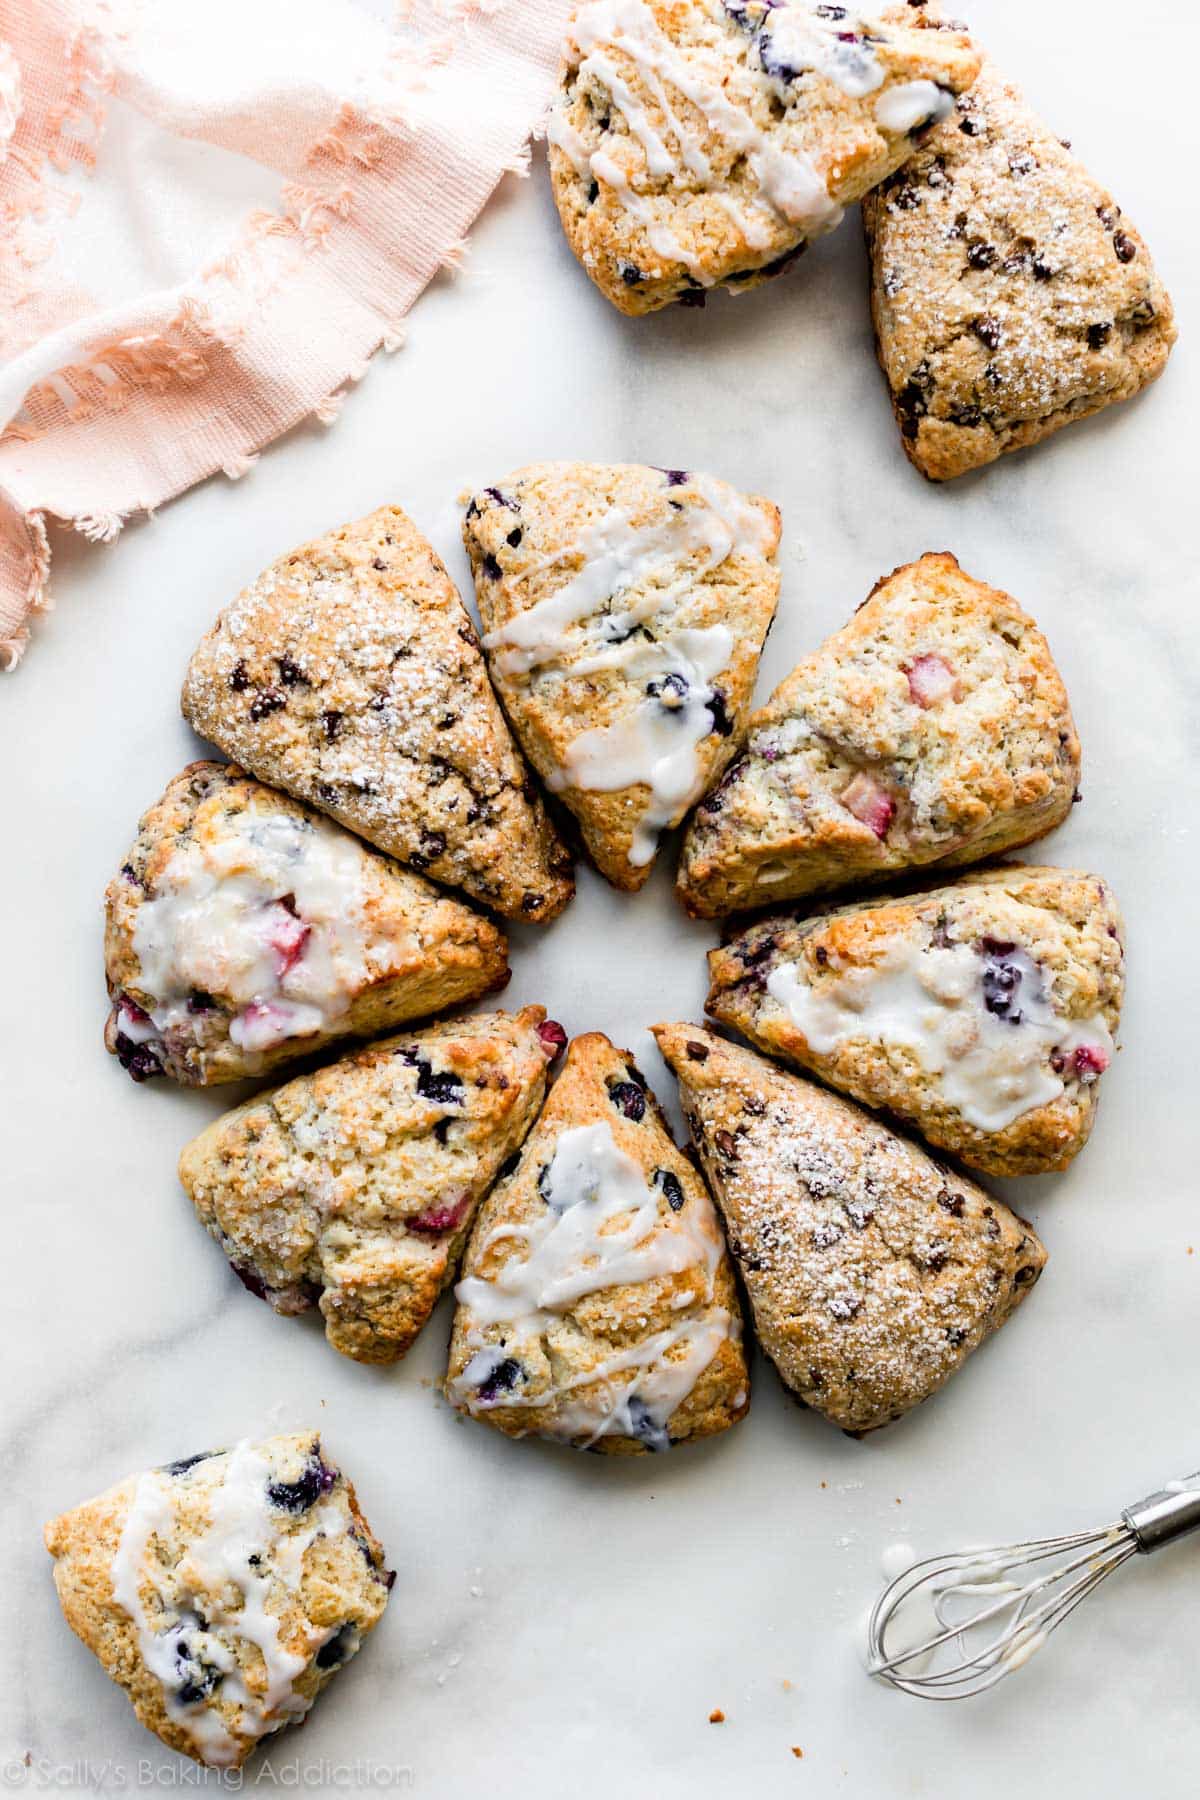
- Blueberry Scones and Chocolate Chip Scones (both pictured)
- Cranberry Orange and Pumpkin Scones
- Banana Scones and Lavender Scones
- Lemon Blueberry Scones and Sprinkle Scones
- Caramel Apple and Cinnamon Chip Scones
- Triple Chocolate Scones – they taste like brownies!
- Strawberry Lemon Poppy Seed Scones
- Ham & Cheese Scones
- Mixed Berry (pictured): Follow recipe below and add fresh or frozen mixed berries. Raspberries and blackberries burst easily, so don’t go overboard on those.
- Cherry Chocolate Chip: Follow recipe below and add 3/4 cup semi-sweet chocolate chips and 3/4 cup chopped fresh or frozen cherries.
- Raspberry Almond: Follow the recipe below and add 1/2 teaspoon of almond extract with the vanilla. After shaping the scones, gently press frozen raspberries into each, using about 1 cup total. (Avoid mixing them into the dough, as they can bleed.) Top the shaped scones with sliced almonds before baking (1/3 cup / 37g total almonds). After baking, drizzle with the raspberry icing from these mini vanilla pound cakes.
- Fresh Herb: Reduce sugar to 2 Tablespoons, leave out vanilla extract, and add 2 minced garlic cloves, 1/2 teaspoon ground black pepper, 1/2 cup chopped herbs such as rosemary, parsley, and basil. Additionally, feel free to add 1 cup shredded cheese to the dough and top with sea salt before or after baking!
Using the master recipe below as a starting point, toss in your favorite add-ins like white chocolate chips, toasted pecans, sweetened or unsweetened coconut, dried cranberries, peanut butter chips, etc. If it’s a particularly wet add-in like chopped peaches, blot them with a paper towel before adding to the dough. Top with lemon curd, raspberry sauce, or any of the suggested toppings below. Above all, have fun finding your favorite flavor!
Look At All Of Your Scones!
Feel free to email or share your recipe photos with us on social media. 🙂
Print
How to Make Perfect Scones
- Prep Time: 30 minutes
- Cook Time: 25 minutes
- Total Time: 1 hour
- Yield: 8 large or 16 small scones
- Category: Breakfast
- Method: Baking
- Cuisine: American
Description
Use this basic scone dough for any sweet scone variety. See blog post for a couple savory scone options. Feel free to increase the vanilla extract and/or add other flavor extracts such as lemon extract or coconut extract. Read through the recipe before beginning. You can skip the chilling for 15 minutes prior to baking, but I highly recommend it to prevent the scones from over-spreading.
Ingredients
- 2 cups (250g) all-purpose flour (spooned & leveled), plus more for hands and work surface
- 1/2 cup (100g) granulated sugar
- 1/2 teaspoon salt
- 2 and 1/2 teaspoons baking powder
- 1/2 cup (8 Tbsp; 113g) unsalted butter, frozen
- 1/2 cup (120ml) heavy cream or buttermilk (plus 2 Tbsp for brushing)
- 1 large egg
- 1 and 1/2 teaspoons pure vanilla extract
- 1–1.5 cups add-ins such as chocolate chips, berries, nuts, fruit, etc
- optional: coarse sugar for topping
Instructions
- Whisk flour, sugar, salt, and baking powder together in a large bowl. Grate the frozen butter using a box grater. Add it to the flour mixture and combine with a pastry cutter, two forks, or your fingers until the mixture comes together in pea-sized crumbs. See video above for a closer look at the texture. Place in the refrigerator or freezer as you mix the wet ingredients together.
- Whisk 1/2 cup heavy cream, the egg, and vanilla extract together in a small bowl. Drizzle over the flour mixture, add the add-ins, then mix together until everything appears moistened.
- To make triangle scones: Pour onto the counter and, with floured hands, work dough into a ball as best you can. Dough will be sticky. If it’s too sticky, add a little more flour. If it seems too dry, add 1-2 more Tablespoons heavy cream. Press into an 8-inch disc and, with a sharp knife or bench scraper, cut into 8 wedges. For smaller scones, press dough into two 5-inch discs and cut each into 8 wedges. To make 10-12 drop scones: Keep mixing dough in the bowl until it comes together. Drop scones, about 1/4 cup of dough each, 3 inches apart on a lined baking sheet. To make mini (petite) scones, see recipe note.
- Brush scones with remaining heavy cream and for extra crunch, sprinkle with coarse sugar. (You can do this before or after refrigerating in the next step.)
- Place scones on a plate or lined baking sheet (if your fridge has space!) and refrigerate for at least 15 minutes.
- Meanwhile, preheat oven to 400°F (204°C).
- Line a large baking sheet with parchment paper or silicone baking mat(s). If making mini or drop scones, use 2 baking sheets. After refrigerating, arrange scones 2-3 inches apart on the prepared baking sheet(s).
- Bake for 18-26 minutes or until golden brown around the edges and lightly browned on top. Larger scones take closer to 25 minutes. Remove from the oven and cool for a few minutes. Feel free to top with any of the toppings listed in the recipe Note below.
- Leftover scones keep well at room temperature for 2 days or in the refrigerator for 5 days.
Notes
- Freeze Before Baking: Freeze scone dough wedges on a plate or baking sheet for 1 hour. Once relatively frozen, you can layer them in a freezer-friendly bag or container. Bake from frozen, adding a few minutes to the bake time in the recipe below. Or thaw overnight, then bake as directed.
- Freeze After Baking: Freeze the baked and cooled scones before topping with icing or confectioners’ sugar. I usually freeze in a freezer-friendly bag or container. To thaw, leave out on the counter for a few hours or overnight in the refrigerator. Warm in the microwave for 30 seconds or on a baking sheet in a 300°F (149°C) oven for 10 minutes.
- Overnight Instructions: Prepare scones through step 4. Cover and refrigerate overnight. Continue with the recipe the following day.
- Special Tools (affiliate links): Glass Mixing Bowls | Box Grater | Pastry Cutter | Whisk | Silicone Spatula | Bench Scraper | Baking Sheet | Silicone Baking Mat or Parchment Paper | Pastry Brush
- Scone Flavors: See blog post above. If adding fruit, use fresh or frozen. If frozen, do not thaw. Peel fruits such as apples, peaches, or pears before chopping. If desired, add 1 teaspoon of cinnamon with the flour. I usually add cinnamon when making chocolate chip scones.
- Over-spreading: Start with very cold scone dough. Expect some spread, but if the scones are over-spreading as they bake, remove from the oven and press back into its triangle shape (or whatever shape) using a rubber spatula.
- Mini/Petite Scones: To make smaller scones, press dough into two 5-inch discs and cut each into 8 equal wedges. Bake for 18-20 minutes or until lightly browned.
- Optional Toppings: Vanilla icing, salted caramel, lemon icing from this iced lemon pound cake, maple icing from these banana scones, brown butter icing from these pistachio cookies, lemon curd, orange icing from these hot cross buns, raspberry icing from these mini pound cakes, dusting of confectioners’ sugar.


Reader Comments and Reviews
I made apple cinnamon scones with salted carmel sauce per your recipe. They were the most drlicious scones I have ever made. My husband gave it a 5 star, so do you.
First time I’ve made this recipe and they are perfect delicious using sultanas and raisins
Will be making them often and trying different flavours
This recipe worked out as one of the best scones I have ever made! TU
I love this recipe, especially the ham and cheese version! I love the freezing directions, however it doesn’t specify how long they can be frozen for. Do you know how long these can be frozen prior to baking before they lose taste or texture?
Hi Rae, we would freeze scone dough up to three months.
My go to scone recipe since 2019. Always perfect, most ad-ins work. I always put more on top to make them look pretty before baking. Never had problem, no time to make! I have forgotten to freeze my butter a few times and they still come out bomb!
Hi there. I’m just wondering, why are these called “scones”? They are nothing like a scone. https://www.fifteenspatulas.com/english-style-scones/ Here is a recipe for proper scones. Not my recipe, but they should look exactly like bigger biscuits, still soft inside, able to slice and add jam and clotted cream.
Hi Christina, Depending where you live, the term “scone” differs. English scones are more similar to American biscuits and they’re often topped with butter, jam, or clotted cream. American scones are different— these scones are sweeter, heavier, and aren’t usually topped with butter because there’s so much butter IN them. Would love to know if you decide to give them a try!
can you use raspberries and marscapone cheese
Hi Shirley, we haven’t tested making scones with mascarpone cheese, so unfortunately can’t offer you advice on how to incorporate it. But raspberries, yes, definitely!
I have trouble with scones looking perfect on top, but with too dark bottoms. Is the oven too hot, or rack placed incorrectly?
Hi Nancy! We recommend baking in the lower third of your oven. Using darker pans can also lead to more browning on the bottoms.
Am I misunderstanding this. A writer wrote that the bottoms of her scones were too browned, yet it was recommended to bake “in the lower third of the oven”. See below. Something doesn’t seem right. Please advise. Thank you, Bev
Nancy says:
April 2, 2025
I have trouble with scones looking perfect on top, but with too dark bottoms. Is the oven too hot, or rack placed incorrectly?
Reply
Trina @ Sally’s Baking says:
April 2, 2025
Hi Nancy! We recommend baking in the lower third of your oven. Using darker pans can also lead to more browning on the bottoms.
Hi Bev, different ovens bake differently. We usually recommend baking in the lower third of your oven. If her scones were browning too quickly on the bottoms, a different oven position may help. Hope this clears things up!
Hi ! I love this recipe and have made it tons of times. Any good egg substitute? I was thinking aquafaba since that’s all I have on hand or plain Greek yogurt?
Hi Aminata, we haven’t tested these scones with any egg substitutes, but let us know if you do any experimenting.
This is now my go to scone recipe and use it weekly. I previously used the famous lady’s recipe but it was hit and miss with the results. This recipe is similar but always seems to work well with the various berry variations I have tried. My favourite is lemon cranberry. (zest and a few drops of lemon oil so not to add too much more liquid) I always use frozen fruit as well so it keeps the dough cold. I also use the food processor to incorporate the butter and dry ingredients then do the remaining in a bowl with great results. Dont over mix ! Great recipe for both beginners and experienced bakers.
So glad you love this recipe!
Inedible. Had to throw them out. I don’t know what I did differently than the 800+ other people, but It was a disappointing experience.
Hi Liz, could you give more feedback about what made them inedible? I wonder if an ingredient was accidentally mis-measured or left out?
Hi Liz,
I am also very surprised to hear this. I have made these so many times and they always turn out great. I wonder if you missed something in the recipe or if you over bake them (they don’t get super brown) they can be a little dry but easily fixed with jam or clotted cream.
I encourage you to try them again.
I almost never leave comments but this was a delicious surprise. I used this basic recipe (gf flour) and added currants, pecans and cinnamon for my first try. I mixed the liquids and put them in the refrigerator. Then the solids and lastly grated the butter, refrigerating for 10 minutes. I did find that grating frozen butter is not fun! Next time i’ll try the cuisinart. But these came out pretty close to PERFECT! If anything they were a bit flakier than i’d like but thank you for such a well researched and delicious recipe!
Turned out amazing! Have always liked these recipes! This will be a keeper for sure in my house.
This sconce recipe and the outcome is amazing! I’m not a baker, just a lover of good/great food. I’m based in Thailand with little to no access to great (but common American/Canadian/European) treats/desserts. Try to find a decent sconce, cannoli, tart, pie, bread or…well you get the point. So, when a craving for a home style dessert or recipe clicks, I have to roll up the sleeves and make it happen.
Omgosh, I was so intimidated at the thought of making scones. I thought it was so much more complicated. I’ve made these scones twice already – once blueberry, the other ham & cheese. SOOOO GOOD! Thank you for an uncomplicated, foolproof recipe!
PS: I used a silicone mat on top of the cookie sheet and bottoms were perfect!
Mine keep coming out cakey on the outside and not at all crisp! What am I doing wrong? I used lemon juice and frozen blueberries as my flavoring/add-ins. Is that my problem?
Hi Lucy, these scones should be buttery and flaky, more dense than cakey. If your dough is too sticky, add a little more flour next time. Thank you so much for giving these scones a try!
Absolutely delicious!!!! Easy to make, simple ingredients, and just perfect.
I tried this recipe gluten free (1 to 1 flour) and it turned out absolutely amazing! You were totally right, leagues better than any scone I’ve had in a coffee shop.
These came out. Great. Thanks for the recipe. How many calories in one of these scones?
Hi Lynn, we’re so glad you enjoyed the scones! We don’t usually include nutrition information as it can vary between different brands of the same ingredients. Plus, many recipes have ingredient substitutions or optional ingredients listed. However, there are many handy online calculators where you can plug in and customize your exact ingredients/brands. Readers have found this one especially helpful: https://www.verywellfit.com/recipe-nutrition-analyzer-4157076
Hi Sally
I would love to make your scone recipe.
I have 1 question. The recipe calls for either heavy cream or buttermilk. The buttermilk I usually buy (Kate’s) is less than 1% milk fat. Can this be used interchangeably with heavy cream?
Thanks
Hi Ellen, we’ve had success using low fat buttermilk in these scones before.
Question for ya! I just tried making these, followed the recipe exactly, baked 8 large scones with chocolate chips at 400° for only 18 minutes and they burnt to a crisp. Has this ever happened? I would love to give these another go.
Hi Kaitlyn, does your oven run hotter than it reads? Or was your oven rack too close to the heating element? For next time, you can certainly try reducing the bake time and temperature a bit, and you could even try moving the pan a rack further from the heating element. Just keep a close eye on them!
I believe the poster (Kaitlyn) should buy an oven thermometer to test the temperature of the oven. It clearly seems it is not as stated on the dial. Possibly the oven might even need professional service.
My scones also burned on the bottom, so I’m going to move them away from the heating element and drop the temp to 375. (My oven is the correct temp, I have a thermometer, and I’m using a light sheet pan). Fingers crossed!
Can I use this base to make savory scones?
Absolutely!
What is the shelf life of frozen scone dough?
Thanks!
Hi Mary, we would freeze scone dough up to three months.
DELICIOUS! The bottoms got a bit brown (likely because I used a dark pan and my oven temp is in increments of 5 so I baked at 205C) BUT the tops and center were perfect. Currently prepping another batch and I think I will bake at 200C for longer and see if that helps! Amazing with strawberry jam and a cup of lady grey tea!
I have been making this recipe for years and it is just the best. thank you for sharing <3
I made these twice and while they’re absolutely delicious the bottoms keep getting overdone. I’m baking them on parchment in a 400 degree oven (even tried 385) and the bottoms start to burn at 8 minutes but they’re still not done in the middle. They were done by 14 minutes. I made the smaller version.
Any idea what I’m doing wrong? I’m going to try to bake again tonight with a 375 degree oven.
Hi Christina, Dark metal sheets typically over-bake bottoms and thin flimsy cookie sheets = burnt bottoms. You can also try moving your pan to a different position in your oven – away from the heat source, or turning your oven down a bit. Hopefully this helps if you try these again — thanks so much for giving these scones a try!
Just threw out my other recipe for Irish soda bread, per husband’s request. This won Hands Down!
I only added 1-1/2 cups walnuts and used no more flour than the 2 cups. Even used imperial margarine, chilled,Dumped the dough on a breadboard and used the pancake turner to move and cut. Slid the pieces on greased cooky sheet, froze while oven heated, baked 20 minutes. Wow!
They looked beautiful but the dough could have been a lot more flavorful. I added almond extract to the icing which was excellent. Next time I’ll up the extract in the dough. My husband loved them I liked them.
I have used the recipe many times and never been disappointed. Instead of vanilla extract I tried PC Black Label (hello from Canada) Fiori di Sicilia extract. It is a combo of vanilla and citrus and worked beautifully with blueberry scones. Highly recommend!!!
I made these for the first time today, and they turned out great! I used 1/4 tsp of baking soda and 1/2 tsp of cream of tater substituted for 1 tsp of baking powder because I don’t have any, and they rose well.