

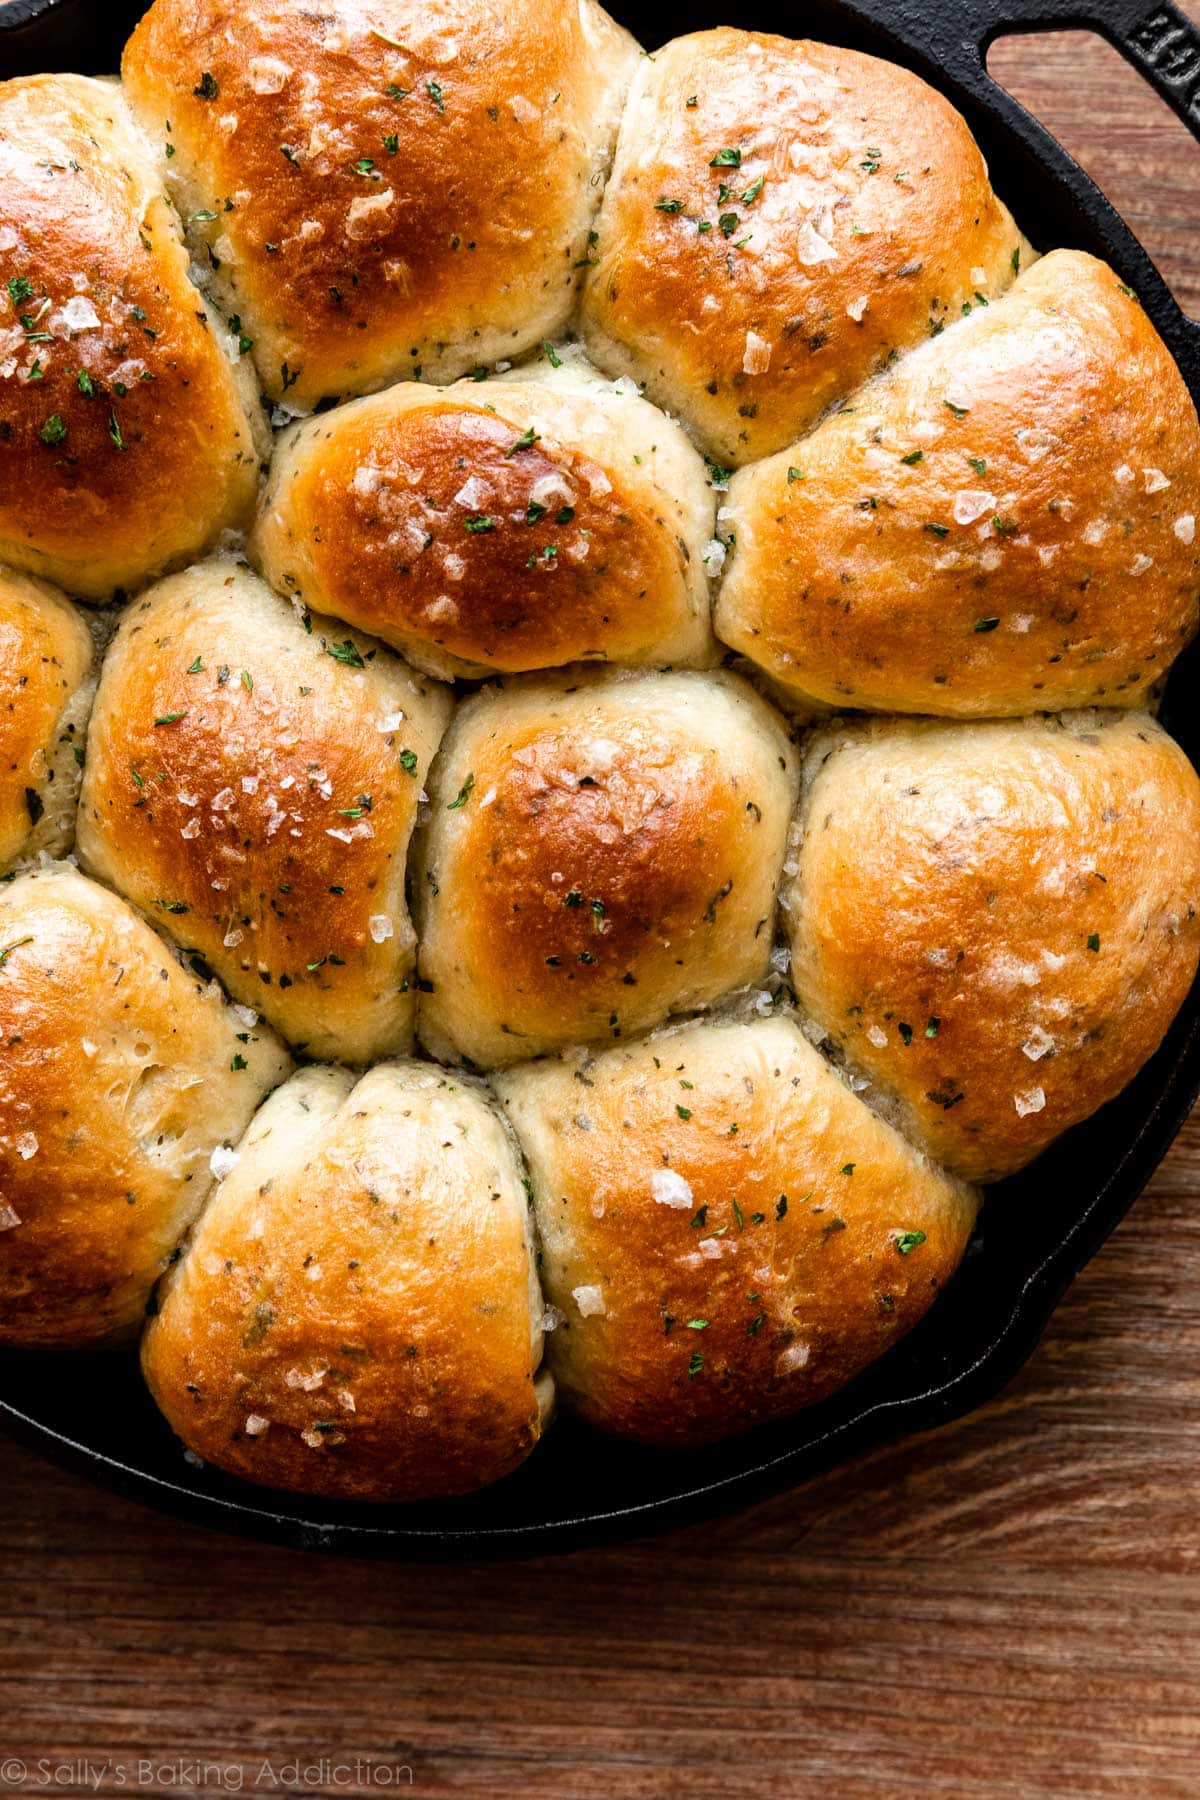
If you’re looking for a flavorful upgrade to ordinary dinner rolls, try these sea salt & herb skillet rolls. Infused with rosemary, basil, parsley, and garlic powder and topped with melted butter and flaky sea salt, each bite is as aromatic as it is delectable. They certainly steal all the attention from the main dish on the table! You can bake these soft and flaky rolls in an oven-safe skillet, but they’re just as tasty in a regular 9×13-inch baking dish.
I originally published this recipe in 2016 and have since added new photos and more success tips.
There’s no arguing that homemade bread is delicious, but adding plenty of herbs, garlic powder, sea salt, and a brush of melted butter transforms ordinary bread into a flavorful indulgence. Let me show you how to make them so you can experience this BREAD BLISS too!
One reader, Heather, commented: “These are insanely delicious! I ended up using fresh herbs and mixed/kneaded by hand. They turned out amazing… soft, chewy, flavorful, large, and perfect. My husband, who is normally pretty quiet about food, couldn’t stop saying how good these are. I have a feeling I’ll be making these often! Thanks so much for the recipe! ★★★★★”
Another reader, Melissa, commented: “Best rolls ever! We had these for Easter lunch and could not stop eating them!! They are so tender and delicious. Do not hesitate to try these rolls. You will not regret it! ★★★★★”
Tell Me About These Sea Salt & Herb Skillet Rolls
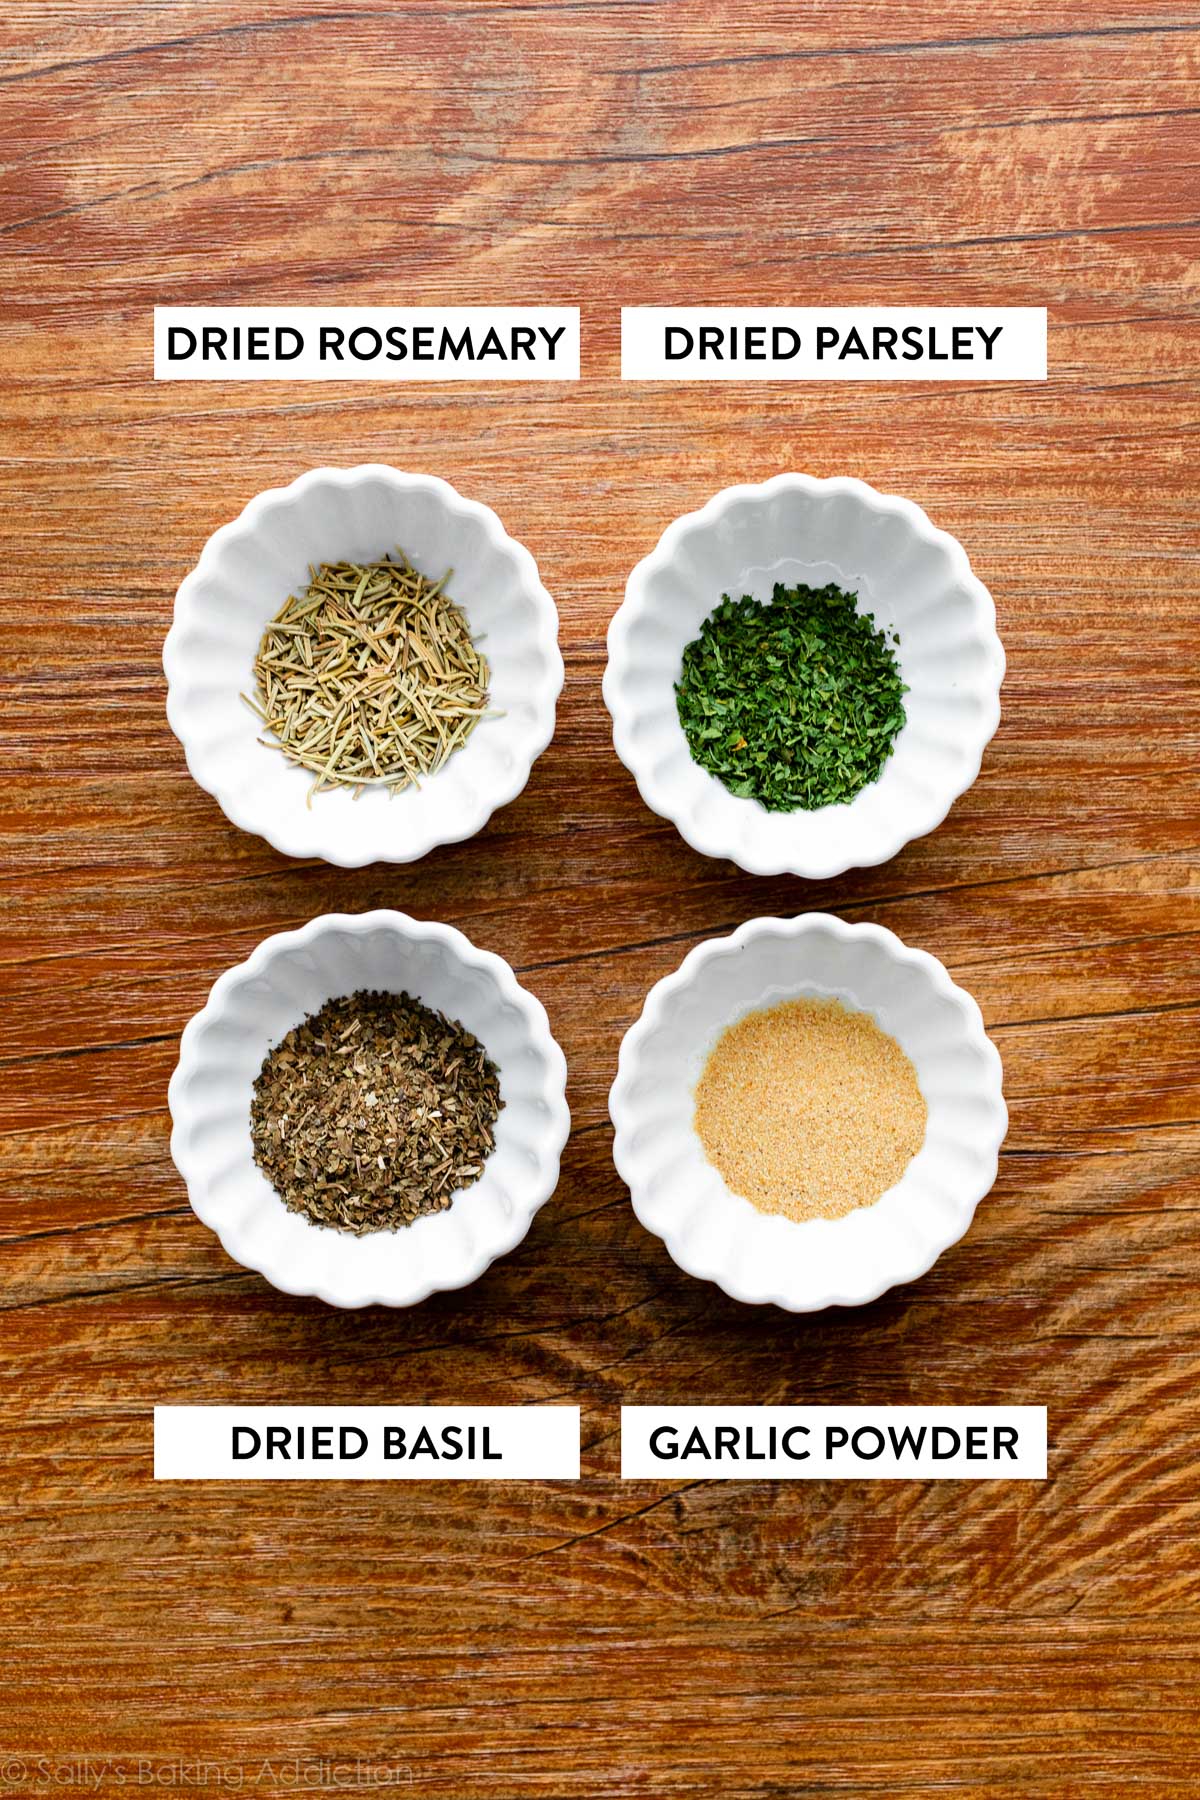
- Flavor: Enjoy rosemary, parsley, basil, and garlic all at once in a buttery roll with sea salt on top. This recipe has a range of some of the BEST flavors around. If you love the garlic, salt, and herb in this recipe, try this rosemary garlic pull apart bread or olive bread next—two favorites!
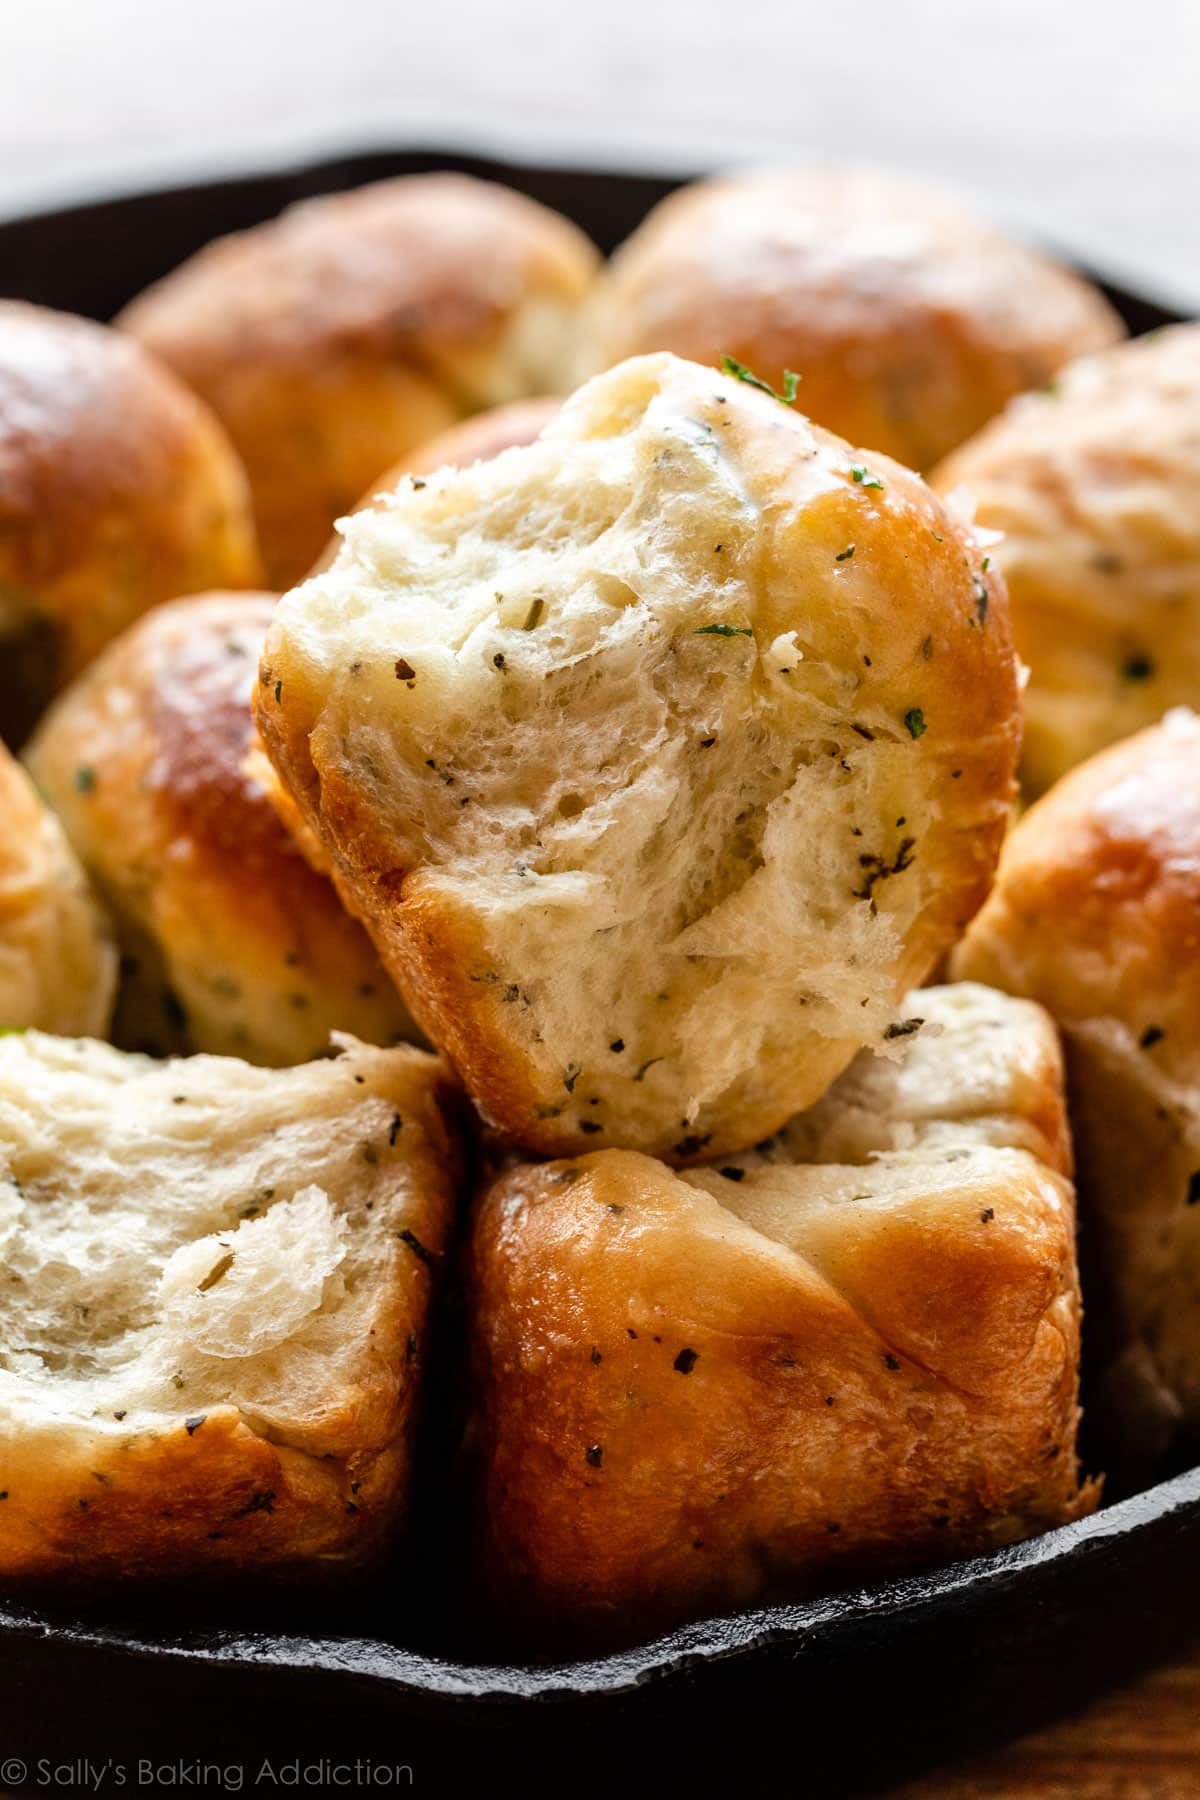
- Texture: In addition to the elevated flavor, the rolls have a wonderfully satisfying texture. Chewy edges seal in a soft and flaky roll and if you bake them in a cast iron skillet, the bottoms have a slight crisp. Don’t forget a little crunch on top from coarse or flaked sea salt. So much to love!
- Ease: Homemade bread or rolls can seem intimidating, but the recipe below is packed with thorough details so you can be confident in the kitchen. And if you’re new to baking with yeast, review my Baking with Yeast Guide.
- Time: Making rolls from scratch certainly takes time and they can be an afterthought when you’re preparing an entire meal. But after 1 taste of these homemade sea salt & herb rolls—you’ll realize they’re worth it. Set aside at least 3-4 hours from start to finish, but keep in mind most of that time is hands off as the dough rises. And you can get started ahead of time. See overnight instructions below.
Key Steps in This Recipe
- Making the dough. The dough comes together with basic kitchen ingredients including milk, yeast, sugar, egg, butter, salt, dried herbs, garlic powder, and flour. The sugar feeds the yeast and tenderizes the dough. You only need 2 Tablespoons of sugar. You can use all-purpose flour or bread flour in this recipe. All-purpose flour is convenient for most, but bread flour produces chewier dinner rolls.
- Kneading the dough. You can knead the dough with a mixer or with your hands.
- 1st rise. The dough rises in about 1-2 hours in a relatively warm environment.
- Shaping the rolls. Form the rolls into balls as if you were making regular dinner rolls. This dough recipe makes slightly fewer rolls.
- 2nd rise. Let the shaped rolls rise until puffy which takes up to 1 hour.
- Baking. Bake until the rolls are golden brown, around 25 minutes.
- Topping. Brush melted butter on warm rolls and top with sea salt.
You can use a paddle attachment or a dough hook to make this dough. You can also make the dough by hand, but it requires a bit of arm muscle. After the dough comes together in the mixing bowl, it’s time to knead. You can simply continue beating the dough with the mixer for this step or you can knead the dough by hand.
If you’re interested, I provide further detail about kneading in my How to Knead Dough video tutorial. My Baking with Yeast Guide is also a wonderful resource for all bread beginners!
Any 10-12 inch oven-safe skillet or 9×13-inch baking pan is fine. This is the cast iron skillet I use, and I highly recommend it. It’s inexpensive, comes pre-seasoned, works on all types of cooktops, heats evenly, and is made to last a lifetime. (Not sponsored, just a true pan fan!)
This 10.25-inch-diameter, 2-inch-deep size is what I use for skillet turkey pot pie, frittata, honey skillet cornbread, bruschetta chicken, cornmeal cake, biscuits, my Dutch baby pancake recipe, asiago-crusted skillet bread, and more. Talk about a useful pan to have in the kitchen!
Absolutely. I usually use garlic powder, dried rosemary, dried parsley, and dried basil because I have each on hand regularly. However, you can substitute with fresh minced garlic and fresh herbs instead. See recipe details below.
Process in Photos: Sea Salt & Herb Skillet Rolls
When you get started, use these helpful photos as your guide.
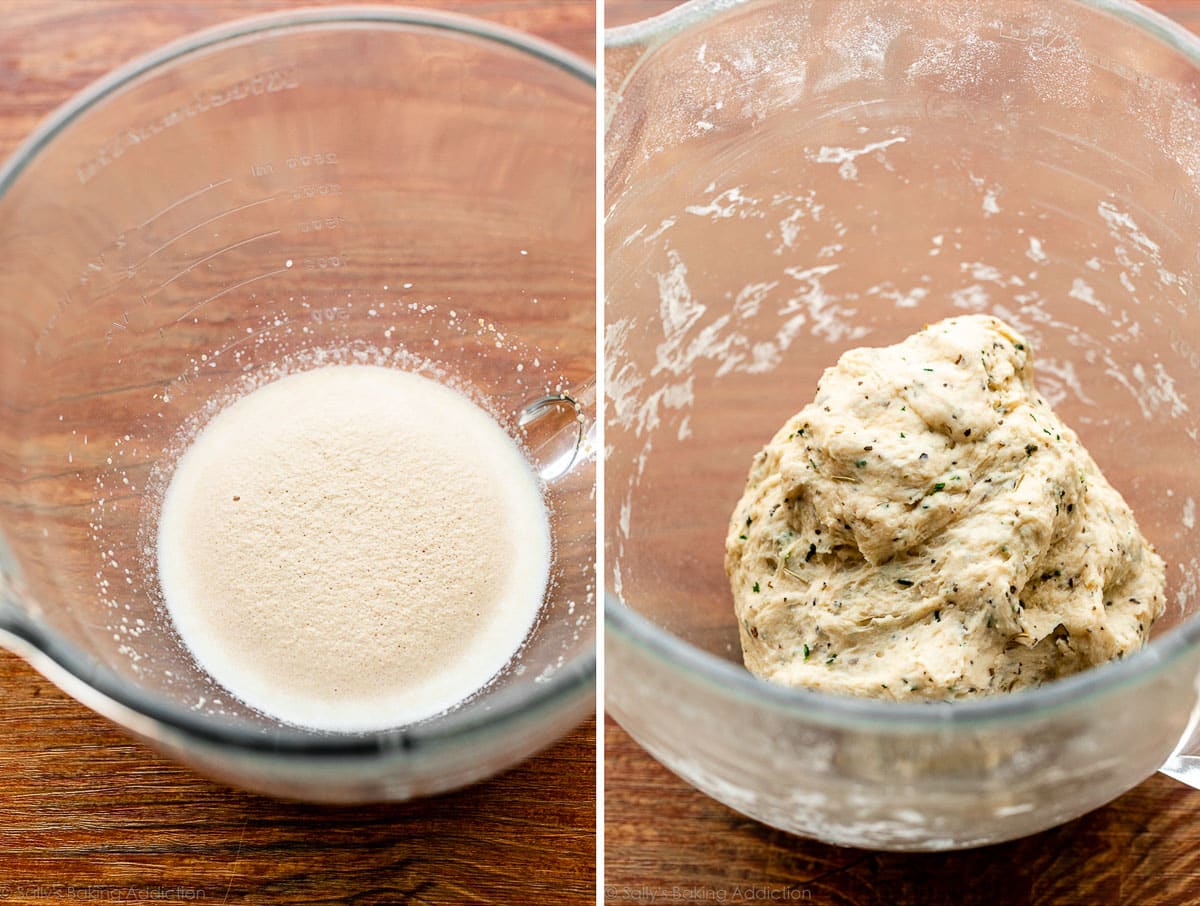
Combine warm milk, yeast, and 1 Tablespoon sugar together in your mixing bowl. Cover and let the mixture sit for a few moments until foamy on top. In this step you are proofing the yeast to ensure it’s active (and not dead and/or expired). NOTE: I do this same step even if using instant yeast. It’s not always necessary as most yeast available these days is already active, but it takes just a few minutes and doesn’t hurt.
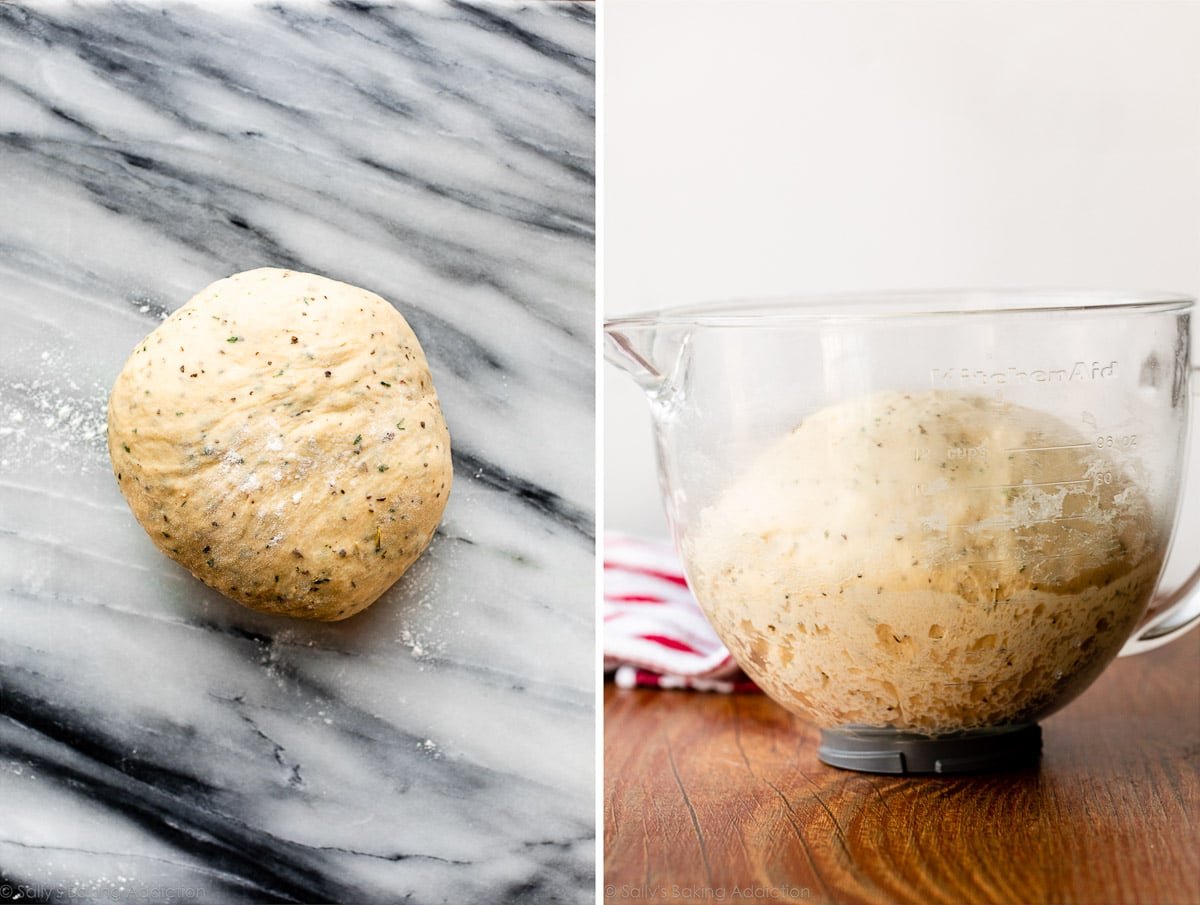
After the dough comes together, it will be soft and slightly sticky.
Knead the dough, using my How to Knead Dough video tutorial as necessary for visuals and extra help. After kneading, let the dough rise until doubled in size.
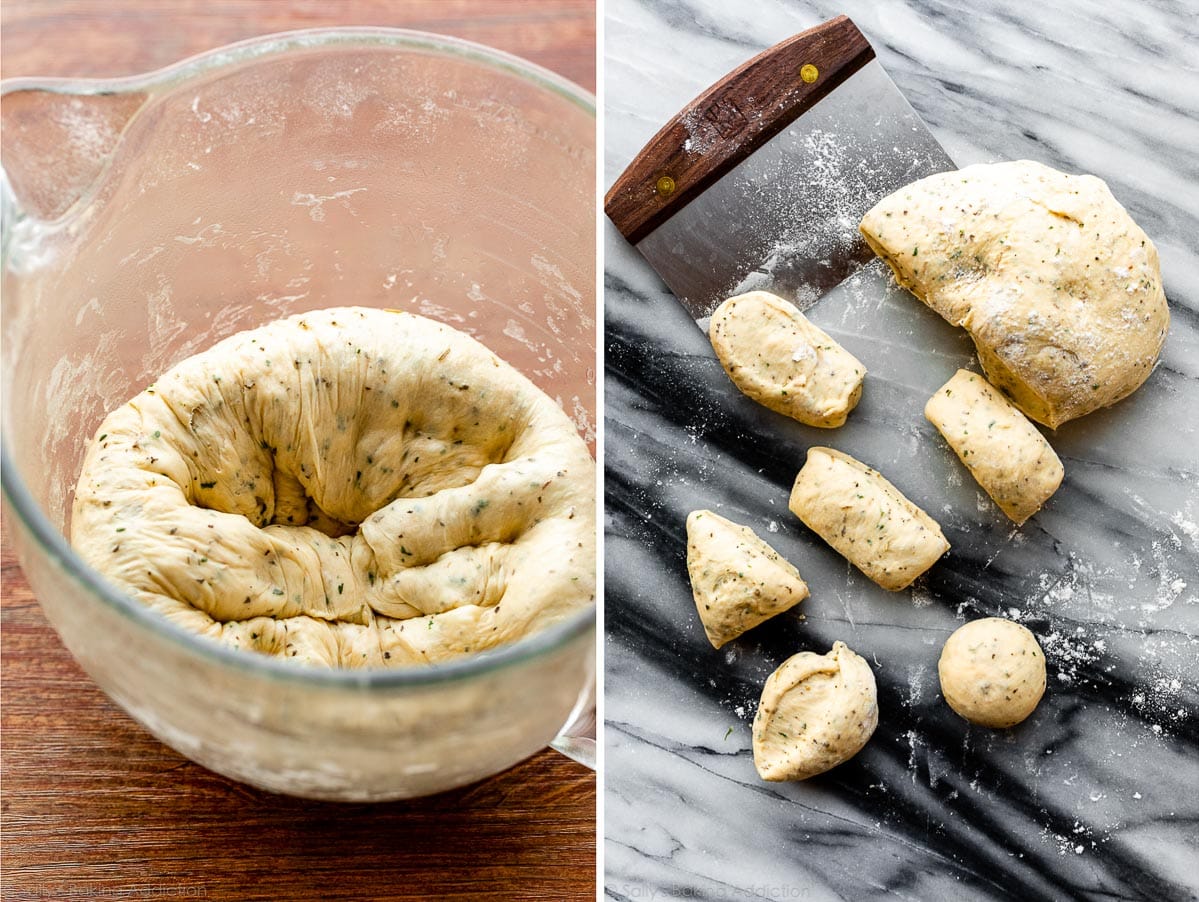
Punch it down to release the air and divide into 12 equal pieces. Shape into balls.
Arrange in your desired baking pan (I always use this 10.25 inch skillet). Let the rolls rise until puffy.
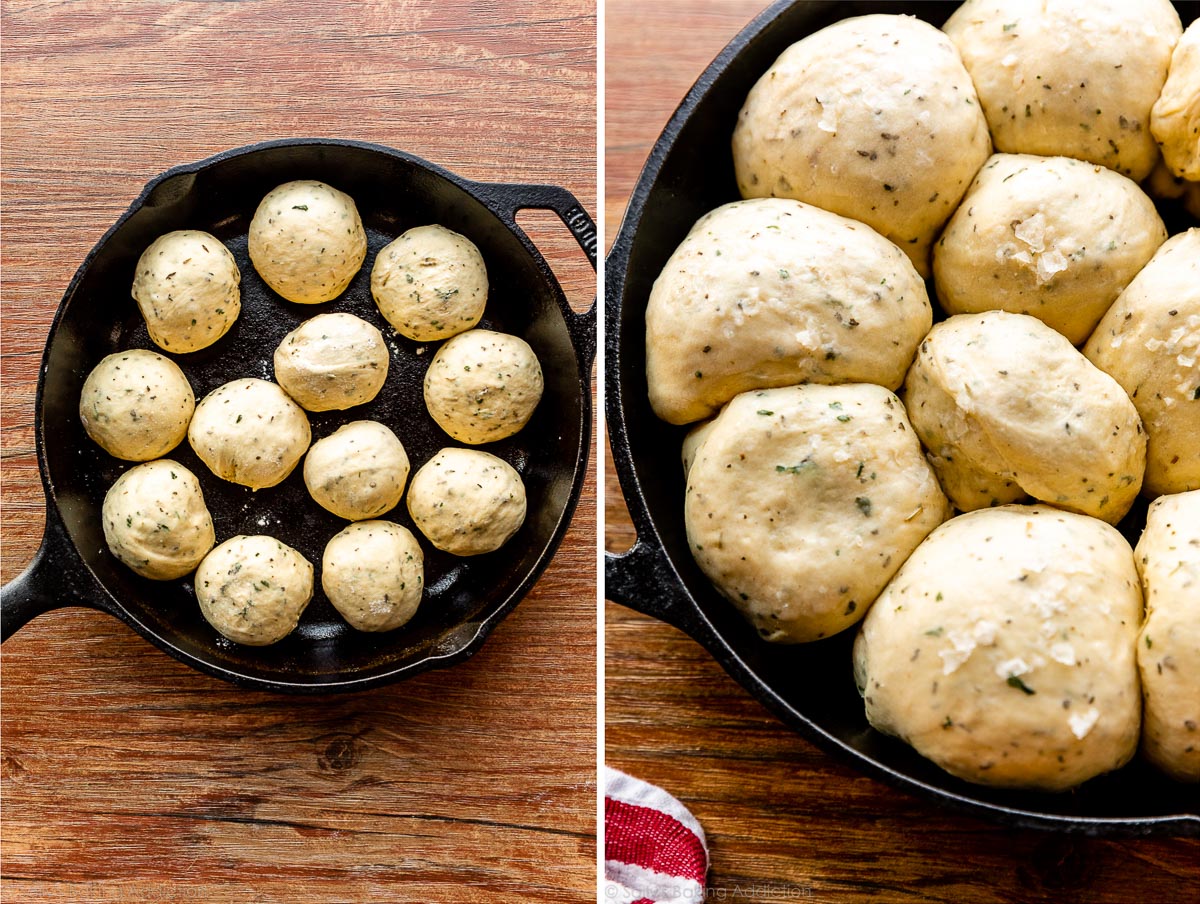
And then it’s time to bake.
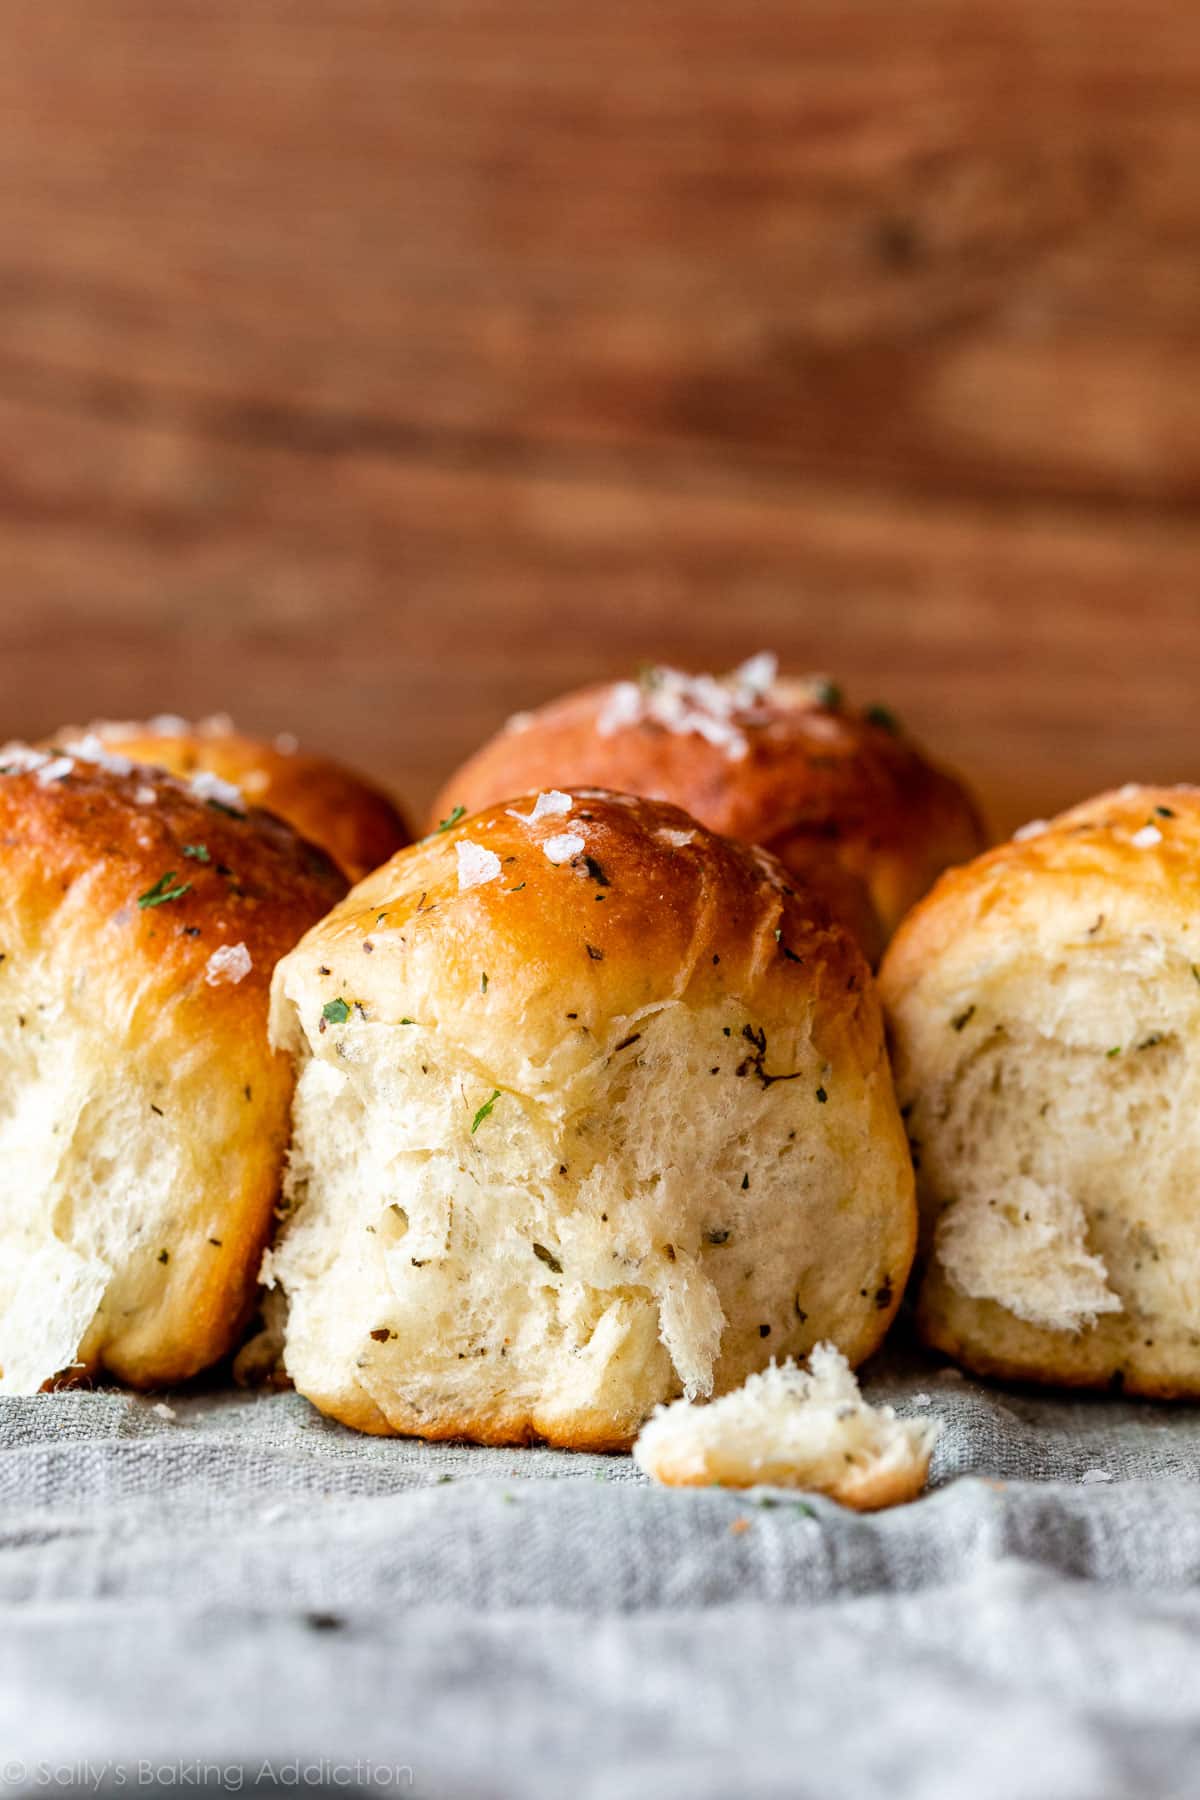
Finish with Melted Butter & Sea Salt
The herb rolls are done when they’re golden brown… and when your kitchen smells like an herb garden. Brush warm rolls with melted butter and finish with sea salt. If you’re ever shopping online for sea salt and need a recommendation, I use and love Maldon flaky sea salt or this coarse sea salt from Whole Foods.
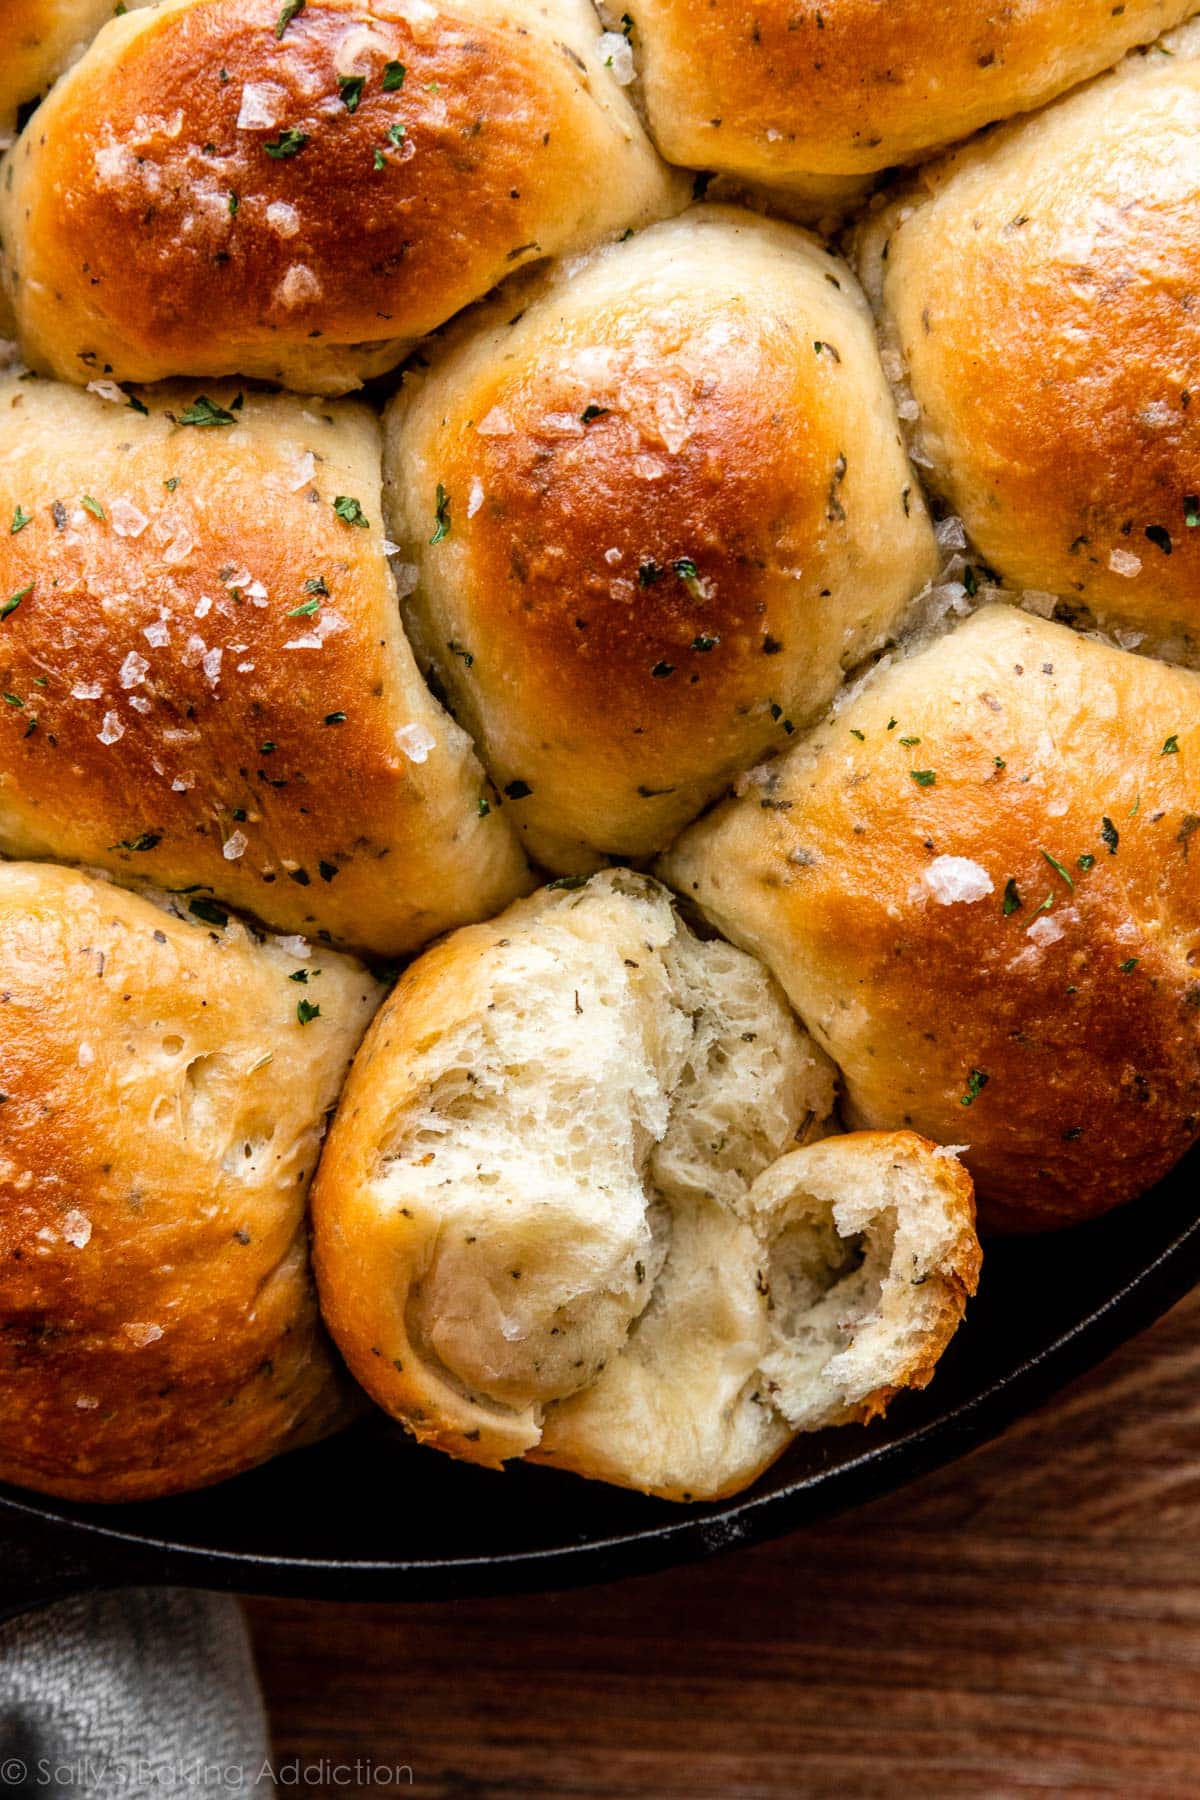
There’s a crunch from the salt on top and the centers are as soft as a mountain of cushy pillows. They’re truly out of this world warm from the oven and when you set them down on the table, all eyes will immediately dart over their way. (Impossible to resist!)
More Standout Bread Recipes
- Pizza Pull Apart Rolls
- Brown Butter Sage Dinner Rolls & Sweet Potato Dinner Rolls
- Focaccia
- Homemade Bread Bowls
- Sandwich Bread
- Pizza Dough (great for beginners!)
- Soft Multigrain Bread
- Croissant Bread
- Homemade Breadsticks

Sea Salt & Herb Skillet Rolls
- Prep Time: 3 hours, 25 minutes
- Cook Time: 25 minutes
- Total Time: 3 hours, 50 minutes
- Yield: 12 rolls
- Category: Bread
- Method: Baking
- Cuisine: American
Description
Sea salt & herb skillet rolls are the fluffiest, softest, most flavorful homemade rolls to have with dinner tonight!
Ingredients
- 1 cup (240ml) whole milk, warmed to about 110°F (43°C)
- 2 and 1/4 teaspoons active dry yeast (1 standard packet)*
- 2 Tablespoons granulated sugar, divided
- 1 large egg, at room temperature
- 1/4 cup (4 Tablespoons; 56g) unsalted butter, melted + slightly cooled and divided
- 1 teaspoon salt
- 2 teaspoons each: dried rosemary, dried basil, & dried parsley*
- 1 teaspoon garlic powder (or 2 teaspoons minced garlic)
- 3 cups (390g) bread flour (spooned & leveled), plus more for work surface
- flaky sea salt or coarse sea salt, for topping
Instructions
- Prepare the dough: Whisk the warm milk, yeast, and 1 Tablespoon sugar together in the bowl of your stand mixer. Cover and allow to sit for 5 minutes. *If you do not own a stand mixer, you can do this in a large mixing bowl and in the next step, mix the dough together with a large wooden spoon/silicone spatula. It will take a bit of arm muscle. A hand mixer works, but the sticky dough repeatedly gets stuck in the beaters. Mixing by hand with a wooden spoon or silicone spatula is a better choice.*
- Add the remaining sugar, egg, 2 Tablespoons butter, salt, rosemary, basil, parsley, garlic powder, and 1 cup flour. With a dough hook or paddle attachment, mix/beat on low speed for 30 seconds, scrape down the sides of the bowl with a silicone spatula, then add the remaining flour. Beat on medium speed until the dough comes together and pulls away from the sides of the bowl, about 2 minutes. If the dough seems too wet to a point where kneading (next step) would be impossible, beat in more flour 1 Tablespoon at a time until you have a workable dough. Dough should be soft and a little sticky, but still manageable to knead with lightly floured hands.
- Knead the dough: Keep the dough in the mixer and beat for an additional 5 full minutes, or knead by hand on a lightly floured surface for 5 full minutes. (If you’re new to bread-baking, my How to Knead Dough video tutorial can help here.) If the dough becomes too sticky during the kneading process, sprinkle 1 teaspoon of flour at a time on the dough or on the work surface/in the bowl to make a soft, slightly tacky dough. Do not add more flour than you need because you do not want a dry dough. After kneading, the dough should still feel a little soft. Poke it with your finger—if it slowly bounces back, your dough is ready to rise. You can also do a “windowpane test” to see if your dough has been kneaded long enough: tear off a small (roughly golfball-size) piece of dough and gently stretch it out until it’s thin enough for light to pass through it. Hold it up to a window or light. Does light pass through the stretched dough without the dough tearing first? If so, your dough has been kneaded long enough and is ready to rise. If not, keep kneading until it passes the windowpane test.
- 1st Rise: Lightly grease a large bowl with oil or nonstick spray. Place the dough in the bowl, turning it to coat all sides in the oil. Cover the bowl with aluminum foil, plastic wrap, or a clean kitchen towel. Allow the dough to rise in a relatively warm environment for 1-2 hours or until double in size. (I always let it rise on the counter. Takes about 2 hours. For a tiny reduction in rise time, see my answer to Where Should Dough Rise? in my Baking with Yeast Guide.)
- Grease a 10-12 inch oven-safe skillet or 9×13-inch baking pan. If using cast iron skillet and it’s already seasoned, no need to grease it. You can also bake the rolls on a lined baking sheet.
- Shape the rolls: When the dough is ready, punch it down to release the air. Divide the dough into 12 equal pieces. (Just eyeball it—doesn’t need to be perfect!) Shape each piece into a smooth ball. Arrange in prepared skillet/baking pan or a couple inches apart on a lined baking sheet.
- 2nd Rise: Cover shaped rolls with aluminum foil, plastic wrap, or a clean kitchen towel. Allow to rise until puffy, about 45-60 minutes.
- Adjust oven rack to a lower position and preheat oven to 350°F (177°C). (It’s best to bake the rolls towards the bottom of the oven so the tops don’t burn.)
- Bake the rolls: Bake for 23-27 minutes or until golden brown on top, rotating the pan halfway through. If you notice the tops browning too quickly, loosely tent the pan with aluminum foil. Remove from the oven, brush warm rolls with remaining melted butter and sprinkle tops with sea salt. Cool for a few minutes before serving.
- Cover leftover rolls tightly and store at room temperature for 2-3 days or in the refrigerator for up to 1 week.
Notes
- Freezing Instructions: Prepare recipe through step 6. Place shaped rolls in a greased baking pan, cover tightly, and freeze for up to 3 months. Once frozen, the dough balls won’t stick together anymore and you can place them in a freezer bag if needed. On the day you serve them, arrange the dough balls in a greased baking pan, cover tightly, then let them thaw and rise for about 4-5 hours. Bake as directed. You can also freeze the baked rolls. Allow them to cool completely and then freeze for up to 3 months. Thaw in the refrigerator or at room temperature. Reheat as desired. If reheating the whole pan, lightly cover and reheat in a 300°F (149°C) oven for about 10 minutes or until warm.
- Overnight Instructions: Prepare the recipe through step 6. Cover the shaped rolls tightly and refrigerate for up to about 15 hours. At least 3 hours before you need them the next day, remove the rolls from the refrigerator, keep covered, and allow to rise on the counter for about 1-2 hours before baking. Alternatively, you can let the dough have its 1st rise in the refrigerator overnight. Cover the dough tightly and place in the refrigerator for up to about 15 hours. Remove from the refrigerator and allow the dough to fully rise for 2 more hours. Continue with step 5.
- Special Tools (affiliate links): Electric Stand Mixer or Large Glass Mixing Bowl with Wooden Spoon / Silicone Spatula | 10- to 12-inch Oven-Safe Skillet, 9×13-inch Baking Pan, or Baking Sheet | Pastry Brush | Flaky Sea Salt or Coarse Sea Salt
- Milk: Whole milk is best. If needed, you can substitute with lower fat milk or nondairy milk. Avoid nonfat milk.
- Yeast: You can substitute instant yeast with no other changes to the recipe. The rise times may be a little shorter. Reference my Baking with Yeast Guide for answers to common yeast FAQs.
- Fresh Herbs: You can substitute the dried herbs with 1 Tablespoon EACH of freshly chopped herbs.
- Salt & Sea Salt Topping: Flaky or coarse sea salt is best for topping. If you’re ever shopping online for flaky sea salt and need a recommendation, I use and love Maldon flaky sea salt. I do not recommend coarse/flaky sea salt in the dough—you need fine salt. You can use fine sea salt or regular table salt.
- Flour: I recommend bread flour for extra chewy and flaky rolls. You can use all-purpose flour if needed instead. Either flour is fine and there are no other changes to the recipe if you use one or the other.


Reader Comments and Reviews
Why does it call for 3 cups of flour in the ingredients list but only 1 cup in the recipe? Am I missing something?
You add the remaining flour in the next sentence of the directions, Alycia!
Thank you for this great recipe; I’ve made these two years in a row and they are scarfed down immediately. Have you ever made them with all or part whole wheat flour?
Hi Liz! These rolls would be very dense with all whole wheat flour. You can try replacing some of the flour to see how it goes. We have a recipe for whole wheat dinner rolls that you may enjoy as well.
Very tasty, thanks!
Hello! If I wanted to triple this (say I’m having 20 – 24 people over and want to make sure everyone gets at least one roll…you know there is always someone who takes two or the kid that only wants to eat rolls and orange slices…) what is a good way to do that? Triple everything, even the yeast? I’d love any suggestions 🙂 Thank you!
Hi Sandy! For best results, we recommend making separate batches rather than doubling, tripling, etc.
Thanks Lexi!
This is the first time I have made dinner roles and appreciated all your tips. They turned out perfectly and I will make again for sure! Better than anything I have purchased from a bakery!!! I have lost my fear of baking bread.
This is an excellent recipe as are all of your other recipes.
I am one of your most loyal followers. However, I have one feature I wish you would add to EVERY recipe, sweet and savoury. The nutritional info would be greatly appreciated by those of us trying to watch our diets, especially the caloric content for each serving. A few of your recipes offer this info but most do not. Including this info would be a positive enhancement.
Hi Charlotte, thank you for your feedback! We don’t usually include nutrition information as it can vary between different brands of the same ingredients. Plus, many recipes have ingredient substitutions or optional ingredients listed. However, there are many handy online calculators where you can plug in and customize your exact ingredients/brands. Readers have found this one especially helpful: https://www.verywellfit.com/recipe-nutrition-analyzer-4157076
Oh my word! I never post comments on websites about recipes I use but I had to put down in writing how amazing these rolls are. I have never been successful with making bread or rolls before but the results from this recipe blew my mind (you know when you are glad the guests went home and left some rolls so you can have them all to yourself?)
Thank you – for giving me the confidence to believe I can make bread recipes but also for this go-to recipe – I love it!
Have not tried this recipe yet but was wondering if I can use Lactaid milk? Thank you!
Hi Barbara, we haven’t tested it, but that should work in a pinch. The dough may not be quite as soft and tender.
Hi! could i add cheese to this recipe? either in the dough or sprinkled on top?
Hi Rachel, We haven’t tested it but don’t see why that would be an issue. A small cube of cheese would likely work best to stuff inside the rolls, or you could try some freshly grated cheese. Let us know what you try!
Holy Moly these are good. They smelled amazing from the moment I mixed everything. The flaked sea salt just made it 100. I couldn’t wait until dinner to eat one. So fluffy and tender. Sally for another winning recipe. Thank you!
I just got a KitchenAid mixer for Christmas. This is my second go with my mixer. This was so very easy! They turned out amazing! Light, tender and of so flavorful.
Could you help me figure out timing for making these rolls either the day before or early morning and then transporting to a luncheon?