
Today we’re conquering our fears and making homemade croissants! If you’re about to run away screaming, I understand. I’m not sugarcoating it: croissants aren’t easy. Croissants require time, patience, and a lot of rolling. However, just because this recipe is advanced doesn’t mean that YOU have to be an advanced baker to try it. You can absolutely handle this quintessential baking bucket list recipe. ♥
Let me hold your hand through the whole process. I’m sharing step-by-step photography, a full video tutorial, plenty of tricks based on what I’ve learned, and the croissant recipe. I started working on croissants earlier this year. I studied a couple recipes, tested them, tweaked what I found necessary, and played with this dough for weeks. The croissants are golden brown, extra flaky, crisp on the outside, soft on the inside, and unbelievable warm from the oven. One bite of this delicate French pastry will immediately transport you to a quaint French bakery. I’m confident in this homemade croissants recipe and I’m confident in YOU baking them.
The good news! You need zero fancy equipment and zero special ingredients. If you’re looking for a weekend project, know how to read directions, and crave a fresh homemade pastry (don’t we all?), then stick around. You’ll be rewarded with the BEST treat ever!!!

Let’s get right into it. Just like making mille-feuille, making croissants is a labor of love. The long recipe directions and all these step-by-step photographs seem intimidating, but let me walk you through the basic process so you aren’t nervous.
The Process
- Make easy dough from butter, flour, sugar, salt, yeast, and milk.
- Roll out dough into a large rectangle.
- Make the butter layer (I have an easy trick for this!!!).
- Enclose the butter layer inside the dough.
- Roll out the dough into another large rectangle, then fold it back together.
- Roll out the dough again, fold it back together again.
- Roll out the dough one more time, fold it back together.
- Shape the croissants.
- Bake!
There’s resting time between most steps, which means most of the time is hands off. To help us develop all the layers, croissant dough needs to rest in the refrigerator often. That’s why I call making croissants a project. Do it over a couple days with long breaks between the steps.

All that rolling out and folding back together? That’s called LAMINATING.
What is Laminated Dough?
Laminating dough is the process of folding butter into dough many times, which creates multiple alternating layers of butter and dough. When the laminated dough bakes, the butter melts and creates steam. This steam lifts the layers apart, leaving us with dozens of flaky airy buttery layers. Same process that makes our Chicago-style deep dish pizza crust so buttery and flaky!
Just like we do when we make a croissant bread loaf or homemade cruffins, we’re going to laminate the dough 3 times, which will create 81 layers in our croissants. Yes, 81! Let me paint that picture for you.
- Start with dough, butter layer, dough = 3 layers
- Roll it out and fold it into thirds = 9 layers
- Roll that out and fold it into thirds = 27 layers
- Roll that out one last time and fold it into thirds = 81 layers
So we’re only laminating the dough 3 times, but that gives us 81 layers. When the croissants are rolled up and shaped, that’s one 81 layer dough rolled up many times. So when you bite into a croissant, you’re literally biting into hundreds of layers.
Isn’t that SO COOL???

Croissants Video Tutorial
Watch me make croissants in this video. I talk you through the whole video too.
Now let’s see everything come together in step-by-step photographs.
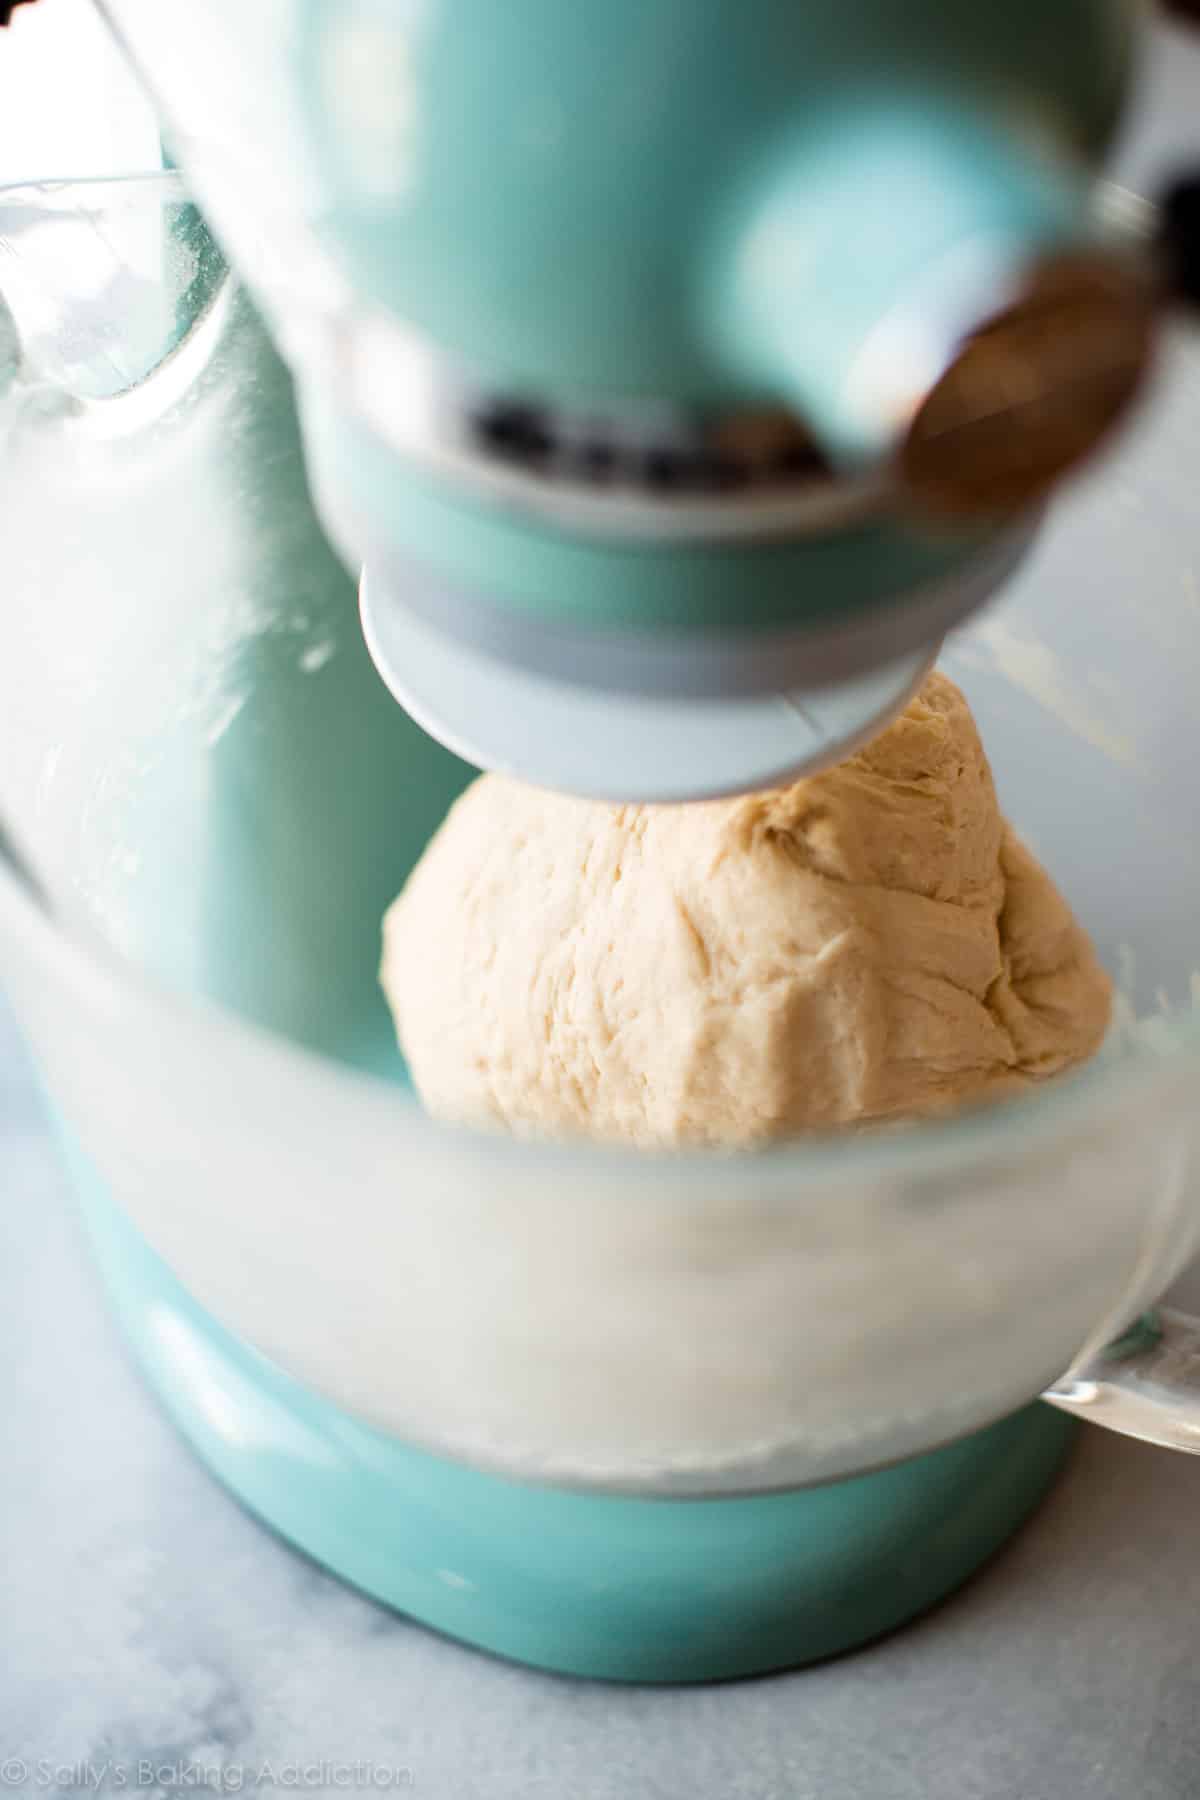
DOUGH
Croissant dough begins with butter, flour, sugar, salt, yeast, and milk. Unlike most yeasted doughs that require warm liquid to activate the yeast, you’re going to use cold milk. The yeast will work its magic later on in the recipe. In the beginning steps of croissants, the dough should always be cold. If, at any point, the dough becomes too warm… stop. Stop what you’re doing and place the dough back in the refrigerator for 20 minutes.
The mixer will beat the dough for about 5 minutes. Stand by your mixer as it works the dough. This dough isn’t particularly heavy, but your mixer will still get a workout. Did you see my Instagram story when my mixer FELL OFF MY COUNTER? I walked away at the wrong time and the whole thing danced off the counter. Unplugged itself and everything. Don’t make my mistake!
See my How to Knead Dough video tutorial if you need any extra help with the kneading step.
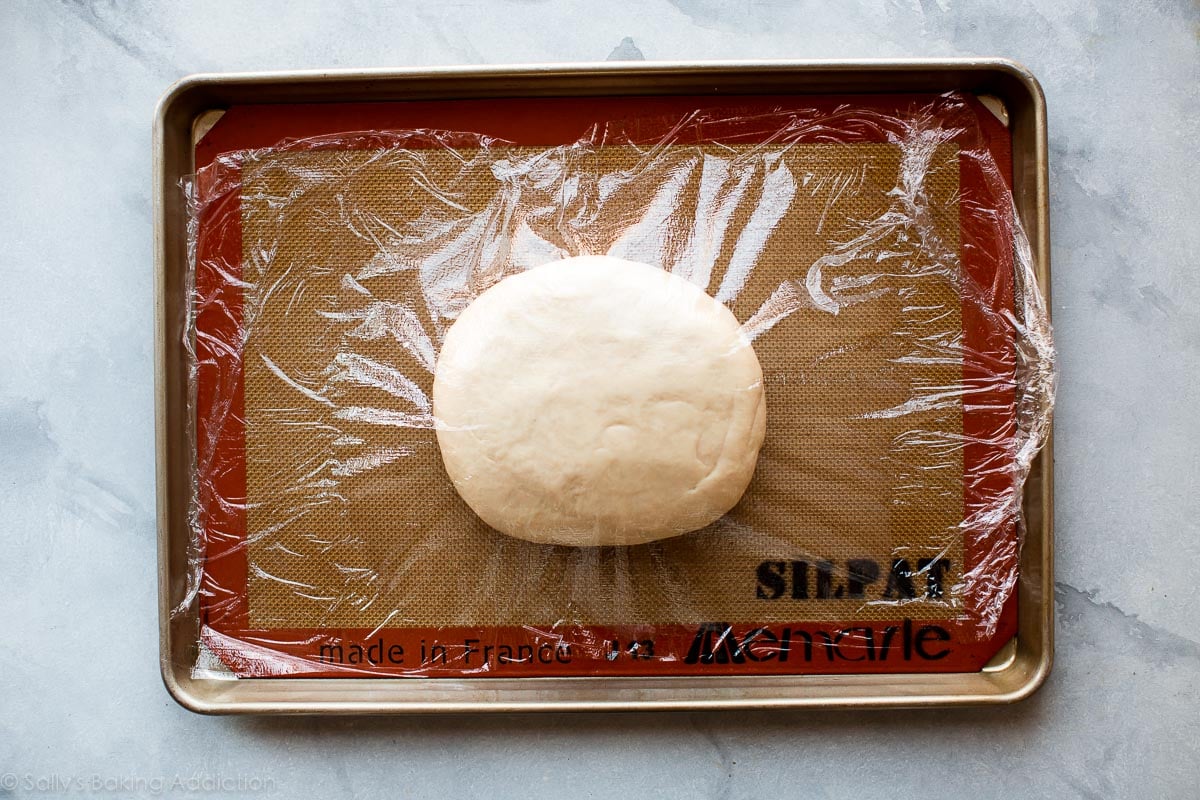
We made the dough, now we’re going to cover it and let it rest in the refrigerator for 30 minutes.
Now let’s roll out the dough into a 14×10-inch rectangle. Use a clean ruler or measuring tape. The ruler or measuring tape, besides your rolling pin, is the most crucial tool when making croissants.
I recommend using a silicone baking mat. While we will still lightly flour it, the mat is nonstick and it’s a handy guide for the exact measurement. You also need to transfer the dough to a baking sheet and the silicone baking mat makes that possible.
The dough isn’t extremely cold after only 30 minutes in the refrigerator, so it will be easy to roll out. Be precise with the 14×10-inch measurement. The dough will want to be oval shaped, but keep working the edges with your hands and rolling pin until you have the correct size rectangle. You can see how I do all this in the video below.
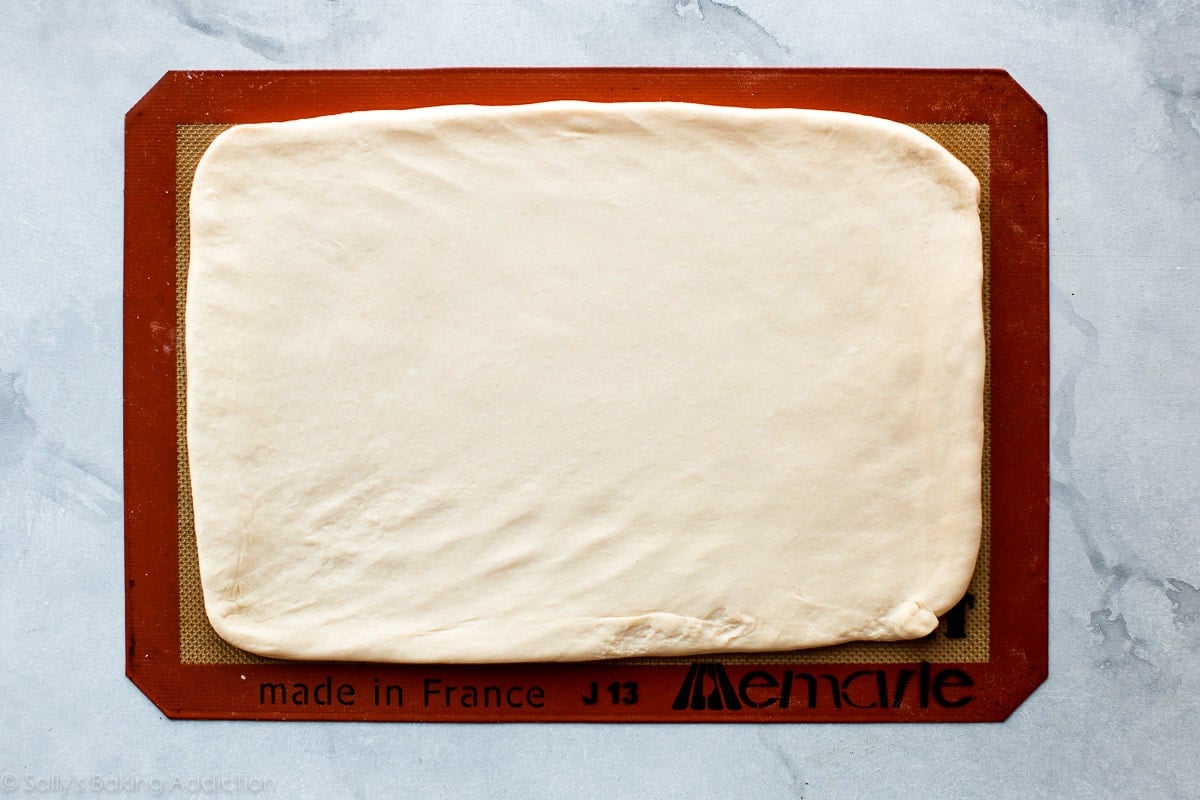
Cover the rolled out dough and chill it for 4 hours or overnight. Literally pick up the silicone baking mat, put it on top of your baking sheet, cover the dough, and chill it. I usually chill it for 4 hours because there is one more 4 hour or overnight chill period coming up. That’s when I typically chill it overnight, making this a 2 day recipe.
BUTTER
Many croissant recipes instruct you to shape extremely cold butter into a rectangle or square. Have you ever tried to manipulate cold sticks of butter into another shape? It’s really hard. I learned the following trick from Zoe at Zoe Bakes. Please go follow Zoe, she is the absolute best. ♥
Start with softened butter, beat it with flour so it has some stability, then spread into a rectangle and chill it. It’s 100x easier to shape softened butter than it is to shape cold butter. Thank you, Zoe!
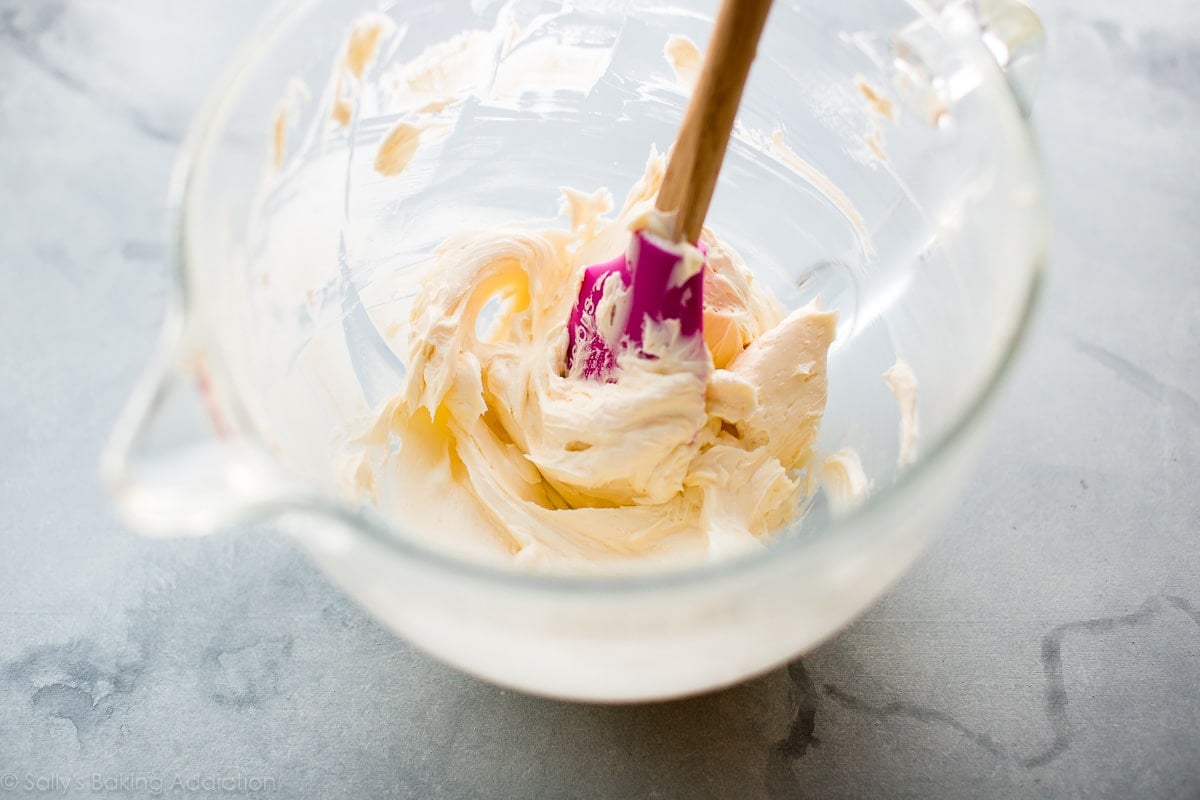
You can use any butter you like best. If you’re going to spend money on European style butter, croissants are when to do it. If I’m being honest, I use store-brand butter and love the croissant’s flavor. It’s butter. It’s going to be good regardless.
The butter rectangle is 7×10 inches, half the length of the dough and the same width, so it fits into the dough. We will chill the butter rectangle right on the silicone baking mat. After it’s chilled, we can peel it right off and place it on the dough to begin lamination.
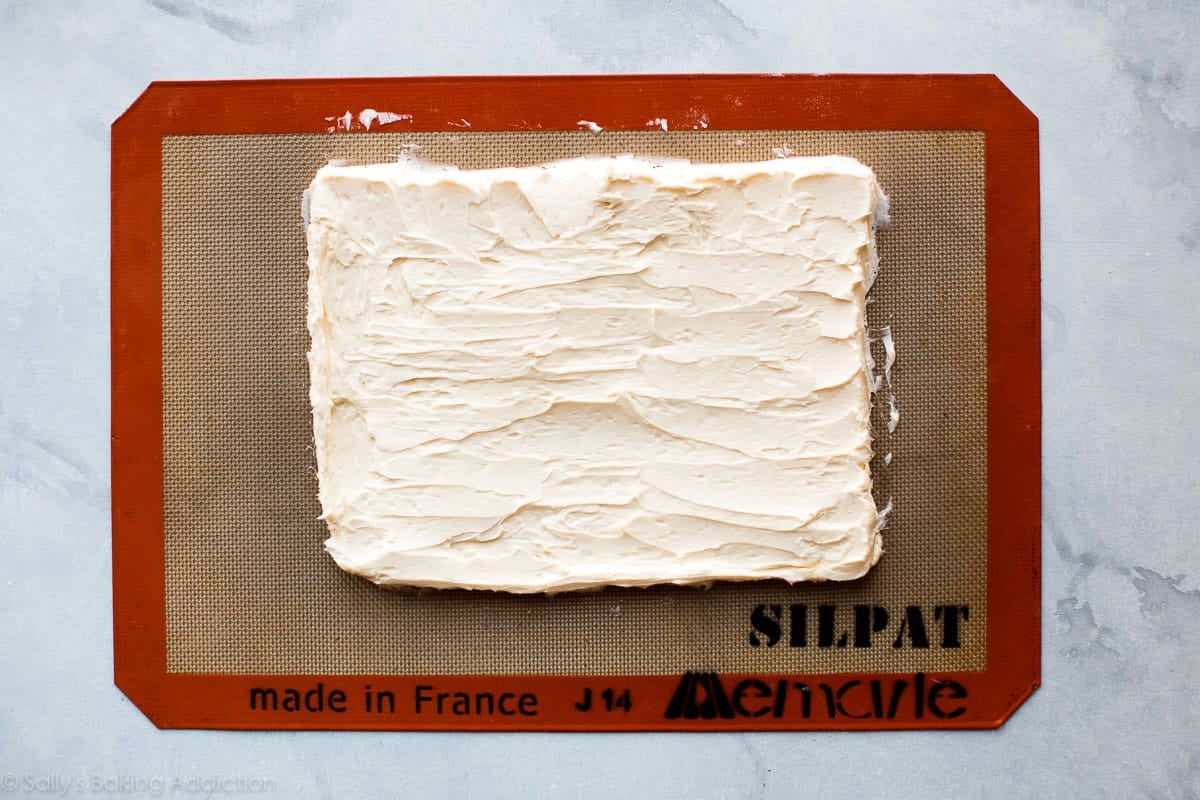
Make sure you only chill the butter for about 30 minutes. Our goal is to have the croissant dough and butter be the same temperature. It makes lamination possible. Butter solidifies much quicker than a soft dough, so that’s why our dough will chill for 4 hours and our butter will only chill for 30 minutes. Make sense?
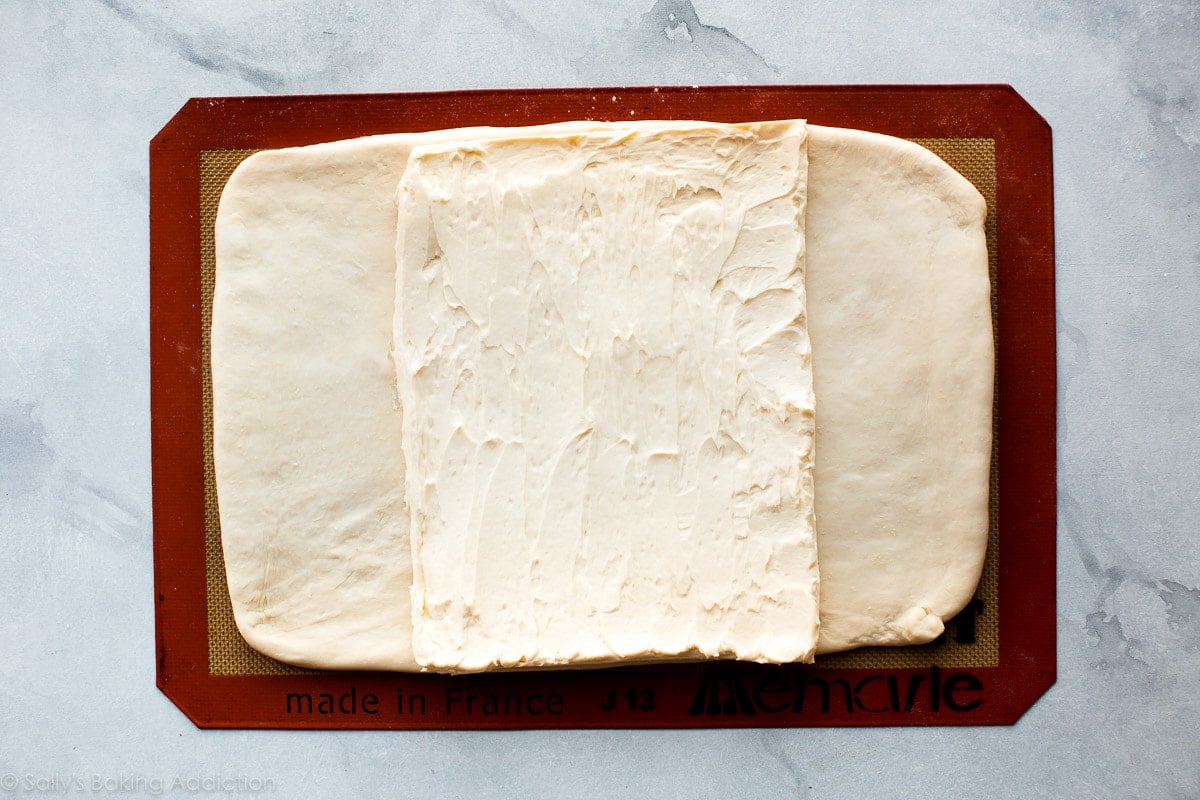
Because you shaped the butter into the precise 7×10-inch size, it fits nicely on the 14×10-inch dough. (After the butter rectangle chills, you can always cut sharp edges with a pizza cutter or knife to make it the appropriate size.)
Fold the cold dough over the cold butter. Use your fingers to seal the butter inside.
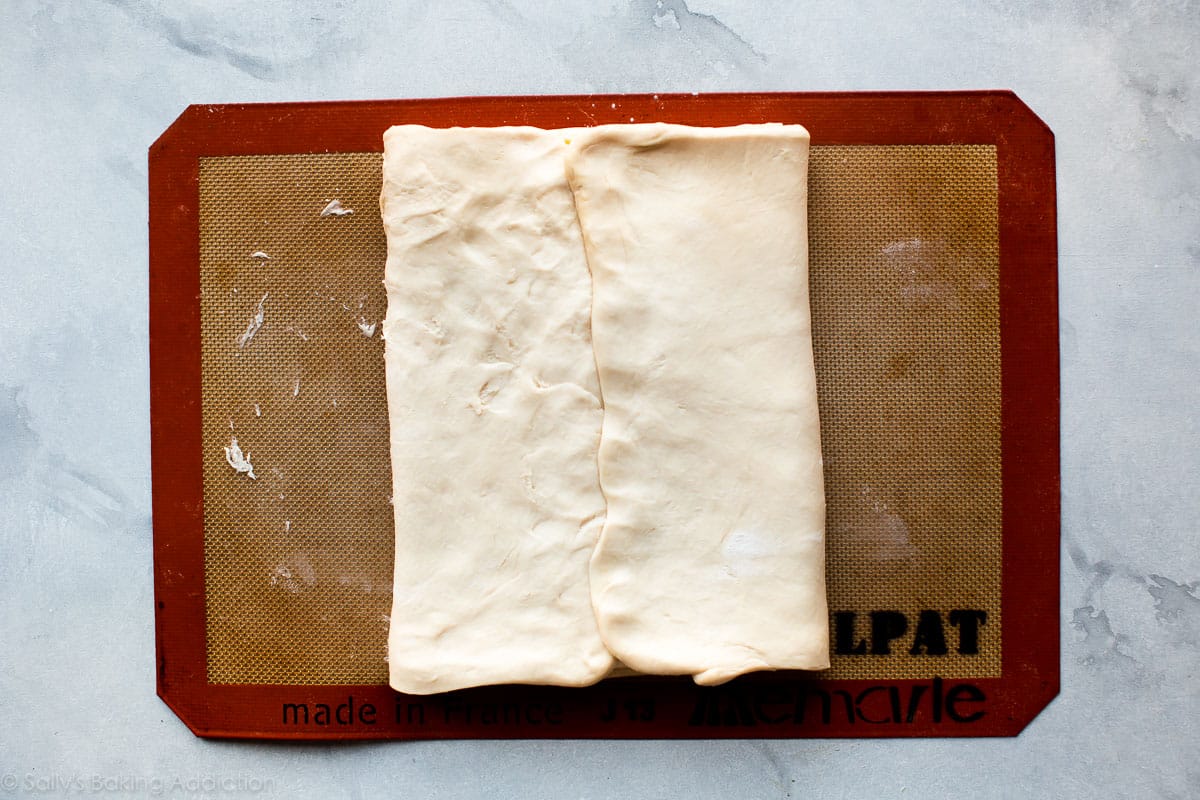
Now we’re going to laminate the dough 3x with a 30 minute break between the 2nd and 3rd time. Why between the 2nd and 3rd time? Because our dough has been out of the refrigerator for long enough by this point and needs to be chilled again. 30 minutes is plenty.
I do not have step-by-step pictures of the lamination process because it’s time sensitive and the dough just became too warm as I tried to set up the shot. However, you can see me laminate the dough and talk through the process in the video below. (3:20-5:15 minutes) Watching me work through this step is more helpful anyway.
Our dough has been rolled out and folded 3x, now it’s time to rest.
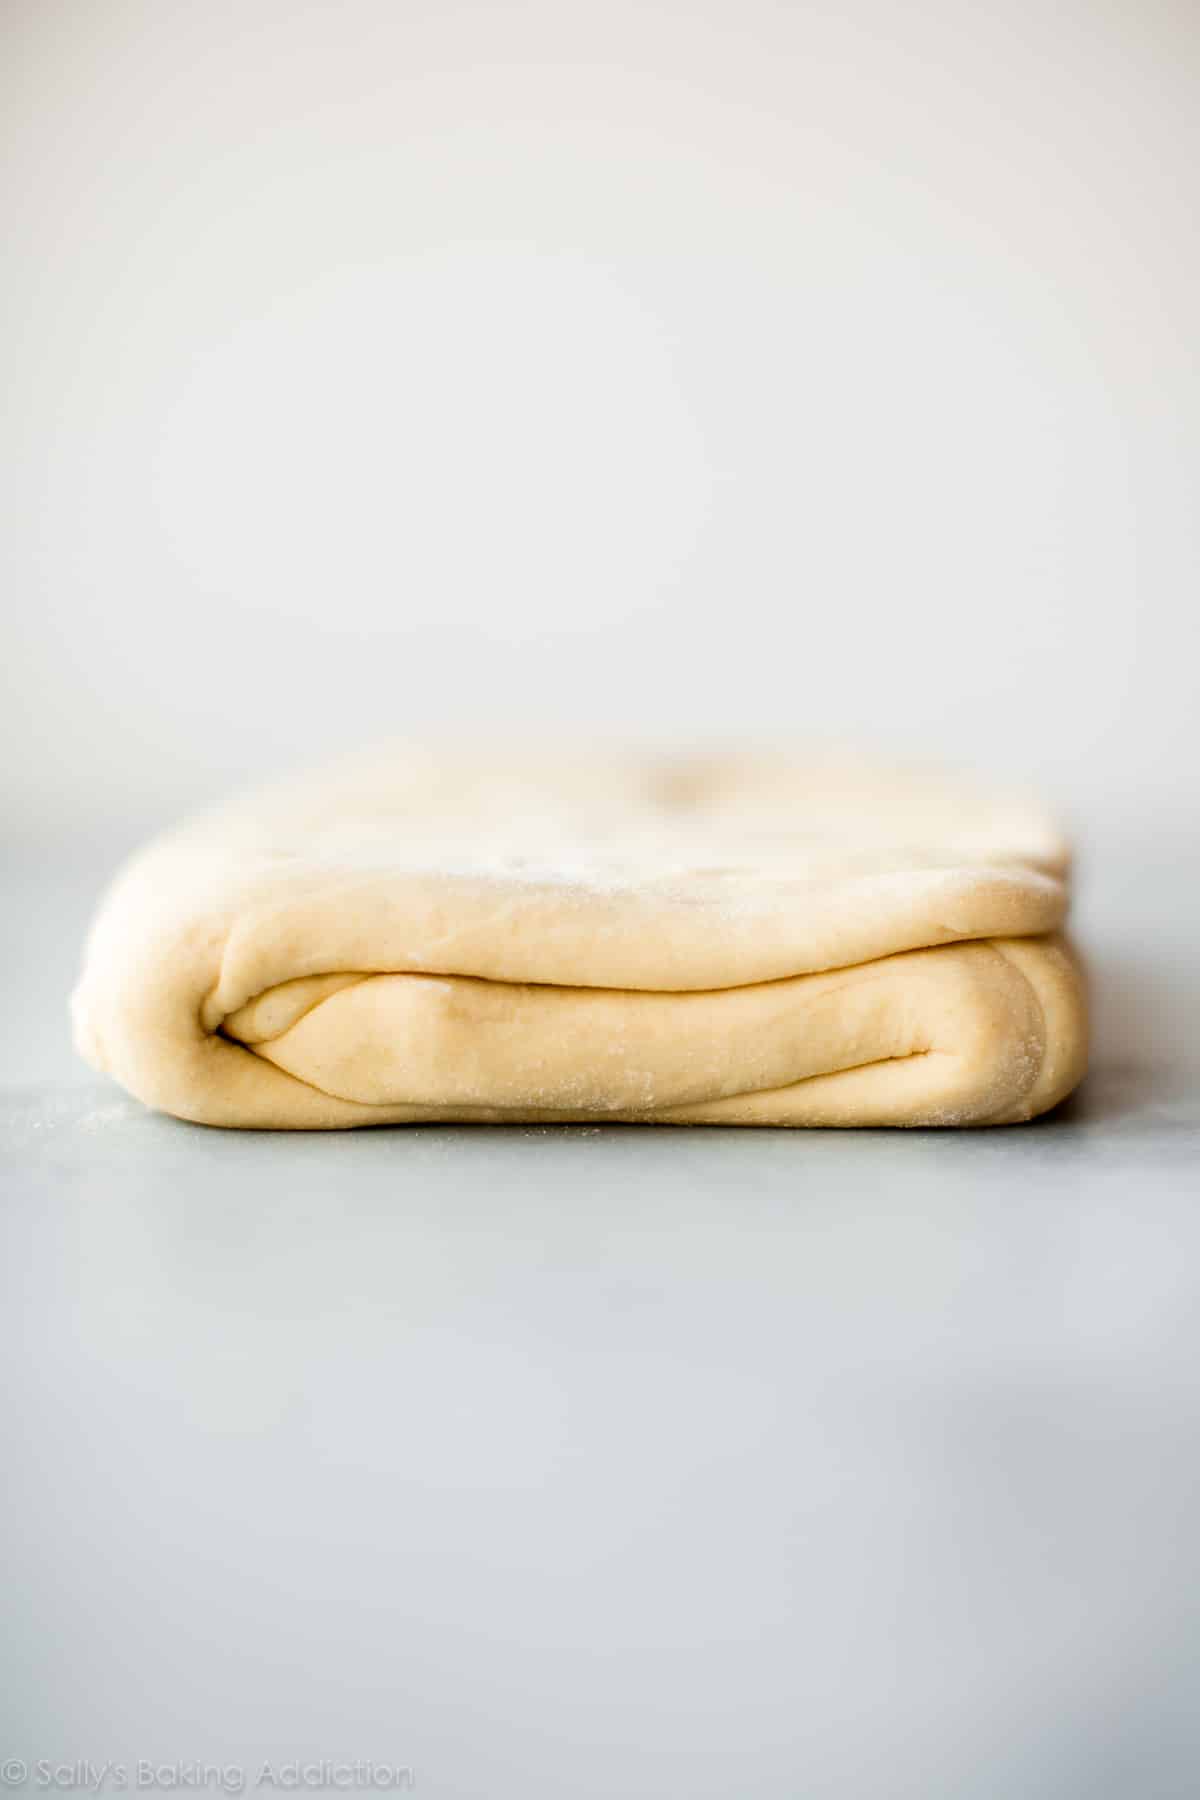
Cover the laminated dough and chill it for 4 hours or overnight. This is when I usually chill it overnight.
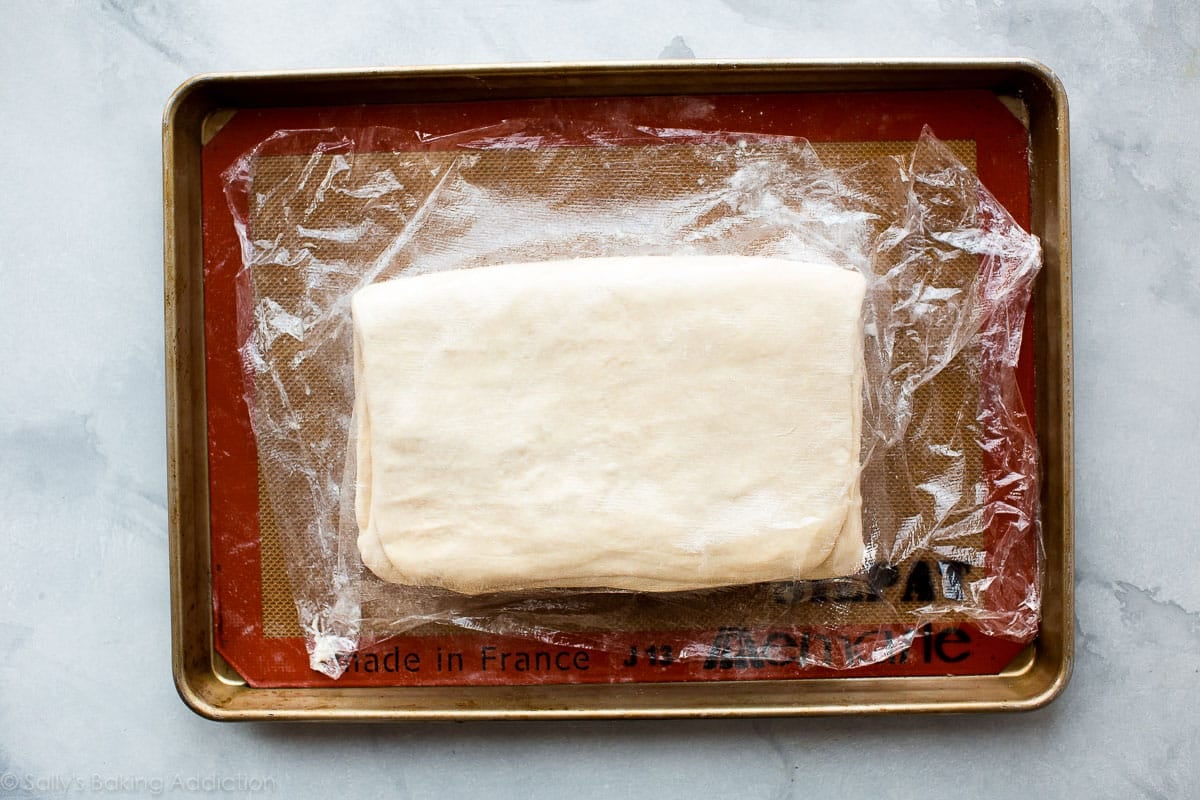
Roll out the dough 1 more time. This time you’ll roll it into an 8×20-inch rectangle.
Use your pizza cutter and slice the rectangle down the center to create two 4×20 rectangles. Then slice across 3x to create eight 4×5-inch rectangles.
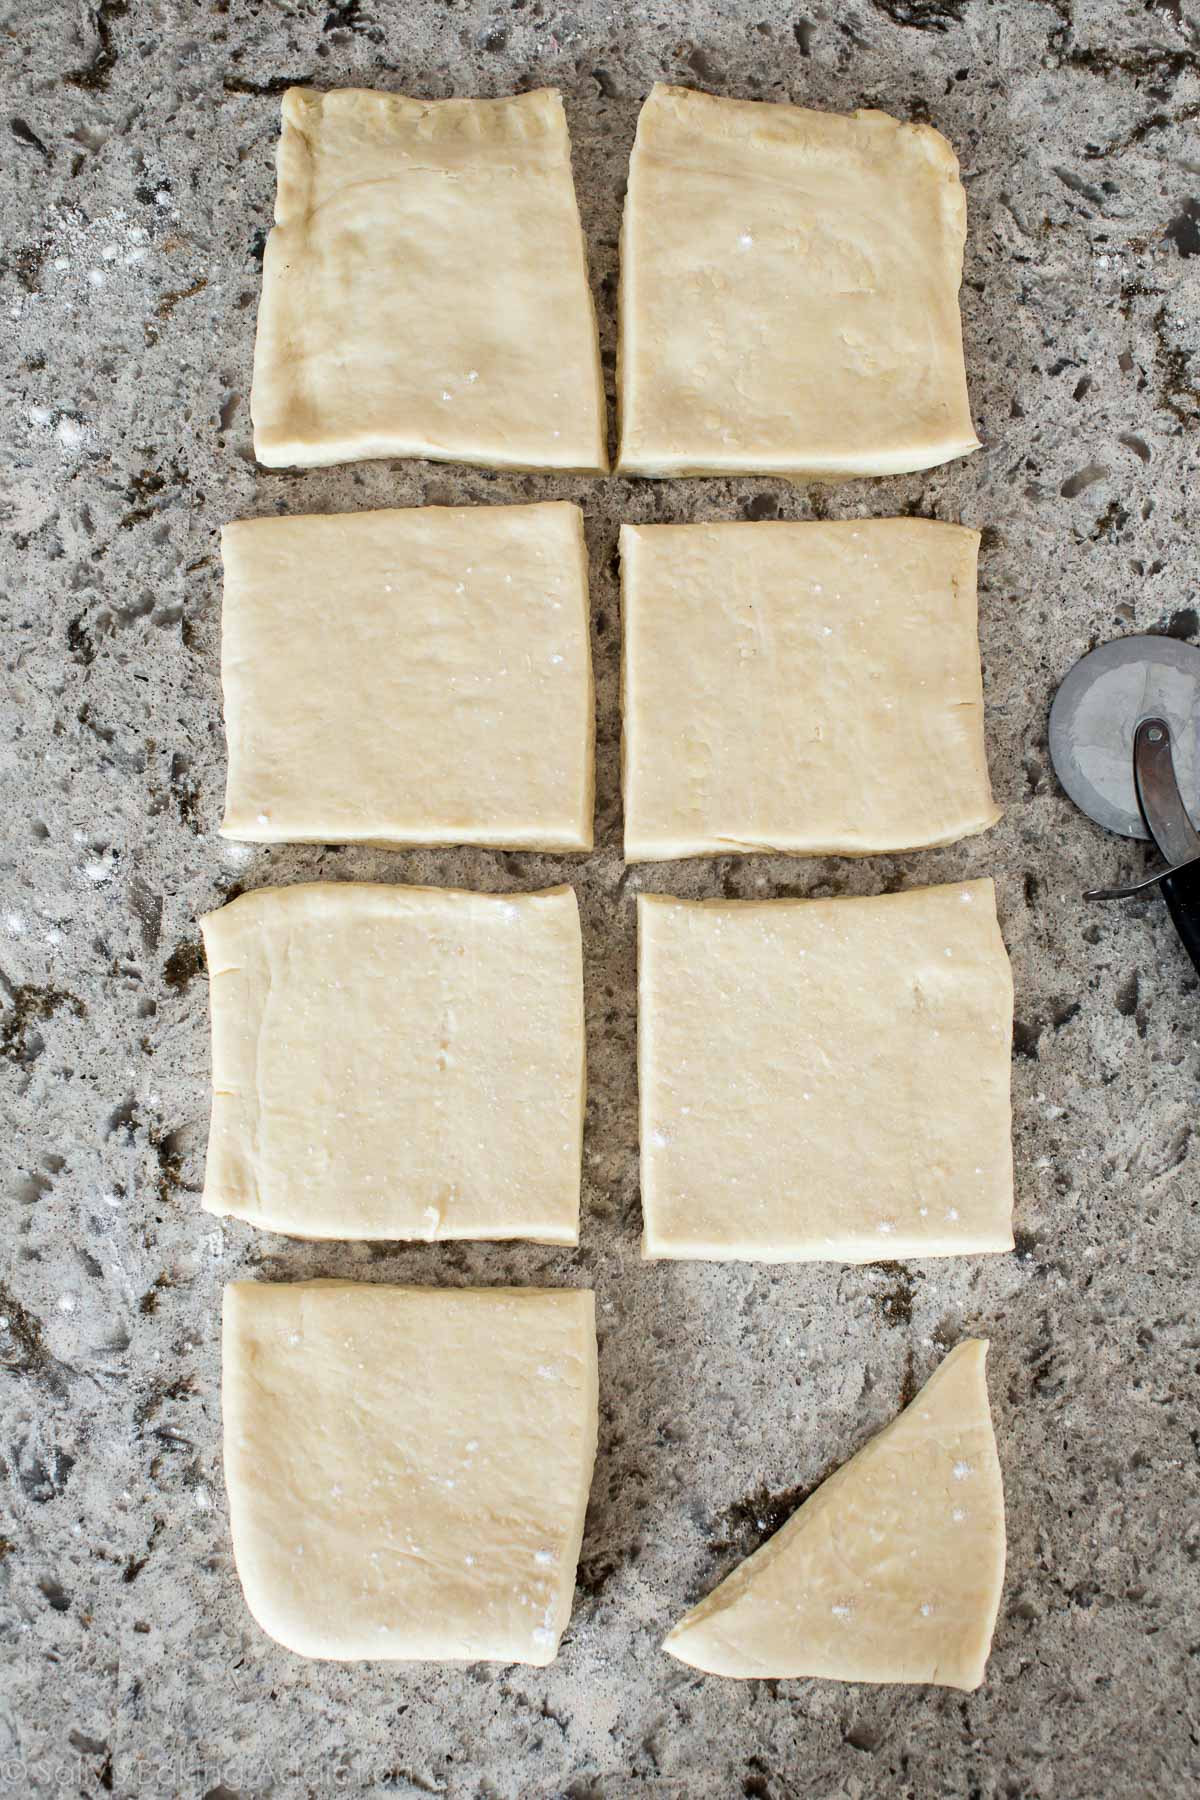
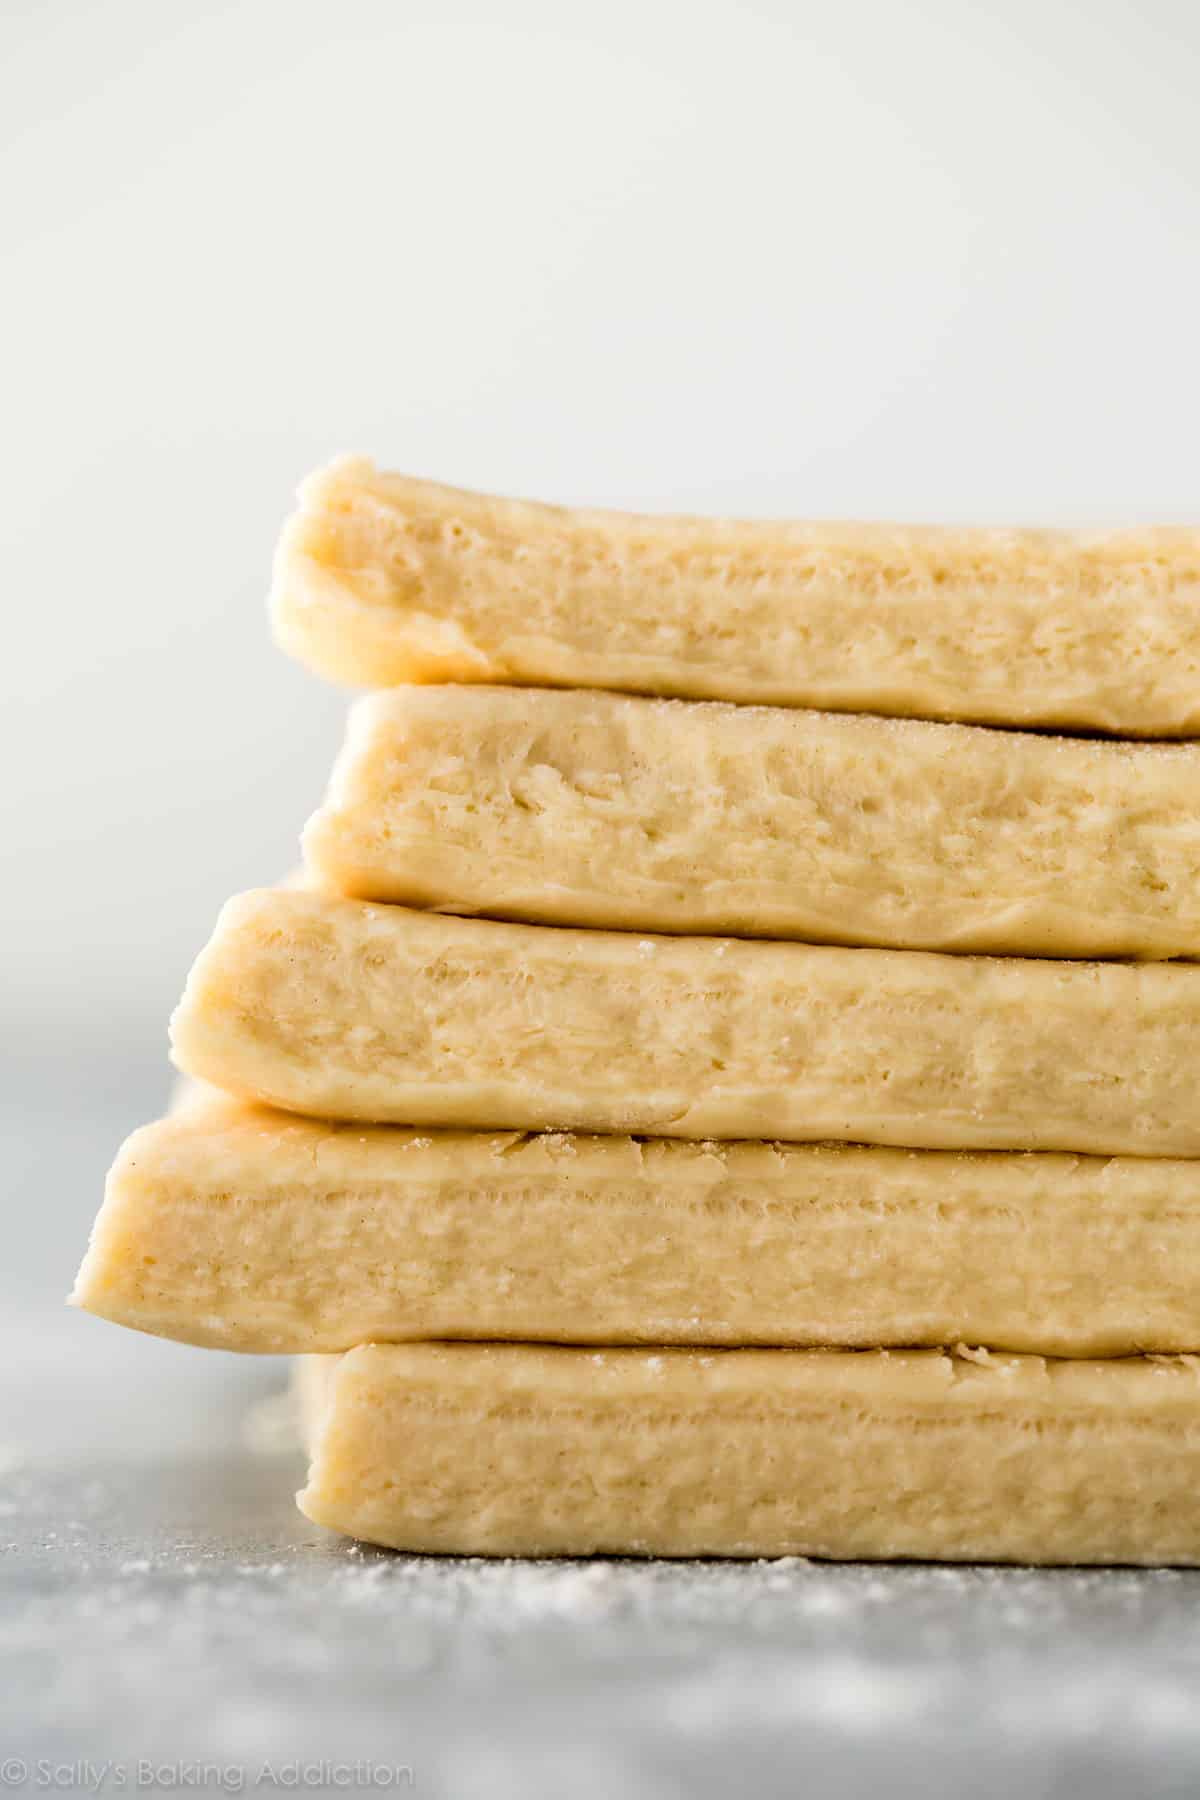
Look at all these layers!!!!
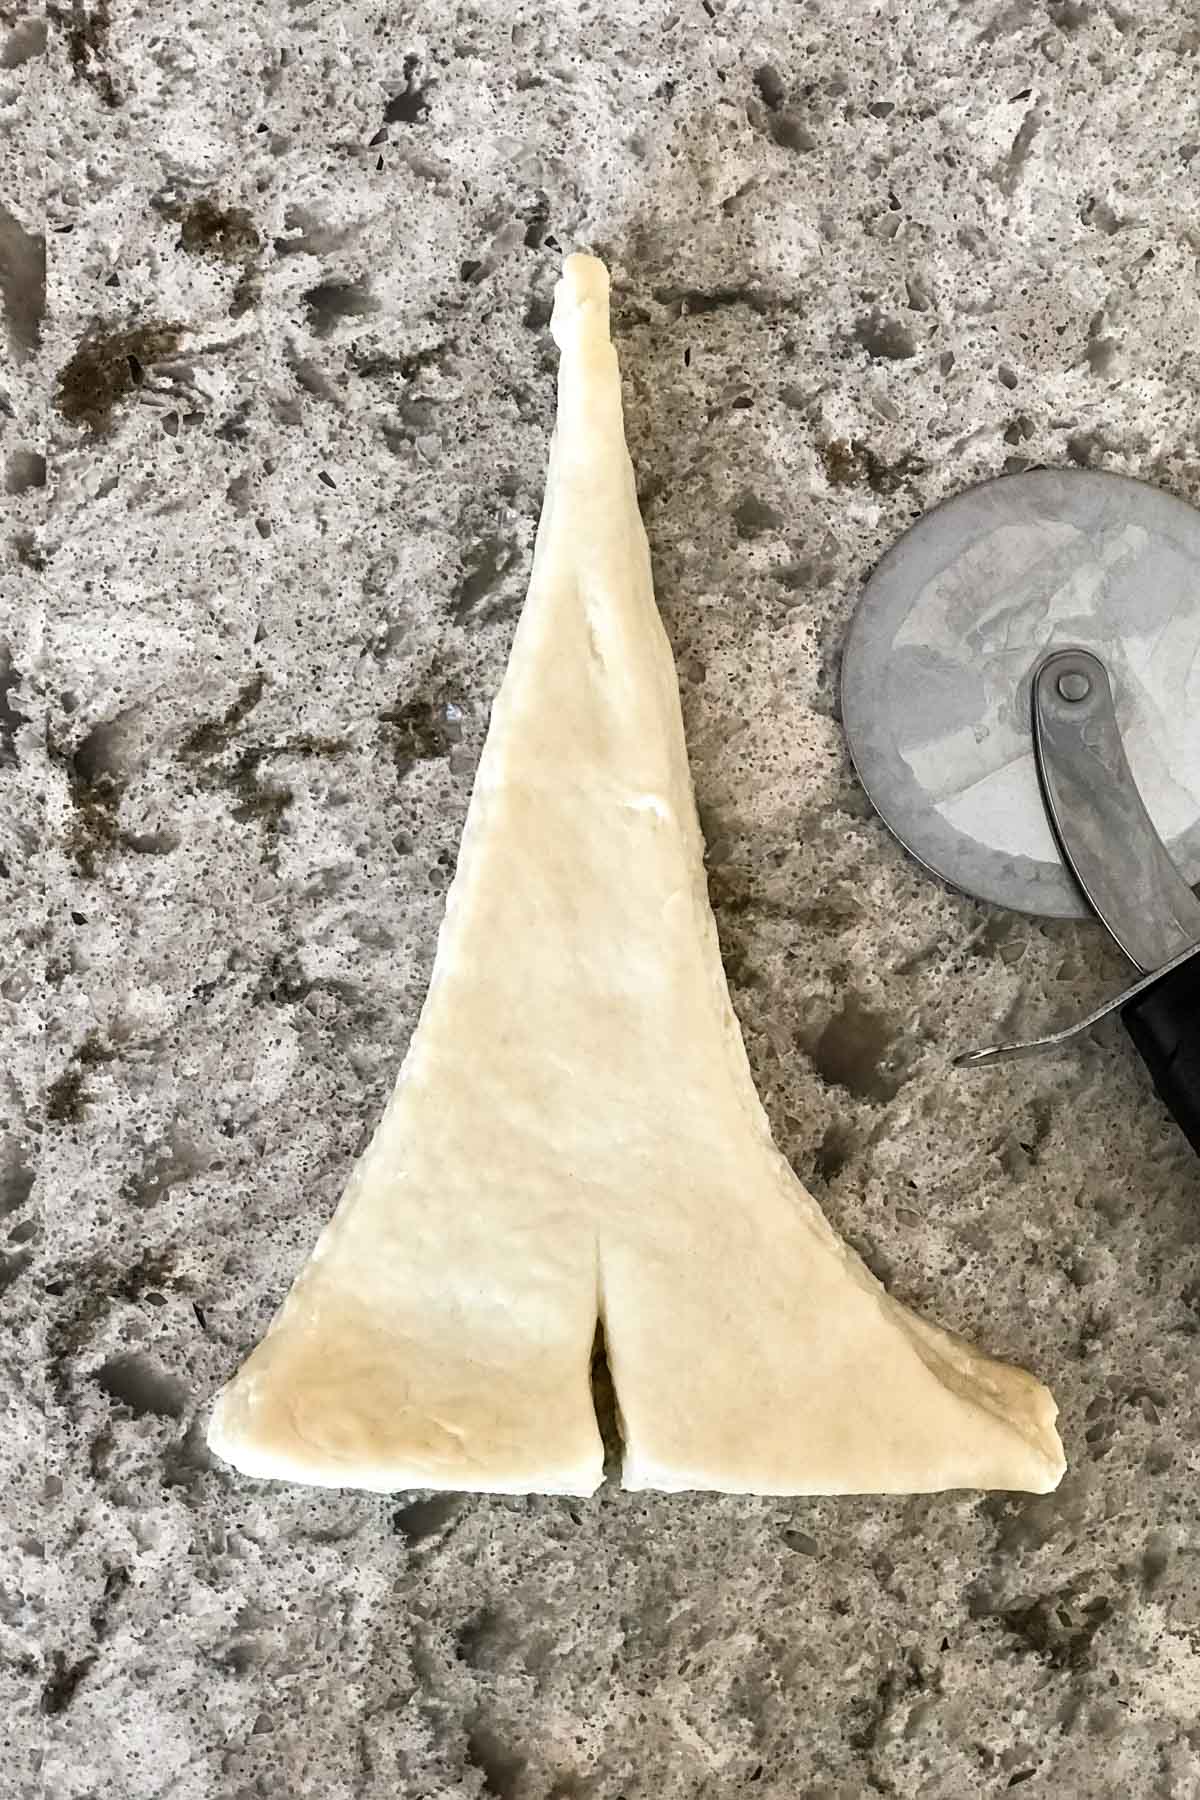
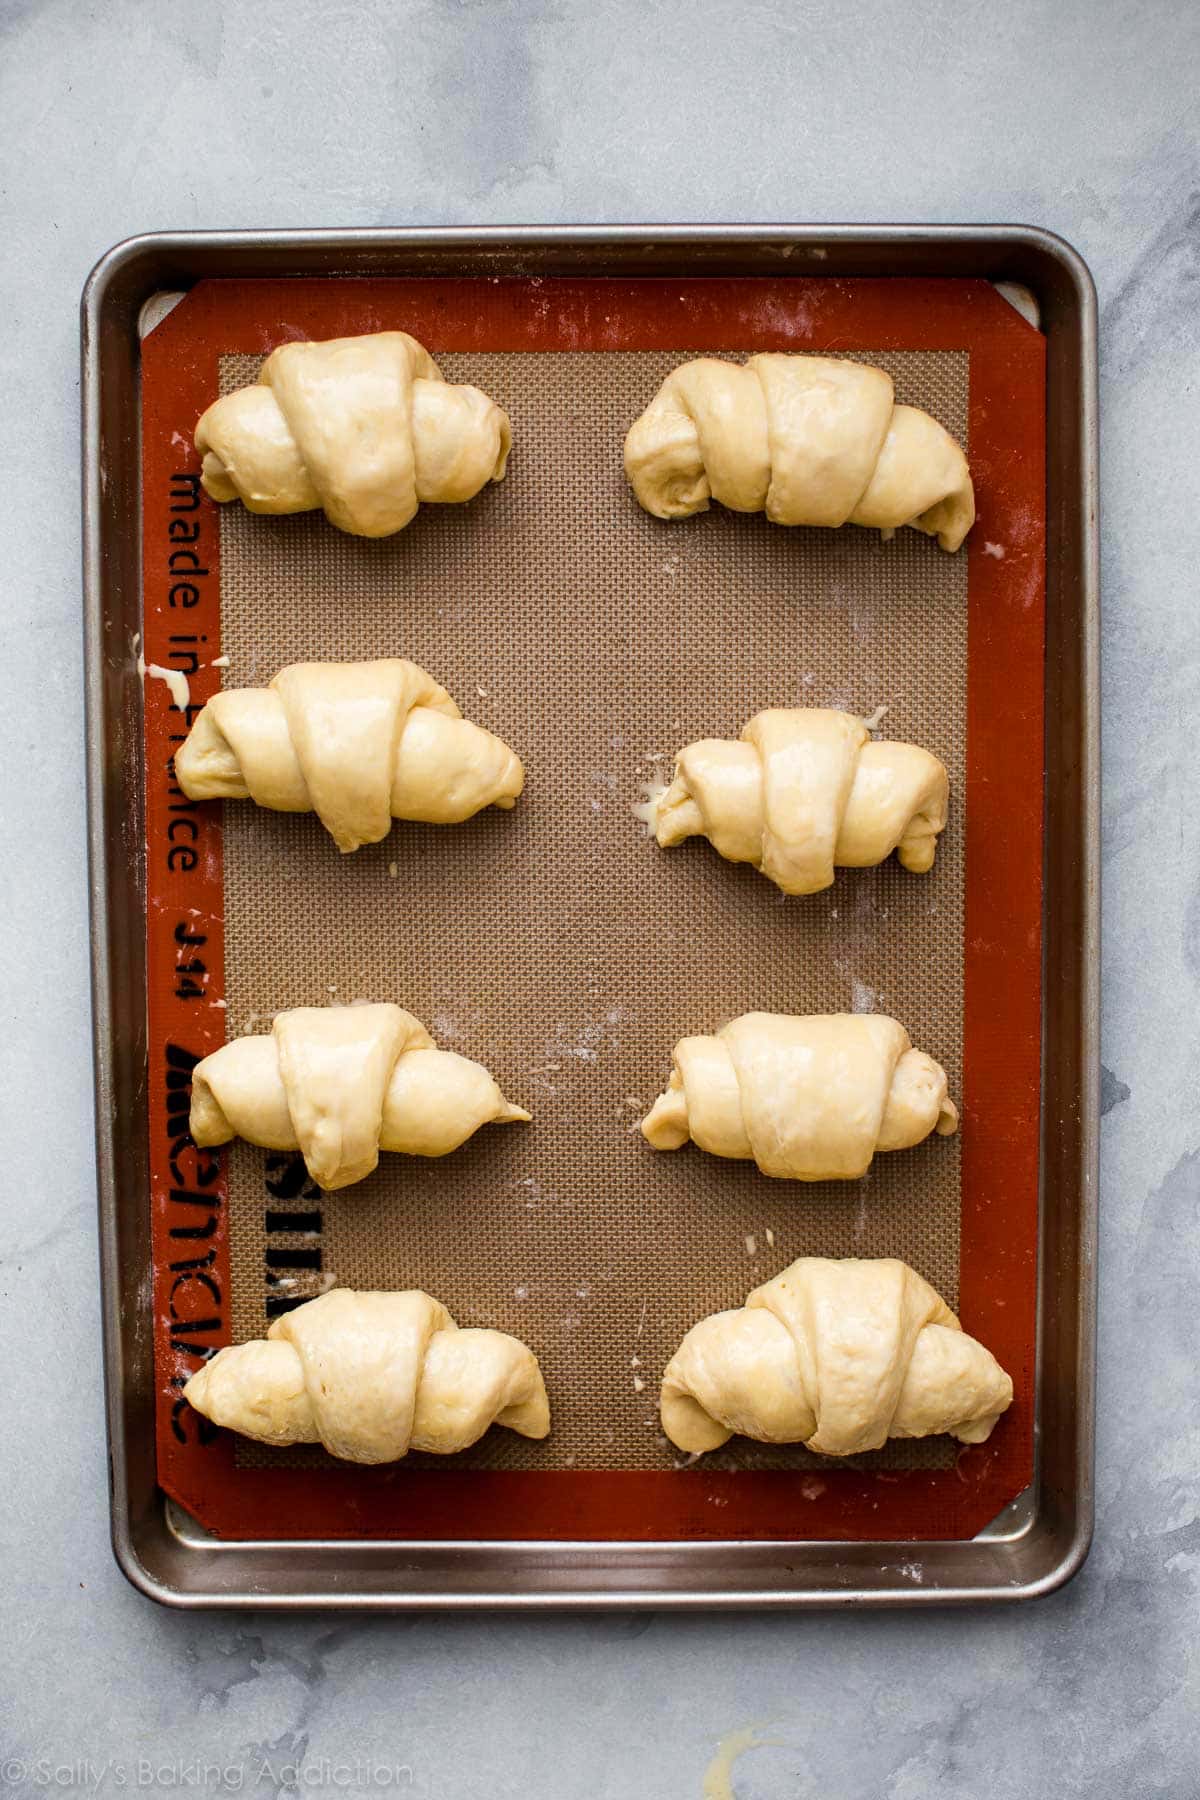
Now slice each of the 8 rectangles into 2 triangles. Using your fingers or a rolling pin, stretch the triangles to be about 8 inches long. Do this gently as you do not want to flatten the layers. Cut a small slit at the wide end of the triangle, then tightly roll up into a crescent shape making sure the tip is underneath.
Loosely cover the shaped croissants and allow to rest at room temperature (I suggest just keeping them on the counter) for 1 hour, then place in the refrigerator to rest for 1 hour. Unlike a lot of croissant recipes, I prefer the shaped croissants to be cold going into the oven. They won’t spread as much. They will rise and proof for the 1 hour at room temperature and continue to do so in the refrigerator for another hour.
The croissants are ready to bake after that! FINALLY.
Brush them with egg wash (egg + milk).
Bake.

Indulge. Because after making the dough and rolling it out a million times, you completely deserve to. Enjoy them plain or with jam, honey butter, or homemade raspberry sauce. Interested in chocolate croissants? Of course you are!
If you happen to have any leftovers, day old croissants are perfect so soak up flavors in an easy breakfast casserole.

FAQ: Why Are There Are Chunks of Butter in my Dough & Why Did Butter Leak Out of the Croissants?
These are 2 common questions and I’m happy to sum it all up for you. Some butter leakage during the baking process is normal and expected, however if your baking croissants are sitting on pools of butter, your butter layer may have been too cold. It would make sense to give the best temperature for the butter layer, but you’re really looking for texture. You want the dough and sheet of butter to be similar in softness. If the butter layer is too hard, it will crack and split under the dough. Let it sit at room temperature to soften before the laminating process (step 7) OR reduce the chill time in step 6 down from 30 minutes to about 15.
See Your Croissants!
Many readers tried this recipe as part of a baking challenge! Feel free to email or share your recipe photos with us on social media. 🙂
Print
How to Make Croissants
- Prep Time: 12 hours, 45 minutes
- Cook Time: 20 minutes
- Total Time: 13 hours, 10 minutes
- Yield: 16 croissants
- Category: Pastries
- Method: Baking
- Cuisine: French
Description
Buttery, flaky, and perfect homemade croissants!
Ingredients
- 1/4 cup (4 Tbsp; 56g) unsalted butter, softened to room temperature
- 4 cups (500g) all-purpose flour (spooned & leveled), plus more for rolling/shaping
- 1/4 cup (50g) granulated sugar
- 2 teaspoons salt
- 1 Tablespoon active dry or instant yeast
- 1 and 1/2 cups (360ml) cold whole milk
Butter Layer
- 1 and 1/2 cups (340g) unsalted butter, softened to room temperature
- 2 Tablespoons (16g) all-purpose flour
Egg Wash
- 1 large egg
- 2 Tablespoons (30ml) whole milk
Instructions
- Preliminary notes: Watch the video below and use the step-by-step photos before you begin. Read the recipe before beginning. Make room in the refrigerator for a baking sheet. In step 6 and again in step 13, you will need room for 2 baking sheets.
- Make the dough: Cut the butter in four 1-Tablespoon pieces and place in the bowl of an electric stand mixer fitted with the dough hook attachment (or you can use a handheld mixer or no mixer, but a stand mixer is ideal). Add the flour, sugar, salt, and yeast. Turn the mixer on low-medium speed to gently combine the ingredients for 1 minute. With the mixer running, slowly pour in the milk. Once all of the milk is added, turn the mixer up to medium speed and begin to knead the dough.
- Knead the dough: Keep the dough in the mixer and beat for an additional 5 full minutes, or knead by hand on a lightly floured surface for 5 full minutes. (If you’re new to bread-baking, my How to Knead Dough video tutorial can help here.) If the dough becomes too sticky during the kneading process, sprinkle 1 teaspoon of flour at a time on the dough or on the work surface/in the bowl to make a soft, slightly tacky dough. Do not add more flour than you need because you do not want a dry dough. After kneading, the dough should still feel a little soft. Poke it with your finger—if it slowly bounces back, your dough is ready to rest. You can also do a “windowpane test” to see if your dough has been kneaded long enough: tear off a small (roughly golfball-size) piece of dough and gently stretch it out until it’s thin enough for light to pass through it. Hold it up to a window or light. Does light pass through the stretched dough without the dough tearing first? If so, your dough has been kneaded long enough and is ready to rest. If not, keep kneading until it passes the windowpane test.
- Remove dough from the bowl and, with floured hands, work it into a ball. Place the dough on a lightly floured silicone baking mat lined, lightly floured parchment paper lined, or lightly floured baking sheet. (I highly recommend a silicone baking mat because you can roll the dough out in the next step directly on top and it won’t slide all over the counter.) Gently flatten the dough out, as I do in the video below, and cover with plastic wrap or aluminum foil. Place the entire baking sheet in the refrigerator and allow the covered dough to rest in the refrigerator for 30 minutes.
- Shape the dough: Remove the dough from the refrigerator. I like to keep the dough on the silicone baking mat when I’m rolling it in this step because the mat is nonstick and it’s a handy guide for the exact measurement. Begin flattening out the dough with your hands. You’re rolling it out into a rectangle in this step, so shaping it with your hands first helps the stretchy dough. Roll it into a 14×10-inch rectangle. The dough isn’t extremely cold after only 30 minutes in the refrigerator, so it will feel more like soft play-doh. Be precise with the measurement. The dough will want to be oval shaped, but keep working the edges with your hands and rolling pin until you have the correct size rectangle.
- Long rest: Place the rolled out dough back onto the baking sheet (this is why I prefer a silicone baking mat or parchment because you can easily transfer the dough). Cover the rolled out dough with plastic wrap or aluminum foil, place the entire baking sheet in the refrigerator and allow the covered dough to rest in the refrigerator for 4 hours or overnight. (Up to 24 hours is ok.)
- Butter layer (begin this 35 minutes before the next step so the butter can chill for 30 minutes): In a large bowl using a hand-held mixer or stand mixer fitted with a paddle or whisk attachment, beat the butter and flour together until smooth and combined. Transfer the mixture to a silicone baking mat lined or parchment paper lined baking sheet. (Silicone baking mat is preferred because you can easily peel the butter off in the next step.) Using a spoon or small spatula, smooth out into a 7×10-inch rectangle. Be as precise as you can with this measurement. Place the entire baking sheet in the refrigerator and chill the butter layer for 30 minutes. (No need to cover it for only 30 minutes.) You want the butter layer firm, but still pliable. If it gets too firm, let it sit out on the counter for a few minutes to gently soften. The more firm the butter layer is the more difficult it will be to laminate the dough in the next step.
- Laminate the dough: In this next step, you will be rolling out the dough into a large rectangle. Do this on a lightly floured counter instead of rolling out on your silicone baking mat. The counter is typically a little cooler (great for keeping the dough cold) and the silicone baking mat is smaller than the measurement you need. Remove both the dough and butter layers from the refrigerator. Place the butter layer in the center of the dough and fold each end of the dough over it. If the butter wasn’t an exact 7×10-inch rectangle, use a pizza cutter or sharp knife to even out the edges. Seal the dough edges over the butter layer as best you can with your fingers. On a lightly floured counter, roll the dough into a 10×20-inch rectangle. It’s best to roll back and forth with the shorter end of the dough facing you, like I do in the video below. Use your fingers if you need to. The dough is very cold, so it will take a lot of arm muscle to roll. Again, the dough will want to be oval shaped, but keep working it with your hands and rolling pin until you have the correct size rectangle. Fold the dough lengthwise into thirds as if you were folding a letter. This was the 1st turn.
- If the dough is now too warm to work with, place folded dough on the baking sheet, cover with plastic wrap or aluminum foil, and refrigerate for 30 minutes before the 2nd turn. I usually don’t have to.
- 2nd turn: Turn the dough so the short end is facing you. Roll the dough out once again into a 10×20-inch rectangle, then fold the dough lengthwise into thirds as if you were folding a letter. The dough must be refrigerated between the 2nd and 3rd turn because it has been worked with a lot by this point. Place the folded dough on the baking sheet, cover with plastic wrap or aluminum foil, and refrigerate for 30 minutes before the 3rd turn.
- 3rd turn: Roll the dough out once again into a 10×20-inch rectangle. Fold the dough lengthwise into thirds as if you were folding a letter.
- Long rest: Place the folded dough on the lined baking sheet, cover with plastic wrap or aluminum foil, and refrigerate for 4 hours or overnight. (Up to 24 hours is ok.)
- At the end of the next step, you’ll need 2 baking sheets lined with silicone baking mats or parchment paper. The dough is currently on a lined baking sheet in the refrigerator, so you already have 1 prepared!
- Shape the croissants: Remove the dough from the refrigerator. On a lightly floured counter, roll the dough out into an 8×20-inch rectangle. Use your fingers if you need to. Once again, the dough is very cold, so it will take a lot of arm muscle to roll. The dough will want to be oval shaped, but keep working it with your hands and rolling pin until you have the correct size rectangle. Using a pizza cutter or sharp knife, slice the dough in half vertically. Each skinny rectangle will be 4-inches wide. Then cut 3 even slices horizontally, yielding 8 4×5-inch rectangles. See photo above for a visual. Cut each rectangle diagonally to make 2 triangles. You have 16 triangles now. Work with one triangle at a time. Using your fingers or a rolling pin, stretch the triangle to be about 8 inches long. Do this gently as you do not want to flatten the layers. Cut a small slit at the wide end of the triangle, then tightly roll up into a crescent shape making sure the tip is underneath. Slightly bend the ends in towards each other. Repeat with remaining dough, placing the shaped croissants on 2 lined baking sheets, 8 per sheet. Loosely cover with plastic wrap or aluminum foil and allow to rest at room temperature (no warmer—I suggest keeping on the counter) for 1 hour, then place in the refrigerator to rest for 1 hour or up to 12 hours. (Or freeze, see freezing instructions.) I prefer the shaped croissants to be cold going into the oven.
- Preheat oven to 400°F (204°C).
- Egg wash: Whisk the egg wash ingredients together. Remove the croissants from the refrigerator. Brush each lightly with egg wash.
- Bake the croissants: Bake until croissants are golden brown, about 20 minutes. Rotate the pans halfway through baking. If croissants show signs of darkening too quickly, reduce the oven to 375°F (190°C).
- Remove croissants from the oven and place on a wire rack to cool for a few minutes before serving. They will slightly deflate as they cool.
- Croissants taste best the same day they’re baked. Cover any leftover croissants and store at room temperature for a few days or in the refrigerator for up to 1 week. You can also freeze for up to 3 months, then thaw on the counter or overnight in the refrigerator. Warm up to your liking.
Notes
- Make Ahead Instructions: Croissants are perfect for getting started ahead of time. The dough can rest for 4 hours or overnight in step 5 and again in step 11. You can also freeze the dough after the 3rd turn in the lamination process (after step 10). Instead of the 4 hour rest in the refrigerator in step 11, wrap the dough tightly in plastic wrap or aluminum foil, place in a freezer zipped-top bag, and freeze for up to 3 months. Thaw in the refrigerator and continue with step 12. You can also freeze the shaped croissants after they rest for 1 hour at room temperature in step 13. (Before placing in the refrigerator.) Cover them tightly and freeze for up to 1 month. Thaw completely in the refrigerator, then bake as directed.
- Special Tools (affiliate links): Stand Mixer (preferred), Hand Mixer, or Glass Mixing Bowl with Wooden Spoon / Silicone Spatula | Rolling Pin | Pizza Cutter | Pastry Brush | Silicone Baking Mat or Parchment Paper | Baking Sheet | Cooling Rack
- Yeast: I use and recommend Red Star Platinum, an instant yeast. You can use active dry yeast instead if needed. No changes to the recipe or prior proofing required; just mix it in as instructed. (Most modern yeasts are already active!) Reference my Baking with Yeast Guide for answers to common yeast FAQs.
- Keep Dough Cold: Make sure the dough is ALWAYS cold. If it warms up too much, stop what you’re doing and place the dough back in the refrigerator for 20 minutes.
- Floured Surface: Lightly flour the work surface, your hands, the dough, and the rolling pin as you work.
- Air Bubbles: Are there air bubbles in your dough as you roll? That’s ok. Pop them with your fingers or a toothpick, then lightly flour where you popped the air bubble.
- Croissants for Brunch: I recommend starting the recipe the day before in the early afternoon. Complete steps 1-10, then let the laminated dough have a long rest in the refrigerator overnight (step 11). Begin step 13 2-3 hours before brunch.
- Dough adapted from Joy of Baking, Food & Wine, and Epicurious


Reader Comments and Reviews
first try went pretty well. Thanks for the video/photos and tips! (Although I was annoyed that your dough was a lot prettier and pliable than mine. lol)
The tip on the butter layer is GOLD! Love this, and I’ve used it in other things. While the recipe and instruction is long, I encourage folks to dive in – it’s not as hard as it looks, and Sally is just making it easier to follow. Leaving nothing to question as always.
Thank you for the recipe. I have made these five times, and each has turned out perfectly. My only issue is getting the shaping down.
my first time ever baking-other than cakes mix, one of the best croissants I’ve ever had! and I had my fair share of them. the buttery flavor the softness even the smell is spectacular!
I have studied this recipe and the pain du chocolat. Thank you for the instructional detail. My friend and I plan to meet the challenge later this week.
Is there a way to make savory croissants?
Can herbs be added to the butter?
Thank you.
Hi Sharon, we haven’t made a savory croissant recipe like that, but don’t see why you couldn’t try it! Let us know how they turn out if you give it a go!
I’ve been wanting to make croissants for awhile so I finally did this weekend and I’ve never made a recipe of yours that wasn’t fabulous. Even with a hand mixer they turned out great! I definitely have to get a mix master now. Thanks you again.