

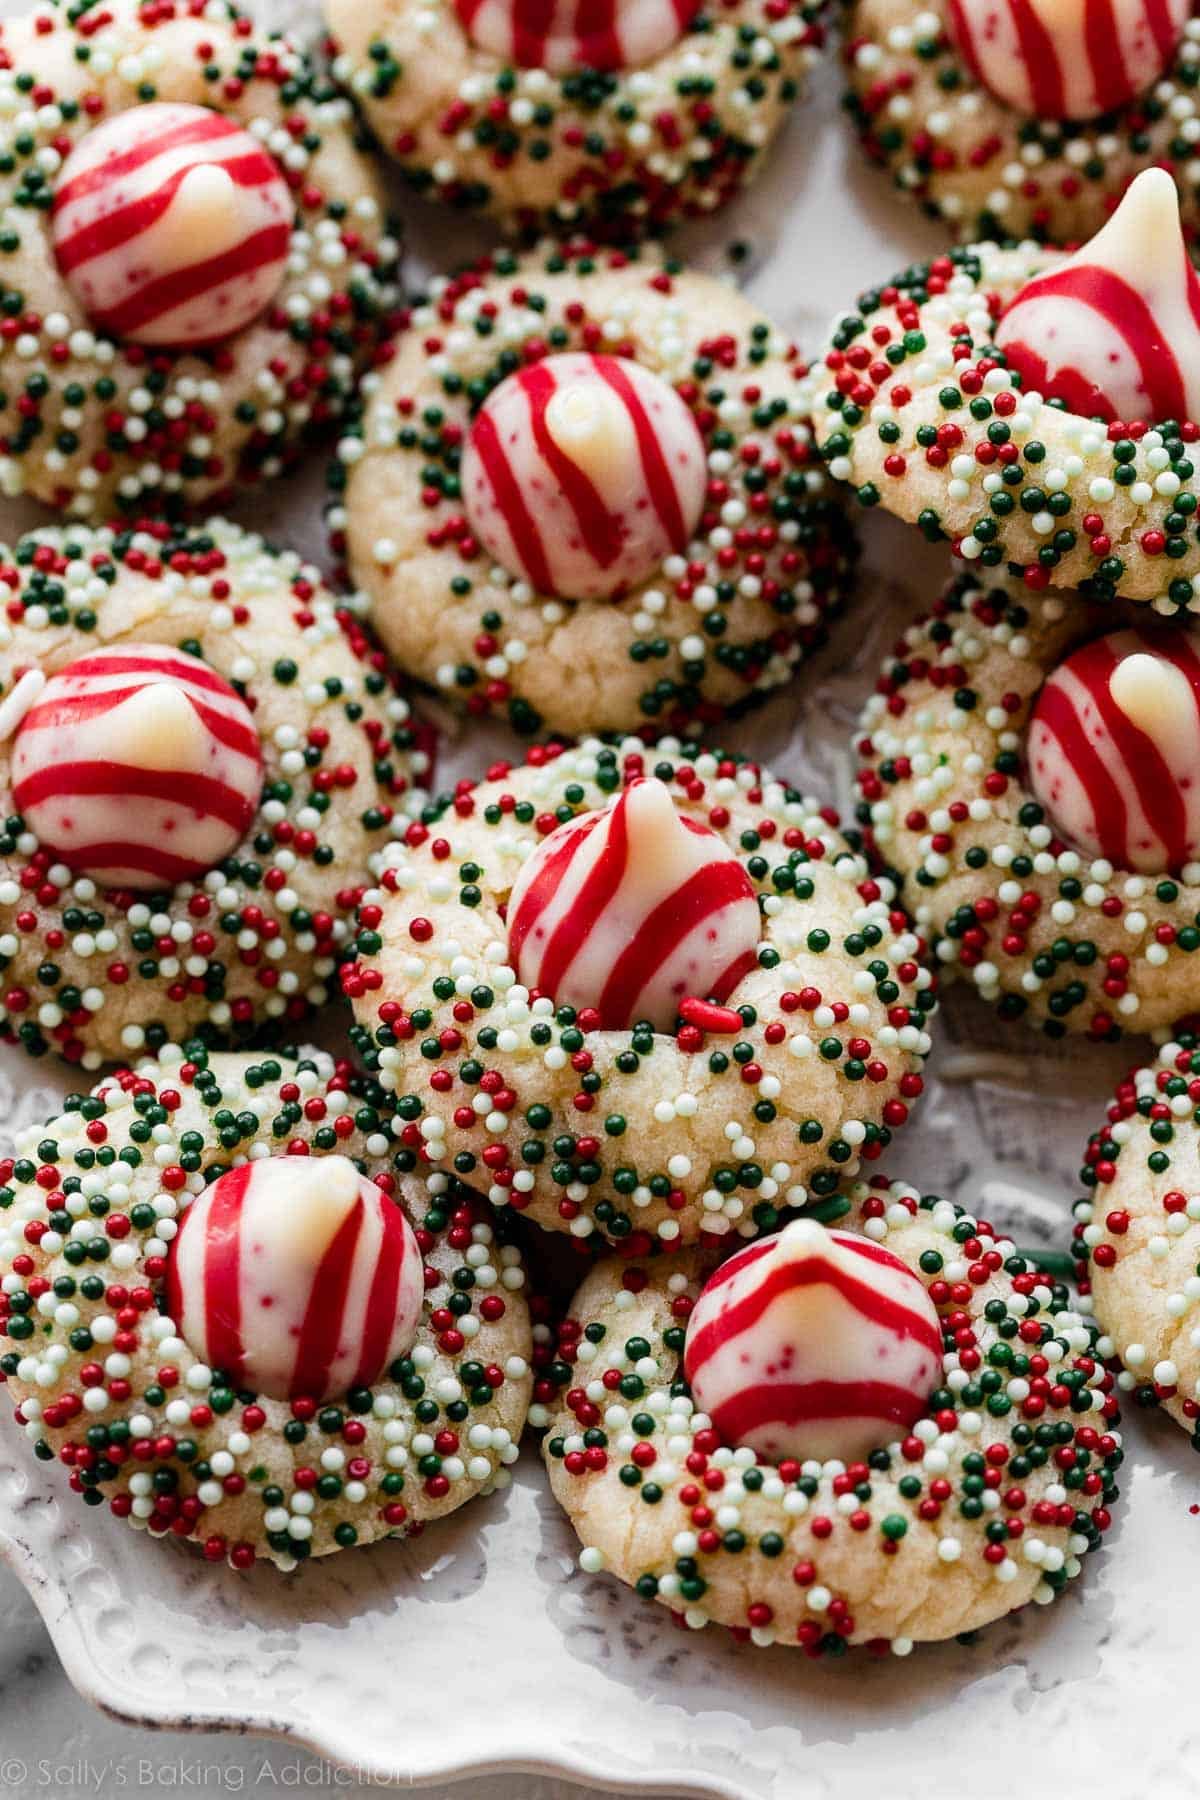
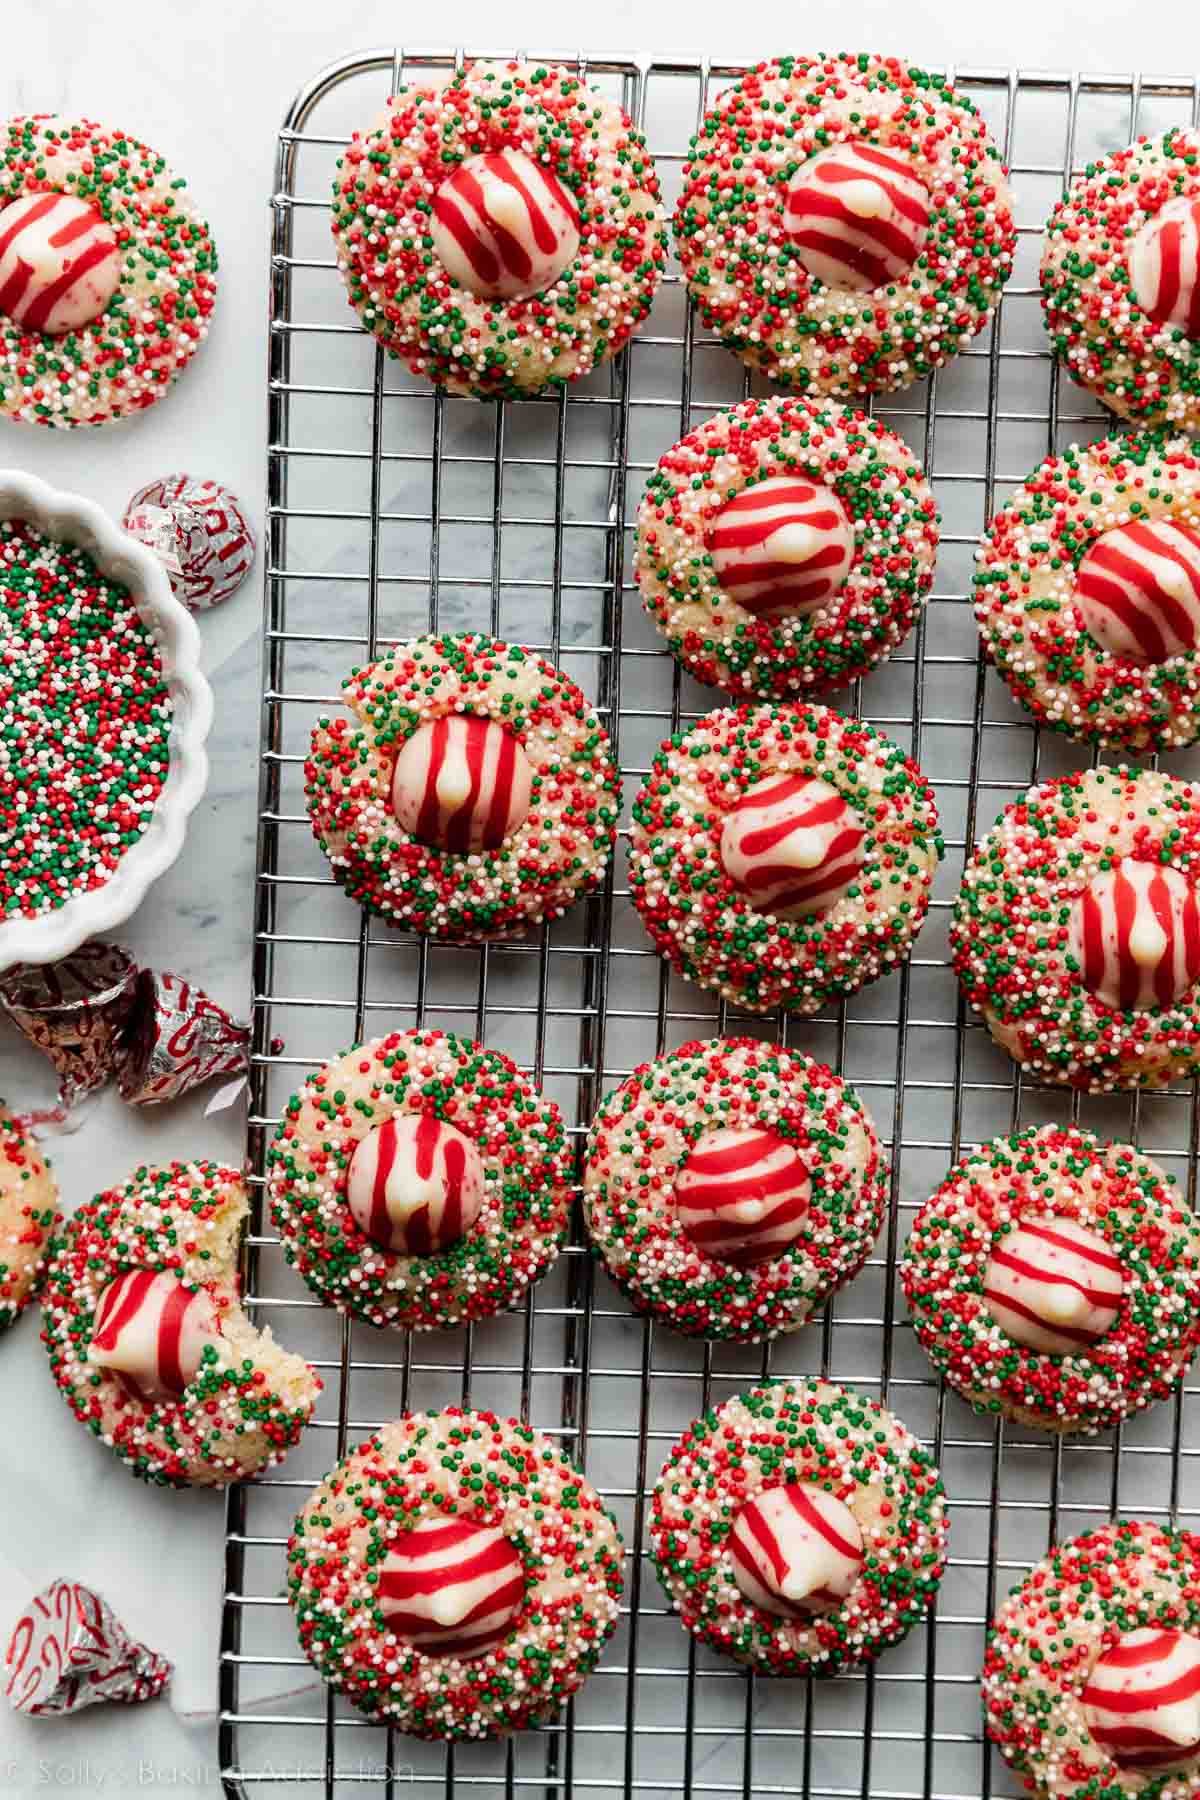
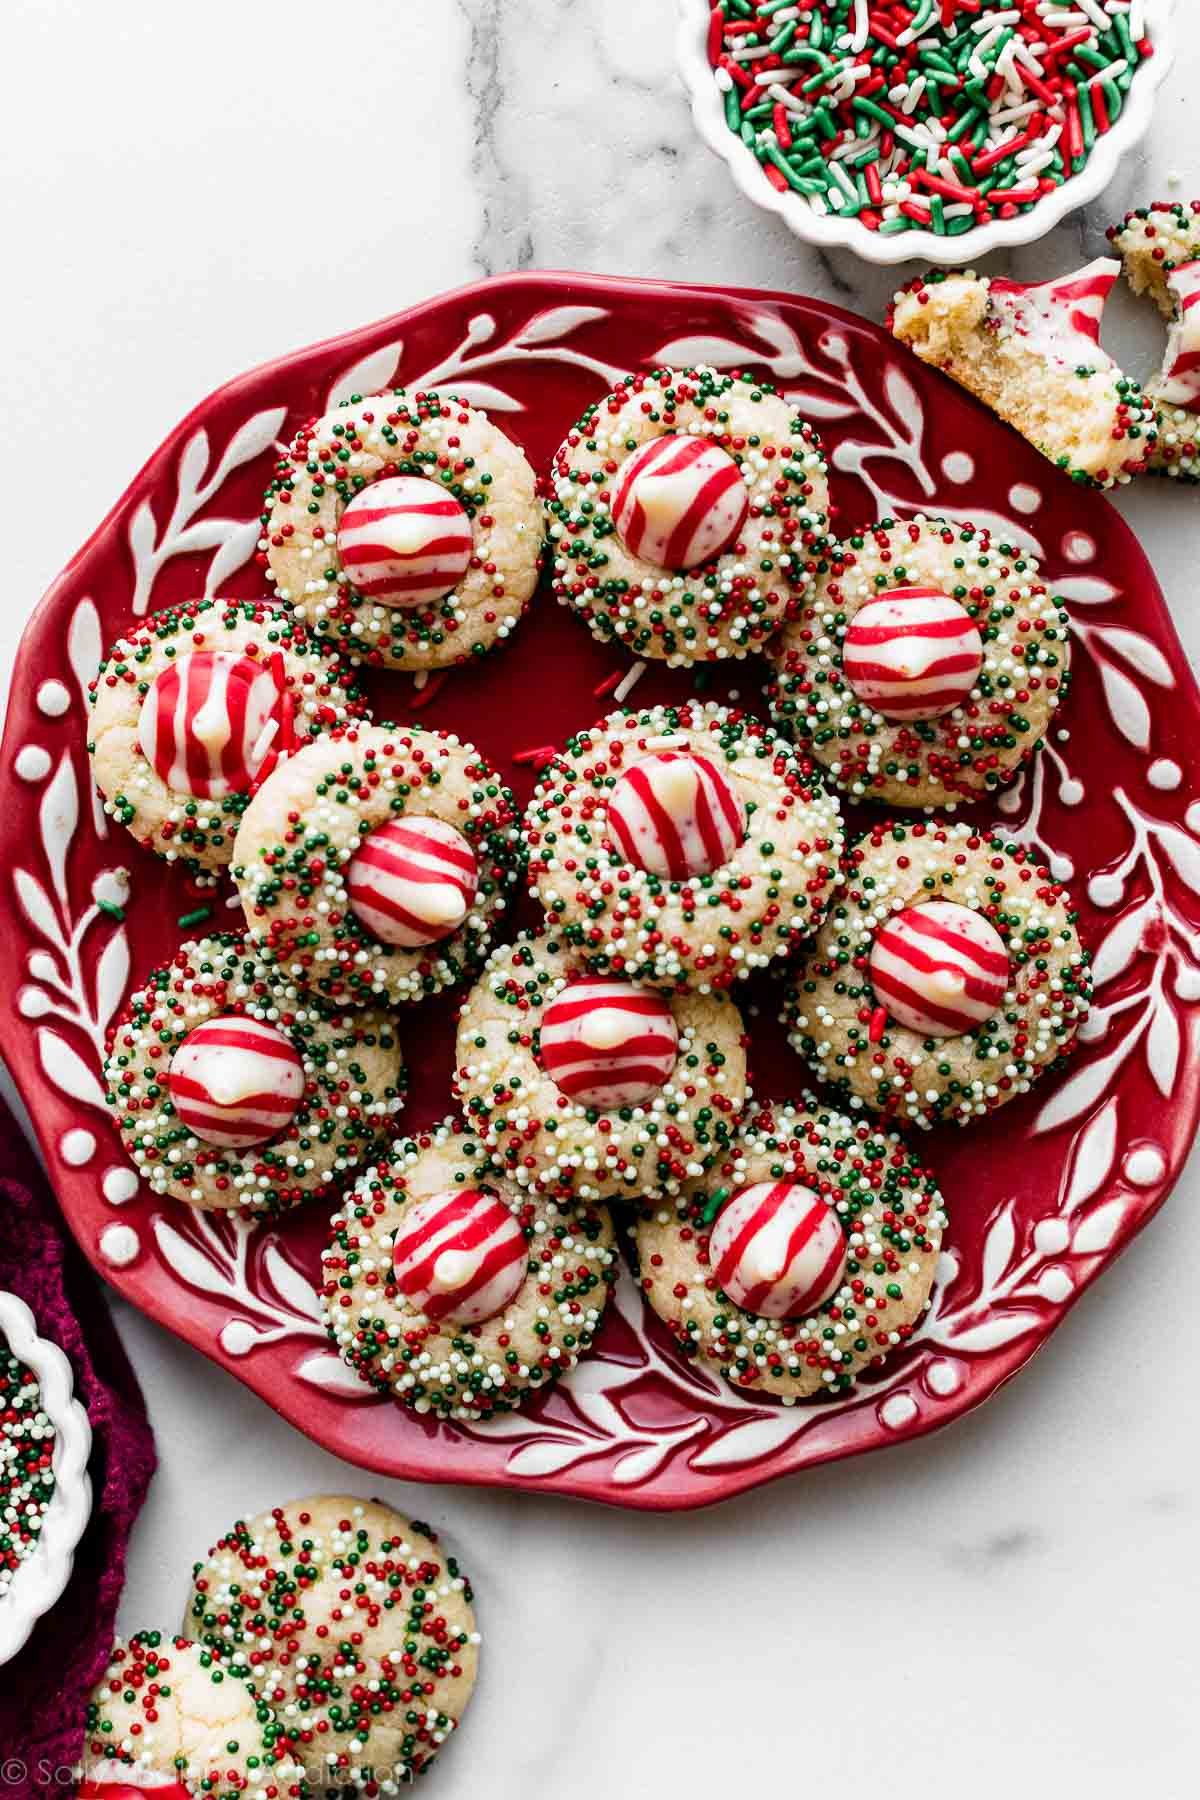
Adorably festive candy cane kiss cookies come together with a handful of basic baking ingredients. These are drop-style cookies (no rolling pin needed!) with plenty of colorful Christmas sprinkles and candy cane-flavored Hershey’s Kisses pressed in the center. They’re the nut-free, peppermint version of classic peanut butter blossoms!
I originally published this recipe in 2013 and have since added new photos, a video tutorial, and a few more success tips. I’ve also made some changes to the recipe, which are reflected in the printable recipe below.
What’s red and white and sweet all over? Well, a puppy in a holiday sweater, obviously. But also: THESE COOKIES! Similar to these Christmas cookie sparkles, but with a peppermint twist and a candy cane kiss!
I originally shared a recipe like this back in November 2013, before I published any cookbooks and right before I started my annual Christmas cookie countdown known as Sally’s Cookie Palooza. (Have you been following that long?!) Bad news, the original recipe was finicky and the cookies often over-spread. Good news, I reworked the entire recipe and now they’re joining my annual Christmas cookie countdown.
One reader, Krystyna, commented: “I loved this recipe so much! I really enjoyed the taste. Just enough peppermint and they look so pretty. It will be part of my holiday baking from now on. ★★★★★“
Another reader, Ruth, commented: “Definitely a keeper—these turned out great! They have a nice peppermint flavor that is not overpowering or artificial-tasting. I love that they are so easy to make and look so festive. These cookies are also pretty with colored sugar instead of the nonpareils. ★★★★★”
Candy Cane Version of Peanut Butter Blossoms
These “blossom”-style cookies are like a candy cane-sugar cookie version of classic peanut butter blossoms. Same easy-to-make process, but instead of peanut butter and chocolate, you get a sugar cookie and candy cane flavor combo. They’re an excellent nut-free alternative if you need one, but also, who says you can’t make both?! *whispers* You should make both.
In fact, you can leave out the peppermint extract, swap the flavor of Hershey Kiss, choose your sprinkle color, and make these sugar cookie blossoms for pretty much any holiday! Have you tried these red velvet kiss cookies, or these Valentine’s Day sparkle sweetheart cookies? All so much fun.
By the way, if you love peppermint you’ll want to try these peppermint meltaway cookies next.
Here’s Why You’ll Love Them
- Very easy to make
- Simple ingredient list
- Change flavors by omitting the peppermint extract and swapping type of Hershey’s Kiss
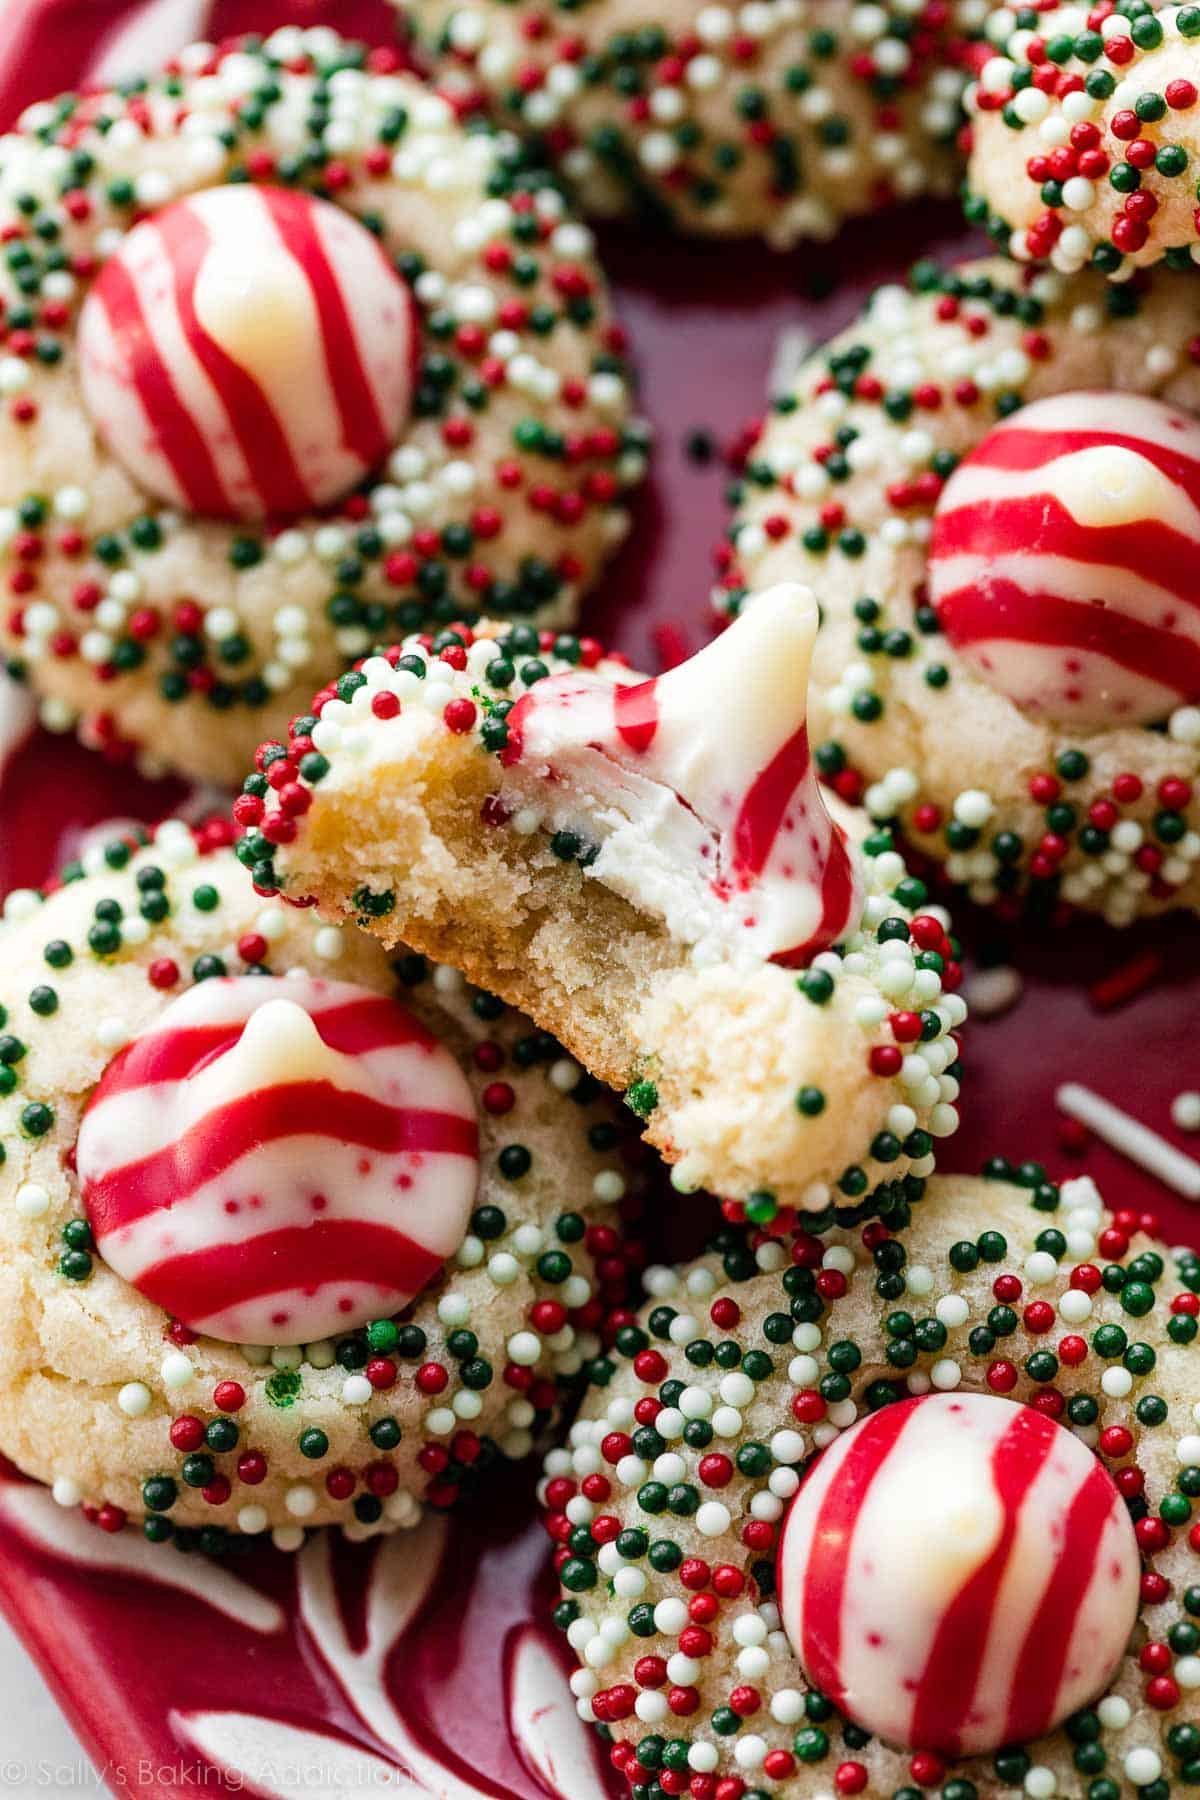
- Soft and chewy cookie with a little crunch from the sprinkle coating
- Sparkly, colorful, striped, and so so festive!
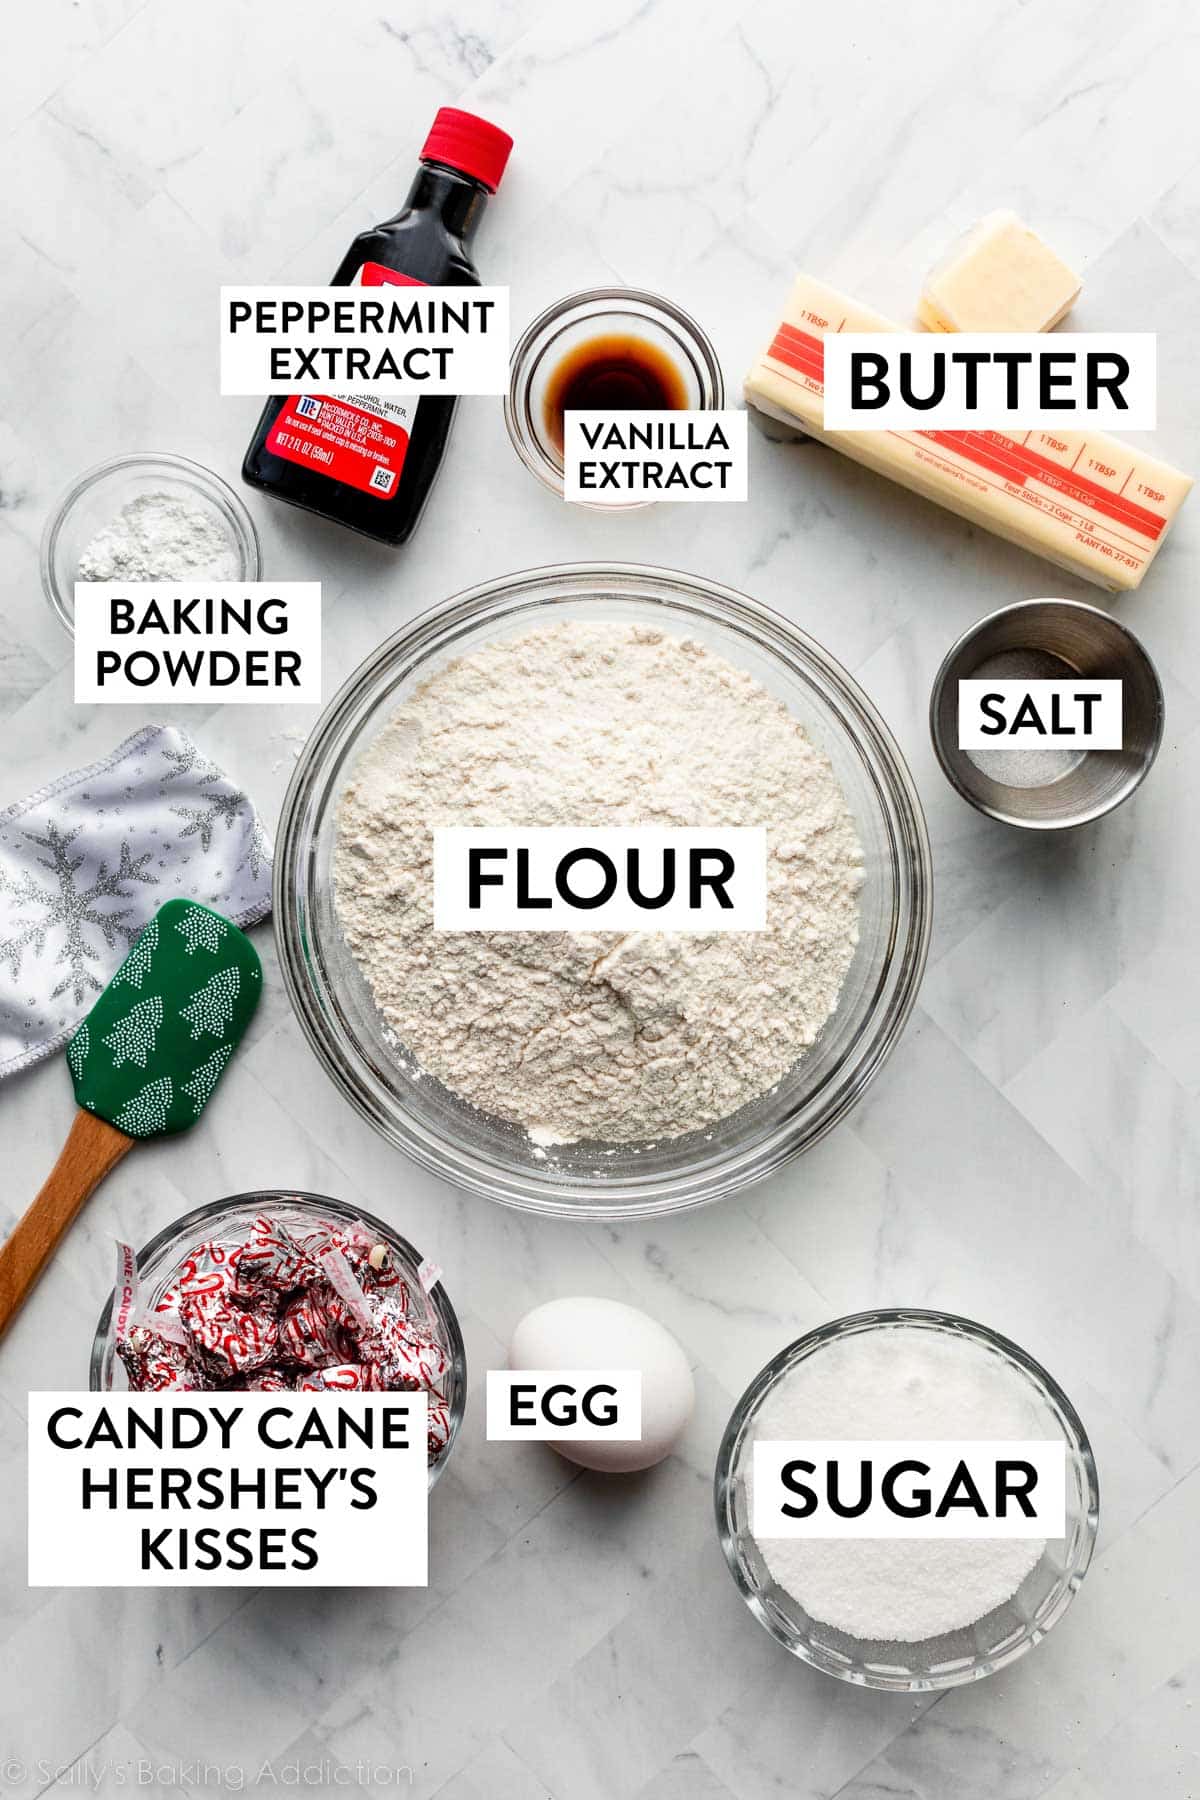
Grab These Ingredients:
- Butter: A sugar cookie staple! Butter adds creaminess and delicious flavor. Make sure you have proper room temperature butter before beginning.
- Sugar: We use all granulated in these sugar cookies.
- Egg: An egg binds everything together. If you’re ever looking for an egg-free holiday cookie, these snowball cookies or peppermint snowball cookies are my top choice.
- Vanilla + Peppermint Extracts: Flavor! Be sure to use peppermint extract and not mint extract. I find the latter tastes more like toothpaste, and less like dessert.
- Flour: Sturdy all-purpose flour is the base of these cookies.
- Baking Powder: So the cookies rise.
- Salt: To balance the sweetness.
- Sprinkles: The FUN part! I recommend using either nonpareils (the teeny-tiny balls) or sparkling sanding sugar for rolling these cookies. Both add a delightful crunch when you bite into the soft cookies. Note: I forgot them in the ingredients photo above!
- Candy Cane Hershey’s Kisses: These red-and-white-striped candy cane-flavored chocolates appear in American grocery stores around the holidays. If you can’t find them, you can swap them for another flavor/color.
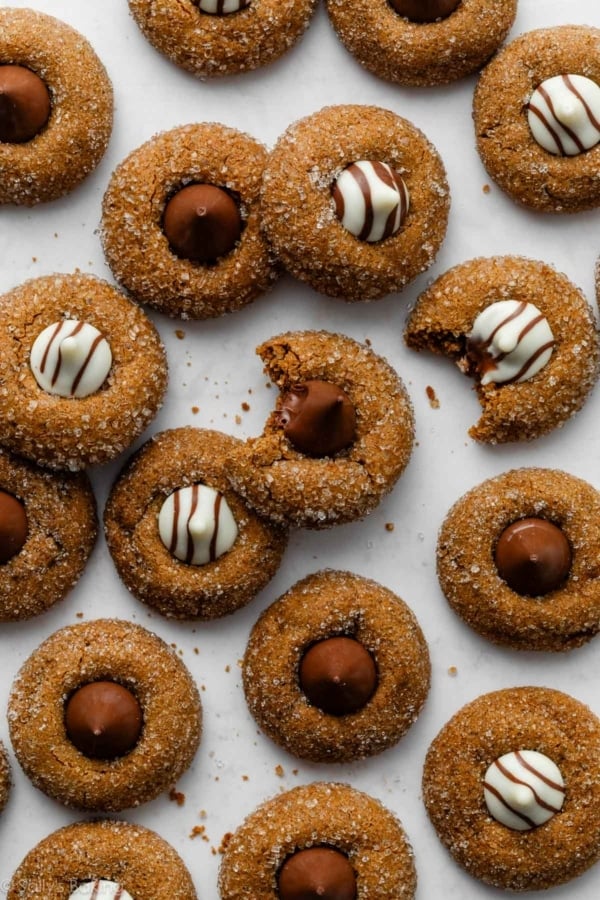
Can I make a chocolate cookie version? Yes, absolutely! See recipe Note below.
Best Way to Make Candy Cane Kiss Cookies
I love that these are simple drop-style sugar cookies—no rolling out cookie dough like we have to do when making traditional sugar cookies.
After the dough comes together, you’re going to roll the cookies and chill them just like we do when making brown butter sugar cookies.
Roll in Sprinkles & Chill
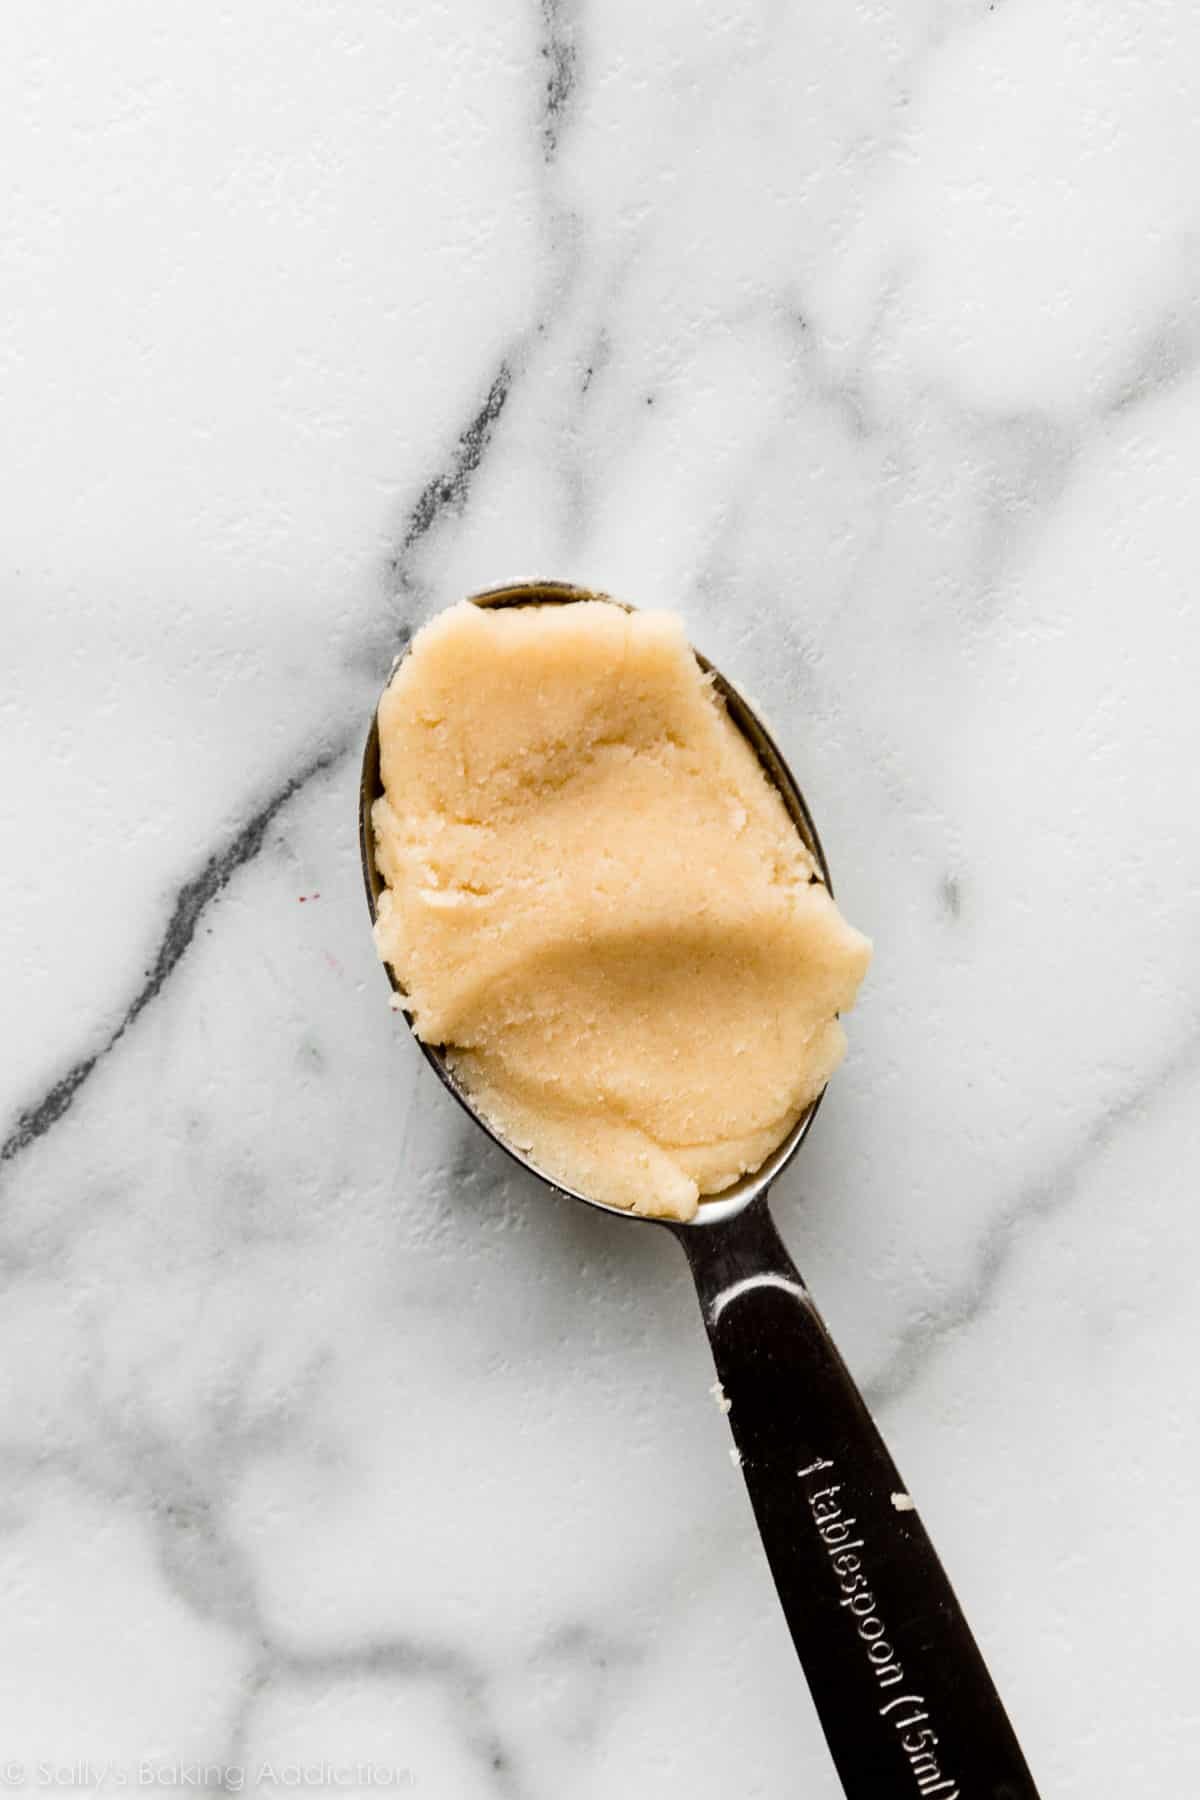
Measure 1 scant Tablespoon, or 20g, of dough per cookie. Roll into a ball. If the dough feels too sticky to roll in your hands, chill it in the refrigerator for 10 minutes and then try again.
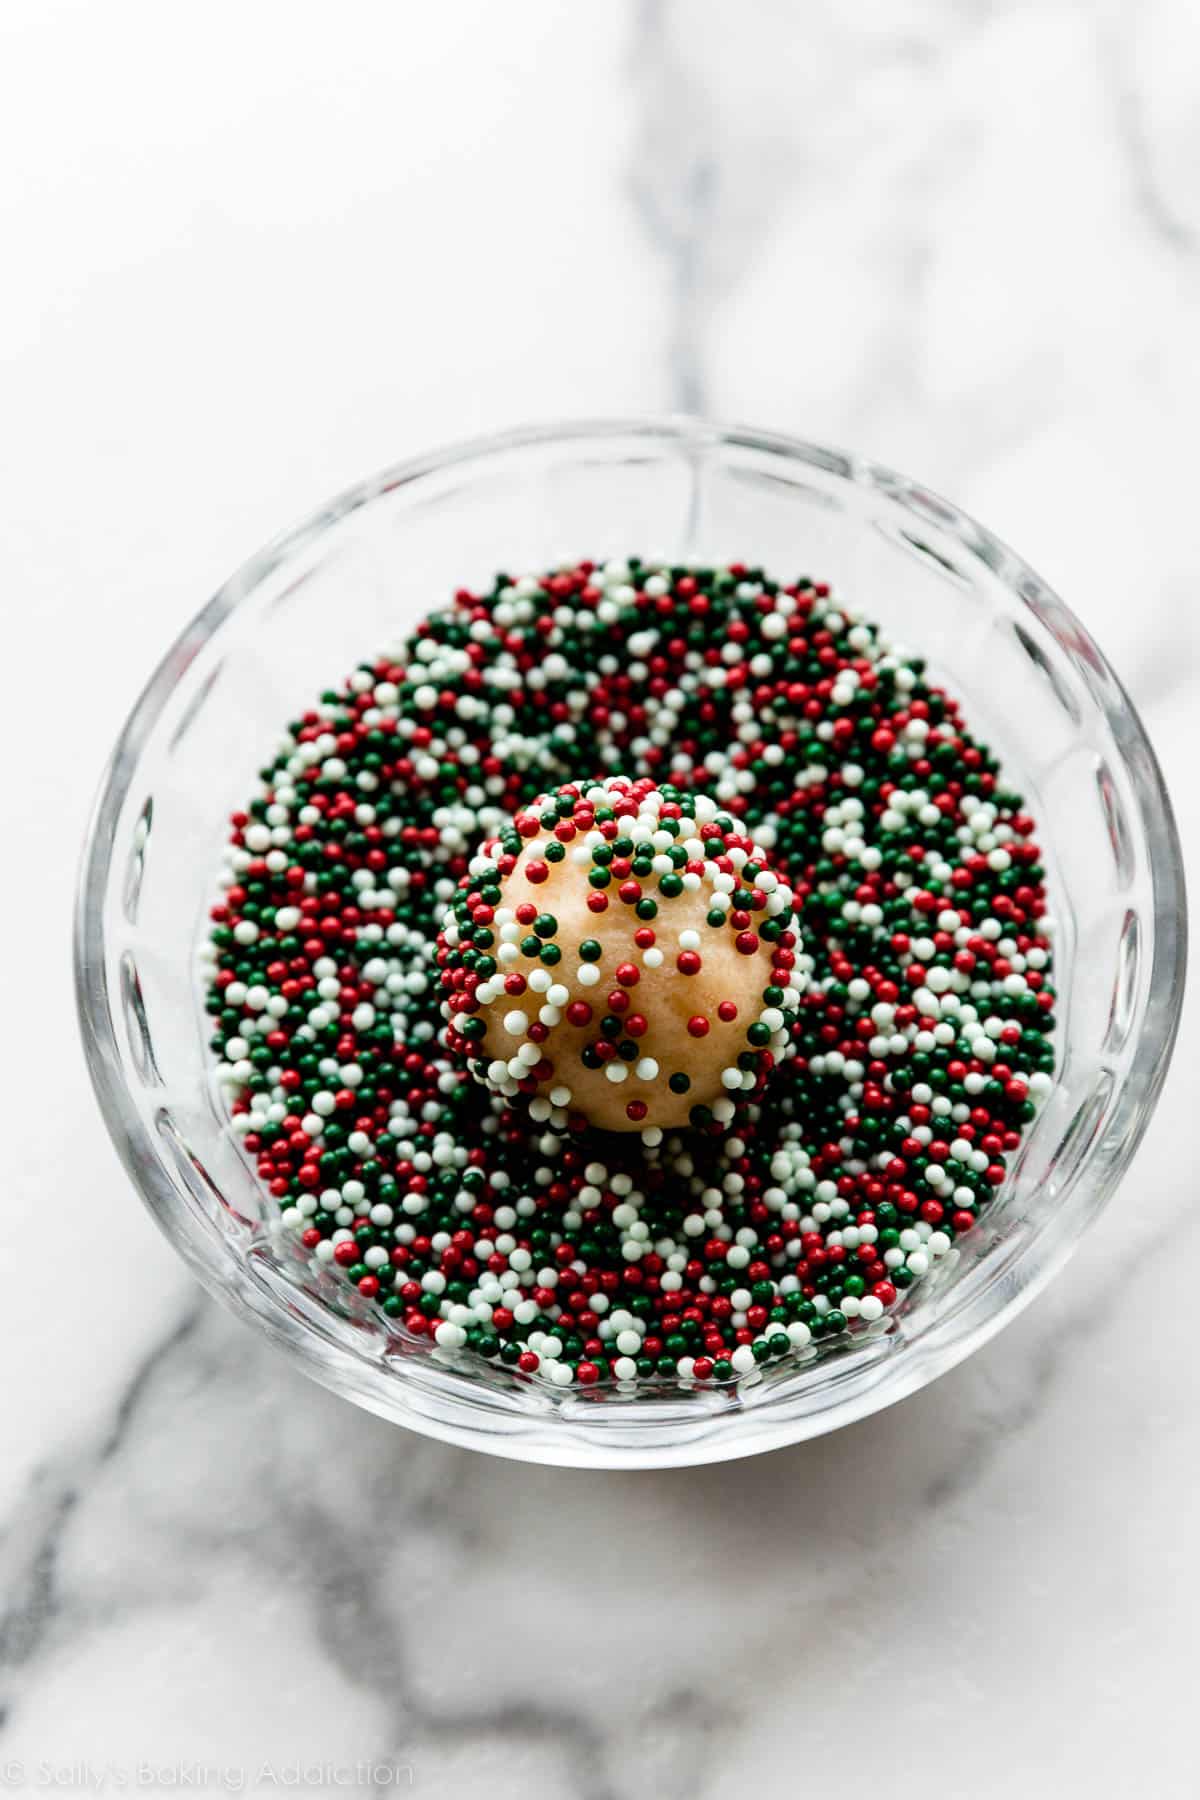
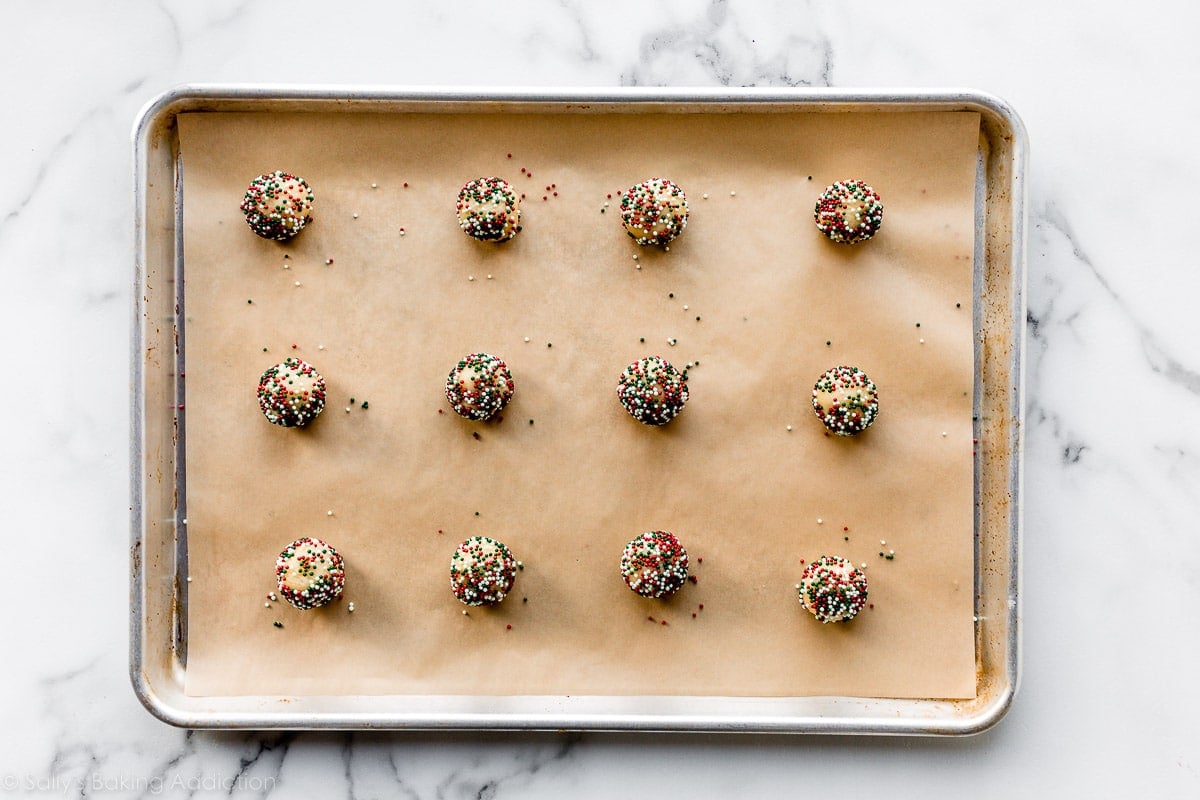
Roll the dough balls in a dish of sprinkles—nonpareils or colored sparkling sugar—and place on a lined baking sheet or a plate. You need to chill the dough balls in the refrigerator for 20 minutes before baking, so if you don’t have room in your refrigerator for a baking sheet, you can chill them on a plate.
Arrange chilled dough balls on your lined baking sheet. Add the candy cane kisses after they’re done in the oven.
Avoid Candy Cane Kiss Puddles
Now let’s talk about candy cane kiss puddles. (Something I’m sure you woke up thinking about today.) Sometimes melted candies are what we are after, like when we make Andes mint chocolate cookies. However, melty-bottomed Hershey’s candy cane kisses are not pretty. Let’s keep those kisses from melting when you add them to the warm cookies…
Here’s how to prevent candy cane kiss puddles: While the cookies are baking, clear a space in your freezer, get out a small baking sheet (or plate), and unwrap the candy cane kisses.
After the cookies bake, let them cool on the baking sheet for 5 minutes. Then carefully transfer them (I use a metal spatula/turner for this) to a smaller baking sheet or a plate. Press a candy cane kiss ever-so-lightly in the center of each cookie. Immediately transfer the cookies to the freezer for 10 minutes. The warm cookies help the candies adhere, and the cold freezer temperature keeps them from melting. This is the same process I use when I make gingerbread blossoms, too.
No more candy kiss puddles. Phew! We can sleep soundly tonight. 😉
3 Success Tips
- Add 1 random extra Tablespoon of flour. 2 cups + 1 Tablespoon of flour seems like an odd amount to print in a recipe, but, in testing, my team and I found that the extra spoonful of flour really made a difference. The dough is easier to handle/roll.
- Chill the dough balls. To prevent cookie puddles.
- Freeze the cookies for 10 minutes. To prevent Hershey’s Kiss puddles.
Everything holds shape nicely using these 3 success tips. Enjoy!
This recipe is part of my annual cookie countdown called Sally’s Cookie Palooza. It’s the biggest, most delicious event of the year! Browse dozens of cookie recipes over on the Sally’s Cookie Palooza page.


Candy Cane Kiss Cookies
- Prep Time: 45 minutes (includes chilling)
- Cook Time: 12 minutes
- Total Time: 1 hour, 10 minutes
- Yield: 32-36 cookies
- Category: Dessert
- Method: Baking
- Cuisine: American
Description
These are festive sugar cookies stuffed with a candy cane-flavored Hershey’s Kiss. Soft, chewy, and easy to make! Don’t forget to place the cookies in the freezer for 10 minutes to prevent the candy from melting.
Ingredients
- 2 cups + 1 Tablespoon (260g) all-purpose flour (spooned & leveled)
- 1 and 1/2 teaspoons baking powder
- 1/4 teaspoon salt
- 10 Tablespoons (142g) unsalted butter, softened to room temperature
- 1 cup (200g) granulated sugar
- 1 large egg, at room temperature
- 1 teaspoon vanilla extract
- 1/4 teaspoon peppermint extract*
- 1/2 cup (about 90g) nonpareil sprinkles (I use these)
- 32–36 candy cane flavor Hershey’s Kisses, unwrapped
Instructions
- Whisk the flour, baking powder, and salt together in a medium bowl until combined. Set aside.
- In a large bowl using a hand-held or stand mixer fitted with a paddle attachment, beat the butter and sugar together on high speed until creamy and combined, about 3 minutes. (Here’s a helpful tutorial if you need guidance on how to cream butter and sugar.) Add the egg, vanilla extract, and peppermint extract and beat until combined, about 1 minute. Scrape down the sides and up the bottom of the bowl and beat again as needed to combine.
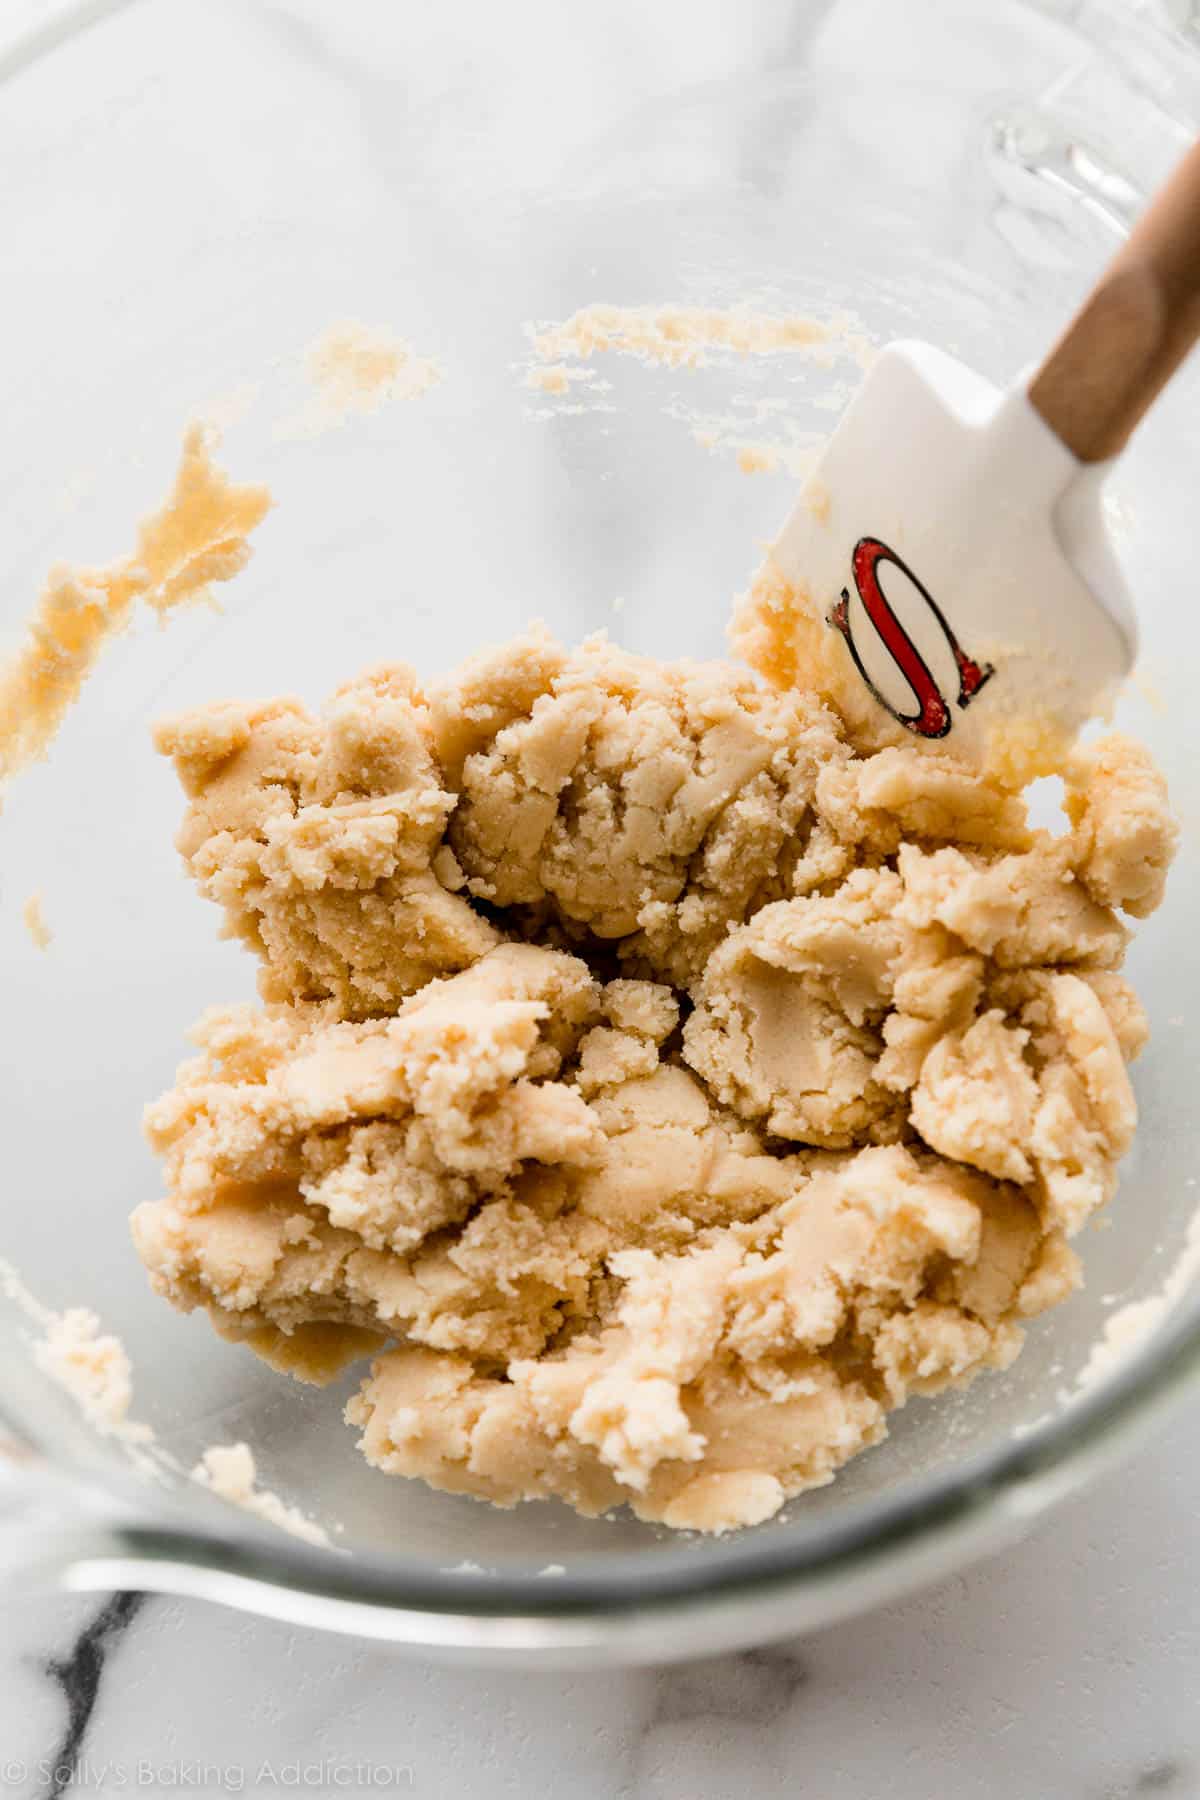
- Add the flour mixture to the wet ingredients and mix on low speed until fully combined. The dough will be very thick.
- Roll dough into balls, 1 scant Tablespoon of dough each (each dough ball should weigh about 20g). The dough may seem dry, but the warmth of your hands will allow it to come together in a ball. Roll each dough ball generously in the sprinkles. If the sprinkles are not sticking to the dough balls, the dough may be too firm. Try pouring the sprinkles onto a plate and pressing the dough balls into the sprinkles. Or continue rolling the dough balls, as the warmth from your hands can help get the sprinkles to stick. If this still isn’t helping, beat 1 teaspoon of water into the dough to help make it a bit stickier, and then try again.
- Place sprinkled dough balls on a baking sheet or plate (whatever will fit in your refrigerator). Chill them in the refrigerator for 20 minutes, and up to 1 day. If chilling for longer than 1 hour, cover them.
- While the cookie dough balls are chilling, preheat oven to 350°F (177°C).
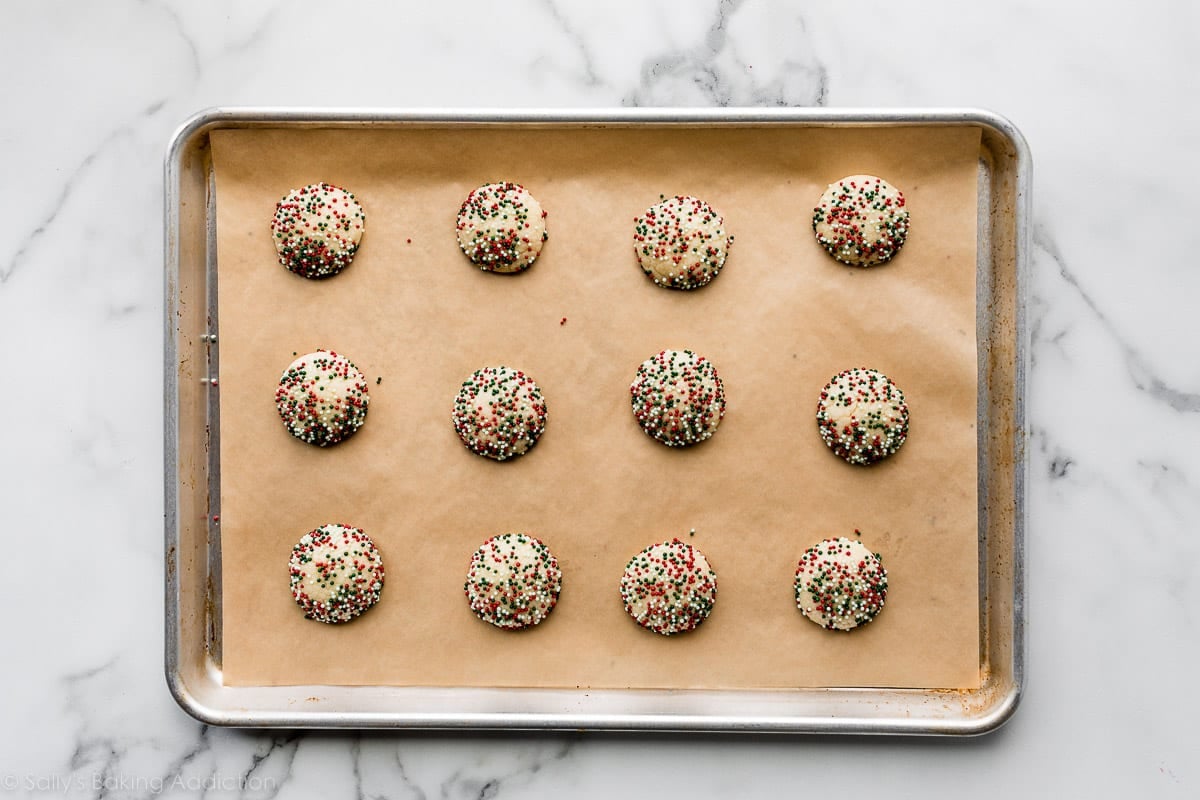
- Place the chilled dough balls about 2 inches apart on the lined baking sheets. Bake for 12 minutes or until edges appear set. The cookies may look under-baked in the centers; that’s ok—do not over-bake. Remove cookies from the oven and allow to cool on the baking sheets for 5 minutes.
- Set the Hershey’s Kisses: Press a kiss candy into the center of each, then, using a thin spatula, immediately transfer the cookies to a large plate or a few smaller plates (gently—they’re soft). Place the plate(s) of cookies in the freezer for 10 minutes to quickly set the candy in the cookie.
- Remove from the freezer and serve.
- Cookies stay fresh covered at room temperature for up to 1 week.
Notes
- Make Ahead & Freezing Instructions: You can make the cookie dough, roll into balls, roll in sprinkles, and then chill them in the refrigerator for up to 1 day. It’s important to coat the cookie dough balls in sprinkles right after it’s been made because otherwise the sprinkles will not stick. Unbaked (and sprinkle-coated) cookie dough balls freeze well for up to 3 months. Bake frozen cookie dough balls for an extra minute, no need to thaw. Baked cookies freeze well for up to 3 months.
- Special Tools (affiliate links): Glass Mixing Bowl | Whisk | Electric Mixer (Handheld or Stand) | Holiday Nonpareil Sprinkles | Baking Sheets | Silicone Baking Mats or Parchment Paper | Thin Spatula/Turner | Cooling Rack
- Peppermint Extract: Feel free to omit, or replace with almond extract, for a classic sugar cookie flavor.
- Sprinkles: I recommend using nonpareils (the tiny balls), sparkling sanding sugar, or regular jimmies-style sprinkles for coating these cookies.
- Candy Cane Hershey’s Kisses: If you cannot find candy cane-flavored Hershey’s Kisses, you can use regular chocolate Hershey’s Kisses or another flavor of your choice.
- Chocolate Version: Want to try a chocolate version? My chocolate peppermint thumbprints recipe is a great place to start. Feel free to roll in granulated sugar as that recipe says, or roll in confectioners’ sugar, or sprinkles. Follow those recipe instructions and instead of indenting the cookies for a thumbprint, bake as regular dough balls. Cool for 5 minutes, and then continue with step 7 above. You can also use these extra fudgy chocolate crinkle cookies. Cool for 5 minutes, and then continue with step 7 above.
- Be sure to check out my top 5 cookie baking tips, and these are my 10 favorite cookie baking tools.


Reader Comments and Reviews
These turned out so gorgeously gaudy and festive! I found the Christmas colored nonpareils on amazon. I followed the recipe and didn’t need to add anything extra to make them stick. It was time consuming to roll out each ball even though I used a cookie scoop, but it seemed worth it if you are wanting an extra fancy and festive looking cookie. I added the extract to the dough and didn’t find it to be overwhelming.
Tysm for sharing this recipe! Everyone loved how they came out!
I was excited to give this recipe a try! The pictures posted are gorgeous so I knew I had to give them a go! I’m not a candy cane fan at all but the cookies were a hit with everyone we shared them with! I used sanding sugar based on the advice of other reviewers instead of the nonpareil sprinkles. It was nice to have a new cookie to share with friends and family! Thank you SBA for another wonderful recipe!
Delicious! Made these for my holiday cookie box, and they were such a cute addition. I recommend!
These are delicous! I have made them three times in the last month and each time they have been amazing. I did use 21 to 22 grams per cookie and that was a very nice size and it made 30 cookies. Rolling in the sprinkles took some time but they turned out so pretty. I had trouble finding Christmas non pareils and found one pound bags at half price at Hobby Lobby in mid November so I bought two bags! This is at the top of the list for our favorite Christmas cookies!
This recipe was the first of Sally’s I’ve tried that did not turn out well. I’m an accomplished baker and always follow directions exactly in a recipe before making tweaks. I started having misgivings as the dough was coming together – it felt too dry. I started realizing these were going to be a major pain in my behind as I started rolling the balls, squeezing and warming them up in my hands for dear life before rolling. And I started questioning my life choices as I tried to roll them in sprinkles and nonpariels. They. Would. Not. Stick. Have you ever tried putting a mitten on a toddler? And as you’re getting them ready to have fun in the snow, it starts off joyous and you’re picturing how wonderful it’s going to be? And then you try to stick their little thumb in the thumb hole and you start off ok but 45 minutes later you have a steady dialogue of very un-PG like comments running through your head and you’re like JUST PUT YOUR THUMB IN! That’s how I felt with the sprinkles. JUST STICK! I ended up literally running each ball under water and angrily mashing sprinkles in. I put them in the fridge the 20 minutes. I baked them. I waited the 5 minutes. And I pressed the kiss in – and the cookies promptly started cracking as I pressed them in. I was too far in to stop, so I just finished them. I had made them for a school wide holiday dinner for my kids, so there was no turning back.
** I still had half the dough left after that adventure, so I flattened it into a 9 x 11 pan, baked it as a sheet cookie, slapped some icing on (and sprinkles, which actually stuck to the icing) so I didn’t feel like I wasted the dough. There was no freaking way I was trying to roll balls into those sprinkles again.
They taste ok. Not the best, not the worst. Absolutely not going to try to make them again, but if I did, I would decrease the flour by a couple of Tbsp and add a little extra butter and I would SKIP the nonpariels and use sugar instead. Also I would press the kiss in immediately after baking and put them in the freezer as suggested, peppermint puddles would be better than cracked cookies.
For all of those who this turned out, let me say with all sincerity, I’m so happy for you.
I’ve made these cookies before but can’t find my original recipe unfortunately. These cookies…do you really mean 20 grams each of dough, that’s a lot. So I made smaller – 15 grams. They turned out flat as a board. So dissapointed. I added a bit of baking soda and the dough is sitting in the refrigerator. On a bright note, the sugar did stick.
Disappointed! The sprinkles were very hard to stick even after wetting the dough. My daughter and I had one after coming out the of the oven and they were good, but then after putting them the in freezer for 10 mins it seems to have hardened the cookies, completely inedible.
I make this all the time and use different sanding sugars depending on the season. I’d like to try different flavors like orange in the cookie and a dark chocolate kiss or hazelnut with hugs. Would you just use extracts? Orange rind added to the cookie? Any other flavor ideas?
Hi Hayley, you might love these chocolate cherry blossoms.
I made the gingerbread blossoms and they turned out amazing!
I want to try these now. And as I have a friend that can only eat gluten free things, do you think it might be best to use almond flour or gluten free flour for these?
Thank you, Sally and team! You guys are awesome!
Hi Elie, we haven’t tested this recipe with gluten free flour so we’re unsure of the results. Although some readers report using an all-purpose 1:1 gluten-free flour in many of our recipes with success, you should expect slightly different results anytime you substitute ingredients. Let us know what you try!
These are so festive! I love having them on a cookie platter. Yummy too!
Just made these for the 2024 Holidays! Went with sanding sugar instead of nonpareils and didn’t have any problems. They are delicious! Thank you Sally!
I followed all of the advice on how to get the nonpareils to stick to the (dry) dough. I’ll add that I am a huge baker, so I understand direction well. I found it very difficult and much more time consuming than I would have wanted for “easy” cookies. Next time (if there is one as I’m exhausted), I’ll follow some of the suggestions for having the dough be less dry. FYI, the ones where I got the nonpareils to stick in an overall way are adorable.
These are delicious and super cute!
Hello! I just prepared the recipe for baking tomorrow and realized that my cookie scoop was 1.5 tbsp instead of 1 tbsp. How much more baking time should I add?
Hi Mariah, maybe a couple minutes – keep an eye on them!
This recipe is delicious and works very well thanks for Sally’s wonderful instructions; she anticipates any problems so you are always covered. I opted for the sanding sugar, 1/4 cup red and 1/4-cup green and 1 tablespoon white, mixed together. I find this easier than the nonpareils because the nonpareils roll around on the counter and on the cookie sheet, where they can roll onto oven floor, so the sanding sugar is easier. I got 44 cookies using a #60 scoop, leveled (1 level tablespoon). They’re very good tasting with the peppermint extract.
I made these cookies today. They are delicious! Personally I find the kisses make them too sweet but I know my guests will love them. I think I’ll make a batch without the kisses too. Made the Maple brown sugar cookies this week too. They are a huge hit. Thank you for the recipes!
Want to make these and freeze baked. Would I freeze w the kiss?
Yes! Baked cookies freeze well for up to 3 months.
These are the best! Made them several times and great to make w my granddaughter. My question- I want to freeze baked cookies, do I freeze with or without kiss?
With the kiss! Baked cookies freeze well for up to 3 months. So glad you enjoy these cookies!
Not sure what happened because I followed the recipe and weighed my ingredients and chilled the dough, checked oven temp etc….but my cookies look much much flatter. I payed attention and chilled mine for 12 hours so that definitely wasn’t the problem. I’m so disappointed that mine look like a flat mess. I was counting on these to look festive on my cookie trays and boxes. Thankfully my husband said they’re delicious but I sure wish I knew what happened. I just can’t figure out what went wrong. First recipe that didn’t work for me.
Hi Barb, I’m sorry to hear this! Happy to help troubleshoot. If your cookies are overspreading, the simplest answer is likely that you may need to add a little more flour to your dough. I hope this helps for next time!
I was thinking of making these with a chocolate base, would you just sub some of the flour for cocoa powder?
Hi Jane! That would take some testing. You may enjoy these red velvet kiss cookies. Let use know if you try anything!
Can i make these without rolling in sprinkles?
Absolutely.
I can’t wait to try this recipe! I think they will be a great addition to my baking of Christmas cookies for giving away as presents! Thank you for sharing this recipe.
Huge hit! I couldn’t keep the dough around long enough to be honest. The cookie dough balls were getting eaten straight from the fridge! For some reason my cookies didn’t seem as fluffy as Sally’s look. They kind of flattened out once they cooled and I placed the kiss in. I didn’t have the same trouble with the chocolate peanut butter cup recipe which has a similar cooking/cooling/candy placement method…I will definitely make these again!
I was worried these might be a little too minty, but they’re great! I couldn’t find nonpareils so used red and green sanding sugar, and they’re so festive and fun.
Thanks so much for all the helpful tips. The cookies turned out great and we had so much fun making them. Merry Christmas from Canada!
Help!! These did NOT turn out ok!! My dough was sticky and wet. I never ever had the dryness problem. They were so sticky the only way I could handle them was to plop them in the sprinkles. Then of course they overspread in the oven. I’ve never had such a bad luck and felt like I followed the recipe to a tee! But they were very flat and not fluffy.
Hi Margaret, we’re happy to help troubleshoot. Was your butter perhaps a bit warmer than room temperature? That could definitely be the culprit for overly sticky dough + over spreading. And how did you measure your flour? Be sure to spoon and level (or is a kitchen scale) to ensure the flour isn’t over/under measured. If it was under measured, there likely wasn’t enough flour to help absorb those wet ingredients, causing the stickiness and extra spread that you mention. Hope these tips help for next time!
Thank you! I do think my butter was too warm. I am going to try again. If my batter remains sticky, do you recommend adding more flour until the dough is drier?
Awesome recipe! To combat the dryness I substituted one tablespoon of butter with applesauce. The dough was just sticky enough for the sprinkles and sugar to stick. I rolled all the batter into balls at once and then rolled them in the sprinkles and sugar. By the time about 1/3 had been coated, the dough balls were drying out just enough that the sprinkles stopped sticking as well. I started rolling each one between my hands for 10 seconds or so first and that fixed it. Love how they turned out!