

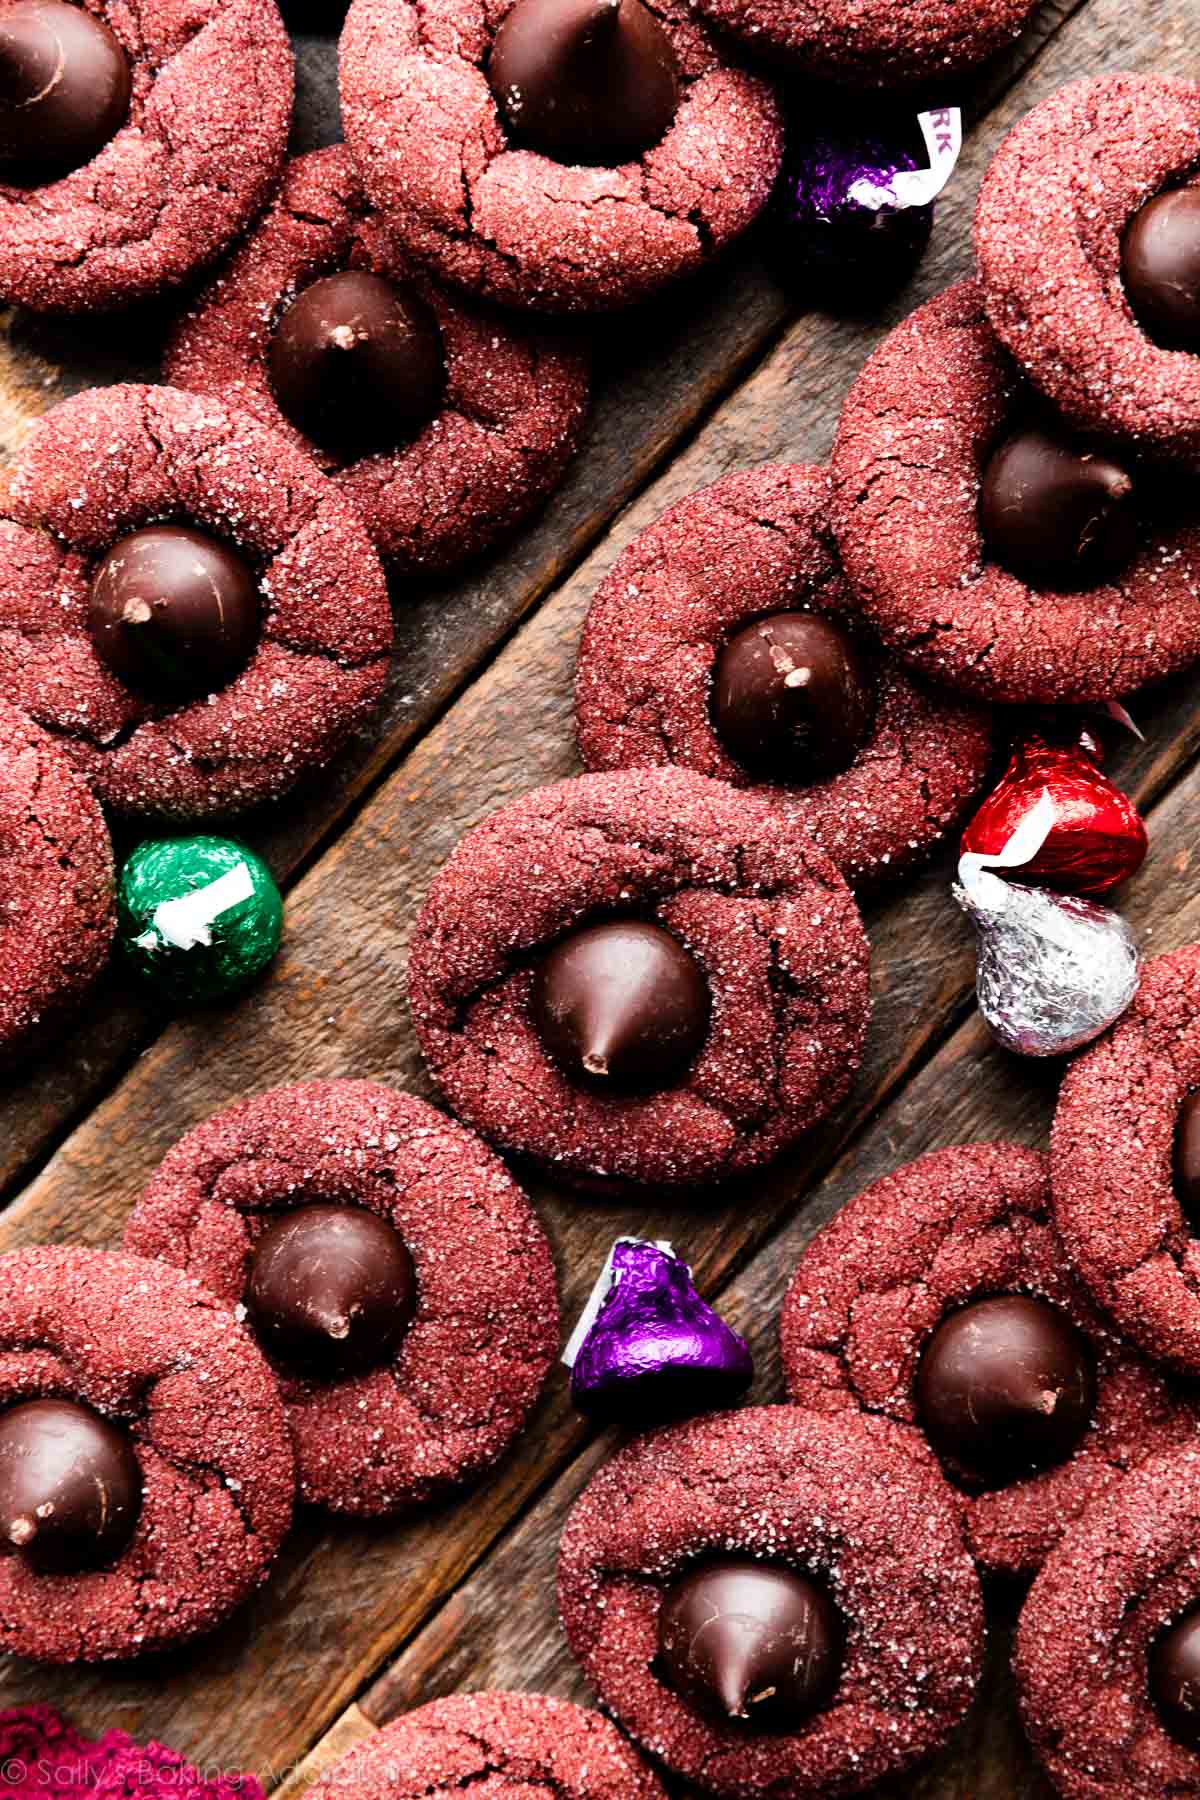
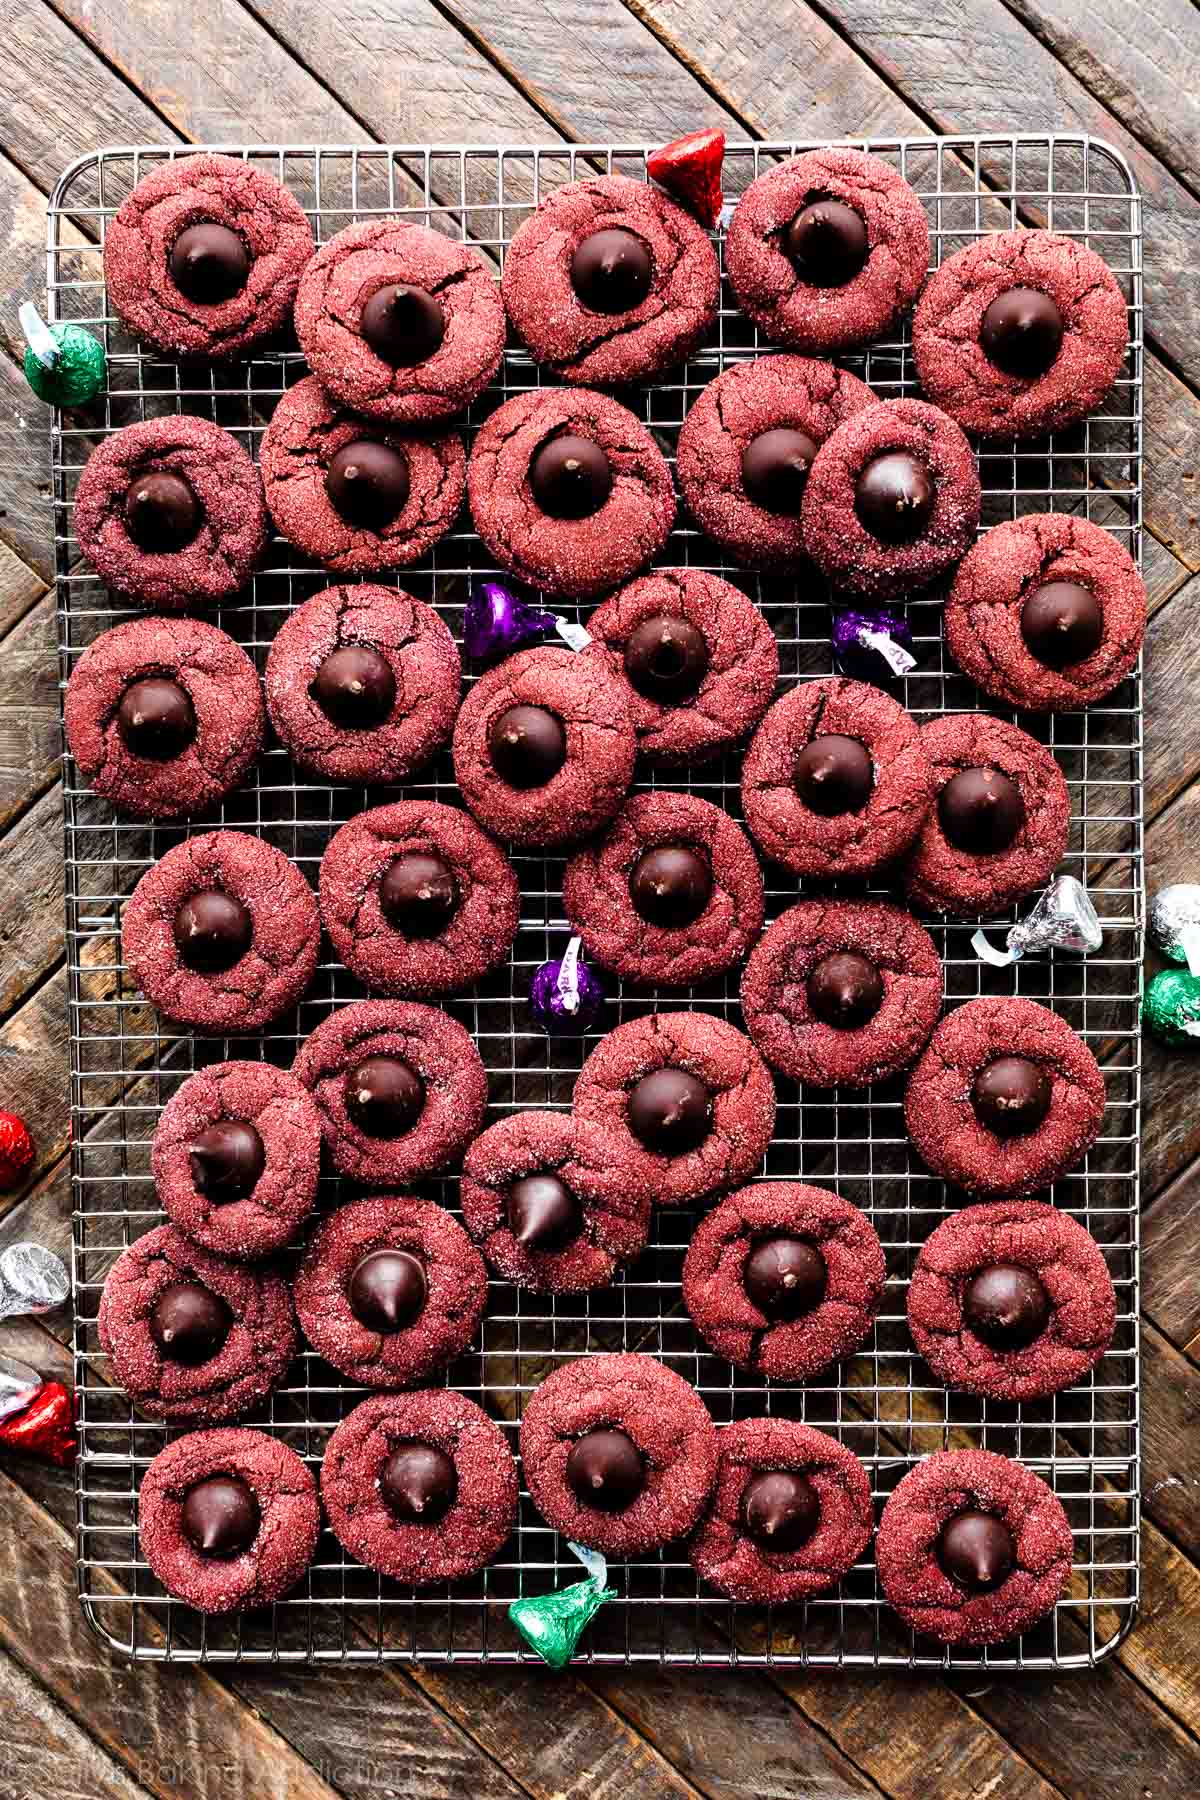
These red velvet kiss cookies are a colorful spin on traditional peanut butter blossoms. Inspired by the classic red velvet cake, they’re soft-baked and buttery with cocoa and vanilla flavors. While the cookies are still warm, press Hershey’s Kisses into the centers.
This recipe is part of my annual holiday cookie countdown called Sally’s Cookie Palooza. Every year since 2013, I work on a handful of new cookie recipes and publish the 10 best ones for readers to enjoy. It’s the biggest, tastiest event of the year on my website!
There’s no comparing true red velvet cake with a cookie, but these scarlet beauties have a similar flavor profile. They’re easily one of the prettiest Christmas cookies I’ve made this holiday season and there was no complicated decorating or special tools involved. That chocolate kiss is our built-in finishing touch. 😉
One reader, Daniel, commented: “I love everything about these cookies, from the appearance and texture to the taste. The cookies were a huge hit and will be placed at the top of my Christmas cookie list and baked throughout the year… ★★★★★”
Tell Me About These Red Velvet Kiss Cookies
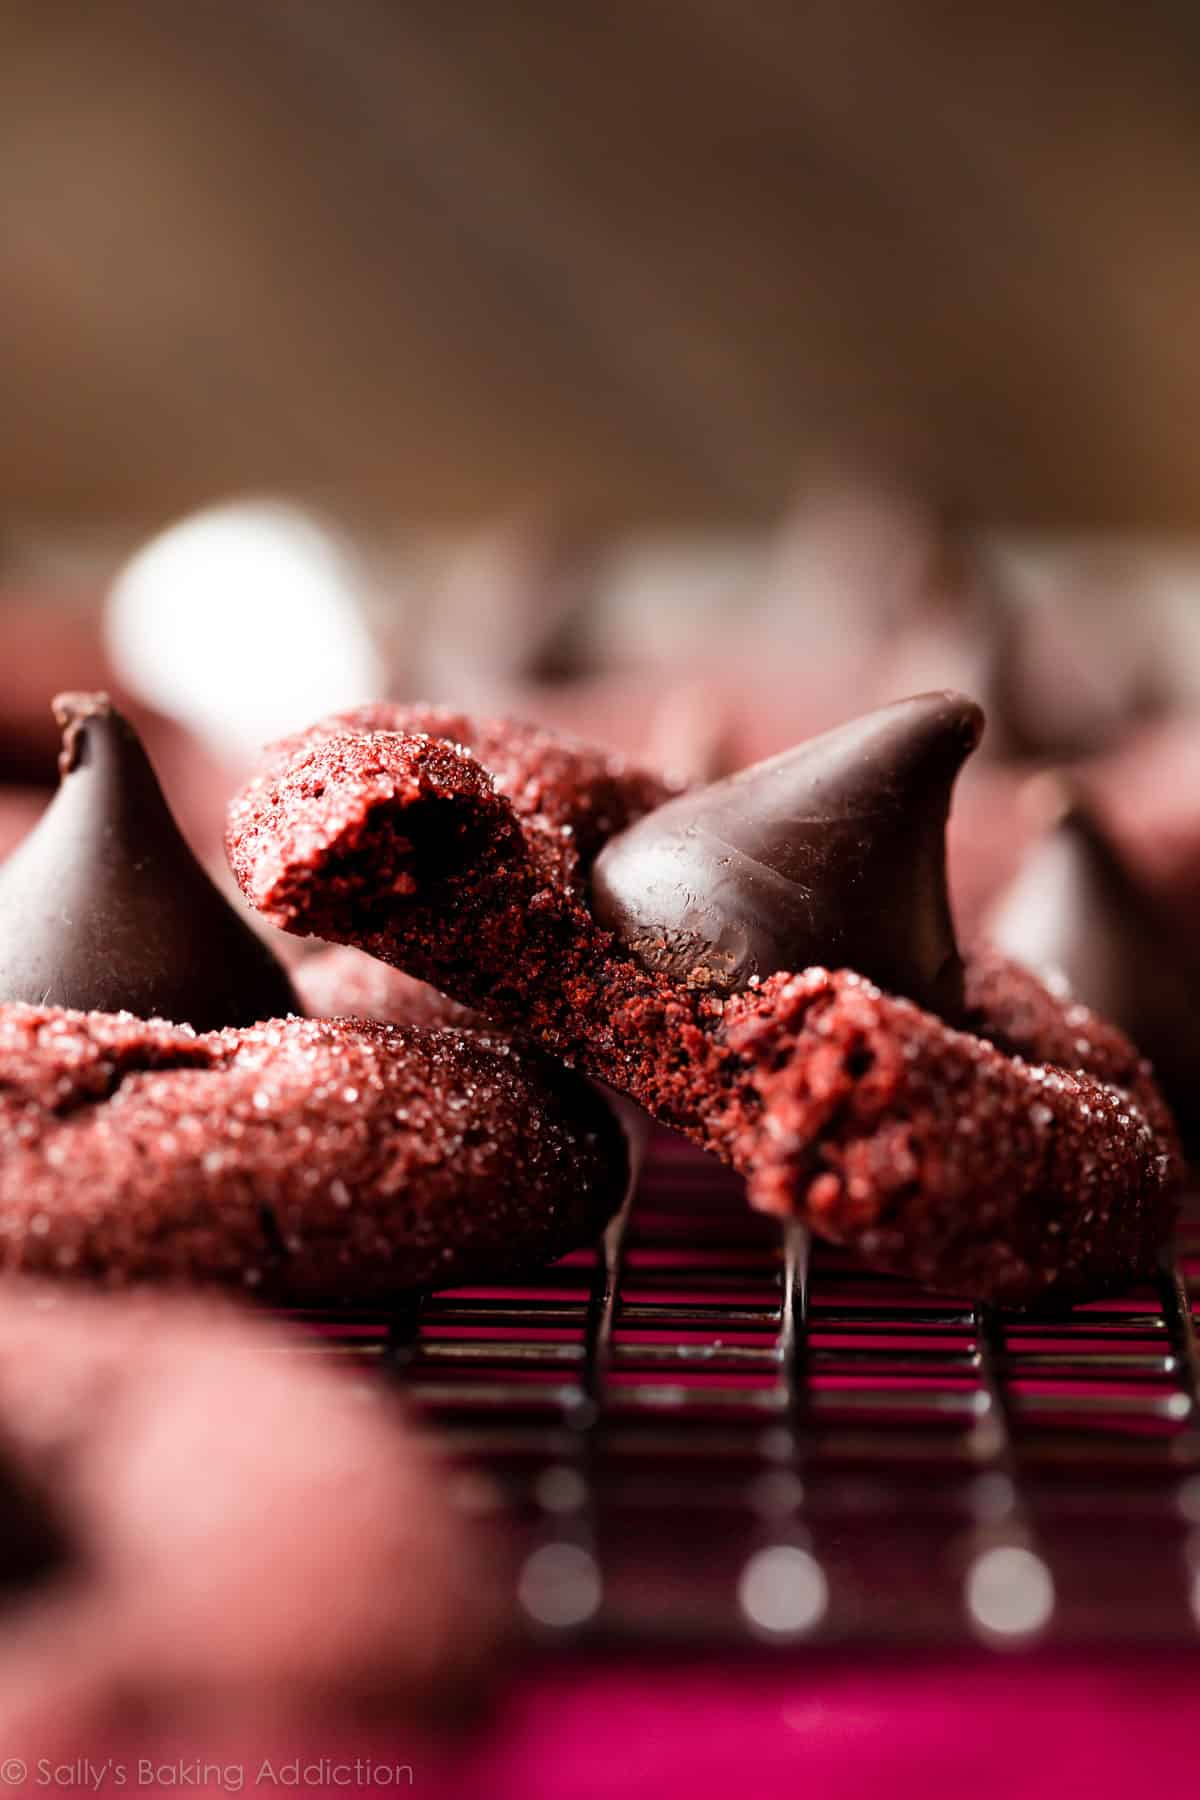
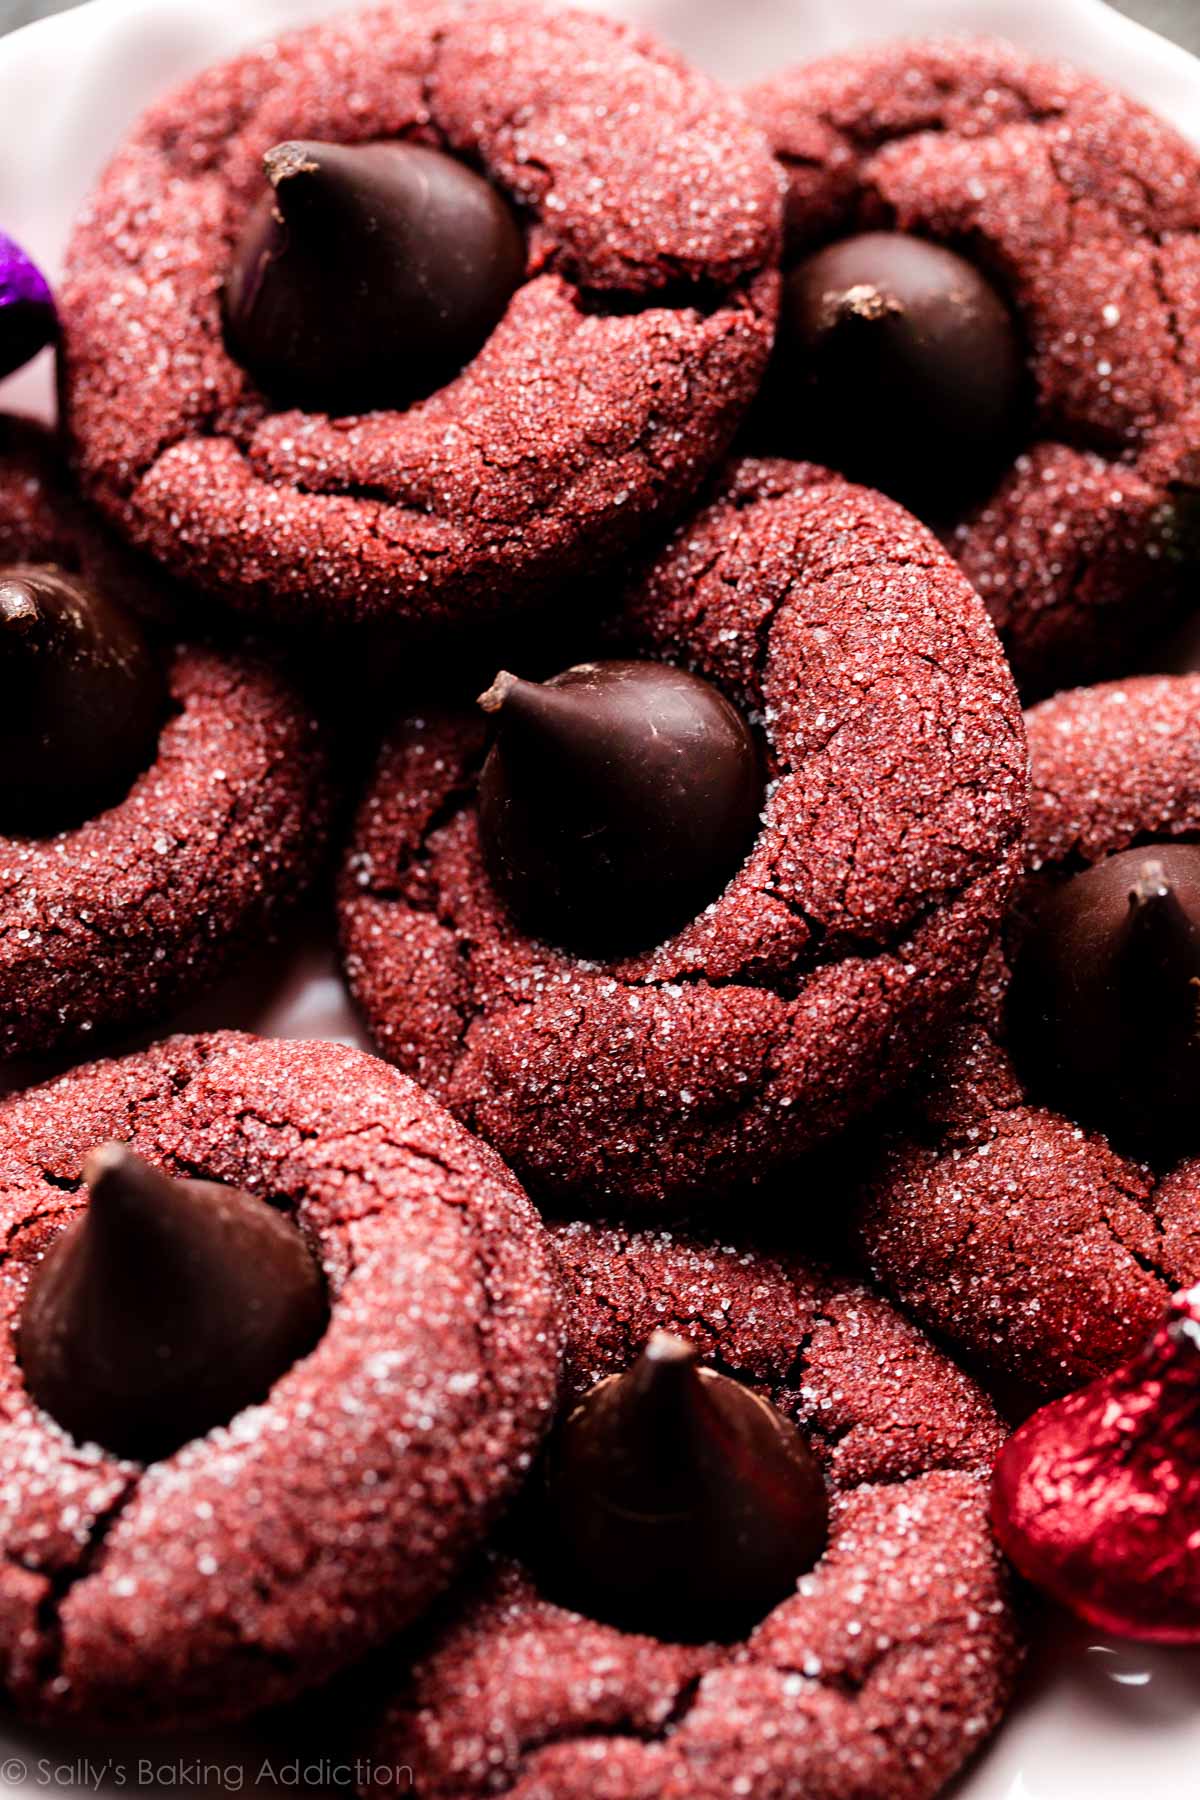
- Texture: Think about a soft-baked chocolate chip cookie. These red velvet blossoms have the same tender, melt-in-your-mouth texture. They’re extra chewy, while a roll in granulated sugar adds a delightful crackly crisp coating.
- Flavor: Is red velvet cake a mystery flavor to you? I used to be the same way. From red velvet cake roll to red velvet cupcakes to texture-packed red velvet seven layer bars, I’ve had a lot of fun getting to know this iconic flavor. Red velvet desserts, including today’s red velvet kiss cookies, are extra buttery with mild cocoa and vanilla flavors.
- Ease: We have a basic cookie dough on our hands. After chilling the cookie dough, roll into balls, and generously coat in granulated sugar before baking. The only complicated part, if we can really call it that, is pressing the Hershey’s Kiss candy into each baked cookie. To prevent the warm cookies from totally melting the chocolate, place the warm cookies in the freezer for a few minutes to “set” that chocolate kiss on top. I do the same thing for candy cane kiss cookies and it works like a charm.
- Time: Set aside enough time to chill this cookie dough. It’s a fairly sticky dough and without time in the refrigerator, your cookies will melt all over the baking sheet. Do yourself a favor and make the cookie dough the night before. If you need a no-chill cookie, try these lace cookies or shortbread wedges.
A Few Notes About Red Velvet Kiss Cookies
The process is pretty uneventful, but there’s a few key notes I want to explain before you start.
- Extra Flour: You’ll notice that the recipe calls for 1 and 3/4 cups of flour, which is enough to help the cookies hold shape. The recipe used to call for 1 and 1/2 cups, plus 1 extra Tbsp. I added even more flour to help solidify this dough as some readers had trouble with over-spreading.
- Red Coloring: You can control how vibrant the red color is. Or, if you wish, skip the red coloring altogether because it’s only for looks. I use and recommend 1/2 teaspoon of gel food coloring. You can find gel food coloring in craft stores, some grocery stores, or online. (I like Americolor Red Red or Super Red.) Liquid coloring is fine in a pinch, but you need more of it for the color to actually show up. If you’re looking for a natural alternative, use 2 teaspoons of beet powder. I’ve done this successfully with my red velvet chocolate chip cookies. The color stands out a lot more in cookie dough than in cake batter—and you won’t taste it.
- Rolling in Sugar: The sugar coating adds a little crunch and sparkle. I’d say it’s optional, but they’re delicious with its addition. Feel free to swap granulated sugar for confectioners’ sugar if you’re looking to mimic the look of chocolate crinkle cookies.
- Hershey’s Kisses: I chose Hershey’s Kisses because they’re the traditional candy used in this type of classic Christmas cookie. I used the dark chocolate kisses in these photos, but feel free to use any of the kisses varieties/flavors. Rolos or any type of small chocolates would be great, too. I make cookies like this with chocolate hearts for Valentine’s Day, see sparkle sweetheart cookies and peanut butter Valentine’s Day cookies.
If you love peanut butter, try a miniature peanut butter cup like we do with these peanut butter cup cookies. You can even skip Hershey’s Kiss completely and give them a dunk in melted chocolate instead. That’s how I made these white chocolate red velvet cookies.
My #1 Trick for Blossom Cookies
As mentioned above and described in the written recipe below, we bake the cookies without the chocolate candy on top. (It would melt.) When the cookies are finished in the oven, let them cool for about 5 minutes. Press a Hershey’s Kiss into the center of each, then immediately transfer them to a large plate or a few smaller plates (gently! they’re soft!). Place the plate(s) of cookies in the freezer for 10 minutes to quickly set the chocolate kiss in the cookie.
This trick (1) prevents the chocolate from melting and (2) helps prevent the kiss candy from falling off the cooled cookies. It’s definitely an extra step, but it helps!
This recipe is part of my annual cookie countdown called Sally’s Cookie Palooza. It’s the biggest, most delicious event of the year! Browse dozens of cookie recipes over on the Sally’s Cookie Palooza page.


Red Velvet Kiss Cookies
- Prep Time: 2 hours, 30 minutes (includes chilling)
- Cook Time: 12 minutes
- Total Time: 3 hours (includes cooling)
- Yield: 32-36 cookies
- Category: Cookies
- Method: Baking
- Cuisine: American
Description
These red velvet kiss cookies are a colorful spin on traditional peanut butter blossoms. Feel free to use other chocolate candies such as Rolos, peanut butter cups, or other small chocolates.
Ingredients
- 1 and 3/4 cups (219g) all-purpose flour (spooned & leveled)
- 1/4 cup (21g) natural unsweetened cocoa powder
- 1 teaspoon baking soda
- 1/4 teaspoon salt
- 1/2 cup (8 Tbsp; 113g) unsalted butter, softened to room temperature
- 3/4 cup (150g) packed light or dark brown sugar
- 1/4 cup (50g) granulated sugar
- 1 large egg, at room temperature
- 2 teaspoons pure vanilla extract
- 1 Tablespoon milk (I use buttermilk)
- 1/2 teaspoon gel red food coloring (or alternative)*
- 32–36 Hershey’s Kisses, unwrapped
Coating
- 1/2 cup granulated sugar (100g) or confectioners’ sugar (60g)
Instructions
- Whisk the flour, cocoa powder, baking soda, and salt together in a medium bowl. Set aside.
- Using a hand mixer or a stand mixer fitted with paddle attachment, beat the butter, brown sugar, and granulated sugar together on medium speed until creamy, about 3 minutes. (Here’s a helpful tutorial if you need guidance on how to cream butter and sugar.) Add the egg and vanilla extract and mix on high until combined, about 1 minute. Scrape down the sides and bottom of the bowl as needed.
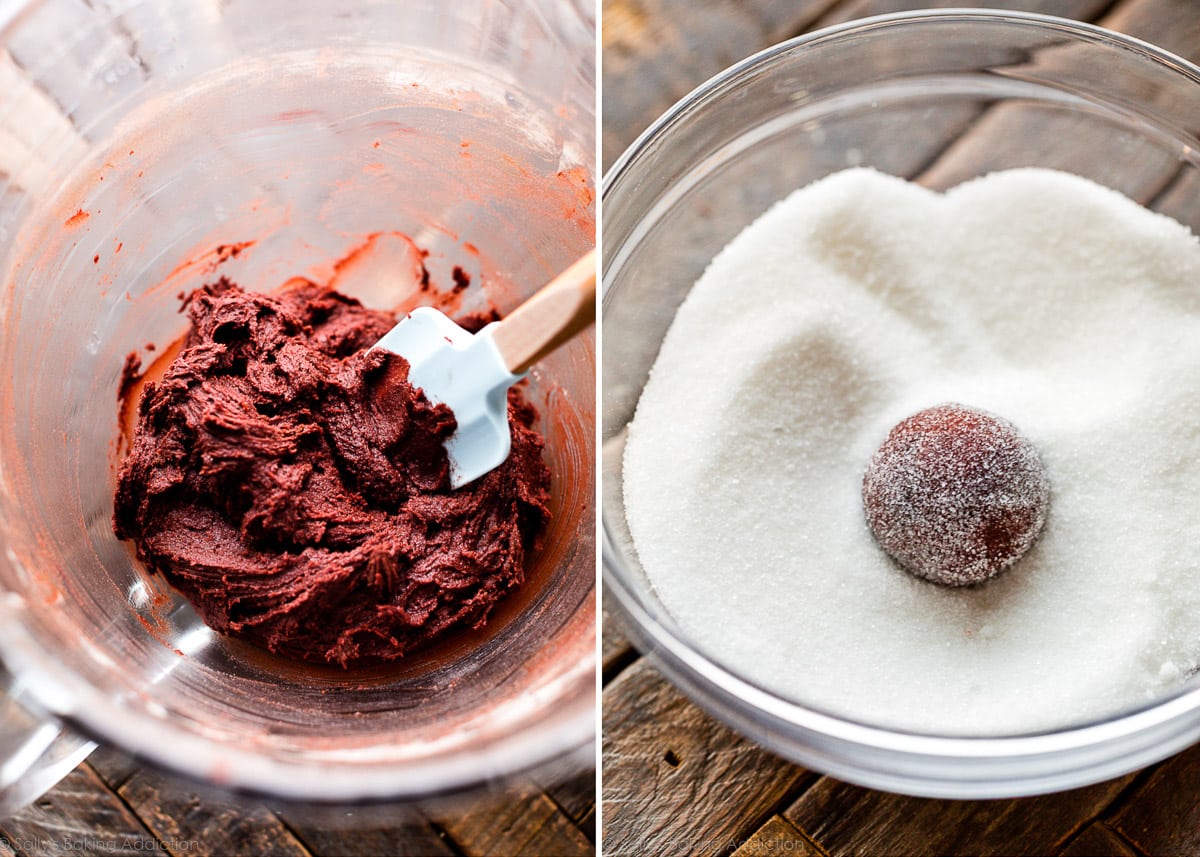
- Pour the dry ingredients into the wet ingredients, add the milk and food coloring, and then mix on low speed until everything is combined. The dough will be sticky. If you want a more vibrant hue, beat in more food coloring a little at a time. Cover and chill the dough in the refrigerator for at least 2 hours (and up to 3 days). If chilling for longer than a few hours, allow dough to sit at room temperature for at least 15 minutes before rolling and baking because the dough will be quite hard.
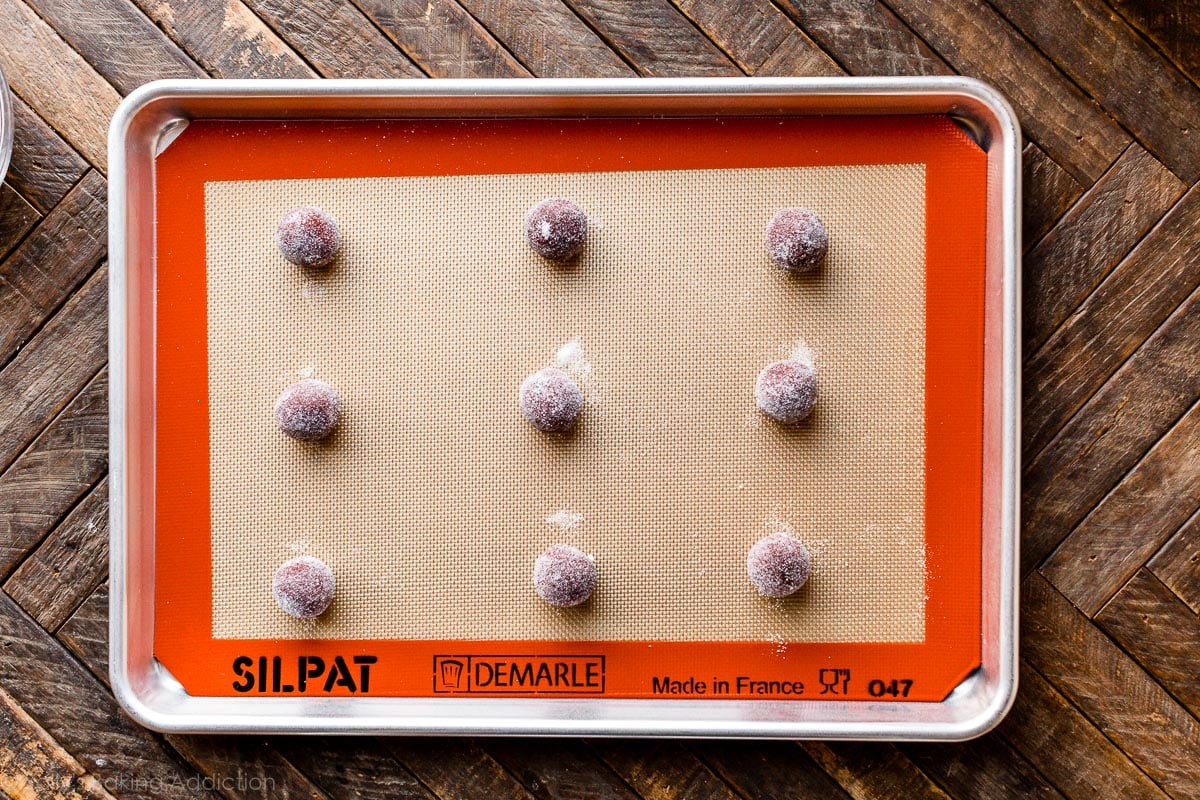
- Preheat oven to 350°F (177°C). Line large baking sheets with parchment paper or silicone baking mats. Set aside. Also, make sure there’s room in your freezer because the cookies will need to be placed inside to prevent the chocolates from melting.
- Roll & coat: Scoop and roll cookie dough, about 1 Tablespoon of dough each. Roll each ball in the 1/2 cup of sugar and arrange on the baking sheet about 3 inches apart.
- Bake for 11-13 minutes or until the edges appear set. Centers will look very soft. Mine usually take 12 minutes. Remove cookies from the oven and cool for just 5-10 minutes on the baking sheets.
- Set the chocolate: Press a Hershey’s Kiss into the center of each, then using a thin spatula, immediately transfer the cookies to a large plate or a few smaller plates (gently—they’re soft). Place the plate(s) of cookies in the freezer for 10 minutes to quickly set the chocolate kiss in the cookie.
- Remove from the freezer and serve.
- Cookies stay fresh covered at room temperature for up to 1 week.
Notes
- Make Ahead Instructions: You can make the cookie dough and chill it in the refrigerator for up to 3 days. (See step 3.) Baked cookies freeze well for up to 3 months. Unbaked cookie dough balls, without sugar coating, freeze well for up to 3 months. When you are ready to bake, remove the balls from the freezer, let sit for 30 minutes, preheat the oven, then roll in sugar as directed. Read my tips and tricks on how to freeze cookie dough.
- Special Tools (affiliate links): Glass Mixing Bowls | Whisk | Electric Mixer (Handheld or Stand) | Red Gel Food Coloring (I like Americolor Red Red or Super Red) or Beet Powder | Baking Sheets | Silicone Baking Mats or Parchment Paper | Thin Spatula
- Cocoa Powder: Use natural unsweetened cocoa powder in this cookie dough, not dutch-process. Here’s the difference between dutch-process vs natural cocoa powder.
- Food Coloring: You can control how vibrant the red color is. Or, if you wish, skip the red coloring altogether because it’s only for looks. I use and recommend 1/2 teaspoon of gel food coloring. You can find gel food coloring in craft stores, some grocery stores, or online. (I like Americolor Red Red or Super Red.) Liquid coloring is fine in a pinch, but you need more of it for the color to actually show up—around 1 Tablespoon. If you’re looking for a natural alternative, use 2 teaspoons of beet powder. I’ve done this successfully with my red velvet chocolate chip cookies. The color stands out a lot more in cookie dough than in cake batter—and you won’t taste it.
- Candies: Feel free to use any of the Hershey’s Kisses varieties/flavors. Rolos or any type of small chocolates would be great, too. (I make cookies like this with chocolate hearts for Valentine’s Day—see sparkle sweetheart cookies.) If you love peanut butter, try a miniature peanut butter cup like we do with these peanut butter cup cookies.


Reader Comments and Reviews
Thank you, Sally, for this interesting variation on a traditional Peanut Butter Blossom! I have to echo other commenters about my experience with this recipe. After chilling the dough for about three hours, I still found that the cookies had the tendency to flatten while baking. As someone else suggested, I began shaping the dough into vertical log shapes, and once they were placed on the cookie sheet, made a strong indentation with my fingertip in the middle of each. Then if needed, I pushed the dough back up into a more vertical shape. This helped keep the spreading to a minimum, as well as created an indentation in the baked cookie for the kiss. I tried using beet powder instead of food coloring, and the amount suggested really didn’t come through at all in the baked cookies, which were straight up brown. I then added quite a bit to the rolling sugar, and that gave a barely discernable pink. Next time I might try a red sugar that is colored with a natural dye for rolling. Also, like others, I used a slightly larger amount of dough (about 2 tbsp), which I preferred for a more even cookie/kiss ratio.
Hi Sally,
I had printed this recipe where it said 1 1/2 cups plus 1 T AP Flr. When I made
them last night they didn’t puff up like the picture. I tested my baking soda,
it was not old. These cookies take good but came out flat????
Hi Debra, thank you for trying this recipe. You can try adding 2 Tablespoons more flour to the dough (so 1 and 3/4 cups (219g) as written plus an additional 2 Tbsp flour), and also chill the shaped cookies for 20 minutes in the fridge before baking. Here are even more tips to Prevent Cookies From Spreading. Hope the next batch turns out better!
Hi! I’m not sure where I went wrong. But the dough wasn’t sticky after mixing all the ingredients together. All of the dough looked like it was supposed to after chilling. Did I mix for too long?
Hi Teresa, how did you measure your flour? Be sure to spoon and level (or use a kitchen scale) to ensure the flour wasn’t over measured, which can dry out the batter.
Could I make these as crinkle cookies and roll in powdered sugar before baking?
Hi Julie, You can use our red velvet chocolate chip cookies for crinkle cookies. Skip the chocolate chips and roll the cookie dough balls in confectioners’ sugar before baking. Enjoy!
Help – my kisses are falling off! I’ve also made two batches of your rainbow kiss cookies from the cookbook and one time the kisses stuck and one time they didn’t. How can I get my kisses to stick?
Hi Shannon, you can let the cookies cool for slightly less time, then press the Kiss into the cookies. The heat should help adhere the Kiss to the bottoms. Hope this helps!
Great cookies! Still moist after a few days!
If I wanted to use a different color to make green velvet instead of red, would I need to change anything ingredients?
Hi Stacey! We haven’t tested these cookies with green food coloring. You certainly can (we would use gel food coloring), but do expect a muddled color due to the cocoa powder in the dough.