

Sweetened mostly with brown sugar and spiced with cinnamon, ginger, nutmeg, and cardamom, these stamped cookies are just as flavorful as they are beautiful. If you’ve never stamped cookies before, see all of my cookie stamping success tips below. You’ll need a set of cookie stamps for this, and I use these cookie stamps for the pictured cookies.
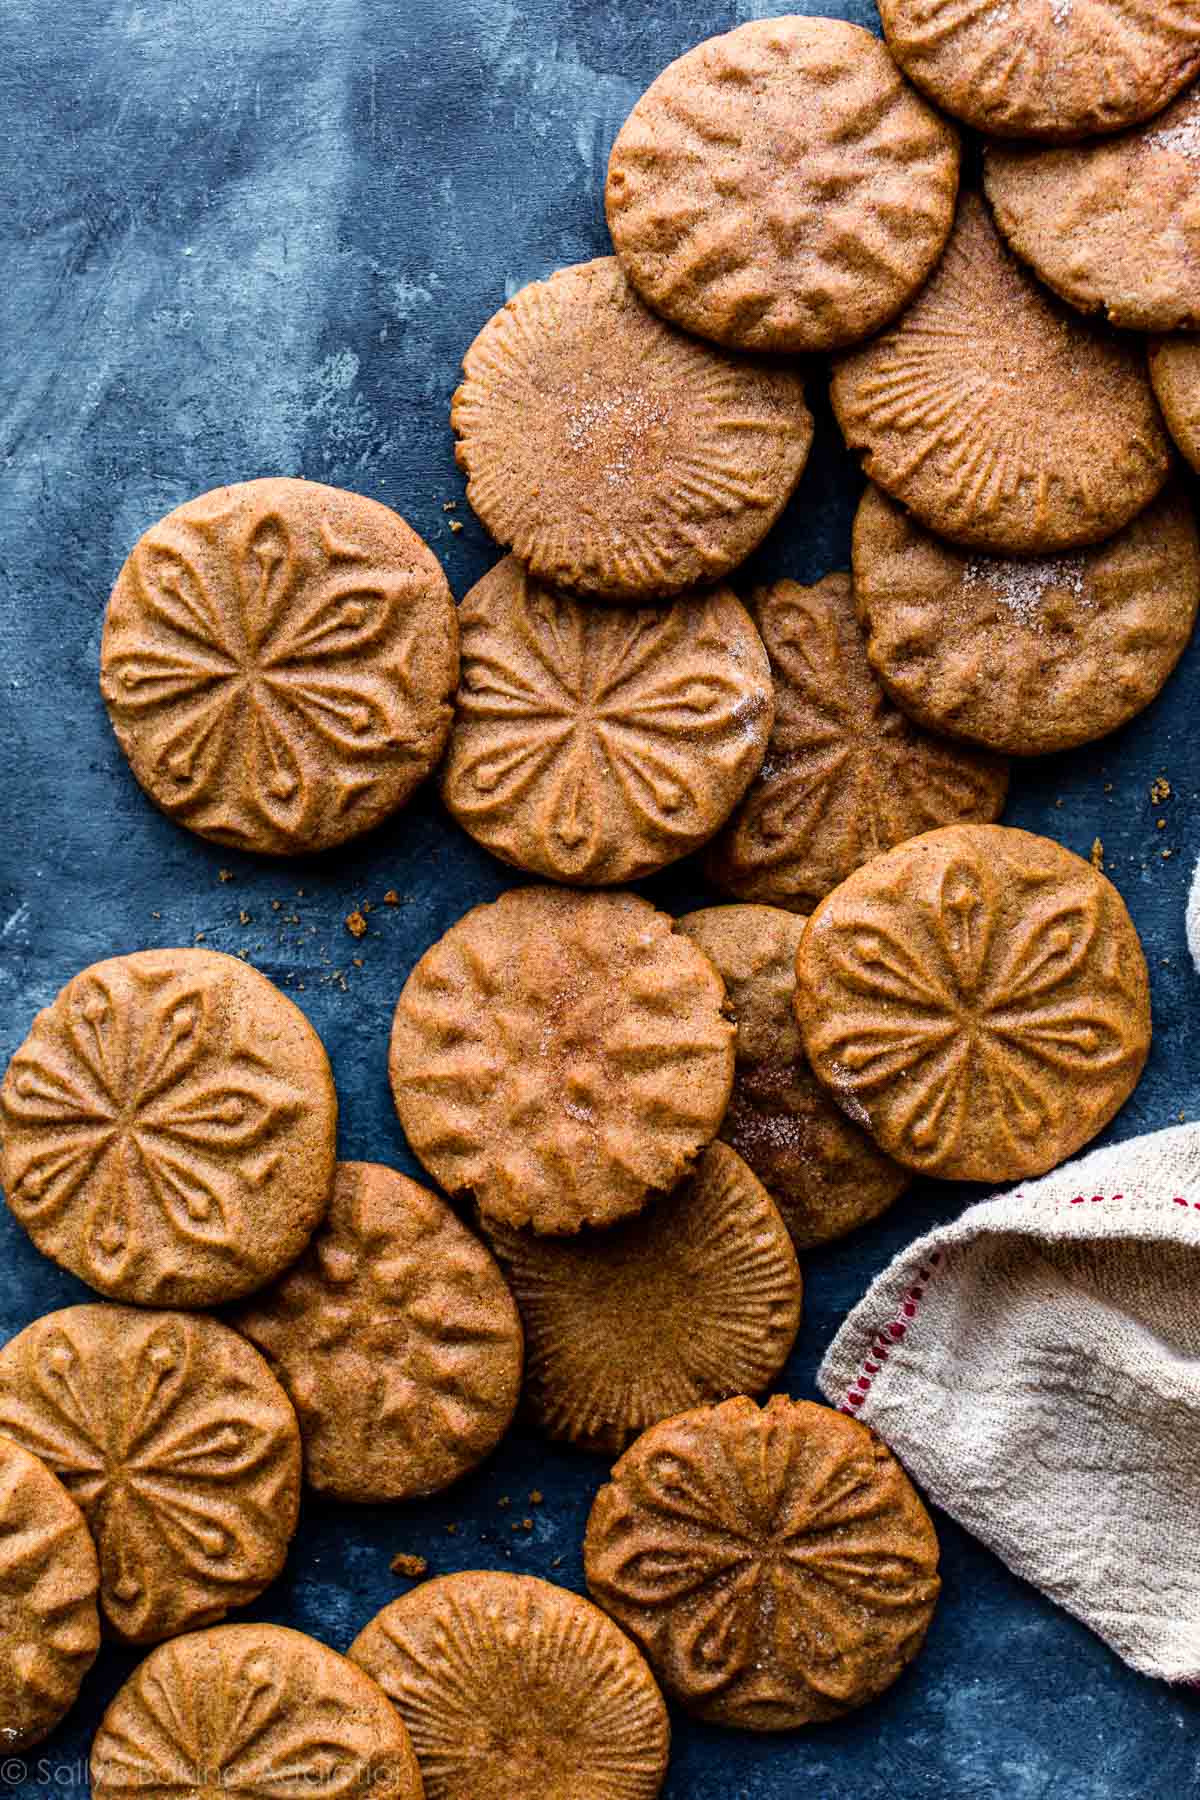
Here’s a gorgeous cookie that requires zero decorating skills. I’m always up for that!
This recipe is part of my annual holiday cookie countdown called Sally’s Cookie Palooza. Every year since 2013, I work on a handful of new cookie recipes and publish the 10 best ones for readers to enjoy. It’s the biggest, tastiest event of the year on my website!
Tell Me About These Cinnamon Brown Sugar Stamped Cookies:
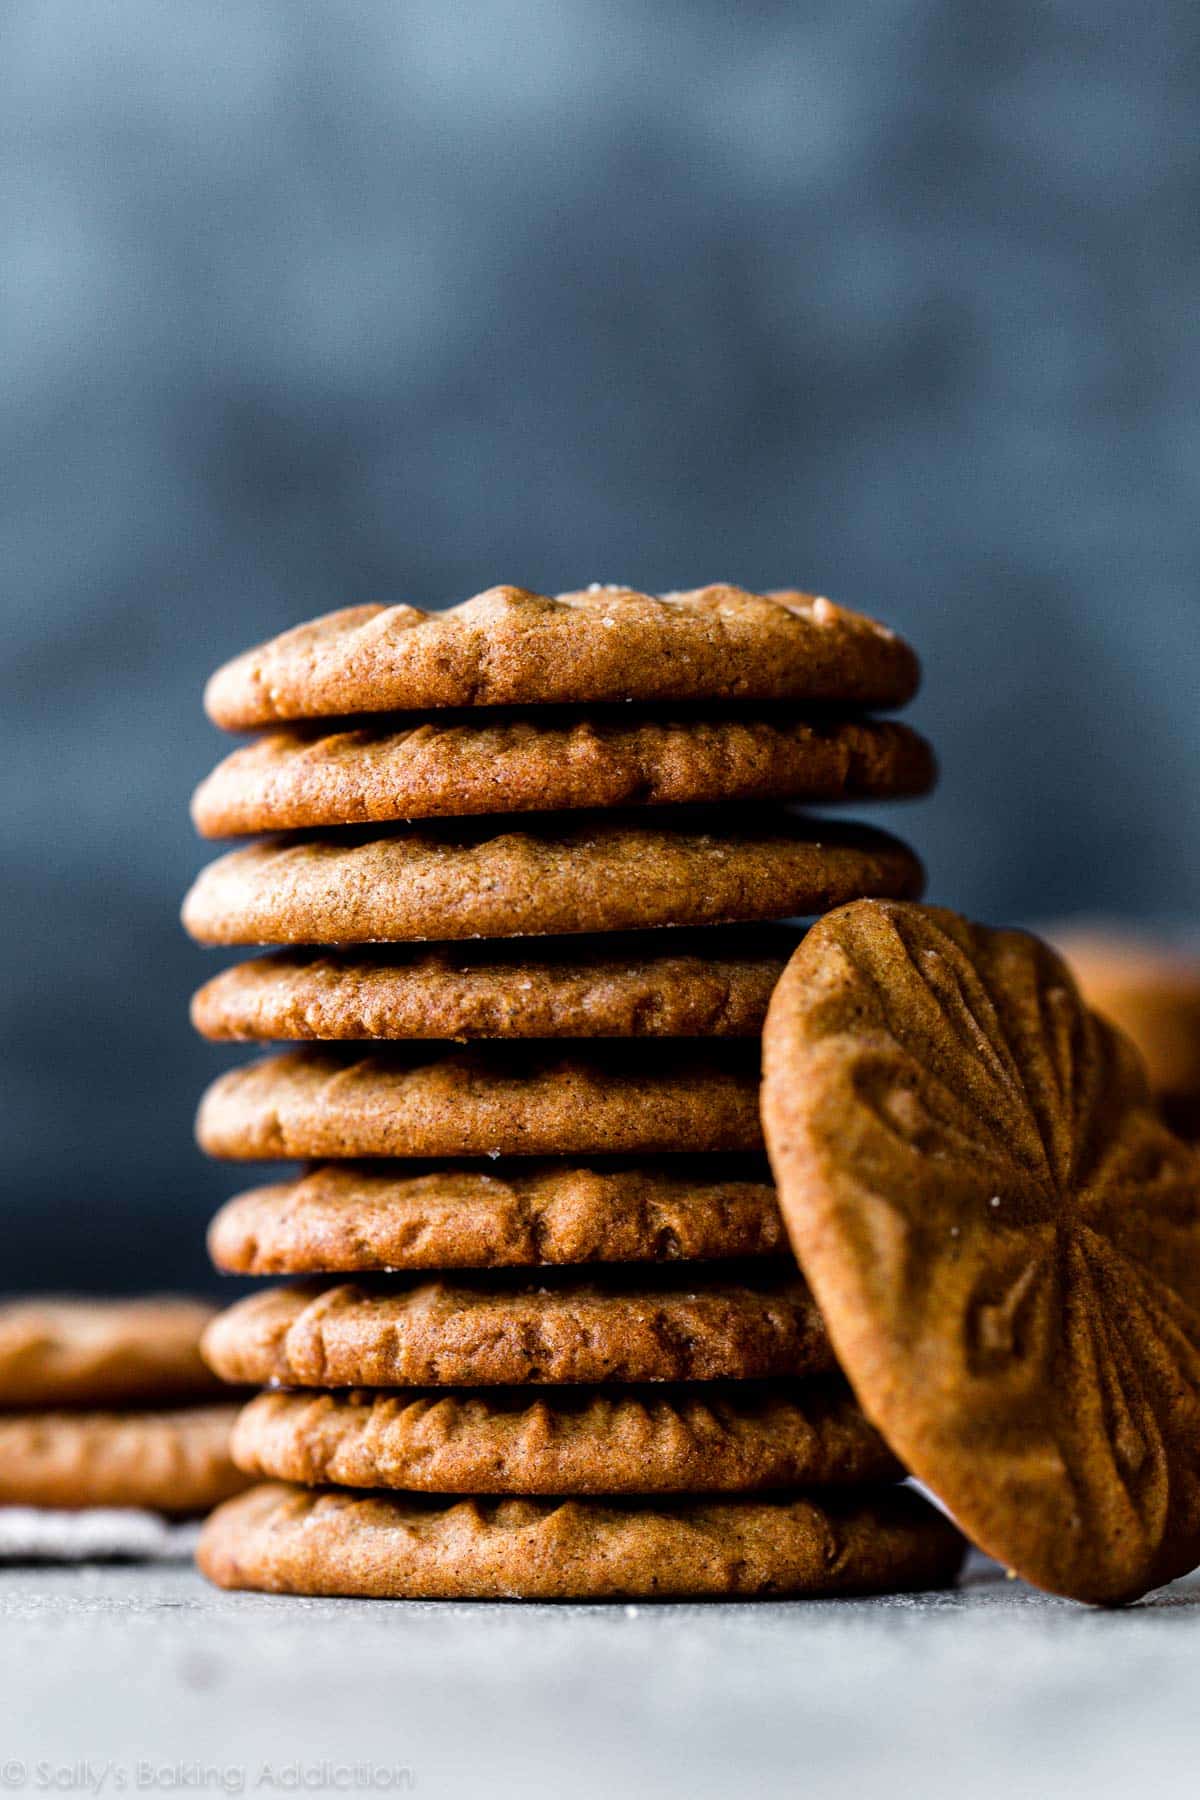
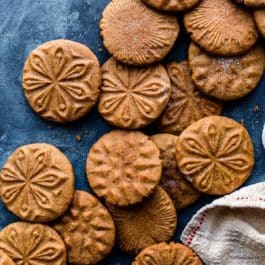
- Texture: The centers are a little soft, but the edges have a crunchy crumbly texture that you don’t always get with soft-baked cookies. They remind me of these crisp molasses cookies, but aren’t quite as crunchy. If you’re looking for a chewy cookie instead, these brown sugar cookies are for you.
- Flavor: There’s a glaring absence of chocolate, sprinkles, and candies, but I wouldn’t necessarily call these stamped cookies plain. They’re sweetened mostly with brown sugar and are generously spiced with cinnamon, ginger, nutmeg, and cardamom. A bit of molasses, honey, or maple syrup (your choice) adds a touch of flavor too. They remind me of Biscoff (Belgian Speculoos) cookies. Sometimes a simple cookie without all the excess fluff is what really hits the spot. They’re fantastic dipped in hot cocoa or coffee!
- Ease: This is a pretty standard cookie recipe—no crazy ingredients or mixing methods. The only thing we’re doing differently is stamping the dough balls before baking. You’ll appreciate that there’s no extra decoration required. The stamp does it all.
- Time: Set aside enough time to chill the cookie dough. I know it’s a drag, but 2 hours in the refrigerator firms up the dough. If you skip it, the cookies will over-spread and the beautiful stamped design will be ruined—wasting all your efforts and ingredients. If you’re doing a bunch of holiday baking at once, you can use the chilling time to make a quick cookie recipe like my shortbread wedges that bake in a cake pan! No chilling required for those.
One reader, Laura, commented: “New favorite cinnamon cookie!! They turned out crisp and crunchy, just as I was hoping, like snap cookies. A wonderful spice flavor. ★★★★★”
Can You Make These Without a Cookie Stamp?
Yes. Follow the recipe exactly as written but skip the stamping step. Simply bake as round cookie dough balls, like you would any other drop cookie. You can even roll in cinnamon sugar or chai sugar before baking, just like we do with snickerdoodles and white chocolate chai snickerdoodles. (In fact! I actually did that with a few of these pictured stamped cookies, but the stamp just pressed the cinnamon sugar down into the cookie and you can’t really see it after baking.
I don’t recommend these as cut-out cookies. If you want to use your rolling pin, stick with sugar cookies, chocolate sugar cookies, maple cinnamon cut-out cookies, gingerbread cookies, or pecan sugar cookies.
Overview: How to Make Stamped Cookies
The full printable recipe is below, but this overview should help you understand the process before you get started.
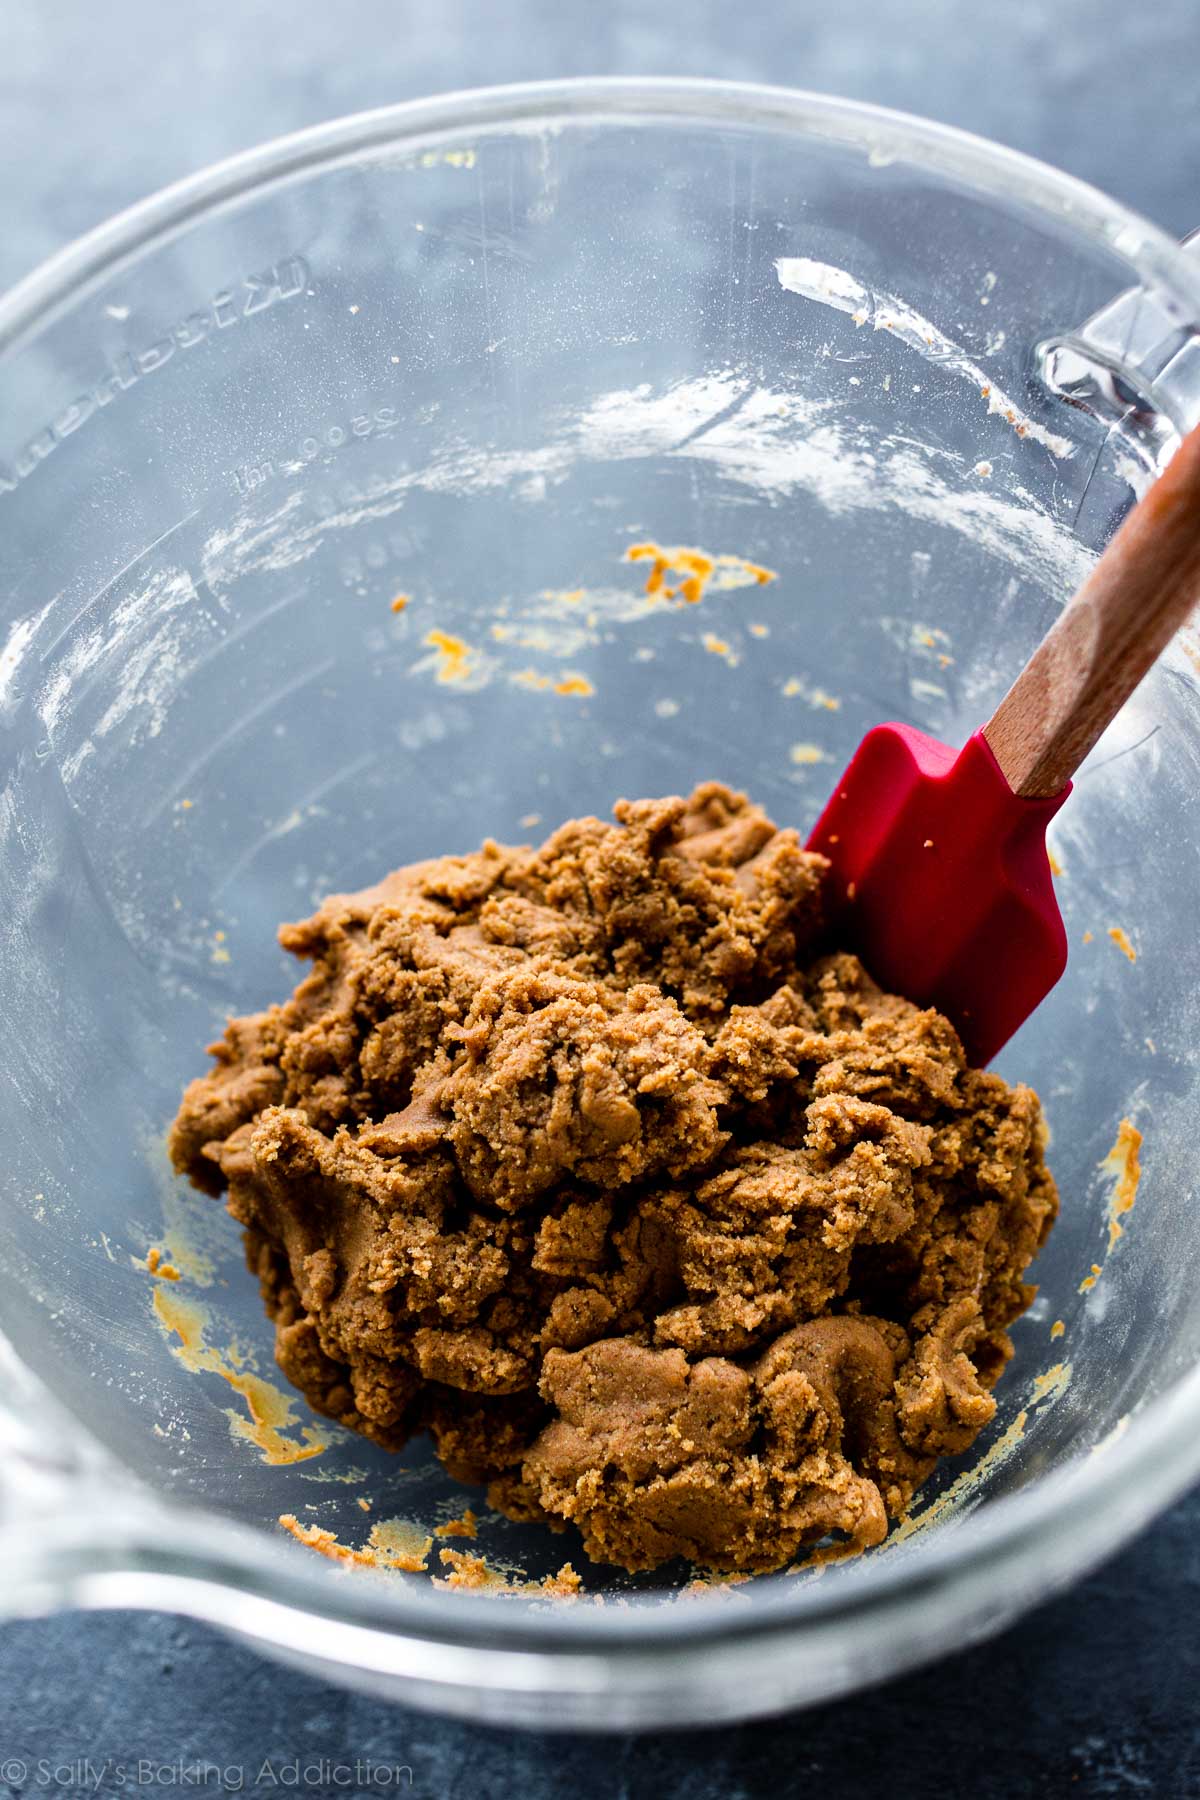
- Make the cookie dough. This is a pretty straightforward recipe. Whisk your dry ingredients together including the spices. Cream the butter and sugars together, then add 1 Tablespoon of molasses/honey/maple syrup, an egg, and vanilla extract. Liquid sweetener slightly thins out the dough. I used molasses in the pictured cookies, but honey or pure maple syrup work too. Bring the dough together by combining the wet and dry ingredients.
- Chill the cookie dough. I’m a broken record here. Don’t skip the chilling step!
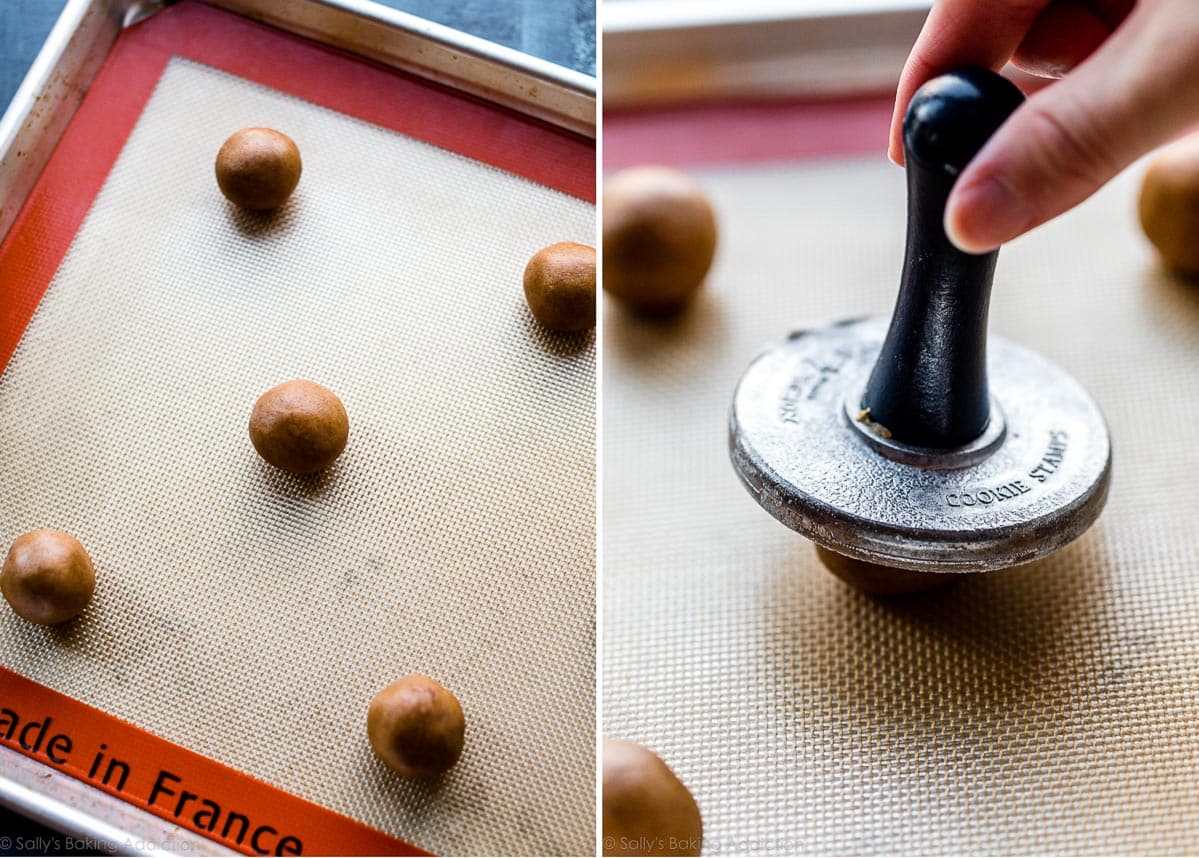
- Roll dough into balls. Measure 1 Tablespoon of chilled cookie dough per cookie and roll into balls. Feel free to roll the cookies in cinnamon sugar, just like we do with snickerdoodles, but know that the sugar coating gets stamped right down into the cookie. I did that for some of the pictured cookies and you can’t even see it!
- Stamp the dough balls. Grab your cookie stamps. I used Nordic Ware’s “starry night” cookie stamps for the pictured cookies. Place the cookie stamp directly on top of each cookie dough ball, centering the ball as best as you can, then firmly press down until the dough extends nearly to the edges of the cookie stamp. Lift straight up. Most cookie doughs, including this one, are a little sticky. That’s expected. If your cookie dough is sticking to the cookie stamp (mine does!), lightly dip the cookie stamp in a bowl of flour before stamping the cookie dough ball. If dipped lightly, the flour bakes right off the cookie.
- Bake. Remember one of my cookie baking success tips? Use your eyes as the timer, not the clock. Cookies are done when the edges are set.
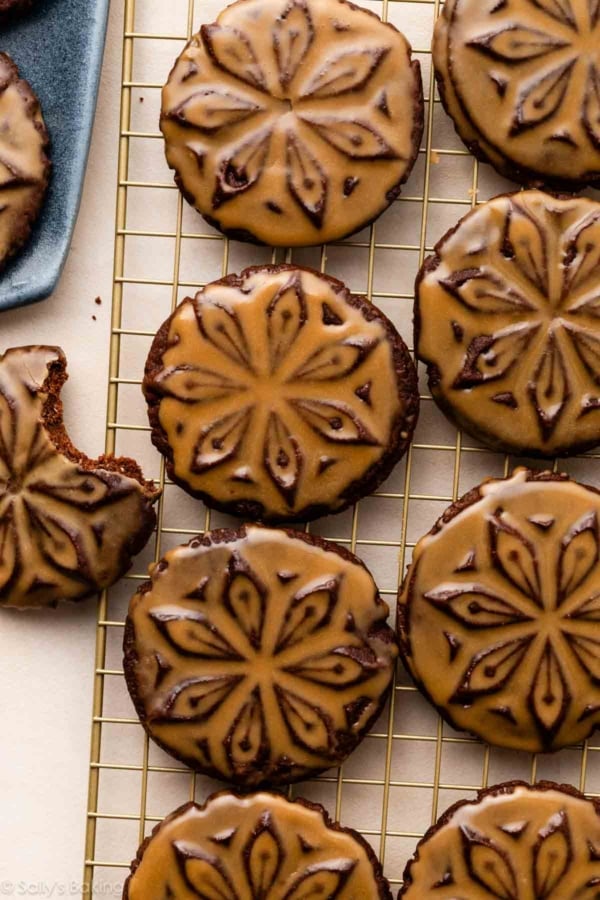
Glaze always adds a lovely finishing touch, but I skipped it for these. If desired, feel free to lightly dip each cooled cookie in vanilla icing or even this eggnog icing.
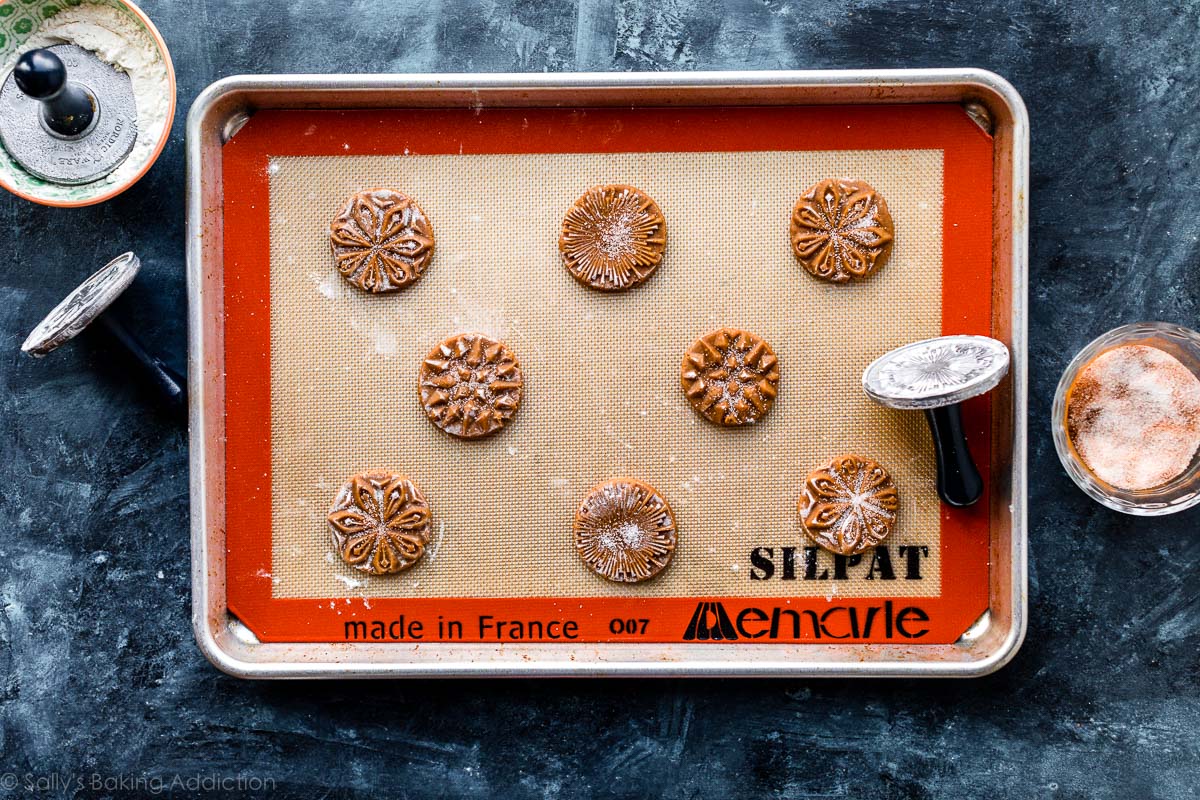
One Thing to Note: Cookies naturally puff up and spread out in the oven, so the design will never be quite as defined on a baked cookie. You can see how defined they are above (before baking) compared to below (after baking).

Success Tips for Stamped Cookies
I include most of these above, but let me summarize each. It’s important to remember that the amount of definition your stamped design holds depends on the recipe, how firm the cookie dough is, and the stamp you use. Like I mention above, cookies naturally puff up and spread out in the oven, so the design will never be quite as defined on a baked cookie.
- Recipe: Not all cookie doughs are ideal for cookie stamps. Avoid using cookie stamps on thick and fluffy cookies, which will likely puff up in the oven instead of holding onto the stamped design. Follow the recipe as written below because it yields a relatively flat cookie. Additionally, darker cookies show the stamped design better than lighter cookies.
- Place the Stamp Centered Over the Dough: Center the stamp as best you can on top of the cookie dough ball before pressing down.
- Flour Your Cookie Stamp: Cookie dough can stick to the stamp. Dip your cookie stamp in flour before stamping. If dipped lightly, the flour bakes right off the stamped cookies.
- Firm Cookie Dough: Don’t skip chilling this cookie dough. You could even chill the stamped cookies before baking. It wouldn’t hurt to stamp the dough balls, preheat the oven, then chill the stamped cookies in the refrigerator as your oven preheats.
- Stamp: There’s really no way of knowing how well your cookie stamp works until you test it out. This isn’t sponsored, but I’m a genuine fan of Nordic Ware cookie stamps. They’re good quality, heavy duty, and work wonderfully. I used the Starry Night ones in these photos. (You can find them online and some stores including Williams-Sonoma and Target.) And once you have the cookie stamps, try these stamped chocolate espresso cookies next!


Stamped Cinnamon Brown Sugar Cookies
- Prep Time: 2 hours, 30 minutes (includes chilling)
- Cook Time: 13 minutes
- Total Time: 3 hours (includes cooling)
- Yield: 32 cookies
- Category: Cookies
- Method: Baking
- Cuisine: American
Description
Sweetened mostly with brown sugar and spiced with cinnamon, ginger, nutmeg, and cardamom, these stamped cookies are just as flavorful as they are beautiful. Chill the cookie dough in the refrigerator for at least 2 hours. Feel free to skip the cookie stamp and bake them as round cookie dough balls.
Ingredients
- 2 cups (250g) all-purpose flour (spooned & leveled), plus extra as needed for stamping
- 1/2 teaspoon baking soda
- 1/2 teaspoon salt
- 2 and 1/2 teaspoons ground cinnamon
- 1/2 teaspoon ground nutmeg
- 1/2 teaspoon ground ginger
- 1/4 teaspoon ground cardamom
- 1/2 cup (8 Tbsp; 113g) unsalted butter, softened to room temperature
- 3/4 cup (150g) packed light or dark brown sugar
- 1/3 cup (65g) granulated sugar
- 1 Tablespoon (15ml) unsulphured or dark molasses (do not use blackstrap; I prefer Grandma’s brand), maple syrup, or honey
- 1 large egg, at room temperature
- 1 teaspoon pure vanilla extract
Instructions
- Whisk the flour, baking soda, salt, cinnamon, nutmeg, ginger, and cardamom together in a medium bowl. Set aside.
- Using a hand mixer or a stand mixer fitted with paddle attachment, beat the softened butter, brown sugar, and granulated sugar together on medium-high speed until creamy, about 3 minutes. (Here’s a helpful tutorial if you need guidance on how to cream butter and sugar.) Scrape down the sides and bottom of the bowl as needed. Add the molasses, egg, and vanilla extract and mix on high speed until combined, about 1 minute. Scrape down the sides and bottom of the bowl again as needed.
- Add the flour mixture to the wet ingredients, then mix on low speed until combined. Cover and chill the dough in the refrigerator for at least 2 hours (and up to 4 days). If chilling for longer than a few hours, allow to sit at room temperature for at least 15 minutes before rolling because the dough will be quite hard.
- Preheat oven to 350°F (177°C). Line baking sheets with parchment paper or silicone baking mats. Set aside.
- Roll and stamp: Measure 1 Tablespoon (20g) of chilled cookie dough per cookie and roll into balls. The dough may seem crumbly, but will come together as you roll. Arrange dough balls 3 inches apart on the baking sheets. Place the cookie stamp directly on top of each cookie dough ball, centering the ball as best as you can, then firmly press down until the dough extends nearly to the edges of the cookie stamp. Lift straight up. If your cookie dough is sticking to the cookie stamp (mine does!), lightly dip the cookie stamp in a bowl of flour before stamping the cookie dough ball. If dipped lightly, the flour bakes right off the cookie.
- Bake cookies until the edges are set, about 13 minutes.
- Remove from the oven and allow cookies to cool on the baking sheet for 5 minutes before transferring to a wire rack to cool completely.
- Cover leftover cookies tightly and store at room temperature for up to 1 week.
Notes
- Make Ahead & Freezing Instructions: You can make the cookie dough and chill it in the refrigerator for up to 4 days (step 3). Baked cookies freeze well for up to 3 months. Unbaked cookie dough balls freeze well for up to 3 months. Thaw completely at room temperature, then stamp and bake as directed in the recipe. Read my tips and tricks on how to freeze cookie dough.
- Special Tools (affiliate links): Glass Mixing Bowl | Whisk | Electric Mixer (Handheld or Stand) | Baking Sheets | Silicone Baking Mats or Parchment Paper | Cookie Stamps (here are some options: Starry Nights (pictured), Snowflakes, Geo Shapes, and Greetings) | Cooling Rack
- Spices: Feel free to make spice substitutions as needed, keeping in mind some spices have a stronger flavor than others. For best results, I recommend following the spices and measurements listed.


Reader Comments and Reviews
These were delicious!!! The dough wasn’t too crumbly for me and definitely needed to chill for a couple hours before I was able to stamp them. I made them a little thicker (probably a couple tablespoons per ball) and they turned out crisp on the outside but still chewy on the inside. I used the Fun Food Tools cookie stamps and they released well from the cookie dough and the designs turned out nice and clear after baking. I did also put them in the freezer for 15 minutes before baking and I think that helped the design stay bold through baking.
This was a tricky recipe to get right. The dough was pretty crumbly, which I knew to expect, but it was a bit hard to work with due to that. Especially since 1 tablespoon was not nearly enough dough for the stamp (the exact Nordicware Starry Night set suggested here). With just a tablespoon, they were paper thin, and still didn’t cover the entire design on the stamp. So, we increased the amount. I wonder if that’s why so many people had trouble with the cookies puffing up, losing the design – using more dough, so that it’s easier to stamp, but then they get puffier?
I have to add, though, that mine looked absolutely perfect, just like the picture – I popped them in the freezer for 10 minutes before baking and they did not puff up or lose the design. Absolutely beautiful and delicious! Crispy on the outside and a little chewy on the inside. Family loved them.
Oh, my goodness, are these ever delicious!! My mom and I LOVE these cookies ! I didn’t have a very good cookie stamp to use for them, but that didn’t matter…the flavor is phenomenal, and they are perfect for dipping in a hot cup of coffee. Thank you for sharing so many wonderful recipes!
These are outstanding. I made the cookie dough ball balls since I couldn’t find a stamp, and added 1/4 tsp cardamom to the raw sugar for an extra bit of pep. A new favorite for sure!!
These are amazing! I did halve the sugar though.
I didn’t use a stamp, but they turned out great!
Thanks! 🙂
Great tasting cookie! Stamping was hard work but looked beautiful when done. I put the cookies in the fridge for 10 minutes before baking. I was disappointed to see that the design was less visible after the cookie puffed up. How do I prevent this the next time?
Hi Hena, the cookies do puff up somewhat and make the stamp a little less defined, but we find that chilling them before baking can help prevent that… so you did everything right! You could try chilling for a little longer next time. Also, adding a glaze on top helps the design pop a bit more, so definitely add that!
The taste is exactly what I was looking for, Christmas in a cookie! But I sealed them in an airtight container and they are hard as a rock the day after. I wanted a stamp cookie to make for a Christmas party Im attending but need to make these in advance. Did I do something wrong? Or are all stamp cookies really tough the day after?
Hi Jamie! Sounds like they may have been slightly over-baked if they were quite hard. An easy fix for next time!
I made these cookies for the first time today and love them. I had stamps gifted to me from my brother and decided to use them today for our Sunday school Christmas party. They are a little bit of work but I think they are worth it
Can you freeze the cooked and cooled cookies or only the cookie dough?
Hi Nick, you can also freeze the baked cookies for up to three months.
I tried making these with a cookie press and it worked really well! I put the dough through the press before chilling, then chilled the pressed cookies for 15 minutes before baking. They taste amazing!
I make these every Christmas but I don’t bother with the stamp anymore bc I haven’t had good luck with it. They are delicious and everyone loves them.
Hi Sally, I would like to make several dozen of these cookies without a stamp. If I freeze the dough, do I still need to thaw the dough before baking? Or can I just bake them from frozen?
Hi Alex, if you’d like to bake from frozen, we’d flatten out the dough balls before freezing since they won’t be flattened with a stamp. Hope you enjoy the cookies!
Will this recipe work with an embossed rolling pin? Sorry if this has been asked and answered before.
Hi Janice, We haven’t tested it but other readers have reported success with using one. Let us know if you give it a try!
First off, the cookies were delicious! My husband raved about them!. Second, the details were still there after I baked the cookies, but the cookies did spread and puff. Some cookies kept the details better than others, especially the first eight that I baked. I’m thinking it was because those were the coldest going in. I’m willing to try again, maybe chilling the cookies before baking. Also, in my research for stamped and/or embossed cookies, I found recipes with no baking soda/powder are supposed to keep the details because it’s the spreading and puffing that looses the details. Thank you, Sally, for a tasty recipe. I knew I could count on you and your team!
Love this recipe, made it without pressing the cookies at all. Soooo yummy. Question, will this recipe double well? Thanks
Hi Elizabeth, Yes you can double this. So glad you enjoyed these cookies!
The crumbly cookie texture came out a bit dry without being crisp. I baked the recommended 13 minutes but maybe I should have done longer or used less dough since my cookie stamps look smaller than the ones used in the photos. The flavor and ease of cooking was great though. I did chill the stamped designs 15 minutes to refirm it (as the dough was starting to get soft by the end of my stamping) and I think that helped keep the designs from puffing out.
This looks perfect for what I want to do! I have cookie cutters with built-in stamps so assume I could roll the dough out to 1/4” thick and use those? Thank you so much!
Hi! How many grams should each ball of dough be? Thanks!
Hi Jj, 1 Tablespoon of dough typically weighs around 20g each.
HI!
I followed the recipe exactly and my cookies spread and did the stamp design baked out. Any recommendations and guidance would be so appreciated! I am thinking of trying again but don’t want the same result. Thanks!
Hi Suji! We’re sorry you had trouble with how the stamp designs came through on the baked cookies. We wonder if the cookies were pressed too flat with the stamp? If you try the recipe again, see if you can add a couple more Tbsp of flour, which will help soak up more butter and prevent them from spreading more than they should. And make sure to start with proper room temperature butter as well.
These are very mild spice cookies with a nice flavor. However, they were a pain to peel off the Nordic ware stamps. I floured etc. my best decision was to rotate my stamps and put some directly into my freezer then pull out, lightly flour and stamp. I still had to peel off the dough but it came off much easier.
I have the same brand of stamps and found that worked for me as well. I kept them in the freezer and rotated out when used. But I dipped them in powdered sugar and that worked super well. I tried granulated and that left a beautiful coating on the cookie, but stuck a bit, so I stayed with powdered. Fun!
Can I use a cookie press instead of a stamp with this recipe?
Hi Debbie, no, this cookie dough would not work in a cookie press. We do use one for these spritz cookies, though.