

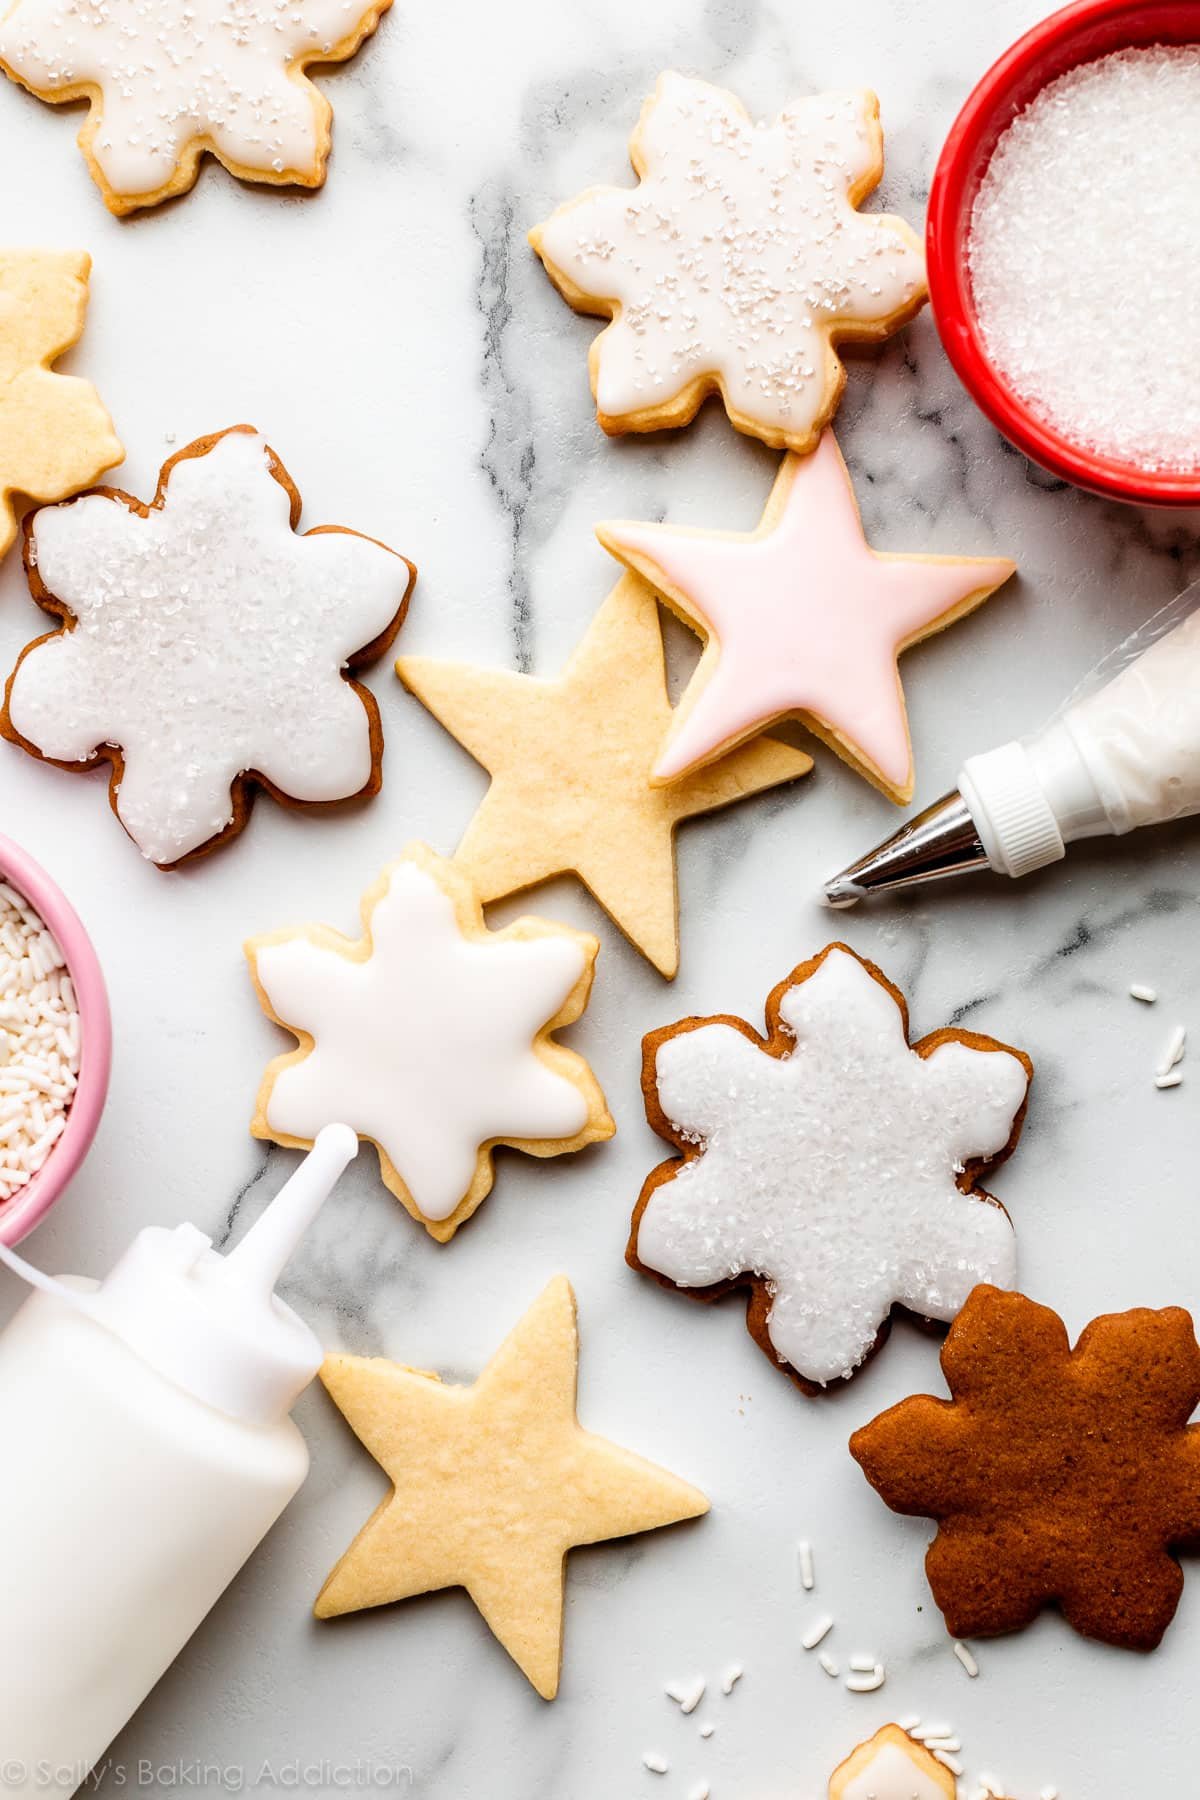
If you need a cookie decorating alternative to traditional royal icing, this easy cookie icing is a great choice. It’s like a very thick opaque glaze and comes together with a fork, whisk, and mixing bowl. This cookie icing takes about 24 hours to completely dry and you can’t pipe intricate detail as you could with royal icing, but if you want EASY cookie icing, this is it! All of the pictured cookies in this post use this icing.
One reader, Sarah, commented: “I had to leave a review—this recipe is amazing! I’m a beginner so I was nervous, but my cookies looked like I bought them from a pro bakery! Awesome glaze, will definitely use this over and over. ★★★★★”

Yes, you can create gourmet-looking decorated cookies without royal icing!
Skip All the Fuss & Use This Easy Cookie Icing
If you’re looking for professional icing with a picture-perfect finish and the ability for lovely piped detail, use royal icing. I love this royal icing and use it often for decorating sugar cookies, but it can be finicky. You need a very precise consistency in order for the royal icing to pipe, set, and dry appropriately—it definitely requires practice and patience. Before I began working with royal icing, however, I used today’s easy cookie icing. It’s still one of my favorite ways to decorate sugar cookies because it’s low maintenance, but still delivers pretty (and delicious) results. Plus, it’s great for making ahead and manageable for kids and beginners.
You Will Love This Cookie Icing:
- Easy to make with a fork, whisk, and bowl
- No special equipment
- 5 basic ingredients
- Can use squeeze bottle or piping tips to decorate
- Manageable for young bakers and/or beginners
- Doesn’t dry into hard cement texture
- After it dries, you can stack, freeze, and transport cookies
You can use this icing on cookie cutter cookies such as these sugar cookies, gingerbread cookies, and chocolate sugar cookies. You could even use it on shortbread cookies or drizzled on spritz cookies. I even used it on some of these pictured Halloween cookies and these Christmas sugar cookies. You could use it to make Valentine’s Day cookies, Easter cookies, and fireworks cookies, too. (Note that the photos in those recipes show royal icing, but this cookie icing will work for less intricate designs.) For all my best decorating tips and tricks, see my tutorial (video included) on how to decorate sugar cookies.
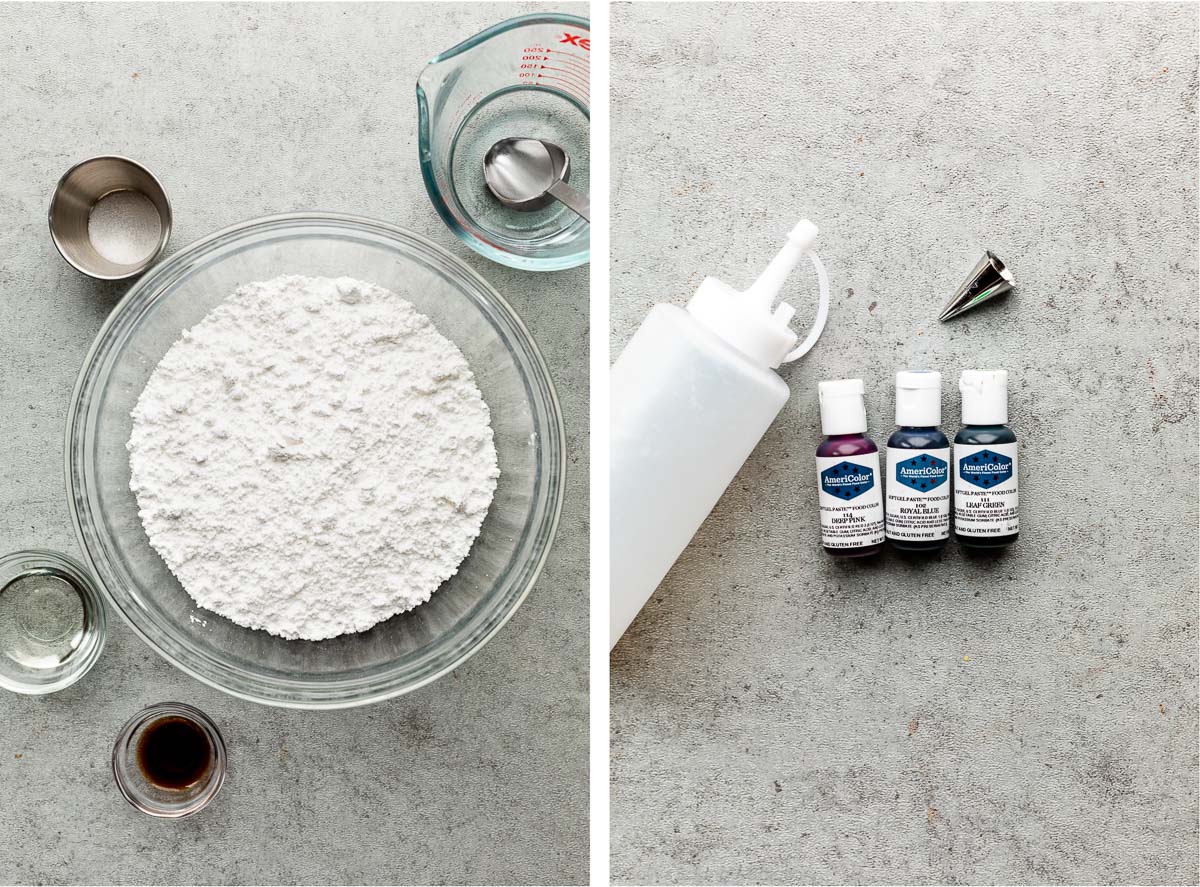
5 Simple Ingredients
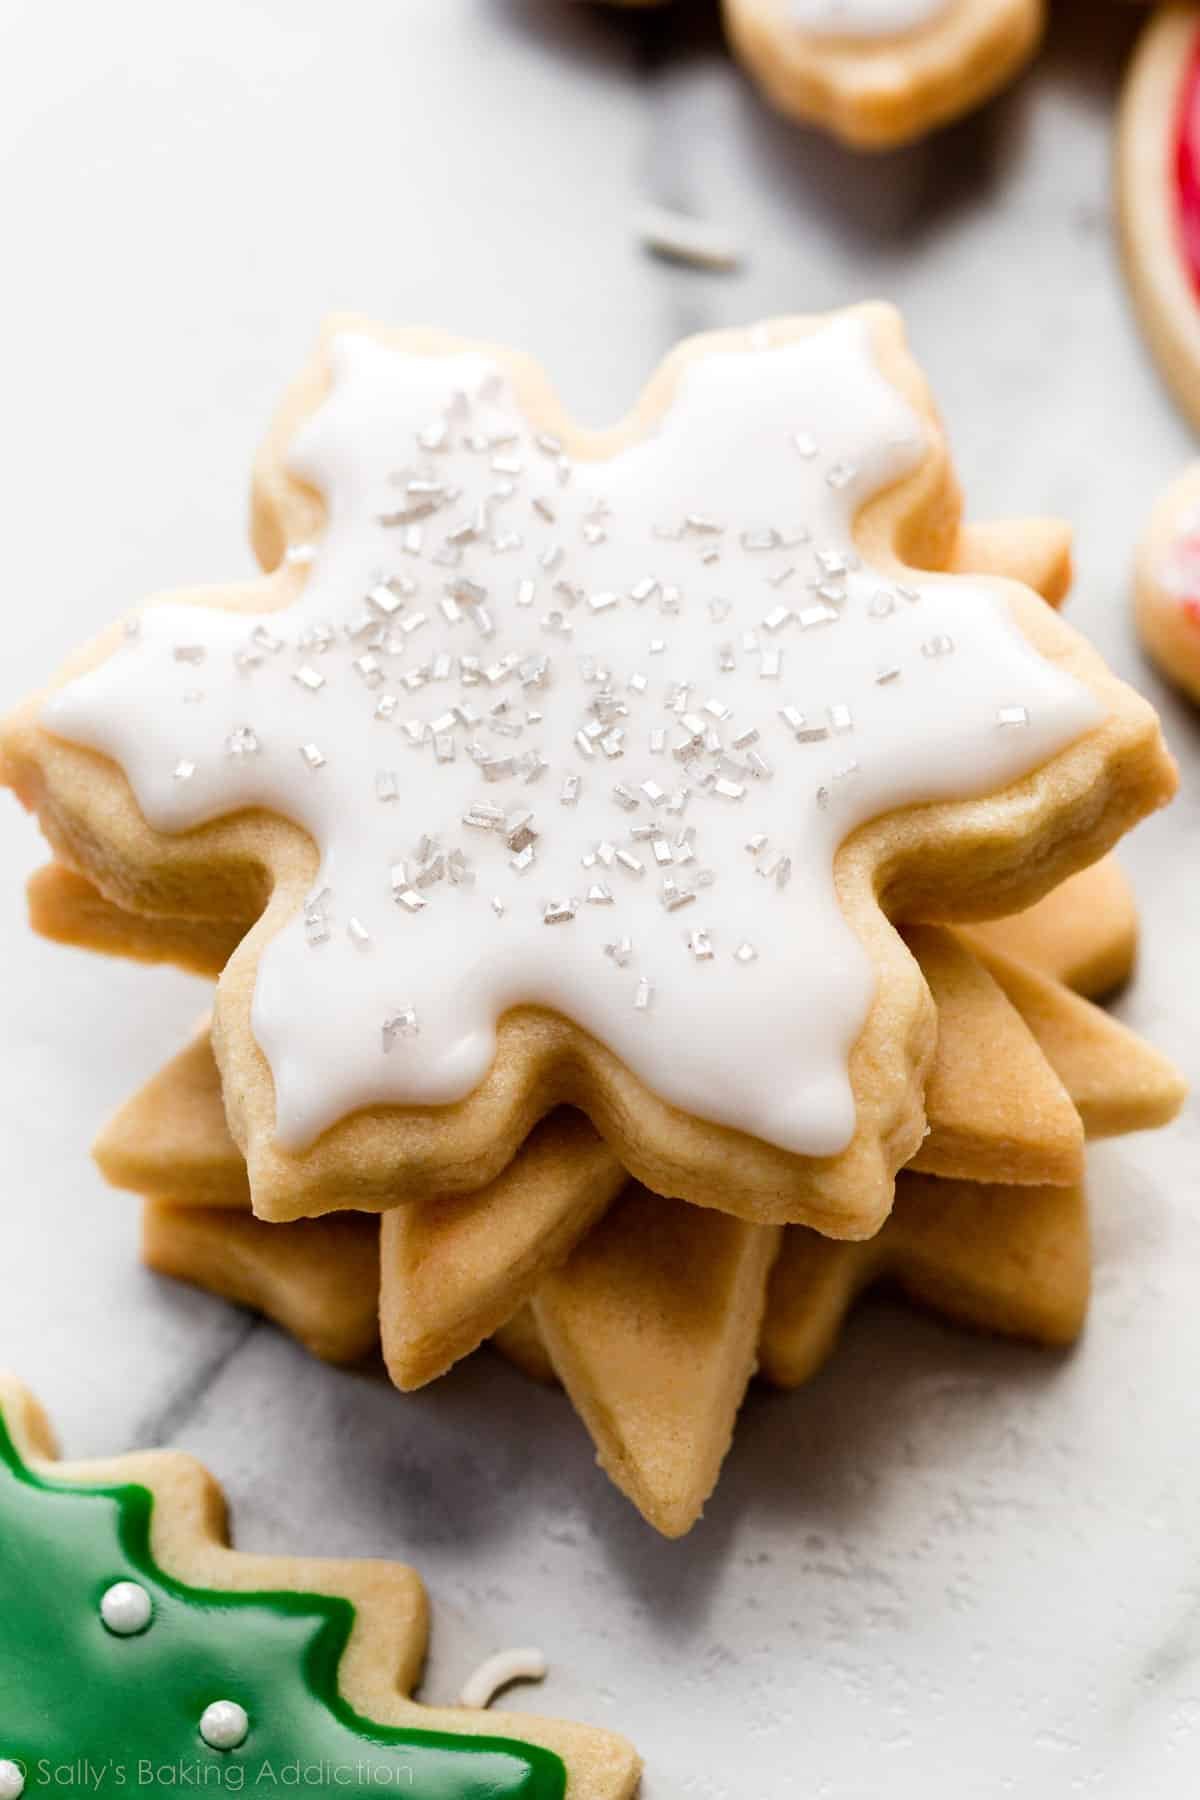
For the icing, you need confectioners’ sugar, water, vanilla extract (replace with water to keep the icing stark white, or use clear vanilla extract), a touch of corn syrup, and a little salt. The icing dries firm with a very slight crisp, so you can easily stack your decorated sugar cookies and travel with them.
- Why corn syrup? You only need 2 teaspoons. Corn syrup gives the icing sticking power and creates a beautiful sheen on the dried icing. I don’t recommend skipping it, but you can if absolutely needed.
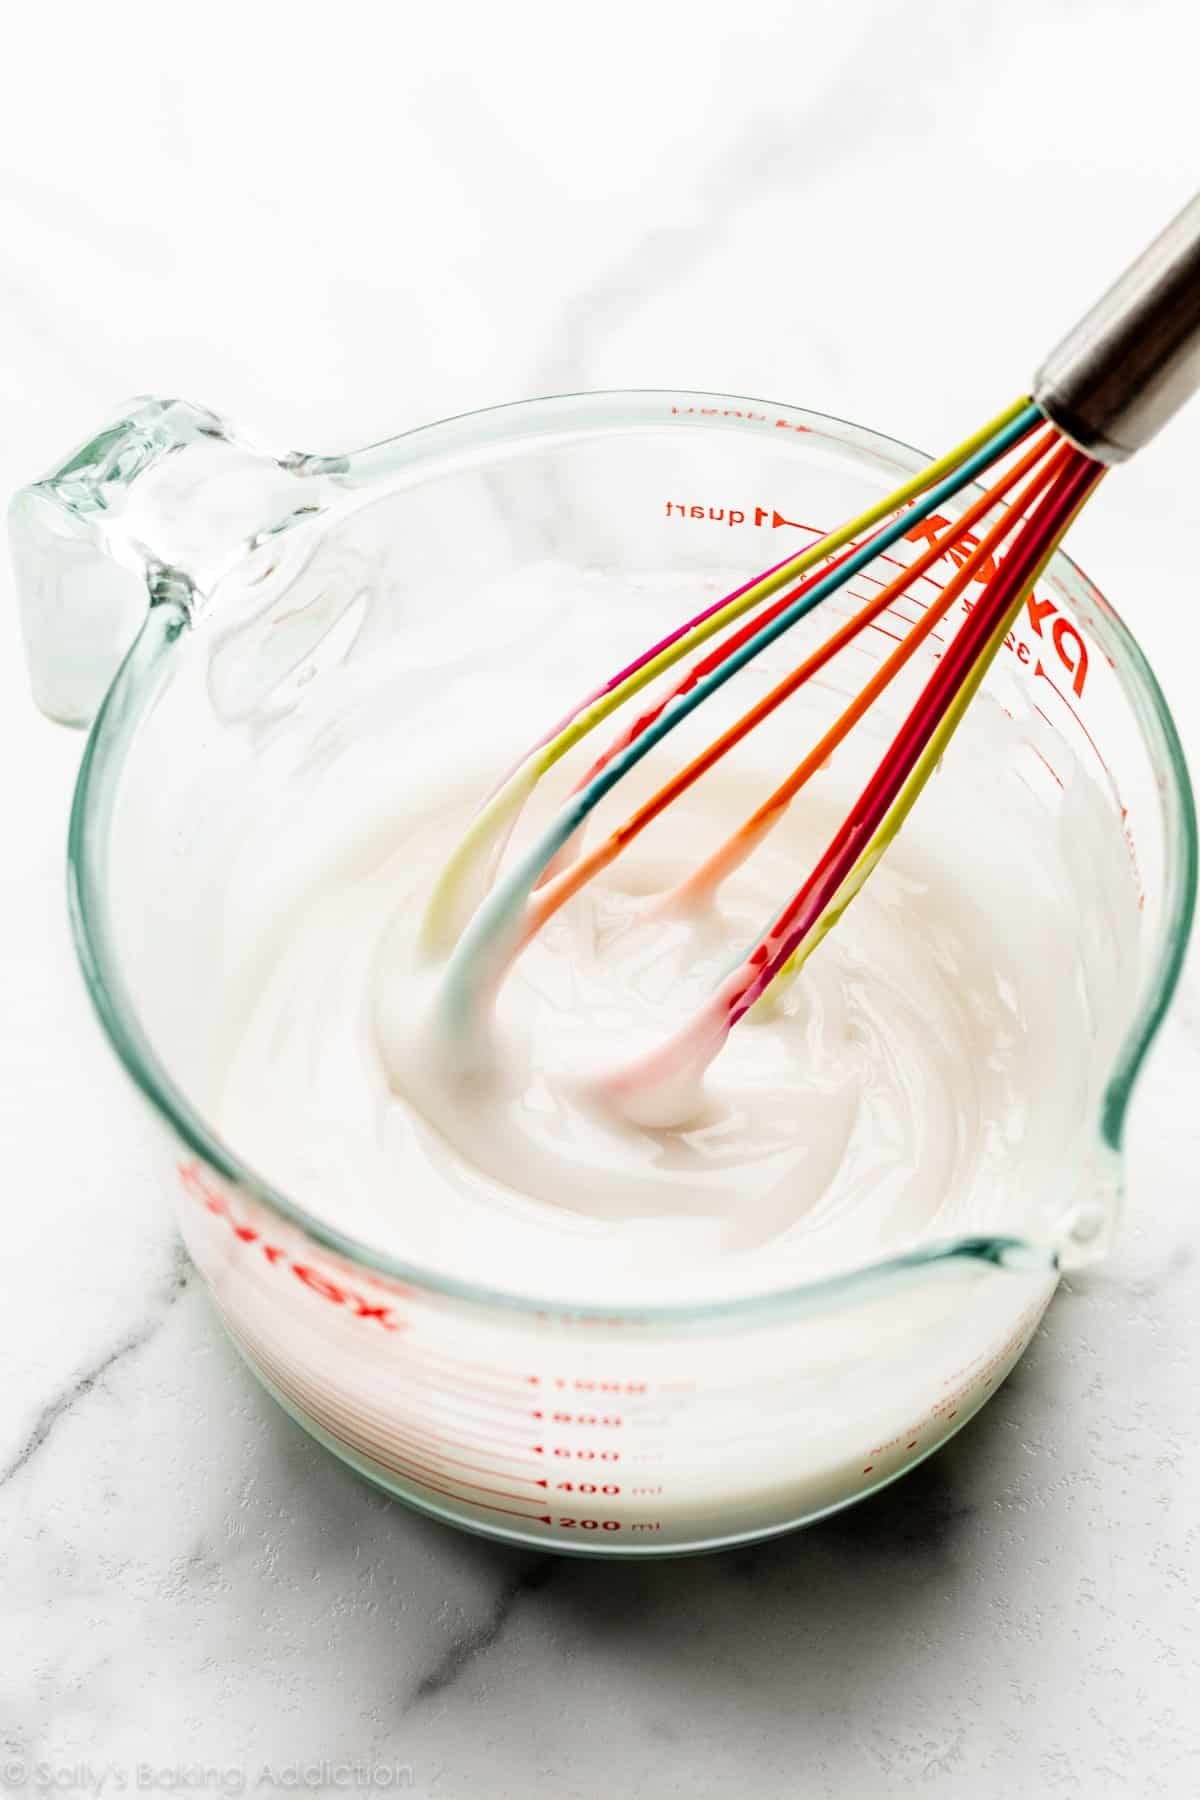
The Right Consistency
The ratio of confectioners’ sugar to water keeps the icing thick. If you drizzle a little icing off the whisk into the bowl, the ribbon of icing will hold for a few seconds before melting back into the icing. That’s when you know it’s the right consistency.
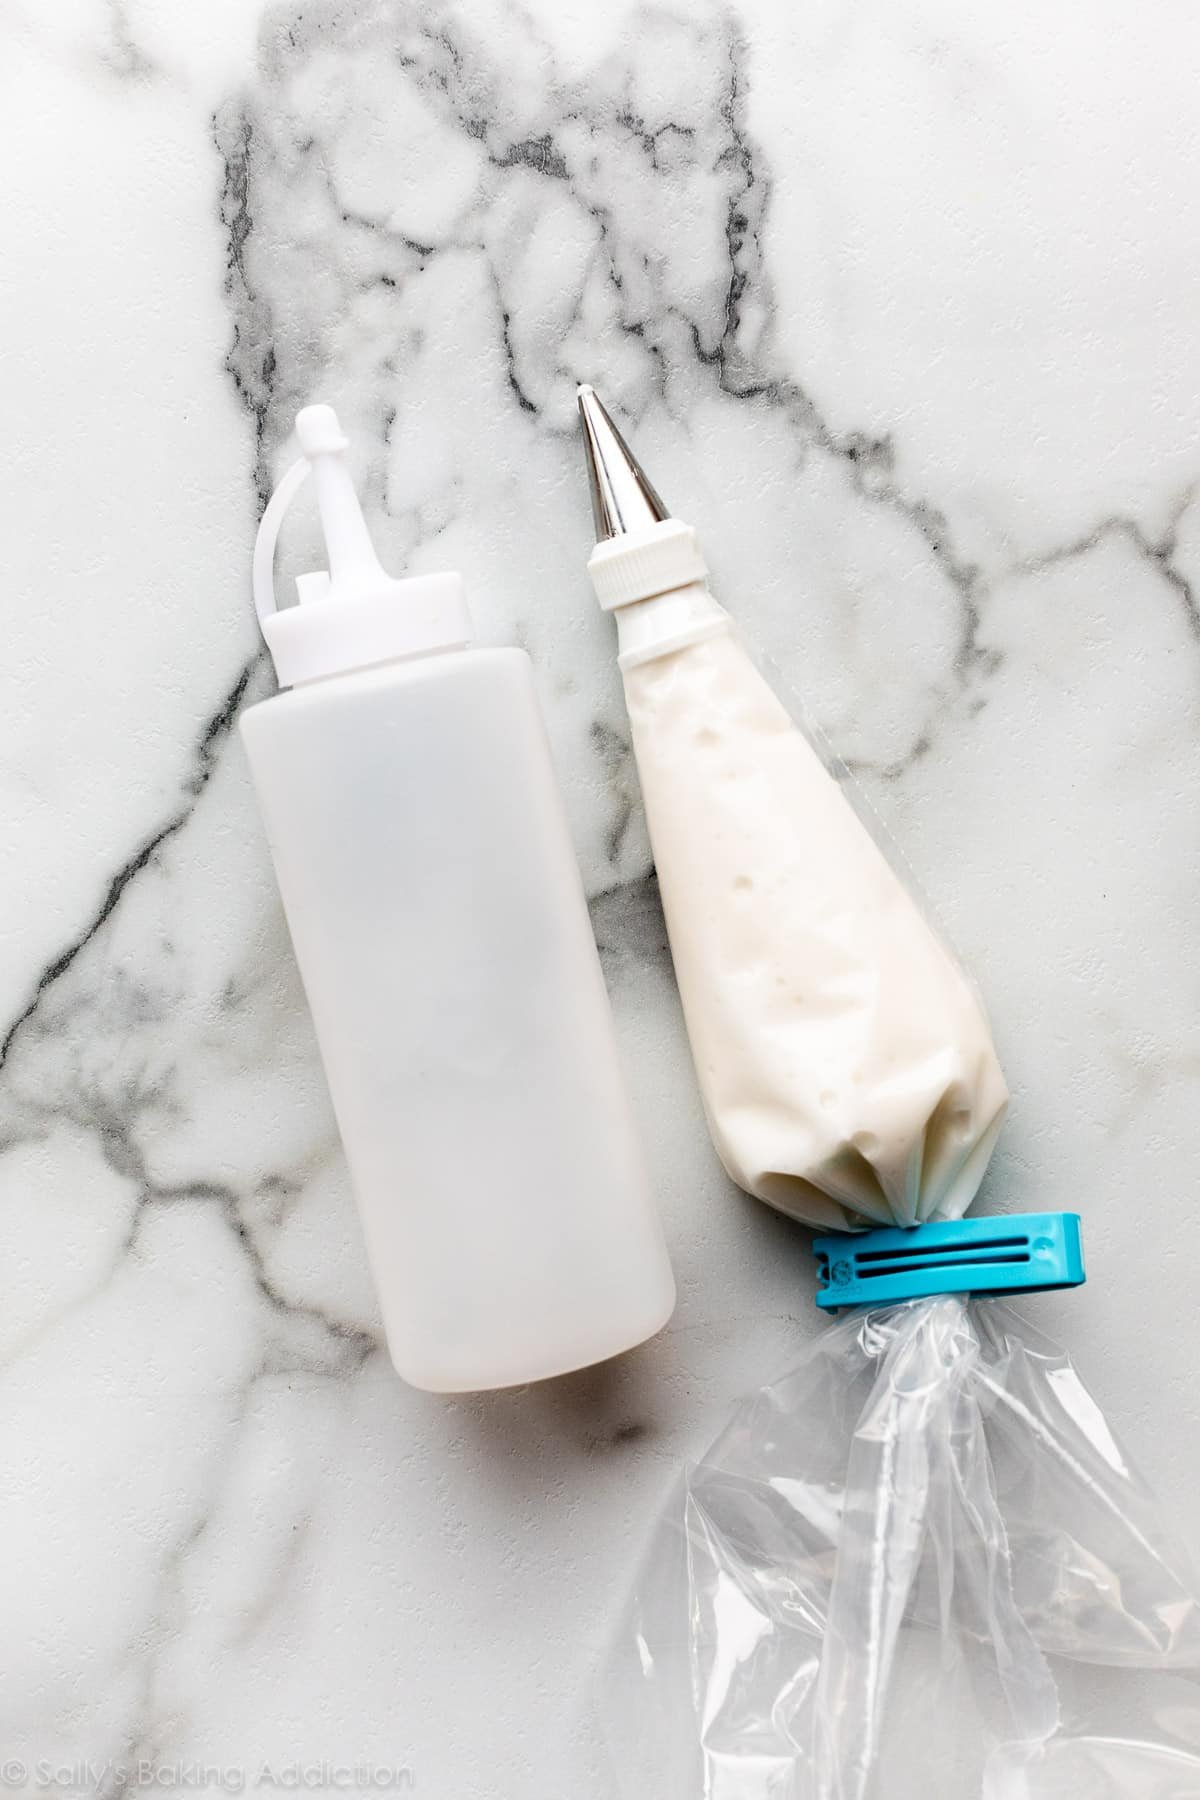
Use a Squeeze Bottle or Piping Bags/Tips
Here’s what I recommend for piping tips:
- Disposable Piping Bags or Reusable Piping Bags
- Use Wilton piping tip #4 for outlining and flooding the cookies with icing. This is the same tip I usually use for royal icing, too. (And great for piping spider webs on Halloween cupcakes!)
- Couplers: Couplers are needed if you’re switching around your piping tips and icing colors. For example, if you only have one piping tip #4 but want to use this tip for multiple colors of icing. A coupler makes it easy to switch tips between bags of icing.
- Optional: Bag clips, bag ties, or rubber bands to keep piping bags closed.
Or instead, use a squeeze bottle!
- To make decorating a breeze, use a squeeze bottle. They’re less intimidating than piping tips and very easy for young bakers to use. Or… just dip your cooled cookies into the icing. No tools needed.
For even more of my favorite tools, you can see this full list of my top recommended cookie decorating supplies.
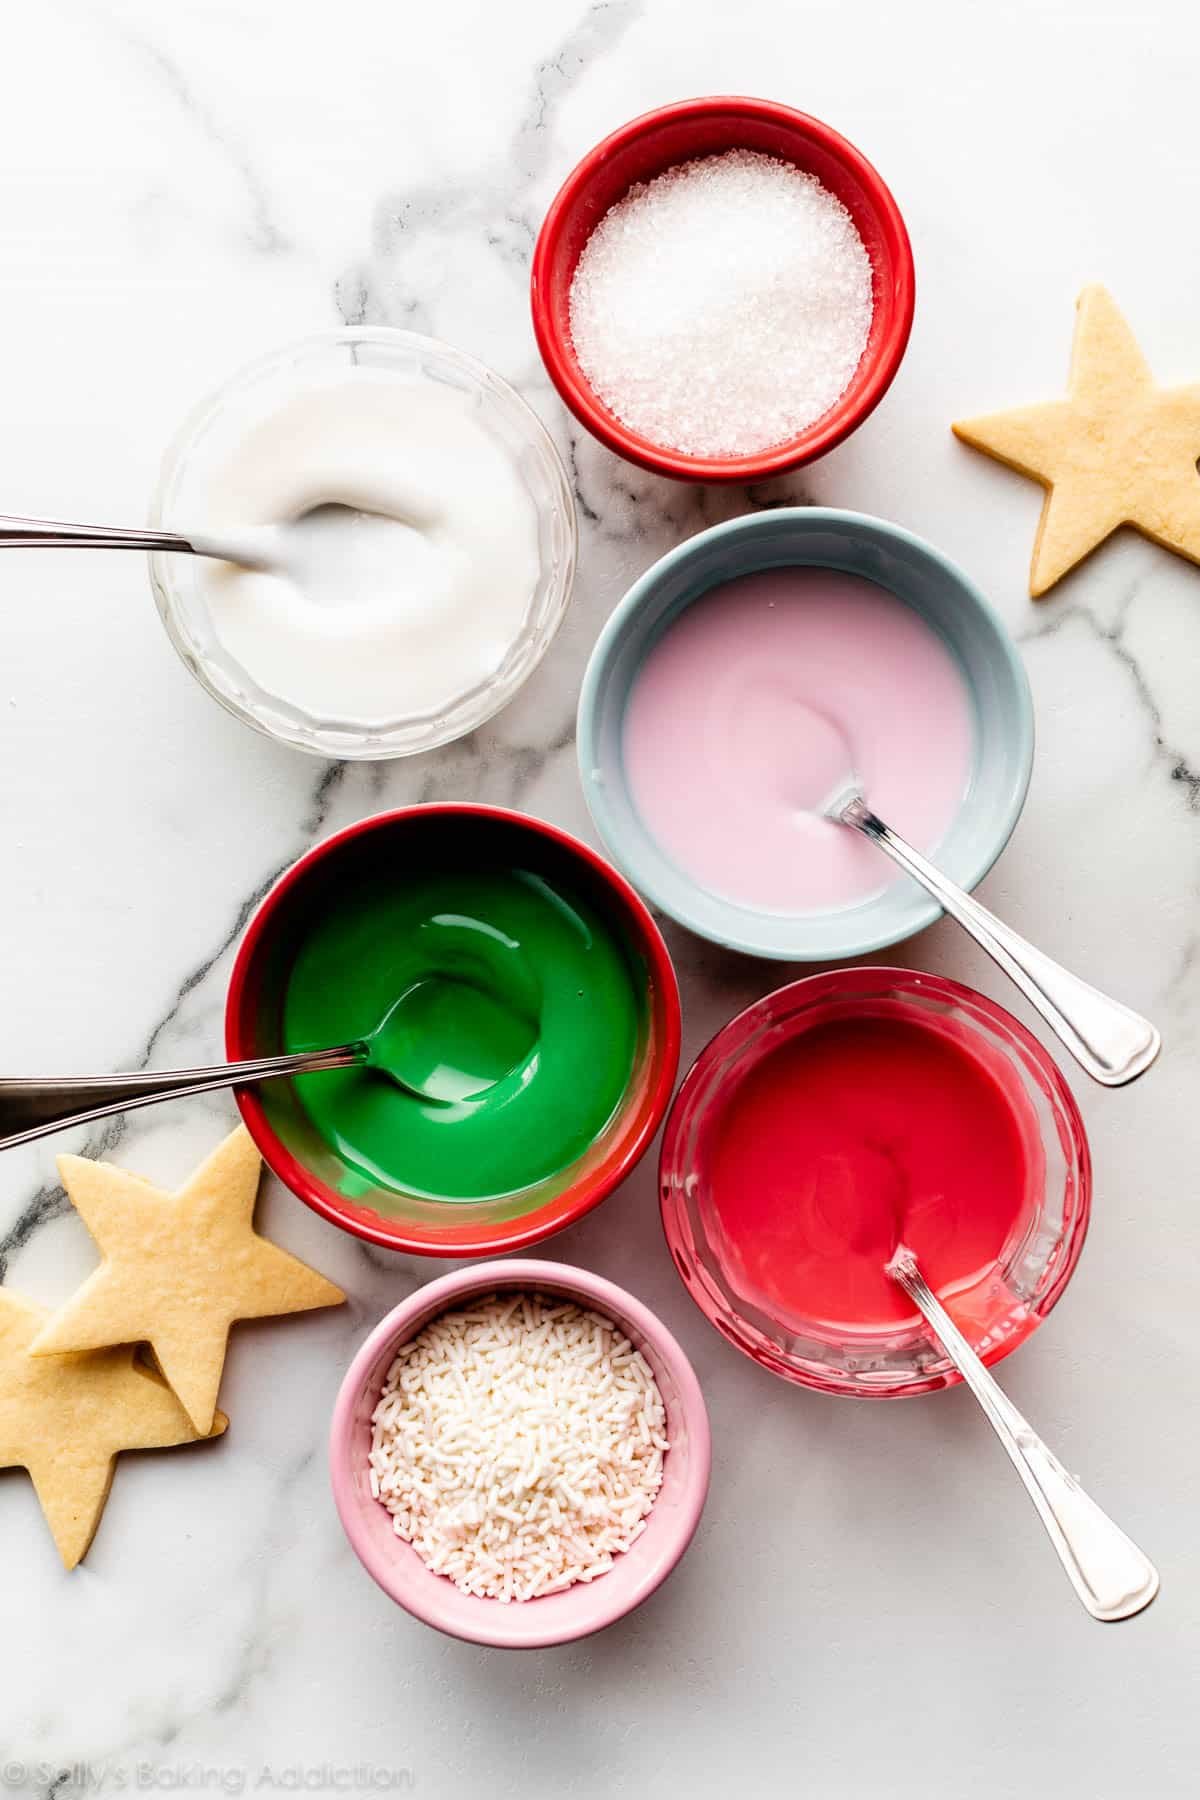
Tinting the Icing Different Colors
You can keep the icing white or tint it your desired color. Use gel food coloring because liquid food coloring can change the consistency. I like the brand AmeriColor; you can find their gel colors in the baking aisle of craft stores or give it a quick search online. I use and recommend (affiliate links) this set of 6 colors or this set of 12 colors.
- As Icing Dries, It Darkens: As icing sits in a piping bag/squeeze bottle before using AND as it dries on a cookie, the color darkens. This is the case with most colors, particularly red and black. When I make black icing, it’s usually blue-ish gray in the bowl and piping bag and then as it dries, it darkens into a black shade. Don’t go overboard on food coloring because the color will deepen as the icing dries.
- Can I Use Natural Food Coloring For Cookie Icing? Yes, absolutely! I’ve used the brand Supernatural and they have a line of natural powdered food coloring that’s available in a few colors. You need to dissolve the coloring in a little water before using, so make sure that you very slightly reduce the amount of water needed in the icing recipe. (Note: If you ever need to thicken the icing back up after adding the coloring, you can whisk in a little more confectioners’ sugar.)

This Cookie Icing Requires Planning Ahead
The icing needs at least 24 hours to dry, but you can certainly eat them prior to the icing drying. This is much longer than royal icing, which usually dries in 2 hours.
PS: If you want to decorate cookies with buttercream frosting instead, use this vanilla buttercream. Feel free to keep it on the thicker side by reducing 1 Tablespoon of milk/cream.
Looking for more holiday baking inspiration? Here are 75+ Christmas cookies with all my best success guides & tips.
Print
Easy Cookie Icing
- Prep Time: 5 minutes
- Cook Time: 0 minutes
- Total Time: 5 minutes
- Yield: about 1.5 cups icing
- Category: Baking
- Method: Whisking
- Cuisine: American
Description
If you need a cookie decorating alternative to traditional royal icing, this sugar cookie icing is a great choice. It’s like a very thick glaze. This icing takes awhile to dry, about 24 hours, and you can’t pipe detail very well, but if you want simple decoration and a simple icing, this is it!
Ingredients
- 3 cups (360g) confectioners’ sugar
- 1/2 teaspoon pure vanilla extract (omit and replace with water for stark white icing)
- 2 teaspoons light corn syrup*
- 4.5–5 Tablespoons (67-75ml) room temperature water
- pinch salt*
Instructions
- Using a fork, stir the confectioners’ sugar, vanilla, corn syrup, 4.5 Tablespoons (67ml) of water, and optional salt together in a medium bowl. It will be very thick and almost impossible to stir. Switch to a whisk and whisk in 1/2 Tablespoon (8ml) of water. If you lift the whisk and let the icing drizzle back into the bowl, the ribbon of icing will hold shape for a few seconds before melting back into the icing. That is when you know it’s the right consistency and is ready to use. If it’s too thick (sometimes it is), whisk in another 1/2 Tablespoon (8ml) of water or a little more until you reach the consistency.
- If desired, stir in gel food coloring. You can pour some icing into different bowls if using multiple colors. When tinting icing, only use 1-2 drops at first, stir it in, then add more as needed to reach your desired color. Remember, color darkens as icing dries.
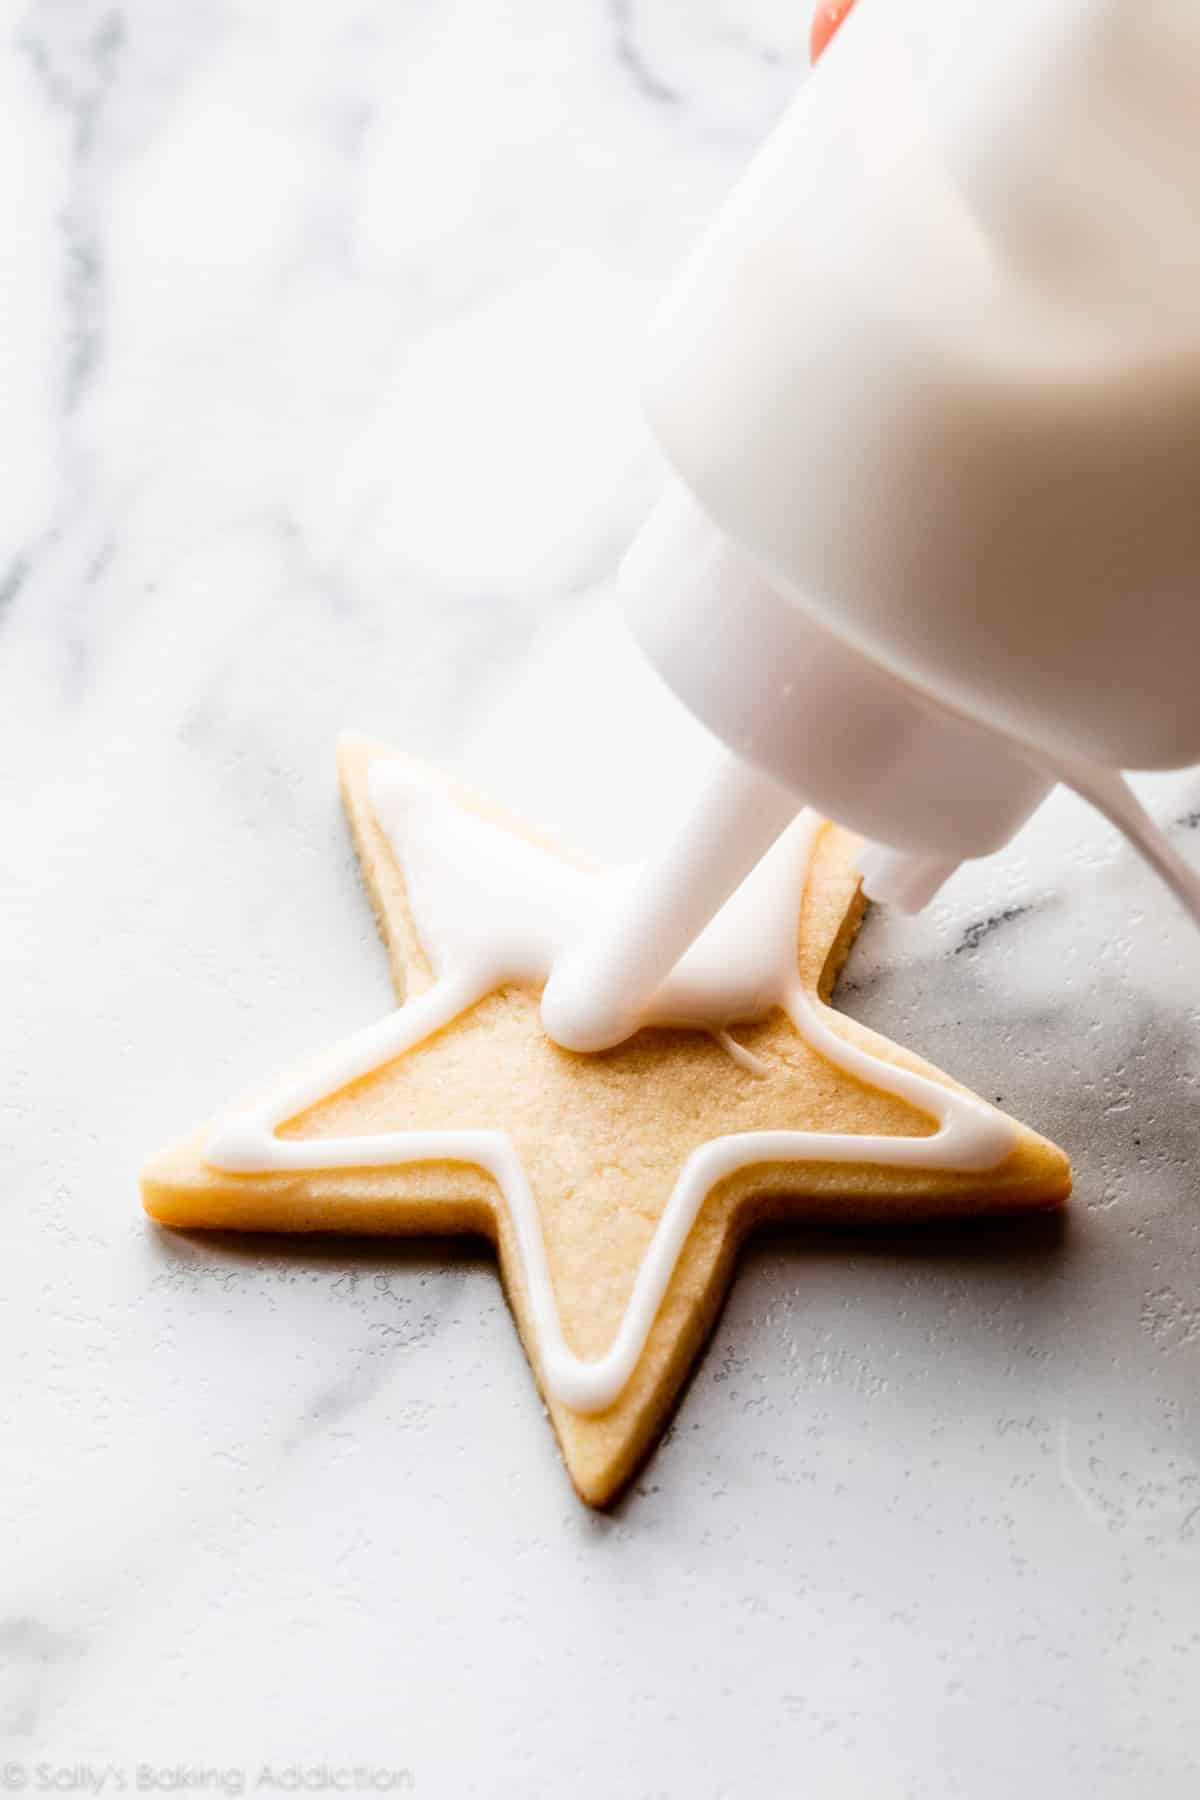
- Decorate: Spoon icing into squeeze bottles or piping bags (reusable or disposable) fitted with Wilton Piping Tip #4. Decorate your cookies as desired. I usually outline cookies with icing first, then fill in the middle. If adding sprinkles on top of the icing, add them right after applying icing on your cookie.
- Let icing dry/set: Feel free to enjoy cookies before icing completely dries. Icing dries in 24 hours. No need to cover the decorated cookies as you wait for the icing to set. If it’s helpful, decorate the cookies directly on a baking sheet so you can stick the entire baking sheet in the refrigerator to help slightly speed up the icing setting. Once the icing has dried, these cookies are great for gifting or for sending.
- The shelf life of your decorated cookies depends on the cookie recipe you are using. If using my sugar cookies, cover and store decorated cookies for up to 5 days at room temperature or up to 10 days in the refrigerator.
- Making Ahead & Storing Icing: If not decorating right away, cover the icing tightly and keep in the refrigerator for up to 2 days. You can store in piping bags (with clips or rubber bands to seal ends), in squeeze bottles, or covered in bowl or container. Bring to room temperature before using. If icing has thickened up, add a few drops of water and mix in to thin out. Depending how you stored the icing (squeeze bottle/piping bag/container or bowl) shake squeeze bottle to mix/massage piping bag to mix/whisk in bowl or container to mix.
Notes
- Freezing Instructions: I do not recommend making and freezing this icing before using to decorate your cookies. It’s not as smooth and easy to use after thawing. However, decorated sugar cookies freeze well up to 3 months. Wait for the icing to set completely before layering between sheets of parchment paper in a freezer-friendly container. To thaw, thaw in the refrigerator or at room temperature.
- Special Tools (affiliate links): Glass Mixing Bowl | Whisk | Gel Food Coloring (I like this set of 6 colors or this set of 12 colors from Americolor) | Squeeze Bottles | Piping Bags (Reusable or Disposable) | Wilton Piping Tip #4 | Couplers | Bag Clips, Bag Ties, or Rubber Bands
- Cookies & Sprinkles in Photos (affiliate links): Pictured cookies are sugar cookies and gingerbread cookies made with Christmas cookie cutters (the exact set is no longer available, but here is a set with similar shapes) and the ball ornament from this set. Sprinkles used on pictured decorated cookies are plain white sprinkles, these white balls on the Christmas trees, Wilton Pearlized Silver Sugar Food Decorative, this white sparkling sugar, and red balls from a sprinkle mix like this on reindeer.
- Corn Syrup: Corn syrup gives the icing sticking power and creates a beautiful sheen on the dried icing. I don’t recommend skipping it, but you can if absolutely needed.
- Salt: I know salt isn’t a typical ingredient in cookie icing, but it helps offset its sweetness. You just need a small pinch.
- Yield: This amount of icing is enough for icing 2 dozen cookies. You’ll have plenty if you want to divide it and tint the batch multiple colors, too. Icing can easily be halved by halving all of the ingredients. (Still add a tiny pinch of salt.)


Reader Comments and Reviews
My kids love this easy recipe for cookie decorating. They had so much fun. They are all sugared up before bedtime. Thank you for sharing.
my icing when i piped it was running down the side of the cookie and really messy and wet
Hi Shiloh, if you lift the whisk and let the icing drizzle back into the bowl, the ribbon of icing will hold shape for a few seconds before melting back into the icing. That is when you know it’s the right consistency and is ready to use. If the icing is too thin, mix in more confectioners’ sugar.
If I let this glaze dry, can I layer additional glaze of a different color on top or will the addition soften up the 1st layer?
Absolutely! I do that often.
Hi! I am planning on making cookies soon for Christmas and am wondering if I should freeze them iced or not…
Should I decorate them and freeze or should I freeze the naked cookies and wait to decorate just before giving them out?
Thanks for your advice!
Hi Marie, you can do it either way! There is a slight risk of the icing bleeding if frozen and thawed. To play it safe you can wait to decorate until before giving them out, but they should be fine either way. Hope they’re a hit!
So I used organic powdered sugar that has tapioca starch rather than corn starch like most powdered sugars. I had a really hard time getting this to thicken up. The directions say it will be hard to stir before switching to the whisk but I didn’t find that to be the case, and had to add so much more sugar to match the ribbon consistency! I even weighed everything so I’m sure I measured correctly. I think it will be fine – more worried that I also forgot the salt (but I doubt that caused my problem). Anyway, just something to consider.
I don’t see where you add the salt. I’m guessing it’s with the sugar?
Yes! Salt is optional but we like adding a pinch.
I use this recipe all the time for your cut out sugar cookies. I ice then freeze them and they’re perfect! I was wondering if it would work out the same if I used this recipe on my homemade ricotta cookies. My icing is similar but doesn’t freeze well. My non iced ricotta cookies freeze beautifully. So I was going to use this recipe to ice my ricotta and then freeze like I do your cut outs. I THINK it’d work but what are your thoughts? Thank you! Love everything you do!
Hi Barb, the easy icing should freeze well on your ricotta cookies as well. We’re glad you enjoy this icing recipe!
I’m still not quite sure went wrong in this recipe! I’ve made many a cookie, cake and frosting from Sally’s Baking Recipes, but this one didn’t seem to work for me. I even tried it twice . The main issue was the flavor- the consistency was great but the product was inedible. I even went out and bought higher quality vanilla for my 2nd batch thinking that might be the problem. I’m not sure why the taste wasn’t there, but this icing kind of tasted the way glue smells? I ended up making a buttercream frosting instead and just had to sacrifice the decorative piece. Pretty disappointing. I would love some pointers or suggestions though, if possible.
Hi Sally this recipe is so nice I loved it and so did my father
Thx
Hi I made this icing let it set and next day icing looked faded this is so frustrating. What do you recommend?
Hi Brenda, what kind of food coloring are you using? We recommend gel food coloring for the most vibrant colors.
I live in California where the weather is hot. Will this icing melt when temperature is above 80 degrees?
Hi Jeanne, the icing will set after 24 hours. If they’re being served inside, in the shade, etc. the icing should be fine. If the cookies are in direct sunlight, the frosting may start to soften.
Best icing recipe I’ve ever made! I didn’t have corn syrup so I left it out and it still had the perfect texture and dried wonderfully. I added a squeeze of lemon to give it a little tartness and my 8 yr old son said it was the best icing he’s ever had LOL
I would like to make this using cocoa powder to make chocolate icing. Do you have any recommendations on how much to use?
Kim, I’m so glad to read this icing was a major success. We love it too– so easy. I haven’t tried a cocoa version, but that is absolutely doable using this recipe as the starting point. I would start by substituting 1/4 cup of the confectioners’ sugar with 1/4 cup (21g) of cocoa powder. That should be plenty of chocolate/cocoa flavor.
I have now used this recipe several times, and it’s wonderful — simple, tasty, and beautiful! It dries quickly enough that, by the time I’ve done all the flooding, the first cookies are dry enough for details. I love that I don’t need any special ingredients. It’s perfect for my non-professional-but-still-want-beautiful-cookies style! Thank you for this great recipe!
Best cookie icing recipe I have ever used! So easy to work with and it isn’t overly sweet!! Thanks for sharing.
Any tips for making black icing that still tastes great??
Hi Jody! We always prefer to use gel food coloring for the most vibrant colors – Americolor makes great ones.
Hi Sally! Love your recipes. I made icing last Friday but never got around to making the dough until today. Is the icing still good as long as it’s been refrigerated?
Hi Courtney, We only recommend storing the icing in the fridge for up to two days, but do whatever you’re comfortable with!
Can you apply this with a butter knife/spoon instead of bottles or bags?
Hi Courtney! The icing is quite liquid and wouldn’t spread on with a knife. You could try drizzling with a spoon. Or you can always use a simple plastic bag with a tiny tip cut off as a makeshift piping bag. Let us know how it goes!
If I only have regular food coloring, Is this okay? I can’t seem to find any gels in enough time to frost my cookies. TIA! 🙂
Hi Rachael! Yes, you can use regular food coloring. Your colors may not be as vibrant but still beautiful!
About how many gingerbread cookies will one batch of this icing decorate? Also, I want to make white, red, and green icing. Can I make one batch (to divide for those colors) and use water instead of vanilla extract? In other words, will the food coloring work to make red and green if water was used? Or, do I need to make a separate batch for them using vanilla extract?
Hi DeAnna, it depends how much icing you want to use on the cookies– this recipe is enough to fully cover and decorate 2 dozen 3-4 inch cookies. You can separate 1 batch into a few bowls for different icing. You can leave out the vanilla if desired. (The icing is still white even when you add the vanilla.) The food coloring will work if you add vanilla.
Hello! If I do not have corn syrup, what can I substitute and how much of it would I need for the posted recipe? Thanks!
Hi Nazia, We’ve never tested this icing with a substitute but you can simply skip it if absolutely needed.
I’m excited to try this recipe. I’m wondering if the drying time is shorter when you are just doing outlines, etc (not covering the whole cookie)?
Hi Laurie, It should be! The thicker you layer on the icing the longer it will take to dry – so just doing outlines should dry relatively faster. Have fun!
Will this icing work if sealed in piping bags and gifted as ‘decorate your own’ cookie packages? Will it be okay in a piping bag for a few days?
Hi Alison! Icing is fine at room temperature for up to 3 days. After that, it’s best to refrigerate it.
The Wilton website states that the royal icing using their meringue powder will keep at room temperature in airtight containers for up to 6 months!
Would this icing work for tye-dying?
Hi Jennifer! We actually haven’t tested this icing with that method, but I don’t see why it wouldn’t work. Let us know if you give it a try!
Do you have any tips for someone using royal icing for the 1st time??
Hi Pauline! Here’s our post on royal icing with lots of helpful tips included 🙂
How long do they take to set? Also I am freezing them in advance so one hey are set can I stack with parchment between
Hi Winter, The exact time really depends on the consistency of your icing and how thick you layer it on. It may feel dry to the touch in a few hours but to stack them we usually try to wait closer to 24 hours just to be sure they are completely dry.
I want to ice gingerbread with this and then mail the cookies out of state. How long will the icing keep?
Hi Z Blair, Check out this post for the best way to ship cookies. Happy Baking!
Hey Sally I was wondering if swerve sugar free confectioners sugar could work in your easy glaze icing and I try not to have too much sugar
Hi Ruth! We’d love to help but we are not trained in baking with sugar substitutes. For best taste and texture (and so you don’t waste your time trying to adapt this recipe since it may not work properly), it may be more useful to find a recipe that is specifically formulated for sugar substitutes. Thank you!
Hi Ruth..curious to know if you tried it using swerve
How long would this icing stay the correct consistency for decorating? I’m hoping to make it and colour it in advance, and transport the squeeze bottles to an event for easy decorating but I want to make sure it would still be usable (probably would make 1-2 hours before using)
Hi Rebecca, it should be fine for that time!
Hi sally
Would this recipe be good one to use when I want to practice making decorations on wax paper
or is there a cheaper recipe I can use
Thank you
Hi Meg! This recipe should work, or you may enjoy our favorite royal icing for more intricate designs.
I used honey instead of corn syrup and it turned out awesome!
How much honey did you use?
Please let us know how much honey you used. Thanks!
Love this!! Did you use the exact same amount of honey as the recipe calls for corn syrup? I would prefer to use honey instead. Thank you!!
Based on your comment, I used an equal amount of maple syrup to the corn syrup called for and it was great. The blue and yellow colored icing definitely had brown undertones but the greens and reds turned out great. Consistency very easy to work with. I did hope it would impart some maple flavor but it didn’t particularly. Still delicious.