
Today we’re conquering our fears and making homemade croissants! If you’re about to run away screaming, I understand. I’m not sugarcoating it: croissants aren’t easy. Croissants require time, patience, and a lot of rolling. However, just because this recipe is advanced doesn’t mean that YOU have to be an advanced baker to try it. You can absolutely handle this quintessential baking bucket list recipe. ♥
Let me hold your hand through the whole process. I’m sharing step-by-step photography, a full video tutorial, plenty of tricks based on what I’ve learned, and the croissant recipe. I started working on croissants earlier this year. I studied a couple recipes, tested them, tweaked what I found necessary, and played with this dough for weeks. The croissants are golden brown, extra flaky, crisp on the outside, soft on the inside, and unbelievable warm from the oven. One bite of this delicate French pastry will immediately transport you to a quaint French bakery. I’m confident in this homemade croissants recipe and I’m confident in YOU baking them.
The good news! You need zero fancy equipment and zero special ingredients. If you’re looking for a weekend project, know how to read directions, and crave a fresh homemade pastry (don’t we all?), then stick around. You’ll be rewarded with the BEST treat ever!!!

Let’s get right into it. Just like making mille-feuille, making croissants is a labor of love. The long recipe directions and all these step-by-step photographs seem intimidating, but let me walk you through the basic process so you aren’t nervous.
The Process
- make easy dough from butter, flour, sugar, salt, yeast, and milk
- roll out dough into a large rectangle
- make the butter layer (I have an easy trick for this!!!)
- enclose the butter layer inside the dough
- roll out the dough into another large rectangle, then fold it back together
- roll out the dough again, fold it back together again
- roll out the dough one more time, fold it back together
- shape the croissants
- bake
There’s resting time between most steps, which means most of the time is hands off. To help us develop all the layers, croissant dough needs to rest in the refrigerator often. That’s why I call making croissants a project. Do it over a couple days with long breaks between the steps.

All that rolling out and folding back together? That’s called LAMINATING.
What is Laminated Dough?
Laminating dough is the process of folding butter into dough many times, which creates multiple alternating layers of butter and dough. When the laminated dough bakes, the butter melts and creates steam. This steam lifts the layers apart, leaving us with dozens of flaky airy buttery layers.
Just like we do when we make a croissant bread loaf, We’re going to laminate the dough 3 times, which will create 81 layers in our croissants. Yes, 81! Let me paint that picture for you.
- Start with dough, butter layer, dough = 3 layers
- Roll it out and fold it into thirds = 9 layers
- Roll that out and fold it into thirds = 27 layers
- Roll that out one last time and fold it into thirds = 81 layers
So we’re only laminating the dough 3 times, but that gives us 81 layers. When the croissants are rolled up and shaped, that’s one 81 layer dough rolled up many times. So when you bite into a croissant, you’re literally biting into hundreds of layers.
Isn’t that SO COOL???

Croissants Video Tutorial
Watch me make croissants in this video. I talk you through the whole video too.
Now let’s see everything come together in step-by-step photographs.
DOUGH
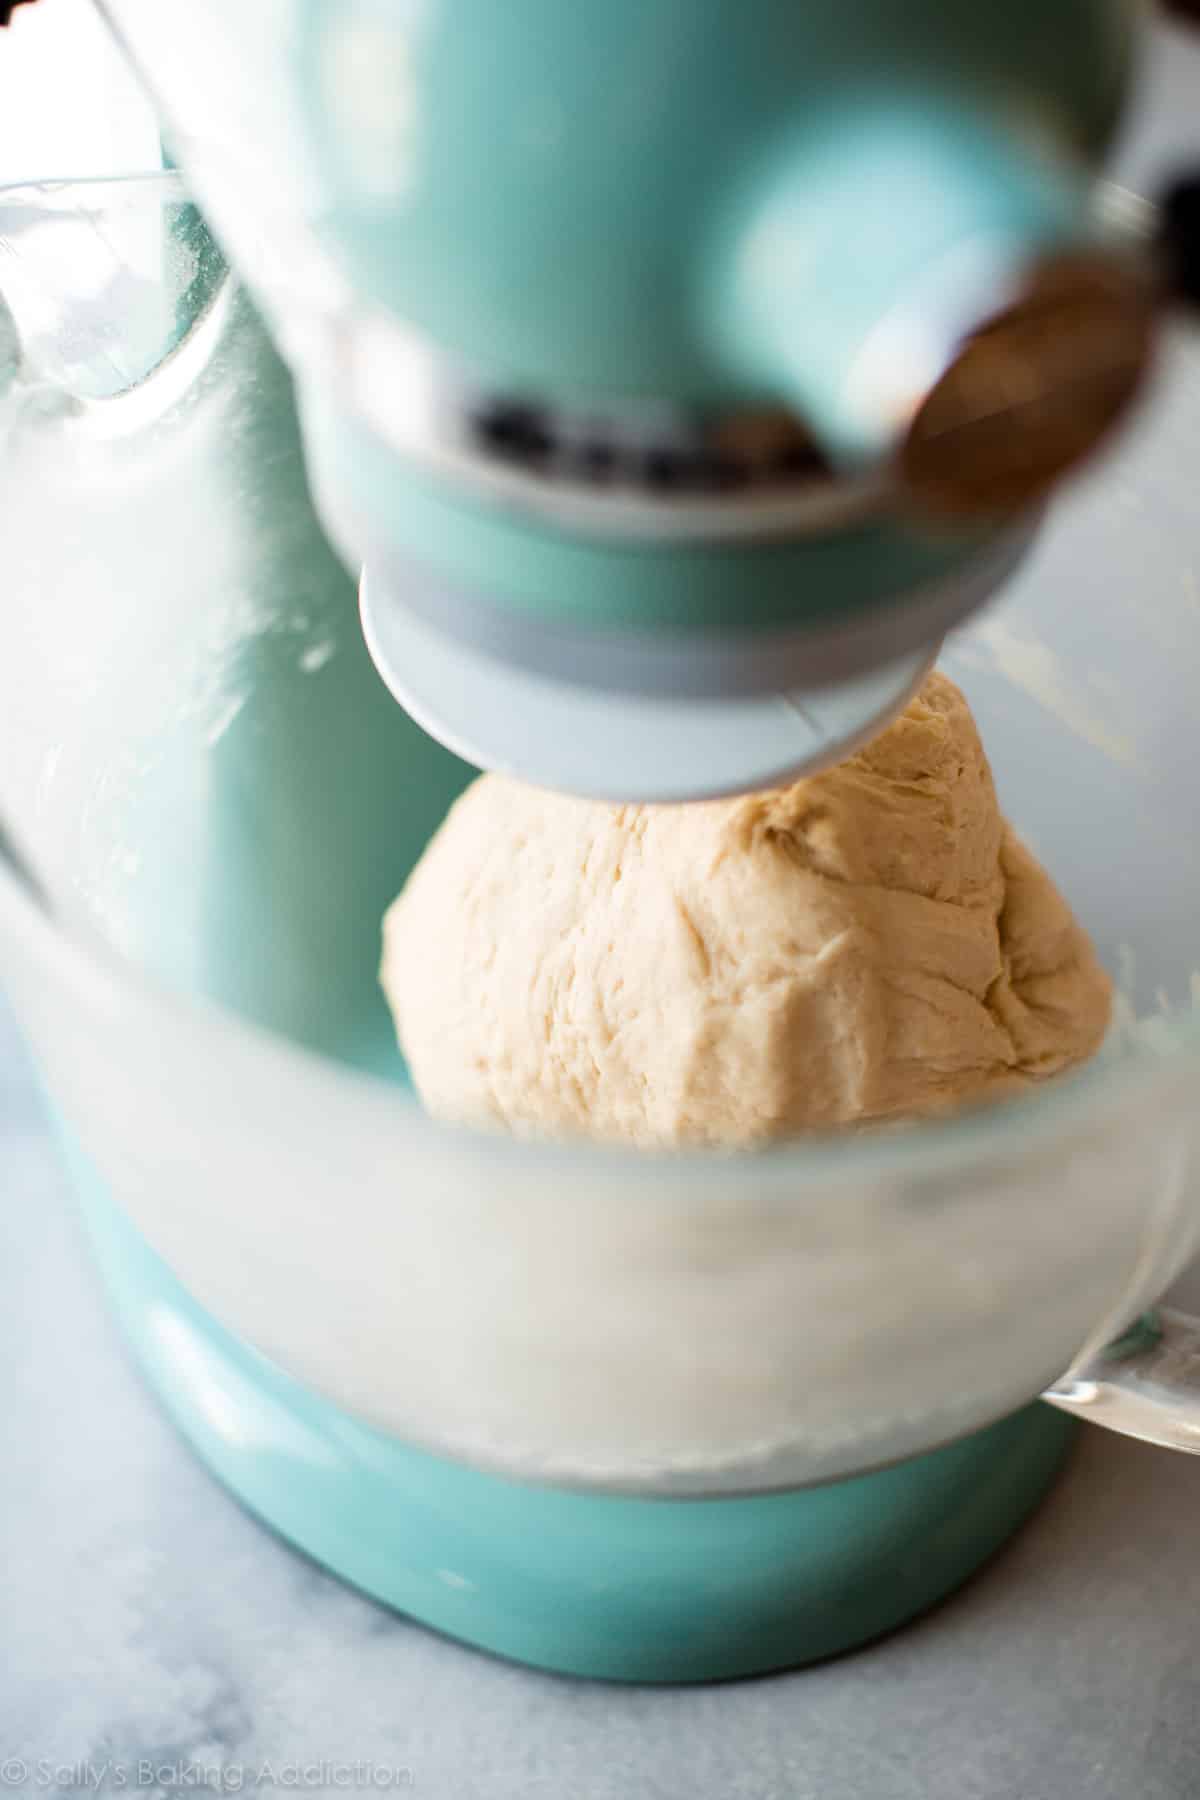
Croissant dough begins with butter, flour, sugar, salt, yeast, and milk. Unlike most yeasted doughs that require warm liquid to activate the yeast, you’re going to use cold milk. The yeast will work its magic later on in the recipe. In the beginning steps of croissants, the dough should always be cold. If, at any point, the dough becomes too warm… stop. Stop what you’re doing and place the dough back in the refrigerator for 20 minutes.
The mixer will beat the dough for about 5 minutes. Stand by your mixer as it works the dough. This dough isn’t particularly heavy, but your mixer will still get a workout. Did you see my Instagram story when my mixer FELL OFF MY COUNTER? I walked away at the wrong time and the whole thing danced off the counter. Unplugged itself and everything. Don’t make my mistake!
See my How to Knead Dough video tutorial if you need any extra help with the kneading step.
We made the dough, now we’re going to cover it and let it rest in the refrigerator for 30 minutes.
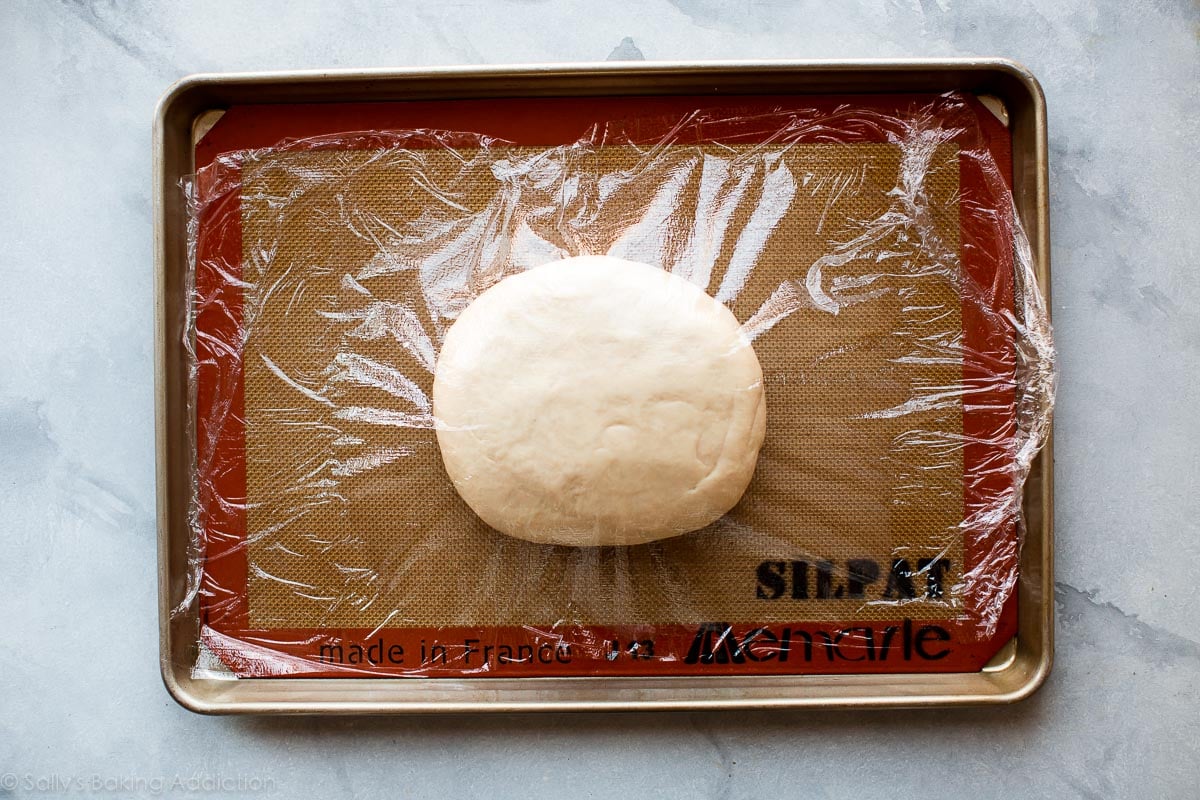
Now let’s roll out the dough into a 14×10-inch rectangle. Use a clean ruler or measuring tape. The ruler or measuring tape, besides your rolling pin, is the most crucial tool when making croissants.
I recommend using a silicone baking mat. While we will still lightly flour it, the mat is nonstick and it’s a handy guide for the exact measurement. You also need to transfer the dough to a baking sheet and the silicone baking mat makes that possible.
The dough isn’t extremely cold after only 30 minutes in the refrigerator, so it will be easy to roll out. Be precise with the 14×10-inch measurement. The dough will want to be oval shaped, but keep working the edges with your hands and rolling pin until you have the correct size rectangle. You can see how I do all this in the video below.
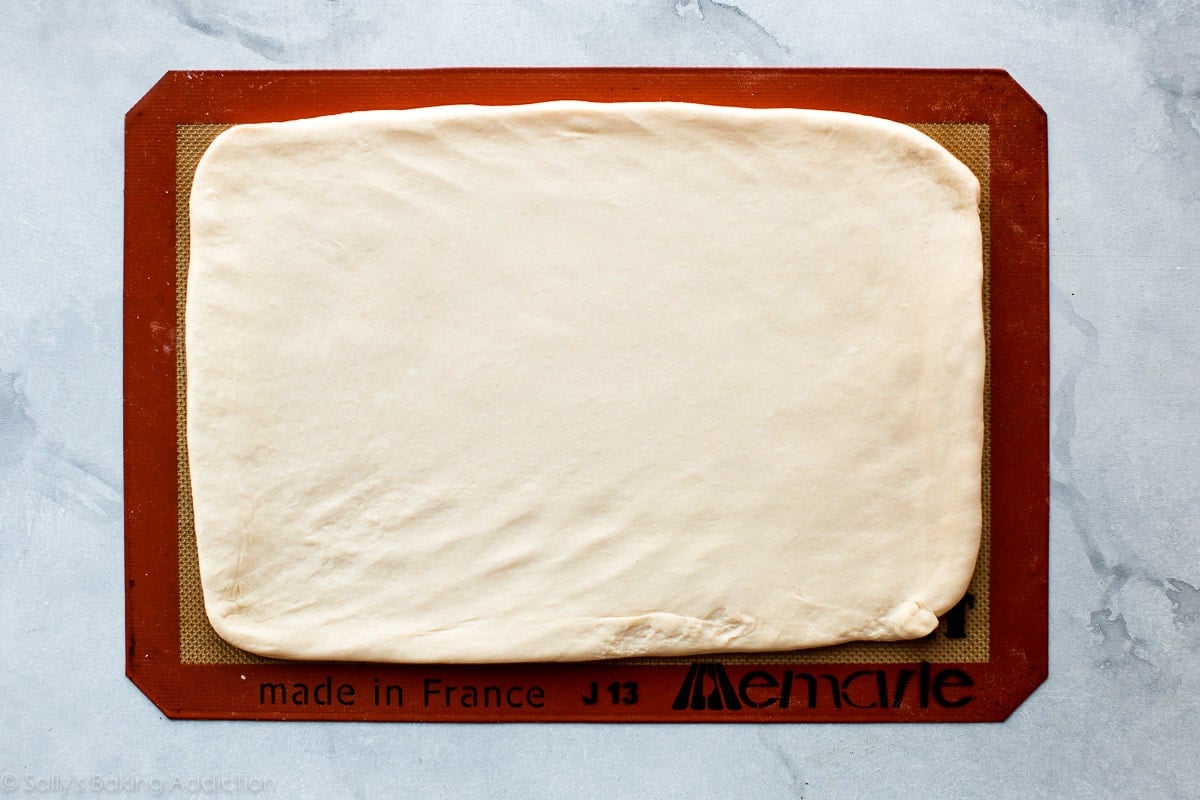
Cover the rolled out dough and chill it for 4 hours or overnight. Literally pick up the silicone baking mat, put it on top of your baking sheet, cover the dough, and chill it. I usually chill it for 4 hours because there is one more 4 hour or overnight chill period coming up. That’s when I typically chill it overnight, making this a 2 day recipe.
BUTTER
Many croissant recipes instruct you to shape extremely cold butter into a rectangle or square. Have you ever tried to manipulate cold sticks of butter into another shape? It’s really hard. I learned the following trick from Zoe at Zoe Bakes. Please go follow Zoe, she is the absolute best. ♥
Start with softened butter, beat it with flour so it has some stability, then spread into a rectangle and chill it. It’s 100x easier to shape softened butter than it is to shape cold butter. Thank you, Zoe!
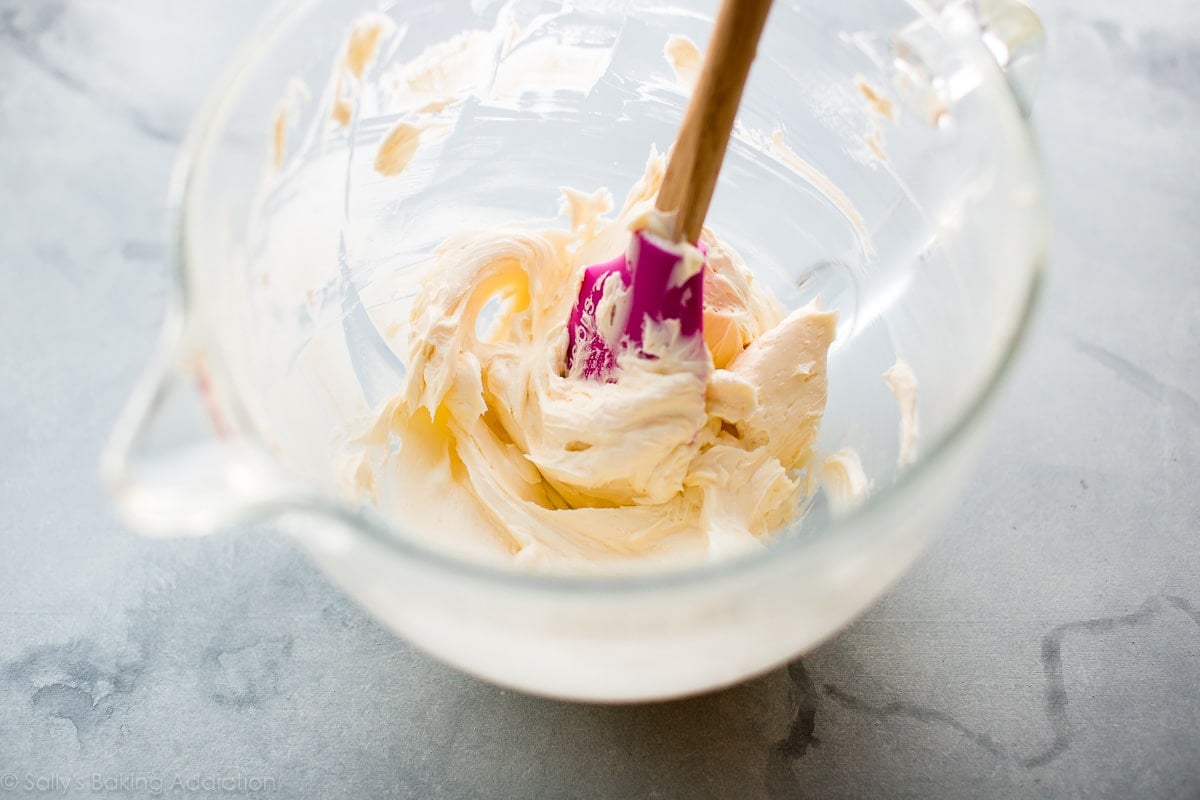
You can use any butter you like best. If you’re going to spend money on European style butter, croissants are when to do it. If I’m being honest, I use store-brand butter and love the croissant’s flavor. It’s butter. It’s going to be good regardless.
The butter rectangle is 7×10 inches, half the length of the dough and the same width, so it fits into the dough. We will chill the butter rectangle right on the silicone baking mat. After it’s chilled, we can peel it right off and place it on the dough to begin lamination.
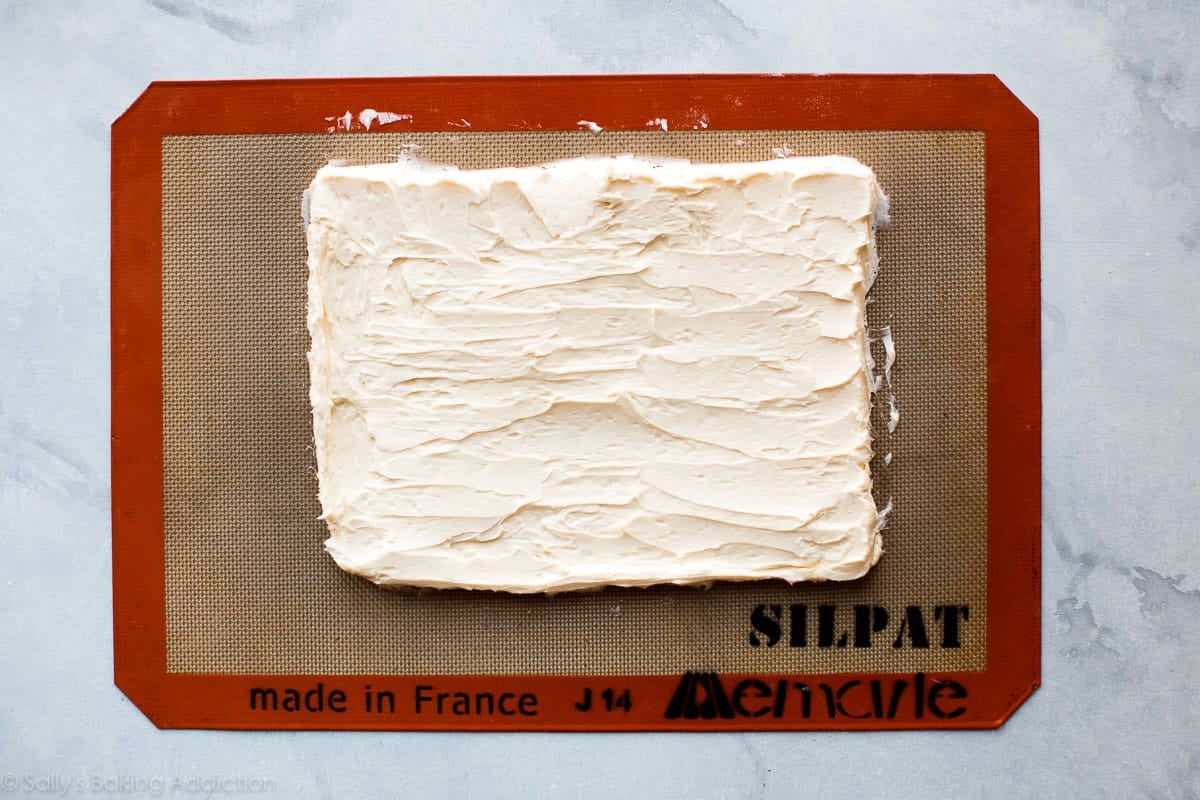
Make sure you only chill the butter for about 30 minutes. Our goal is to have the croissant dough and butter be the same temperature. It makes lamination possible. Butter solidifies much quicker than a soft dough, so that’s why our dough will chill for 4 hours and our butter will only chill for 30 minutes. Make sense?
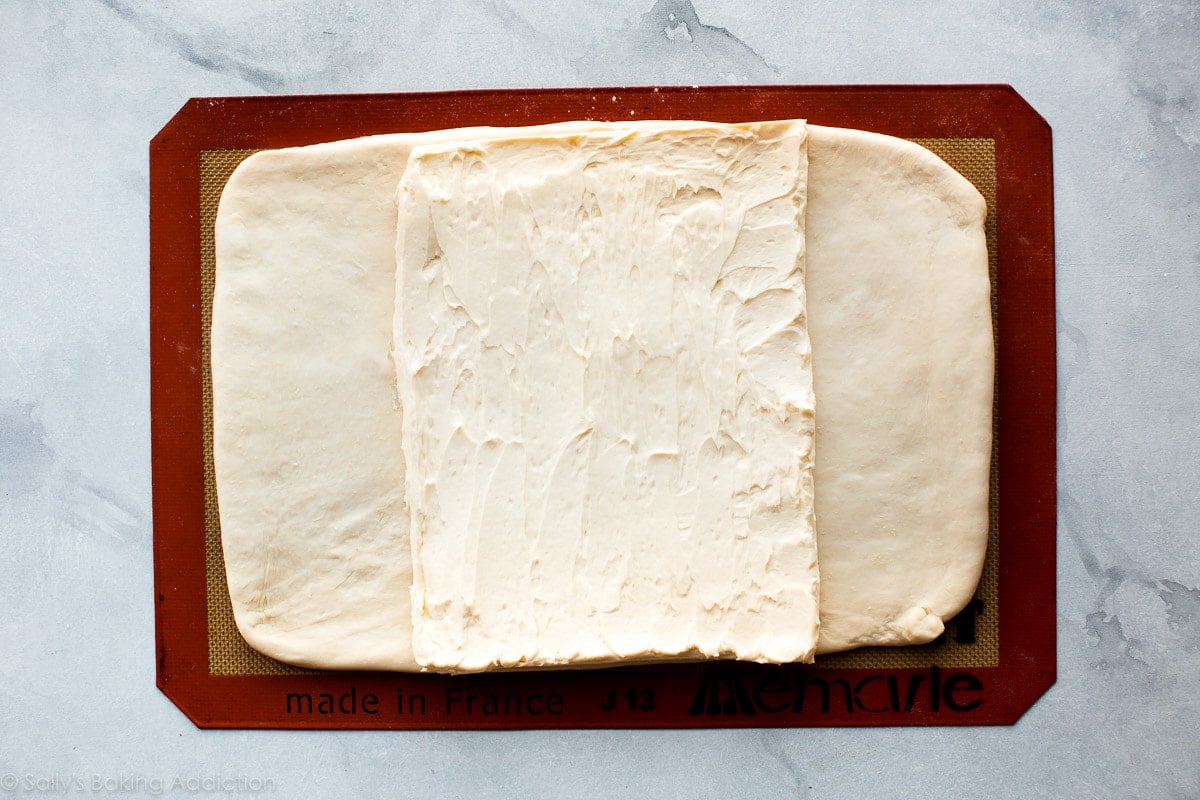
Because you shaped the butter into the precise 7×10-inch size, it fits nicely on the 14×10-inch dough. (After the butter rectangle chills, you can always cut sharp edges with a pizza cutter or knife to make it the appropriate size.)
Fold the cold dough over the cold butter. Use your fingers to seal the butter inside.
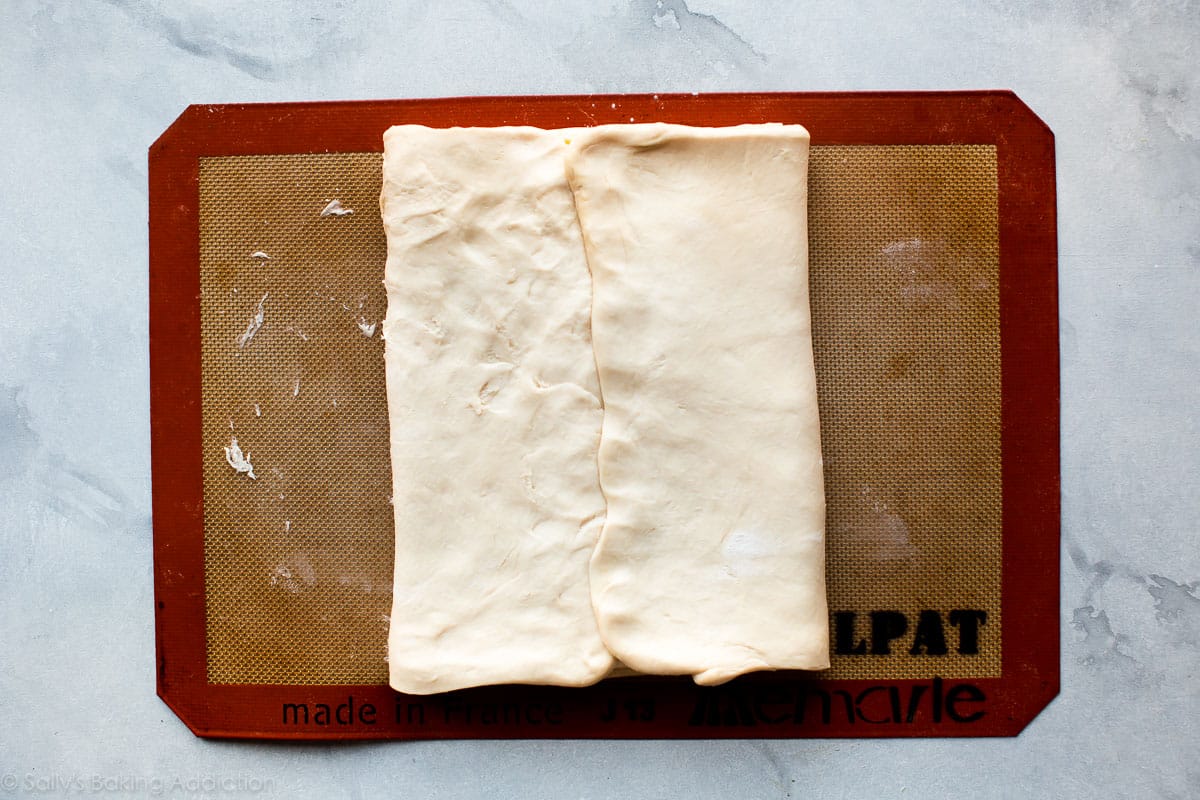
Now we’re going to laminate the dough 3x with a 30 minute break between the 2nd and 3rd time. Why between the 2nd and 3rd time? Because our dough has been out of the refrigerator for long enough by this point and needs to be chilled again. 30 minutes is plenty.
I do not have step-by-step pictures of the lamination process because it’s time sensitive and the dough just became too warm as I tried to set up the shot. However, you can see me laminate the dough and talk through the process in the video below. (3:20-5:15 minutes) Watching me work through this step is more helpful anyway.
Our dough has been rolled out and folded 3x, now it’s time to rest.
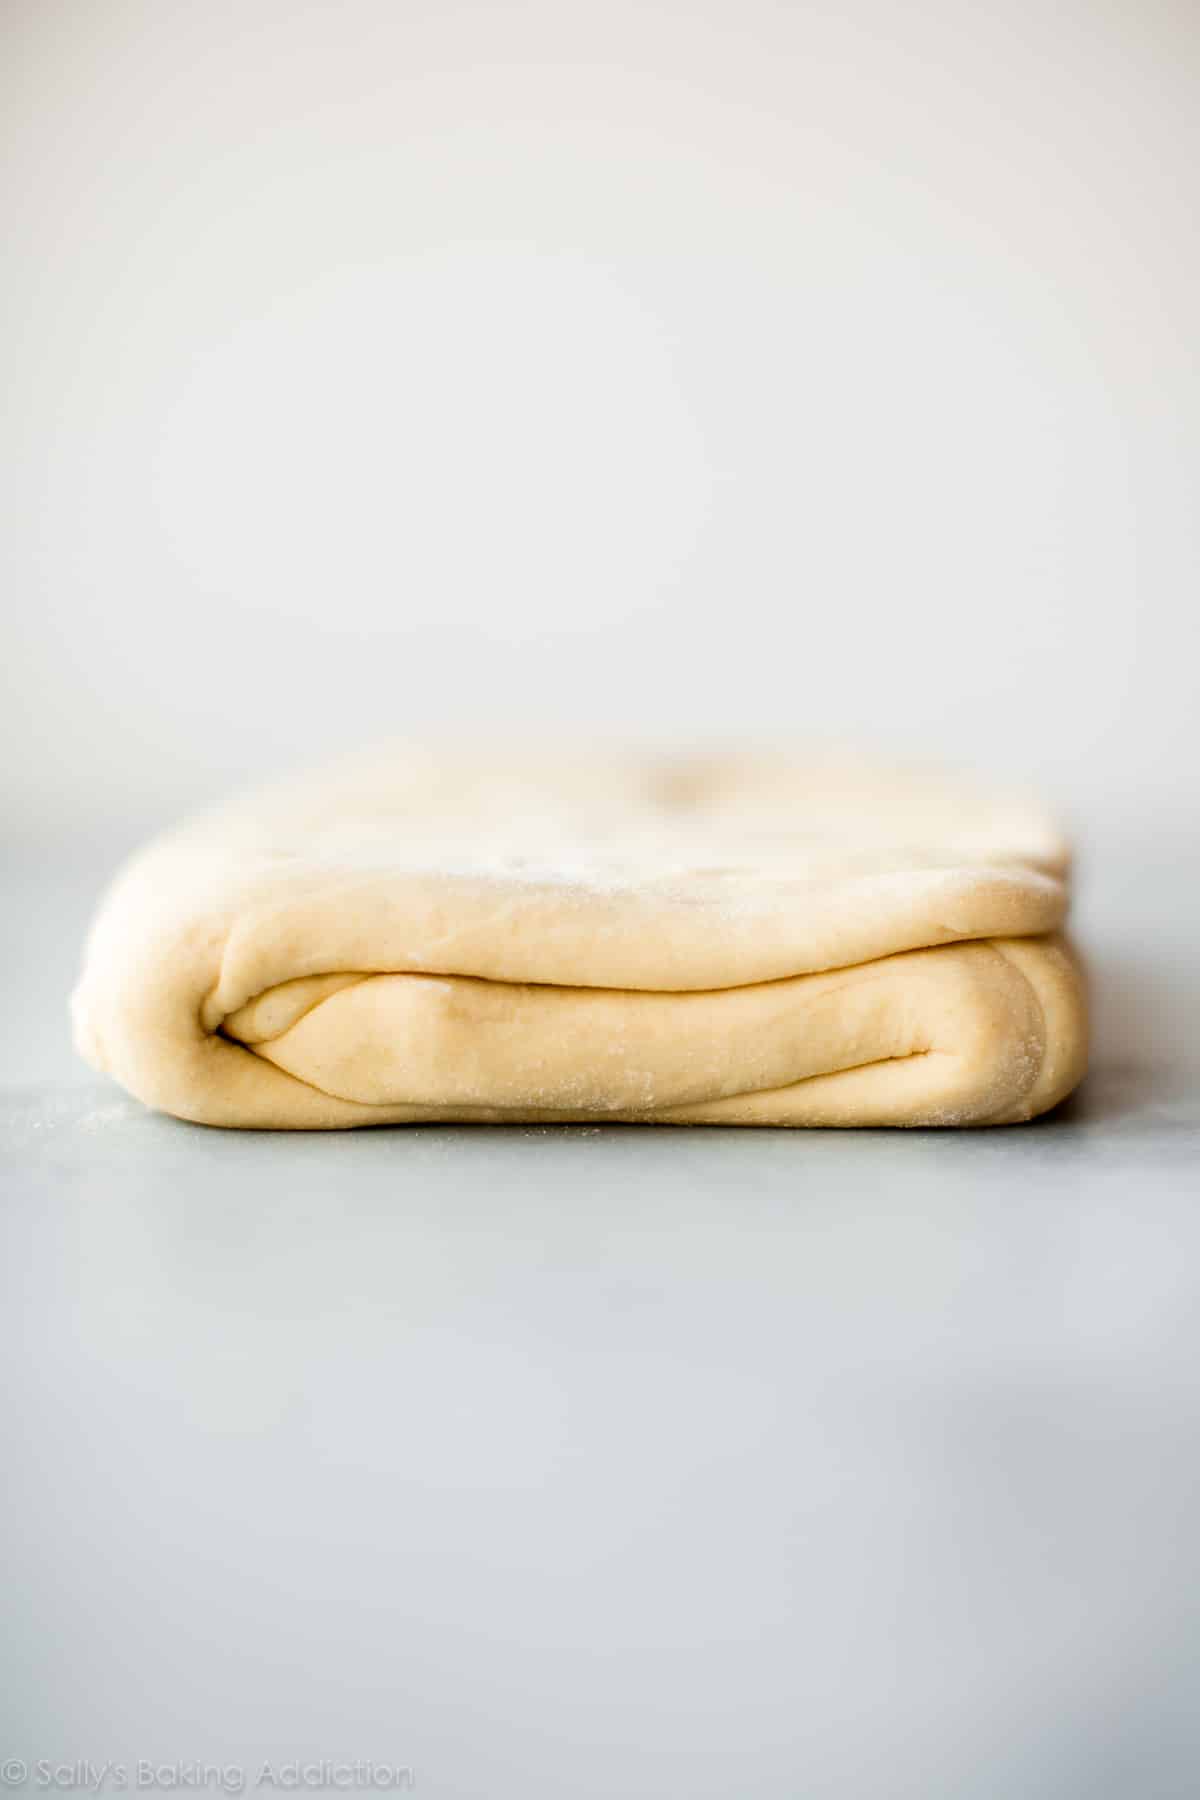
Cover the laminated dough and chill it for 4 hours or overnight. This is when I usually chill it overnight.
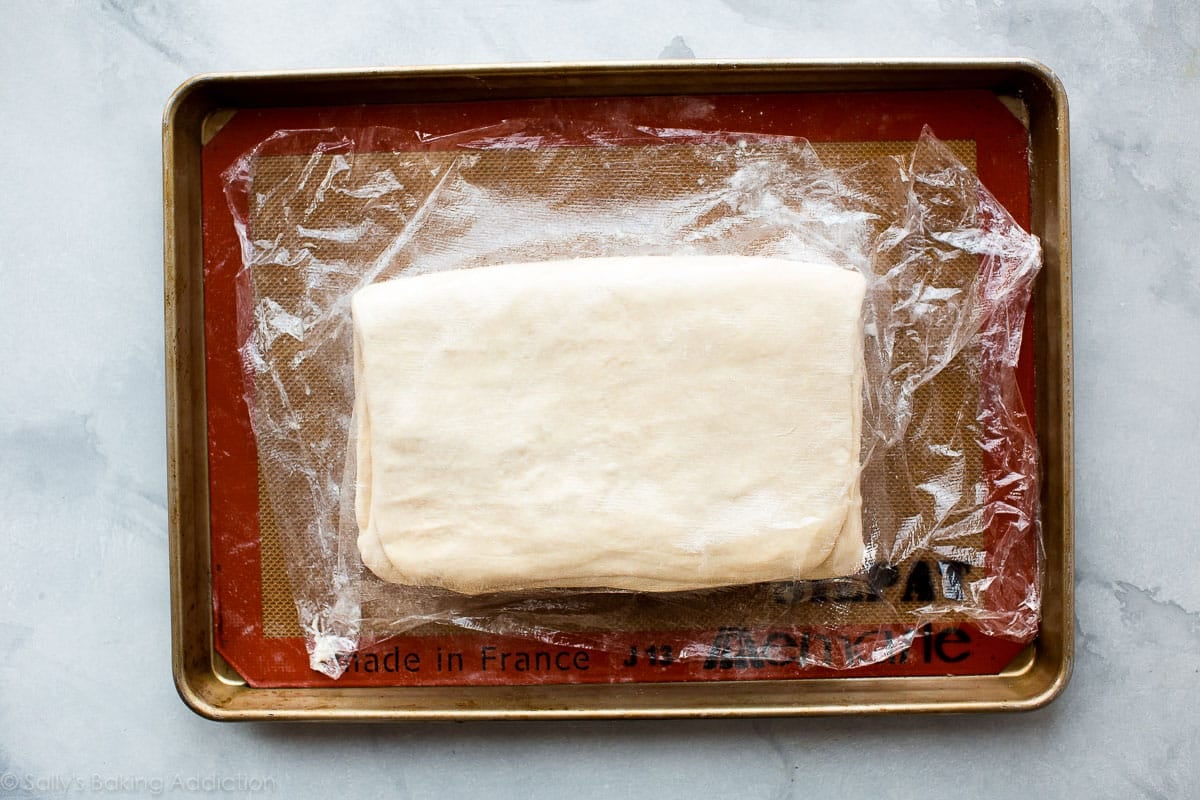
Roll out the dough 1 more time. This time you’ll roll it into an 8×20-inch rectangle.
Use your pizza cutter and slice the rectangle down the center to create two 4×20 rectangles. Then slice across 3x to create eight 4×5-inch rectangles.
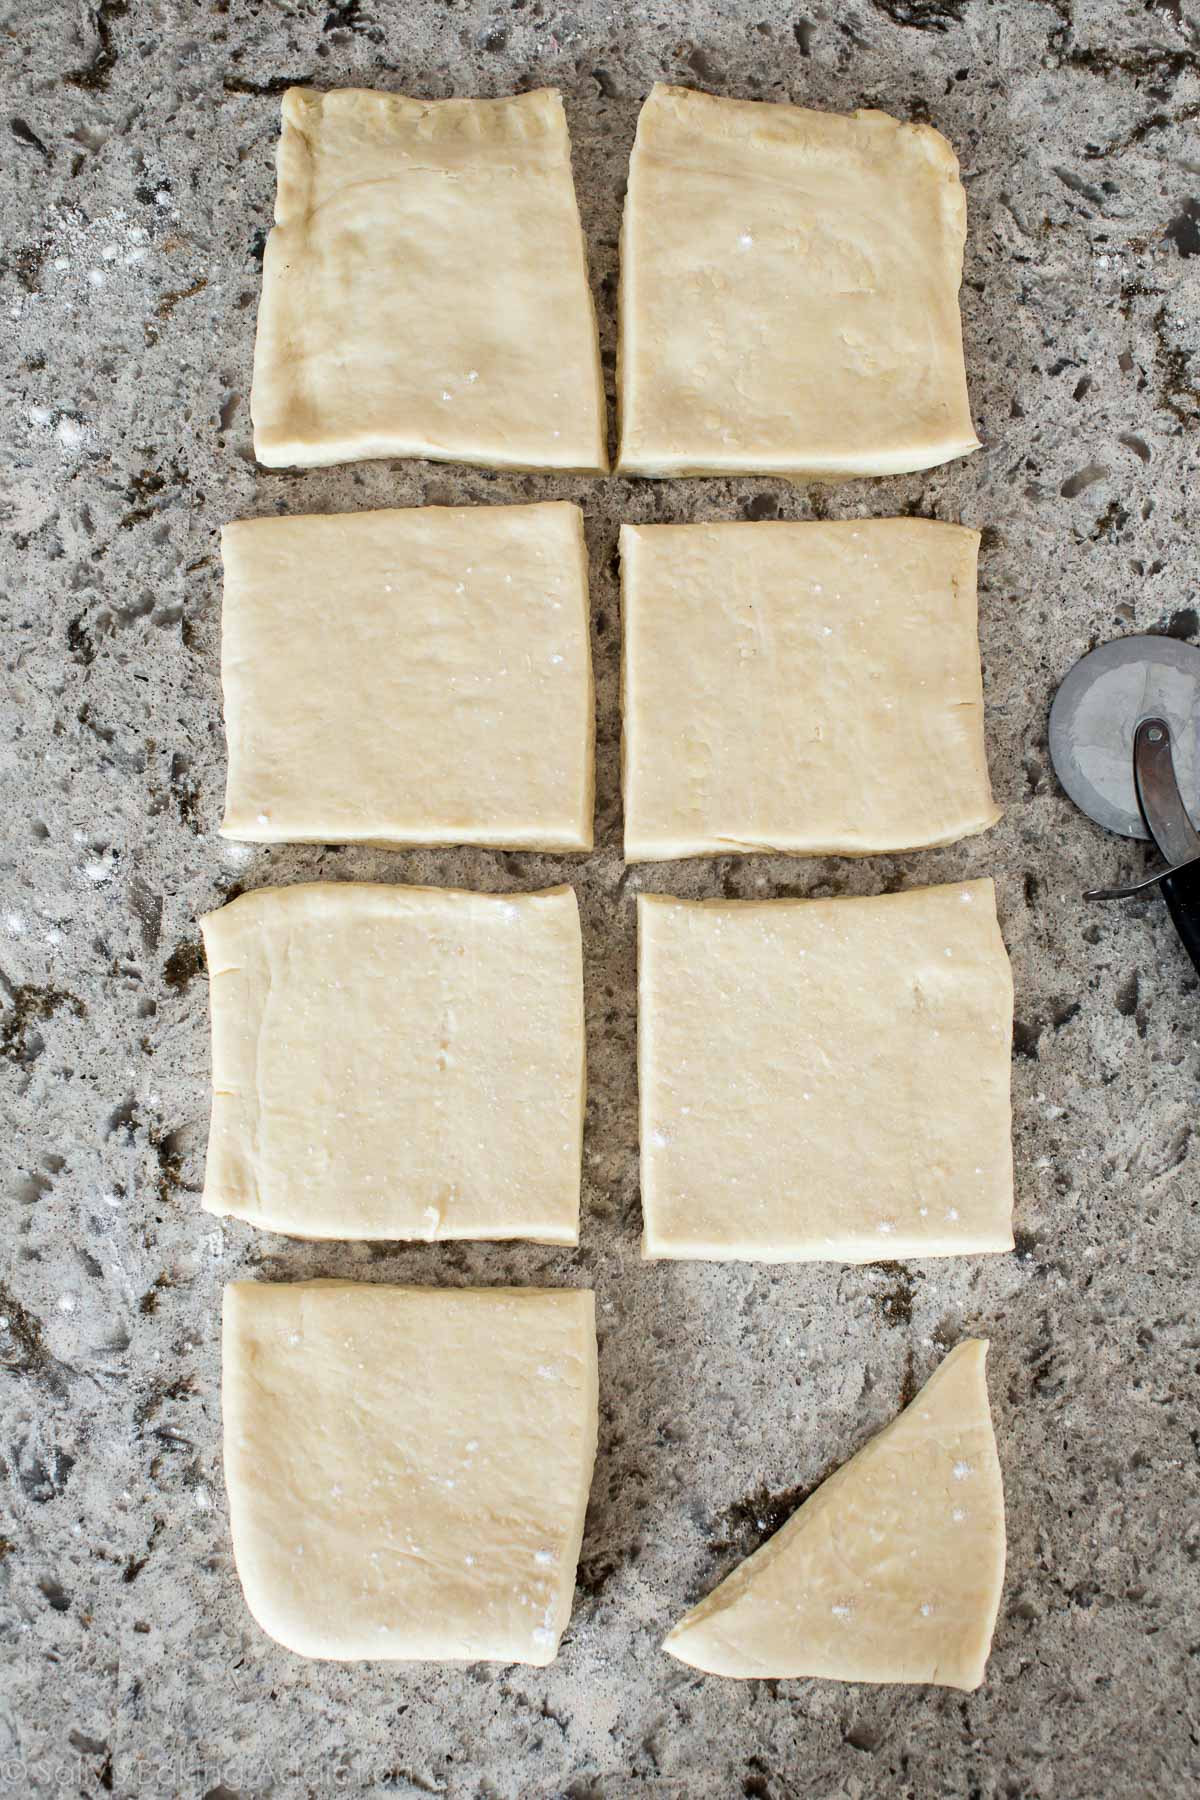
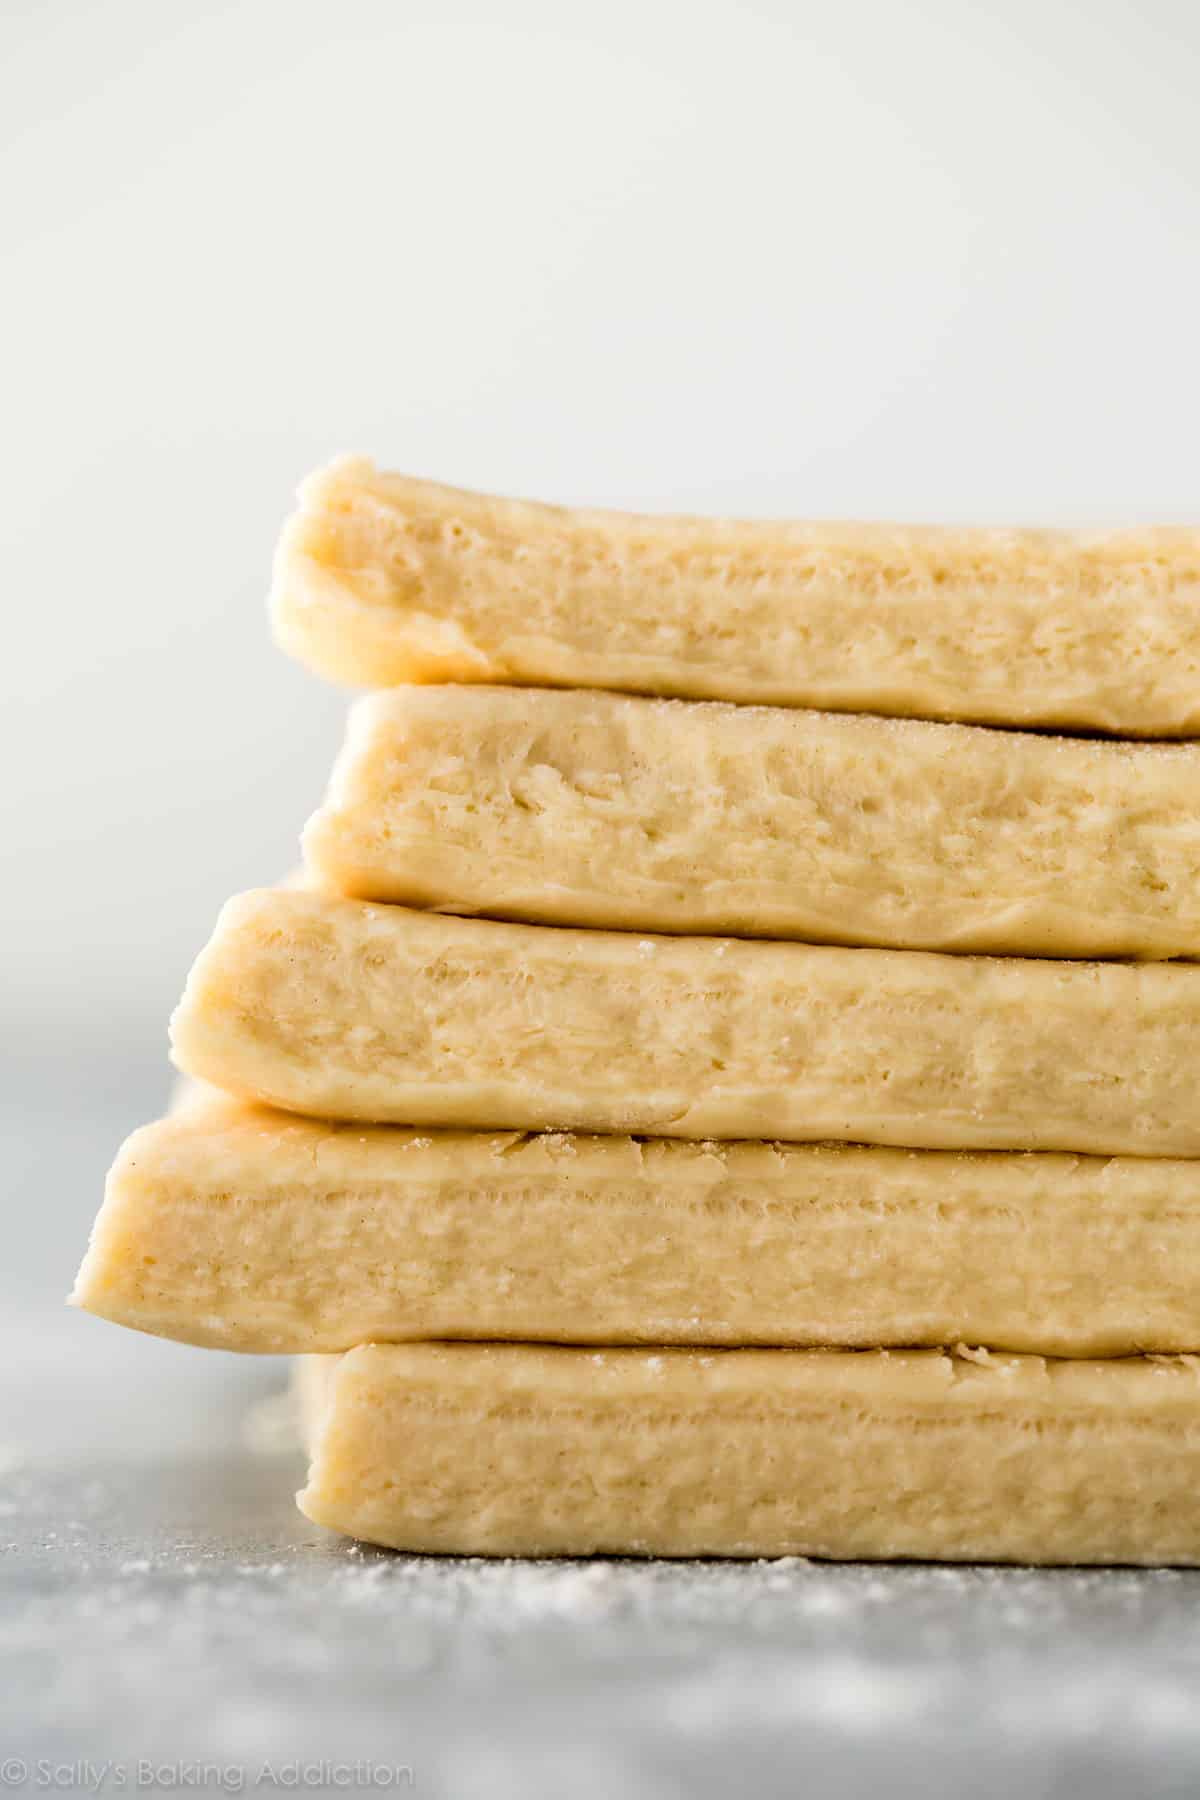
Look at all these layers!!!!
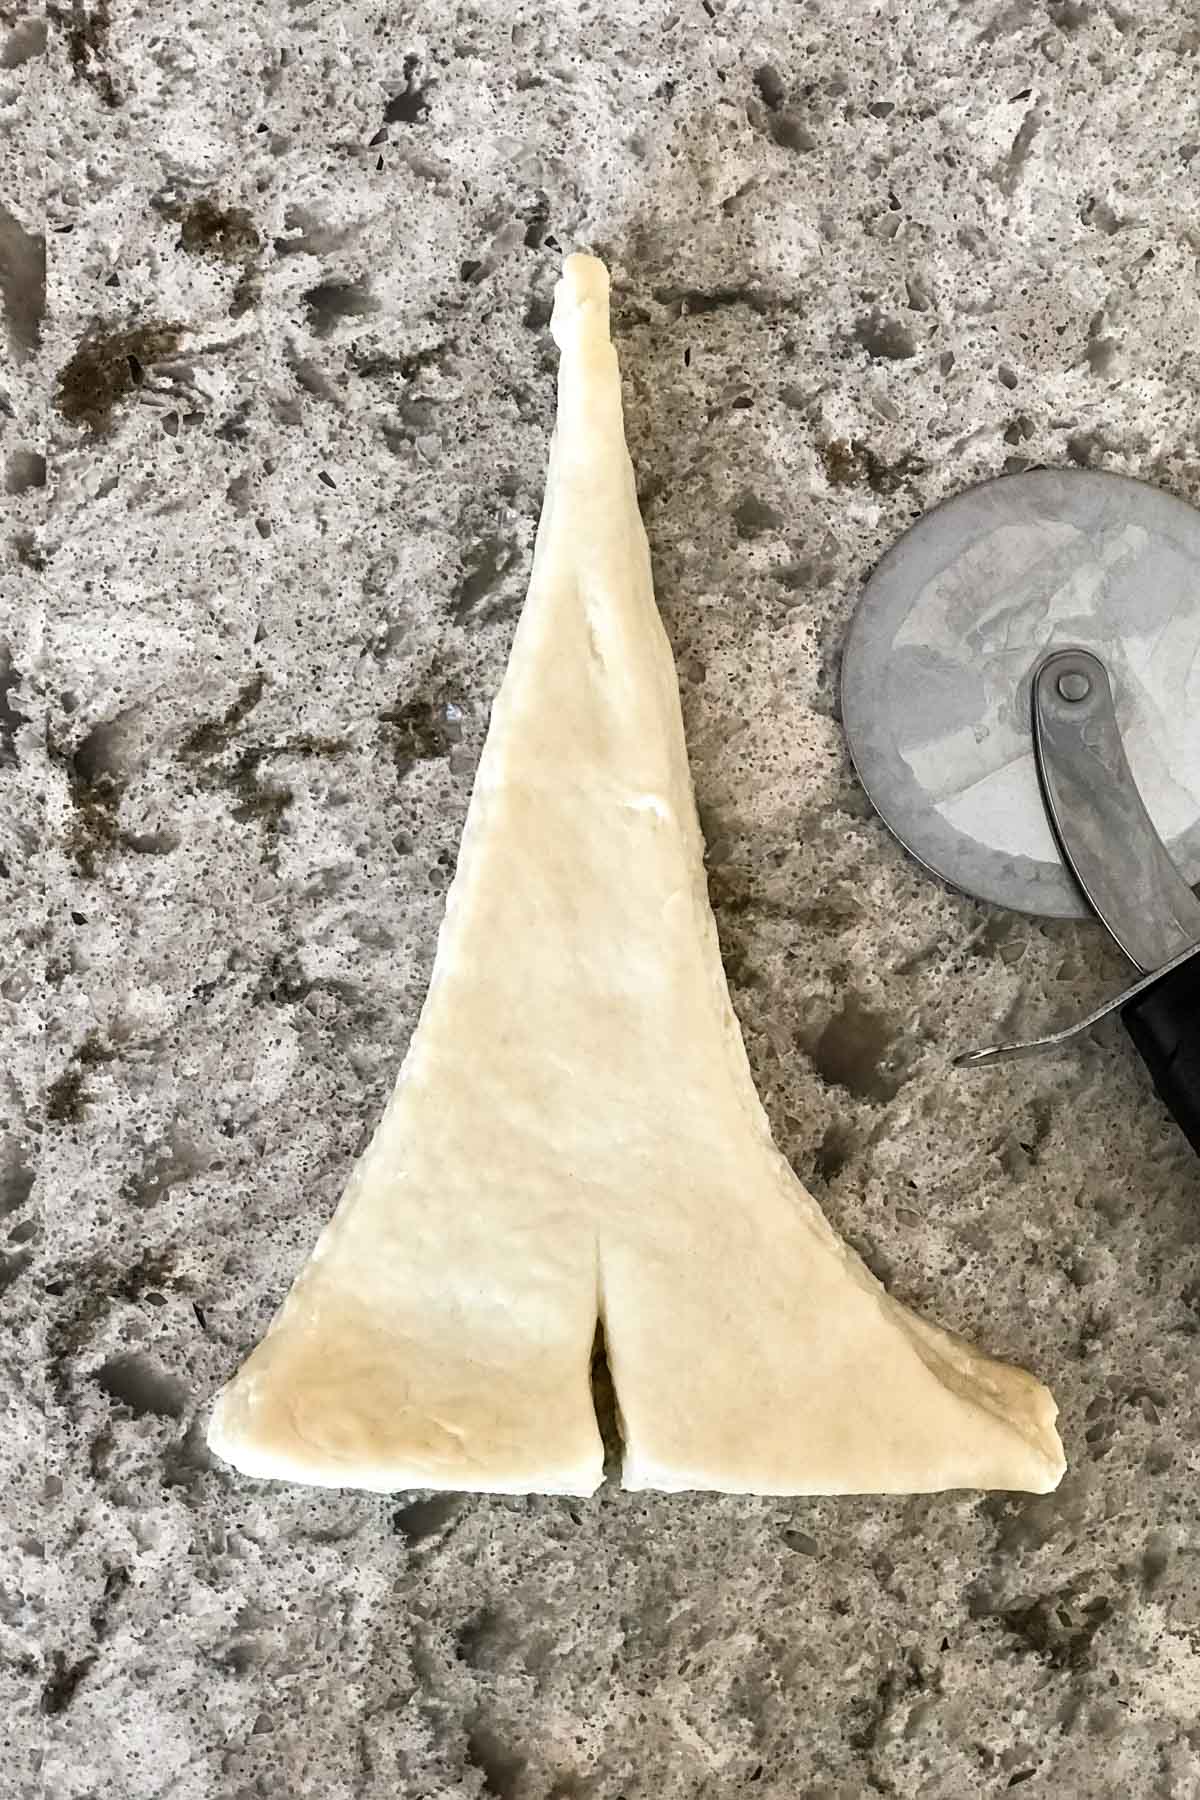
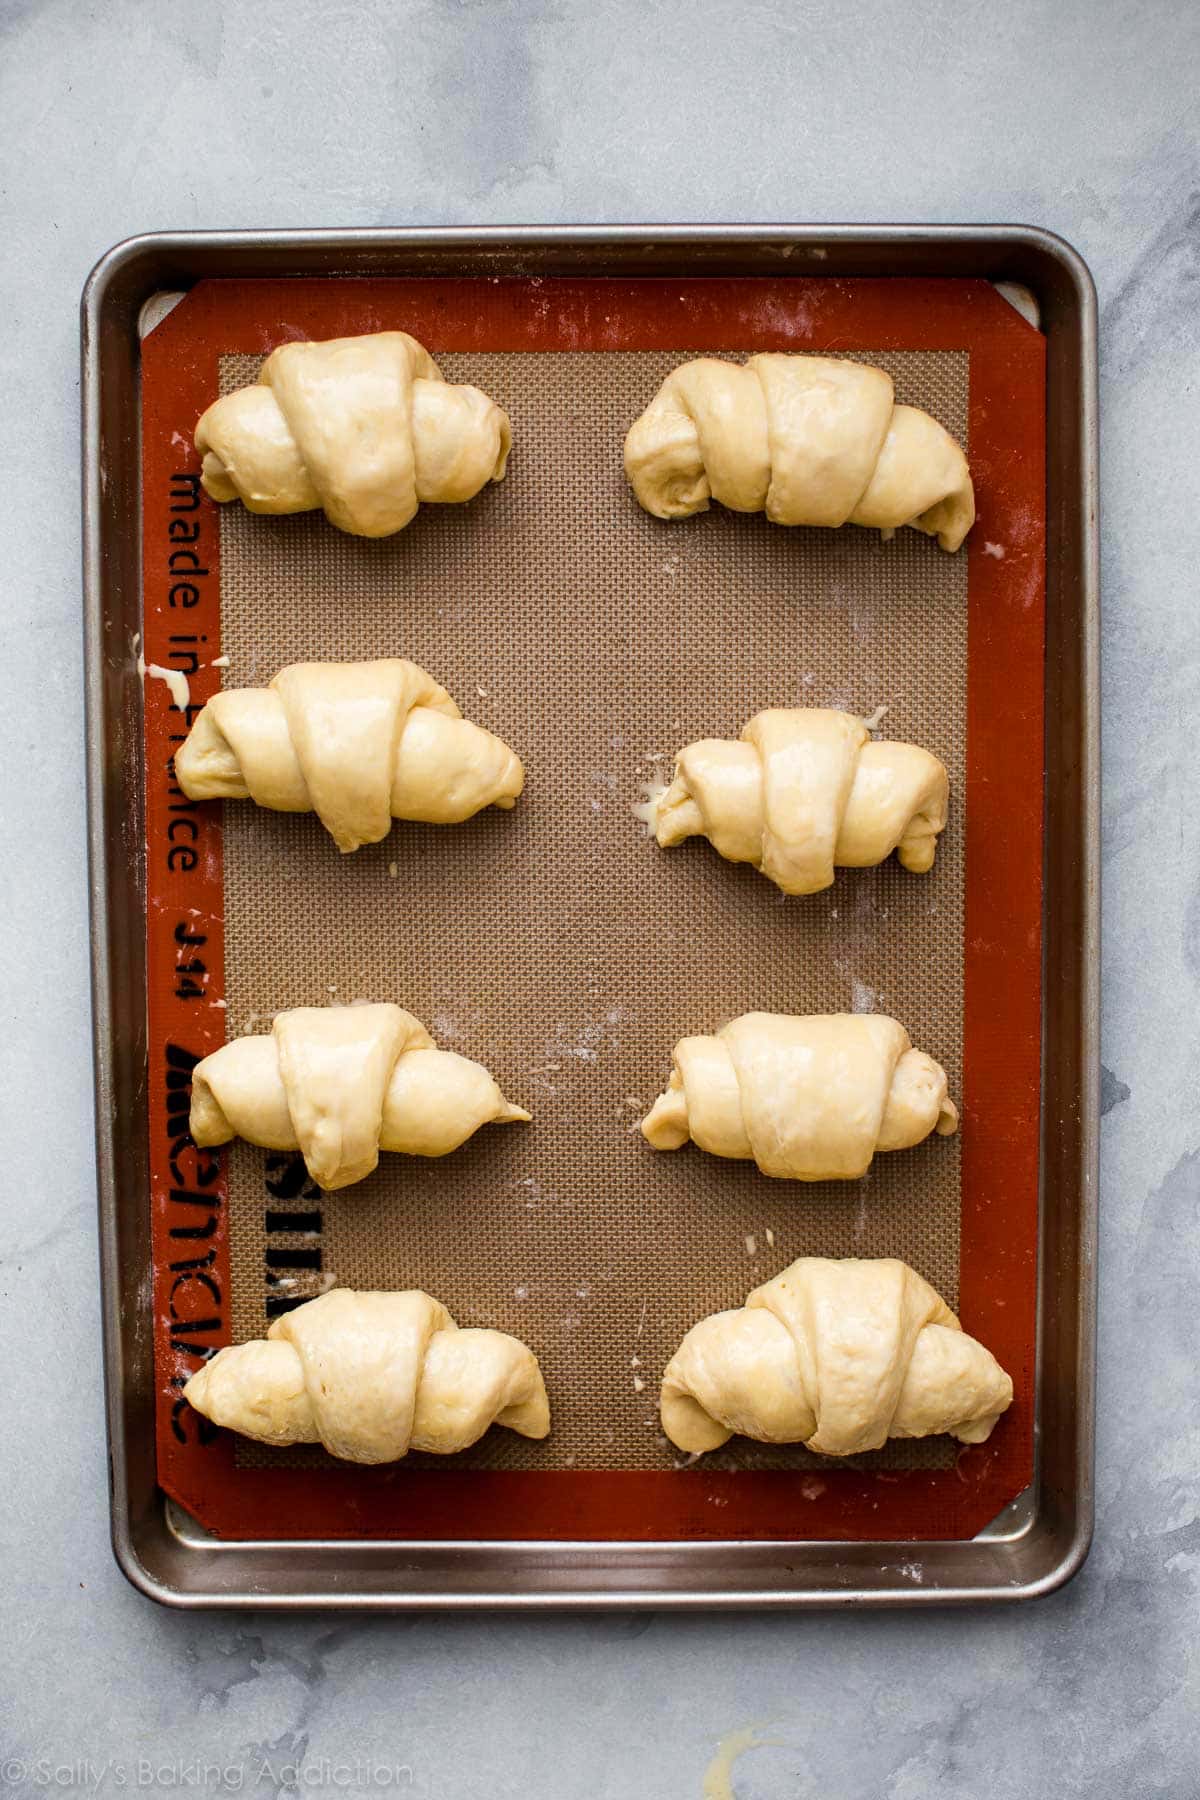
Now slice each of the 8 rectangles into 2 triangles. Using your fingers or a rolling pin, stretch the triangles to be about 8 inches long. Do this gently as you do not want to flatten the layers. Cut a small slit at the wide end of the triangle, then tightly roll up into a crescent shape making sure the tip is underneath.
Loosely cover the shaped croissants and allow to rest at room temperature (I suggest just keeping them on the counter) for 1 hour, then place in the refrigerator to rest for 1 hour. Unlike a lot of croissant recipes, I prefer the shaped croissants to be cold going into the oven. They won’t spread as much. They will rise and proof for the 1 hour at room temperature and continue to do so in the refrigerator for another hour.
The croissants are ready to bake after that! FINALLY.
Brush them with egg wash (egg + milk).
Bake.

Indulge. Because after making the dough and rolling it out a million times, you completely deserve to. Enjoy them plain or with jam or homemade raspberry sauce. Interested in chocolate croissants? Of course you are!
If you happen to have any leftovers, day old croissants are perfect so soak up flavors in an easy breakfast casserole.

FAQ: Why Are There Are Chunks of Butter in my Dough & Why Did Butter Leak Out of the Croissants?
These are 2 common questions and I’m happy to sum it all up for you. Some butter leakage during the baking process is normal and expected, however if your baking croissants are sitting on pools of butter, your butter layer may have been too cold. It would make sense to give the best temperature for the butter layer, but you’re really looking for texture. You want the dough and sheet of butter to be similar in softness. If the butter layer is too hard, it will crack and split under the dough. Let it sit at room temperature to soften before the laminating process (step 7) OR reduce the chill time in step 6 down from 30 minutes to about 15.
See Your Croissants!
Many readers tried this recipe as part of a baking challenge! Feel free to email or share your recipe photos with us on social media. 🙂
Print
How to Make Croissants
- Prep Time: 12 hours, 45 minutes
- Cook Time: 20 minutes
- Total Time: 13 hours, 10 minutes
- Yield: 16 croissants
- Category: Pastries
- Method: Baking
- Cuisine: French
Description
Buttery, flaky, and perfect homemade croissants!
Ingredients
- 1/4 cup (4 Tbsp; 56g) unsalted butter, softened to room temperature
- 4 cups (500g) all-purpose flour (spooned & leveled), plus more for rolling/shaping
- 1/4 cup (50g) granulated sugar
- 2 teaspoons salt
- 1 Tablespoon active dry or instant yeast
- 1 and 1/2 cups (360ml) cold whole milk
Butter Layer
- 1 and 1/2 cups (340g) unsalted butter, softened to room temperature
- 2 Tablespoons (16g) all-purpose flour
Egg Wash
- 1 large egg
- 2 Tablespoons (30ml) whole milk
Instructions
- Preliminary notes: Watch the video below and use the step-by-step photos before you begin. Read the recipe before beginning. Make room in the refrigerator for a baking sheet. In step 6 and again in step 13, you will need room for 2 baking sheets.
- Make the dough: Cut the butter in four 1-Tablespoon pieces and place in the bowl of an electric stand mixer fitted with the dough hook attachment (or you can use a handheld mixer or no mixer, but a stand mixer is ideal). Add the flour, sugar, salt, and yeast. Turn the mixer on low-medium speed to gently combine the ingredients for 1 minute. With the mixer running, slowly pour in the milk. Once all of the milk is added, turn the mixer up to medium speed and begin to knead the dough.
- Knead the dough: Keep the dough in the mixer and beat for an additional 5 full minutes, or knead by hand on a lightly floured surface for 5 full minutes. (If you’re new to bread-baking, my How to Knead Dough video tutorial can help here.) If the dough becomes too sticky during the kneading process, sprinkle 1 teaspoon of flour at a time on the dough or on the work surface/in the bowl to make a soft, slightly tacky dough. Do not add more flour than you need because you do not want a dry dough. After kneading, the dough should still feel a little soft. Poke it with your finger—if it slowly bounces back, your dough is ready to rest. You can also do a “windowpane test” to see if your dough has been kneaded long enough: tear off a small (roughly golfball-size) piece of dough and gently stretch it out until it’s thin enough for light to pass through it. Hold it up to a window or light. Does light pass through the stretched dough without the dough tearing first? If so, your dough has been kneaded long enough and is ready to rest. If not, keep kneading until it passes the windowpane test.
- Remove dough from the bowl and, with floured hands, work it into a ball. Place the dough on a lightly floured silicone baking mat lined, lightly floured parchment paper lined, or lightly floured baking sheet. (I highly recommend a silicone baking mat because you can roll the dough out in the next step directly on top and it won’t slide all over the counter.) Gently flatten the dough out, as I do in the video below, and cover with plastic wrap or aluminum foil. Place the entire baking sheet in the refrigerator and allow the covered dough to rest in the refrigerator for 30 minutes.
- Shape the dough: Remove the dough from the refrigerator. I like to keep the dough on the silicone baking mat when I’m rolling it in this step because the mat is nonstick and it’s a handy guide for the exact measurement. Begin flattening out the dough with your hands. You’re rolling it out into a rectangle in this step, so shaping it with your hands first helps the stretchy dough. Roll it into a 14×10-inch rectangle. The dough isn’t extremely cold after only 30 minutes in the refrigerator, so it will feel more like soft play-doh. Be precise with the measurement. The dough will want to be oval shaped, but keep working the edges with your hands and rolling pin until you have the correct size rectangle.
- Long rest: Place the rolled out dough back onto the baking sheet (this is why I prefer a silicone baking mat or parchment because you can easily transfer the dough). Cover the rolled out dough with plastic wrap or aluminum foil, place the entire baking sheet in the refrigerator and allow the covered dough to rest in the refrigerator for 4 hours or overnight. (Up to 24 hours is ok.)
- Butter layer (begin this 35 minutes before the next step so the butter can chill for 30 minutes): In a large bowl using a hand-held mixer or stand mixer fitted with a paddle or whisk attachment, beat the butter and flour together until smooth and combined. Transfer the mixture to a silicone baking mat lined or parchment paper lined baking sheet. (Silicone baking mat is preferred because you can easily peel the butter off in the next step.) Using a spoon or small spatula, smooth out into a 7×10-inch rectangle. Be as precise as you can with this measurement. Place the entire baking sheet in the refrigerator and chill the butter layer for 30 minutes. (No need to cover it for only 30 minutes.) You want the butter layer firm, but still pliable. If it gets too firm, let it sit out on the counter for a few minutes to gently soften. The more firm the butter layer is the more difficult it will be to laminate the dough in the next step.
- Laminate the dough: In this next step, you will be rolling out the dough into a large rectangle. Do this on a lightly floured counter instead of rolling out on your silicone baking mat. The counter is typically a little cooler (great for keeping the dough cold) and the silicone baking mat is smaller than the measurement you need. Remove both the dough and butter layers from the refrigerator. Place the butter layer in the center of the dough and fold each end of the dough over it. If the butter wasn’t an exact 7×10-inch rectangle, use a pizza cutter or sharp knife to even out the edges. Seal the dough edges over the butter layer as best you can with your fingers. On a lightly floured counter, roll the dough into a 10×20-inch rectangle. It’s best to roll back and forth with the shorter end of the dough facing you, like I do in the video below. Use your fingers if you need to. The dough is very cold, so it will take a lot of arm muscle to roll. Again, the dough will want to be oval shaped, but keep working it with your hands and rolling pin until you have the correct size rectangle. Fold the dough lengthwise into thirds as if you were folding a letter. This was the 1st turn.
- If the dough is now too warm to work with, place folded dough on the baking sheet, cover with plastic wrap or aluminum foil, and refrigerate for 30 minutes before the 2nd turn. I usually don’t have to.
- 2nd turn: Turn the dough so the short end is facing you. Roll the dough out once again into a 10×20-inch rectangle, then fold the dough lengthwise into thirds as if you were folding a letter. The dough must be refrigerated between the 2nd and 3rd turn because it has been worked with a lot by this point. Place the folded dough on the baking sheet, cover with plastic wrap or aluminum foil, and refrigerate for 30 minutes before the 3rd turn.
- 3rd turn: Roll the dough out once again into a 10×20-inch rectangle. Fold the dough lengthwise into thirds as if you were folding a letter.
- Long rest: Place the folded dough on the lined baking sheet, cover with plastic wrap or aluminum foil, and refrigerate for 4 hours or overnight. (Up to 24 hours is ok.)
- At the end of the next step, you’ll need 2 baking sheets lined with silicone baking mats or parchment paper. The dough is currently on a lined baking sheet in the refrigerator, so you already have 1 prepared!
- Shape the croissants: Remove the dough from the refrigerator. On a lightly floured counter, roll the dough out into an 8×20-inch rectangle. Use your fingers if you need to. Once again, the dough is very cold, so it will take a lot of arm muscle to roll. The dough will want to be oval shaped, but keep working it with your hands and rolling pin until you have the correct size rectangle. Using a pizza cutter or sharp knife, slice the dough in half vertically. Each skinny rectangle will be 4-inches wide. Then cut 3 even slices horizontally, yielding 8 4×5-inch rectangles. See photo above for a visual. Cut each rectangle diagonally to make 2 triangles. You have 16 triangles now. Work with one triangle at a time. Using your fingers or a rolling pin, stretch the triangle to be about 8 inches long. Do this gently as you do not want to flatten the layers. Cut a small slit at the wide end of the triangle, then tightly roll up into a crescent shape making sure the tip is underneath. Slightly bend the ends in towards each other. Repeat with remaining dough, placing the shaped croissants on 2 lined baking sheets, 8 per sheet. Loosely cover with plastic wrap or aluminum foil and allow to rest at room temperature (no warmer– I suggest keeping on the counter) for 1 hour, then place in the refrigerator to rest for 1 hour or up to 12 hours. (Or freeze, see freezing instructions.) I prefer the shaped croissants to be cold going into the oven.
- Preheat oven to 400°F (204°C).
- Egg wash: Whisk the egg wash ingredients together. Remove the croissants from the refrigerator. Brush each lightly with egg wash.
- Bake the croissants: Bake until croissants are golden brown, about 20 minutes. Rotate the pans halfway through baking. If croissants show signs of darkening too quickly, reduce the oven to 375°F (190°C).
- Remove croissants from the oven and place on a wire rack to cool for a few minutes before serving. They will slightly deflate as they cool.
- Croissants taste best the same day they’re baked. Cover any leftover croissants and store at room temperature for a few days or in the refrigerator for up to 1 week. You can also freeze for up to 3 months, then thaw on the counter or overnight in the refrigerator. Warm up to your liking.
Notes
- Make Ahead Instructions: Croissants are perfect for getting started ahead of time. The dough can rest for 4 hours or overnight in step 5 and again in step 11. You can also freeze the dough after the 3rd turn in the lamination process (after step 10). Instead of the 4 hour rest in the refrigerator in step 11, wrap the dough tightly in plastic wrap or aluminum foil, place in a freezer zipped-top bag, and freeze for up to 3 months. Thaw in the refrigerator and continue with step 12. You can also freeze the shaped croissants after they rest for 1 hour at room temperature in step 13. (Before placing in the refrigerator.) Cover them tightly and freeze for up to 1 month. Thaw completely in the refrigerator, then bake as directed.
- Special Tools (affiliate links): Electric Stand Mixer | Rolling Pin | Pizza Cutter | Pastry Brush | Silicone Baking Mat | Baking Sheet
- Yeast: I use and recommend Red Star Platinum, an instant yeast. You can use active dry yeast instead if needed. No changes to the recipe or prior proofing required; just mix it in as instructed. (Most modern yeasts are already active!) Reference my Baking with Yeast Guide for answers to common yeast FAQs.
- Keep Dough Cold: Make sure the dough is ALWAYS cold. If it warms up too much, stop what you’re doing and place the dough back in the refrigerator for 20 minutes.
- Floured Surface: Lightly flour the work surface, your hands, the dough, and the rolling pin as you work.
- Air Bubbles: Are there air bubbles in your dough as you roll? That’s ok. Pop them with your fingers or a toothpick, then lightly flour where you popped the air bubble.
- Croissants for Brunch: I recommend starting the recipe the day before in the early afternoon. Complete steps 1-10, then let the laminated dough have a long rest in the refrigerator overnight (step 11). Begin step 13 2-3 hours before brunch.
- Dough adapted from Joy of Baking, Fine Cooking, and Epicurious


Hi Sally,
I’m really stuck here, my dough is really sticky and it’s tearing apart, I tried your recipe before but it didn’t turn out great so I decided to try it again but it’s a mess. What should I do?
Hi Gia, I’m glad to help. If you find that the dough is overly sticky and is tearing as you work with it, sprinkle more and more flour on it as you shape it and roll it out. Keep the dough as cold as possible, even if that means stopping during any point and refrigerating it for 15-20 minutes before continuing.
Hi Sally!
I am making these for brunch for my daughter’s First Communion this Saturday. It’s my second time making them (they were DELICIOUS the first time I made them a few months ago, this time I have doing 2 batches- 1 regular and 1 chocolate filled!). I have it planned to start Thursday afternoon so the 4 hour long rests are over night and then Saturday morning I can just put the shaped croissants in the oven before grandparents come.
My question is, once they are shaped and they go in the fridge for 1-12 hours after step 13, can they be in the fridge for a bit longer without being frozen? For example, if I get them shaped late Friday afternoon, can they be in the fridge for over 12 hours/under 24 hours? Is that a hard 12 hours and no more at that point??
Thank you and happy baking!
Diane 🙂
Hi Diane! I’m so glad you enjoy these homemade croissants– and I’m glad to help here! 12 hours is ideal for that last rest, but you can extend it a bit longer if needed. There won’t be any huge problem if doing so.
Hi Sally!
I am about to bake these croissants this weekend. My family doesn’t like consuming white sugar in any form, so I was wondering whether I could substitute the granulated sugar with brown sugar? Thank you in advance for answering!
Great recipe! I tried it. Thanks for sharing !
So, I have used this recipe so many times!!! It’s honestly such a great recipe! The first time I used it was for a French project I had, but I normally do it with my friend because I have a really short attention span. This time I did it alone and after mixing the dough I realized I just added the milk without waiting until I mixed the other ingredients. I don’t think it will impact the outcome but I didn’t want to continue without double checking because it’s a two day process. The only thing I think it could affect is the yeast, but only because I don’t work with yeast often so I’m not 100% sure how sensitive it is. Also for new bakers let me give you a bit of advice, DONT USE MARGARINE. I did that the first time and ended up having to keep adding flour to stop the butter from leaking out, they were extremely thick. All of these recipes are super reliable though, this is my go to website for all of my recipes!
Update- the croissants were fine but I would try maybe baking one croissant or something first to see if you need to lower the temperature of your oven. 400 was too hot for mine, it baked perfectly except for the bottoms which burnt. Surprisingly though, it still tasted good with the bottoms burnt. That’s impressive.
Hi Sally, I think Your recipe is super fantastic but I can’t seem to get the shaping part right, could you please elaborate more on that. Thank you 🙂
Amazing recipe Thank you Sally. Perfect croissants and your recipe is perfectly easy to follow.
Hi Sally,
Can I scale down the recipe to make only half the no. of croissants? Also, is there any alternative for the egg wash at the end? Can I do a milk wash instead? (Im allergic to eggs)
Hi Adi, You should be able to cut the recipe in half. Yes, try a milk wash instead of egg for a nice shiny top!
Just made them and they turned out great! When i made the dough, I needed to add more milk than called for, about a 1/4 cup more. I also used bread flour.
Needed to bake for 25-30 min,
But my daughter said they tasted better than the bakery! They are time consuming, but TOTALLY worth it! Will make again
I just baked these delish, buttery croissants! It took 2 days but the light and layered butteriness is just so worth it. I’ve tried another recipe before and the croissants were tough. This is surprisingly scrumptious though I struggled with the race with melting butter and shape throughout. I’d also halved the ingredients for a smaller batch.
Thank you, Sally, for the wonderful recipe!
Hi Sally! I made this recipe today, and I encountered a problem during the first and second lamination. After the first lamination, there was a slight tear in the middle of the dough so the butter had seeped out a little, I then proceeded to refrigerate this for 30 minutes as instructed. For the second lamination, I tried to roll out the dough again but it eventually started to tear and the butter was all over the place. I badly need help! Should I have left the dough in longer to refrigerate? (I did 4 hrs as instructed). Thank you!
Hi Sab! I’m glad to help. Refrigeration and an extra dusting of flour will both help here. You were right to keep that dough refrigerated. A little extra time could have helped, but what definitely could help (for next time) is dusting that torn dough with exposed butter with flour. Sprinkle flour on top and pat with your fingers to “coat” the exposed butter. This always helps!
I am a complete newb when it comes to baking. Having some extra time on my hands lately (who doesn’t at the moment) I decided to plunge headfirst into the skill. Watch the tutorial. It really helps make sense of the recipe and instructions.
The recipe itself is quite simple requiring ingredients you probably already have (milk, flour, eggs, yeast, butter…). The actual construction is where the complexity arises and this recipe walks you through it beautifully. One of the best complex recipe explanations I’ve seen.
I guess they came out OK. My son ate four of them within ten minutes of coming out of the oven, my daughter polished off another two and I was left with two. I froze the rest for future morning coffees.
Speaking as someone with zero baking experience, I might suggest two changes. First, I’d make fewer and make them a bit larger (but that’s just because I like bigger croissants). Second, at least in my oven, I’d lower the temperature to 375 and bake about five minutes longer to ensure that they cook entirely through. Other than that, fantastic job.
Great directions and recipe for first time croissants! They came out excellent, and while not quite like your pictures, your step by step pictures and comments/descriptions let me know where I could have been done better. On the original lamination step my butter was a little too hard so when I tried to roll it, the butter broke instead of rolled. Lesson learned for next time! Thanks again!
Thank you for this recipe! I baked them this morning and all the steps were perfectly laid out. They are delicious!
I saw you have an alternate recipe for chocolate croissants. Do you have suggestions for how to make almond croissants?
Hi Annette! I haven’t mastered almond croissants yet. So glad that you tried and enjoyed these!
Fabulous!
Time consuming but easy enough to follow instructions
Having tried to make croissants only once before (that went awfully, using a different recipe)
These were the best croissants I’ve ever eaten
Made croissants for the first time and the results were beautiful and delicious – thank you!! Might I add that I watched your video so many times throughout the process to make sure I got it right, that the music started humming in my head as I did the last step of rolling out and shaping the croissants? 🙂
The biggest struggle I had was shaping the halved rectangles into true triangles. They turned out into “right triangles” instead of isosceles triangles. Don’t know if that makes sense. Also, I struggled to go from 4×5 rectangles to a 8″ triangle while still being gentle. Didn’t affect taste though!
Hi Fran, so glad you enjoyed these croissants! If you shaped the dough in these exact measurements (4×5 inch rectangles), the triangles shouldn’t be even on all sides. Be extra careful stretching them and take your time. Practice makes perfect. Happy you made these!
Hi Sally. This is only mu second time making croissants and the first time using your recipe. I followed exactly all your steps. They are in the oven right now…but I just noticed the butter is melting…The butter is not suppose to melt when they cook, is that right?
Anyways…at first I was worried that only one hr out of the fridge and one hr in the fridge wasn’t enough time rising, because other recipes have all night rising at room temperature…but they are puffing in the oven…a little bit, not overwhelming. The recipe was very easy to follow. Thank you. I will keep you posted on the result.
Also, I wanted to ask you…when I cut the triangles shape and then gently pulled so that they got to be 8 inches…I tried to do that as gently as I could, but the dough was cold and then by pulling the butter was melting in my hand a little bit. What if next time I just make a larger rectangle, so I will have larger triangles to I avoid the pulling? Thank you!!! 🙂
Hi! I very much enjoyed this recipe! But, the croissants didn’t come out quite as flaky as I hoped they would, any idea why this might be? Maybe when I did the folding I didn’t roll the dough out to the right density…
These turned out PERFECT for me! I’m so pleased because I did slip up a couple times but they still look and taste delicious! They didn’t rise as much as I expected while proofing, but they rose beautifully in the oven. Will definitely be making these again.
Sally! These are amazing! Making croissants always intimidated me cause I thought it was a challenge to make. But your step by step tutorial made this SO easy! The only thing I did different was having to reduce my oven temp to 375 cause my bottoms were getting browned too quickly. I also made half regular and half chocolate/almond. They were so good and will definitely be making again! However, I know you state they’re best eaten right away, but do you have any tips on storage? I made them last night and dove into 2, they were SO flakey and just amazing, and this morning they softened up and not as flakey, but still delicious. Your recipes have never let me down!
Hi, Sally!
I made this recipe around 2 weeks ago- but forgot to write a review. This was my first try making croissants, and it turned out absolutely stunning. Very flaky, buttery, and rich. The temperatures were perfect, and tasted amazing straight out of the oven.
Thanks so much!
This post is one of my favorite on your blog! I think I already commented to say thank you for this recipe and the detailed steps, but I have to say it again. I’ve only made this recipe once but i divided it and froze it so that we could have fresh croissants throughout the month. Today with my last bit of dough I made maple rhubarb danishes. This dough is insanely good. Holy cow! You are amazing
Tell me this though, if I want to make some croissants immediately and then some at a later time, could I cut the dough after step 11 and freeze half? Or is it better to shape them all, bake half and freeze the other?
Hi Kim, Yes simply use the freezing directions in the recipe notes for half of the dough and enjoy the other half right away!
Can I freeze the shaped unbaked croissants (without the egg glaze) ?
You certainly could, but my recommendation is to freeze after step 11, thaw then continue with the recipe.
I always use the bread machine (dough setting) when making dough, so no different this time. It came out perfect. I did the butter, perfect. The lamination was also perfect. I was so proud of myself.
Until I rolled them 🙁 After proofing, they remained flat, didn’t rise like they should.
After baking, they were still flat but cooked through to the middle, very dense not airy and light.
Did anyone else have this problem?
Hi Jenny, I’m glad everything was going well until the rising step. I haven’t tested this recipe with a bread machine so I can’t say if that was the issue. If you try it again, I recommend skipping the bread machine just to see the difference. Could it be the yeast, by chance? Is it expired?
Omg! Was so terrified to make them… literally read around 15recipes and yours was so detailed and at the same time simple! They came out perfect!!! Thank you for all the tips!!!
this recipe is definitely a project but so worth it! thank you for the recipe 🙂
I made these about 6 weeks ago and they are absolutely fabulous! I am making again for Mother’s Day. I have only had one cup of coffee but I can’t see the link above anywhere to get the video and can’t get it browsing online either. Can you post the link? Thank you so much!
Hi Karen, so glad you enjoy these croissants. Give the video a few seconds to load and pause any ad blockers you may have in place. It’s under the words “Croissants Video Tutorial”
I did it! It took time, as expected, but totally worth it! The detailed tutorial, video and troubleshooting notes were super-helpful: thank you, Sally! Air bubbles: popped with a toothpick; butter sometimes breaching during lamination: floured the spots.
The only thing I couldn’t solve was the butter leakage during baking – despite letting the shaped croissants rest overnight before baking; this resulted in the bottom a bit overbaked, but lucky me not burned. I baked them at 375°F, though.
They came out amazing: buttery and flaky, with delicious layers. I had to refrain myself from eating them all!
Much like everyone else who’s making use of quarantine time for baking, I made these this weekend and had wonderful results (like I have with every recipe of Sally’s, like the bagels last week )! Definitely recommend starting early afternoon the day before, Sally does a great job of breaking the steps down. My apartment is very warm, so I did have some butter breaches during the lamination, but I floured the spots and stuck in the fridge for 20 minutes or so, and didn’t have any issues with baking. I also needed to turn my oven temp down a bit—definitely recommend keeping a careful eye ( as I did) to not accidentally scorch your precious babies.
I don’t eat croissants too often, so I will definitely plan to make them myself when I have the urge! I agree with Sally’s assessment that none of the steps are individually too difficult, just takes patience and planning. Thanks for helping me cross this off the bucket list, Sally 🙂