

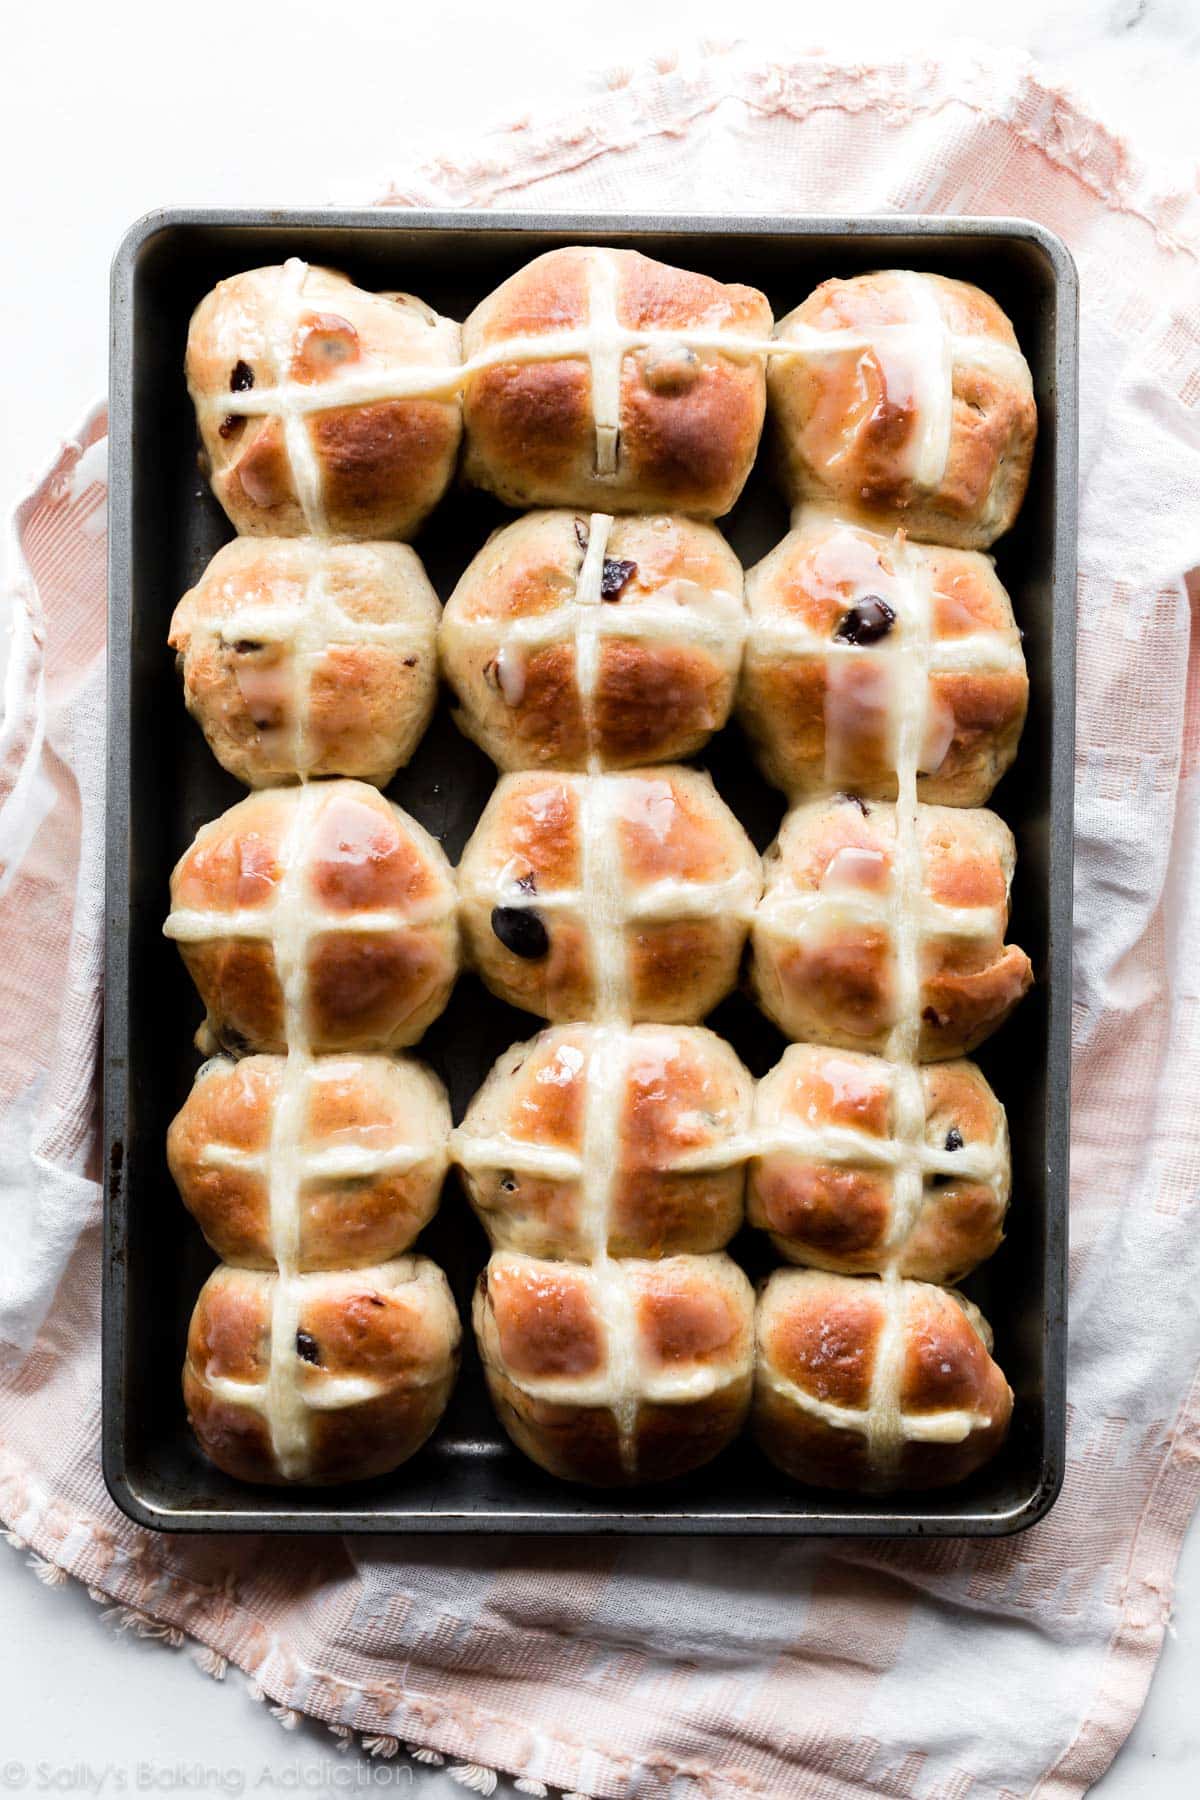
Learn how to make our rendition of hot cross buns using this deliciously spiced yeast dough. Brown sugar, raisins or currants, butter, and vanilla add exceptional flavor and each dense bun is marked with a traditional cross. Orange icing is a tasty finishing touch to this Easter recipe!
What are Hot Cross Buns?
A nursery rhyme, of course! And the first song we usually learn on the recorder. But what are the hot cross buns we eat? Hot cross buns are rich with history dating back to the 12th century. They’re yeasted sweet buns filled with spices and various fruits such as currants, raisins, and/or candied citrus. They’re decorated with a white cross representing the crucifix, either marked right into the dough or etched on top with icing. Hot cross buns are a traditional Easter food, typically eaten on Good Friday.
We’ve been making these for years and I would love to share our family’s version here today. If you’re looking for a more traditional hot cross bun recipe using a little less sugar, candied peel, and lemon, we’ve always loved Mary Berry’s hot cross bun recipe.
What Do These Hot Cross Buns Taste Like?
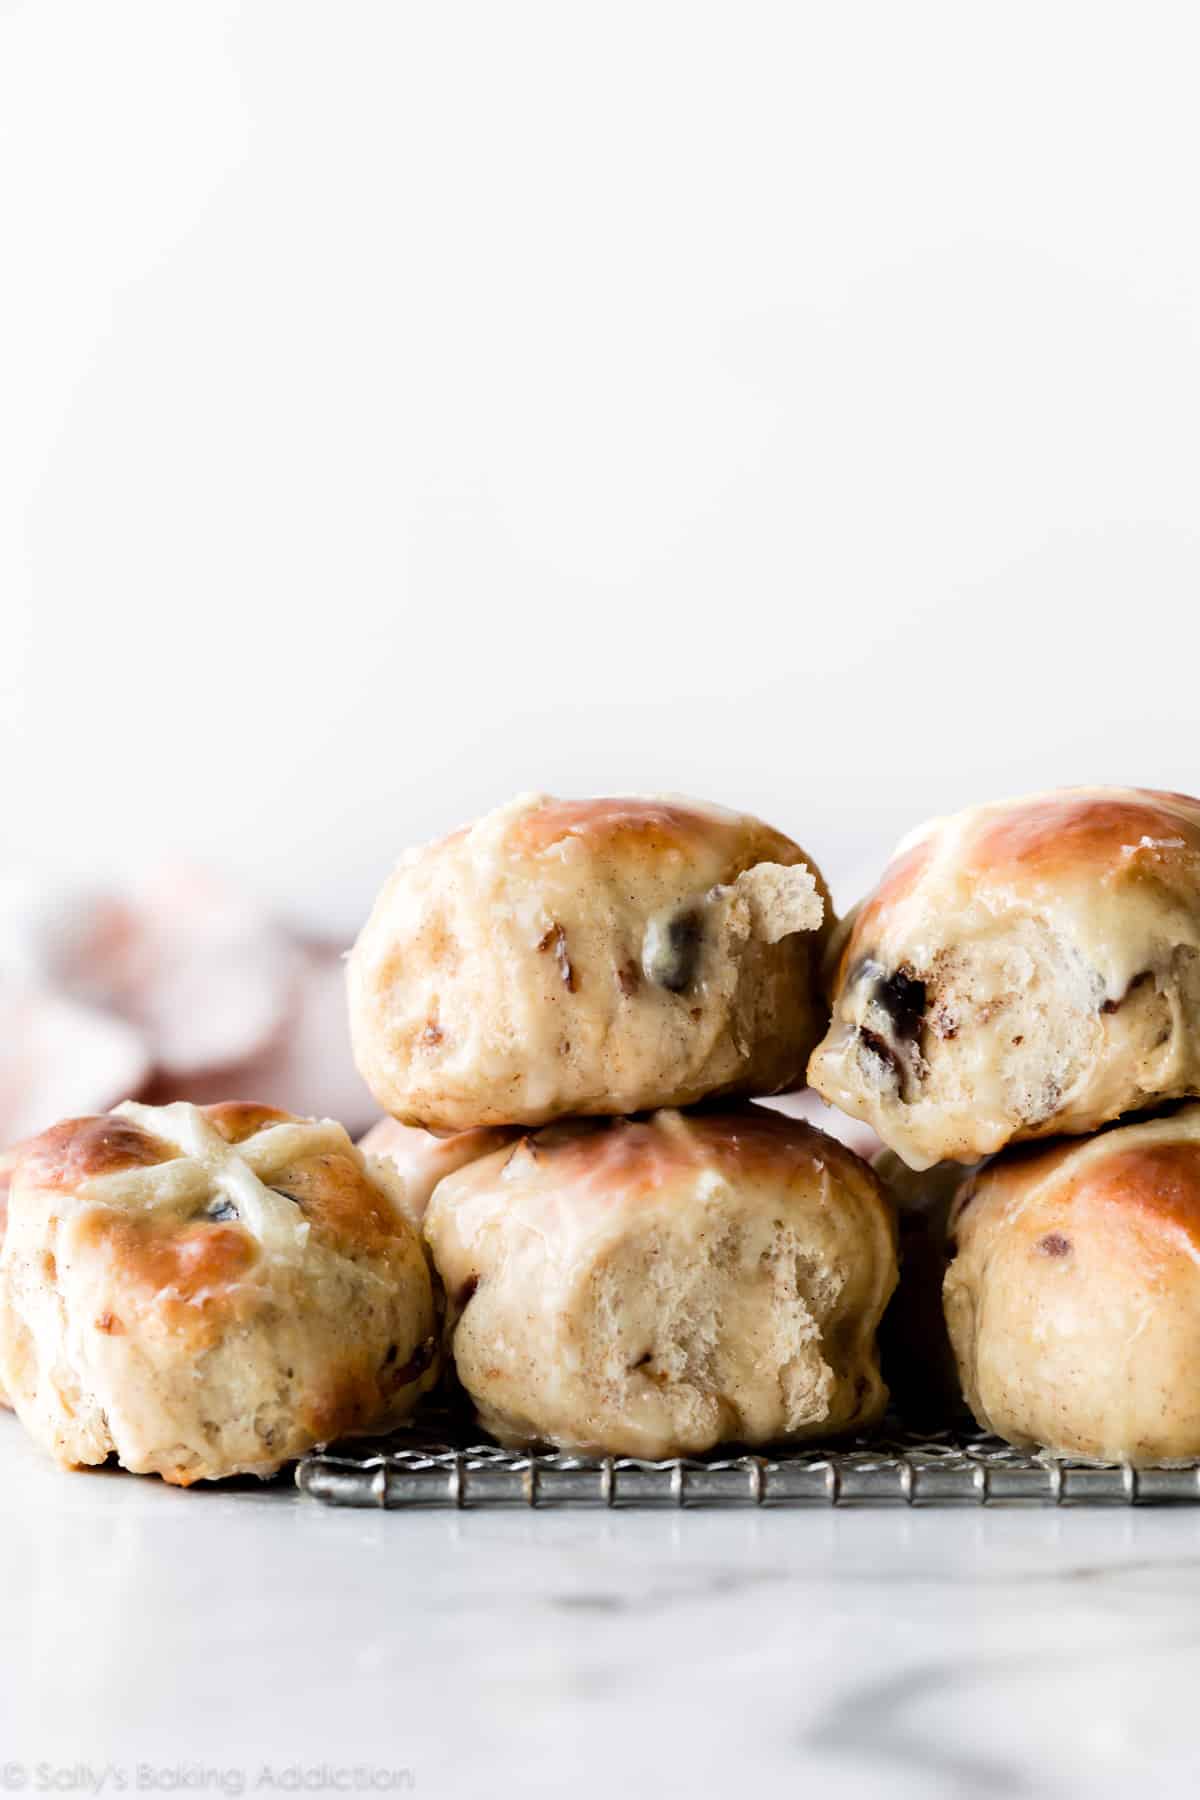
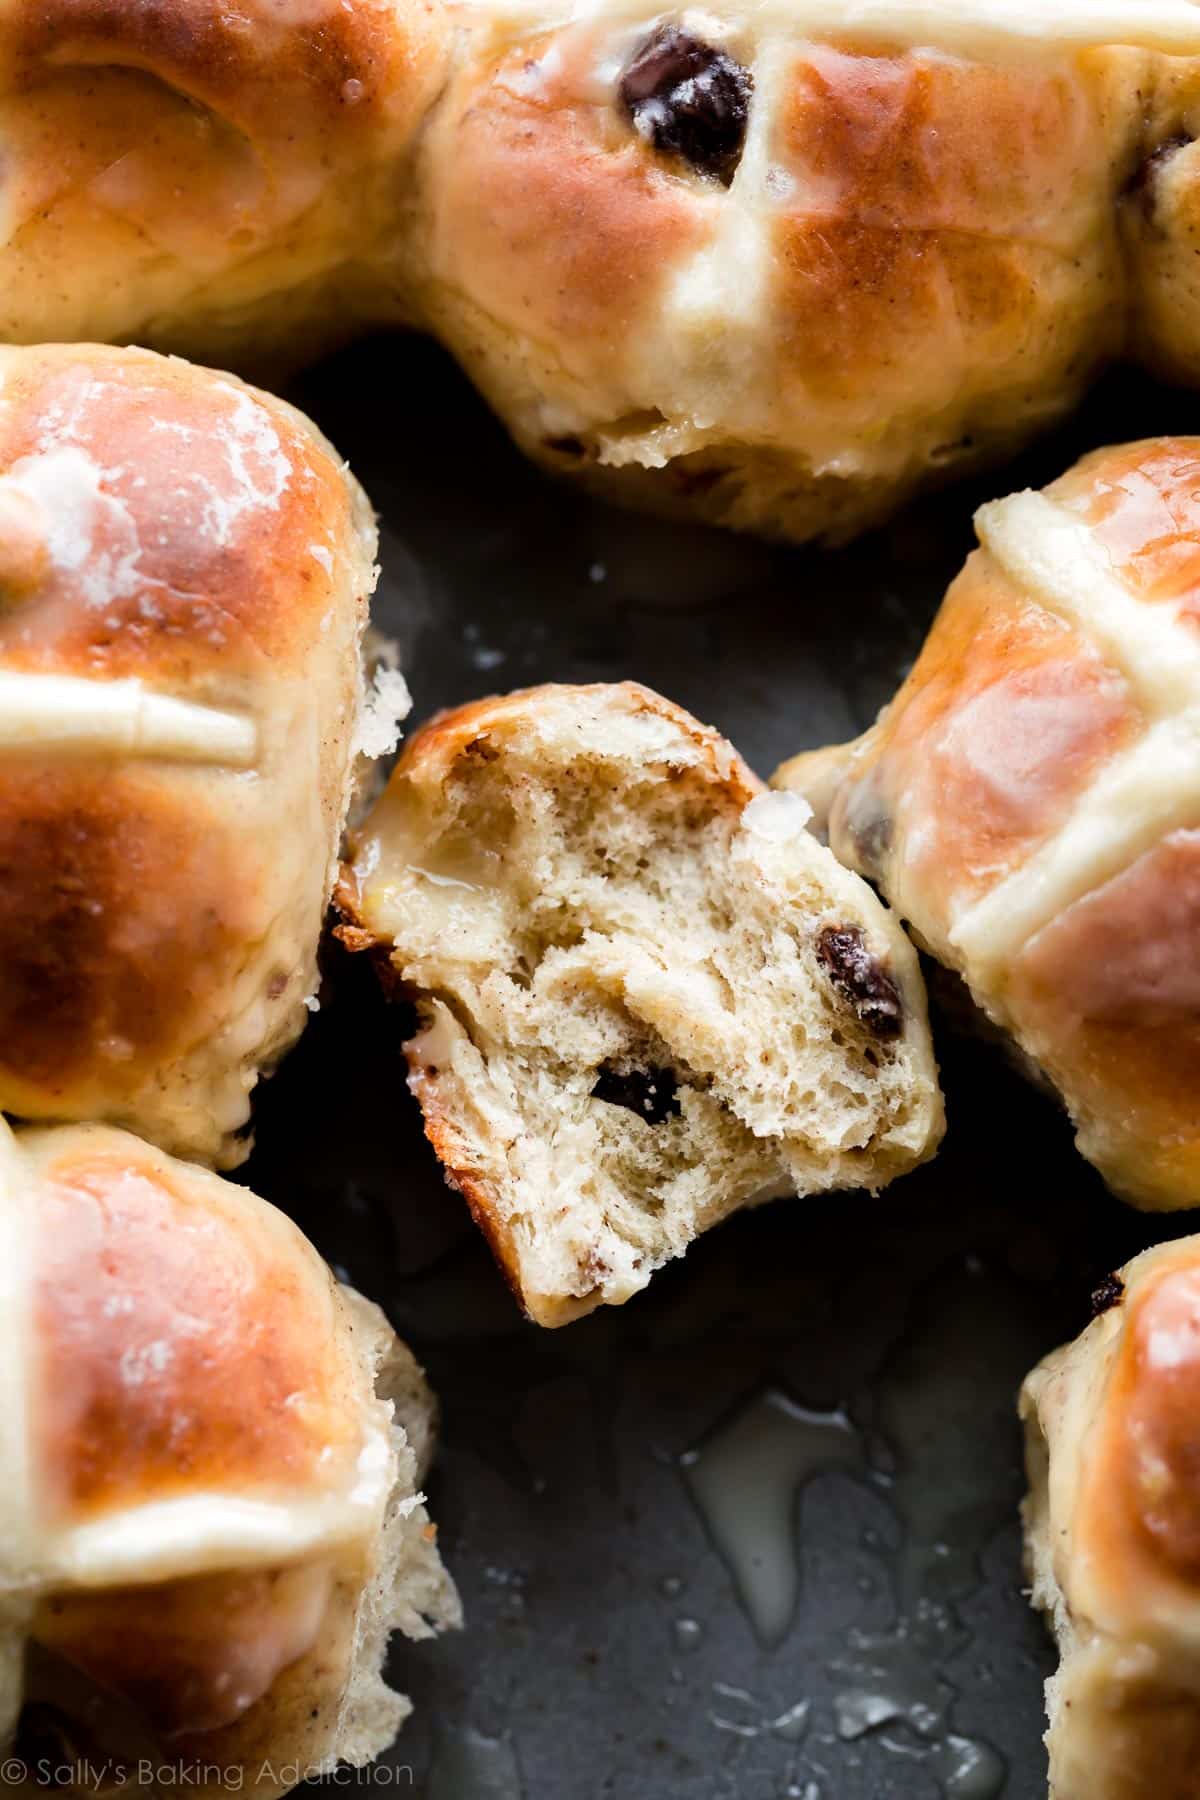
These hot cross buns are a cross between a dinner roll and cinnamon roll. They’re soft, yet dense with a deliciously spiced flavor from cinnamon, nutmeg, and allspice. You can play with the spices, even adding a little cardamom too. The buns are sweetened mostly with brown sugar, then topped with a glossy orange icing. For extra flavor, sometimes we throw a little orange zest or candied orange peel into the dough. This recipe uses raisins. We always enjoyed hot cross buns with currants, a type of raisin, but I couldn’t find them anywhere this year.
You’ll love these hot cross buns if you enjoy:
- Sweet orange icing
- Raisins
- Cinnamon spices
- Brown sugar
- Buttery bread
Video Tutorial: How to Make Hot Cross Buns
This recipe begins just like dinner rolls. Hot cross buns require basic baking ingredients like flour, yeast, butter, eggs, sugar, and milk. Less milk, more butter and more eggs produces a slightly denser roll compared to the dinner rolls. These are more of a dessert/breakfast roll. Here are the basic steps:
- Make the bread dough.
- Knead the dough for 5 minutes. Reference my How to Knead Dough video tutorial if you need extra help with this step.
- Cover the dough and let it rise. The dough rises in about 1-2 hours.
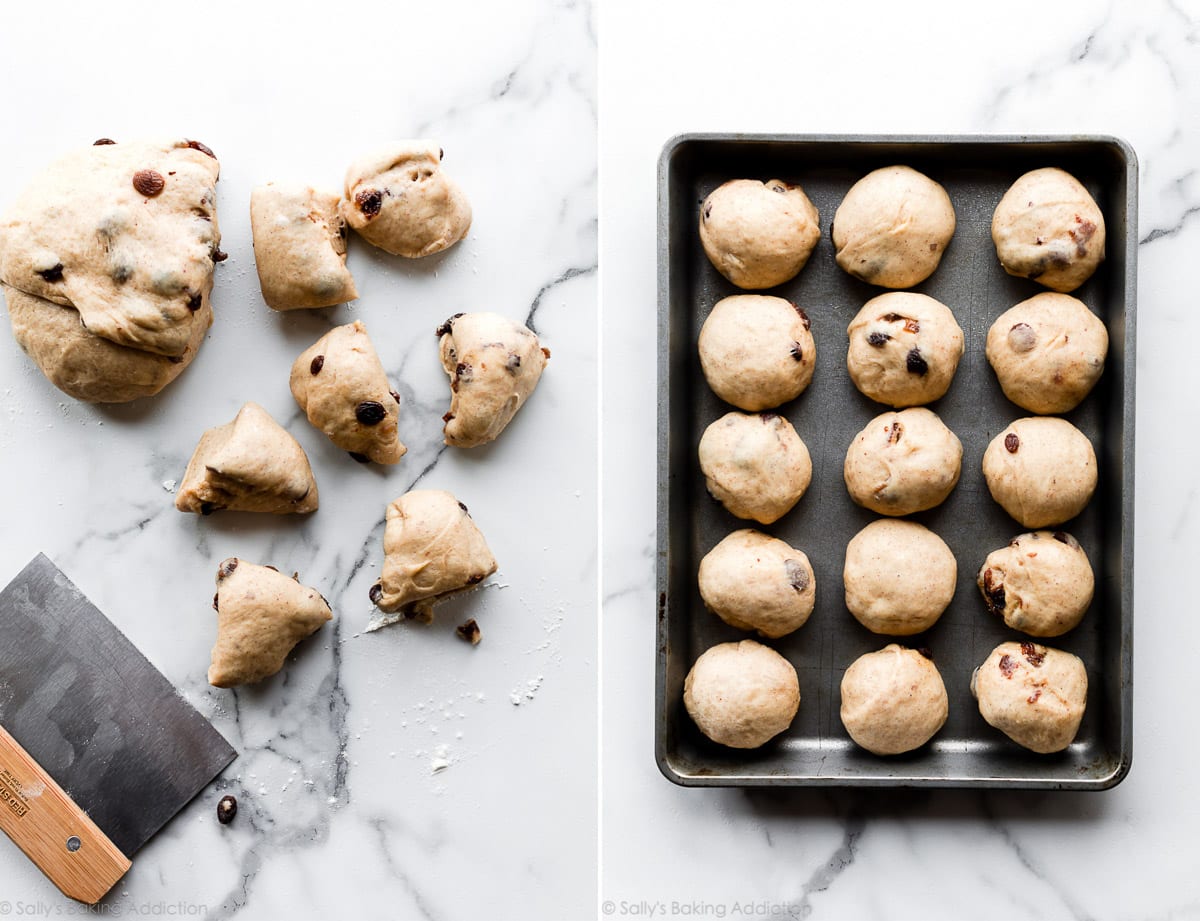
- Punch down the dough to release the air, then shape into rolls.
- Let the rolls rise for about 1 hour.
- Pipe the crosses on top.
- Bake for 20-25 minutes until golden brown.
- Top with orange icing.
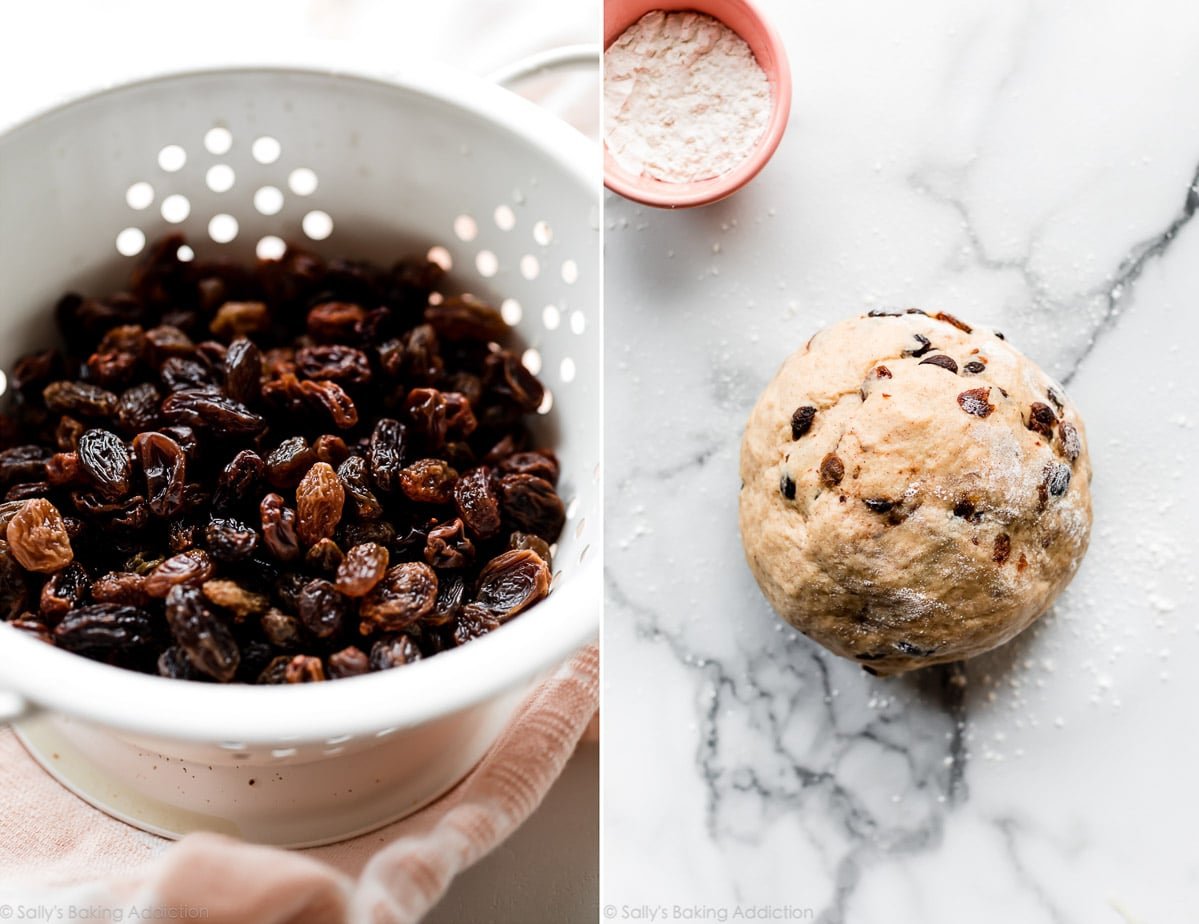
For extra plump and moist raisins, soak them in hot water for 5-10 minutes before using. You could also use dried cranberries.
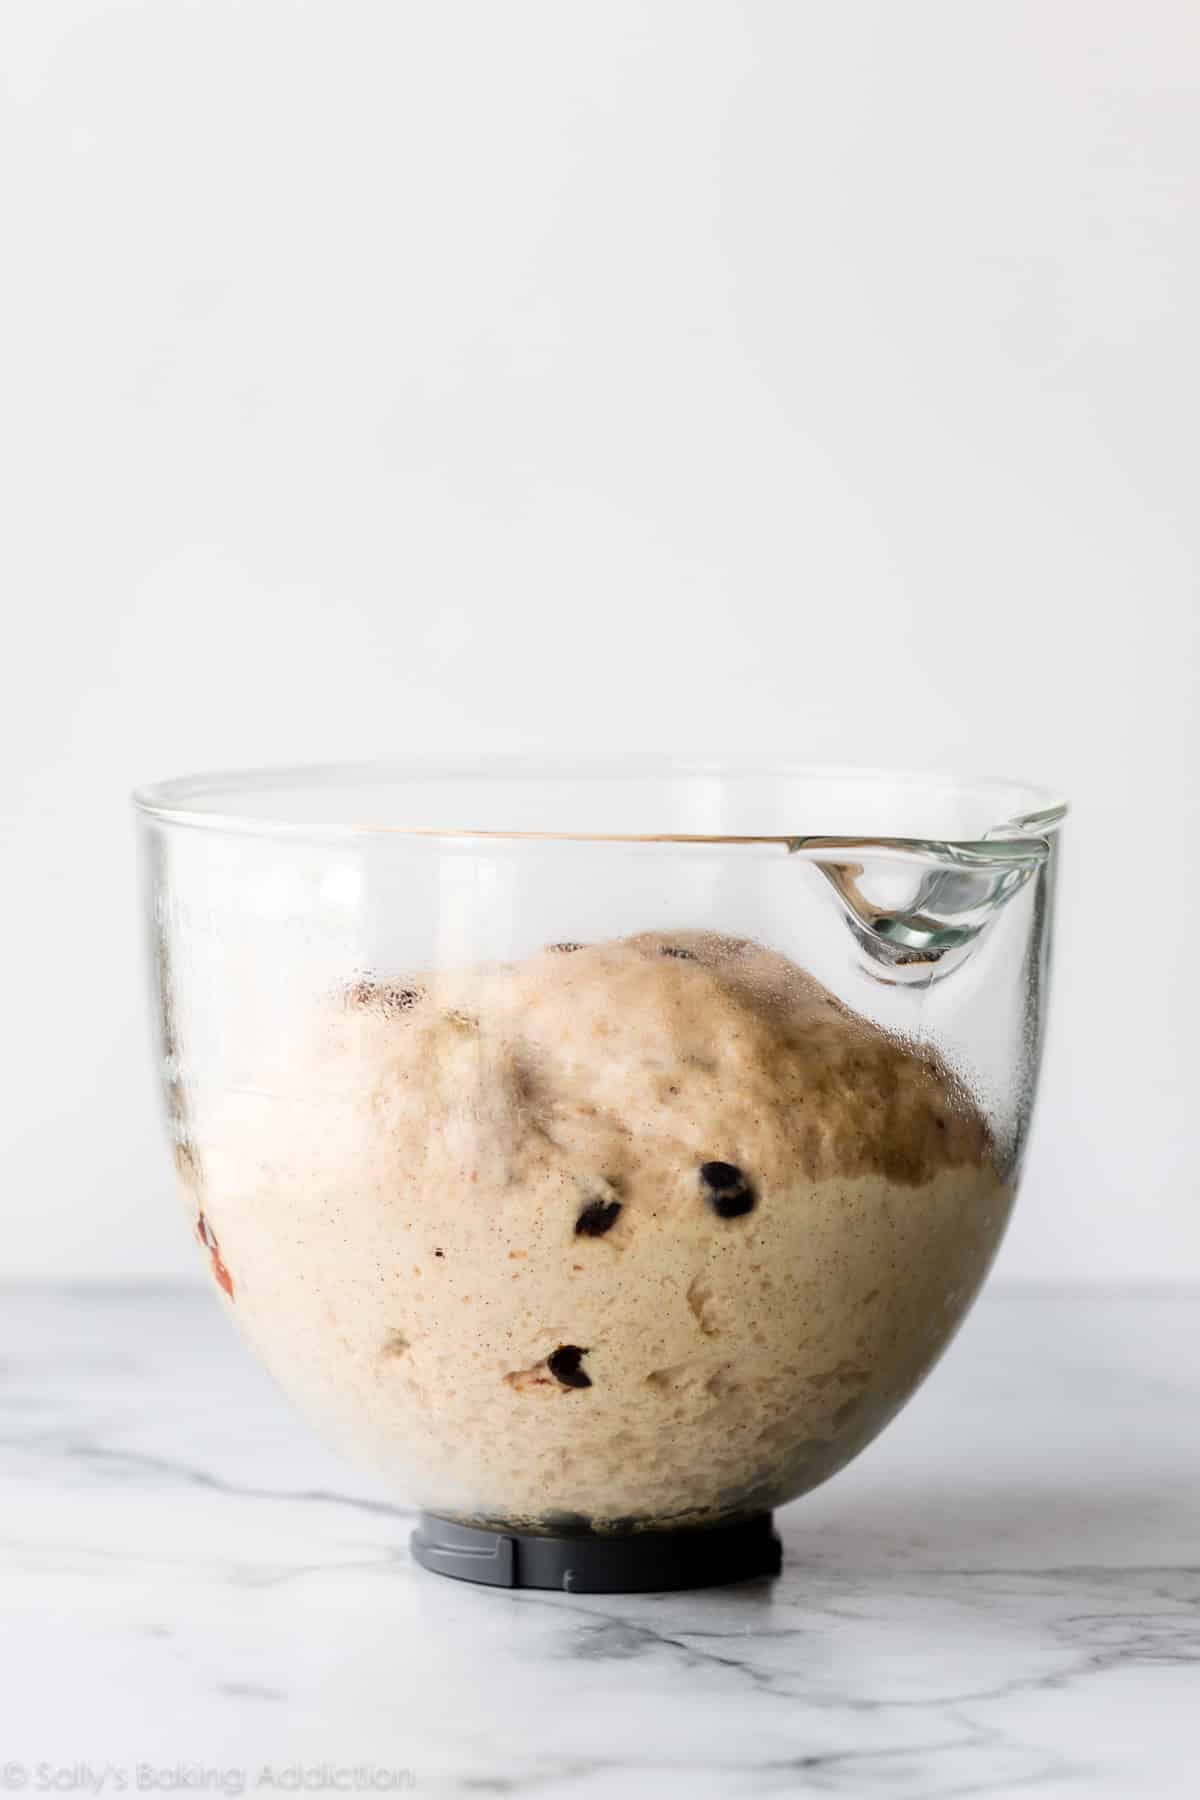
After the dough rises in the bowl (above), punch it down to release the air. Divide into 15 portions, then roll into balls as shown in the video above. Take a piece and stretch the top of the dough while pinching and sealing the bottom. Make sure the rolls are smooth on top and sealed on the bottom. This is the same way you shape honey butter rolls and sage dinner rolls.
Cover the shaped rolls, then let them rise for 1 more hour.
Crosses on Hot Cross Buns
There’s a couple ways to make crosses on hot cross buns:
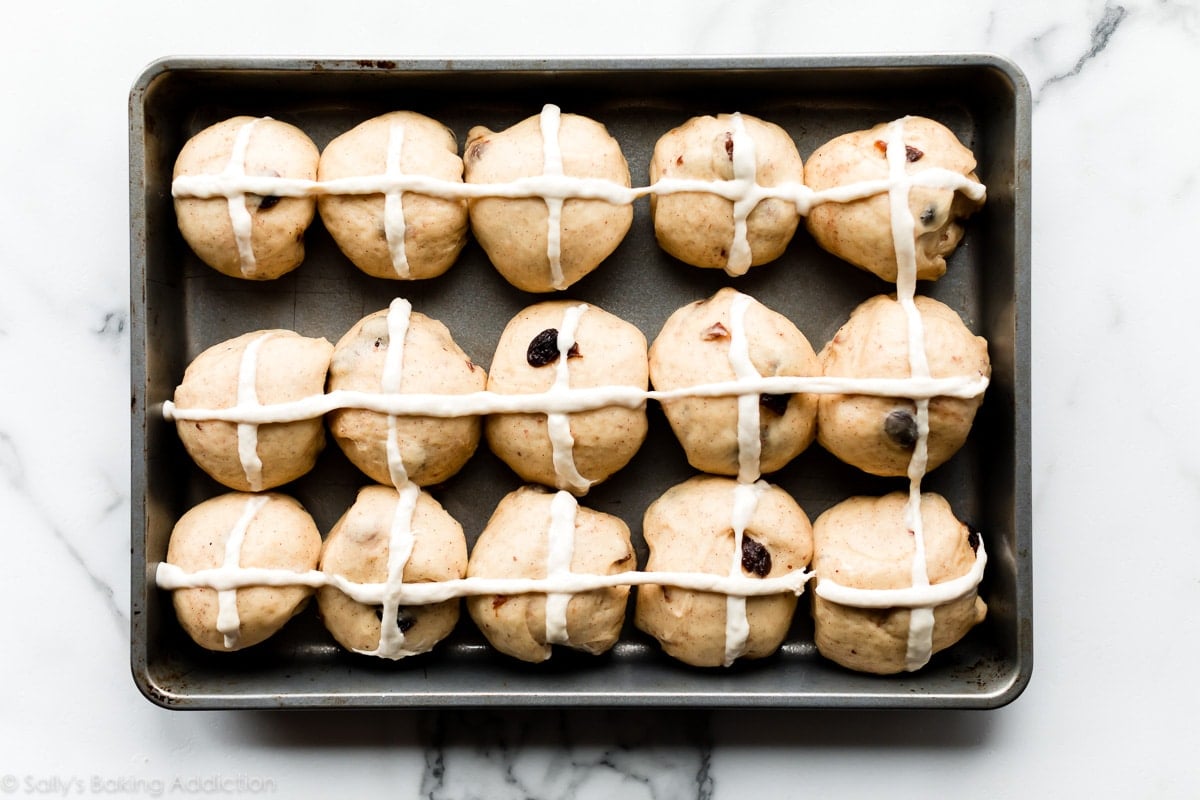
- Flour Cross: Pipe a “paste” of flour and water on top of each bun BEFORE baking. This is the most traditional application of the cross and the method I usually choose. It gets a *little* hard after baking, but it’s still perfectly chewy.
- Icing Cross: Pipe a thick cross made from icing on each bun AFTER baking.
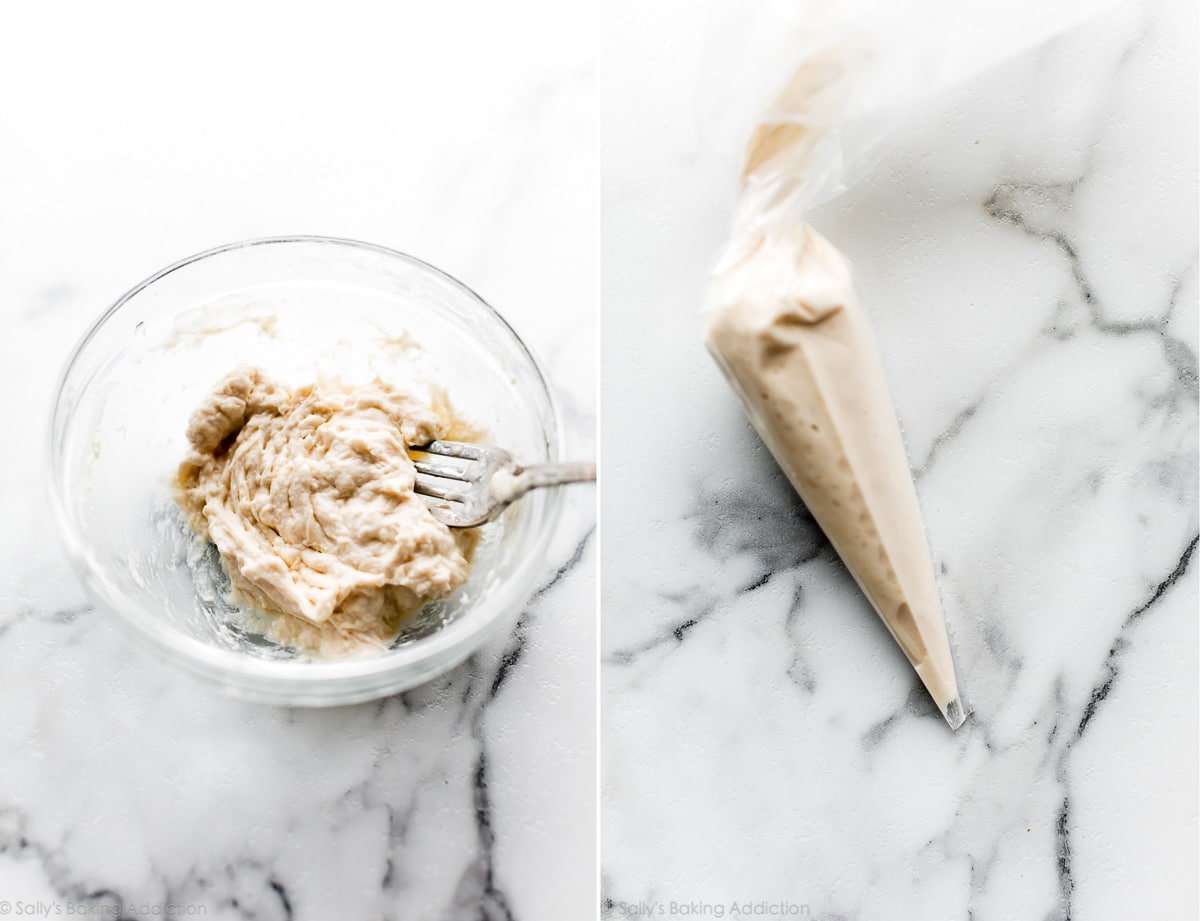
Use a piping bag—no piping tip needed—or a zipped-top bag. Snip the corner off. If making the flour cross, make sure the corner opening is small because you want a thin line.
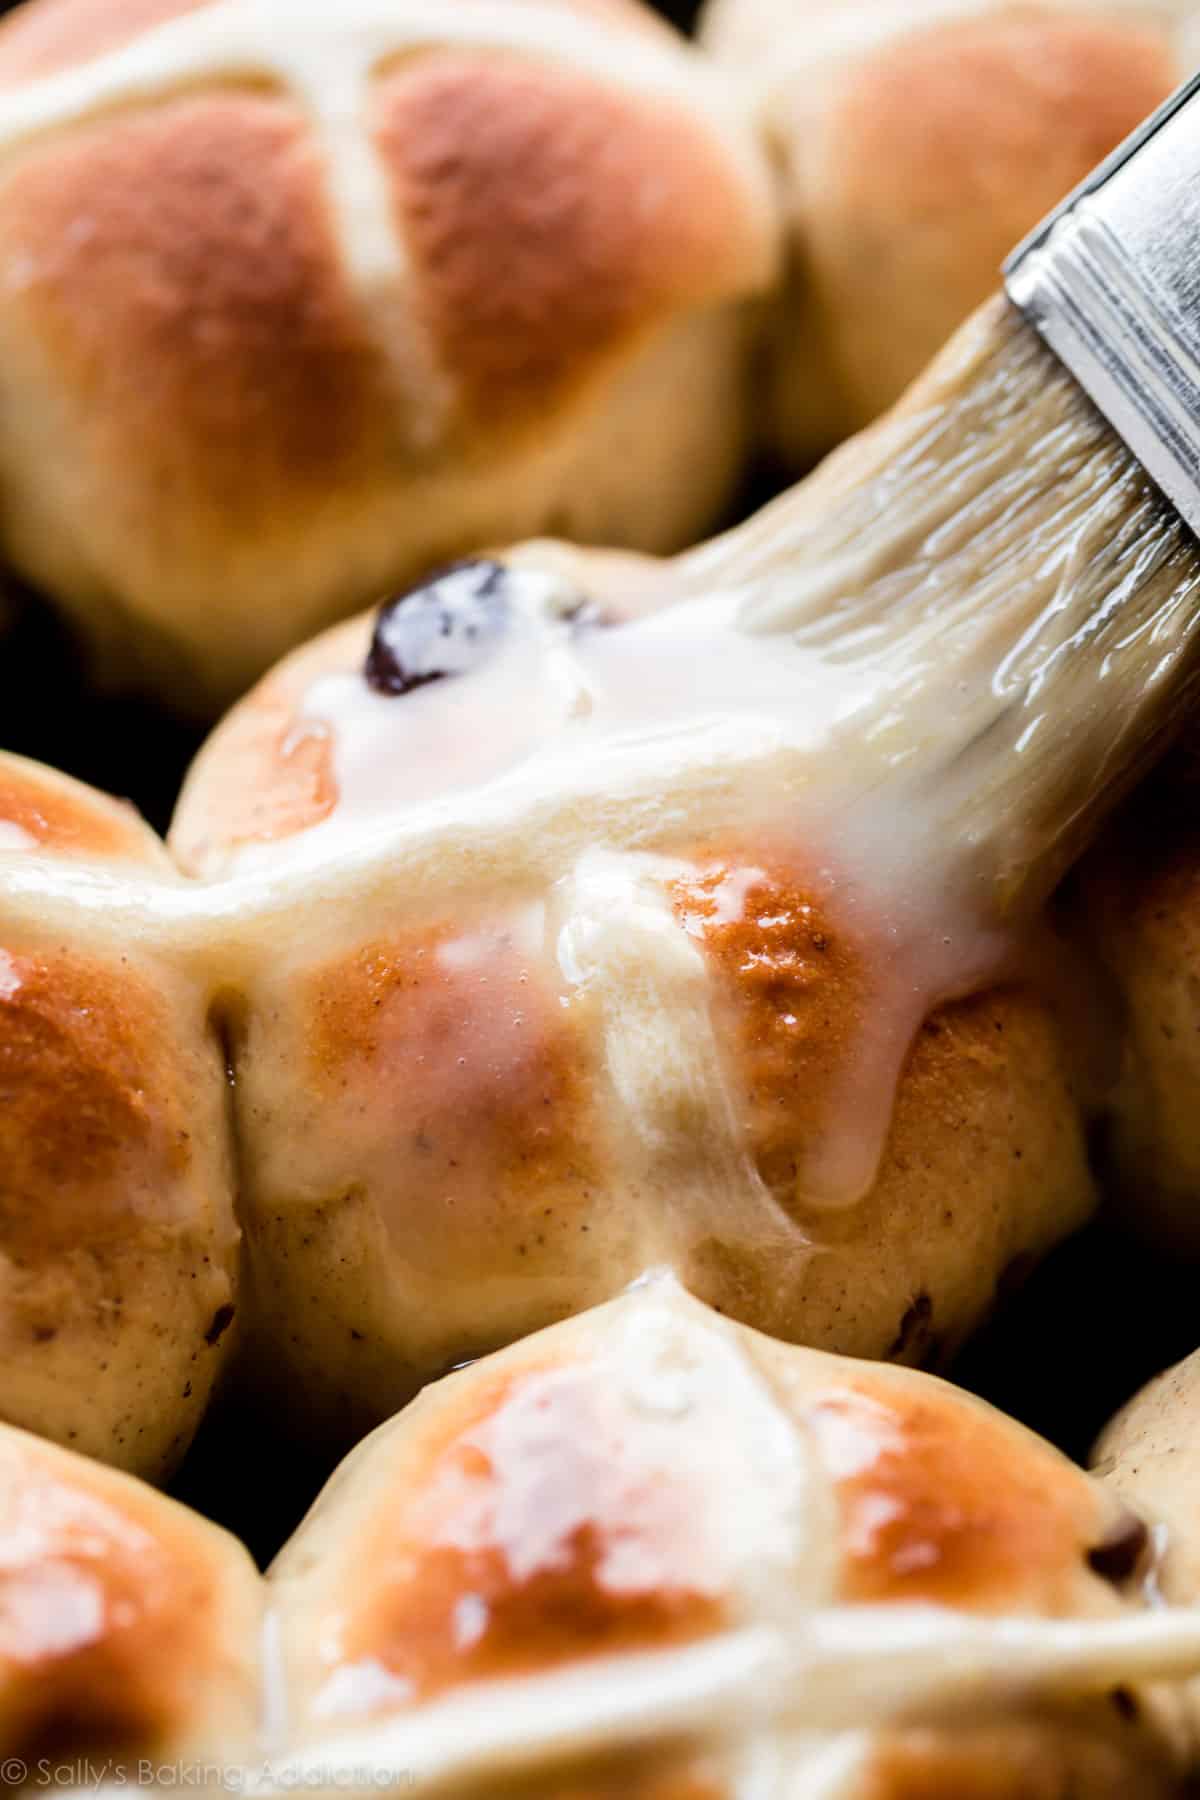
Orange Icing
The lush orange icing is the best finishing touch and it’s even better if you brush it on the buns right out of the oven. It’s sticky, sweet, and warm—orange and cinnamon spices are just meant to be.
Hot cross buns are an excellent addition to any Easter gathering menu. See more Easter brunch recipes and Easter dessert recipes.
More Easter Recipes
- Coconut Cream Pie
- Biscuit Breakfast Casserole & Easy Breakfast Casserole
- Coconut Cake
- Easter Egg Buttercream Candies
- Carrot Cake
- Easter Cookies
- Lemon Meringue Pie
- Easter Cake
- Easter Cupcakes
- Jelly Bean Sugar Cookies
Hot Cross Buns
- Prep Time: 3 hours, 25 minutes
- Cook Time: 22 minutes
- Total Time: 3 hours, 45 minutes
- Yield: 14-16 buns
- Category: Bread
- Method: Baking
- Cuisine: English
Description
Learn how to make flavorful hot cross buns using this deliciously spiced yeast dough. Each bun is marked with a traditional cross, baked until golden, then topped with orange icing. See recipe notes for icing cross alternative, as well as freezing and make-ahead instructions.
Ingredients
- 3/4 cup (180ml) whole milk, warmed to about 110°F
- 2 and 1/4 teaspoons active dry yeast or instant yeast (1 standard packet)
- 1 teaspoon granulated sugar
- 1/2 cup (100g) packed light or dark brown sugar
- 5 Tablespoons (71g) unsalted butter, softened to room temperature and cut into 5 pieces
- 1/2 teaspoon pure vanilla extract
- 2 large eggs, at room temperature
- 1 teaspoon salt
- 1 and 1/4 teaspoons ground cinnamon (see note)
- 1/2 teaspoon ground nutmeg
- 1/2 teaspoon ground allspice
- 3 and 1/2 cups (438g) all-purpose flour or bread flour (spooned & leveled)*
- 1 cup (140g) raisins or currants*
Flour Cross
- 1/2 cup (63g) all-purpose flour or bread flour
- 6–8 Tablespoons (90-120ml) water
Orange Icing
- 1 cup (120g) confectioners’ sugar
- 3 Tablespoons (45ml) fresh or bottled orange juice (or use milk and a splash of vanilla extract for plain icing)
Instructions
- Prepare the dough: Whisk the milk, yeast, and granulated sugar together in the bowl of your stand mixer. Cover and allow mixture to sit for about 5 minutes or until foamy on top. *If you do not own a mixer, you can do this in a large mixing bowl and in the next step, mix the dough together with a large wooden spoon or silicone spatula. It will take a bit of arm muscle. A hand mixer works, but the sticky dough repeatedly gets stuck in the beaters. Mixing by hand with a wooden spoon or silicone spatula is a better choice.*
- Add the brown sugar, butter, vanilla extract, eggs, salt, cinnamon, nutmeg, allspice, and 1 cup (125g) flour. Using the dough hook or paddle attachment, mix on low speed for 30 seconds, scrape down the sides of the bowl with a rubber spatula, then add the remaining flour and the raisins. Beat on low speed until the dough comes together and pulls away from the sides of the bowl, about 2 minutes. Dough should be a little sticky and soft. If it’s too sticky and not pulling away from the sides of the bowl, mix in additional flour 1 Tablespoon at a time.
- Knead the dough: Keep the dough in the mixer and beat for an additional 5 full minutes, or knead by hand on a lightly floured surface for 5 full minutes. (If you’re new to bread-baking, my How to Knead Dough video tutorial can help here.) If the dough becomes too sticky during the kneading process, sprinkle 1 teaspoon of flour at a time on the dough or on the work surface/in the bowl to make a soft, slightly tacky dough. Do not add more flour than you need because you do not want a dry dough. After kneading, the dough should still feel a little soft. Poke it with your finger—if it slowly bounces back, your dough is ready to rise. You can also do a “windowpane test” to see if your dough has been kneaded long enough: tear off a small (roughly golfball-size) piece of dough and gently stretch it out until it’s thin enough for light to pass through it. Hold it up to a window or light. Does light pass through the stretched dough without the dough tearing first? If so, your dough has been kneaded long enough and is ready to rise. If not, keep kneading until it passes the windowpane test.
- 1st Rise: Lightly grease a large bowl with oil or nonstick spray. Place the dough in the bowl, turning it to coat all sides in the oil. Cover the bowl with aluminum foil, plastic wrap, or a clean kitchen towel. Allow the dough to rise in a relatively warm environment for 1-2 hours or until double in size. (I always let it rise on the counter. Takes about 2 hours. For a tiny reduction in rise time, see my answer to Where Should Dough Rise? in my Baking with Yeast Guide.)
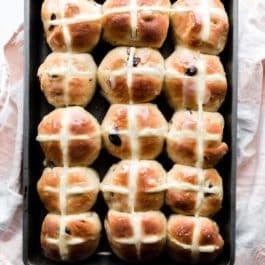
- Grease a 9×13-inch baking pan or two 9-inch square or round baking pans. You can also bake the rolls in a cast iron skillet or on a lined baking sheet.
- Shape the rolls: When the dough is ready, punch it down to release the air. Divide the dough into 14-16 equal pieces. (Just eyeball it– doesn’t need to be perfect!) Shape each piece into a smooth ball, pinching it on the bottom to seal. I do this entirely in my hands and you can watch in the video above. Arrange in prepared baking pan.
- 2nd Rise: Cover shaped rolls with aluminum foil, plastic wrap, or a clean kitchen towel. Allow to rise until puffy, about 1 hour.
- Preheat oven to 350°F (177°C).
- Add the cross: Whisk the cross ingredients together, starting with 6 Tablespoons of water. You want a thick paste that will pipe easily. Add remaining water if needed. Spoon paste into a piping bag or zipped-top bag. (No need to use a piping tip if using a piping bag.) Snip off a small piece at the corner. Pipe a line down the center of each row of buns, then repeat in the other direction to create crosses.
- Bake the rolls: Bake for 20-25 minutes or until golden brown on top, rotating the pan halfway through. If you notice the tops browning too quickly, loosely tent the pan with aluminum foil. Remove from the oven and allow rolls to cool for a few minutes as you prepare the icing.
- Make the icing: Whisk the icing ingredients together, then drizzle or brush on warm rolls. Serve immediately.
- Cover leftover rolls tightly and store at room temperature for 1-2 days or in the refrigerator for up to 1 week.
Notes
- Freezing Instructions: Prepare recipe through step 6. Place shaped buns in a greased baking pan, cover tightly, and freeze for up to 3 months. Once frozen, the dough balls won’t stick together anymore and you can place them in a freezer bag if needed. On the day you serve them, arrange the dough balls in a greased baking pan, cover tightly, then let them thaw and rise at room temperature for about 4-5 hours. Continue with step 8. You can also freeze the baked hot cross buns. Allow them to cool completely, then freeze without icing for up to 3 months. Thaw in the refrigerator or at room temperature, then reheat as desired and add icing.
- Overnight Instructions: Prepare the recipe through step 6. Cover the shaped buns tightly and refrigerate for up to about 15 hours. At least 3 hours before you need them the next day, remove the buns from the refrigerator, keep covered, and allow to rise on the counter for about 1-2 hours before baking. (Skip step 7.) Alternatively, you can let the dough have its 1st rise in the refrigerator overnight. Cover the dough tightly and place in the refrigerator for up to 12 hours. Remove from the refrigerator and allow the dough to fully rise for 2 more hours. Continue with step 5.
- Special Tools (affiliate links): Electric Stand Mixer or Glass Mixing Bowl and Wooden Spoon / Silicone Spatula | 9×13-inch Baking Pan, two 9-inch Square Baking Pans, two 9-inch Round Baking Pans, Cast Iron Skillet, or Baking Sheet | Piping Bag (Disposable or Reusable)
- Optional Add-Ins: Instead of (or in addition to) raisins, try using dried cranberries, chopped pecans or walnuts, chopped candied citrus, or chopped dried apricots. Keep total add ins to about 1 and 3/4 cups total. Feel free to add the zest from 1 lemon or orange to the dough when you add the butter. Add 1/4 teaspoon ground cloves or cardamom, if desired. Feel free to adjust the spices to your liking. You can plump up the raisins, currants, or dried cranberries if desired. Soak in hot water for 5-10 minutes, drain, then pat dry before adding to dough.
- Whole Milk: Lower fat or nondairy milks work in a pinch. The rolls will lose a little flavor and richness. I highly recommend whole milk or even buttermilk.
- Cinnamon: Cinnamon can prohibit doughs from rising. We use 1 and 1/4 teaspoons in this dough to produce dense buns. If you want a fluffier roll-type hot cross bun, feel free to reduce the cinnamon down to 1/2 teaspoon or leave it out completely.
- Yeast: Use instant yeast or active dry yeast. Rise times will be slightly longer using active dry yeast. Reference my Baking with Yeast Guide for answers to common yeast FAQs.
- Flour: You can use all-purpose flour or bread flour. All-purpose flour is convenient for most, but bread flour produces chewier hot cross buns. Either flour is fine and there are no other changes to the recipe if you use one or the other.
- Icing Cross: If you prefer to make a cross from icing and pipe it onto the buns after baking, skip step 9 and skip the orange icing glaze on top. However, you can use the orange icing recipe to make the icing cross. Reduce orange juice to 1 Tablespoon to yield a very thick icing. Replace with milk and add a splash of vanilla extract, if desired. Feel free to also make the orange glaze for topping if you want double icing—a cross and glaze all over.


Reader Comments and Reviews
My first time making Hot Cross buns. They turned out great! It’s a beautiful dough. Thanks sallym
All your recipes are 5 stars and I have made this before with great results. But I’m wondering I just got a new ceramic casserole dish. Would these work in the ceramic dish or should I stick with 9 x13 metal pan? Also should I line it with parchment?
Thank you !
Hi Mary, a ceramic dish should work just fine, although the bake time may be a few minutes longer. Feel free to grease the dish or use parchment. Enjoy!
Thank you!!! My daughter and I tried a different recipe first time and it was a failure, then came across this one and perfection. We made them for my Mom’s birthday she loved them so yay! Thank you
If I’m freezing the rolls should I wait for the glaze and icing for the day of serving it can I freeze with them both? Thanks!
Hi Heather, for best results, we recommend glazing/icing fresh the day you plan to serve the buns. Enjoy!
Hi Sally
I’ve successfully made this recipe many times. Could wheat flour be used instead of white? If so would ou make any adjustments?
Hi Carol, you can try a combination of all-purpose flour and whole wheat flour, but we recommend sticking to all all-purpose flour for better results. The buns would be pretty dense if you use whole wheat flour.
Do you do an egg wash before putting the cross on? Mine never turn out so golden brown.
Hi Megh, we do not, but you certainly could try an egg wash if you wish.
This recipe was wonderful and they came out amazing!! All the steps were very easy to follow. I used bread flour and am curious if I use all purpose flour how it will come out differently. Will make again!!!
Whenever I have tried the flour cross, it comes out hard and unpleasant. I heard that some people add a little sugar to the flour paste. Will this method make the cross more palatable?
Hi Vivien, we haven’t tested that before, but you could certainly give it a try. If the cross was too hard, were the rolls over baked by chance? Alternatively, you could try the icing cross in the recipe notes.
I usually add a bit of sugar and some cinnamon or nutmeg too, because I hate the taste of plain crosses and like the flavour I add, I find it makes it a little softer and yummier!
wait why are you calling currants raisins when they’re entirely different fruit!?
What? You can use either currants or raisins in this recipe. The images show raisins.
You’re correct that black and red currants are different fruit. However, “currants” are what tiny Corinth raisins are called.
My class read The Secret Garden, so I decided to find a recipe for hot cross buns to bring to share with them along with some raw milk. I’ll be honest, I didn’t have super high expectations for these. I was betting they’d take one bite and that’d be that. I should have known better because there isn’t a recipe on your site that I’ve made that turned out “just okay”! Going in I thought this would be a one and done (we tried it once, so we’re good), but instead this went into my recipe box. I will definitely make again. Thank you for sharing your amazing recipes with all of us! As suggested in the notes, I used less cinnamon (only 3/4 teaspoon) for a softer bun and added 1/4 teaspoon of cardamom. It was truly perfection! Thank you!!
Hi, could you use choc chips instead of dried fruit?
Hi Peta, we don’t see why not! Enjoy!
Sally’s recipes are normally amazing but these turned out more muffin-like than bready. I wouldn’t use this same recipe again. Dough might have been impacted by the humid weather but needs even more time to rise maybe?
Hi Amy, Were the rolls dense? Make sure you are kneading the dough enough and when it rises that it doubles in size. For us this usually takes about 2 hours but it may take longer depending on the temperature of your kitchen.
My favorite hot cross bun so far! Next time I will skip the flour criss and do
an icing one because we all peeled off the flour one.if you do use the flour paste, make less than called for. I had do much leftover. The flavor of these rolls (used only .5 tsp) and texture were so good. Loved the orange glaze, too! Definitely put it in the next level! Love that it fits nicely into 9×13
Next time, try to thin the flour mixture out a little more, and make the cross a little thinner. A perfect cross should nearly meld into the bun and just prevent browning in the shape of a cross – it shouldn’t be able to peel off. The consistency can take a couple tries to perfect but it makes the most authentic bun!
Hot cross buns are often toasted and eaten with butter – putting icing on them would make them far too sweet, and much trickier to toast!
I’m at an elevation of almost 6900’ and I made these today for our Easter dinner. Perfection! No adjustments except for a little longer in the oven. Thanks for another great recipe!
Made 5 dozen for church today; they were a hit. Mixed dough in the bread machine. Used cinnamon + pumpkin pie spice which I had on hand. Added orange zest to some batches and the glaze. Made a quince jam +OJ glaze for a couple of batches. I weighed ingredients which I find is helpful when baking.
The easiest, best recipe. I look forward to these every year.
Made these today and were delicious! Like others, the first proof took longer than expected (still less than double at 2.5 hours) but I proceeded to the next step and the dough was very easy to shape into buns. Attempted the flour cross but it was far too goopy and switched to Sally’s alternate orange icing cross after they came out of the oven. Suggest updating recipe notes to remind bakers to let the buns cool before icing a cross, otherwise it’ll melt everywhere. The orange glaze was delicious!
These turned out great, even though I thought the first rise was not as tall as shown or expected and was using the proof feature from the stove. Nice flavor. Did a mix of raisings and craisins. Next time will add orange zest into the dough.
Perfect is how I would describe this recipe! Made it today, have never made hot cross buns, and they came out so delicious!! I did use fine orange zest and orange juice in the icing for a good punch of flavor.
Would this be just as good without the raisins? Planning to serve this to a bunch of picky eaters… 🙂
You can sub pretty much any dried fruit. I like using apricots or cranberries because my family hates raisins. 🙂 Just be warned, these will create a slightly more tart taste.
You can use anything, I like mixed peel and sultanas. If they’re super picky try choc chips for choc hot cross buns instead, although classic are always my fave.
These turned out really well. You are my go-to for recipes. The only thing I had trouble with was making the flour cross. I did it successfully on 6 of the buns but either the flour pastes was too thick/sticky or too runny. I couldn’t figure it out.
These are good, but mine do not look anything like the picture. Lol. I used the minimal amount of water for the cross, added extra flour, and still my crosses were too runny. I should’ve followed my gut and kept adding flour. Also my dough was much darker, did not brown as beautifully on the top, and they took a good bit longer to bake. Also, I should’ve listened to my gut and only made half the icing because there is noooo wayyyy anyone would need that full recipe for these. Still taste good but I find the aesthetic on Sally’s recipes is usually not easy to achieve.
Excited to make these! Can I double the recipe?
Hi Natalie! We recommend making two batches instead of doubling for best results.
I always LOVE your recipes. They are my go to for everything. This one is no different. Haven’t made these in years. I always stick to your exact instructions. Never had a fail yet. Thank you for being my reliable ” cook book”! Hot Cross Bun recipe is now a keeper!
These turned out really well, the taste was delicious. i used 2% milk as that was all i had. The only trouble i had was i couldn’t shape the dough into round balls very well , the dough kept separating. perhaps i added too much flour and it was dry so they turned out ‘rocky road’ style. They were delicious to eat but I wouldn’t win any prize for the presentation. I will definitely make them again, they were eaten very fast. Thankyou Sally i love your explanation of each recipe as well as the recipe itself.
These are amazing. Made them last week. Most people had not heard of them but loved them.
I didn’t do the freezing option per instructions but they turned well.
I made these this weekend and we loved them. I was a little anxious because I am still new to yeast baking and this dough was so much denser that it didn’t rise as fast as some others. But all was well in the end! Thanks for another great recipe.
Can you use buttermilk instead of whole milk?
Hi Cassandra, you can use buttermilk in place of regular milk in this recipe – same amount. Enjoy!
Hi- May I add some chopped chocolate to the dough? If so, how much? Thank You, Zenda.
Hi Zenda, you could replace the raisins with chocolate chips if you want to add chocolate to these.
My trial run didn’t turn out. It is my first time working with active yeast. After 5 min of kneading dough on low speed in Kitchen Aid, the dough was still very sticky and stuck to the sides. I added flour little bits at a time. Still sticky. At this point I worry about over-kneading and/or too much flour. Help?? The smell is amazing though! I am determined to master these.
Hi Claire, The video included after the recipe instructions should offer a helpful visual for what this dough should look like. There are a lot of variables that go into the consistency of dough, even down to the weather and humidity in the air. There’s nothing wrong with adding just a little more flour to bring the dough into a less sticky and knead-able consistency. Hope you enjoy the buns!
I had to add maybe 1/4-1/3 c of flour during the kneading process. Using the measurements in the recipe did not work at all for me. I think it’s just a very humid time of year, where I live.