

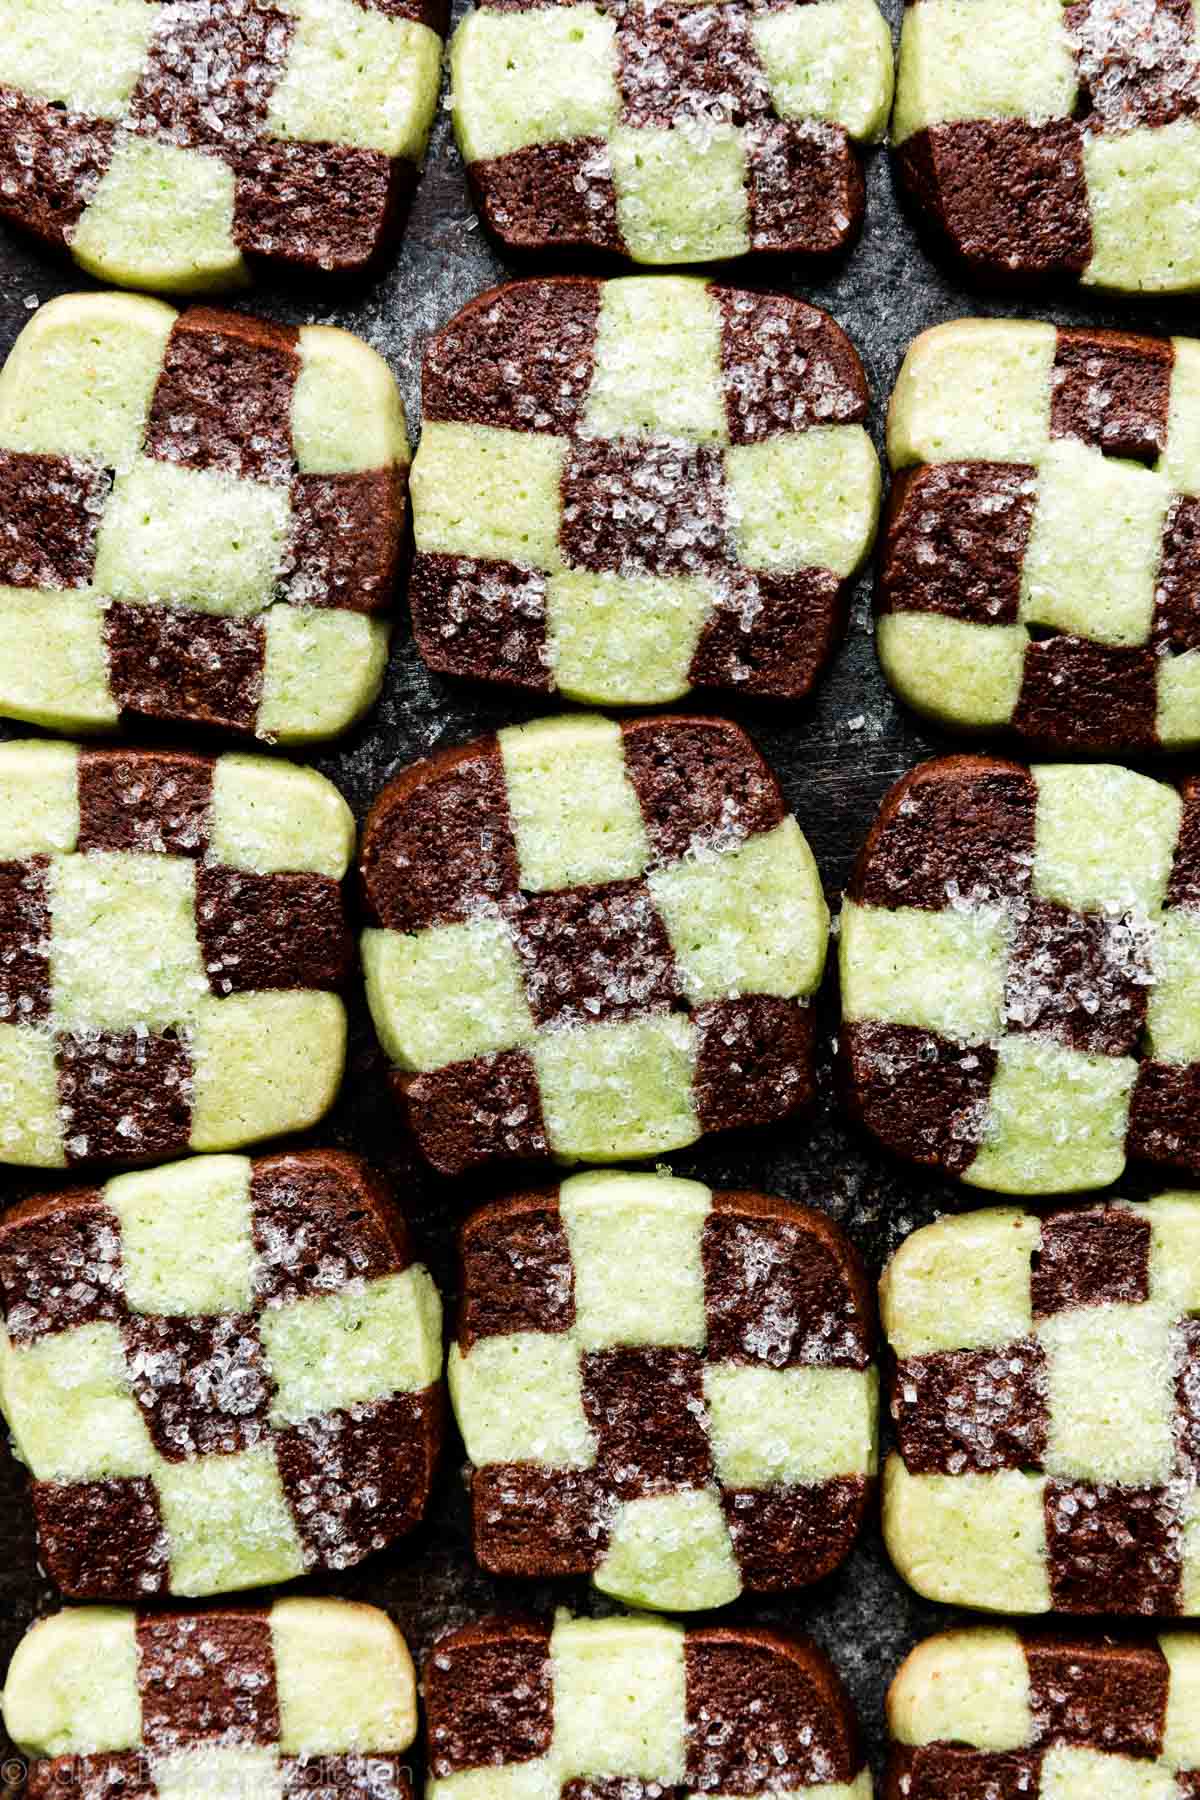
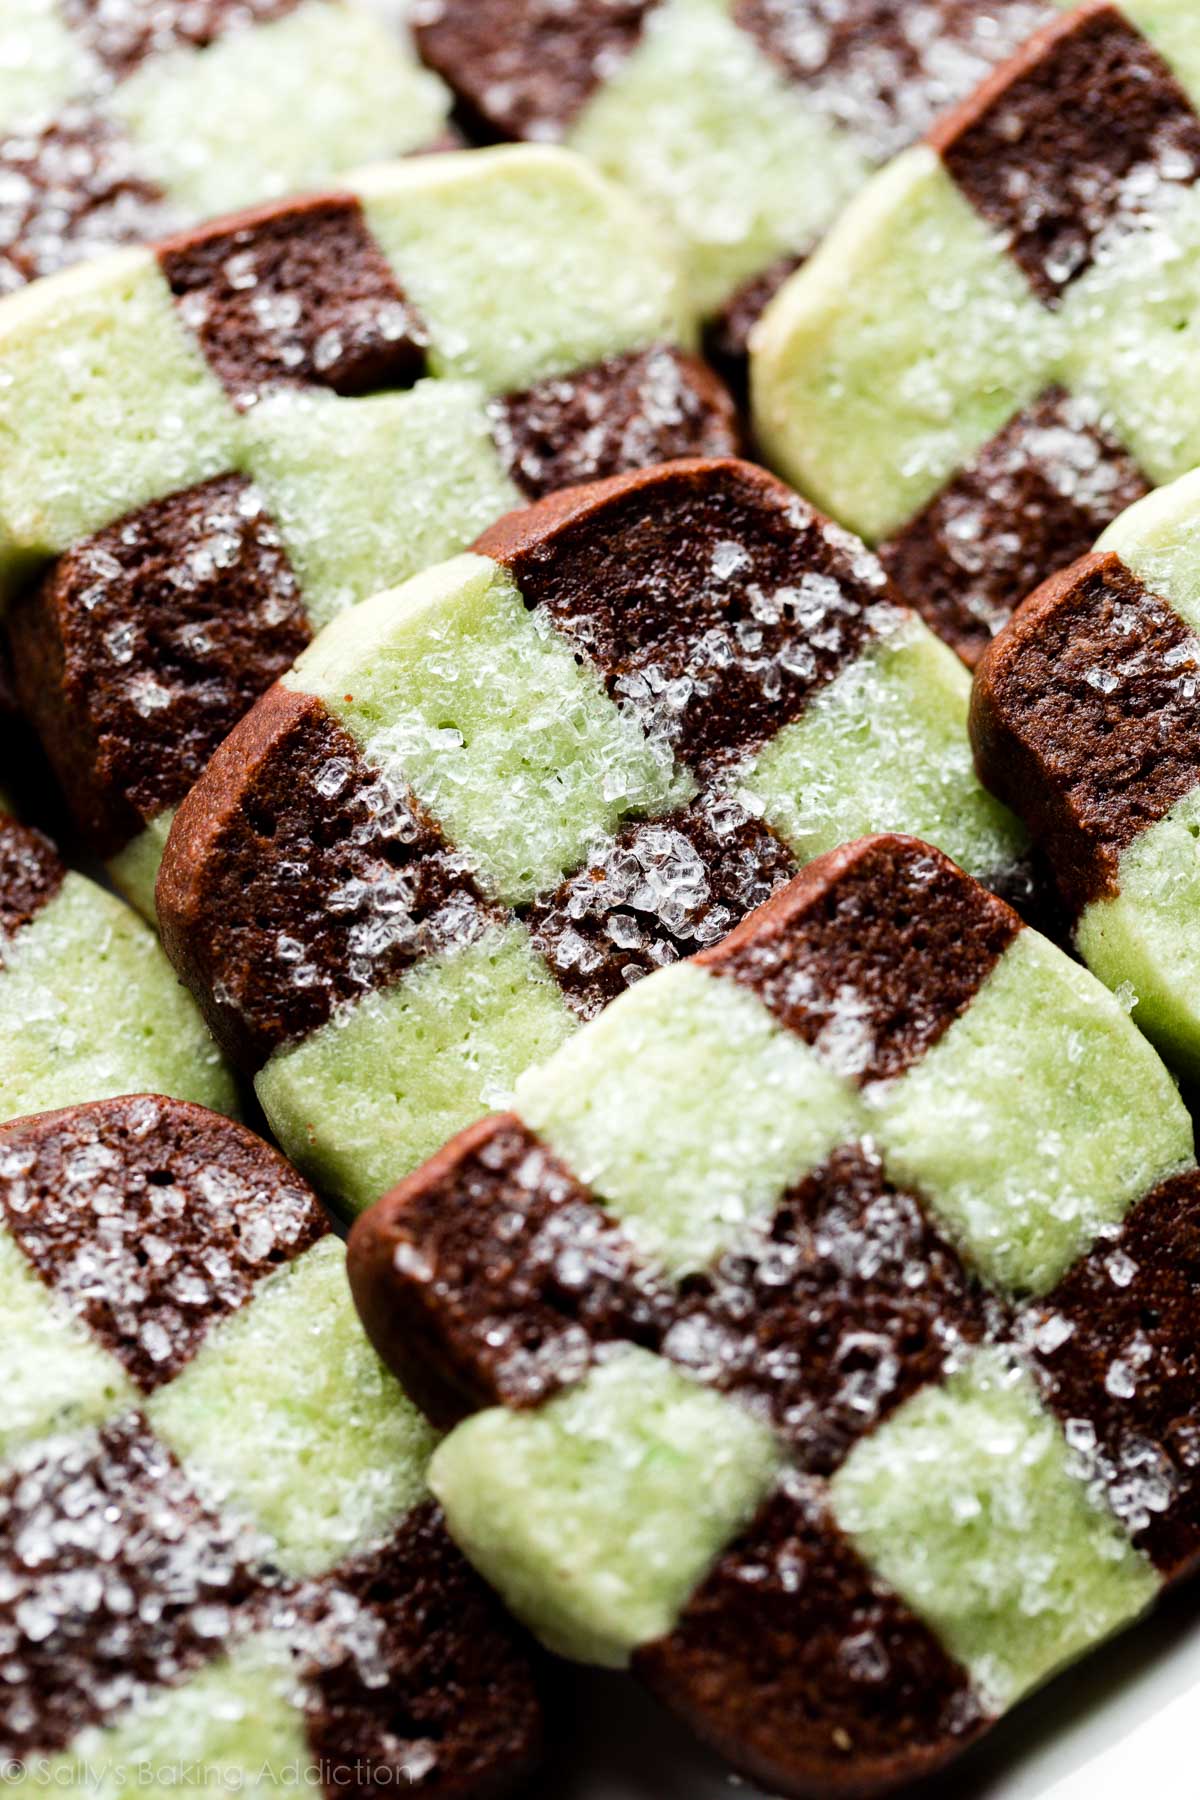
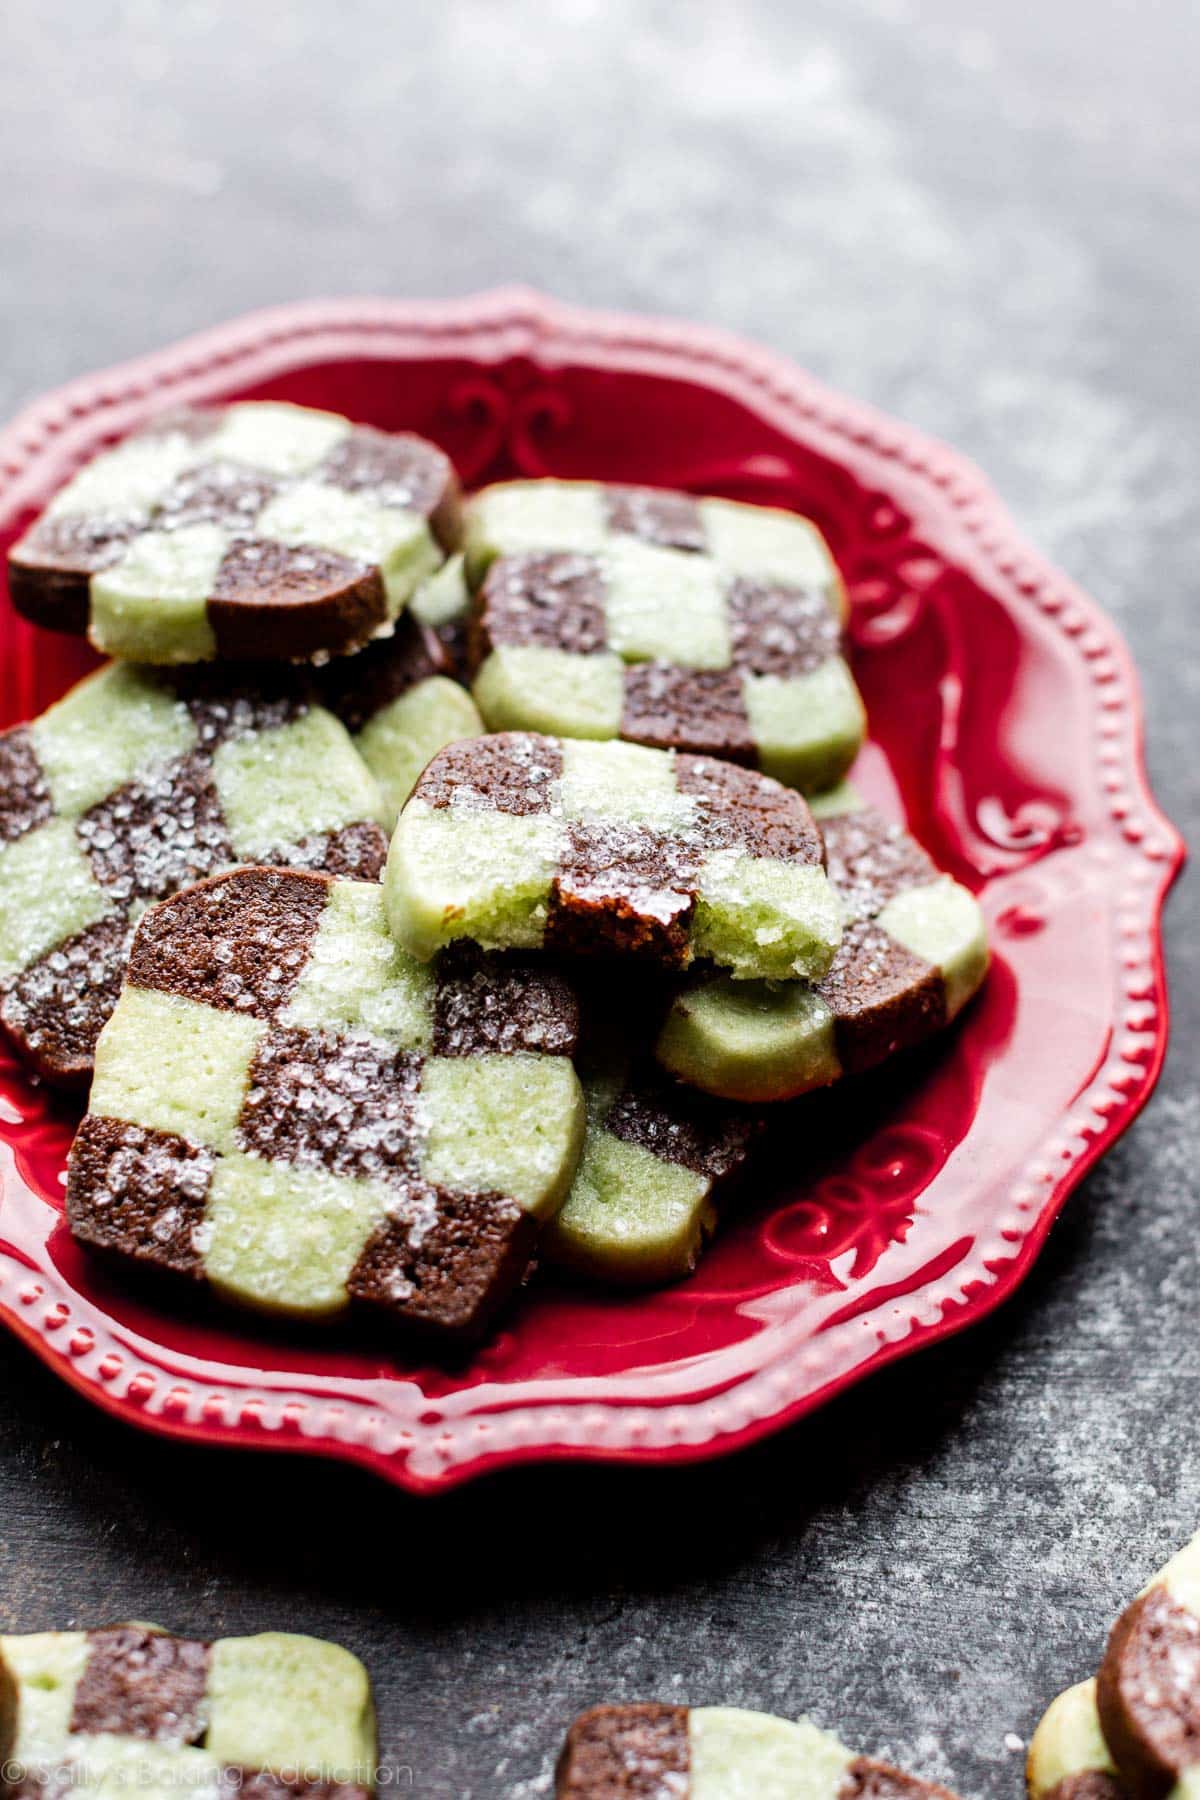
Developed from the same cookie dough used for my neapolitan cookies, these mint chocolate checkerboard cookies are shaped to resemble a fun checkerboard pattern. They’re soft butter cookies flavored with chocolate, mint, and topped with crisp sparkling sugar. It all starts from 1 basic cookie dough!
Oh what fun! We’re dressing up traditional vanilla and chocolate checkerboard cookies with a refreshing minty flair. These cookies are impressive and take a bit of precision. Nothing you can’t handle though. Let’s walk through the process together.
Tell Me About these Mint Chocolate Checkerboard Cookies
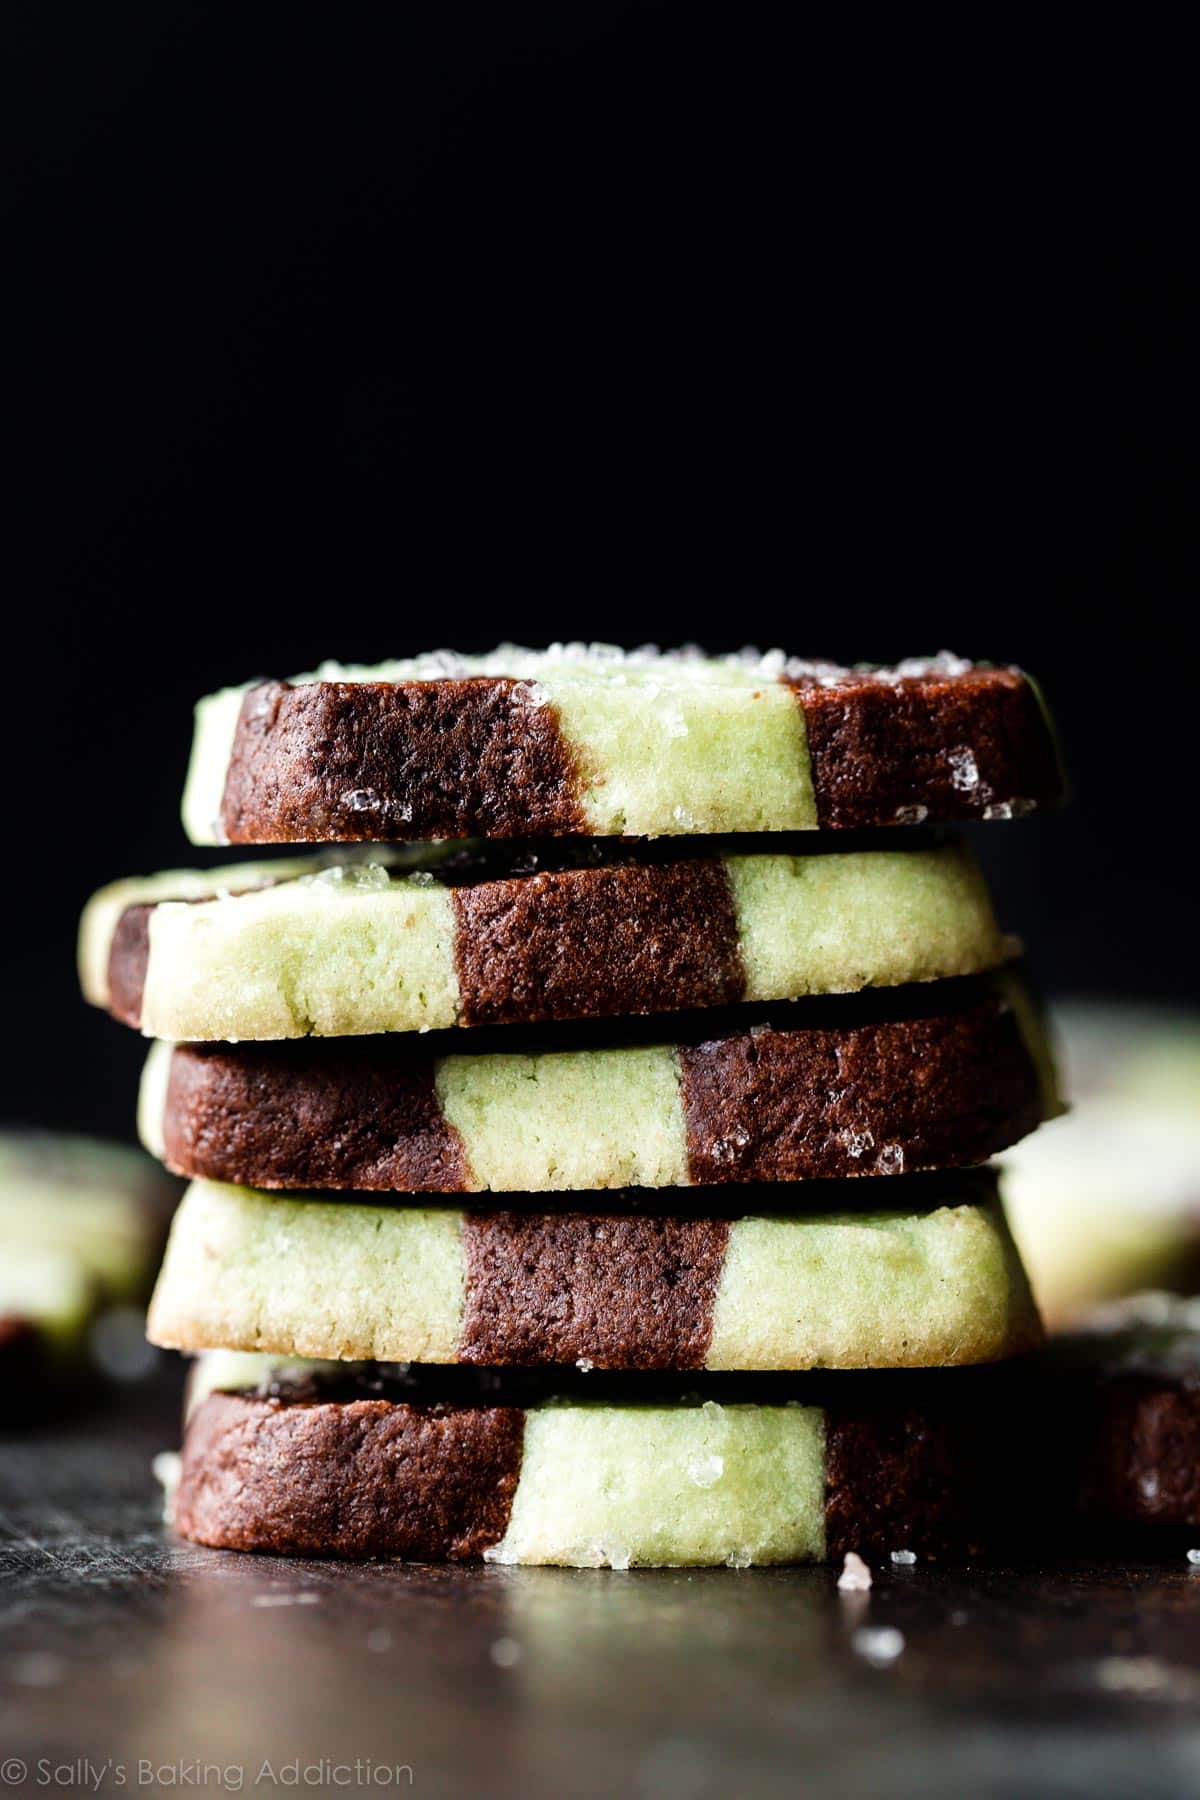
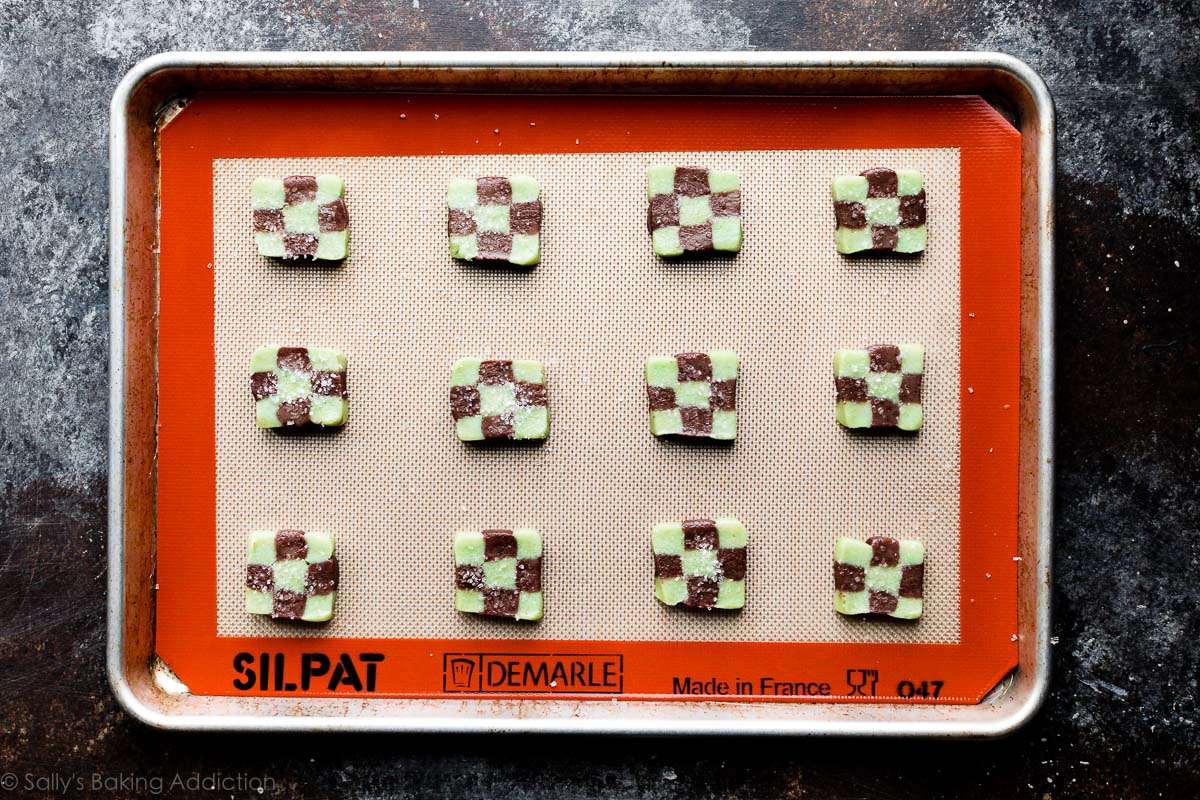
- Texture: These mint chocolate checkerboard cookies are slice and bake cookies, also known as icebox cookies. If you slice them thick enough—I recommend 1/2 inch thick—they’ll be wonderfully soft in the centers with crisp edges. The sparkling sugar on top is optional, but adds another layer of sparkly crunch.
- Flavor: Checkerboard cookies are typically vanilla and chocolate, but the addition of peppermint extract gives them a festive flavor. You could easily leave the mint dough plain or replace the peppermint extract with strawberry extract and a drop of pink/red food coloring instead. Cocoa powder adds the chocolate flavor, but I love adding a little espresso powder to the chocolate dough as well—deepens that chocolate flavor.
- Ease: Shaping these two doughs into a playful checkerboard pattern can be a little tricky, but use my step-by-step photos and detailed instructions below. Take your time and make sure you chill the cookie dough for the recommended times.
- Yield: This recipe yields 24 cookies if you slice each to be 1/2 inch thick. For 36 cookies, you can slice each to be 1/4 inch thick. I prefer the thicker cookies because they’re a bit softer in the centers.
One reader, Sarah, commented: “These cookies are outstanding! They turned out perfectly! I am not a great baker, but I can follow a good recipe. I read this recipe beginning to end before starting, followed the amazing pictures for support, and the result was outstanding! The best part is that for this recipe to really work, it feels like you need to slow down and sink into it. So it was both a stress reliever and a delicious outcome. ★★★★★”
Start with 1 Dough
When I wrote Sally’s Cookie Addiction cookbook a few years ago, I tested a basic vanilla butter cookie recipe. This recipe, written below, includes a handful of basic baking ingredients like flour, butter, sugar, and eggs. I turned the vanilla butter cookie recipe into pinwheel cookies, a recipe you can find on page 62 if you own a copy. I love this basic cookie dough and you can flavor it, shape it, and layer it in so many ways including my neapolitan cookies, pinwheel cookies, and today’s mint chocolate checkerboard cookies. Convenient!
Compared to my plain butter cookies and chocolate butter cookies, these buttery cookies are a bit lighter (addition of baking powder) and sweeter (more sugar). And the dough is a bit firmer since there’s precise shaping involved (more flour).
Prepare the base cookie dough, then divide it in half. One is mint, one is chocolate.
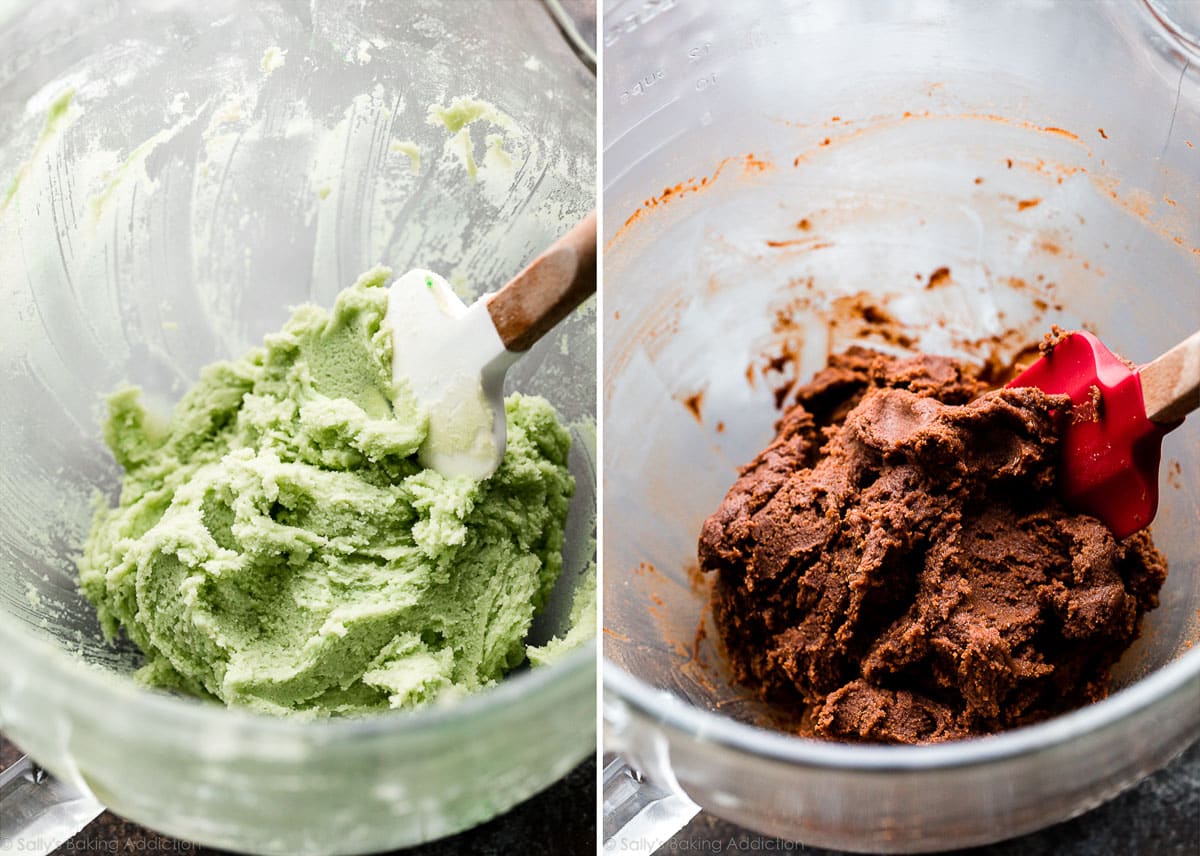
Photo Overview: How to Shape Checkerboard Cookies
The full written recipe is below, but let me lay out the shaping process into photographed steps right now. You’ll find this helpful when you begin.
Grab a ruler or measuring tape because precision is helpful. After you make your mint and chocolate cookie doughs, pictured above, carefully form into 6 inch rectangle blocks. Each block will be 2 inches tall and 2 inches wide. Wrap both dough blocks up in plastic wrap or cover on a plate (see left photo below). Refrigerate for just 1 hour. The *key* is to only refrigerate until the dough is less sticky, but still pliable enough to bend and shape. Chilling any longer will make it difficult to form a neat checkerboard pattern.
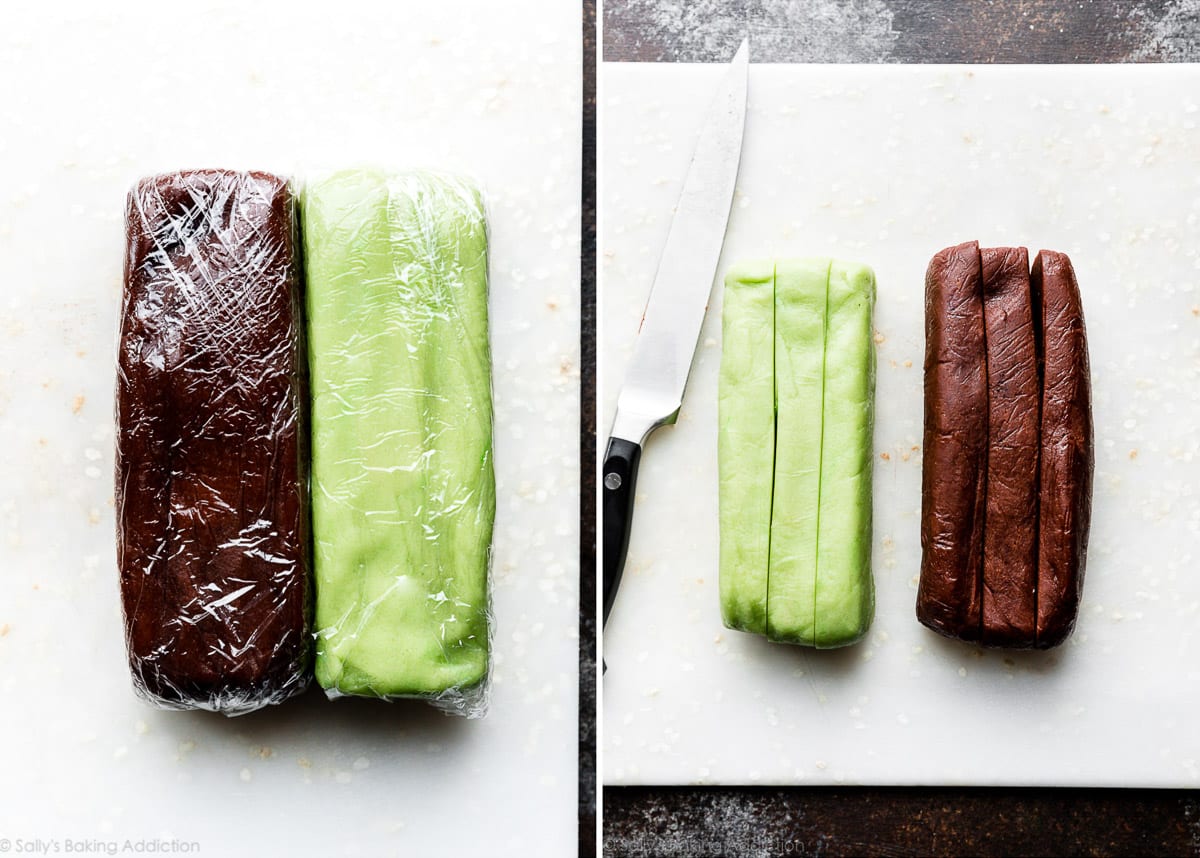
Now let’s start the checkerboard pattern. Remove doughs from refrigerator and unwrap. Using a sharp knife, cut each block lengthways into 3 even strips (see right photo above). Then cut each strip into thirds again. You’ll have 9 thin strips from each dough block:
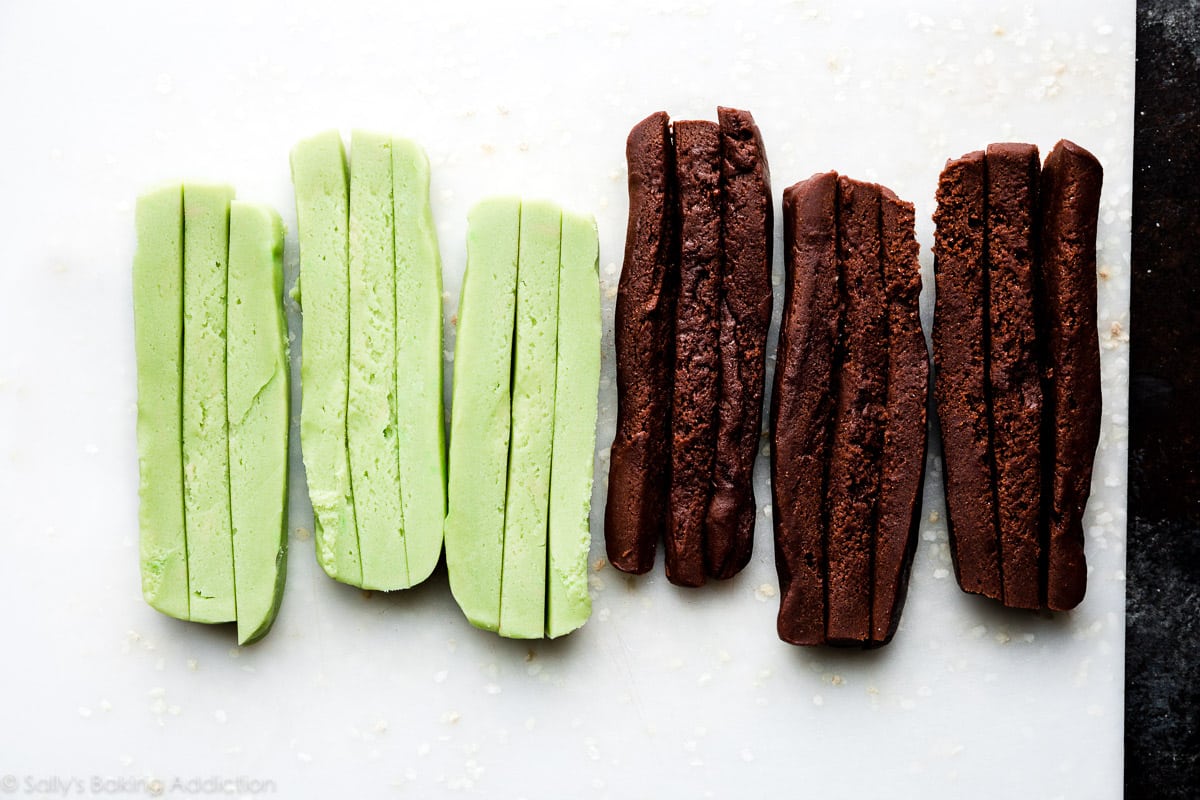
As you can see in the photo above, my dough strips are a little uneven and messy, so for a neat checkerboard pattern, I like to trim off the rounded edges. Save your dough scraps because you can make extra cookies. See recipe note below.
Place 1 mint dough strip on your work surface. Line up a chocolate dough strip next to it. Line up a mint dough strip next to that. Top each with a row of alternating flavored dough strips, then top that with another row of alternating dough strips. Repeat with 2nd block, starting with a chocolate dough strip this time. As you’re working, press the strips tightly together to rid any gaps. This is why it’s important the doughs are still a bit soft and pliable.
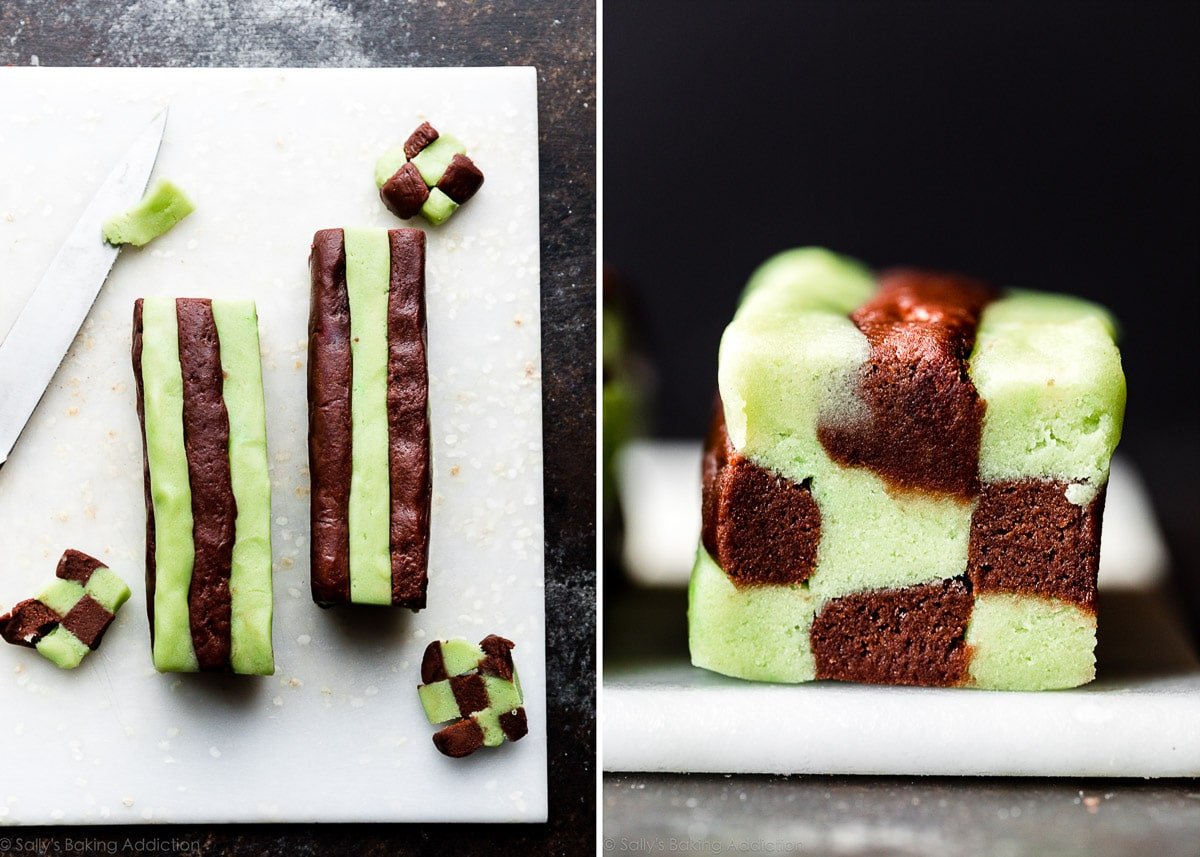
If desired to keep the checkerboard pattern neat, trim off any rounded edges of your blocks. Cover or wrap your checkerboard blocks up tightly, then place back in the refrigerator for at least 2 hours. This chill time is imperative and helps (1) firm up the dough you just handled and (2) set the checkerboard design. A crucial step!
After that, all you have to do is slice and bake.
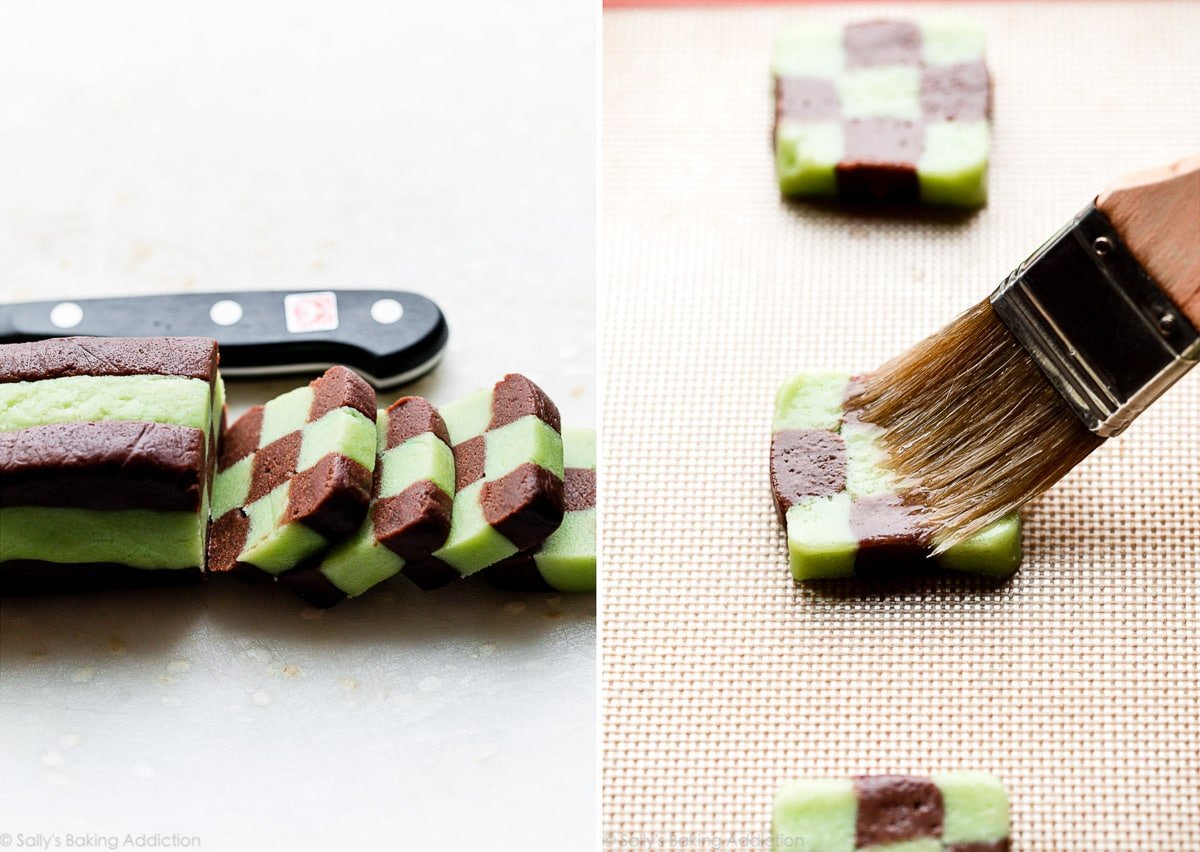
Brush with a little egg wash—1 egg white mixed with water (convenient because you use 1 extra egg yolk in the cookie dough)—then sprinkle with coarse sugar. The egg white/sugar topping is optional, but adds a glistening touch on these pretty cookies. I always use Wilton brand white sparkling sugar which is a product you can find online or in the baking aisle of most grocery stores. If you can’t find it, Sugar in the Raw works too!
Checkerboard Design Success Tips
Before I leave you with the detailed recipe, let me summarize my 3 best success tips:
- Use measuring tape or a ruler. It’s important that your blocks of dough are equal size in step 7 because it makes shaping the checkerboard blocks easier in step 8. Take the time to be precise.
- Trim edges. For squared off cookies, trim any rounded edges with a sharp knife. In steps 8 and 11 below, trim the dough strips, checkerboard blocks, and sliced cookies. This is all optional, but it helps create neat looking checkerboard cookies. Don’t stress though—the cookies still taste awesome even if your pattern is messy.
- Chill for the recommended times. 1 hour in step 7 and 2 or more hours in step 9.


Mint Chocolate Checkerboard Cookies
- Prep Time: 4 hours, 45 minutes (includes chilling)
- Cook Time: 13 minutes
- Total Time: 5 hours
- Yield: 24-36 cookies
- Category: Cookies
- Method: Baking
- Cuisine: American
Description
Developed from the same cookie dough used for my neapolitan cookies, these mint chocolate checkerboard cookies are styled and shaped to resemble a checkerboard pattern. It all starts from 1 basic cookie dough! For best success, read through the recipe and notes before beginning because there are a couple chilling and shaping steps.
Ingredients
Base Cookie Dough
- 2 and 1/2 cups (313g) all-purpose flour (spooned & leveled)
- 1/2 teaspoon baking powder
- 1/2 teaspoon salt
- 1 cup (16 Tbsp; 226g) unsalted butter, softened to room temperature
- 1 cup (200g) granulated sugar
- 1 large egg + 1 egg yolk, at room temperature* (save extra egg white)
- 1 and 1/2 teaspoons pure vanilla extract
- optional for topping: 1 Tablespoon (15ml) water and 1/4 cup (50g) coarse sugar
For the Mint Dough
- 1 teaspoon peppermint extract
- optional: 1 drop green food dye
For the Chocolate Dough
- 2 Tablespoons (10g) unsweetened natural or dutch-process cocoa powder
- 1 Tablespoon (15ml) milk
- optional: 1 teaspoon espresso powder
Instructions
- Make the dough: Whisk the flour, baking powder, and salt together in a medium bowl. Set aside.
- In a large bowl using a hand mixer or a stand mixer fitted with a paddle attachment, beat the butter and granulated sugar together on medium-high speed until creamed, about 3 minutes. (Here’s a helpful tutorial if you need guidance on how to cream butter and sugar.) Add the egg, egg yolk, and vanilla extract and beat on high speed until combined, about 1 minute. Scrape down the sides and up the bottom of the bowl and beat again as needed to combine.
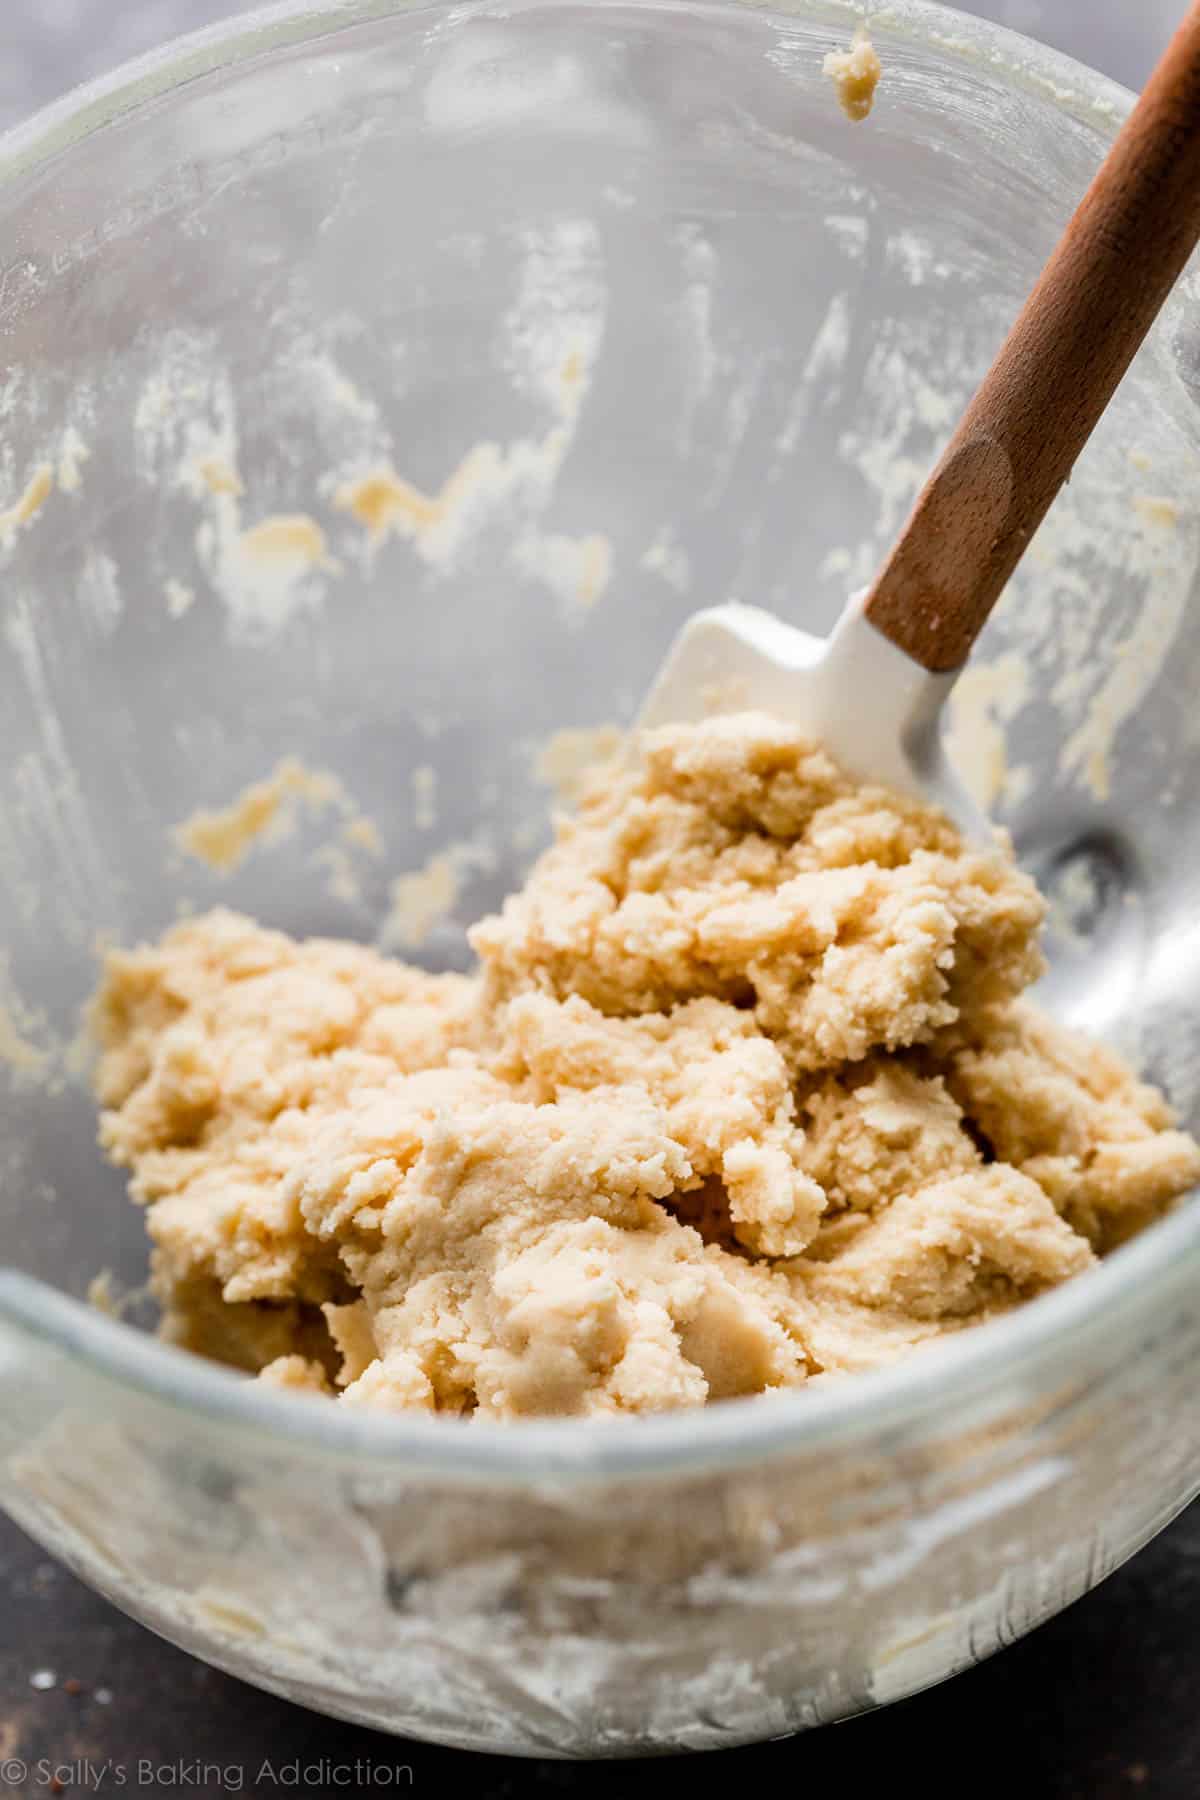
- Add the dry ingredients to the wet ingredients and mix on low until combined. Dough will be thick and sticky. Remove from the mixing bowl. No need to rinse out the mixing bowl.
- Divide the dough in half: There’s almost 4 cups of dough. Divide in half, a bit less than 2 cups each.
- Make the mint dough: Place half of the dough back into the mixing bowl. Add the mint dough ingredients. I recommend starting with 1 small drop of green food coloring. Beat on low speed until dough is combined. Add another small drop of food coloring if desired. For the pictured cookies, I used 1 drop of leaf green gel food coloring. Remove from the mixing bowl. No need to rinse out the mixing bowl, but feel free to wipe clean.
- Make the chocolate dough: Place other half of dough back into the mixing bowl. Add all of the chocolate dough ingredients. Beat on low speed until dough is combined.
- Shape & chill cookie dough for just 1 hour: Place doughs on a lightly floured work surface. It’s sticky, so do your best in this step. With lightly floured hands, carefully form both doughs into a 6 inch long rectangle block, 2 inches tall and 2 inches wide. Wrap both dough blocks up in plastic wrap or place on a plate and cover with aluminum foil. Refrigerate for just 1 hour. The *key* is to only refrigerate until the dough is less sticky, but still pliable enough to bend and shape. Chilling any longer will make it difficult to form a neat checkerboard pattern. If you need to chill it for longer than 1 hour, make sure you let it sit at room temperature for 15-30 minutes before continuing with the next step.
- Shape the dough: See photos in the blog post above for visuals of this step. Remove doughs from refrigerator and unwrap. Using a sharp knife, cut each block lengthways into 3 even strips. Then cut each strip into thirds again. You’ll have 9 thin strips from each dough block. My strips are usually a little uneven and messy, so for a neat checkerboard pattern, I always trim off* any rounded edges. Place 1 mint dough strip on your work surface. Line up a chocolate dough strip next to it. Line up a mint dough strip next to that. Top each with a row of alternating flavored dough strips, then top that with another row of alternating dough strips. Repeat with 2nd block, starting with a chocolate dough strip this time. As you’re working, press the strips tightly together to rid any gaps. (This is why it’s important the doughs are still a bit soft and pliable.) If desired to keep the checkerboard pattern neat, trim off* any rounded edges of your blocks.
- Chill for 2 more hours: Wrap each block of dough back up or cover and refrigerate for 2 more hours and up to 4 days.
- Preheat oven to 350°F (177°C). Line 2 baking sheets with parchment paper or silicone baking mats. Set aside.
- Slice and bake: Slice each block into 12 1/2-inch thick cookies. For thinner cookies, slice each block into 18 cookies, about 1/3-inch thick. (Bake time will be about 1 minute shorter.) Trim the cookie edges* to make neat squares, if desired.
- Arrange cookies 2-3 inches apart on the baking sheets. If desired, brush each lightly with egg wash (see recipe note) and sprinkle with coarse sugar. Bake for 12-14 minutes or until very lightly browned around the edges.
- Remove from the oven and allow cookies to cool on the baking sheet for 5 minutes before transferring to a wire rack to cool completely.
- Cookies stay fresh covered at room temperature for 1 week.
Notes
- Make Ahead Instructions: Baked cookies freeze well up to 3 months. Thaw overnight in the refrigerator and bring to room temperature, if desired, before serving. You can shape the cookie doughs in the checkerboard pattern blocks and chill in the refrigerator for up to 4 days (see step 9). You can also freeze the checkerboard pattern blocks for up to 3 months. Thaw overnight in the refrigerator then continue with step 10.
- Special Tools (affiliate links): Glass Mixing Bowl | Whisk | Electric Mixer (Handheld or Stand) | Americolor Leaf Green Gel Food Coloring | Baking Sheets | Silicone Baking Mats or Parchment Paper | Pastry Brush | Coarse Sugar | Espresso Powder | Cooling Rack
- Eggs/Egg Wash: You need 1 egg plus an additional egg yolk for the cookie dough. Save the extra egg white and mix it with 1 Tablespoon of water to make a simple egg wash. Brush this over each cookie as directed in step 12, then sprinkle with coarse sugar before baking. This gives the cookies a little crunch and sparkle.
- Trimmed Off/Excess Dough: In steps 8 and 11, I recommend trimming the dough strips, checkerboard blocks, and sliced cookies. This is optional, but it helps create neat looking checkerboard cookies. You’ll have some leftover cookie dough scraps. Discard or meld them together, roll out with a rolling pin (about 1/4 – 1/2 inch thick), and cut into shapes. Bake as directed in this recipe.


Reader Comments and Reviews
These were fun to make, but they did not have much taste.
Although my checkerboard was not as neat as I would’ve liked for my first try they were absolutely delicious and came together well!
We themed them for Halloween so left the one dough vanilla flavoured and used orange food colour instead.
Will definitely make them again!
Great recipe!!! I’m keeping this one. I’ve already received requests for variations and more of these. I did have trouble with the cool-assemble- cool process the first time but my second attempt came out almost exactly as pictured. We had a cold front and the humidity dropped so I’m sure that helped with the second attempt. I’m trying the pumpkin variation mentioned above for Halloween as well. Fingers crossed they come out well!
I love these cookies! Everyone else loved them too. I’m not good at making them even so they were a little crooked
Hi Sally, these look fantastic and they are on my list to make this week-end! I’m going to use orange and the chocolate for Halloween but I was wondering if there would be a way to make them a pumpkin flavor? Does that sound like a good combination? Could it be made like that? Just wondering…..
Hi Katrina, Instead of the mint dough, you can use our new recipe for Pumpkin Spice Roll Cookies. It would be delicious paired with the chocolate dough. Let us know if you give it a try!
I made these checkerboard cookies using a halved recipe to make the chocolate dough alone, then combined it with the pumpkin spice roll cookie dough to make Halloween checkerboards. They came out fantastic!
I should have let the blocks of dough cool for longer before I sliced the strips and then let the strips warm up to fuse them together. The dough I worked with was far too sticky. This recipe is a lot of work but when I want a full release of baking serotonin, these will be my go to.
Hi Sally, can I omit the egg?
Hi Neha, the egg + egg yolk is needed in this recipe. We haven’t tried it with any egg substitutes, but let us know if you give anything a try.
I love this recipe.
These are delicious – the recipe is divine. Mine were a bit sloppy, though, and there were definite gaps in the checkerboard. I think I might make the cookies slightly smaller next time, and lay out the dough in shorter bars. Has anyone tried that? Or should I just wear my irregular but delicious badge with honor and move on…?
These cookies were actually very easy to make, especially if you are naturally someone with a particular eye for precision (when it comes to shaping the dough logs). I made them once and they turned out perfect. Not too much mint and not too much chocolate either. The recipe is really a perfect balance of the two flavors. I didn’t take pictures the first time around, but I plan on making them for Christmas, so I’ll post on IG the second time around!
I love all your recipes and this has been my go-to site for festive events and everyday treats. I’d love to use this recipe, but to make pinwheel cookies instead. Can I just make the two flavors of dough, layer on top of each other, roll into a log lengthwise, chill, slice, and bake?
Hi Tess, Yes you can! Enjoy 🙂
These cookies are outstanding! They turned out perfectly! I am not a great baker, but I can follow a good recipe. I read this recipe beginning to end before starting, followed the amazing pictures for support, and the result was outstanding! The best part is that for this recipe to really work it feels like you need to slow down and sink into it. So it was both a stress reliever and a delicious outcome!
I had trouble with the pieces sticking together – even with being careful to only chill for one hour with the first chill. Any ideas how I can avoid this in the future? I’m certain that we will be making this recipe again!
Hi MB, do you mean that the doughs weren’t sticking together or they were? Cut the chill time shorter if they were too firm to meld together. So glad you enjoyed these!
These taste really good! I would just caution against using too much flour on your surface when cutting and organizing the strips because I had a bit of trouble with getting them to stick together and had some of the squares detach from the cookies in the oven and shortly after baking. Overall, though, these are an interesting, eye-catching addition to a holiday cookie plate! Thanks, Sally! 🙂
I’m glad you enjoyed these cookies, Isabel!
Can I use mint extract for this recipe?
Thanks!
You can, but I find it tastes more like toothpaste than anything. I always recommend peppermint extract for baking.
I just finished baking these and I must have done something wrong from the get-go because they don’t look as pretty as the photos.
I used coconut sugar and almond-milk as substitutes. Since coconut sugar turned to dough a darker colour I opted to use more food colouring. This in turn made me use more peppermint extract which then lead to a more wet dough. I thought of adding flour but didn’t.
I wrapped each checkerboard in foil and placed in fridge overnight. This morning there is almost no checkerboard design as the wet doughs melted together. They also didn’t hold their shape when I cut the dough. So, I had to remash the cookies into a square so I could at least have square cookies. **I have not eaten any as they are cooling. I hope the taste is ok**
Any thoughts? Should I have not used the coconut sugar? Was that the downfall or something else?
Hi Amy, I don’t recommend coconut sugar. It’s not as fine as regular granulated sugar and likely didn’t whip enough air into the butter during the creaming step. They aren’t interchangeable in delicate cookie doughs like this. Your dough may have benefitted from extra flour if you used more peppermint extract. I hope they taste great though. Let me know.
Hi Sally,
Thanks for the reply. I agree with you about the sugar. When I was whipping it into the butter I did notice it wasn’t dissolving well. I also thought about more flour but didn’t add.
Next time I make these I’ll follow the recipe to the T and see how it goes. My husband does love them, “they’re like a minty biscuit!” Haha. Thanks again.
These came out really well! My only regret is that I didn’t carefully slice my dough, so the checkerboard design is a bit uneven. I’ll be more careful next time! These have a lovely peppermint flavor – not too overwhelming, but it comes through nicely. I decided to take a page from your Neapolitan cookies and dipped the corners of these into melted chocolate. I think these are a great addition to my holiday cookie baking repertoire! 🙂
Yum! I love that you added melted chocolate to yours. Such a lovely touch. I’m thrilled you enjoyed this recipe, Rebecca!
Would it be possible to divide the dough into three colors instead of just two?
Yes, you could! You can see how we made three different flavors in these Neapolitan Cookies.
Hi!
Love the checkerboard pattern but not a big fan of mint, so i was wondering if I could swap out the mint for the strawberry dough from the neopolitan cookies?
Thanks!
Definitely!
Hey Sally! These look so delicious. Do you think they could be made with three different colors instead of just two?
Hi Mary! I can’t see why not. Let me know if you try anything. Those would be extra fun cookies!
I made these this weekend, and though mine do not look nearly as perfect as yours, they came out fairly well. Next time I’ll put more finesse into them!
Well these are just fantastic and were so fun to make! I was originally going to make your chocolate crinkles (a family favorite!) this weekend, but as soon as I saw these I had to try them! We loved them! Crinkles coming up in a few days 😉
Happy to hear these were a success, Coby – enjoy your Chocolate Crinkle Cookies!
Hello! Always excited about your new stuff! I was comparing this recipe with the 1 Dough Neapolitan cookies and see that the base is the same except has less chocolate (melted chocolate). Why did the extra melted chocolate not make the cut this batch? Just curious! I made the Neapolitan cookies and just loved them! Thanks! I’m making your Almond Butter Macaroons tonight!
Hi Kelly, I can’t believe I missed this comment/question last week. My apologies. I decided to ditch the melted chocolate in this dough because it’s just one extra ingredient. It’s great to use in the neapolitan cookies because we’re also dipping the cookies in chocolate. However– here– we can get away without it. 2 Tablespoons adds enough flavor. Additionally, I found that melted chocolate in the chocolate cookie dough made it really hard to manipulate in the checkerboard shape. It wouldn’t adhere nicely to the mint dough.
Oh my gosh.
I have no words. Your are THE baking queen, Sally. These were insanely good. It is a perfect blend of flavor and I was intimidated but these came out FLAWLESS. Thank you so so much we love them!
Anna
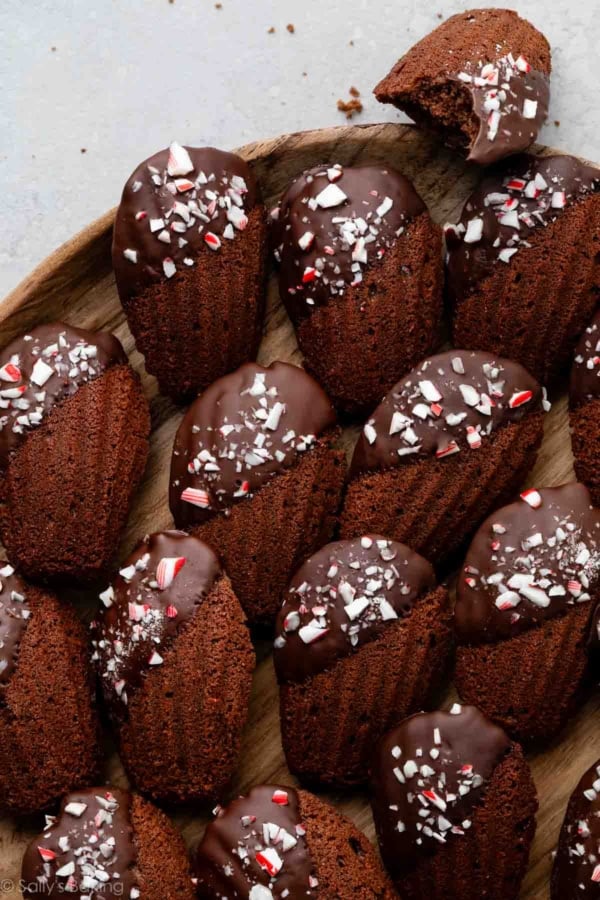
My 9 year old daughter and I made the Neopolitan cookies for her class a few years ago. We fell in love with them and can’t wait to try this version! She suggested dipping half in bittersweet chocolate and sprinkling peppermint candy dust on top
I love that idea! Can’t wait to hear how you and your daughter like this recipe, Joelle. Happy baking to you both!
I’m making these this weekend- they look so pretty! We love the Neapolitan cookies, so I’m going to try my hand at these as well..
Hope you love these ones just as much, Patrice! Let me know how they turn out for you.
This is the same recipe handed down my mother from decades past, except we made 4 colors – red, yellow, green, chocolate. Can also be made red and white for either Christmas or Valentines Day. Impressive and delicious. My suggestion is to freeze the logs once they’ve been completely formed. Then just slice and bake to serve fresh. They go fast!
We recently finished redoing our kitchen and I can’t wait to make these. I don’t think I have mint extract on hand, though. Do you think I could sub with something else — I doubt vanilla would be a strong enough flavor, but maybe orange zest?
How exciting for a new kitchen! How about another flavor extract such as coconut or orange? Strawberry extract would be great too.
These look so good! I can’t wait to try these! This is my first time following along with the Cookie Palooza! So far I am LOVING it!
Lots of love from Ohio!
Hi Tiana, I’m so glad to hear you’re enjoying Cookie Palooza! Can’t wait to hear which recipes you decide to make 🙂 Happy baking!
Absolutely brilliant and such a change to every day cookies Love them and the kids think they are magical.
Could these be made into sandwich cookies by putting frosting in-between?
Hi Emily, I can’t see why not.