

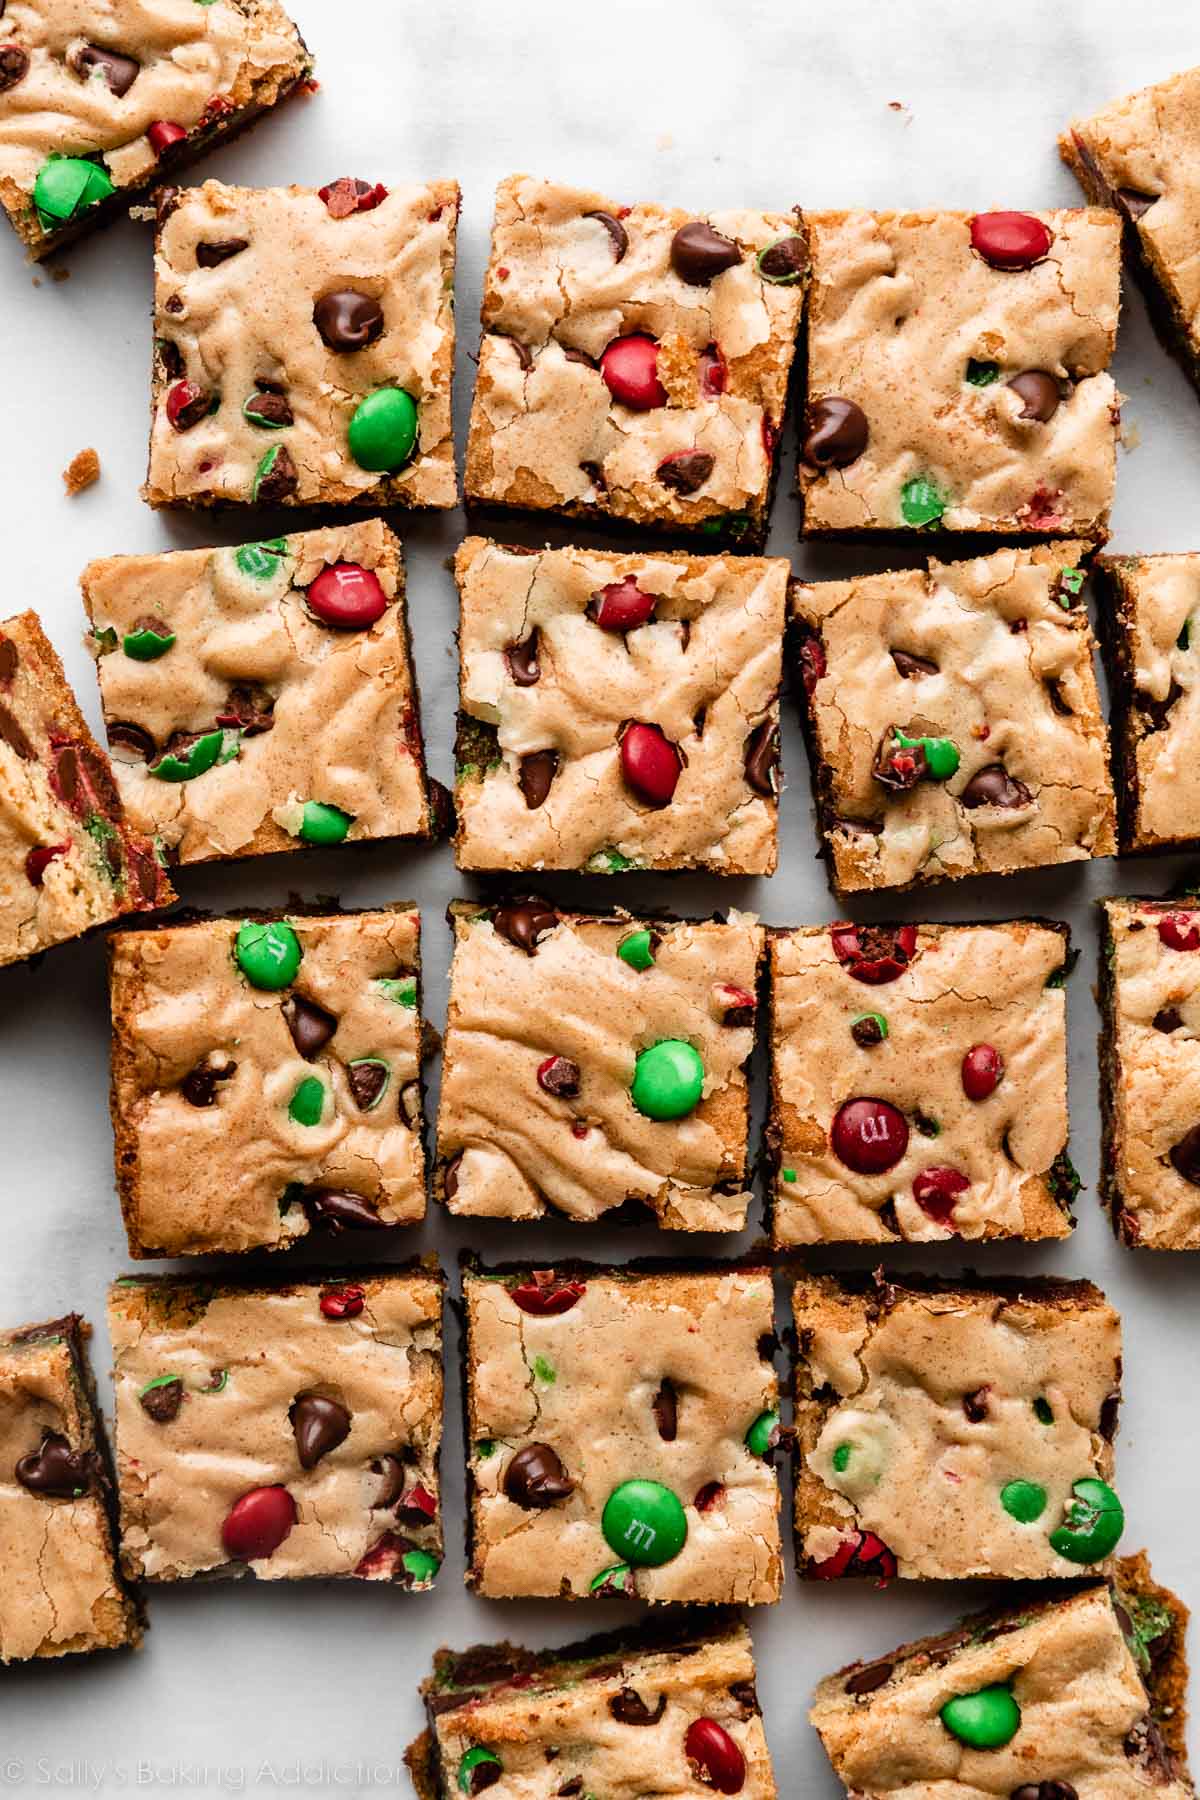
These extra soft and chewy M&M cookie bars are so easy to make—no mixer, no dough chilling, no individual dough rolling required! You can use a mix of regular and mini M&Ms and chocolate chips for texture variety, and change out the colors to make them festive for a holiday.
One reader, Donna, commented: “I made these bars today and I love how quick and easy they are to make. I decided somewhat impulsively to bake and was pleased to find this recipe which calls for melted rather than room temperature butter, and I didn’t need to use the mixer either! These cookies are absolutely delicious and soft and chewy on the inside. ★★★★★“
Finally a cookie recipe without chilling!
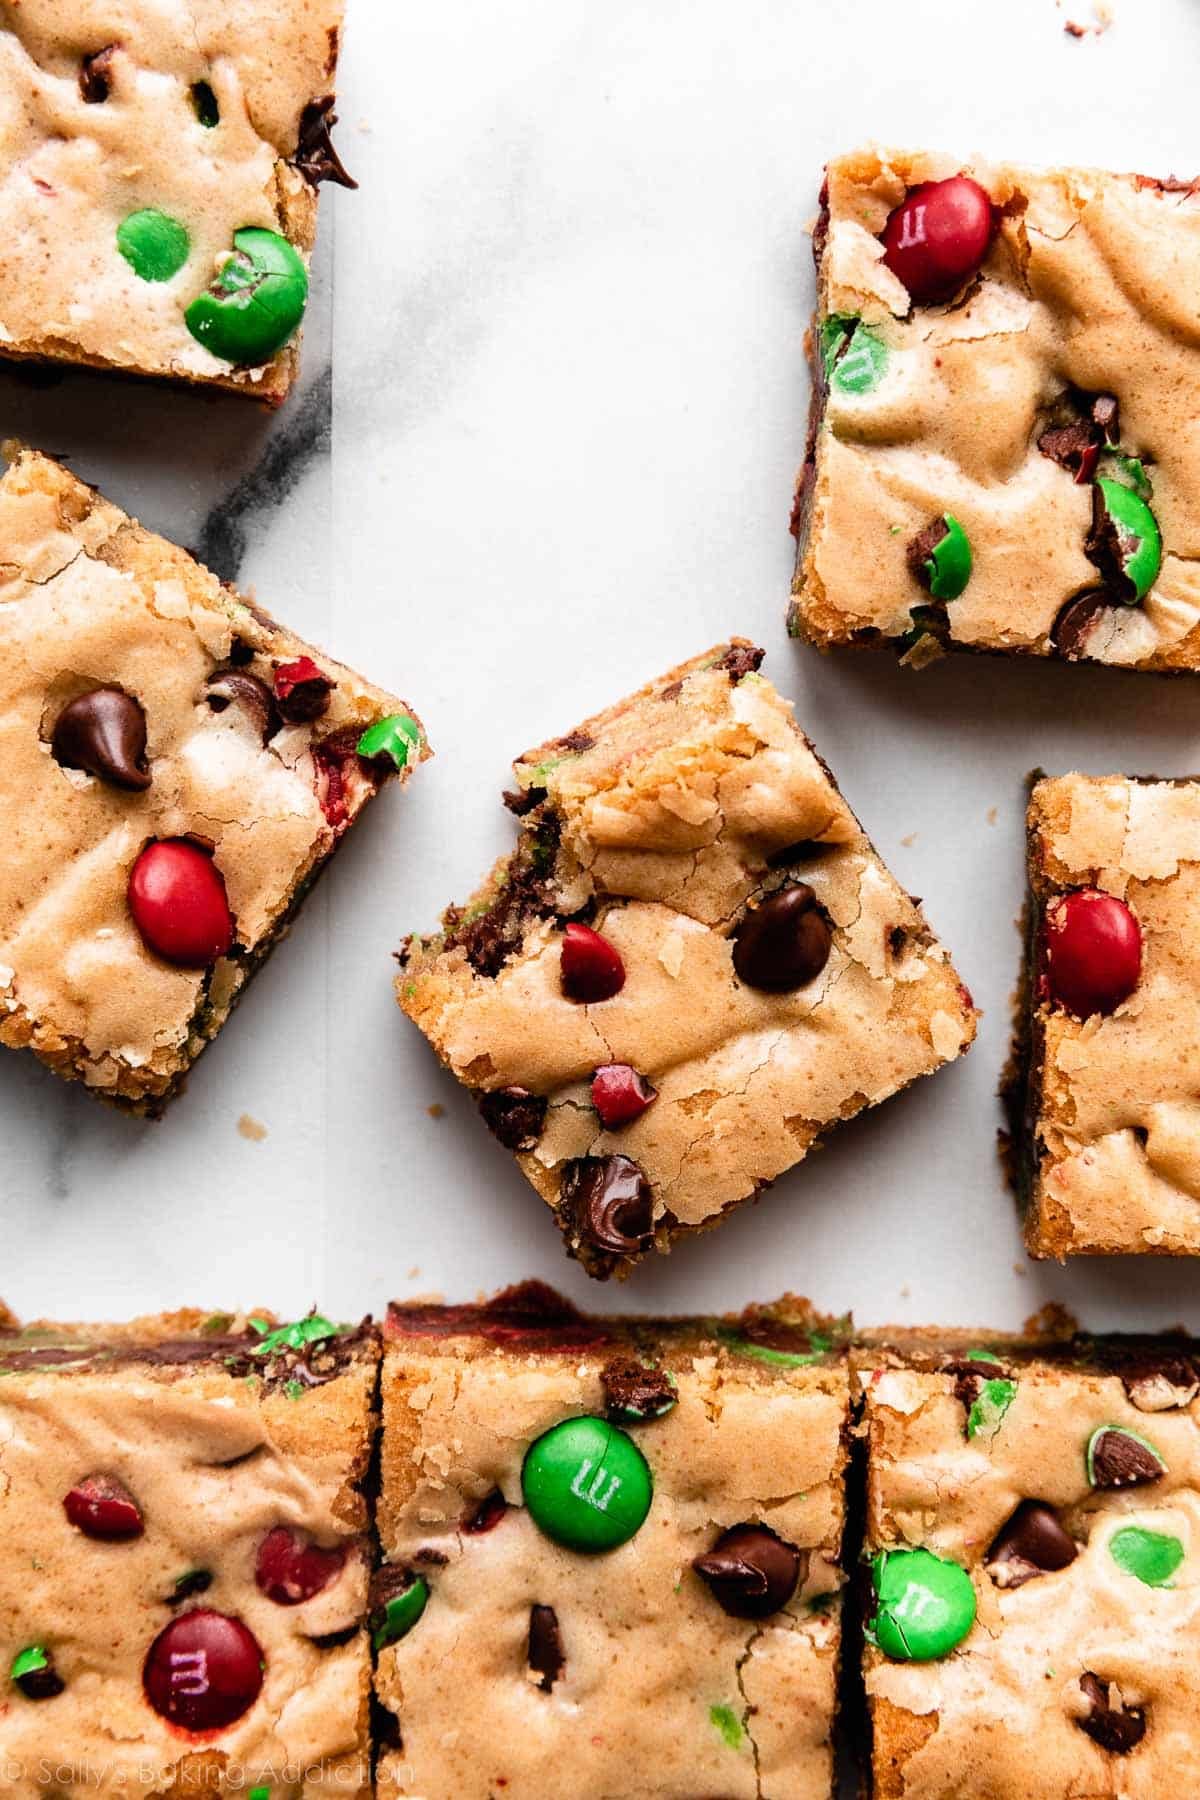
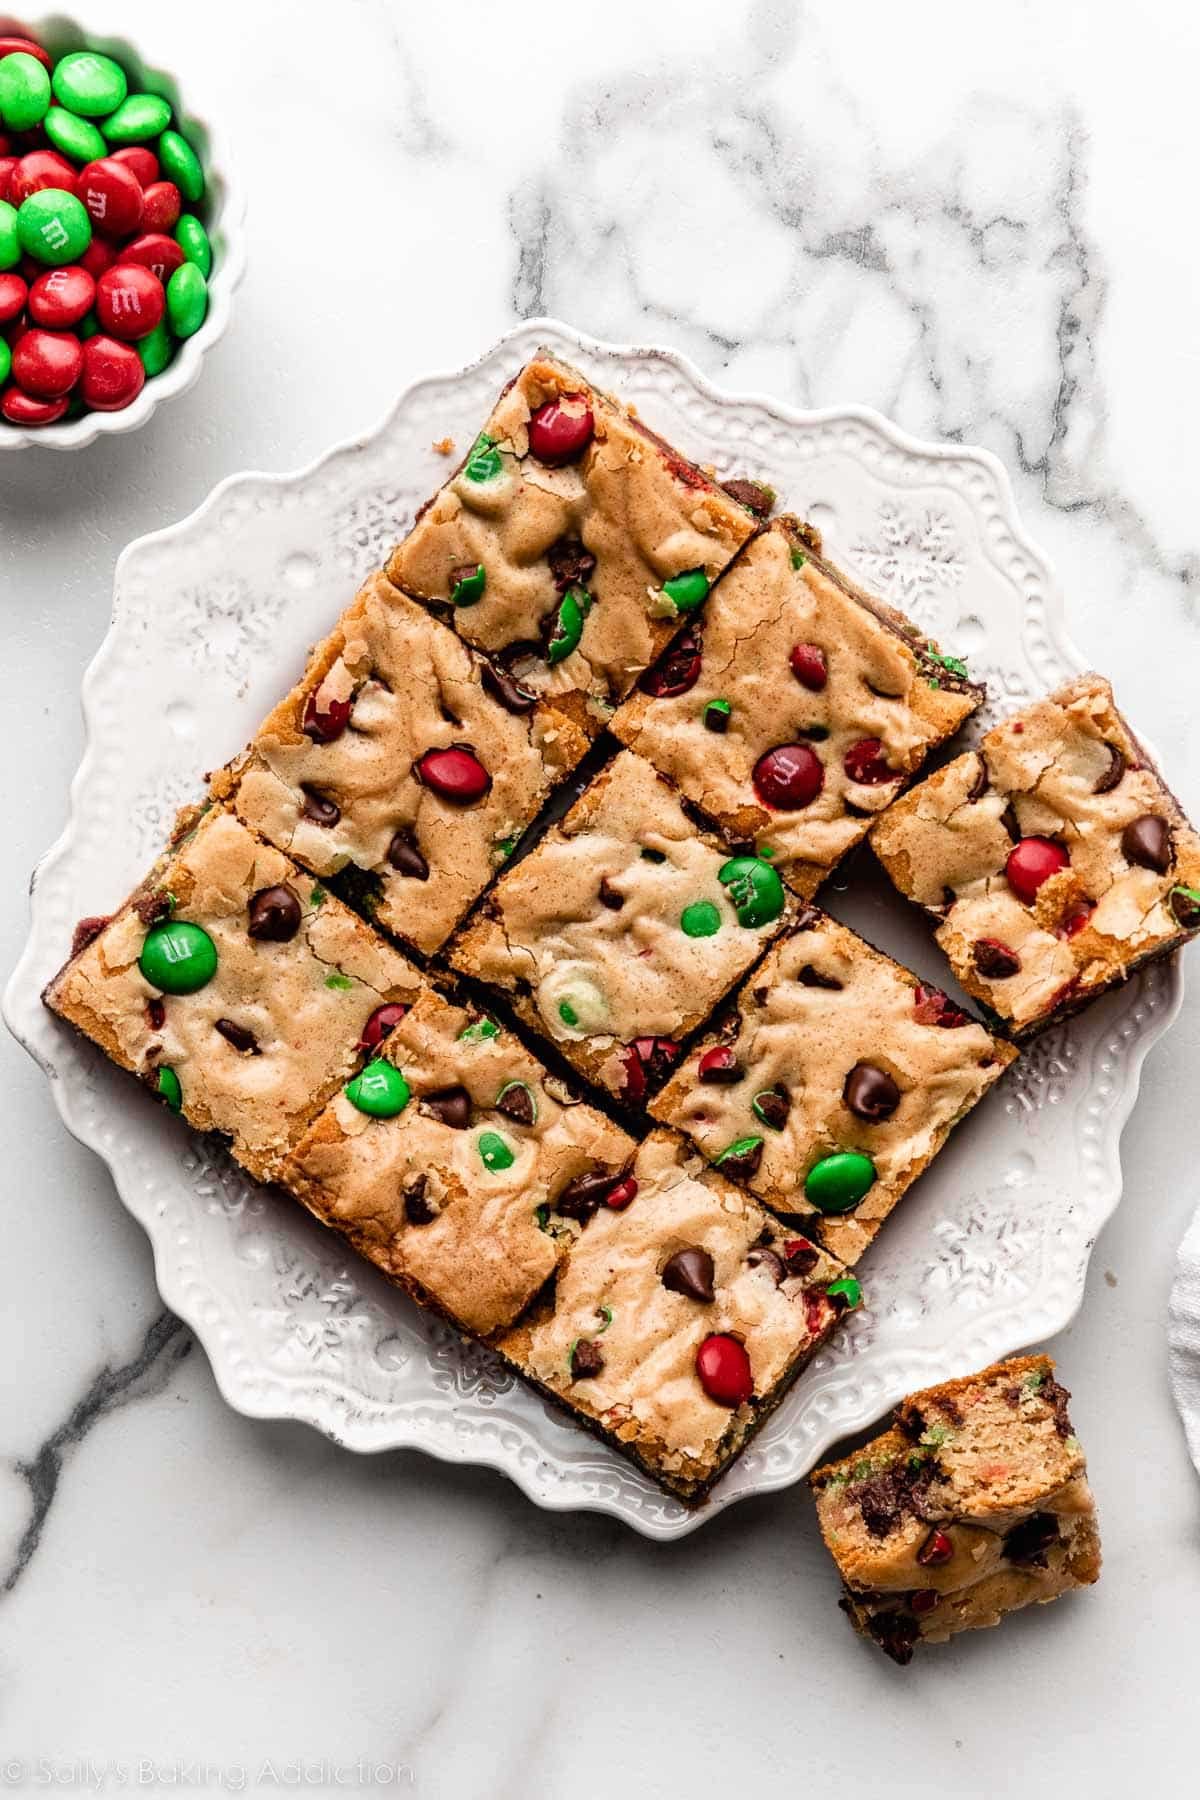
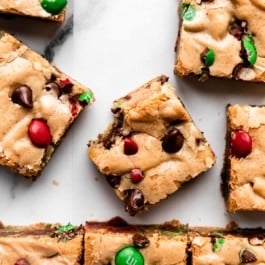
Let’s call these no-chill, no-roll M&M cookies! When you need a big batch of cookies but are pressed for time (or mental energy, LOL), cookie bars are the solution. This recipe makes a generously sized 9×13-inch pan of M&M cookie bars, perfect for sharing, especially at the holidays. Kids love these, but so do adults. Seriously, aside from special diets, have you ever met anyone who would turn down a chewy chocolate chip M&M cookie bar? I’m pretty sure I haven’t!
Here’s Why You’ll Love These M&M Cookie Bars
- Like a bigger batch of soft chocolate chip cookie bars—with colorful M&M candies!
- Makes a large pan to serve a crowd.
- A great recipe for young bakers to help with.
- No mixer, no dough chilling, no dough ball rolling—a no fuss dessert recipe!
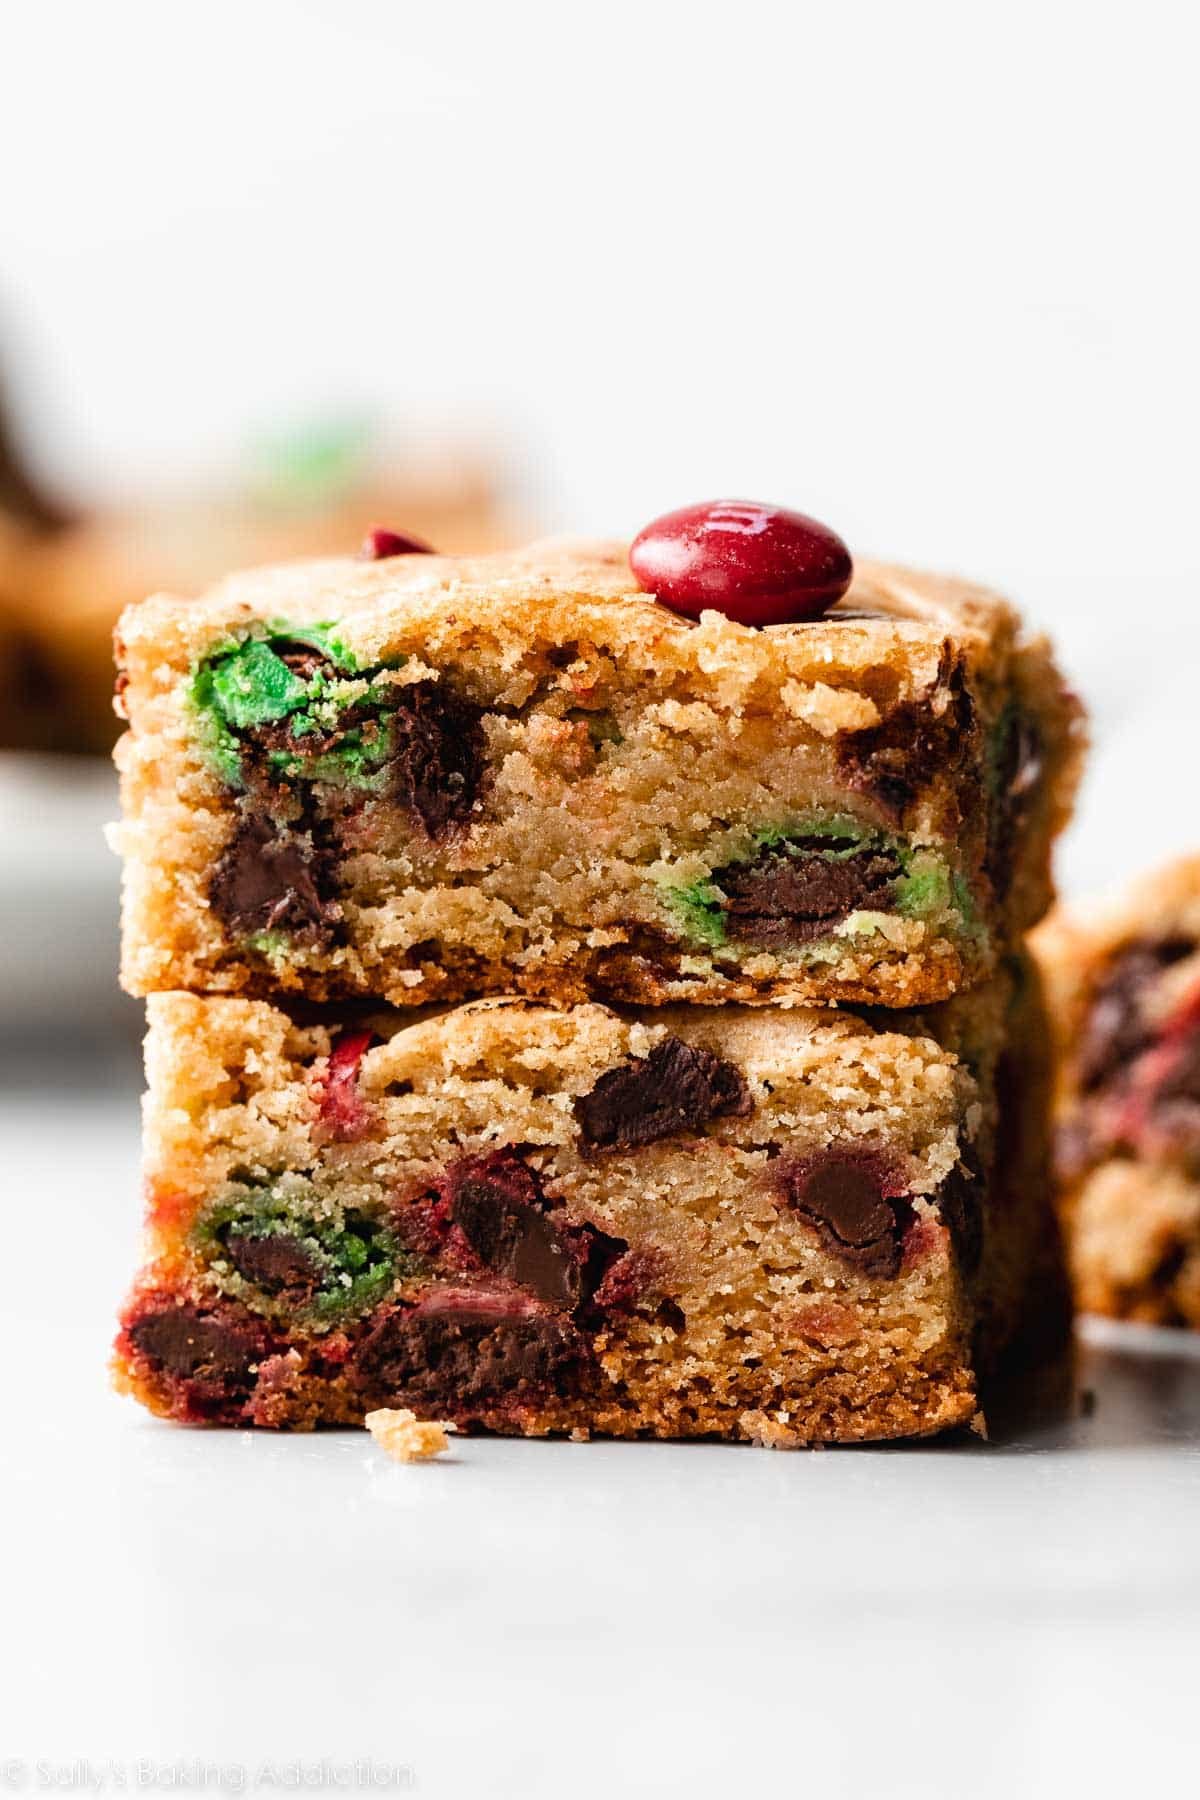
- Soft in the center, crisp around the edges.
- As easy as a box mix, but way more delicious.
- Add chocolate chips or white chocolate chips for texture variety.
- Choose your color M&Ms to match a holiday or theme.
Unlike these soft-baked M&M cookies, there’s no dough chilling or rolling dough into individual balls and baking in batches. The only waiting you’ll have to suffer through is for the pan to cool for 1 hour before you cut them into bars. (I know, I’m sorry.)
Easy Ingredients, No Mixer
Like with these favorite chewy chocolate chip cookies, using melted butter makes for the softest, chewiest bar cookies. I usually like to use melted butter in bar recipes like brownies and blondies because the bars taste chewy, not cakey. I tested this recipe with creamed softened butter, and the baked result ended up looking more like a puffy sheet cake.
Using melted butter also means you don’t need an electric mixer to make these bar cookies, AND you get that shiny, crackled look on top similar to brownies.
This recipe is similar to the Super Chewy Chocolate Chip Cookie Bars on page 28 of Sally’s Cookie Addiction, but I reduced the sugar a bit, since M&Ms are so sweet. We’re doing away with the extra egg yolk, and instead ensuring softness with an extra 1/2 teaspoon of cornstarch.
It’s also similar to my smaller recipe for chocolate chip cookie bars, but scaled up to make a full 9×13-inch pan. Here’s everything you need:

- Flour: All-purpose flour is the base of this recipe.
- Baking Soda: Baking soda helps these bars rise as they bake.
- Cornstarch: Cornstarch gives the cookie bars that ultra-soft consistency we all know and love.
- Salt: Salt adds flavor and balances the sweetness.
- Butter: Use melted butter in this recipe for the chewiest cookie bars. Because we use melted butter, there’s no need to get out your mixer.
- Sugar: I like to use a mix of brown sugar and white granulated sugar this recipe. More brown sugar than white granulated sugar promises an extra soft and chewy cookie bar because there’s more moisture in brown sugar.
- Eggs: Eggs bind everything together and add richness.
- Vanilla Extract: Pure vanilla extract adds flavor. If you have any homemade vanilla extract, use that!
- M&M Candies: Use regular-size, mini, or a mix of both. I also like to crush up about 1/4 cup of the M&Ms so some are broken, and sprinkle some on top. Totally optional—just adds some texture variety. You can even use different colors for different holidays. I love using red, white, and blue M&Ms for one of my 4th of July desserts.
- Chocolate Chips: I typically use semi-sweet chocolate chips, but feel free to swap them for white chocolate chips, peanut butter chips, or butterscotch chips.
Have I Mentioned No Dough Chilling?
Just melt, mix, press, and bake! Chant it in your head while you get out the ingredients. Melt, mix, press, bake! Melt, mix, press, bake! No dough chill! No dough chill!
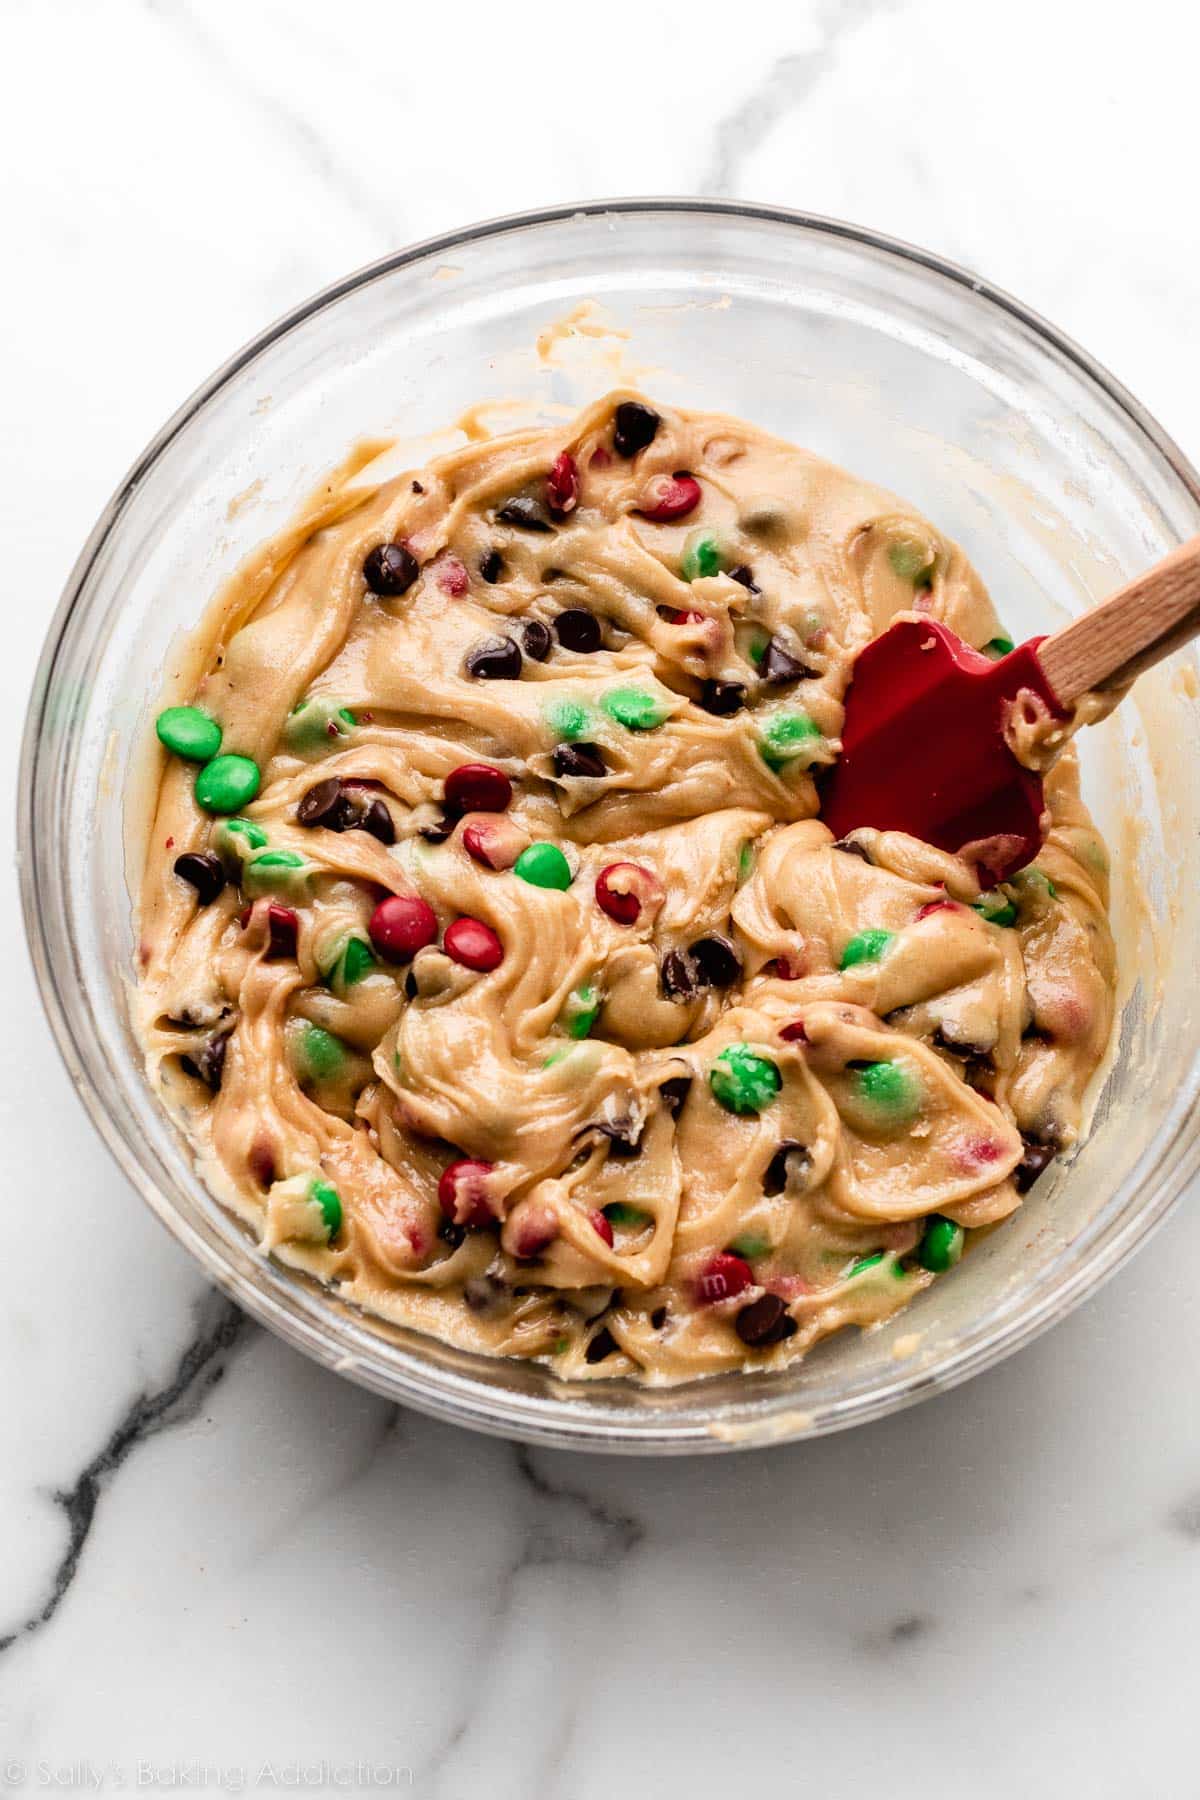
The dough will be slick from the melted butter, but should be easy enough to spread/press into the pan. In fact, it doesn’t even look like regular cookie dough and you might remember that from a batch of these chewy chocolate chip cookies. Before & after adding your add-ins:

I strongly recommend lining the baking pan with parchment paper (with overhang on the sides) to make cutting into bars easier. Spread the dough into the pan:
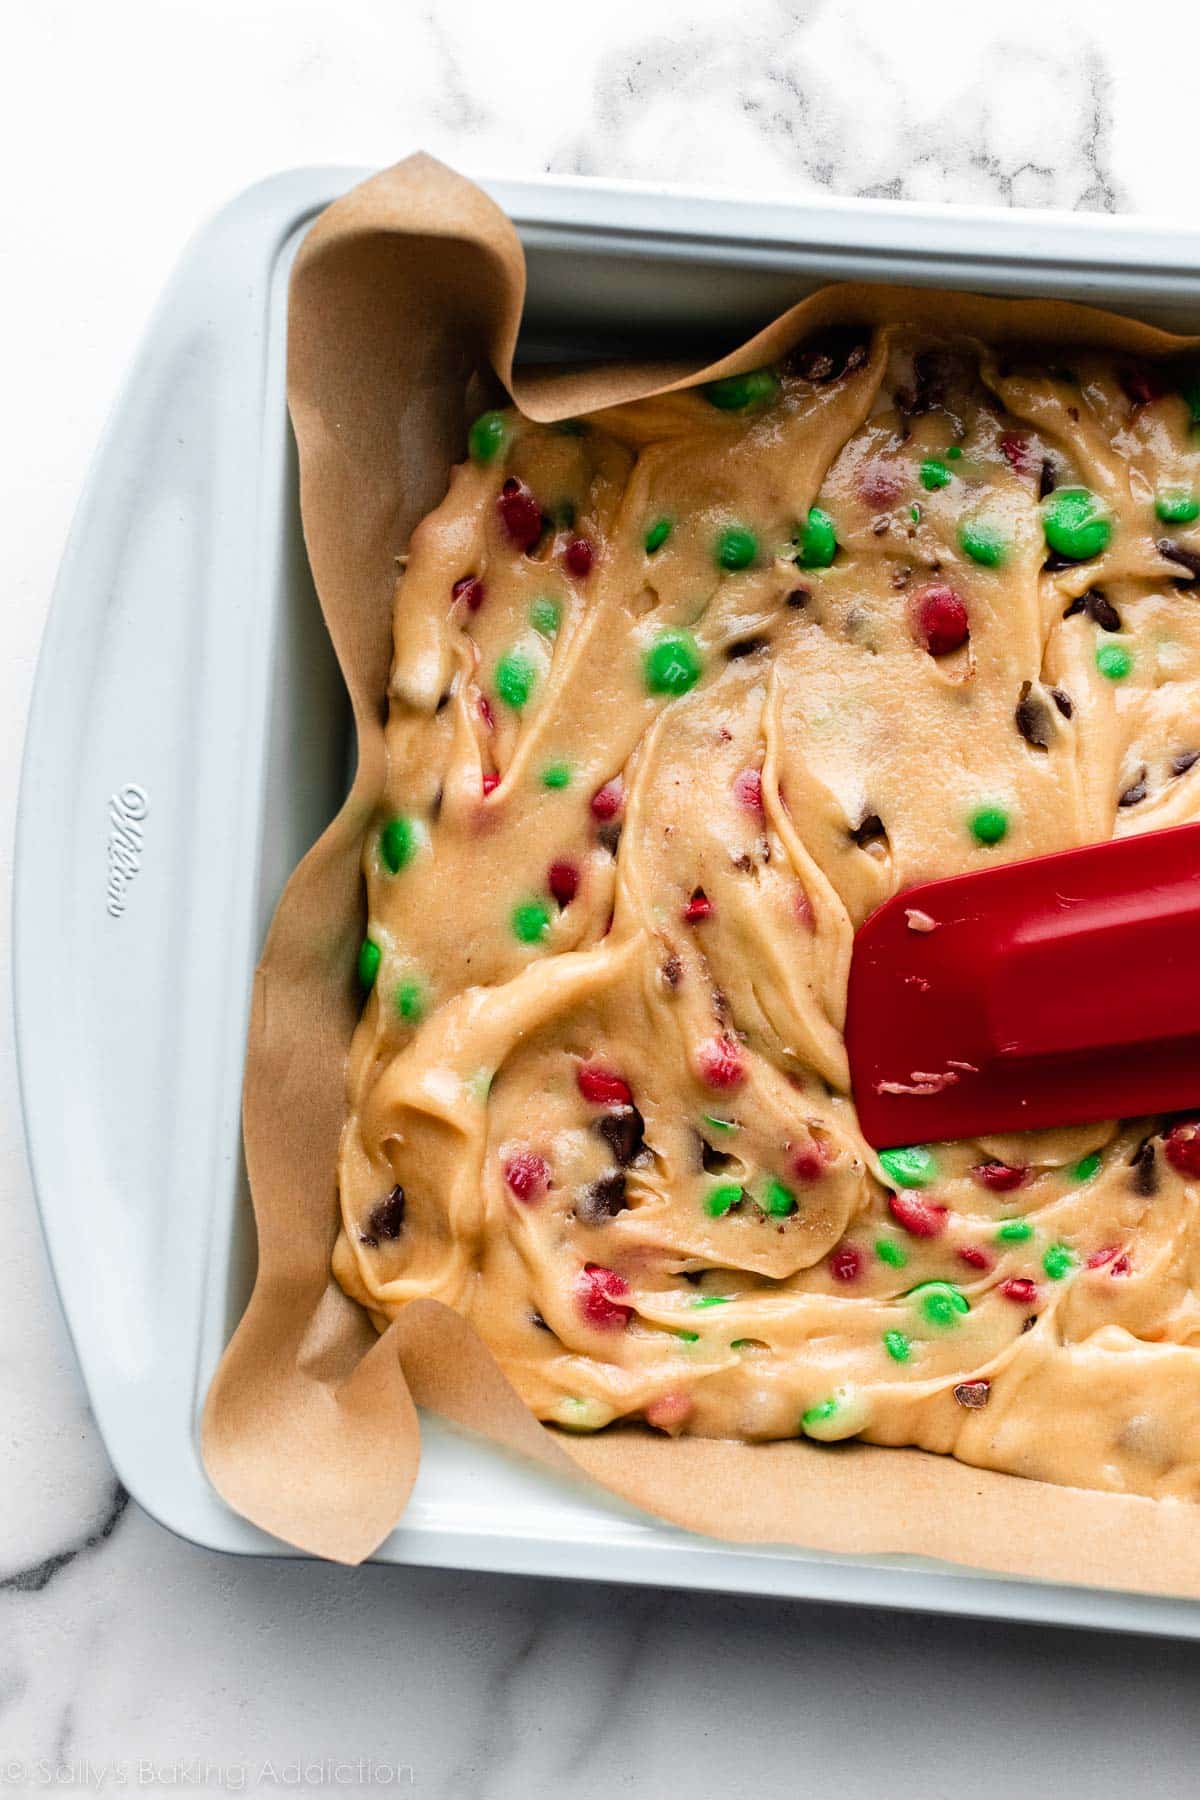
It’s almost gooey-like, so it’s easier to spread than regular, creamy-thick cookie dough. Bake for just 26–30 minutes and avoid over-baking:

I press a few more M&Ms and chocolate chips into the tops of the warm cookie bars, for looks. This is optional. Cool the bars for 1 hour inside the pan, then simply lift the whole thing out using the parchment paper lining. Set it onto a cutting board and slice. They’ll still be a bit warm and that’s fine!
Success Tips for M&M Cookie Bars
- Line the pan so you can easily remove the bars as a whole and slice them, just like I recommend when making rice krispie treats and homemade brownies, too.
- Don’t over-bake. Check the bars around 24 minutes into baking, and if you notice they’re browning too much, tent foil over the pan for the remaining bake time.
- Wait at least 1 hour to slice, for neat slices.
Can I Make These With Brown Butter?
Yes! If you want to amp up the depth of flavor by using browned butter, you absolutely can! My team and I have tested it, and you need to start with an extra 3 Tablespoons of butter to make up for the moisture loss that occurs during browning. Otherwise, the bars will taste dry.
Feel Free to Pipe Some Buttercream Decor
These M&M cookie bars are fabulous on their own, but then again, a little frosting is always a good idea. My favorite chocolate buttercream is far from basic; it’s incredibly silky, smooth, and rich. Even though it’s wonderfully creamy, it holds its shape well, and is perfect for piping. It makes a delicious and beautiful finishing touch on this chocolate chip cookie cake, and would have the same effect on these cookie bars if you want to add some flair!
This recipe is part of my annual cookie countdown called Sally’s Cookie Palooza. It’s the biggest, most delicious event of the year! Browse dozens of cookie recipes over on the Sally’s Cookie Palooza page.


Soft M&M Cookie Bars
- Prep Time: 15 minutes
- Cook Time: 27 minutes
- Total Time: 1 hour, 40 minutes (includes slight cooling)
- Yield: 24 bars
- Category: Dessert
- Method: Baking
- Cuisine: American
Description
Think of these bars as no-chilling, no-rolling EASY M&M cookies! Using melted butter, more brown sugar than white sugar, and a touch of cornstarch guarantee the absolute softest, chewiest M&M cookie bar texture.
Ingredients
- 2 and 3/4 cups (343g) all-purpose flour (spooned and leveled)
- 1 and 1/2 teaspoons cornstarch
- 1 teaspoon baking soda
- 1/2 teaspoon salt
- 1 cup (16 Tbsp; 226g) unsalted butter, melted & cooled for just 5 minutes*
- 1 cup (200g) packed light or dark brown sugar
- 1/2 cup (100g) granulated sugar
- 2 large eggs, at room temperature
- 2 teaspoons pure vanilla extract
- 1 and 1/4 cups (about 260g) mini or regular-size M&Ms
- 3/4 cup (135) semi-sweet chocolate chips
Instructions
- Preheat the oven to 350°F (177°C). Adjust oven rack to the center rack position. Line the bottom and sides of a 9×13-inch metal or glass baking pan with parchment paper, leaving an overhang on the sides to easily lift the bars out of the pan. Set aside.
- Whisk the flour, cornstarch, baking soda, and salt together in a large bowl. Set aside.
- In a medium bowl, whisk the melted butter, brown sugar, and granulated sugar together until no brown sugar lumps remain. Whisk in the eggs and vanilla extract. Pour this into the flour mixture and mix together with a large spoon or silicone spatula. The dough will be very soft, slick, and thick. Fold in the M&Ms and chocolate chips. The M&Ms and chips may not stick to the dough because of the melted butter, but do your best to combine them.
- Transfer dough to the prepared baking pan and press/smooth into an even layer. Bake for 26–30 minutes or until lightly browned on the sides and top and a toothpick inserted in the center comes out mostly clean with a few moist (not wet) crumbs. Do not over-bake. If you notice the bars browning too much before 25 minutes, tent the pan with foil. Bars puff up in the oven, but settle as they cool.
- Allow the bars to cool in the pan set on a wire rack for at least an hour. While they’re still warm, I like to press a few more M&Ms and chocolate chips into the tops, just for looks (optional!). Once relatively cool, lift the bars out of the pan using the overhang on the sides and cut into squares.
- Cover leftover bars and store at room temperature for up to 1 week.
Notes
- Make Ahead & Freezing Instructions: You can make the cookie dough and chill it in the refrigerator for up to 3 days or freeze for up to 3 months. Allow to come to room temperature and continue with step 4. Baked and cooled cookie bars freeze well for up to 3 months. Thaw bars overnight in the refrigerator and bring to room temperature before serving.
- Special Tools (affiliate links): 9×13-inch Glass Baking Pan or Metal Baking Pan | Parchment Paper | Glass Mixing Bowls | Whisk | Silicone Spatula | Cooling Rack
- Cornstarch: If you don’t have cornstarch, you can leave it out. The cookie bars will still be soft.
- Butter: Avoid letting the melted butter cool for too long, otherwise your dough will be crumbly instead of soft (and your cookie bars can end up cakey). You want it still warm, but not hot enough to begin cooking the eggs.
- Can I Use Browned Butter? Yes! If you want to amp up the depth of flavor by using browned butter, you absolutely can! My team and I have tested it, and you need to start with an extra 3 Tablespoons of butter to make up for the moisture loss that occurs during browning. Otherwise, the bars will taste dry.
- M&Ms: You can use regular-size, mini, or a mix of both. I like to crush some of them, too, to sprinkle on the top before baking. Totally optional!
- Do I have to add chocolate chips? You can skip the chocolate chips. If you skip them, increase M&Ms to 1 and 1/2 cups (about 300g). You could also replace the chocolate chips with white chocolate chips, butterscotch chips, or peanut butter chips.
- 9-Inch Square Pan: To make a smaller 9-inch pan of cookie bars, use this similar scaled-down recipe for chocolate chip cookie bars. For the add-ins, use 1 cup (200g) of M&Ms and 1/2 cup (90g) chocolate chips.


Reader Comments and Reviews
Love this recipe but the dough is super dry. It’s more like a regular cookie dough then a creamy mix. Seems like too much flour. Did it twice and second time I did spoon and level measure, first time I did not. But seemed like more flour the second time then the first. Results were still good but I wanted to verify the flour is 2 3/4 cups and not 2 1/4.
Hi Debra, 2 3/4 cups is correct. Do you happen to have a kitchen scale? That’s really the most accurate way to measure since measuring flour by volume is so tricky and easy to pack in too much.
I love to cook but baking is sort of tricky for me. This recipe is an absolute winner! My whole family loves it. I love that i have almost every ingredient in my pantry already. Using parchment paper makes this so simple to cut when done.
Another fail proof, amazing recipe. So good!!
I’ve used this recipe multiple times and like it, but this last time they didn’t rise and came out looking undone (pale)
I weighed all of my ingredients and checked afterwards to confirm I used all of them. What would you guess may have gone wrong?
Hi Lydia! Perhaps an ingredient was mis-measured? Could they have been under-baked, or perhaps your baking soda is getting old? Those are our best guesses – glad you usually enjoy the recipe!
If I were to brown the butter, should I let it cool for 5 minutes, like I would if I were using regular melted butter, or should I let it cool for a shorter or longer time?
Hi CH, yes, you can let the browned butter cool for 5 minutes before using.
I followed the recipe exactly! It’s perfect.
Came out perfectly. So delicious. Great for a group. Yum!
I’ve made this twice now. Once for Xmas Eve and again today for my sons 8th birthday in lieu of a cake. Its just a perfect, easy and delicious recipe. My kids now know to ask, “Is it Sally’s?” And if I say yes we all know its going to be delicious! I can’t recommend enough!
Can i reduce the sugar? Brown on 130 Gramm and white one 65 Gramm?
These were crowd pleasers – and so easy to customize the M&M colors for holiday themed treats. We loved it and followed the recipe exactly.
For ages I’ve been doubling the chocolate chip cookie bars fo a 9×13 – I’m so happy that tonight I saw your note and made this recipe instead! So soft and lovely.
I don’t normally do reviews, but this recipe deserves it! I have made these cookie bars multiple times, and every time they get devoured so fast! My sisters say it’s their favorite recipe, and my parents (who never eat what I bake) tried it, and loved them! I was so shocked, because this recipe is so easy. Thank you Sally for this amazing recipe!!
Also, I love baking them just with semi-sweet chocolate chips!!
Hello! When I tried making these I actually halved all the measurements to make a smaller portion (yes, i have rechecked and correctly calculated all of them) but the dough ended up being a more cookie dough texture rather than a bit watery and soft. Is this normal or was it a mistake on my part?
Hi NL, how are you measuring your flour? Be sure to spoon and level (or use a kitchen scale) to ensure the flour isn’t over measured, which can lead to a thicker dough. Is the melted butter cooling off for too long? That can also cause the dough to be less slick. We hope you enjoyed the cookie bars!
Seems funny to leave a review for cookie bars, BUT this one deserves it. I followed this recipe as written and used only chocolate chips. The bars are so delicious with a perfect texture. It is a no fail recipe if you follow it. Easy to make, easy to clean up, and easy to eat. Yum!
Hey, just wondering if i can halve this recipe and bake it in 8×8/9 inch pan?
Hi Lily! See recipe notes: To make a smaller 9-inch pan of cookie bars, use this similar scaled down recipe. For the add-ins, use 1 cup (200g) of M&Ms and 1/2 cup (90g) chocolate chips.
We love this recipe but have a child that has recently had to go gluten free, do you happen to know if this works gluten free?
Hi Leah, we haven’t tested this recipe with gluten free flours but please let us know how it goes if you do!
These are so good. I measured everything with a scale and they came out perfectly.
Mine looks a little under but idk if it’s supposed to look that way because it’s soft-baked and it has melted butter. The toothpick came out clean too. Is it ok to serve?
Hi Jenny! These are a soft cookie bar, if you’ve baked them for 26–30 minutes, they should be fine! You don’t want to over-bake them. See the photos of the baked bars above in the post!
Loved it! I added a layer of frozen peanut butter into the middle of the brownie before baking it and it was delicious. Everyone loved it.
Next time I might add a little more salt though
I am in love with these bars! My family loves them & my coworkers request them all the time. The recipe comes together so quickly & I love that I don’t have to use a mixer. Thank you Sally!
I was a little bit nervous because of all of the comments saying these didn’t turn out, but ours came out perfect! And my seven year-old did the measuring, so it wasn’t because we were perfectly precise. I realized when we went to make them that I’d accidentally bought peanut butter M&Ms. I just made them with all chocolate chips instead and then we put red and green sprinkles on top before baking so they’d still look festive. They were a bit hit at the party!
I’ve made these with peanut butter M&Ms & they were delicious 🙂
Hi! For the soft mnm slice I was wondering what the measurements are!
Hi Charlotte, see gray recipe card towards the bottom of the post for full ingredient amounts and instructions. You can get there by scrolling towards the bottom or by clicking the pink Jump to Recipe button at the top of the page.