Pavlova

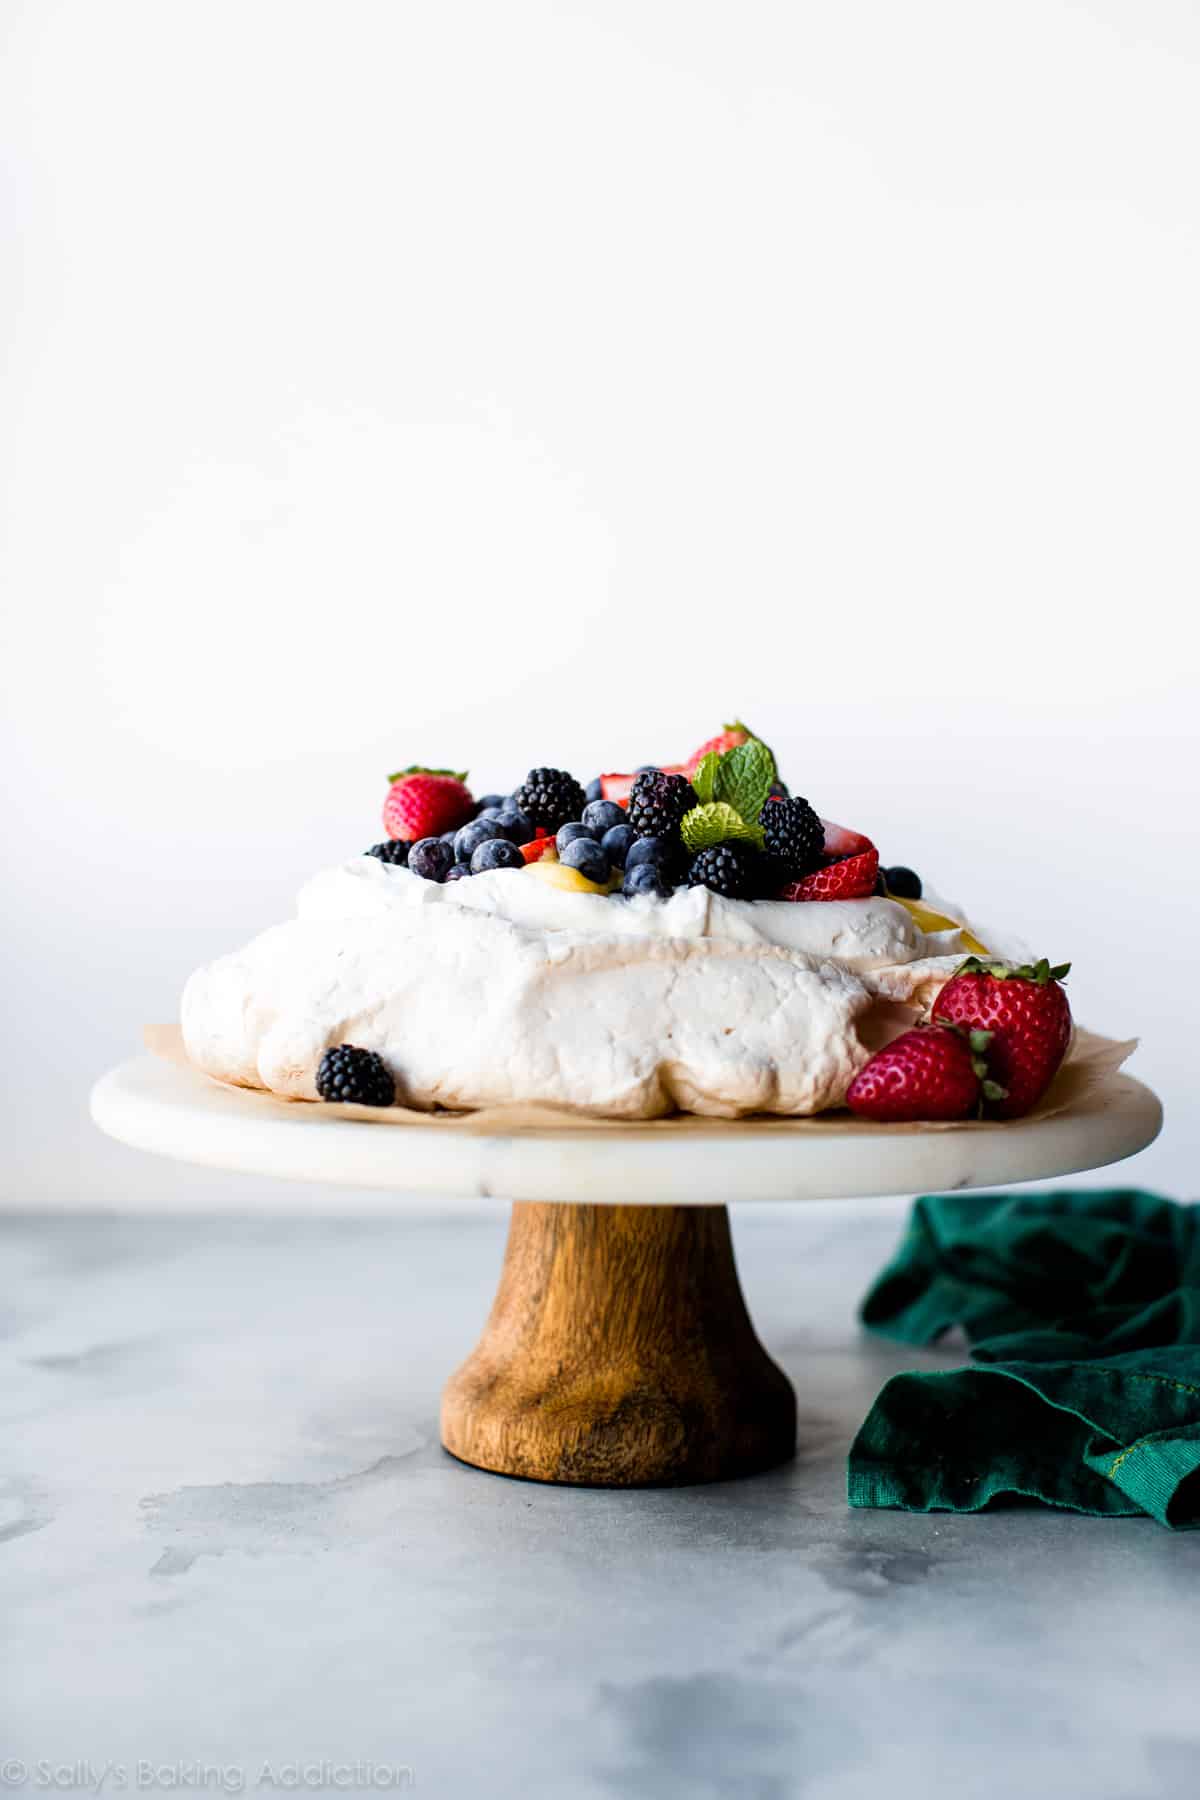
pavlova with fresh fruit topping on a marble and wood cake stand

Another fresh and exciting recipe for you!

What is pavlova? Pavlova is a dessert popular in New Zealand and Australia. It’s not as common here in the states, but I hope to help change that! A texture lover’s dream come true, pavlova is made from egg whites that are slowly baked in a relatively cool oven. The egg whites take on a chewy-crisp texture on top, a soft marshmallow texture inside, and a crunchy crisp texture around the edges. That’s three completely different textures in one single bite. The crunchy edges are just like meringue cookies.

Pavlova loves to be dressed up with assorted toppings, mainly fresh whipped cream and piles of fresh fruit. Naturally gluten free, pavlova is light, sweet, and screams warm weather favorite. Happy spring, my friends, we’re making PAVLOVA!!
pavlova on a marble and wood cake stand

Video Tutorial: How to Make Pavlova

To obtain the unique pavlova texture, you must adhere to an exact recipe. While it’s fun to play around with ingredients, pavlova is not the time to stray from what’s listed. It’s picky, but picky doesn’t mean difficult. In fact, you only need 5 ingredients to make pavlova and I bet you have each in your kitchen right now:

  • Egg whites
  • Sugar
  • An acid such as cream of tartar or vinegar
  • Cornstarch
  • Vanilla extract

Let me explain why these ingredients are used.

Pavlova Ingredients

  1. Egg whites – beaten into stiff peaks, egg whites are the base and volume of pavlova.
  2. Sugar – in addition to sweetening the dessert, sugar stabilizes the egg whites by holding them together both in the oven and as the whole pavlova cools. Without sugar, the protein molecules (science!) in egg whites will collapse. Additionally, sugar helps achieve the delightfully crisp texture. (Sugar is so much more than a sweetener in our baked goods.) Speaking of sugar, make sure that you use superfine or castor sugar. Just pulse sugar a few times in a food processor to reduce the size of the crystals.
  3. Acid – you can use 1/2 teaspoon of cream of tartar or 1 teaspoon white, apple cider vinegar, or even lemon juice. The pavlova will NOT taste like vinegar, I promise. The acid helps the egg whites hold onto air and, like the sugar, helps prevent the egg whites from collapsing. I tested with both and I actually prefer cream of tartar. I found that my pavlova spread a bit more when I used liquid acid.
  4. Cornstarch – I tested pav with and without cornstarch. I found that the center was fluffier and more marshmallow-y with cornstarch. Then I tested with 1 teaspoon cornstarch and 2 teaspoons cornstarch. I found it was a little chalky tasting with 2 teaspoons. I’m sticking to 1 teaspoon.
  5. Vanilla extract – purely for flavor!

(Not sponsored by any of these companies, but here’s exactly what I use.)
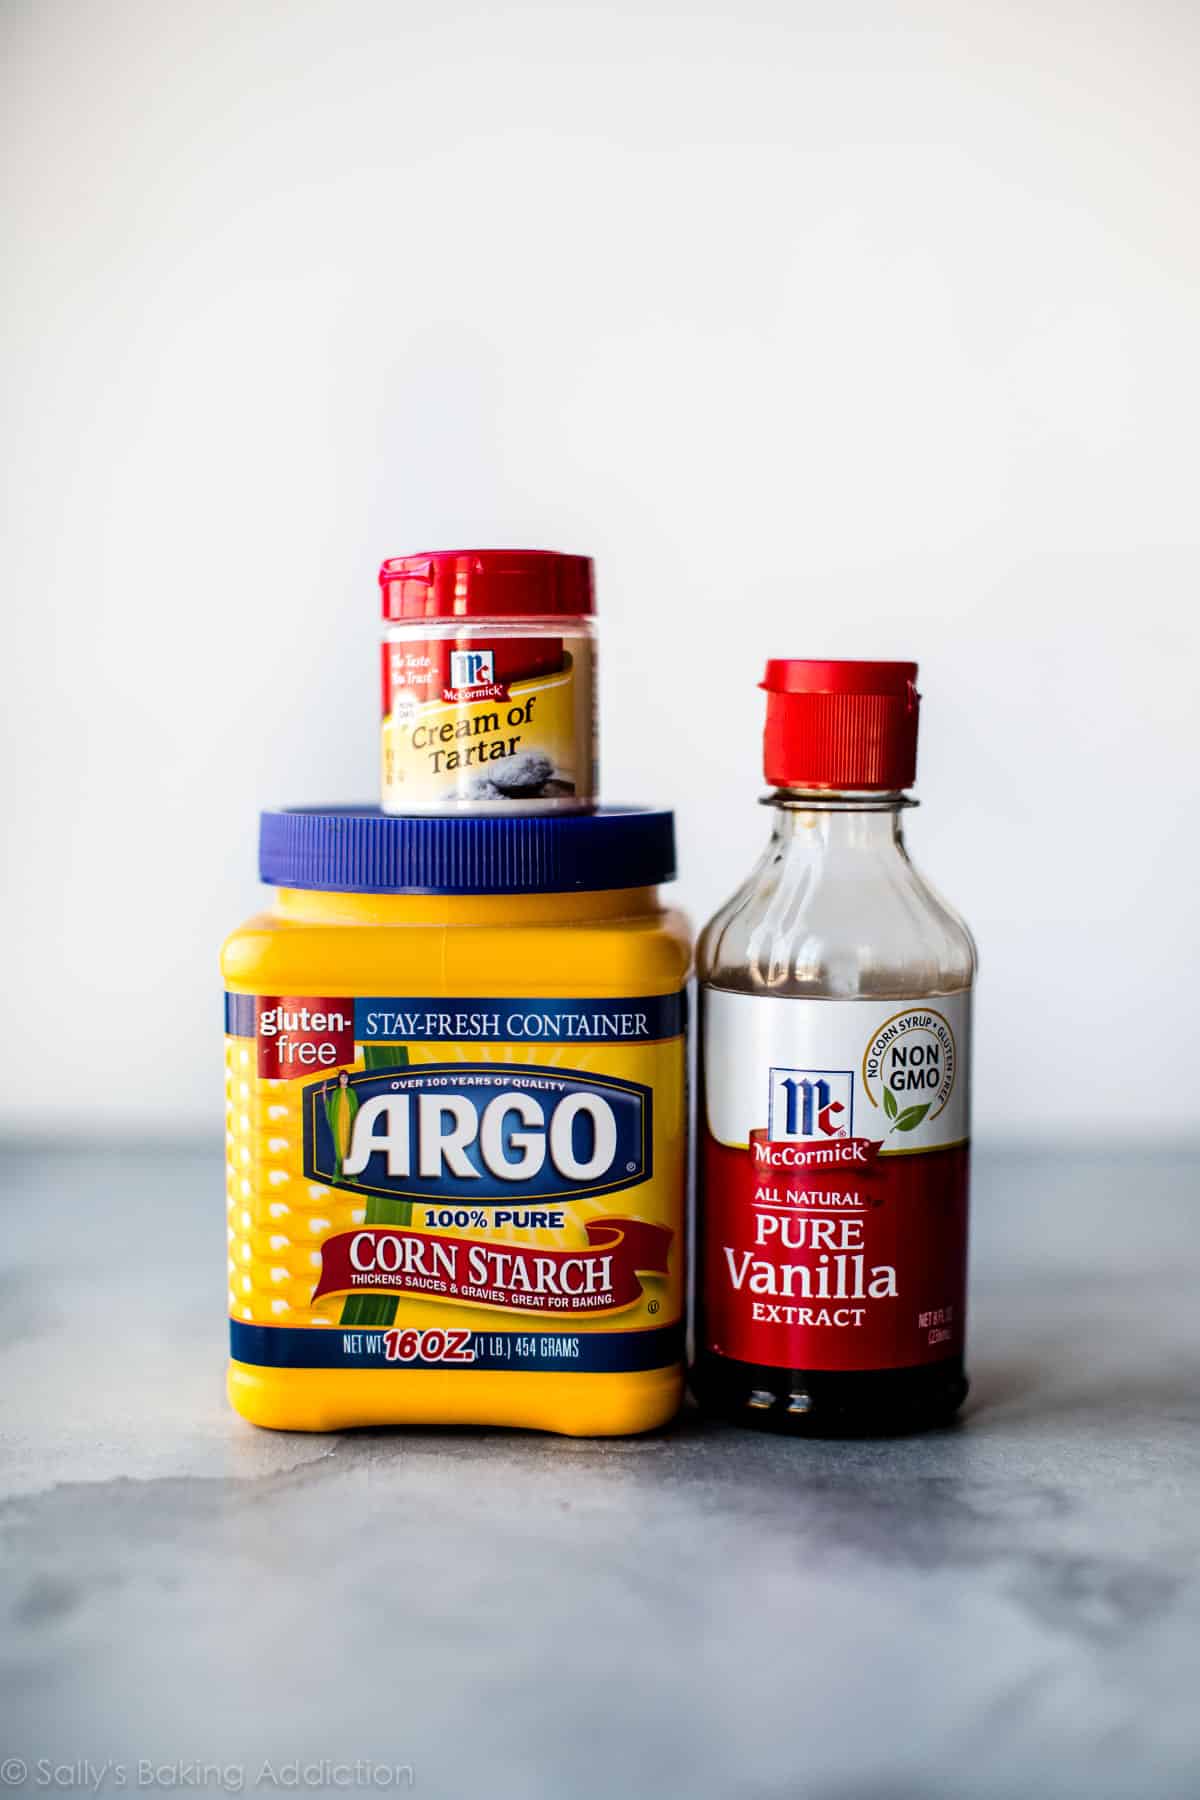
ingredients for pavlova including containers of cornstarch, cream of tartar, and vanilla extract

Ingredients are simple and method is effortless. There’s plenty of downtime when making pavlova. All you really have to do is watch it beat in your stand mixer then check on it in your oven. Kick your feet up!
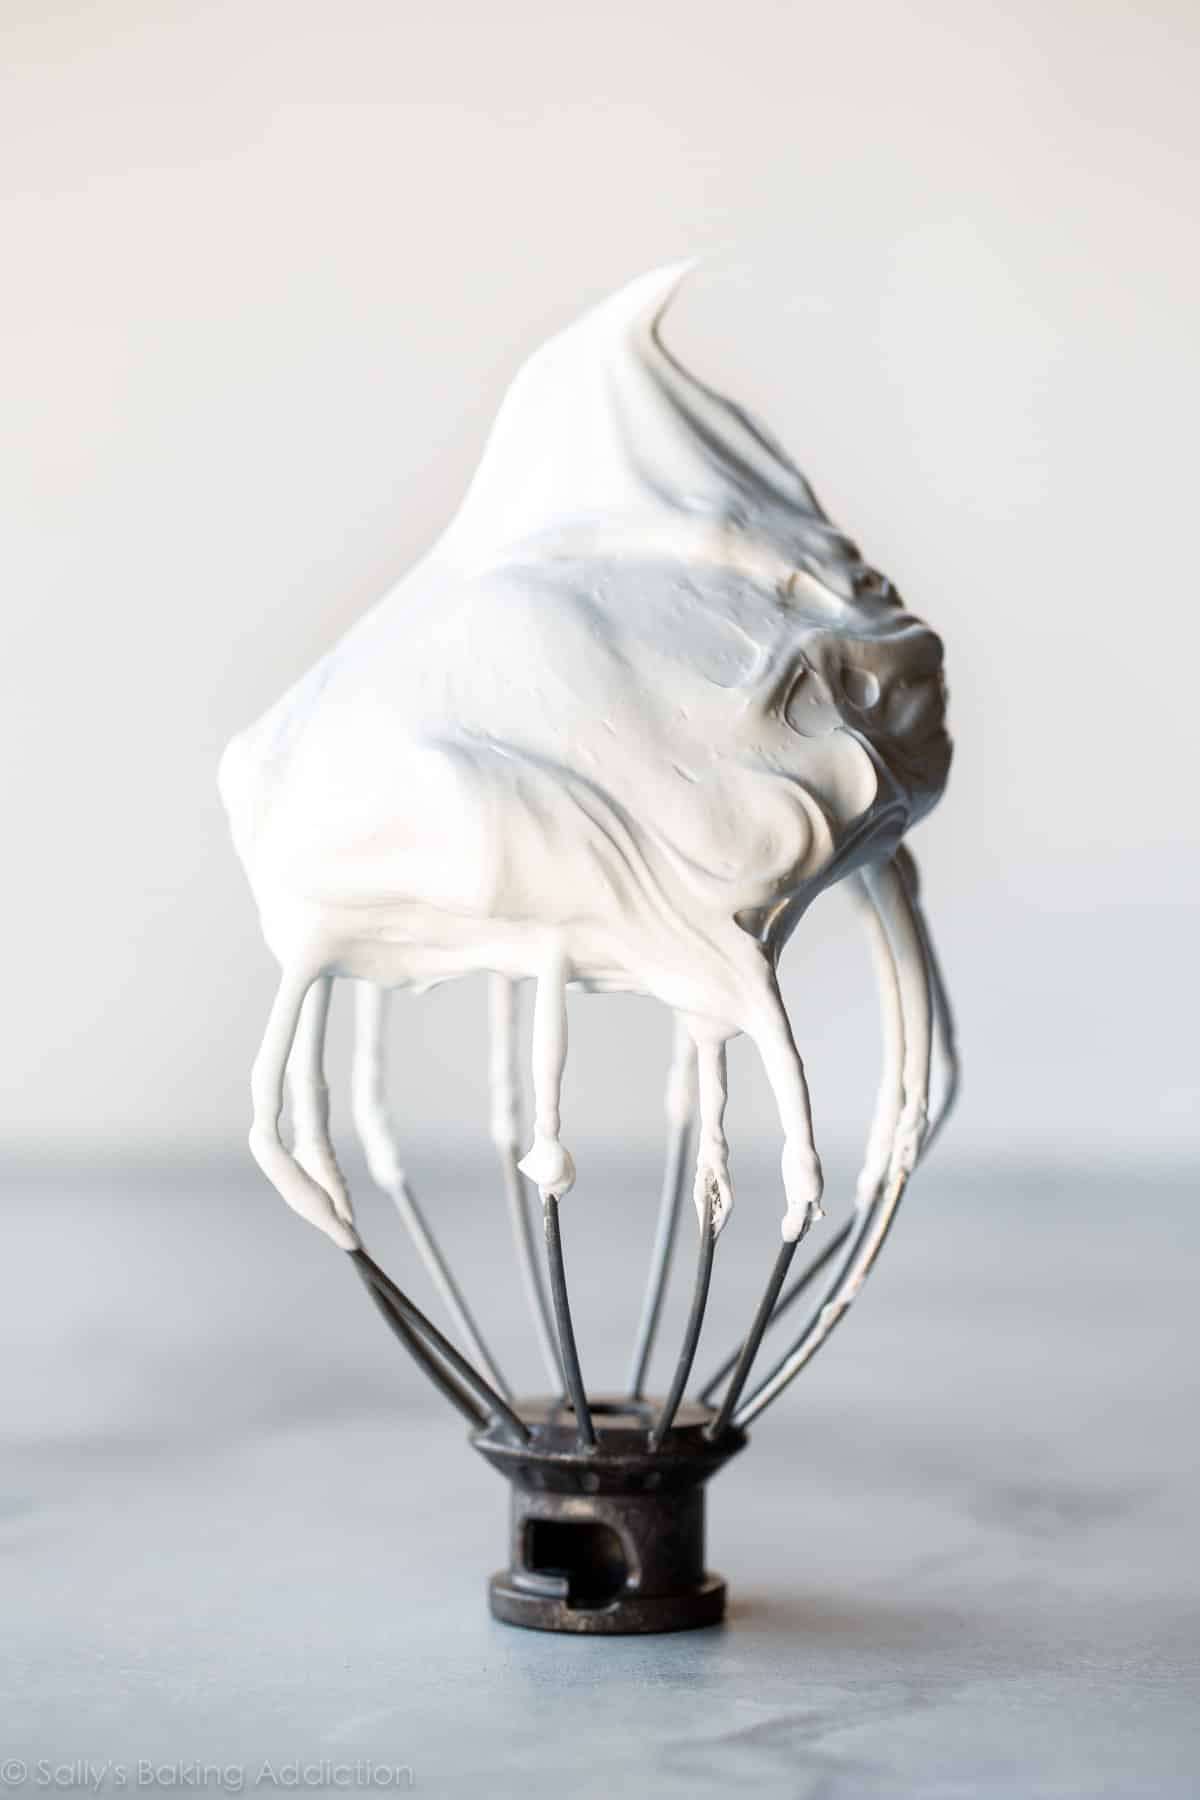
pavlova mixture on a whisk attachment
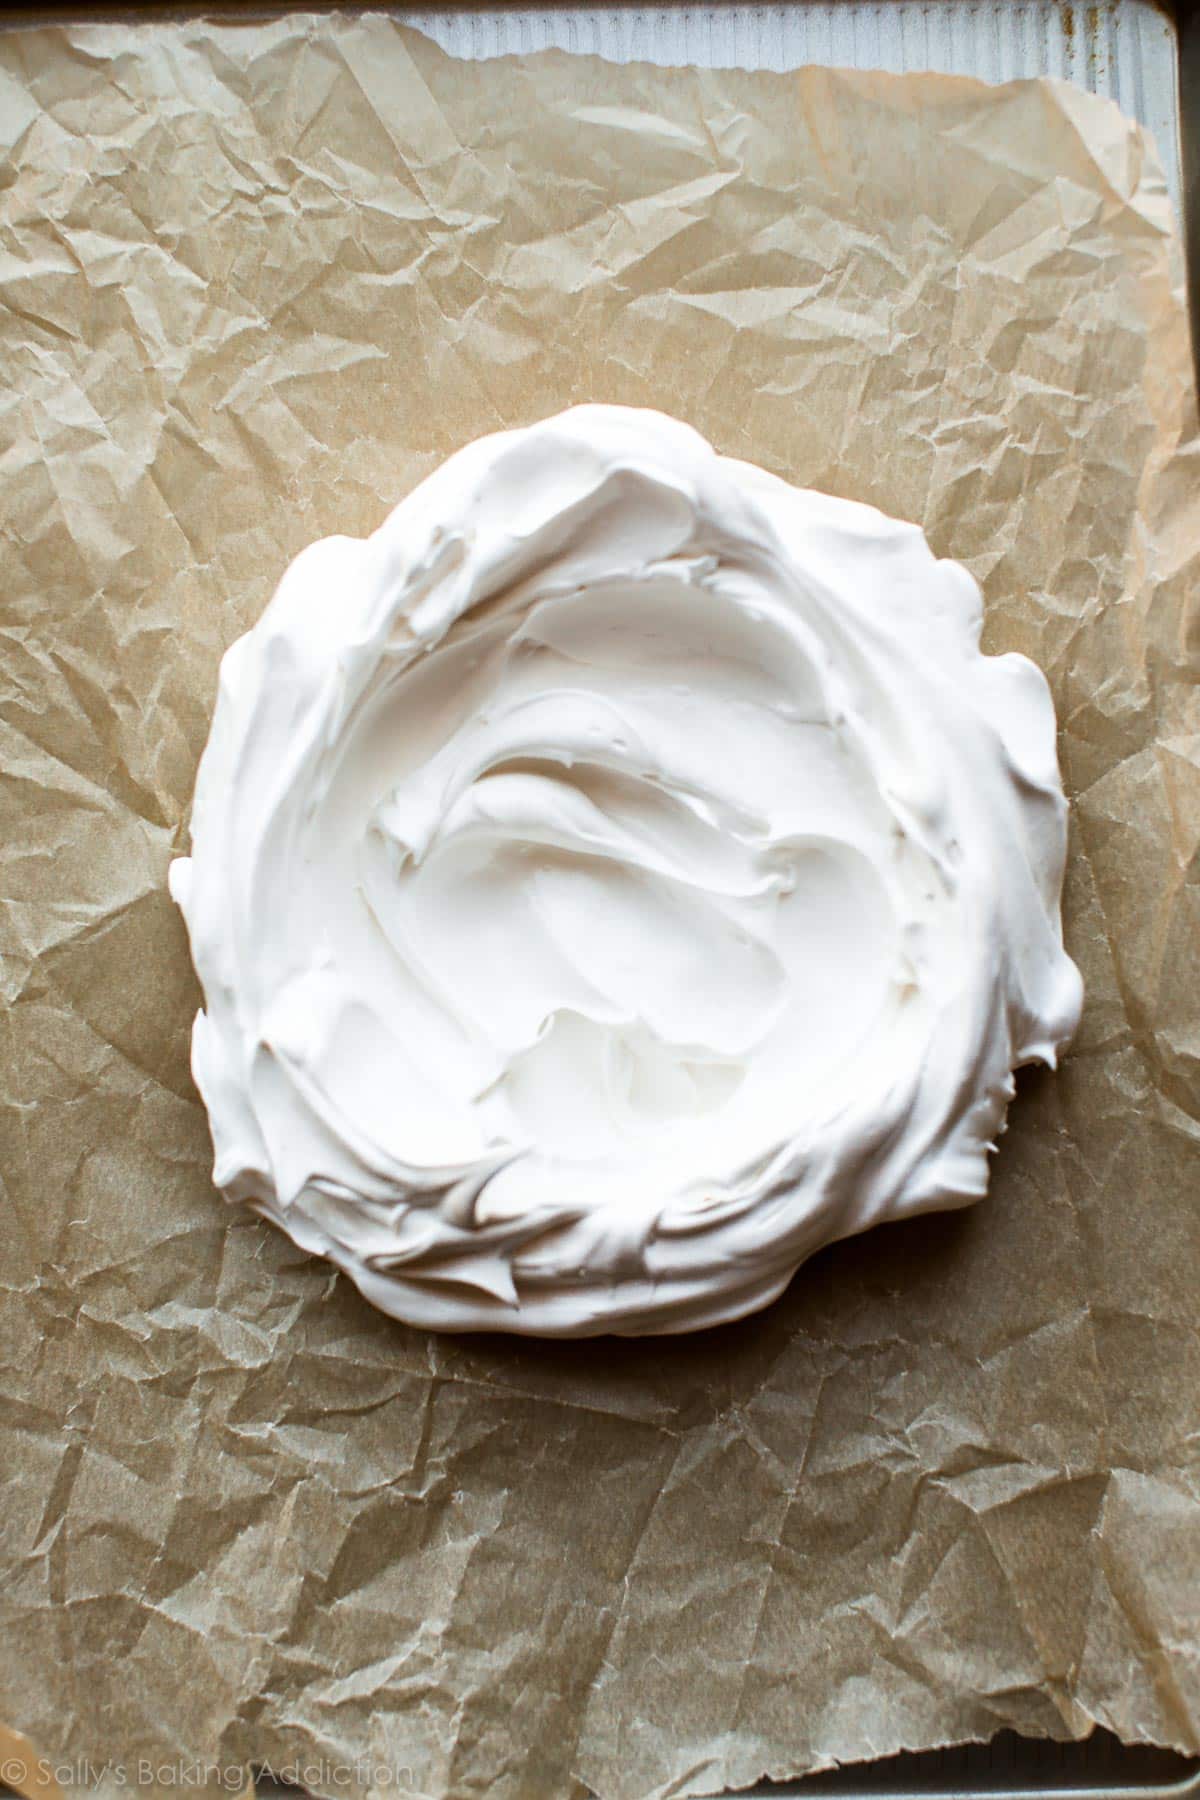
pavlova spread onto a baking sheet before baking

Just like our chocolate swirled meringue cookies and the meringue on our lemon meringue pie, whip the egg whites into super stiff peaks. Stiff enough that you can hold the whisk over your head and feel confident that the whipped egg whites won’t drop. ๐Ÿ˜‰ Then you’ll spread the pavlova mixture onto your lined baking pan. You can use parchment paper or a silicone baking mat. Do not grease the baking panโ€”use a nonstick surface instead. Spread it into a circle, about 8-9 inches in diameter. You can eyeball it or trace one with a pencil. I just eyeball it. Like I did in the lemon meringue pie video, use the back of a spoon to create decorative peaks. Make sure the edges are tall and you have a nice dip in the center. That’s were we’ll pile our whipped cream and fruit!

Alternatively, you can make mini pavlovas. Here I piped the mixture into 6 mini pavlovas using Ateco 849. A piping tip isn’t necessaryโ€”you can just spoon it on. Again, make sure you leave a dip in the center to hold the toppings.
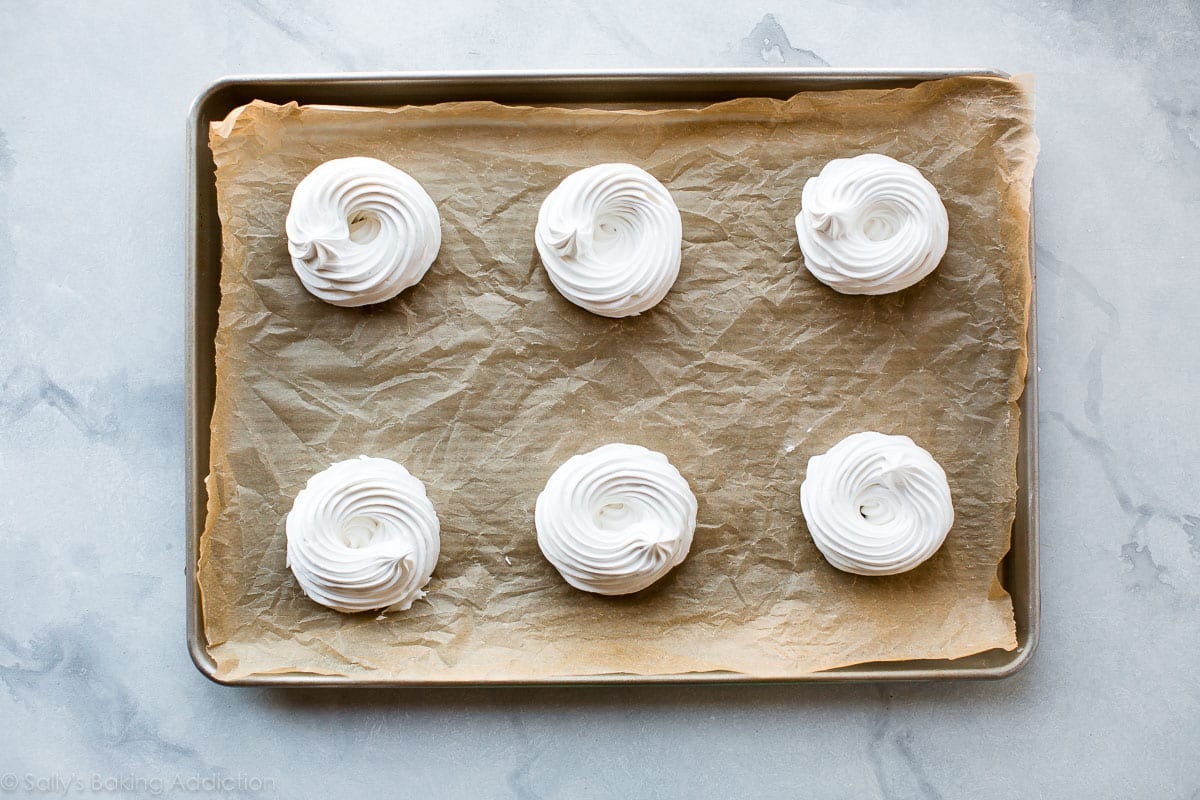
mini pavlovas on a baking sheet

A relatively cooler oven is imperative for properly cooking your pavlova, but let’s start the pavlova at 350ยฐF (177ยฐC) then reduce it down to 200ยฐF (93ยฐC). I do this to help “set” the outer crust quickly. This trick helps reduce spread.

A properly cooked pav is pale in color. Cracks and bumps are par for the course, but the pavlova shouldn’t completely deflate. Especially if you follow the precise measurements and instructions in the recipe. You can help avoid too many cracks by cooling the pavlova in the oven. The sudden change of temperature (inside the oven to outside the oven) shocks the pavlova, so it’s best to cool inside the cooling oven.

Make sense?
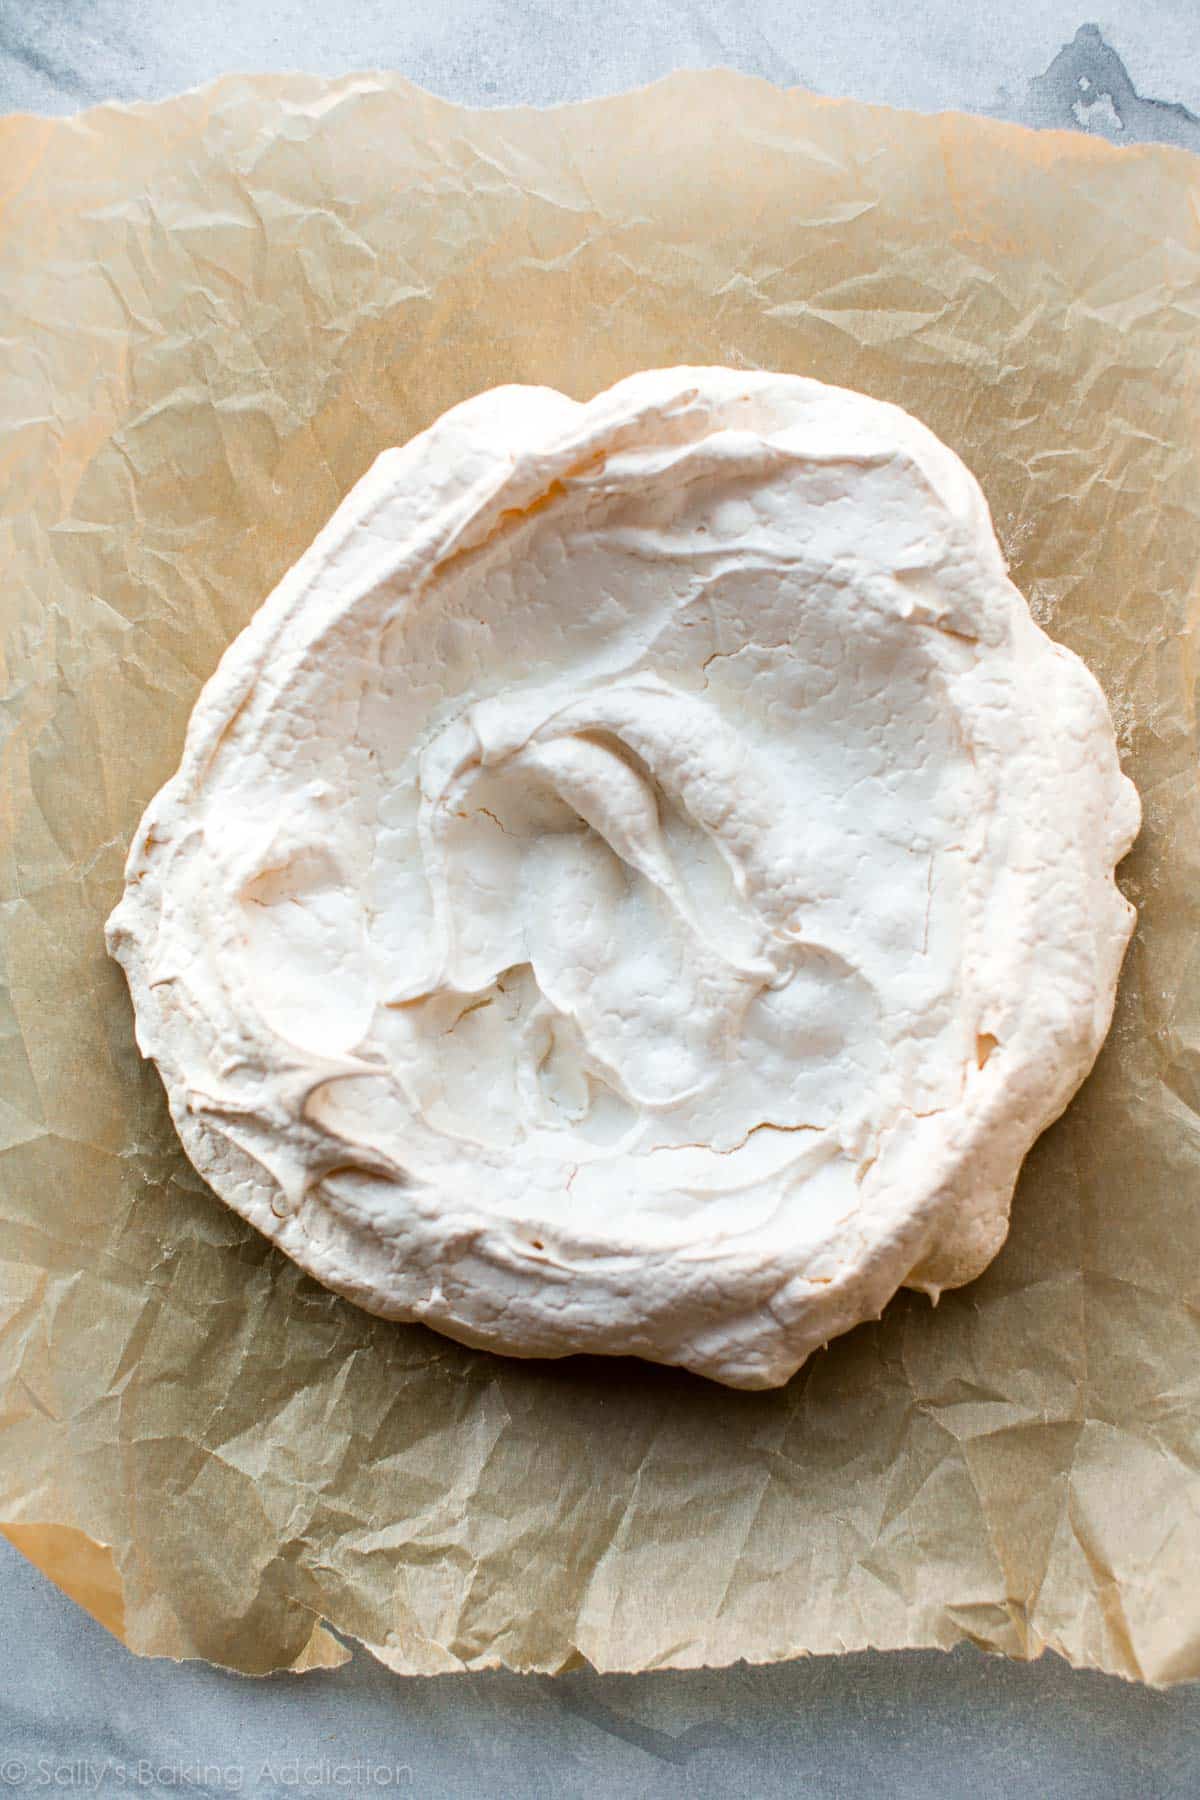
pavlova spread onto a baking sheet after baking
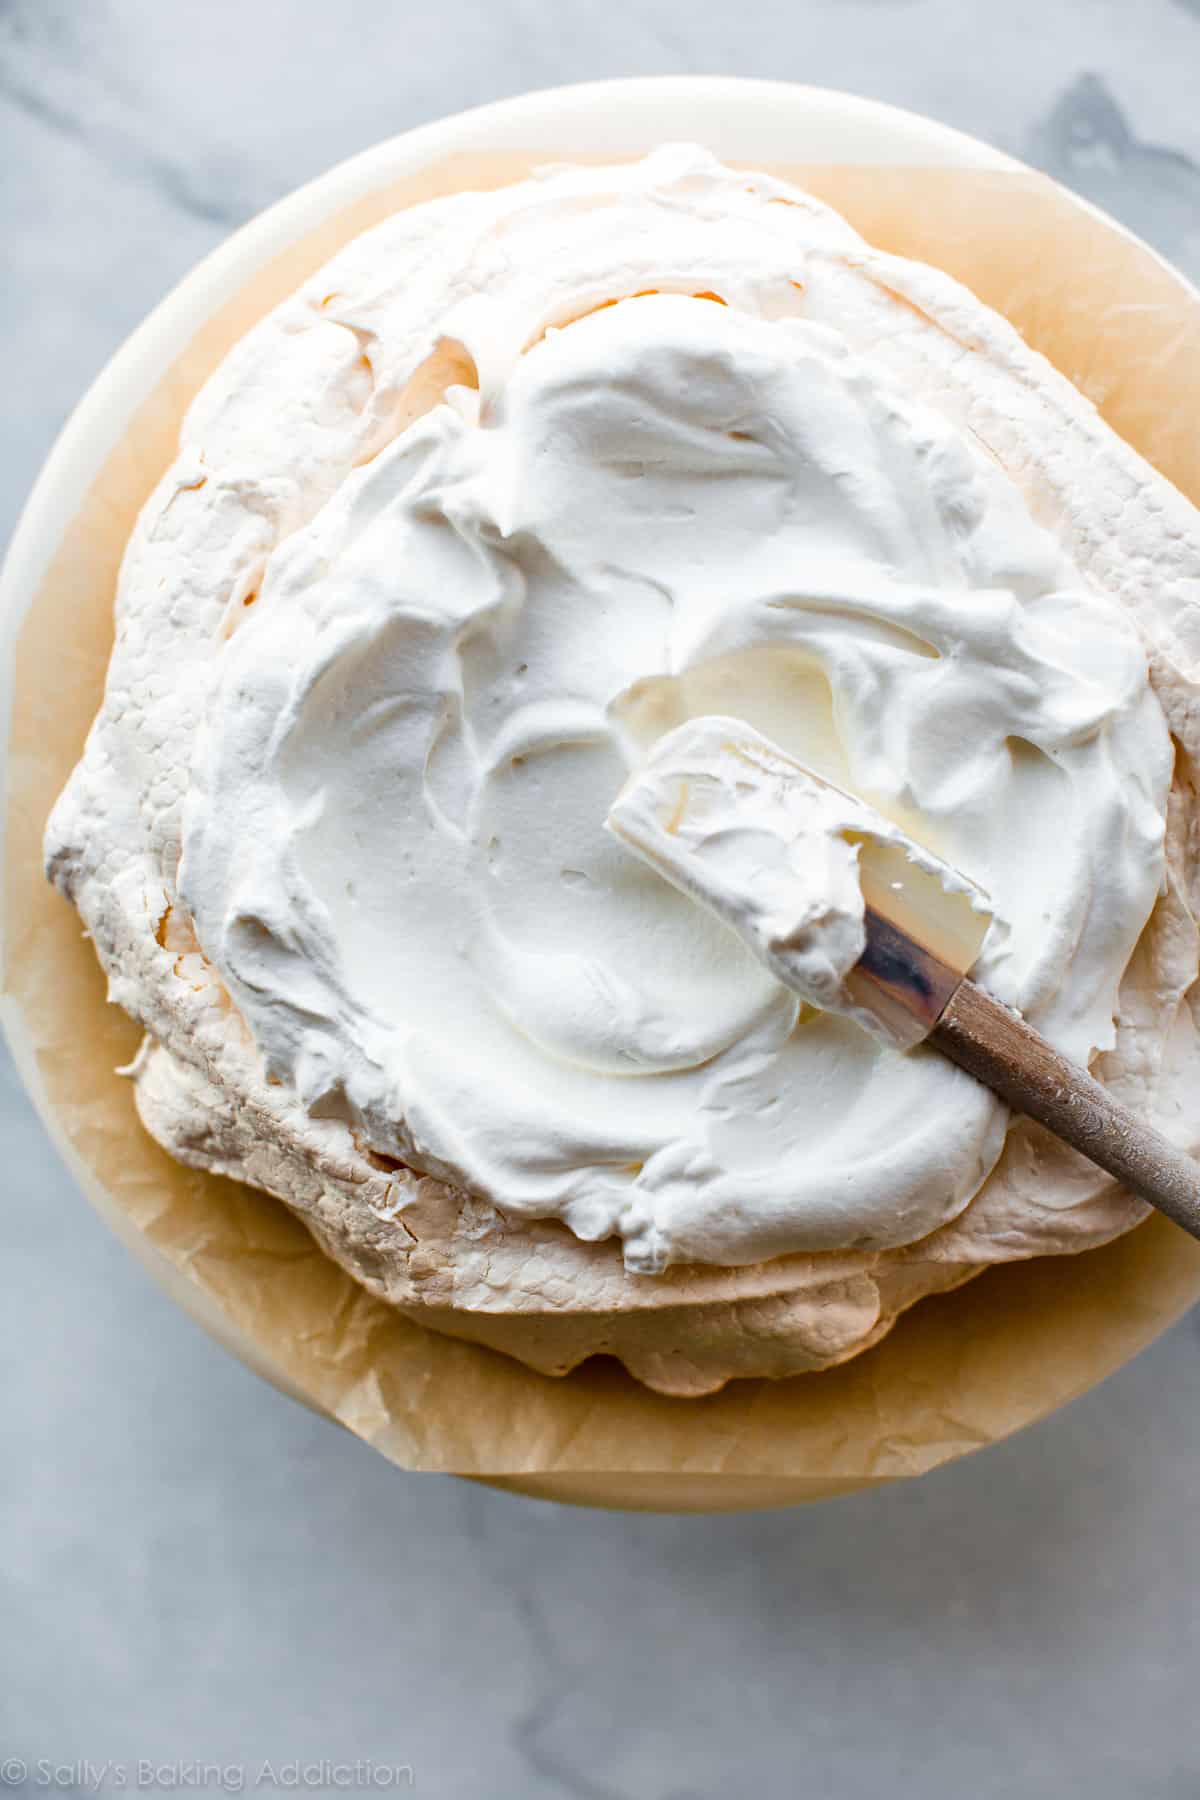
overhead image of spreading whipped cream onto baked pavlova on a marble cake stand
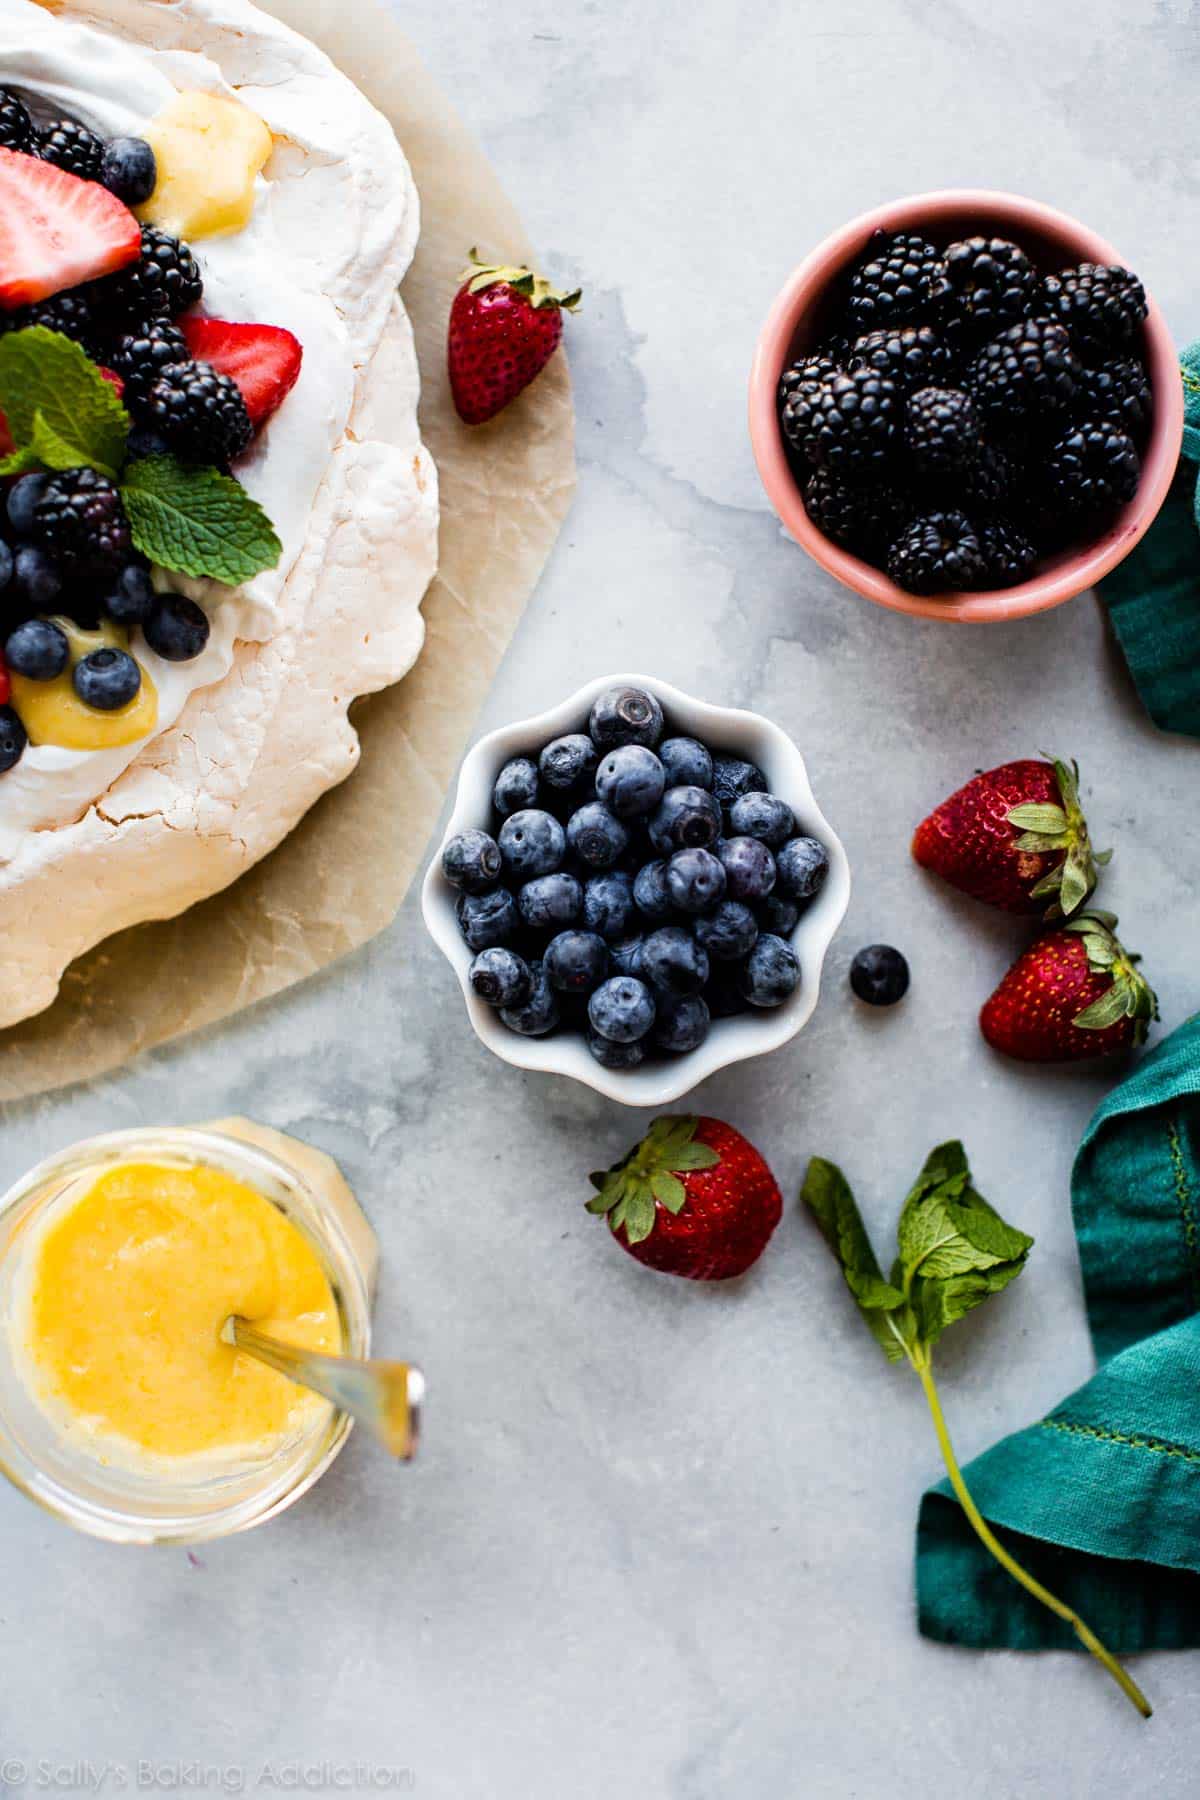
pavlova toppings including fresh berries and lemon curd in bowls

You can top your pavlova or mini pavlovas any which way, but here are some of my topping suggestions:

No need to get artistic, just pile it all on top into a massive pavlova mountain.
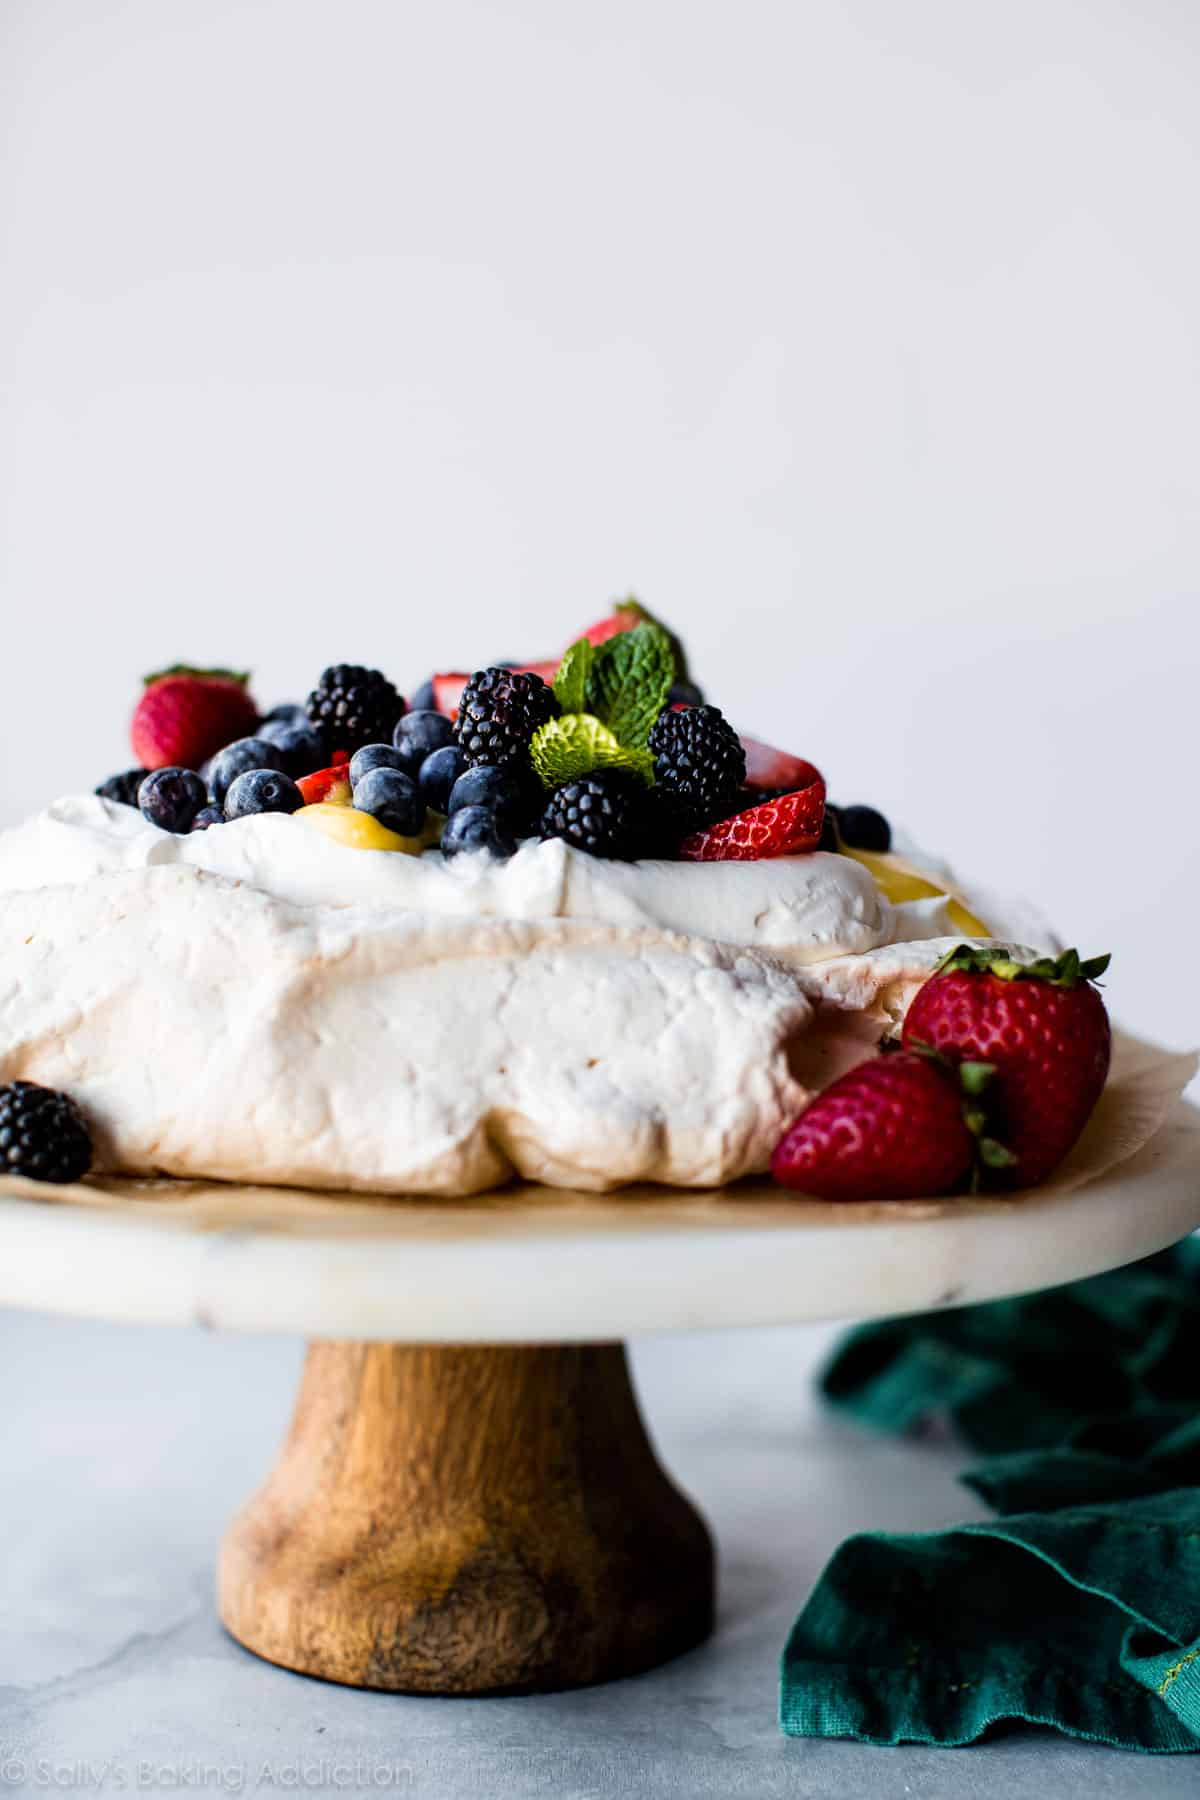
pavlova on a marble and wood cake stand

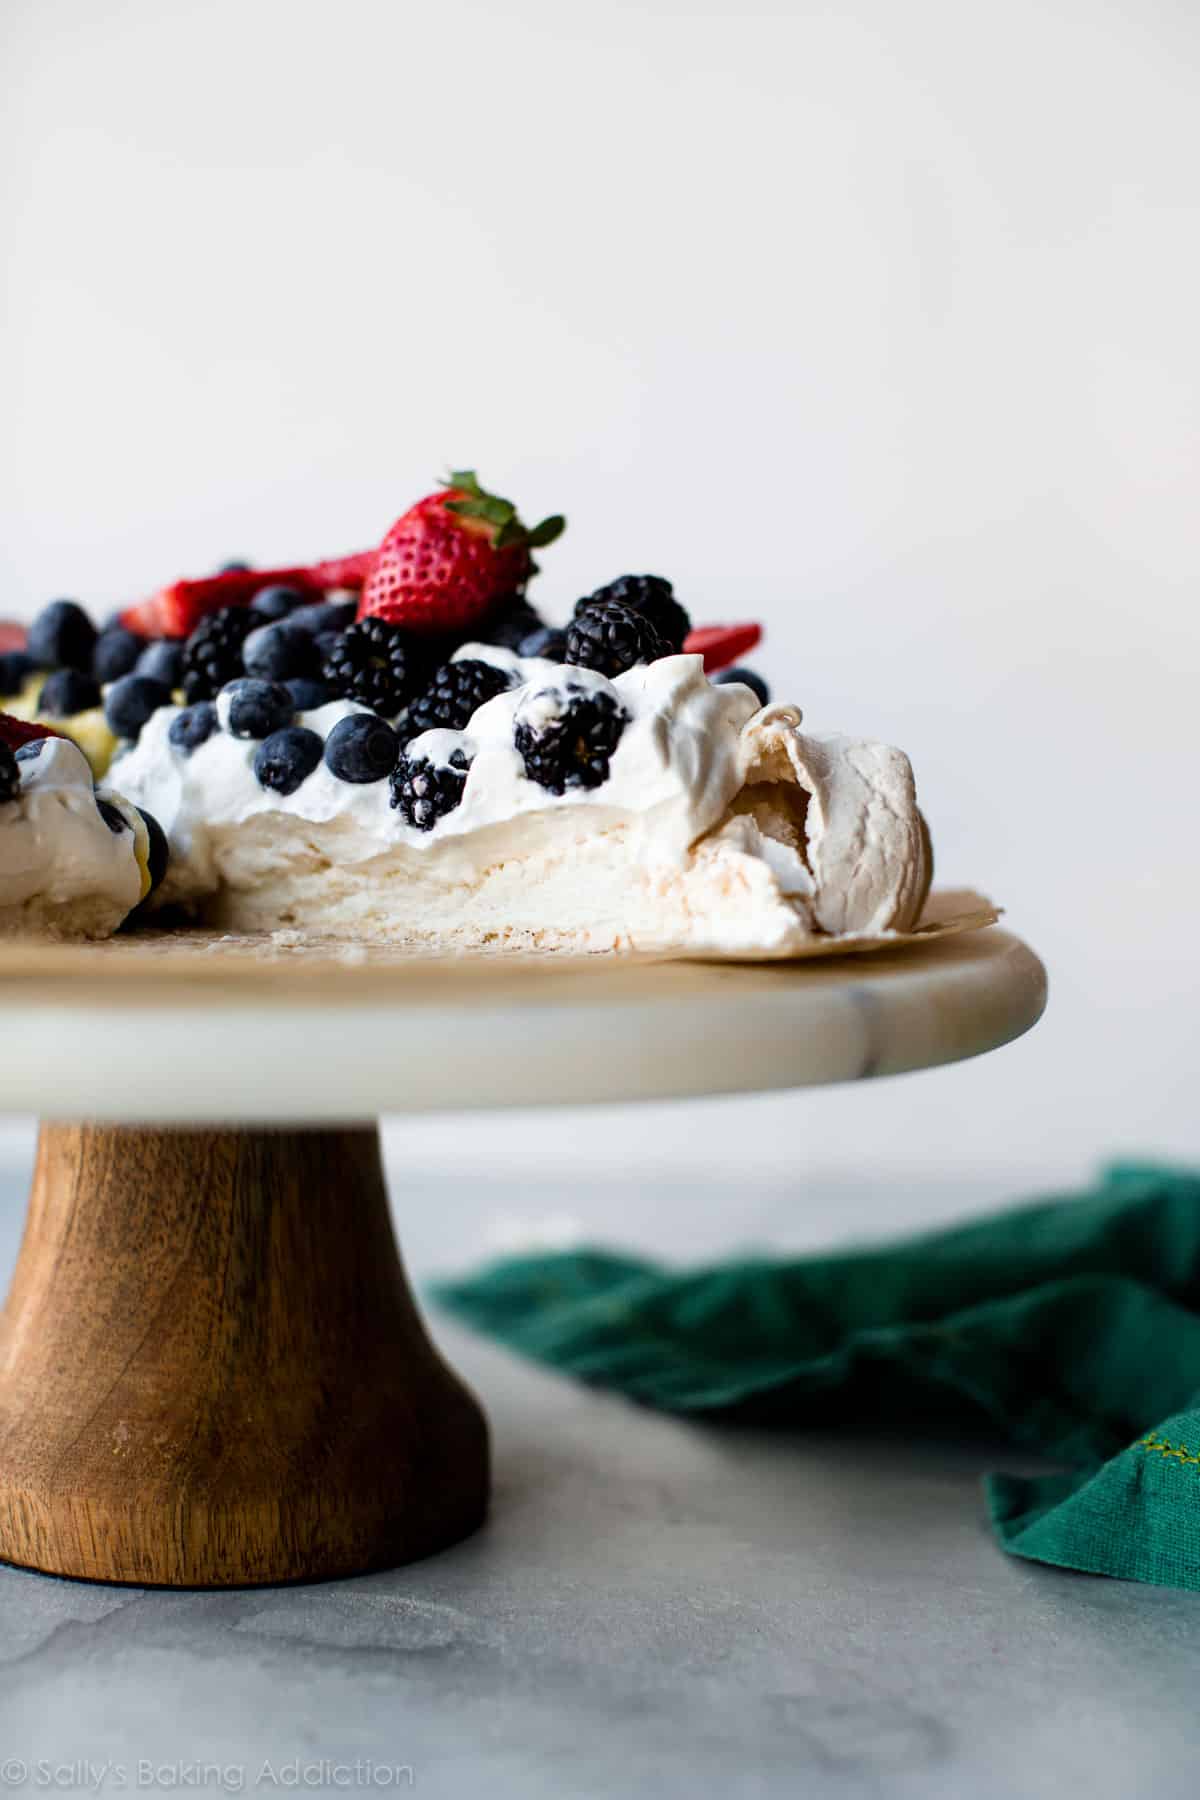
Things are bound to get a little messy when slicing, but if you cooked the pavlova long enough so that the bottom is crisp and the edges are set, it will hold a pie slice shape. This big thing serves about 8-10 people!

If you’re still on the fence about trying pavlova, might I remind you that the center tastes like marshmallows.
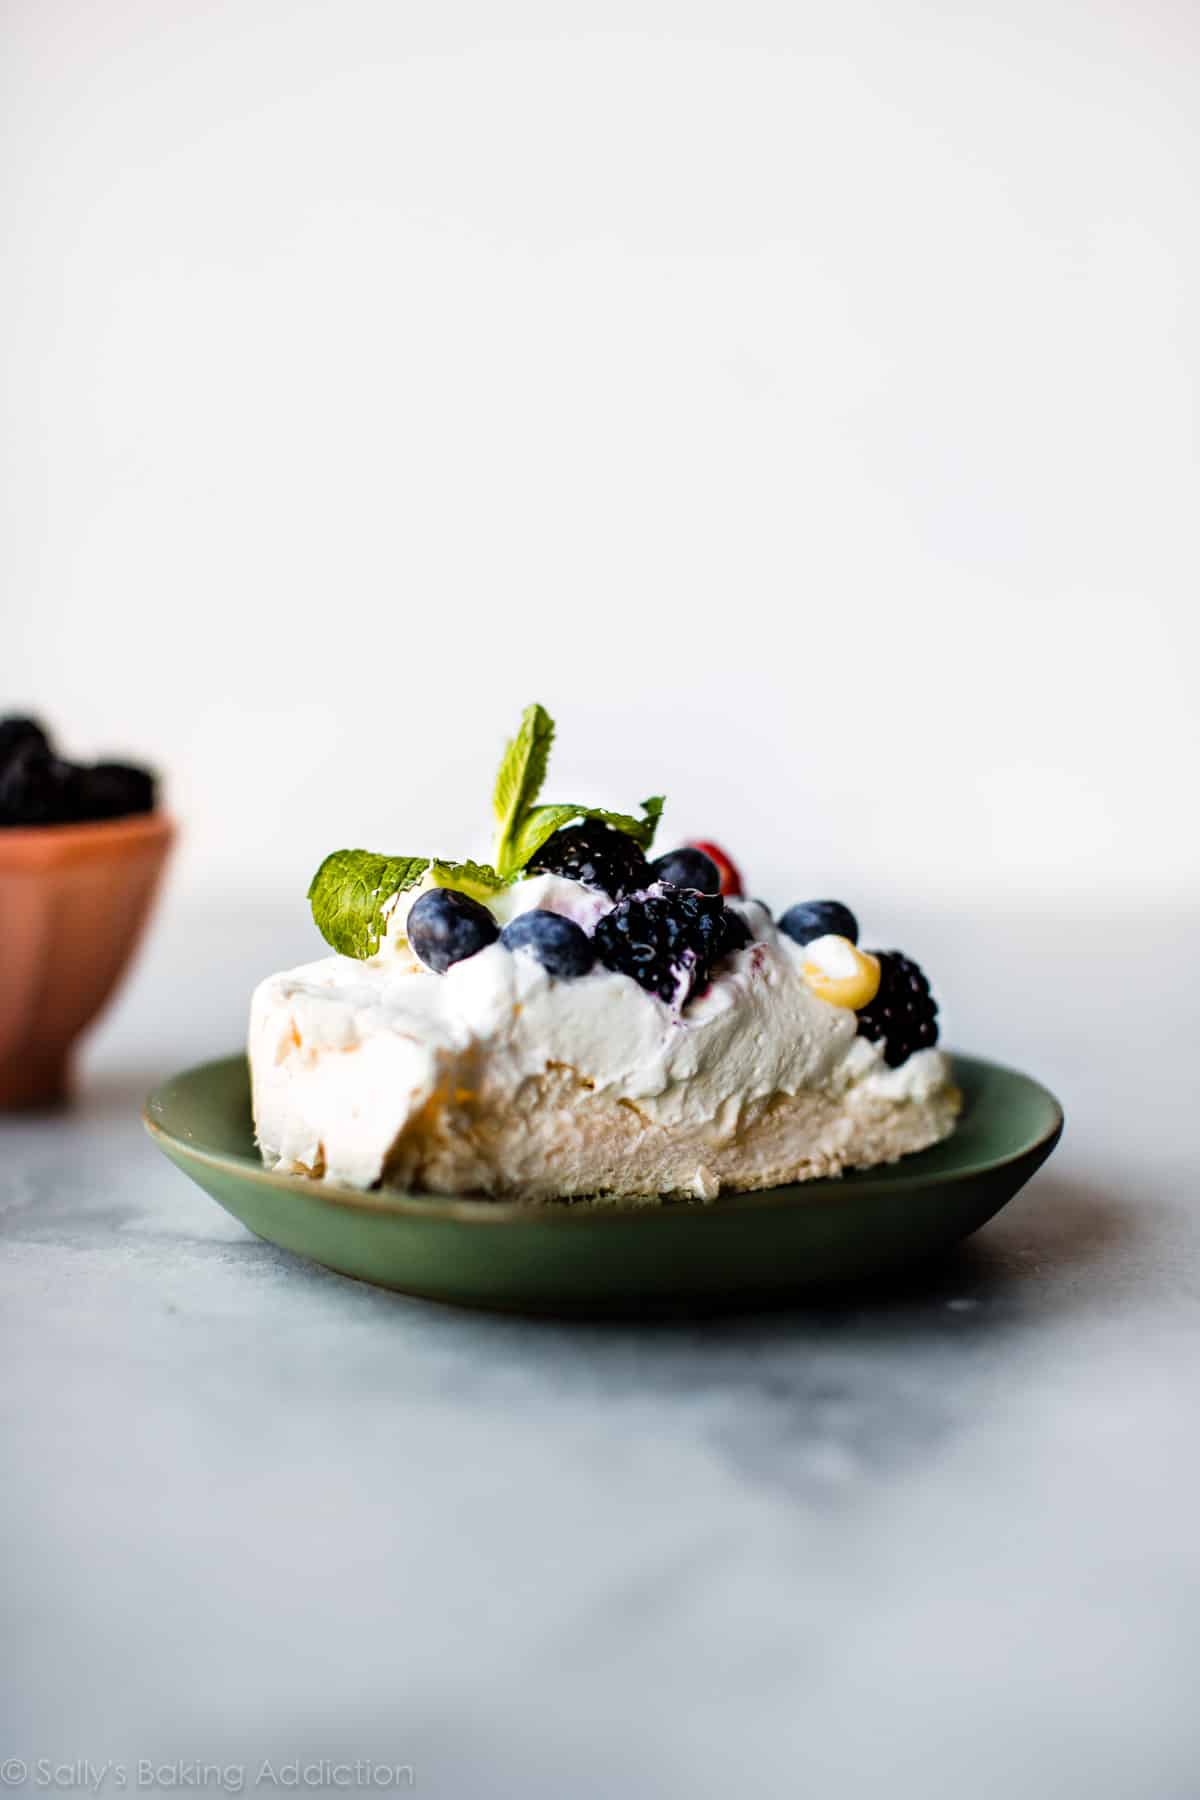
slice of pavlova with fresh fruit topping on a green plate

Have fun!

For more gluten-free baking inspiration, here are 40 gluten-free dessert recipes that are always a hit, including cranberry frangipane tart and flourless chocolate cake.

Print
clock clock iconcutlery cutlery iconflag flag iconfolder folder iconinstagram instagram iconpinterest pinterest iconfacebook facebook iconprint print iconsquares squares iconheart heart iconheart solid heart solid icon
pavlova on a marble and wood cake stand

Pavlova

5 Stars 4 Stars 3 Stars 2 Stars 1 Star 4.8 from 147 reviews
  • Author: Sally
  • Prep Time: 20 minutes
  • Cook Time: 90 minutes
  • Total Time: 4 hours
  • Yield: serves 8-10
  • Category: Dessert
  • Method: Baking
  • Cuisine: New Zealand
Save Recipe

Description

Pavlova is crisp on the edges, chewy on top, and marshmallow soft and creamy in the centers. Pile high with lemon curd, whipped cream, and fresh fruit to make a naturally delicious gluten free dessert!


Ingredients

  • 4 large egg whites (use the yolks for lemon curd!)*
  • 1 cup (200g) superfine sugar*
  • 1 teaspoon pure vanilla extract
  • 1/2 teaspoon cream of tartar*
  • 1 teaspoon cornstarch

Toppings


Instructions

  1. Preheat the oven to 350ยฐF (177ยฐC). Line aย large baking sheet with parchment paper or a silicone baking mat. (Preliminary note: you will quickly reduce the oven toย 200ยฐF (93ยฐC) in step 4.)
  2. With a handheld mixer or a stand mixer fitted with a whisk attachment, beat the egg whites on medium-high speed until soft peaks form, about 5 minutes. Add the sugar in 2 additions, beating for 30 seconds between. Once all of the sugar has been added, turn the mixer up to high speed and continue beating until glossy stiff peaks form, about 2 minutes. The peaks should be stiff enough that you can hold the whisk upright and the peaks won’t move. Add the vanilla extract and beat for 1 more minute. The peaks should still be very stiff. If not, keep on mixing on high speed. Using a rubber spatula, fold in the cream of tartar and cornstarch.
  3. Spread the pavlova mixture into an 8-9-inch circle (see note for mini size). You canย make decorative peaks with the back of a large spoon if desired. Make sure the edges are relatively tall and there is a nice dip in the center.
  4. Place pavlova in the oven. As soon as you close the oven door, reduce heat toย 200ยฐF (93ยฐC). The pavlova will stay in the oven as it cools down toย 200ยฐF (93ยฐC). Bake until the pavlova is firm and dry, about 90 minutes total. Rotate the baking sheet if you notice some spots browning. Try to limit how many times you open the oven as the cool air will interrupt the baking.
  5. Turn the oven off and let the pavlova cool inside the oven. Once the pavlova is cool, you can store it covered at room temperature for up to 2 days. Or serve right away.
  6. Once cool, top the pavlova with whipped cream and assorted toppings. Slice and serve.

Notes

  1. Make Ahead Instructions:ย See step 5 for making the pavlova in advance. Pavlova is best enjoyed right after it’s garnished. It doesn’t freeze well.
  2. Special Tools (affiliate links): Electric Mixer (Handheld or Stand) | Baking Sheet | Silicone Baking Mat or Parchment Paper | Marble Cake Stand or Serving Platter
  3. Egg Whites:ย (1) Room temperature egg whites whip faster than cold egg whites. And (2) room temperature egg whites whip into a greater volume than cold egg whites. So make sure your egg whites are at room temperature before beginning.
  4. Sugar: Superfine sugar dissolves easier into egg whites. To avoid tasting sugar granules, pulse 1 cup granulated sugar a few times in a food processor. You now have superfine sugar to use in the recipe.
  5. Acid: You can use 1/2 teaspoon of cream of tartar or 1 teaspoon of white vinegar, apple cider vinegar, or lemon juice.
  6. Mini Pavlovas: Divide pavlova mixture up into individual portions instead of spreading into one large 8-9-inchย circle. In the photos,ย I piped the mixture into 6 mini pavlovas usingย Ateco 849. A piping tip isn’t necessaryโ€”you can just spoon it on. Make sure you leave a dip in the center to hold the toppings. Bake time depends on size, see step 4 for what to look for. If making 6 mini pavlovas like I did, bake for 35-40 minutes at 200ยฐF (93ยฐC). Start them in a 350ยฐF (177ยฐC) oven, like I do in this written recipe.
  7. Pavlova base from reader Laurel. Thanks, Laurel!
sally mckenney headshot purple shirt.
About the Author

Sally McKenney

Sally McKenney is a baker, food photographer, and New York Times best-selling author. Her kitchen-tested recipes and step-by-step tutorials have given millions of readers the knowledge and confidence to bake from scratch. Sallyโ€™s work has been featured on TODAY, Good Morning America, Taste of Home, People, and more.

Read More

Leave a Comment

Your email address will not be published. Required fields are marked *

Recipe rating 5 Stars 4 Stars 3 Stars 2 Stars 1 Star

This site uses Akismet to reduce spam. Learn how your comment data is processed.

Reader Comments and Reviews

  1. Artemesia says:
    November 9, 2025

    FWIW if you fold the lemon curd into the whipped cream and use that mix to fill the Pavlova it is a next level of fabulousness. Made it this way last year and it was wonderful. About to make two for a dinner party for my husband’s 79th birthday this week.

    Reply
  2. Dina Elsherif says:
    November 4, 2025

    Can I replace the normal egg to the bottles egg whites? There is one called two chicks free range egg white, that bottle is pure egg white with no additives. If yes. How many ml?

    Reply
    1. Trina @ Sally's Baking says:
      November 4, 2025

      Hi Dina, we havenโ€™t tested this recipe with egg whites from a carton, but they can be more difficult to whip up. Let us know if you try!

      Reply
  3. Shannon Bowden says:
    October 5, 2025

    This recipe is incredible! Such excellent instructions that everything went smoothly. Made this for an 80th bday and all guests loved it. Highly recommend making the lemon curd as it made the dessert next level. Thanks Sally for helping me make this dessert so successful!

    Reply
  4. Kat says:
    September 16, 2025

    As always, a perfect recipe. I made individual pavlovas for my guests. So easy! And looked great! Itโ€™s not often you get pavlovas at a dinner party, but this will be a go-to.

    Reply
  5. Gwyn says:
    September 15, 2025

    Hello I am making the pavlova as per the recipe. How much whipped cream will be required? If I whip two cups which will yield four cups is that too much?

    Reply
    1. Trina @ Sally's Baking says:
      September 15, 2025

      Hi Gwyn! We would whip up 1 cup of cream – following our whipped cream recipe.

      Reply
  6. Cynthia says:
    September 1, 2025

    Just wondering if it would turn out the same if I use a sugar substitute (like Swerve or Eyrithritol)?

    Reply
    1. Michelle @ Sally's Baking says:
      September 2, 2025

      Hi Cynthia, Weโ€™d love to help but we are not trained in baking with sugar substitutes. For best taste and texture (and so you donโ€™t waste your time trying to adapt this recipe since it may not work properly), it may be more useful to find a recipe that is specifically formulated for sugar substitutes. Thank you!

      Reply
    2. Norehan Fong-Harun says:
      October 26, 2025

      Hi Cynthia… If I May reply to your question… I’ve substitute sugar with stevia.. half the amount of sugar in the recipe… It turned out and tasted great!! Give it a try…

      Reply
  7. Kate Mack says:
    August 24, 2025

    I have made this recipe exactly as said several times and it turns out perfect every time. Just popped one in the oven for my American friends BBQ this afternoon. Can wait to enjoy

    Reply
  8. Joy says:
    August 17, 2025

    In regards to the superfine sugar and cornstarch , would powdered sugar work just as well considering it consists of the same ingredients?

    Reply
    1. Lexi @ Sally's Baking says:
      August 20, 2025

      Hi Joy, Powdered sugar is too fine and fluffy for the recipe. Superfine is best!

      Reply
  9. AA says:
    August 15, 2025

    Cooked it exactly according to the instructions and it was fully raw inside. What a disappointment.

    Reply
  10. NM says:
    July 20, 2025

    5 stars for easy to follow instructions, useful tips and a website that doesn’t jump around if your screen goes to sleep ๐Ÿ™‚

    Reply
  11. Patty says:
    July 17, 2025

    Can I use a modified food starch like Clear Jel cook type for the cornstarch

    Reply
    1. Trina @ Sally's Baking says:
      July 17, 2025

      We’ve never tested that, Patty!

      Reply
  12. Tonya says:
    July 15, 2025

    Made this tonight, it turned out fantastic and delicious. Just curious how to store leftovers with the whipped cream and fruit on it. Is it ok to put in the fridge or put in an airtight container then in fridge? Thank you! I will definitely be making this again!

    Reply
    1. Trina @ Sally's Baking says:
      July 15, 2025

      Hi Tonya! Leftovers with whipped cream need to be stored in the fridge, but the pavlova will lose its crunch. Pavlova is best enjoyed right after itโ€™s garnished!

      Reply
  13. Gen says:
    July 15, 2025

    Hi Sally,
    My oven is a 2 in 1 convection + steamer.
    Hence there isnt an option to take it down to 97 degrees celcius.
    What is the timing required if I can only bake it at 100 degress?

    Thanks

    Reply
    1. Lexi @ Sally's Baking says:
      July 15, 2025

      Hi Gen, we’re unsure of the exact timing, but the bake time will be shorter if baking at a slightly higher temperature.

      Reply
    2. Brenda says:
      August 9, 2025

      Hi Gen,
      Iโ€™m needing to make 4 9×13 size pavlovas for a wedding. How much should I adjust the ingredients for that size? Should the bake time be adjusted or is 90 minutes fine? Can I bake two at a time? Thanks

      Reply
  14. Eloisa Montes says:
    July 10, 2025

    not giving your one star because itโ€™s bad but it didnโ€™t work for me. i was whisking the egg whites only and soft peaks never formed. it turned thick and foamy even after more than 5 minutes of whisking. it was super fluffy thick and really foamy like soap but thicker idk what happened but it never turned into glossy soft peaks

    Reply
    1. Beth @ Sally's Baking says:
      July 15, 2025

      Hi Eloisa, we’re sorry to hear this didn’t work for you, and are happy to help troubleshoot. Were you using a stand mixer or a hand mixer, or were you whisking by hand?

      Reply
    2. Ellen says:
      August 2, 2025

      That sounds like there was some tiny bit of fat or oil in the mixer, to me. Try again, but before you do it, make sure it’s perfectly clean and wipe bowl and beater with vinegar. Also, be sure you follow the instructions for the order you add ingredients. You probably are doing it right, but it’s worth mentioning to beat to soft peaks, add sugar slowly, stiff peaks, cornstarch and cream of tartar. I bet that will help!

      Reply
    3. Bas says:
      November 19, 2025

      Mine never formed peeks either but ny kiychen aid hand mixer does not come with a wisk just thin beaters tht works great for beating just cant get peeks from these beaters so maybe its same for u the beeters u use

      Reply
  15. Holy HannaH says:
    July 8, 2025

    Hello, I made these last night & since I had never made anything similar I have questions and comments:
    โ€ขIs the outside suppose to be crisp and break, or no?
    I made 2 medium sized and estimated the time in a new oven so I’m not sure if that’s how they’re supposed to be or if I need to make a slight adjustment next time.
    โ€ขCan these be made with slightly less sugar? I understand & am super grateful you explained the role of each ingredient but my peaks held so well that it seems it should be ok to use slightly less sugar.
    โ€ขMy peaks didnt form until after I added the vinegar & cornstarch and beat it some more; is that normal?
    โ€ขTo anyone that thought they were going to hand whisk these into perfection, good luck with that!
    โ€ขIt was said in the instructions but it bears repeating, KEEP BEATING, the peaks will form, I almost gave up too.
    โ€ขI used vinegar instead of the cream of tartar and had zero issues whatsoever.

    Reply
    1. Lexi @ Sally's Baking says:
      July 9, 2025

      Hi Holy, we’re happy to help! 1) Cracks are normal for pavlova. You can help avoid too many cracks by cooling the pavlova in the oven. The sudden change of temperature (inside the oven to outside the oven) shocks the pavlova, so itโ€™s best to cool inside the cooling oven. You do want a crispier outside texture. 2) Without the full amount of sugar in this recipe, the egg whites would deflate and you wouldnโ€™t get the crisp exterior. We donโ€™t recommend reducing the amount. 3) Glossy stiff peaks should form after the addition of the sugar. The peaks should be stiff enough that you can hold the whisk upright and the peaks wonโ€™t move. If that’s not happening, keep mixing to incorporate more air so that the stiff peaks can form. Thank you so much for giving it a tryโ€”we hope you enjoyed the pavlova!

      Reply
  16. Gemma says:
    July 1, 2025

    The temperature is too low so the pavlova breaks. Increase it to 240F and it will turn out much better and hold its shape.

    Reply
    1. Sally @ Sally's Baking says:
      July 3, 2025

      Hi Gemma, thank you for your feedback and I’m sorry if your pavlova broke. If you increase the oven temperature, the bake time will also need to be adjusted.

      Reply
  17. Tegan Rambeck says:
    June 1, 2025

    Do you know if I could use a cornstarch substitute (arrowroot) with success??

    Reply
    1. Beth @ Sally's Baking says:
      June 1, 2025

      Hi Tegan, we haven’t tested it with arrowroot, so are unsure of the result. If you decide to try it, please let us know how it goes!

      Reply
  18. Sabrina says:
    May 30, 2025

    I have a ton of egg whites left over from a recipe, could I make a bunch of minis and freeze them?

    Reply
    1. Beth @ Sally's Baking says:
      May 31, 2025

      Hi Sabrina, we don’t recommend freezing pavlova, as the texture just isn’t the same afterwards. Here are all our recipes that call for egg whites. Hopefully you can find something in there to make that you could freeze!

      Reply
    2. Allison says:
      June 16, 2025

      What happened? I used plain granulated sugar, because I did not have superfine sugar, but it turned out like a thick-ish liquid.

      Reply
      1. Trina @ Sally's Baking says:
        June 16, 2025

        Hi Allison, you really need superfine sugar for this recipe. See recipe Notes for instructions on making your own superfine sugar from granulated sugar.

      2. Allison says:
        June 18, 2025

        Thankyou! I used superfine sugar and it turned out awesome โค๏ธ

  19. Caitlin says:
    May 30, 2025

    I made this for my momโ€™s 70th birthday. First time making a pavlova and I donโ€™t think I baked it long enough, itโ€™s still sort of soft on the sides. The oven is already cool and the party is tomorrow evening. Any thoughts on trying to bake it more tomorrow before the party to see if I can firm it up?

    Reply
    1. Lexi @ Sally's Baking says:
      May 30, 2025

      Hi Caitlin, The pavlova should already be firm and dry when you turn off the oven to cool. Were any of the ingredient amounts changed by chance? You can certainly try putting it back in the oven for a bit to see if that helps. We hope it’s a hit!

      Reply
  20. AA says:
    May 30, 2025

    I left out the vanilla. Made these into minis. Baked it on 90C for 55 mins and left it to cool in the oven for 2-3 hours. Topped it with whipped cream, fresh strawberries, blueberries and a chocolate drizzles.
    Came out great. Thank you.

    Reply
  21. Sara says:
    May 25, 2025

    Hi there! I have a new gas oven that canโ€™t be set lower than 250F (and the element is at the bottom)โ€ฆ do you have any tips for baking these so they donโ€™t burn?

    Reply
    1. Lexi @ Sally's Baking says:
      May 28, 2025

      Hi Sara! We wish we could help, but the lower temperature is key for making sure the pavlova doesn’t burn. You can certainly try it at 250, knowing that the time will be shorter, but the quicker bake time may impact the internal texture. Let us know if you give it a go!

      Reply
  22. Lauren says:
    May 23, 2025

    Do you think you could add some cocoa powder and make a chocolate pavlova?

    Reply
    1. Trina @ Sally's Baking says:
      May 23, 2025

      Hi Lauren, we havenโ€™t experimented with a chocolate variation โ€“ let us know if you give it a try!

      Reply
  23. Sarah says:
    May 22, 2025

    Can I use confectionerโ€™s sugar instead of superfine sugar and if so, do I have to adjust the measurements?

    Reply
    1. Trina @ Sally's Baking says:
      May 22, 2025

      Hi Sarah, confectioners’ sugar is too fine and fluffy for the recipe. Superfine is best!

      Reply
  24. Lori Smith says:
    May 21, 2025

    Hi

    Thank you for posting this fabulous recipe.
    Would it be alright to double or triple this recipe? Iโ€™d like to make the mini oneโ€™s for a party.

    Reply
    1. Beth @ Sally's Baking says:
      May 22, 2025

      Hi Lori, yes, you can double the recipe as long as your mixer has the capacity for more volume and you have the oven space for more baking sheets. Enjoy!

      Reply
  25. Eve B. says:
    May 20, 2025

    I’ve been making this nonstop since we first made it last year. I’m in charge of making mini pavlovas for a baby shower, and I’m curious if the cooking time will be shorter for the smaller pavlovas. I would love any incite to what you think I should do!

    Reply
    1. Lexi @ Sally's Baking says:
      May 21, 2025

      Hi Eve, see recipe Notes for mini pavlova details. So glad this is a favorite for you!

      Reply
  26. Tammy Creamer says:
    May 7, 2025

    I made this a couple years ago and it was a crowd pleaser. I plan on making it again for Mother’s Day!

    Reply
  27. Silvia says:
    April 20, 2025

    Hi, silly question perhaps, but what to do with the parchment paper? Tried to remove from one of the sides and it crumbles.

    Reply
    1. Michelle @ Sally's Baking says:
      April 20, 2025

      Hi Silvia, it can be a little tricky! Just be very careful and gentle. Make sure to use non-stick parchment paper (as opposed to wax paper or other). If itโ€™s crumbling too much, it may be over-baked. We hope you loved this pavlova recipe!

      Reply
      1. Valeriia Manis says:
        May 10, 2025

        I made it with silicone baking mats, it does not stick to it! I do have to practice the meringue a little more though…have too big of a void inside

  28. Tatiana Diamond says:
    April 20, 2025

    HI!!! i love this recipe, but i just came to say that i know pavlova is mistaken as new zealands dessert(yes they took it from us) but it is originally a russian dessert named after a russian ballerina, ith her last name, Pavlova. I just def would like more people to know about this, because a lot of our dishes are misinterpreted.BUT I LOVE THIS RECIPE lol it takes just like my grandmothers.

    Reply
    1. MPF says:
      June 12, 2025

      Hi! Itโ€™s not a Russian dessert, the chef, most likely from New Zealand or Australia and named it after her after she toured over there.

      Reply