

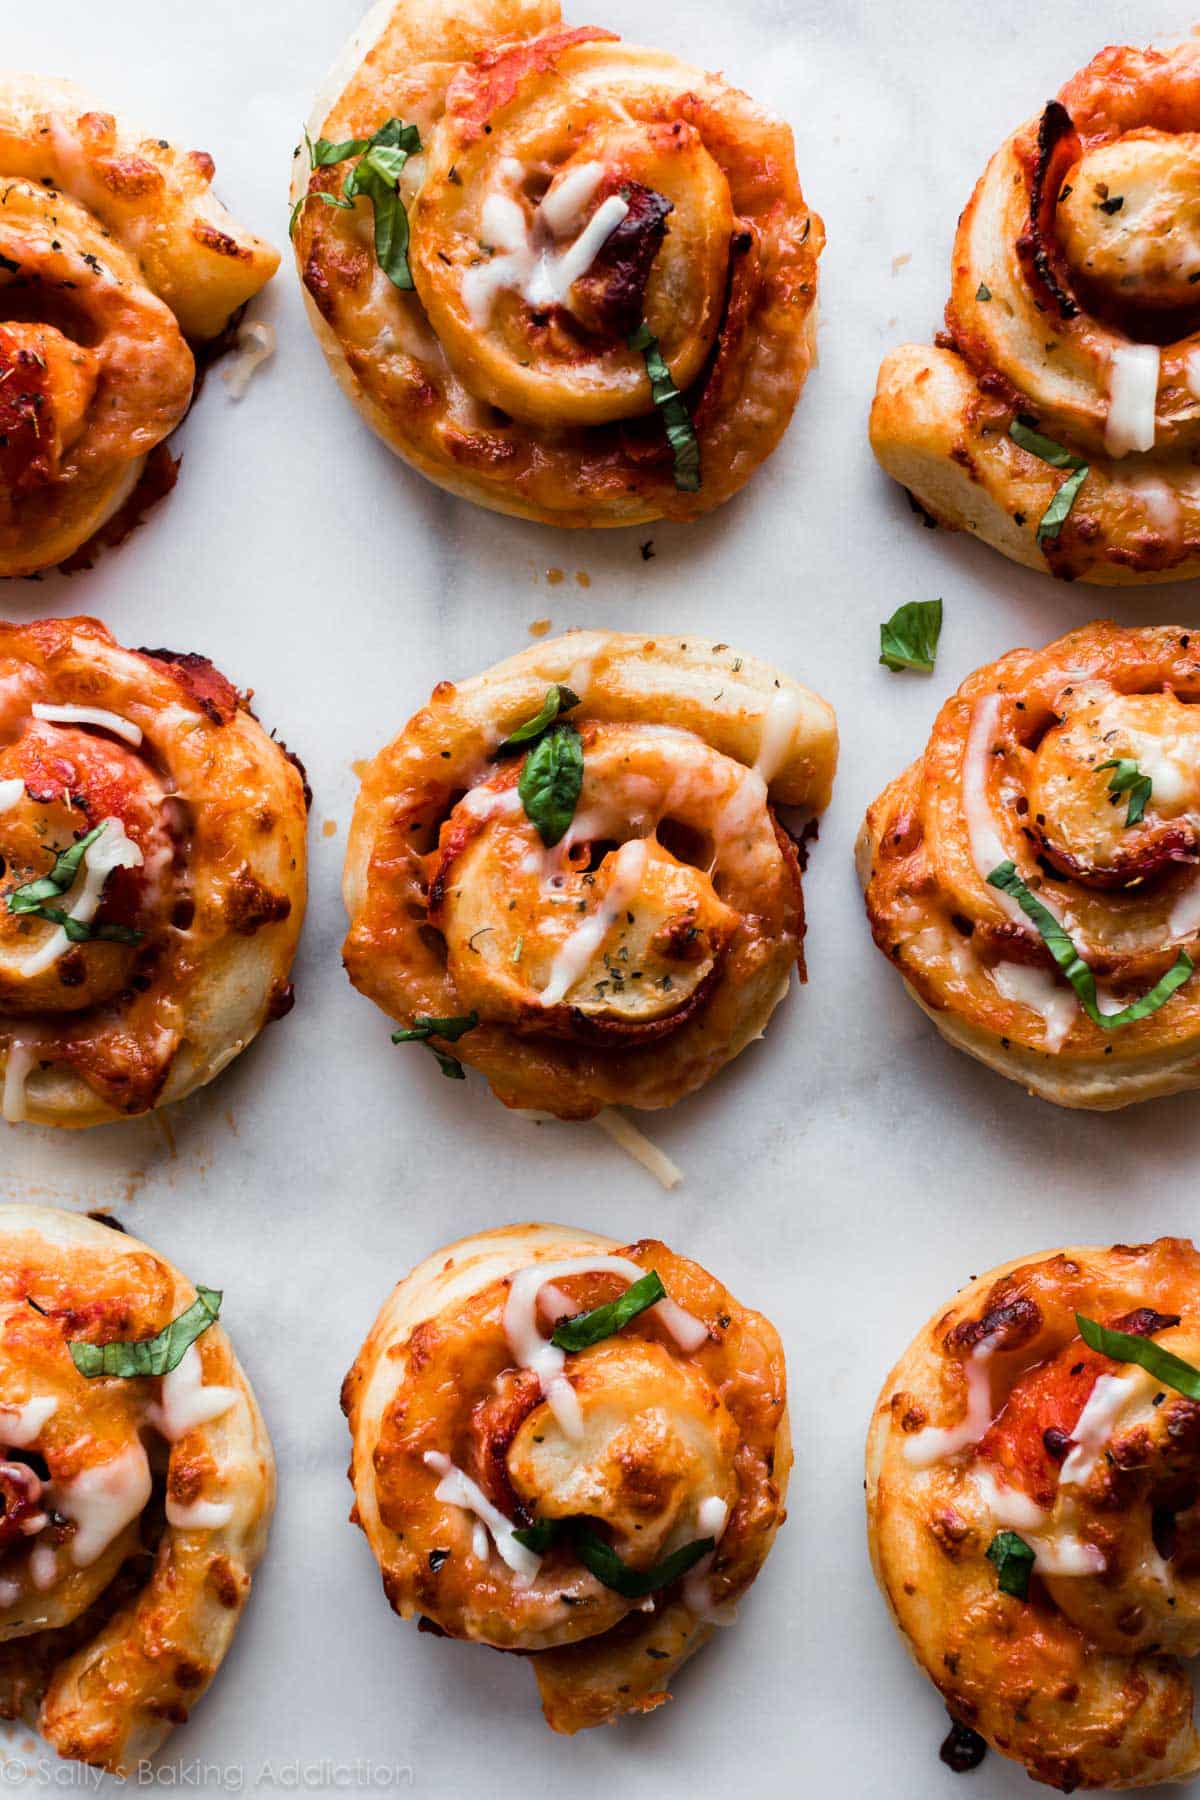
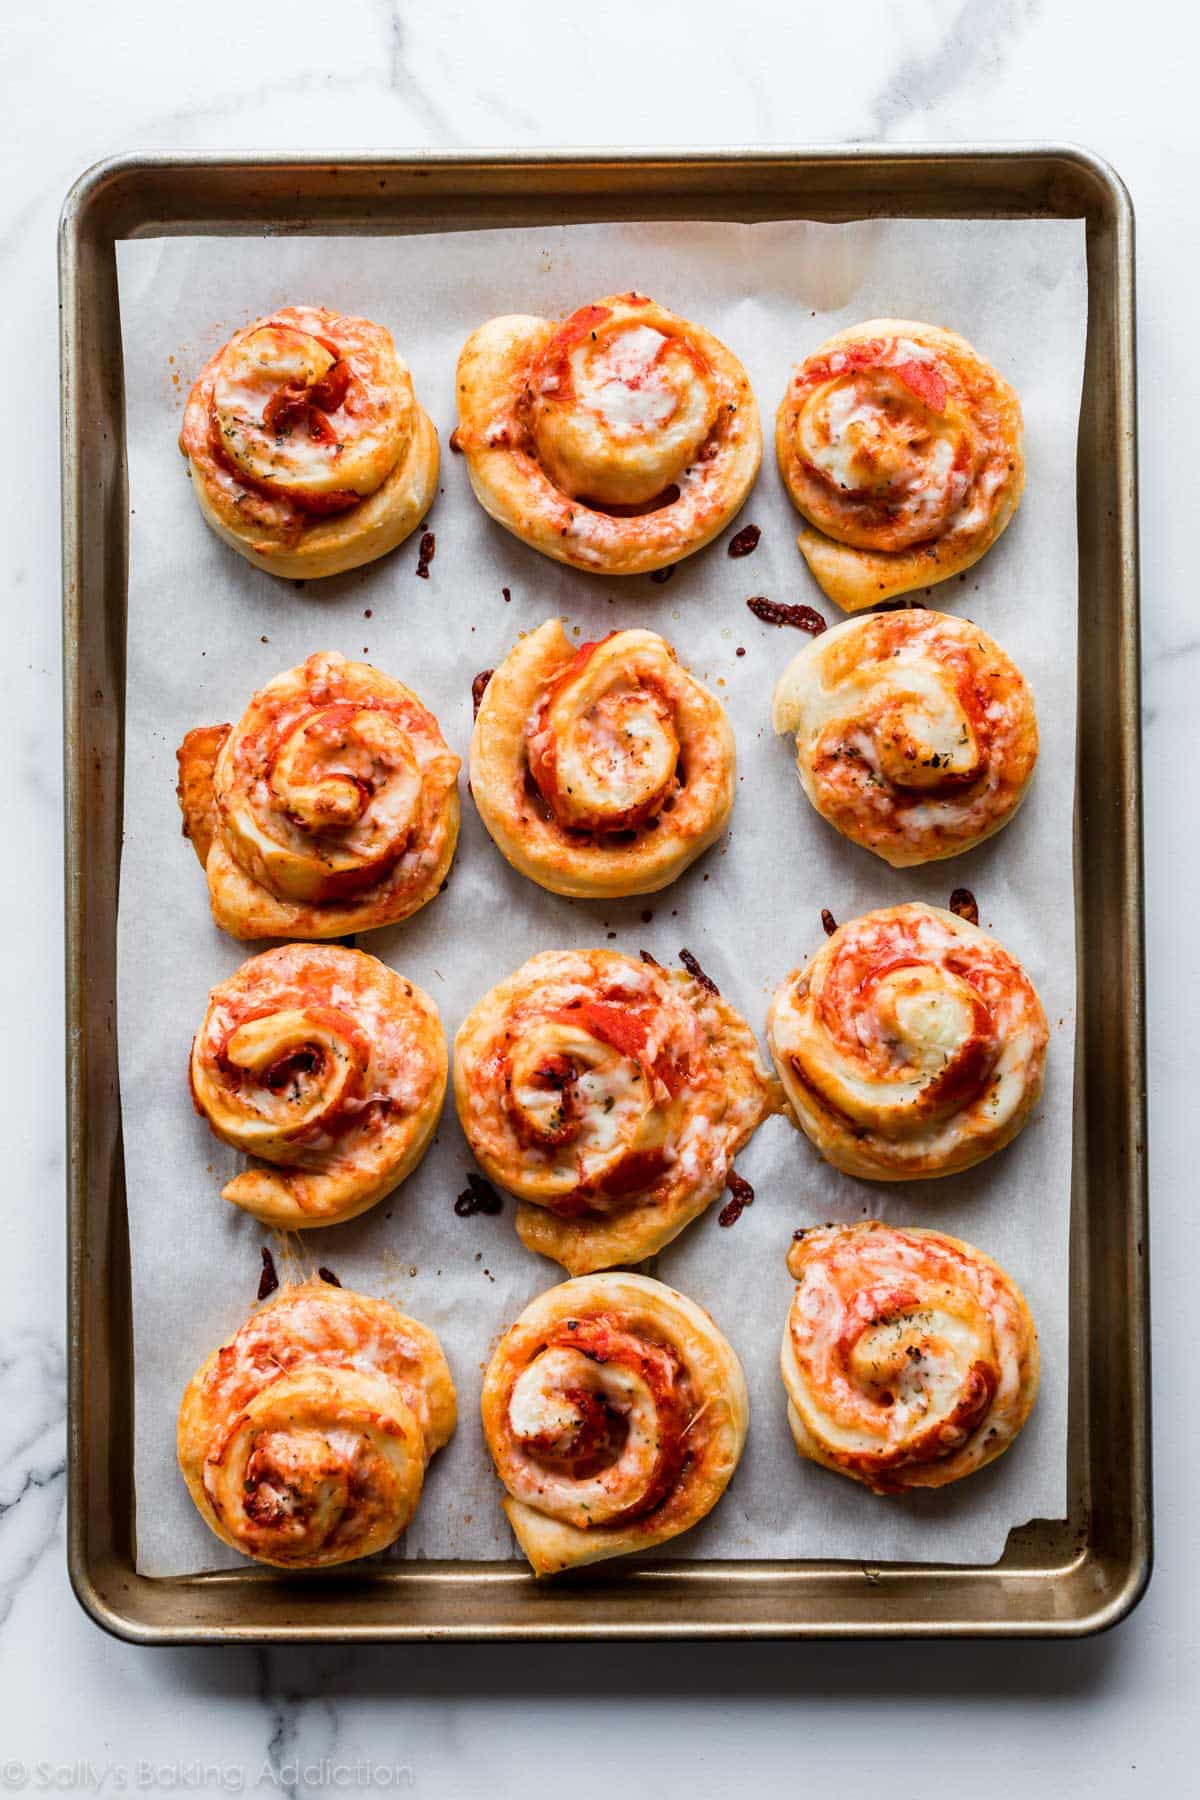
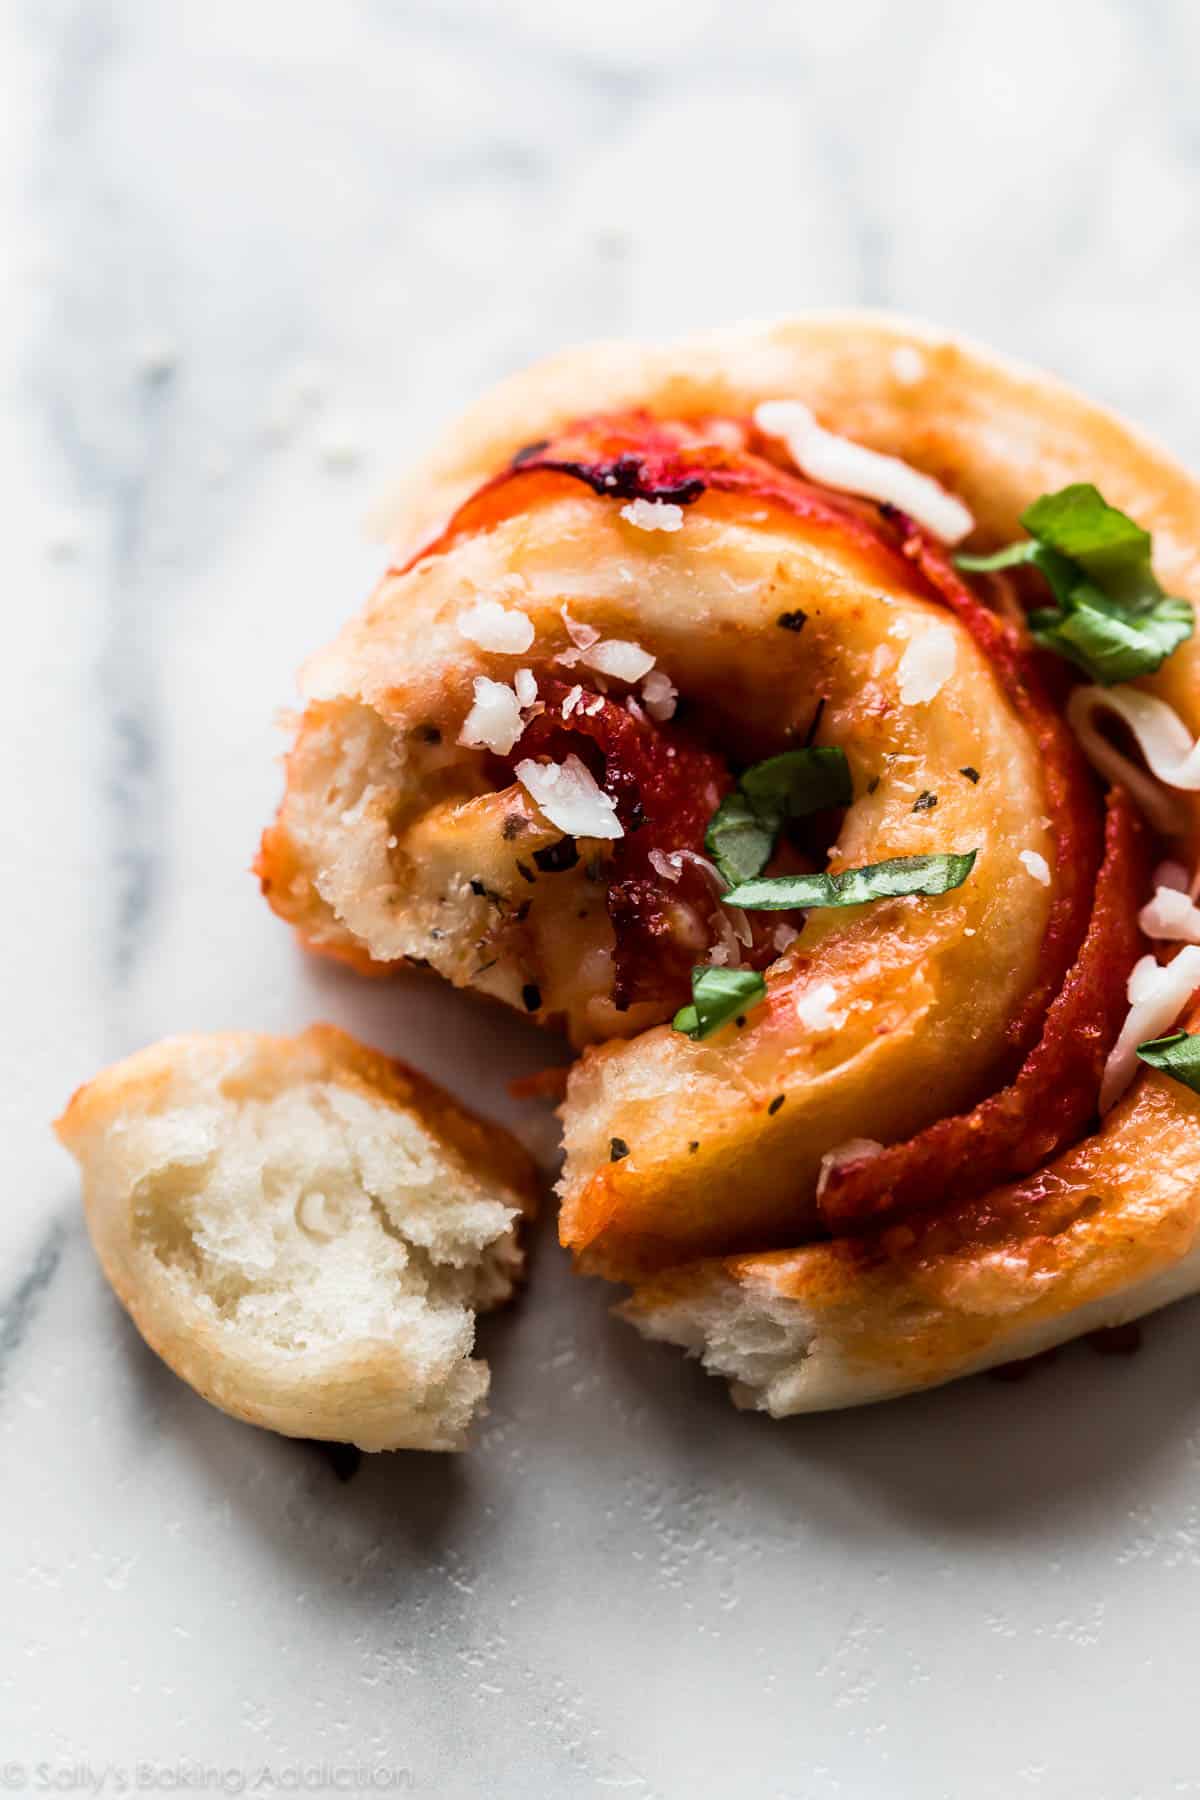
Pepperoni Pizza Rolls: prepared with my kitchen-tested pizza dough recipe, these pepperoni pizza rolls are an instant crowd-pleaser. Packed with mozzarella cheese and pepperoni, these rolls are extra awesome dipped in your favorite pizza sauce.
Our team won the SuperBowl last year and to say the city of Baltimore went bananas is an understatement. The streets were packed, the crowd was roaring. Our plans aren’t quite as exciting for the SuperBowl this year, but I have an AWESOME new snack to bring along. These are pepperoni pizza rolls and you can use frozen or homemade pizza dough!
It took me 3 tries to get these pizza rolls right. The 1st time I made them, the rolls completely fell apart as I was cutting. The 2nd time, I burnt them to a black crisp. But the 3rd time was a charm! The rolls were pizza perfection: crispy on the bottom, tender on the inside, super cheesy, and packed with pepperoni. You will love making and eating pizza this way.
Homemade Pizza Dough
You can use store-bought, but I encourage you to try homemade pizza dough. This lean dough makes a crust that is extra flavorful and crisp with a super soft and chewy interior. You can watch me make the dough in this helpful video tutorial. The entire dough recipe yields 24 pizza rolls, but you can cut the dough in half to yield only 12 rolls. (Extra pizza dough freezes and thaws beautifully.)
Or use my whole wheat pizza dough instead. The same steps apply, just swap out the crust. You can use either dough recipe for homemade garlic knots, too.
If you wish to use a rich bread dough for a softer, dinner roll or homemade breadstick like texture, I highly recommend making these pizza pull apart rolls instead!
Baking with Yeast Guide
Reference this Baking with Yeast Guide whenever you work with baker’s yeast. I include practical answers to all of your common yeast questions.

How to Make Pizza Rolls
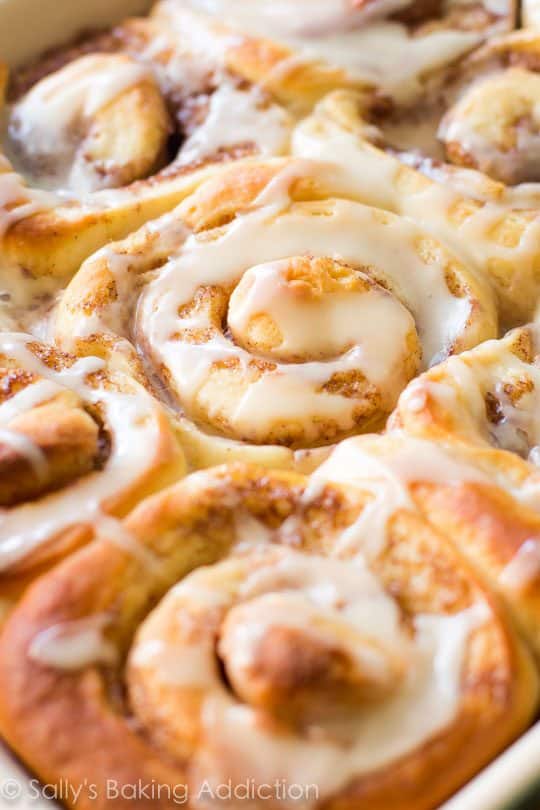
Pizza rolls are surprisingly simple and if you’ve made cinnamon rolls before, you’re familiar with the process. It’s all pretty similar to making stromboli. After the pizza dough is prepared, follow these 3 easy steps:
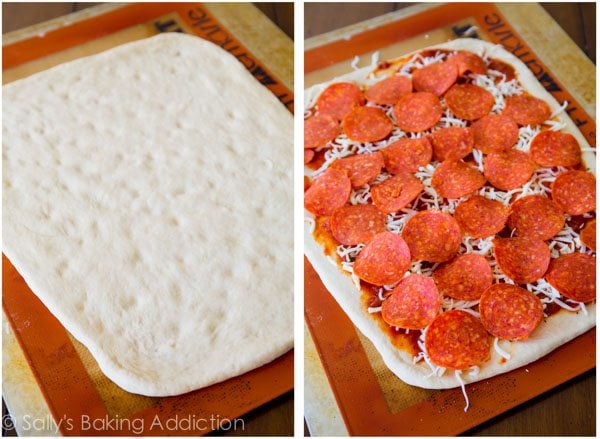
- Roll out the dough, make dents in it with your fingers, and brush with olive oil. Why? The little dents in the dough prevent air bubbles and the olive oil prevents any sogginess.
- Fill the dough with your favorite pizza toppings like pizza sauce, cheese, and pepperoni. Thinly sliced peppers, onions, and cooked crumbled sausage works too!
- Roll up the dough and chill for 25 minutes. Why? Chilling will prevent your rolls from falling apart as you cut. During that time, preheat your oven. You want the entire oven to be hot and ready!
Top with some parmesan cheese and bake into crispy, melty perfection.
Dip the bottom of the rolls in a little cornmeal before baking. This is completely optional, but adds a wonderful CRUNCH on the bottom.
I haven’t met anyone who doesn’t like cinnamon rolls and pizza, and with today’s recipe, you get the best of both worlds.
More Favorite Appetizers

Pepperoni Pizza Rolls
- Prep Time: 1 hour, 45 minutes
- Cook Time: 20 minutes
- Total Time: 2 hours, 10 minutes
- Yield: 24 rolls
- Category: Appetizers
- Method: Baking
- Cuisine: American
Description
You’ll have fun both making and eating these Homemade Pizza Rolls! Made with my tested pizza dough recipe, this is a perfect party snack. Use your favorite pizza toppings such as pepperoni, cheese, and pizza sauce. The recipe can be halved to make 12 rolls.
Ingredients
- 1 recipe homemade pizza dough*
- 2 teaspoons olive oil
- 2/3 cup pizza sauce (homemade or store-bought)
- Italian seasoning or ground basil, to taste
- garlic powder, to taste
- 1 cup shredded mozzarella cheese
- 60–65 pepperoni slices
- optional: 1/2 cup yellow cornmeal
- optional: extra mozzarella cheese and fresh basil
Instructions
- Prepare pizza dough through step 4. When the dough is ready, punch it down to release any air bubbles. Divide the dough in half. On a lightly floured surface, roll out each half into a large rectangle, about 10×12 inches.
- To prevent the filling from making your pizza rolls soggy, brush the tops lightly with 1 teaspoon olive oil each. Using your fingers, push dents into the surface of the dough rectangles to prevent bubbling. See photo above for visual. Spread 1/3 cup pizza sauce on top of each dough rectangle. Sprinkle each lightly with Italian seasoning and garlic powder.
- Sprinkle 1/2 cup shredded mozzarella evenly over sauce, then top with pepperoni slices. Carefully roll dough rectangles into tight logs. Place logs onto 1 prepared baking sheet, seam side down and place baking sheet in the refrigerator to chill, uncovered, for at least 20 minutes. Chilling prevents the rolls from falling apart as you slice.
- During that time, preheat the oven to 400°F (204°C). Line two large baking sheets with silicone baking mats or parchment paper.
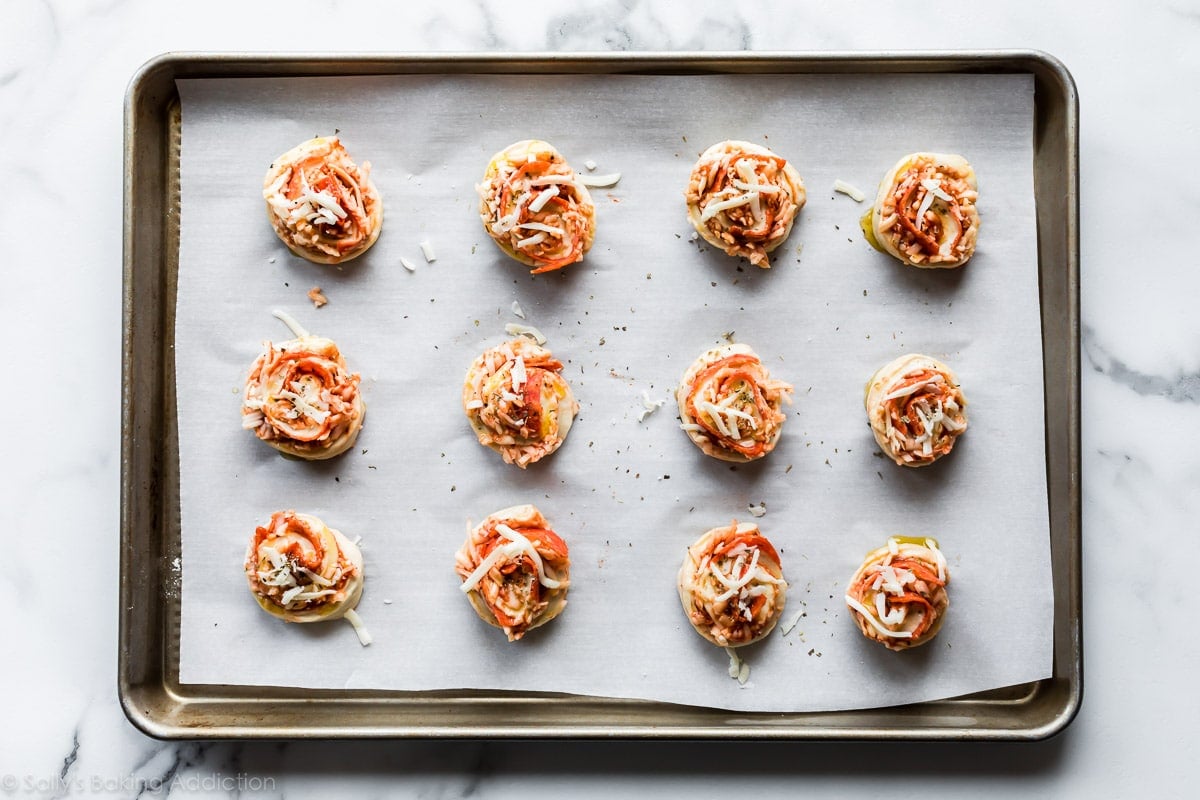
- Remove logs from the refrigerator and cut each into 12 1-inch slices. Pour cornmeal into a plate or bowl. Dip the bottom of each roll into cornmeal and place 12 on each baking sheet, cornmeal side down. The cornmeal is optional, but gives the bottom of the rolls an extra delicious crisp. Sprinkle the tops of the rolls with extra cheese, if desired.
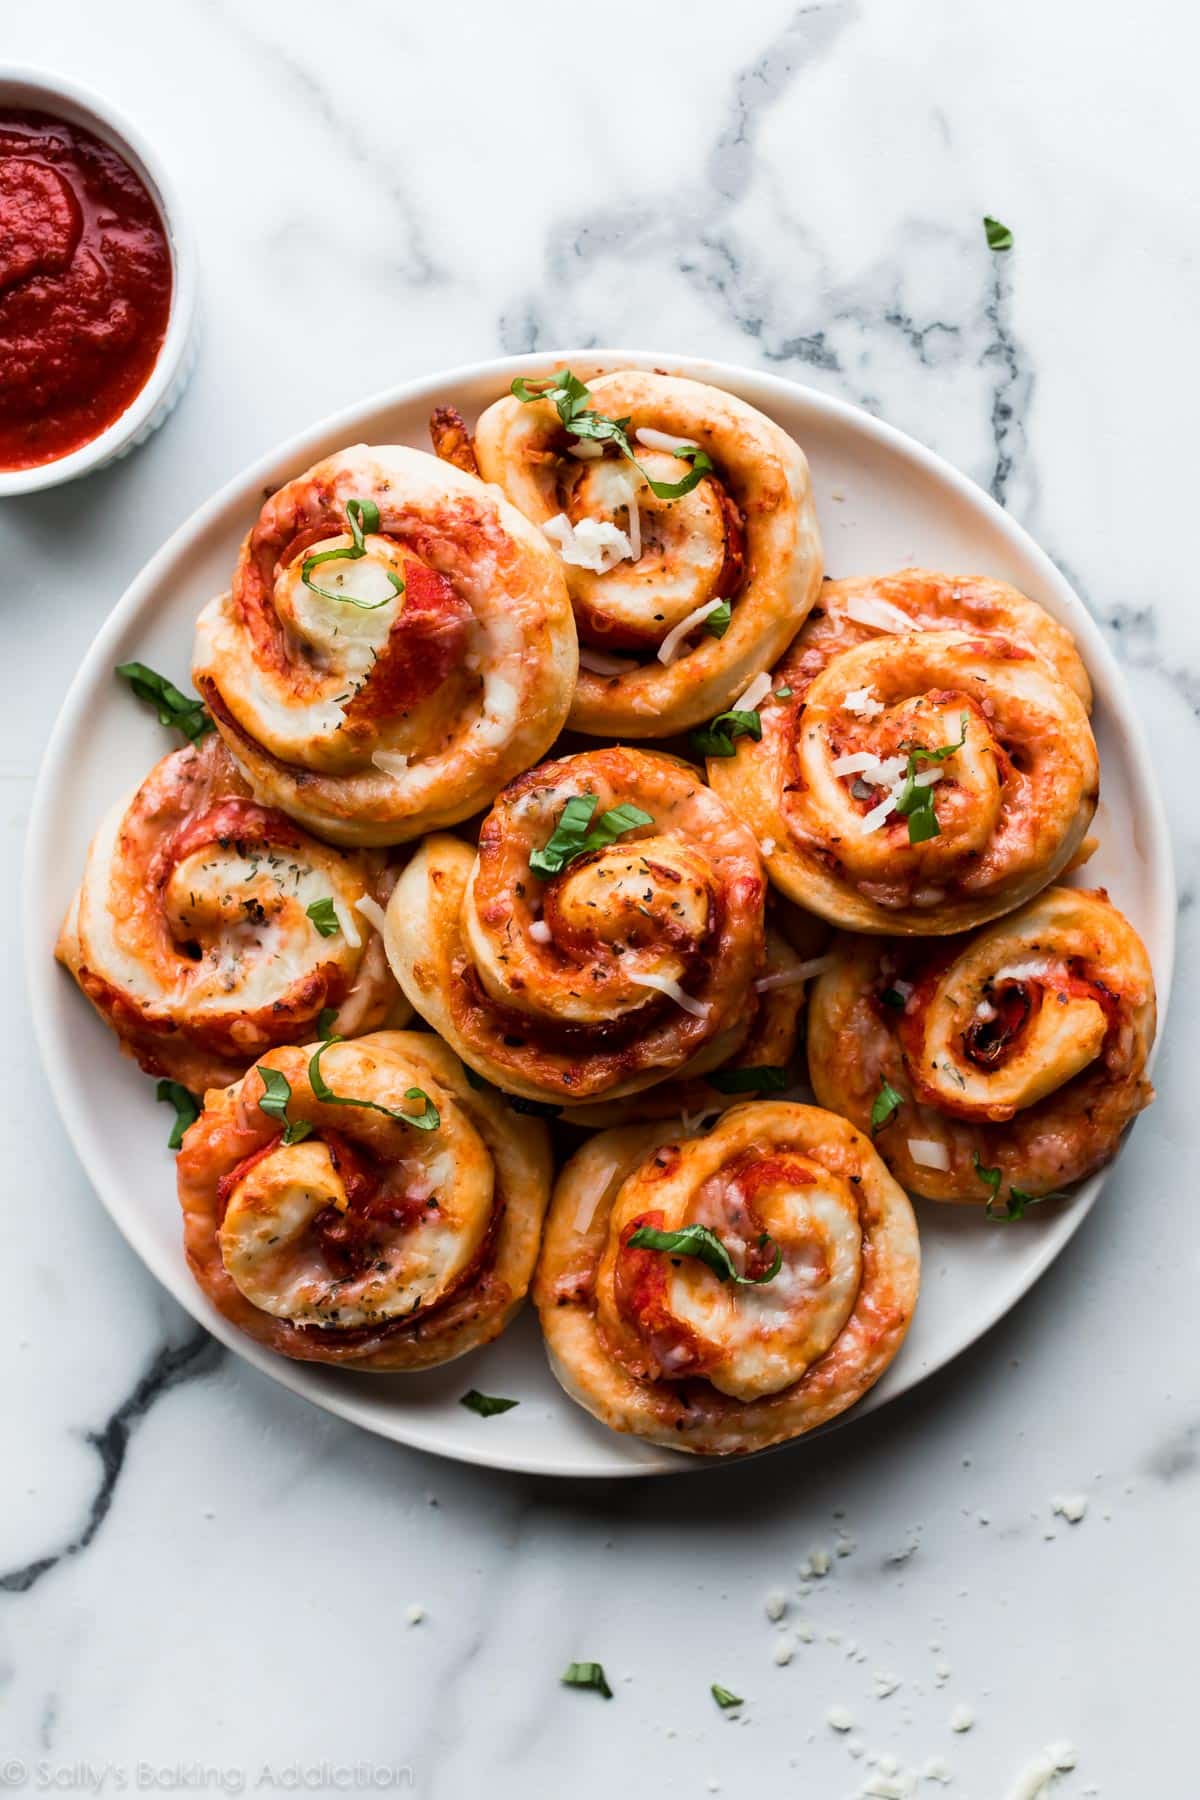
- Bake for 15-20 minutes or until the sides are lightly browned. Cool for 5 minutes, then serve with fresh basil on top (if desired) and extra pizza sauce for dipping. Pizza rolls should be enjoyed immediately, though they can be covered tightly and stored for a few days in the refrigerator. Reheat to your liking.
Notes
- Make Ahead & Freezing Instructions: If you plan to make this snack ahead of time, prepare the rolls through step 3 where you chill the logs in the refrigerator. Cover the rolls tightly with plastic wrap and refrigerate for up to 1 day. The next day, proceed with the recipe. Baked pizza rolls freeze well, up to 3 months. Bake frozen rolls at 350°F (177°C) for 25-30 minutes or until heated through. See the pizza crust recipe for how to freeze and thaw the pizza dough.
- Special Tools (affiliate links): Stand Mixer (for pizza dough) | Rolling Pin | Pastry Brush | Baking Sheets | Silicone Baking Mats or Parchment Paper
- Half Batch: Recipe can easily be halved to yield 12 rolls. Freeze half of the pizza dough for another time.
- Whole Wheat Version: If desired, use whole wheat pizza dough instead.
- Muffin Pan or 9×13-inch Baking Pan: You can bake these rolls in muffin pans or 9×13-inch baking pans. Bake time is the same.
- Reference my Baking with Yeast Guide for answers to common yeast FAQs.


Reader Comments and Reviews
Delicious!!! Made these last week – definitely adding to our rotation of regular meals. Used pre-made pizza dough from the grocery store deli. It yielded 10 rolls. There wasn’t a leftover between my husband and me! Worth every calorie and carb!!!
We made these for our “Only Murders In the Building” Season 3 watch party. They were perfect, and so easy to make!
So glad to read this! And I love that show. 🙂
A big hit with kids, grandkids and grandparents alike!
Hi, these were great! I want to have them stored uncooked in the freezer but I’m not quite understanding the instructions. Do you chill the roll, slice and freeze then cook from frozen? Or bake first then freeze? Thanks!
Hi Sam, the freezing instructions are for baked rolls. Hope this helps!
These look awesome! If I wanted to freeze the prepared rolls before baking, what would be your recommended procedure for making them ready to bake? Would it better to freeze the roll intact or freeze them sliced already? Or do they come out just as fresh and delicious if I freeze them after baking and rewarm them?
Hi Angela, that shouldn’t be a problem to freeze the unbaked rolls (although they’re still wonderful baked, frozen, and then reheating!). Bake time will be about the same as reheating the baked rolls. Hope you enjoy the recipe!
This recipe got rave reviews from my guests!
Glad to read this!
Love this recipe. Is there a reason why I can no longer view the instructions and ingredients? Thank you!
Hi Veronica, so glad you love these. There was a coding glitch on the website last night that erased the bottom half of this post, including the recipe! It has been restored. Sorry about that, we’re not really sure what happened.
Our family loves this recipe, I came back to make it yet again but I don’t seem to see the actual recipe on this page anymore. Has it moved or is something maybe just not loading on my end? I’d love to make it again but I can’t remember all the details! Please help
Hi Kaila, there was a coding glitch on the website last night that erased the bottom half of this post, including the recipe! It has been restored. Sorry about that; it only happened with this 1 post. Very odd! Glad you enjoy these.
Thank you so much for fixing that! I’m glad it was only on one post then.
They are very good!
When you roll up the dough, do you roll up from the short side or long side? Does it matter?
Hi Nancy, roll it up from the long side, so that you can cut 12, 1 inch rolls. Enjoy!
I don’t have any pepperoni. Is there any other pizza topping that would go well with this?
Hi Lana! Thinly sliced veggies or other pizza toppings would work great. Enjoy!
I assume you grease the muffin tins
Can these be baked, cooled and frozen for later use. If yes, then do they need to be thawed or baked again directly
Hi Shalika, absolutely. See recipe notes for make ahead and freezing instructions.
Thank you for this recipe, these are amazing and I used up some extra pizza dough! and for so many other recipes! Your site is my go-to and so many of your recipes have become my favorites…you know, the kind of recipe where you say “this is the one” and no longer have to search! Thank you!!
Hi Kim, We are so glad that you’re enjoying this!
These were amazing, as are all your recipes! Great for a party, my family of 6 devoured all 24 though, lol! Wonder about maybe doing these as ham and cheese or spinach and gruyere? Such great hand handheld snacks. Also I think I’ve used this pizza dough recipe 50+ times and shared it almost as many times. THANK YOU!
Hi Barbara, either of those would be delicious — let us know what you try!
Hi. I love your videos and have made many of your recipes with great success. I’m vegetarian, so I was wondering if I could leave out the pepperoni and use olives, bell peppers, and other regular pizza toppings instead?
Definitely! Thinly sliced veggies work best for rolling the dough up. Enjoy!
I made the homemade dough. Added roasted peppers and crumbled sausage to the pepperoni. Will use coarse cornmeal next time for more crunch. Delicious and loved by all.
Made this using your whole wheat pizza dough– it was a huge hit! I’m definitely making this again.
I made these last night, and they were delicious! I used your homemade pizza dough recipe, which was perfect. Since I made the dough, I found they took longer than the 2 hours 10 minutes listed- probably closer to 2 hours 45 minutes. Well worth the time and I will for sure make them again!
I just made this with some leftover pizza dough I had. As another commenter said, they weren’t very pretty after slicing into rolls, but they baked up beautifully and were delicious! My two beagles each had a bite and give it two paws up! Your recipes never disappoint, Sally!
I made these for my sons for dinner tonight. When I was cutting them into rolls, they weren’t so pretty, but I hoped that they would still taste good. They baked up really nicely, actually, and they turned out looking like pretty little rolls. I tasted half of one, and it was really yummy. I actually brushed the rolls with a little melted garlic butter. My sons loved them, and one of them commented on how he liked the crusty bottom due to the cornmeal. I love that I have dinner mostly prepared for them tomorrow. I LOVE make-ahead directions!! It’s a keeper! Thank you, Sally!
My family devoured these delicious rolls. I’m definitely adding them to my monthly menu. The kids loved them on their lunches, and as after school snacks. Thank you for this genius recipe!
I made these with puff pastry instead of pizza dough, though all the same fillings. I wasn’t sure if it would be too liquidy – but they came out delightfully! Like savory crispy palmiers. These will absolutely be making a grand entrance at my SB party!
These were a huge Superbowl hit!! Only made 12; my boys were looking for more after 10 minutes. Also made your popcorn chicken and loaded potato skins – fantastic!!! Used both sweet potato and russet for the skins – tasted just like TGIF appetizers! Every recipe I make of yours, Sally, is a huge hit. Oh, also made no-bake chocolate peanut butter cookies – OMG!!!!
Can you freeze these completely made but before baking or do you need to freeze the dough and then make the rolls after thawing it?
You could freeze the unbaked pizza rolls- I don’t see any issues with that.
These were so fantastic. Although I was a little hesitant to follow *all* of the instructions because of the time required for rising and chilling, the wait was 100% worth it. Loved these and they were a unique addition to our work bake sale!
When baking the rolls from freezer, there is no need to let them come to room temperature before baking, right?
Nope– they can be frozen.
We made these for supper tonight with our young children. They were fun to make together as a family, and we all loved them! I baked them in muffin pans – which I believe helped to save a couple of the rolls (from the end cuts) that likely would have otherwise unraveled. Thanks!
just made these and they came out delicious! loved the detailed and clear instructions, this is a foolproof recipe!
Could you make these the day before up until the chilling stage and then slice and bake the next day?
I’m sure you could chill the rolls overnight, yes. I’ve never tried it so I can’t be 100% sure the baked dough will still have the same texture after being in the refrigerator for so long. Let me know if you try it!
In a pinch could I use frozen bread dough or pizza dough?
Sure can!