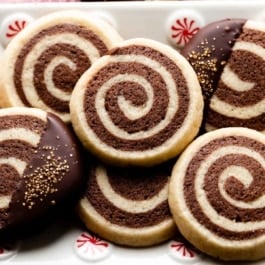
Enjoy classic chocolate and vanilla pinwheel cookies using this tried-and-tested homemade recipe. These mesmerizingly beautiful and delightfully soft pinwheel cookies come together by layering and rolling chocolate and vanilla cookie dough together. The best part about these slice-and-bake cookies? You only need to make 1 dough! Follow my in-depth tutorial and video for recipe success.
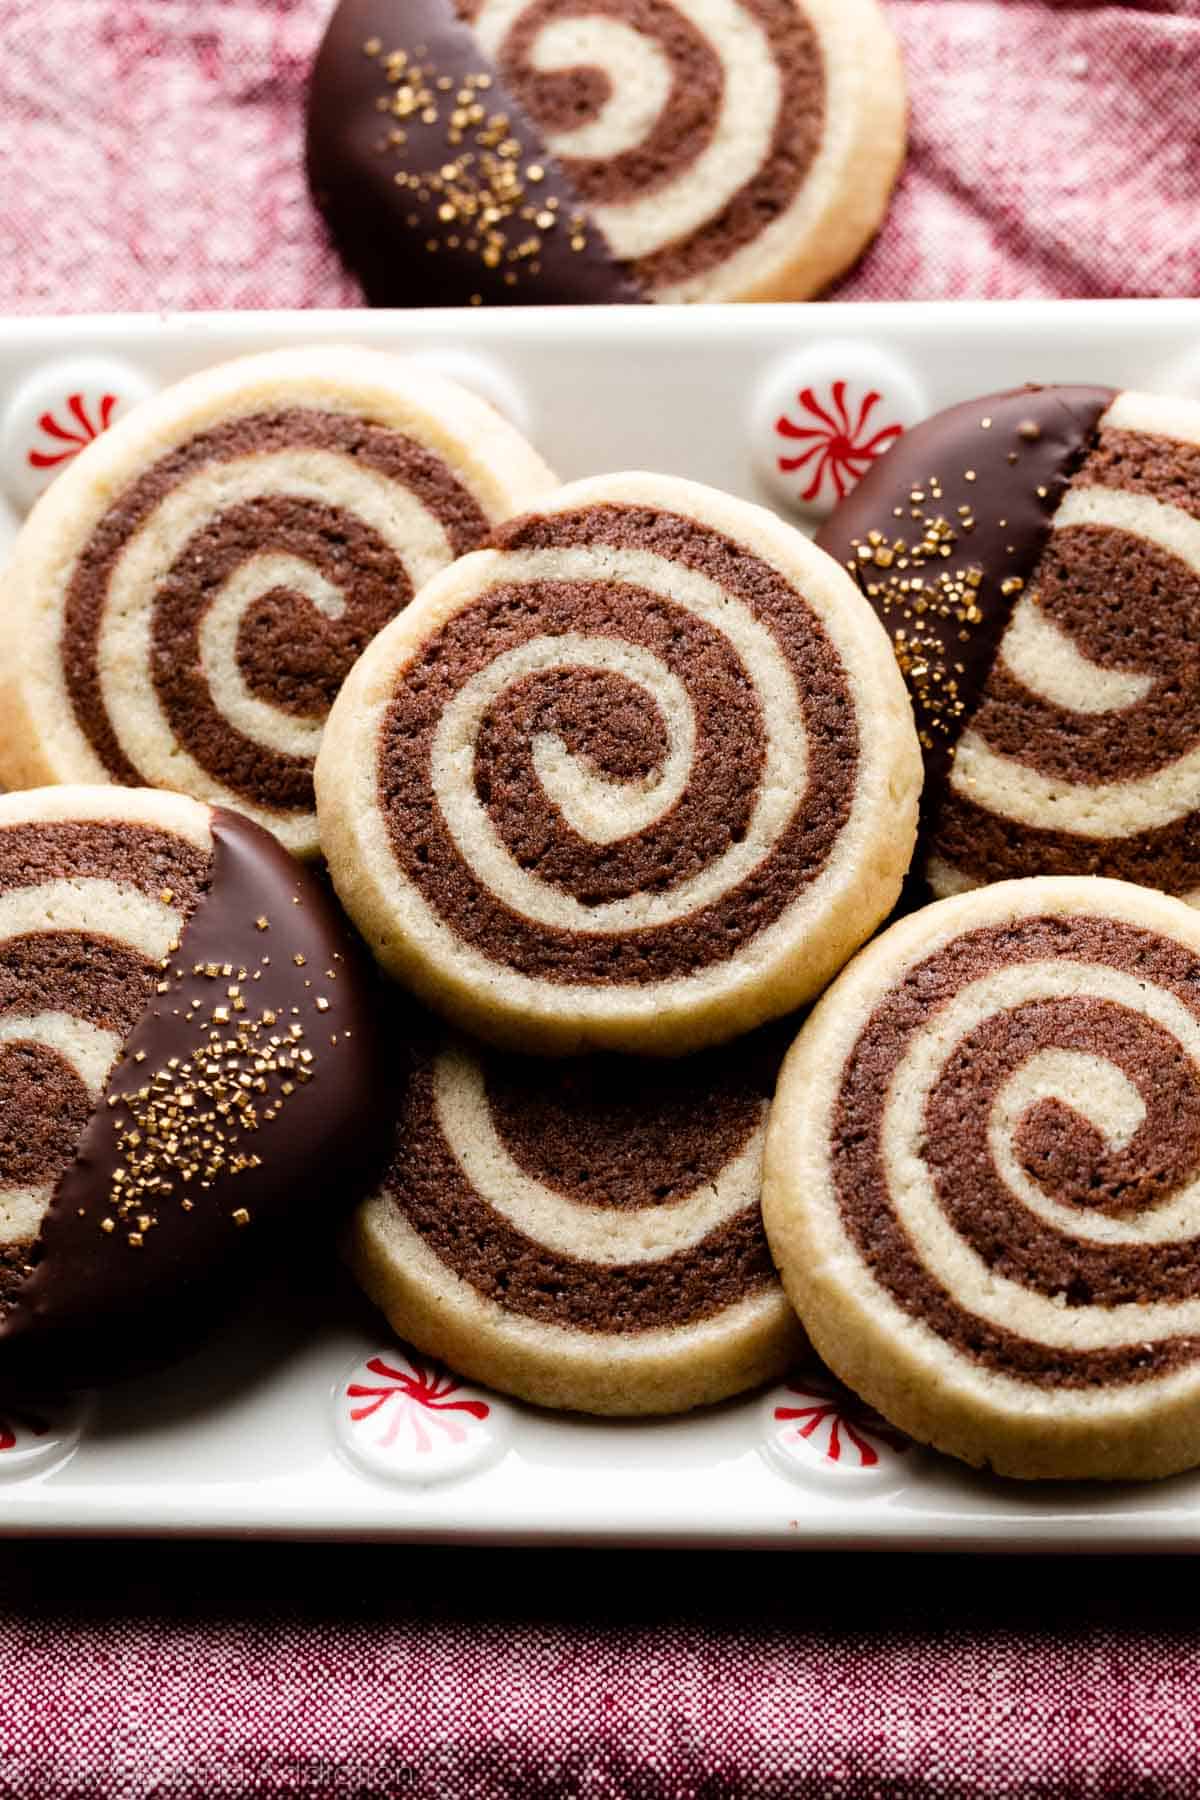
Look into the pinwheel cookies… you are getting hungry… very hungry…
Have you ever made pinwheel cookies before? I have a recipe for these slice-and-bake style cookies in Sally’s Cookie Addiction, but this one is very slightly different. (Though the end result is the same!) The main difference is that I use cocoa powder + milk for the chocolate dough today, instead of melted chocolate. I find the chocolate dough more pliable this way, and it’s easier to roll up with the vanilla dough to make that characteristic swirl. Both recipes work.
Today’s recipe actually uses the same base dough as mint chocolate checkerboard cookies and these neapolitan cookies, but since pinwheels have the tendency to overspread, I add a *touch* more flour. This gives you extra insurance, just in case the dough starts to get a bit sticky.

It’s All Made From the Same Dough
What I love most about this recipe is that, like my cookbook version, these neapolitan cookies, and these mint chocolate checkerboard cookies, it’s all made from one base dough. We’ll add some cocoa powder and milk to half the dough to make the chocolate portion. I also love adding a little espresso powder because it really deepens the cocoa flavor—I always use it in chocolate cake.
Some pinwheel cookie recipes have you make two completely separate doughs. So I appreciate the convenience of this version! You can spend more time perfecting your swirl. 😉
Love a good swirly slice-and-bake cookie? Try these cinnamon roll cookies!
What’s the Texture Like?
They may look like crunchy cookies, but they’re surprisingly soft in the centers, thanks to the soft chocolate dough and the extra egg yolk. If you can handle a sticky chocolate dough, you’ll be rewarded with a soft cookie! Let’s get started.
Let Me Walk You Through This Process
The full printable recipe is below, but there are some key points I want to walk you through before you begin. The process can be tricky if you aren’t fully prepared, so let me set you up for success!
The base dough is very similar to my sugar cookies, butter cookies, chocolate butter cookies, and spritz cookies. You need these ingredients:
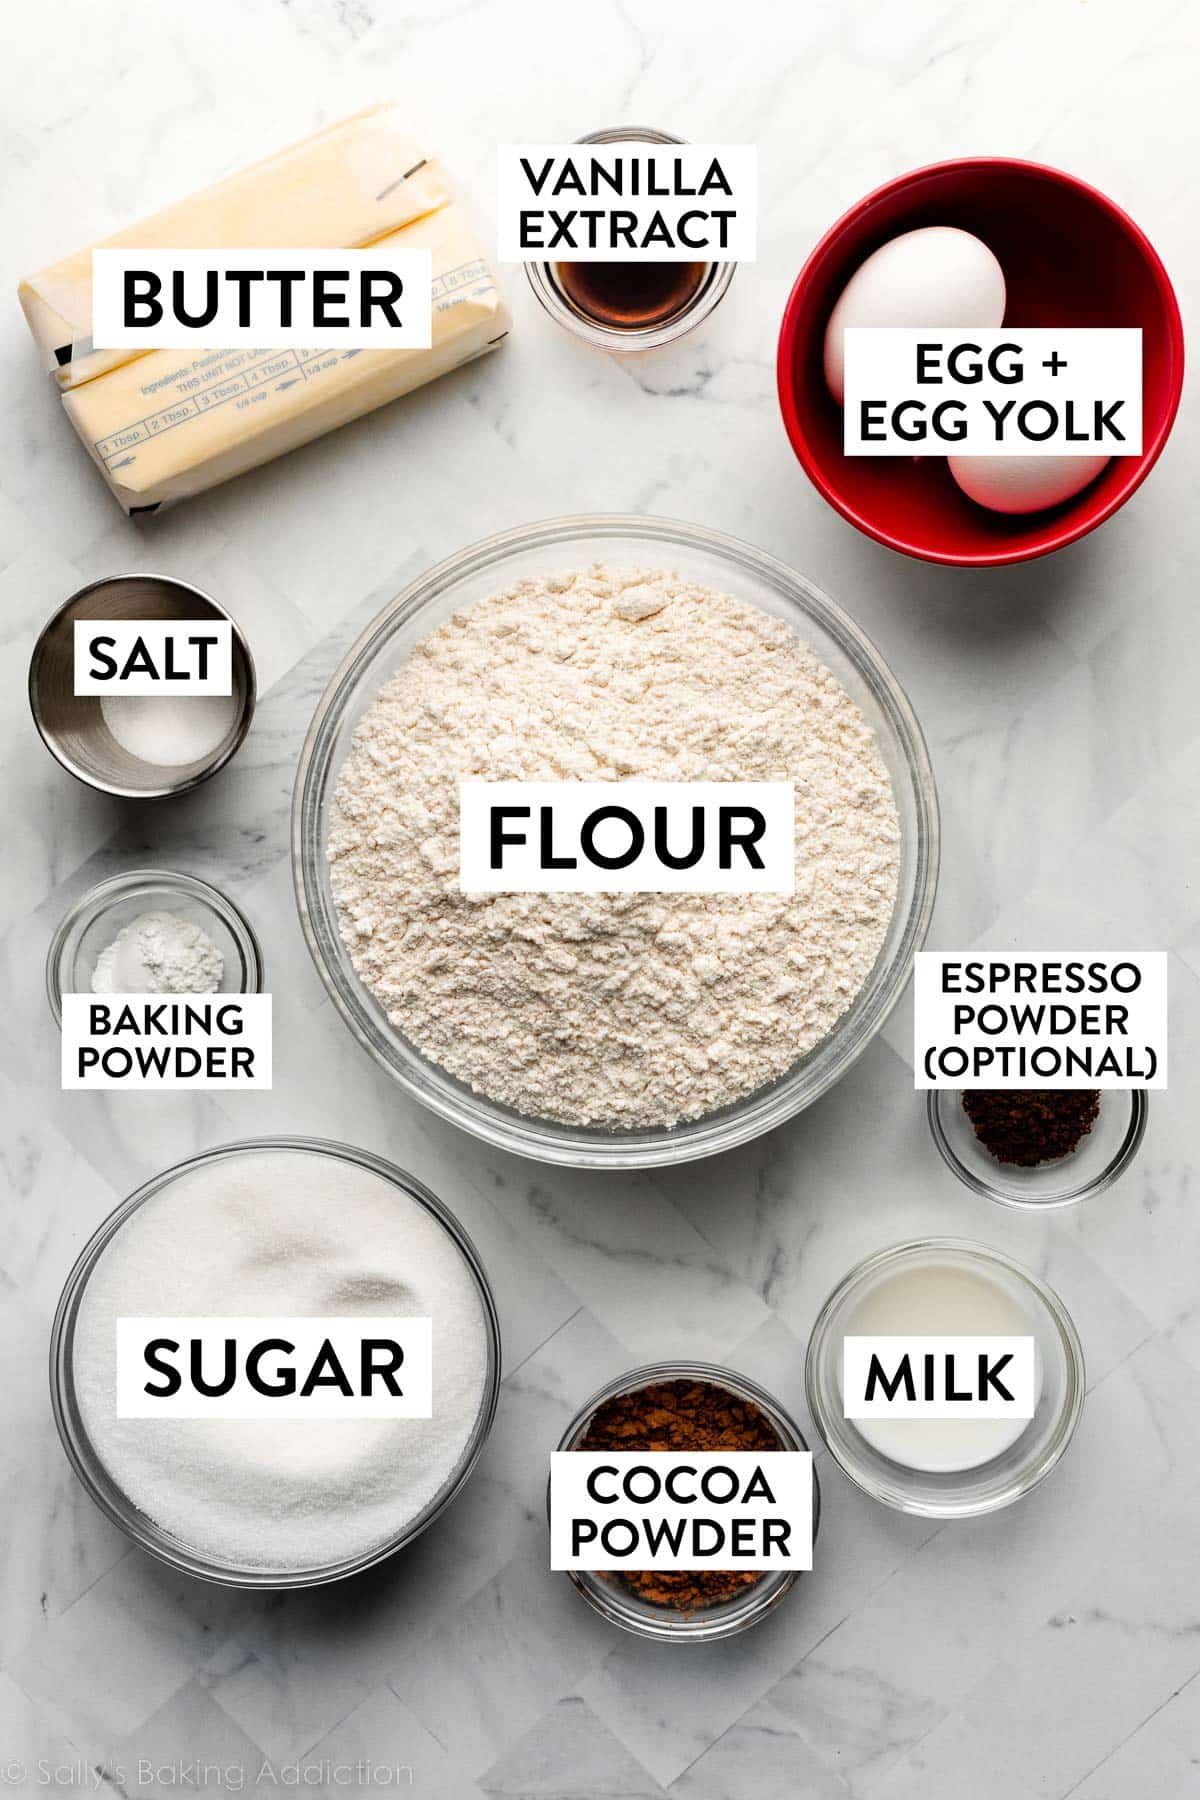
Not many notes on the ingredients as these are all fairly common in a baker’s kitchen! Two things, though: (1) Make sure you use proper room temperature butter for creaming. (2) We’re adding an extra yolk to the dough for softness. Trust me on this—1 egg is not enough and 2 eggs is too much. So, just like a batch of extra moist and soft chocolate chip cookies, use 1 whole egg + 1 extra egg yolk.
(Note the photo above shows 2 eggs, but you don’t need that second egg white.)
Make the Dough & Chill It Briefly
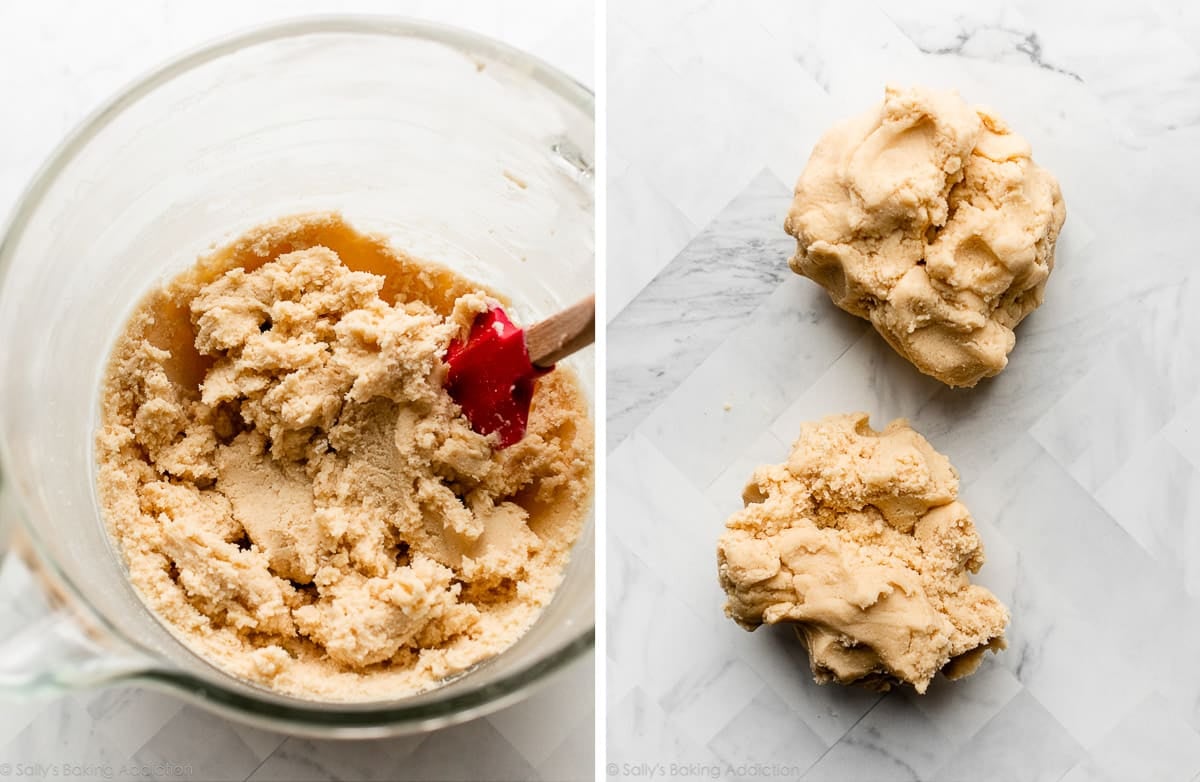
The dough comes together with a mixer fairly quickly. After it’s all mixed together, divide it in half. Don’t get worried if it’s not perfectly even—if one portion of the dough is a little less than half, use that one for making the chocolate dough, since you’re going to add more ingredients to it:
Place half of the dough back into the mixing bowl and add cocoa powder, milk, and the optional espresso powder:
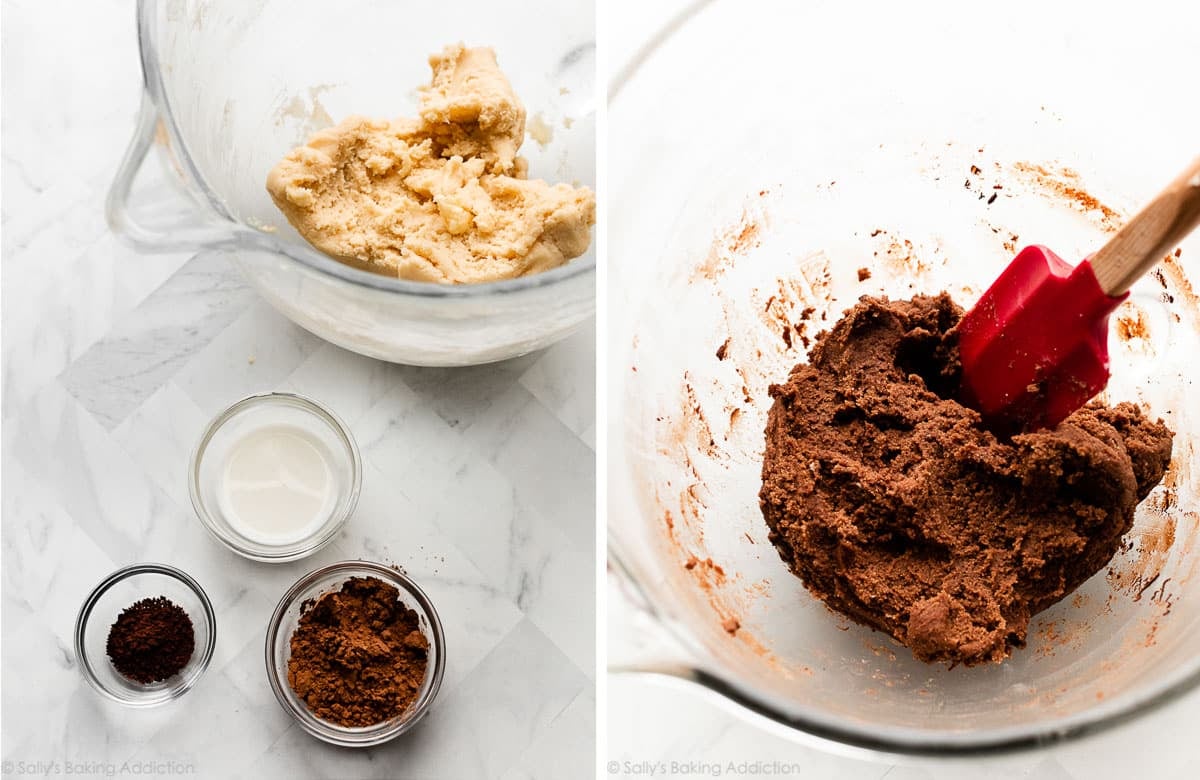
Now you have 2 doughs: vanilla and chocolate. Using lightly floured hands, shape each into small rectangles, about 1 inch thick, and about 4×5 inches. (The exact measurement doesn’t matter much here, but it will when you go to roll the doughs out after chilling.) You can use flour on the counter and your hands when you’re shaping the vanilla dough, but you can use cocoa powder instead when you’re working with the chocolate dough. (Or just stick with flour.)
Wrap doughs up and chill for just 60–90 minutes. The point is to chill the doughs just long enough so they’re easier to roll out and handle, but also still pliable and bendy. If the doughs chill too long, they’ll be too stiff. 60–90 minutes is your sweet spot! If you’re making these as part of a marathon holiday cookie baking day, this is the perfect amount of time to tackle quick no-chill recipe like shortbread cookies.
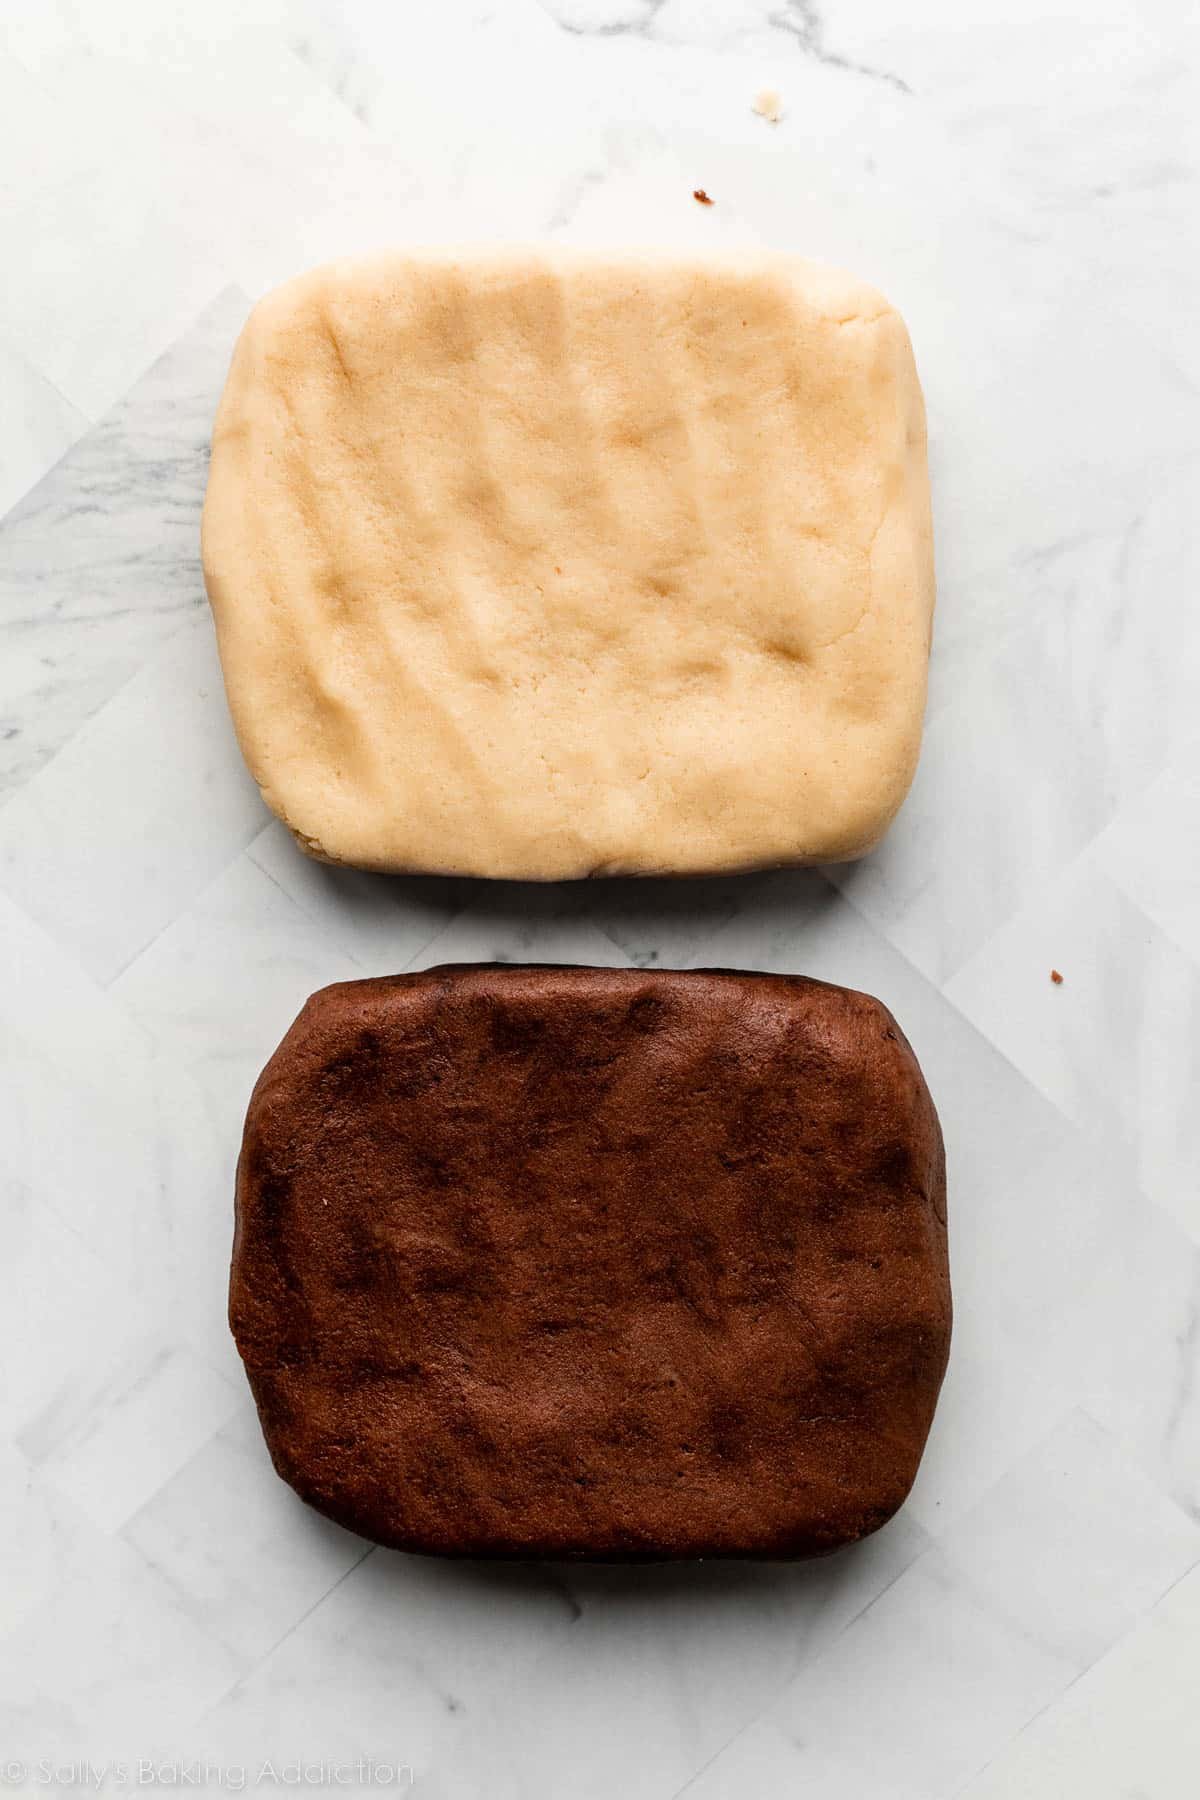
Tip: The chocolate dough is stickier than the vanilla dough. It’s not quite as sticky as these double chocolate chip cookies, but cocoa powder usually produces a sticky dough. That’s why, when we roll the doughs together to make the pinwheel design, we have the vanilla dough on the bottom. Vanilla will be on the outside of the cookie. If we swapped them and had the chocolate dough on the outside, the cookies would spread even more.
How to Roll Pinwheel Cookies
Are you ready to roll? Let me walk you through this. I promise you can do it.
After the blocks of dough chill in the refrigerator, it’s time to shape the pinwheel cookies. Place a piece of parchment paper on your work surface, and sprinkle it with flour to keep the dough from sticking.
Rolling Tip: I layer the parchment paper sheet on top of a silicone baking mat, to keep it from sliding all over the counter. You could also tape the edges of the parchment to the counter before you begin rolling. I find these doughs stick less to parchment vs. silicone baking mats, so that’s why I roll out on parchment. Do not roll the doughs out on your counter because you’ll have a difficult time lifting/transferring them.
Remove the vanilla dough from the refrigerator. (Keep the chocolate dough in the fridge for now.)
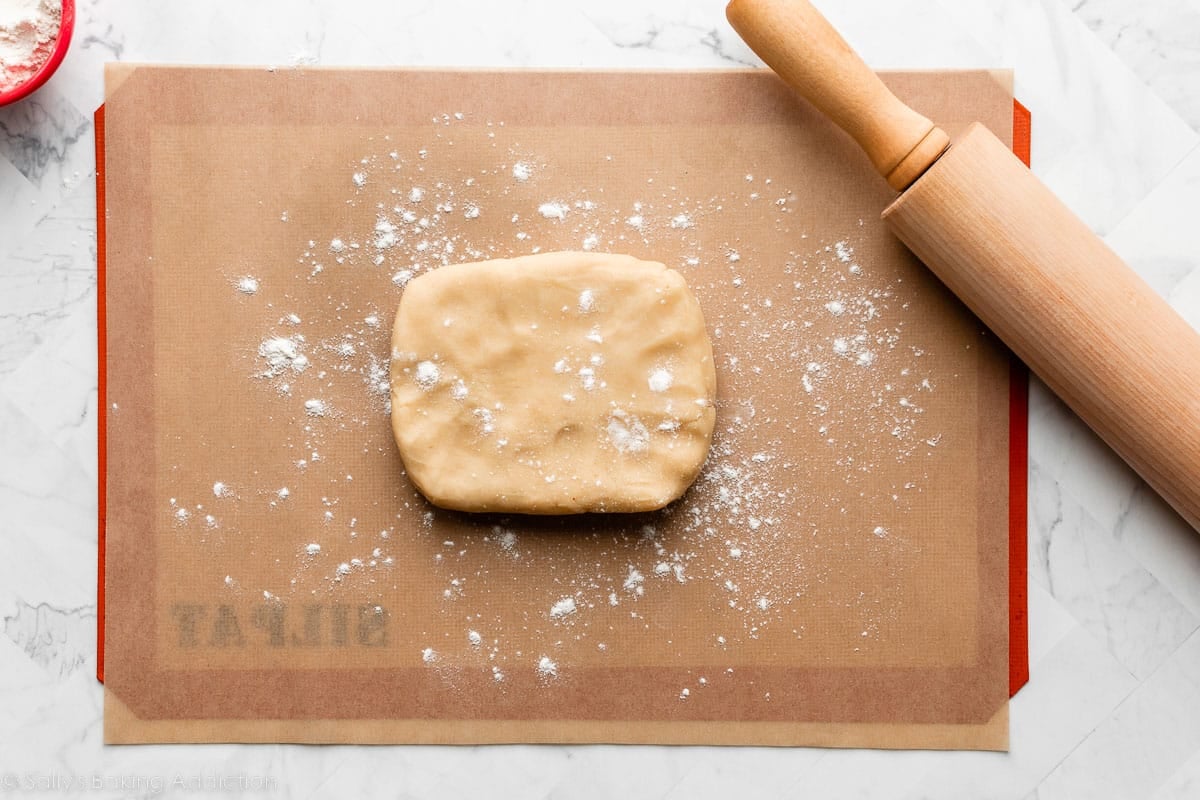
Roll the vanilla dough into an 8×14-inch rectangle, between 1/8–1/4 inch thick.
Another Rolling Tip: Flip the dough every now and then in between rolls, to make sure it’s not sticking. Add a little more flour if needed to prevent sticking. Use your hands to straighten out the sides. You can see me do this in the video below.
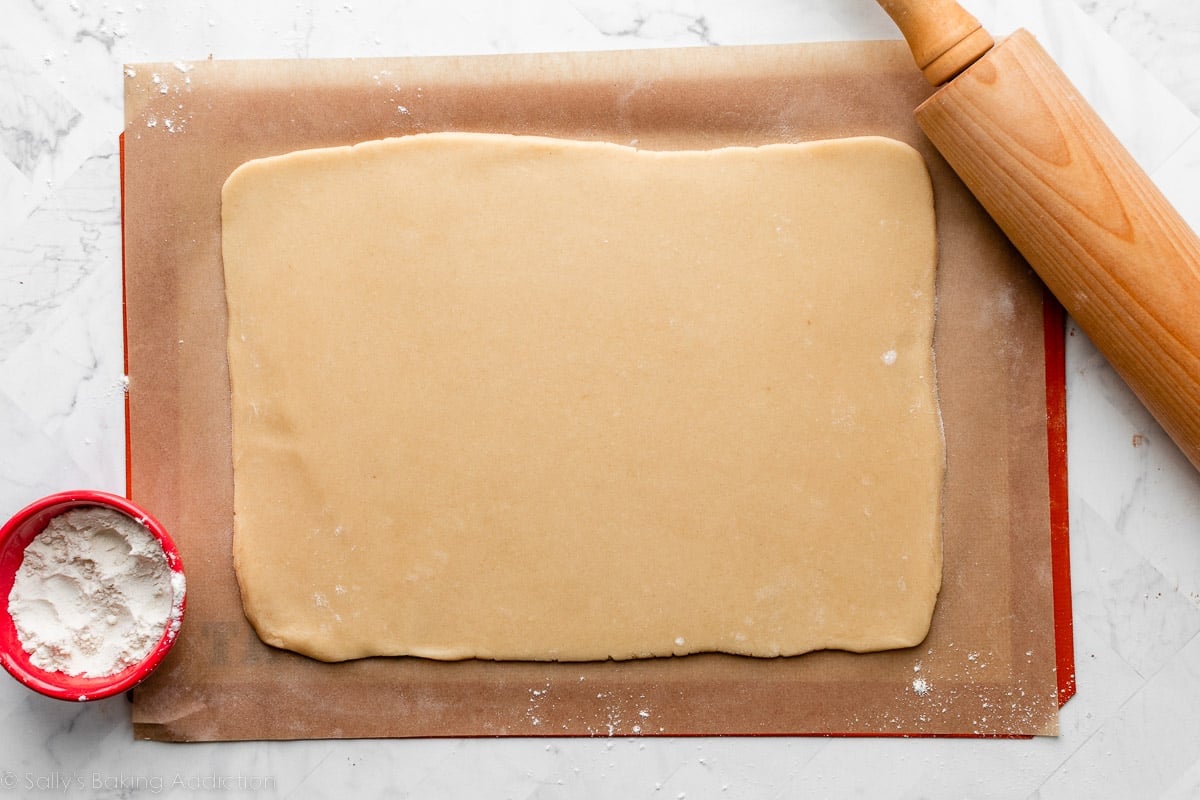
Return the rolled-out vanilla dough to the refrigerator (simply lift up the parchment and place the whole thing in the refrigerator), and then work on the chocolate dough. Dust your rolling pin and work surface with cocoa powder and roll out the chocolate dough to about the same size as the vanilla, or slightly smaller.
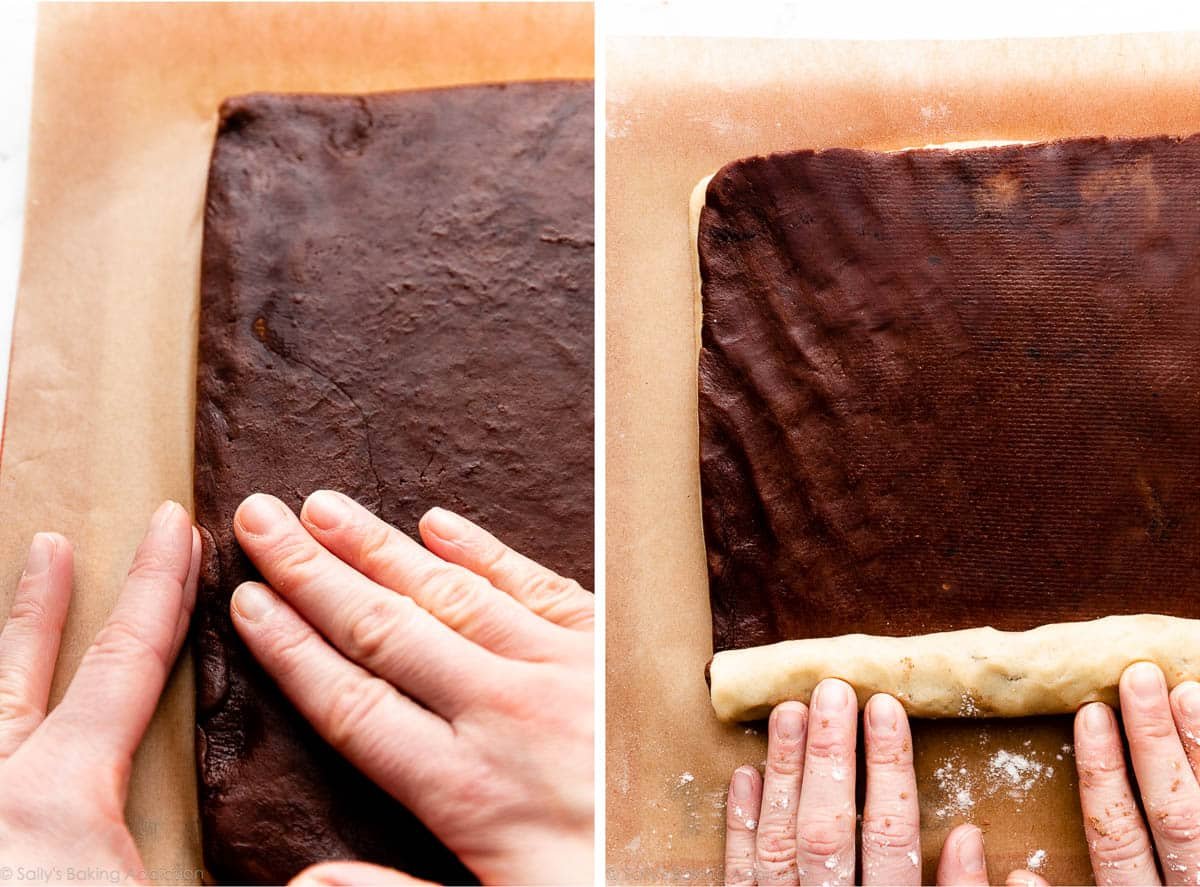
Carefully pick up the chocolate dough and layer it over the top of the vanilla dough. Pat it down gently to rid any air bubbles from between the layers.
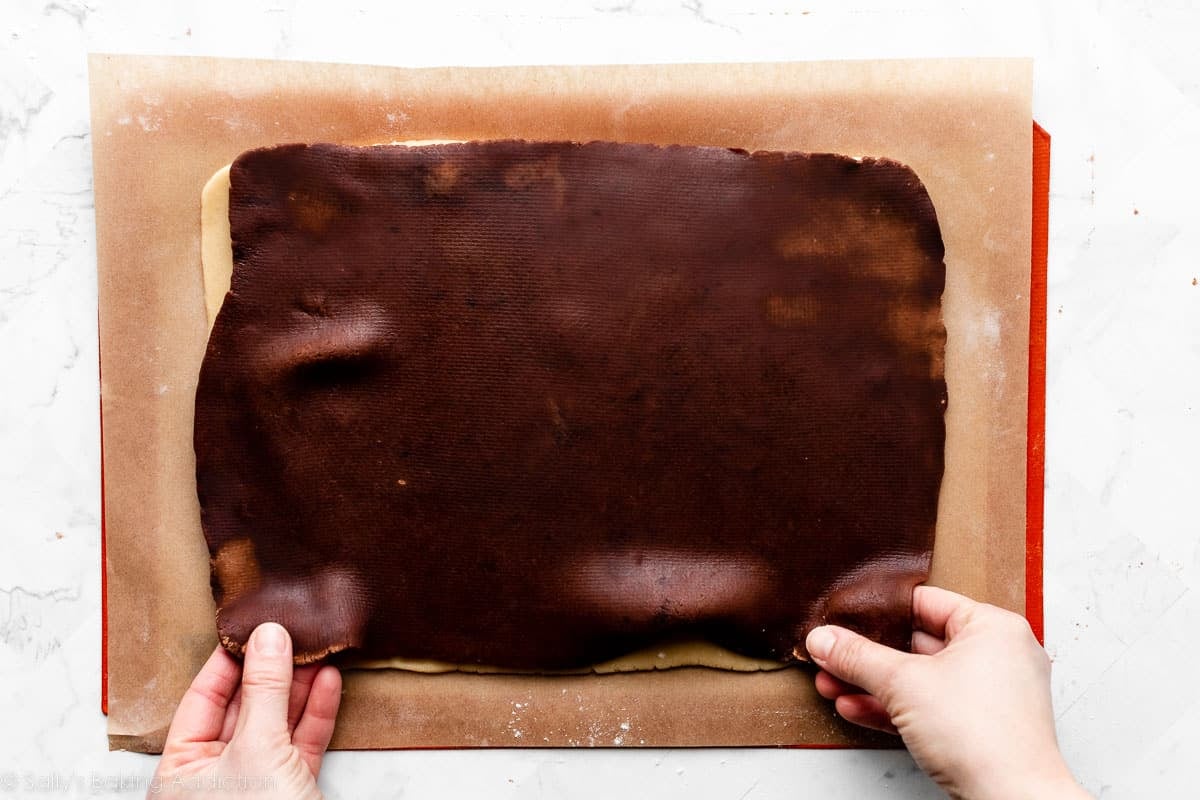
Tip: If you’re having trouble getting the doughs to line up nicely, see the Troubleshooting section below. You can straighten up the edges with your hands.
Working from one of the long edges, begin rolling. Go slowly, and try to roll it as tightly as possible. You can kind of meld the doughs together with your fingers at the beginning to get the roll started. (You can see me do this in the video tutorial below.) If you notice bare or cracked spots of vanilla dough, just patch it up with your fingers as you go. Doesn’t have to look perfect.
Chill the Dough Logs for 2 Hours
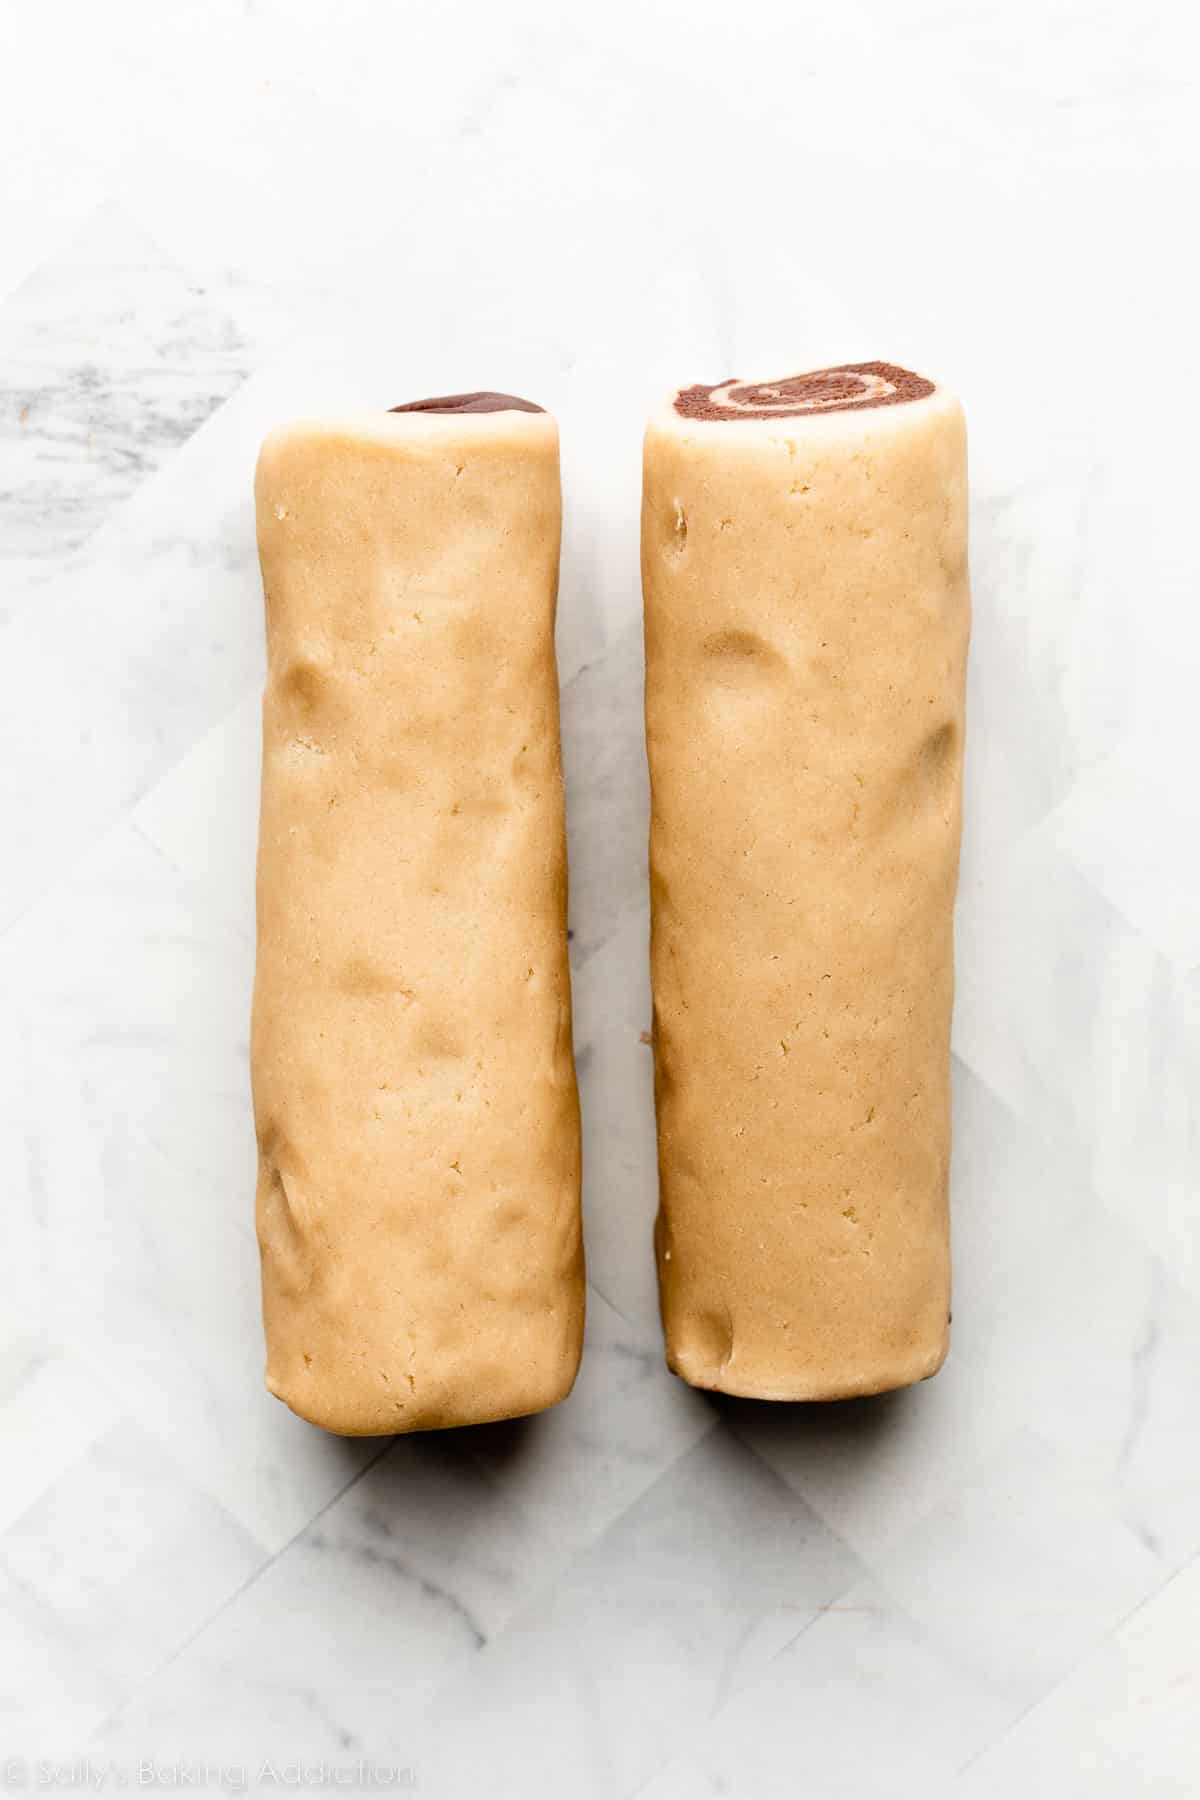
You’ll end up with a log of dough that’s about 14 inches long. Slice it in half. Wrap up both logs of dough, and chill them in the refrigerator for at least 2 hours, and up to 4 days. This chilling time can be much longer than the first, because we’re done rolling/shaping the dough and it no longer has to be pliable.
Let’s Slice & Bake the Cookies
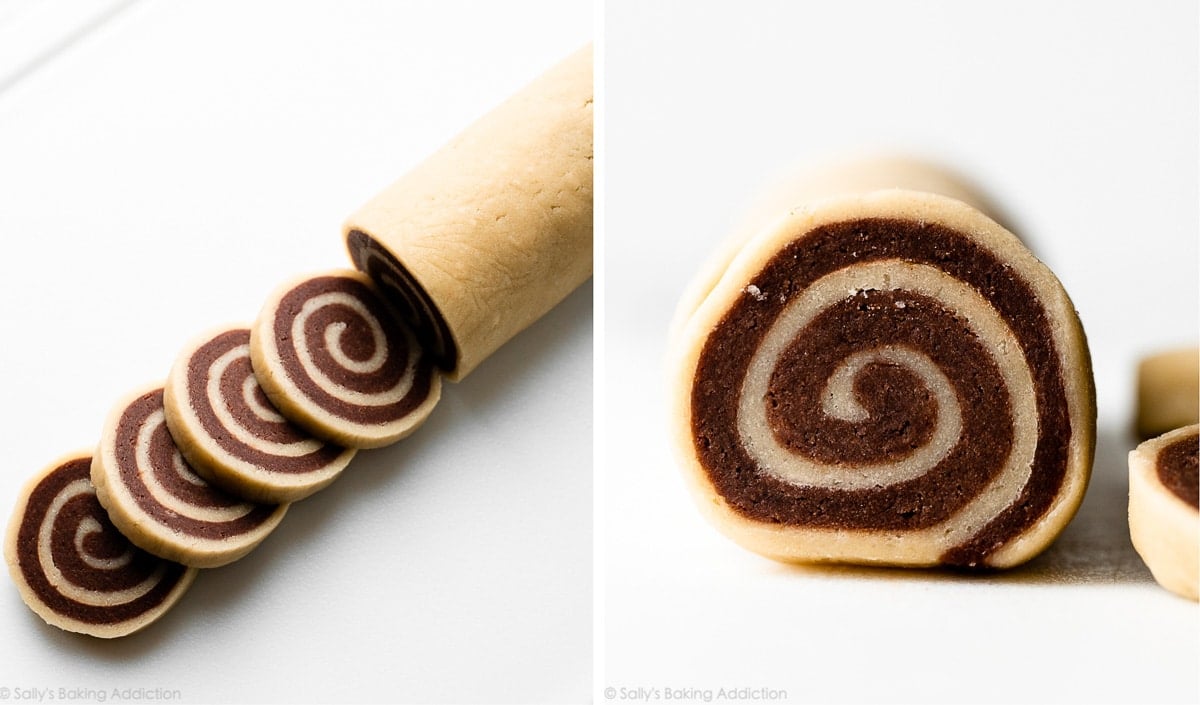
When you’re ready to bake, use a sharp knife to slice each dough log into 14 cookies, about 1/2 inch thick. If any of your cookies look a little misshapen, you can reshape into a circle before you put it on the baking sheet. (Again, you can see me doing this in the video below.)
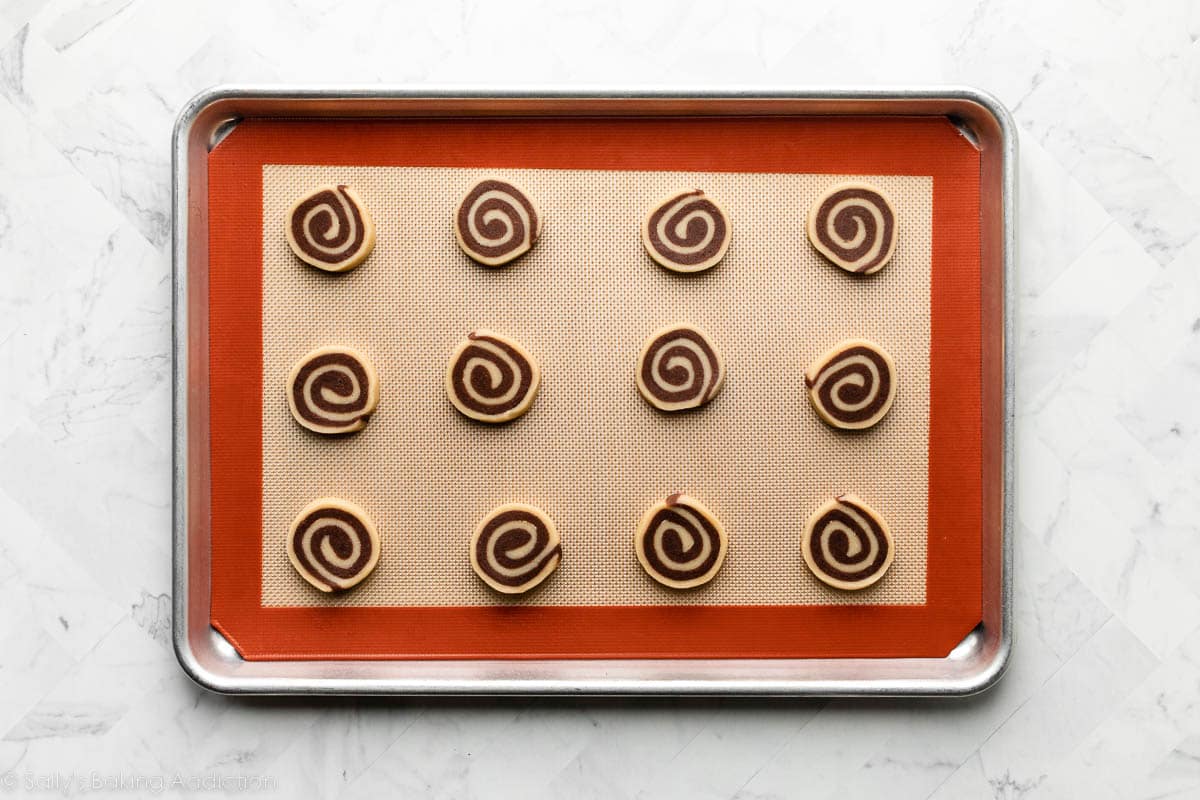
Place the cookies about 2 inches apart on the baking sheet and bake.
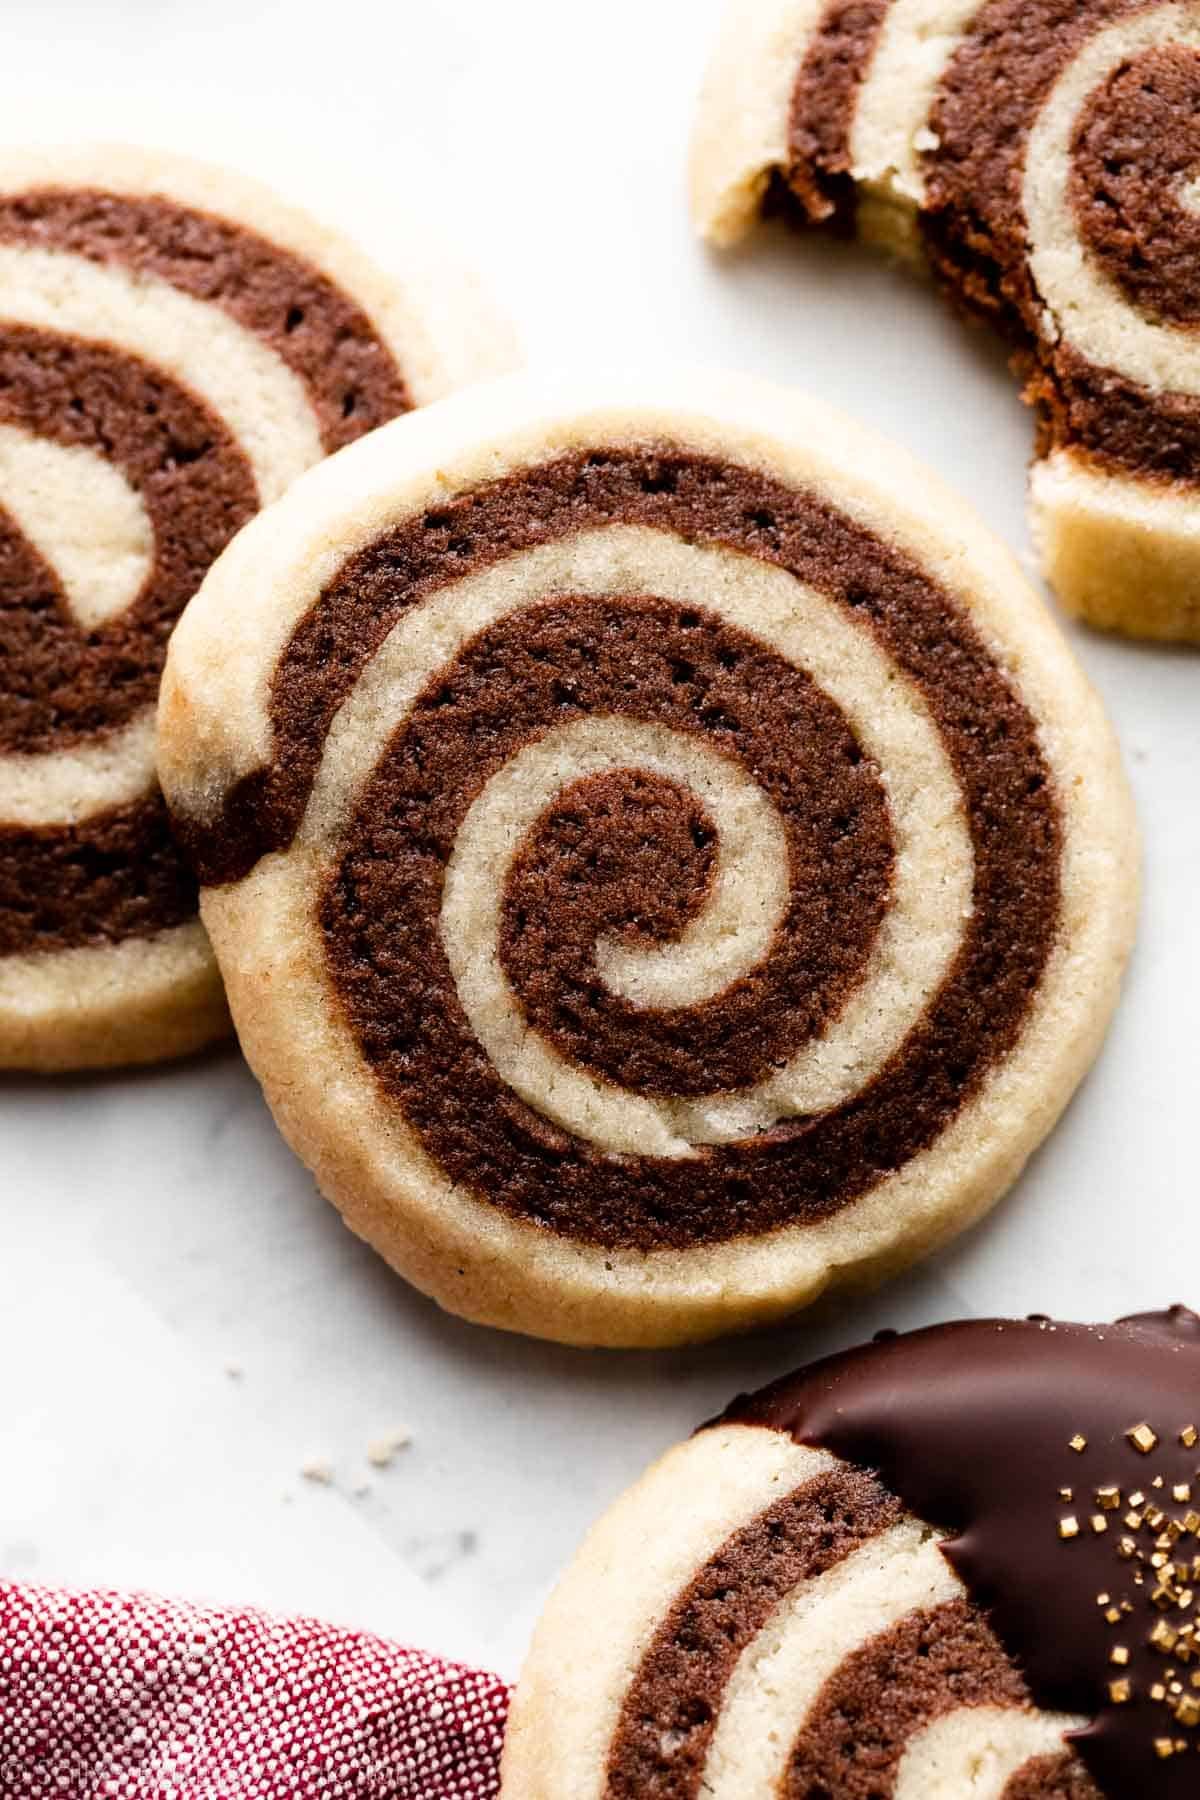
How to Prevent Pinwheel Cookies From Over-Spreading
These pinwheel cookies have a tendency to spin… I mean, spread… out of control, so we want to keep this dough cold. Make sure you chill the dough for at least the minimum amount of time whenever the recipe instructs. 2 tips:
- Any time you aren’t working with a dough, place it back in the refrigerator. When you’re working with either the vanilla or the chocolate dough, keep the other one in the refrigerator.
- You can also place the baking sheets with the sliced cookies on them in the refrigerator for about 10 minutes before baking, to help set their shape. (Or put all of the sliced cookies on a plate to refrigerate if your refrigerator doesn’t have enough room for a baking sheet.)
Troubleshooting Pinwheel Cookies
- Vanilla dough is sticking to parchment: Place the whole thing back in the refrigerator for 10 minutes, then use flour-dusted fingers to patch it back together as best you can.
- Chocolate dough is tearing when I try to move it: Place the whole thing back in the refrigerator if you can for 10 minutes. Use cocoa powder- or flour-dusted hands to patch anything back together.
- Chocolate & vanilla doughs aren’t lined up evenly: That’s fine, tear off any overhanging pieces of chocolate dough, and use it to patch any areas that need some.
- I can’t get it to be an even rectangle: Use a pizza cutter to slice off any uneven edges.
- Chocolate and vanilla swirls are separating in baked cookies: Make sure that you pat down any air bubbles between the chocolate and vanilla doughs before you roll them together. Also, it could be that you’re adding a little too much flour when you’re rolling out the doughs. This is great for keeping the dough from sticking, but can also make it difficult for the 2 doughs to stick together. Next time, try using an egg wash with the extra egg white and 1 Tablespoon water. Brush the egg wash on the vanilla dough before layering on the chocolate dough. (This is a step in my cookbook, but I omit it here. I find ridding air bubbles between the doughs usually solves the issue.)
Variations
- Tinting the Dough: Feel free to tint the vanilla dough. After dividing the dough in half, beat in a little gel food coloring. If you’re skipping the chocolate dough (see next), you can tint both doughs OR you can leave 1 dough white and tint the other half.
- Skipping the Chocolate/Adding Flavor Extracts: Yes, you can skip the chocolate and tint one or both of the doughs a color so the pinwheel design shows. Feel free to keep the flavor of both dough halves vanilla, or add another extract, such as peppermint or coconut. See recipe Note below.
- Roll Dough Logs in Sprinkles or Coarse Sugar: After chilling the logs of dough, you can roll in sprinkles or coarse sugar before slicing and baking.
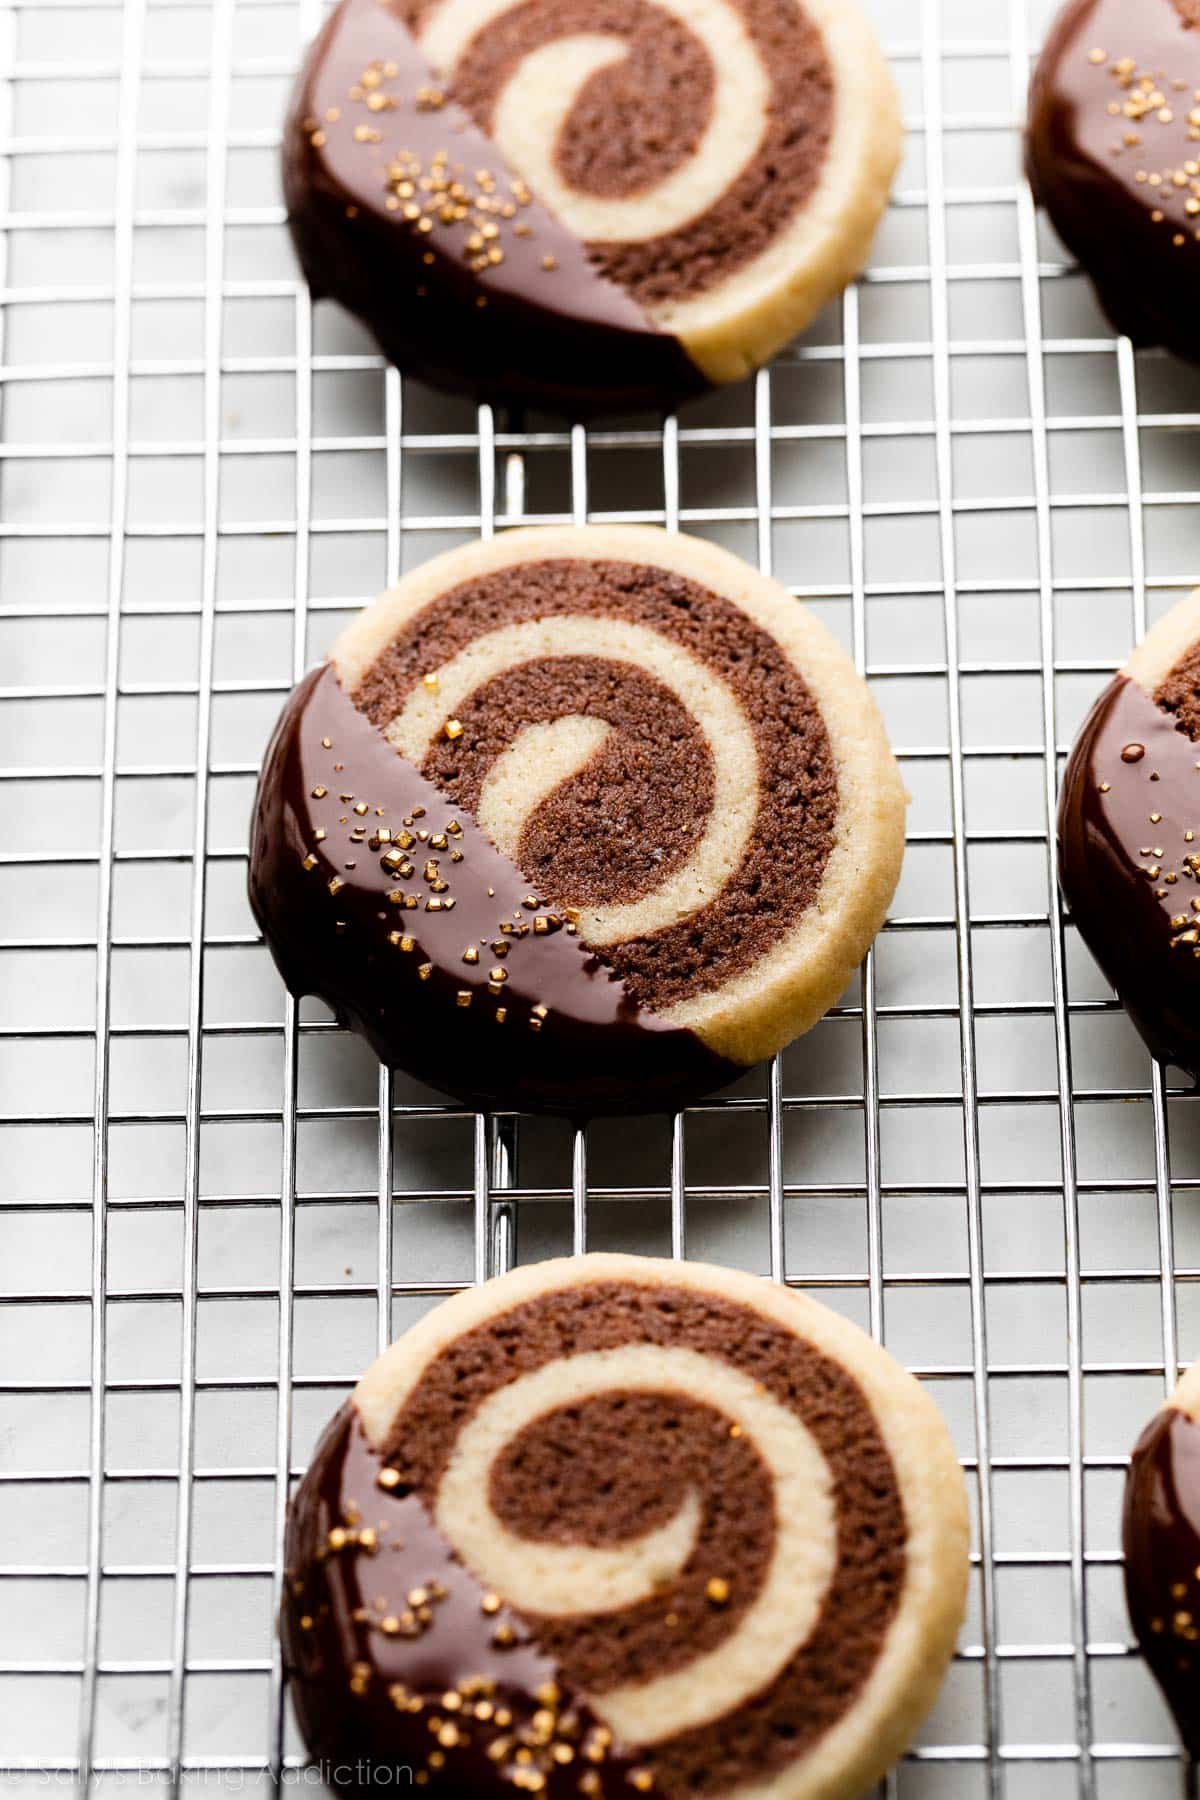
- Chocolate Dip: Like these chocolate ginger cookies, pinwheels are extra delicious with a dip in melted chocolate. I sprinkled the chocolate with some shimmery gold sprinkles. Who doesn’t love sparkly Christmas cookies?!
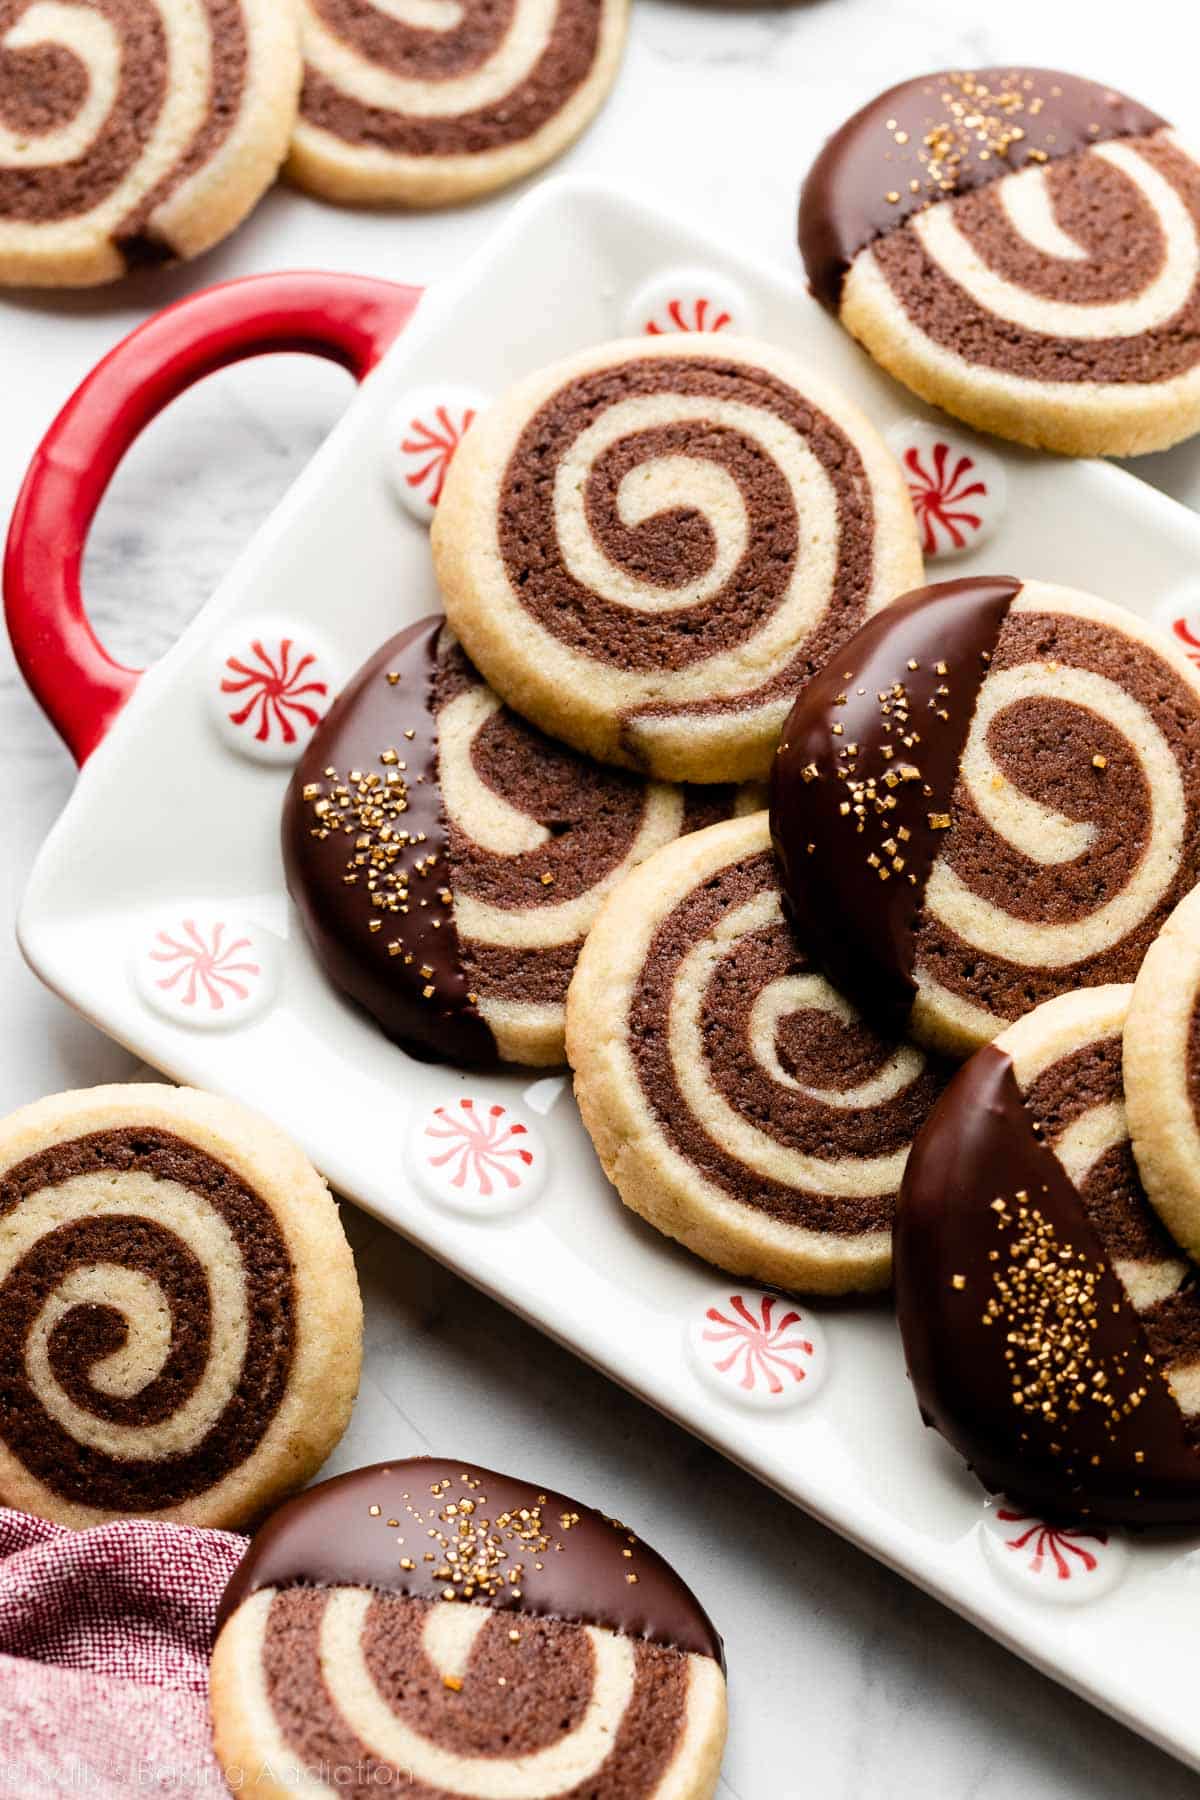
Or try a mint chocolate version, like these checkerboard cookies. Flavor/tint the vanilla dough just as you do in that recipe.
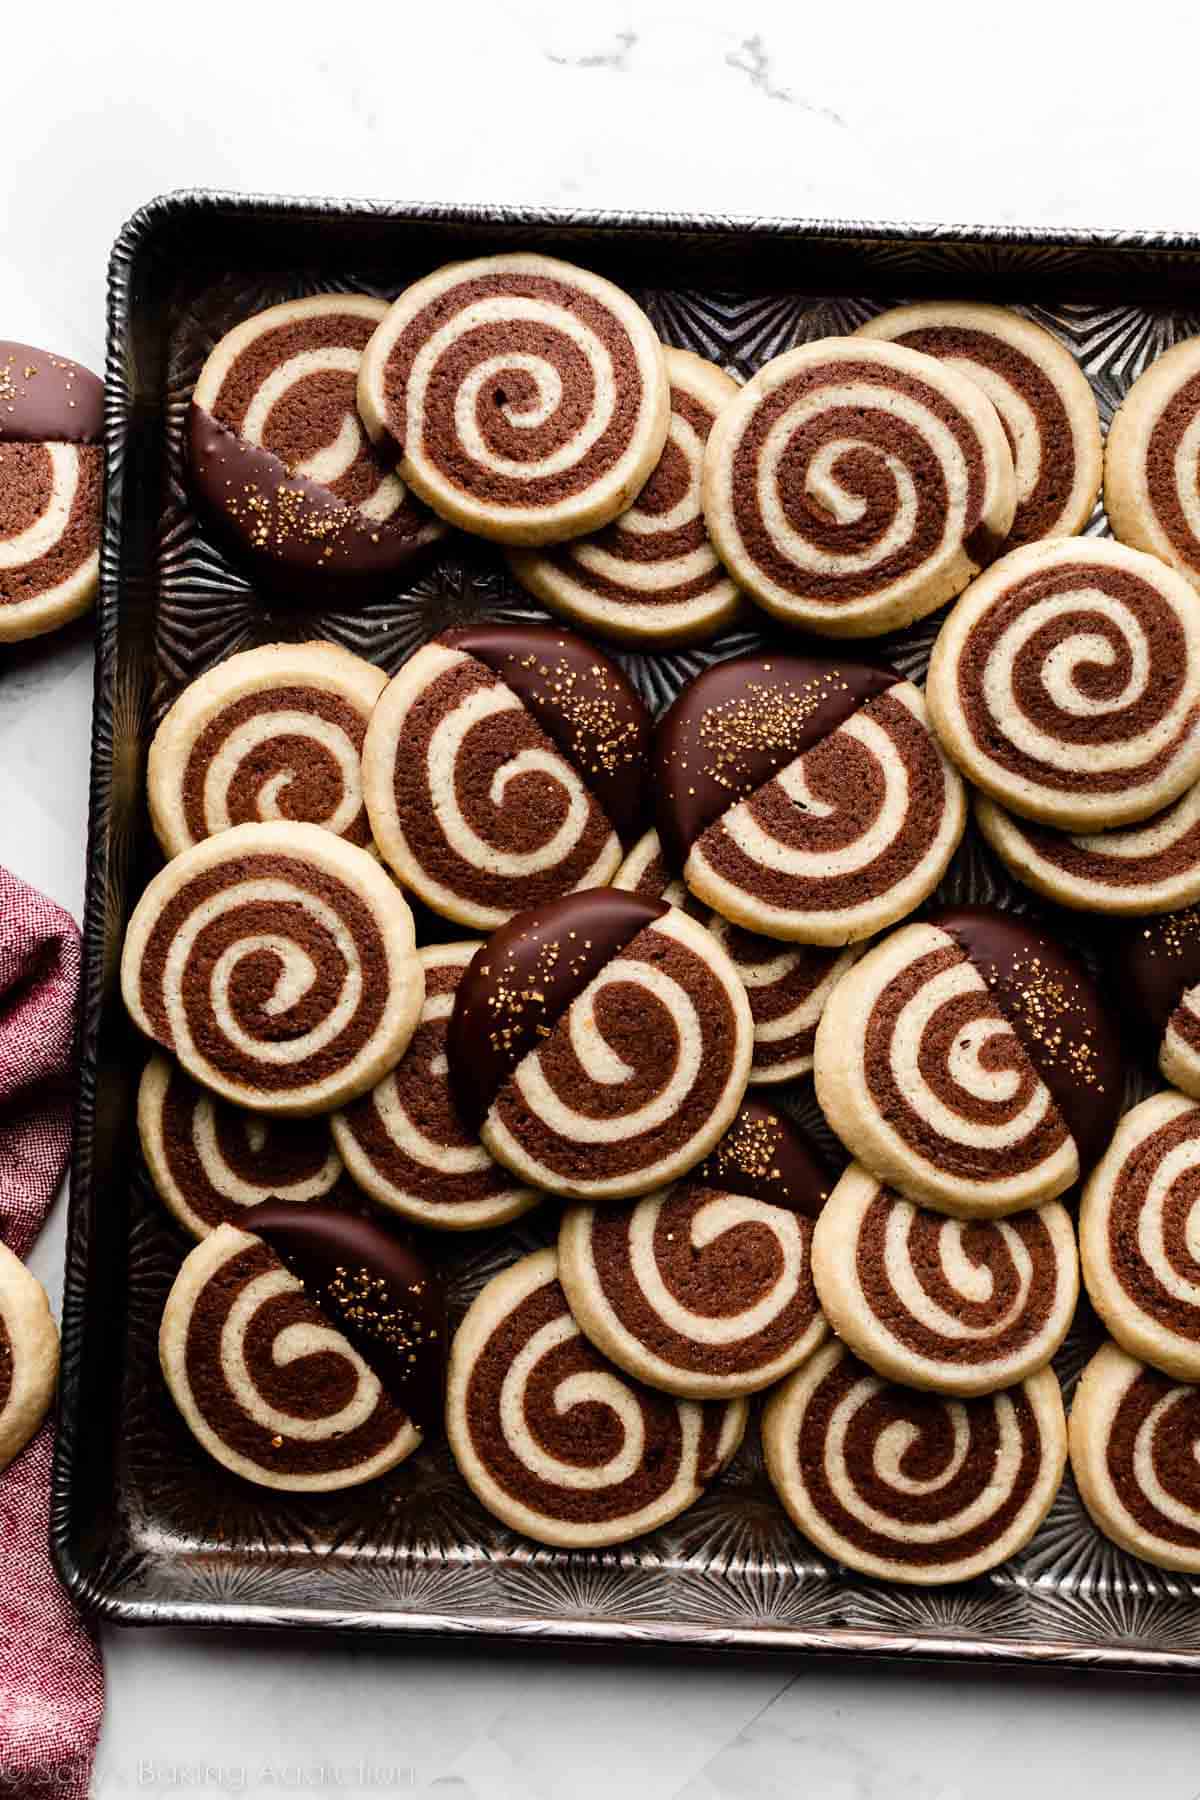
How to Make Pinwheel Cookies
- Prep Time: 4 hours, 15 minutes (includes chilling)
- Cook Time: 15 minutes
- Total Time: 4 hours, 35 minutes
- Yield: 28 cookies
- Category: Cookies
- Method: Baking
- Cuisine: American
Description
These buttery slice-and-bake pinwheel cookies are a delicious (and beautiful!) swirl of chocolate and vanilla, which start with 1 basic cookie dough. For best success, watch the video tutorial and read through the recipe and Notes before starting. I also have a troubleshooting section above.
Ingredients
Base Cookie Dough
- 2 and 2/3 cups (333g) all-purpose flour (spooned & leveled)
- 3/4 teaspoon baking powder
- 1/2 teaspoon salt
- 1 cup (16 Tbsp; 226g) unsalted butter, softened to room temperature
- 1 cup (200g) granulated sugar
- 1 large egg + 1 egg yolk, at room temperature
- 1 and 1/2 teaspoons pure vanilla extract
For the Chocolate Dough
- 2 Tablespoons (10g) unsweetened natural or dutch-process cocoa powder
- 1 Tablespoon (15ml) milk
- optional: 1/2 teaspoon espresso powder
Optional for Dipping
- 6 ounces (170g) white, semi-sweet, or dark chocolate, finely chopped (see Note)
- optional: sprinkles
Instructions
- Make the dough: Whisk the flour, baking powder, and salt together in a medium bowl. Set aside.
- In a large bowl using a hand mixer or a stand mixer fitted with a paddle attachment, beat the butter and granulated sugar together on medium-high speed until creamed, about 2 minutes. Scrape down the sides and up the bottom of the bowl as needed. Add the egg, egg yolk, and vanilla extract and beat on high speed until combined, about 1 minute. Scrape down the sides and up the bottom of the bowl and beat again as needed to combine.
- Add the flour mixture to the wet ingredients and mix on low speed until combined. Dough will be thick and sticky. Remove from the mixing bowl—no need to rinse out the mixing bowl.
- Divide the dough in half: You should have a little less than 2 lbs. of dough, or somewhere between 800–900g. Divide the dough in half. Note: It’s ok if the portions aren’t exactly half. If one half is slightly smaller, use that one for the chocolate dough.
- Make the chocolate dough: Place half of the dough back into the mixing bowl. Add the cocoa powder, milk, and espresso powder (if using). Beat on low speed until dough is combined.
- Shape & chill for 60–90 minutes: The doughs are sticky, so just do your best in this step. Place both doughs on a lightly floured work surface. (Tip: I like to use cocoa powder as my “flour” for handling/rolling the chocolate dough.) With lightly floured hands, carefully form each dough into a 1-inch-thick rectangle block, about 4×5 inches in size. Wrap both dough blocks up in plastic wrap, parchment paper, or aluminum foil. Refrigerate for 60–90 minutes. The *key* is to only refrigerate until the dough is less sticky, but still pliable enough to bend and shape. Chilling any longer will make it difficult to roll together. If you need to chill it for longer than 90 minutes, make sure you let it sit at room temperature for 15–30 minutes before continuing with the next step.
- Roll out the doughs: Remove vanilla dough from the refrigerator and unwrap. Keep chocolate dough in the refrigerator. Lightly flour a piece of parchment paper. Note that I like to place the parchment paper on top of a silicone baking mat to prevent it from sliding all over the counter, or you can tape it down. (Do not roll the doughs directly on the counter because you may have a hard time lifting/transferring them.) Using a lightly floured rolling pin, begin rolling out the vanilla dough. Flip the dough every now and then between rolls to ensure it’s not sticking to the parchment. Roll out to an 8×14-inch rectangle, and use your hands to ensure the sides are straight and smooth. The thickness will be between 1/8–1/4 inch. Set the dough aside, and it’s most helpful if you refrigerate the vanilla dough at this time. Pick up the vanilla dough using the parchment paper and place the whole thing in the refrigerator as you roll out the chocolate dough. Lightly dust another piece of parchment paper with flour or cocoa powder. Using a lightly floured (or cocoa powder-ed) rolling pin, roll the chocolate dough out to an 8×14-inch rectangle, or very slightly smaller. Remove vanilla dough from the refrigerator. Carefully peel the chocolate dough off the parchment and do your best to line it up on top of the vanilla dough. Flatten the chocolate dough on top as best you can, gently patting it down to remove any air bubbles between the layers of doughs. Patch any torn chocolate dough pieces back together. And feel free to use a pizza cutter or sharp knife to straighten up any uneven edges.
- Roll into a log: Starting with a long side, tightly roll the 2 doughs together, making sure there are no gaps between them. You can use the parchment paper under the vanilla dough to assist in rolling. Go slowly, and try to roll it as tightly as possible. You can kind of meld the doughs together with your fingers at the beginning to get the roll started. (You can see me do this in the video tutorial below.) If you notice bare or cracked spots of vanilla dough, which usually happens (don’t worry!), just patch it up with your fingers as you go. Doesn’t have to look perfect. Once you have your log of dough, cut it in half, so you have two 7-inch-long dough logs.
- Chill for 2 more hours: Wrap each dough log in plastic wrap, parchment paper, or aluminum foil and refrigerate for 2 more hours and up to 4 days.
- Preheat oven to 350°F (177°C). Line 2 baking sheets with parchment paper or silicone baking mats. Set aside.
- Slice and bake: Slice each log into 14 1/2-inch-thick cookies.
- Arrange cookies about 2 inches apart on the prepared baking sheets—expect these cookies to expand quite a bit in the oven. If the dough got a little soft from working with it, chill the cookies on the baking sheet in the refrigerator for 10 minutes before baking. Bake for 14–15 minutes or until very lightly browned around the edges.
- Remove from the oven and allow cookies to cool on the baking sheet for 5 minutes before transferring to a wire rack to cool completely.
- Optional chocolate dipping: Coarsely chop the chocolate. Melt in a double boiler or the microwave. If using the microwave, stir every 20 seconds until it’s smooth. Dip half of each cooled cookie into the chocolate. Add sprinkles on top of chocolate, if desired. Allow chocolate to completely set at room temperature or in the refrigerator.
- Cookies stay fresh covered at room temperature for 1 week. Refrigerate cookies dipped in chocolate after a few days.
Notes
- Make Ahead Instructions: Baked cookies freeze well up to 3 months. Thaw overnight in the refrigerator and bring to room temperature, if desired, before serving. You can shape the cookie doughs into the pinwheel logs and chill in the refrigerator for up to 4 days (see step 9), or freeze for up to 3 months. Thaw overnight in the refrigerator, then continue with step 10.
- Special Tools (affiliate links): Glass Mixing Bowl | Whisk | Electric Mixer (Handheld or Stand) | Baking Sheets | Silicone Baking Mats | Parchment Paper Sheets | Rolling Pin | Cooling Rack | Double Boiler (optional for melting chocolate) | Gold Shimmer Sprinkles
- Tinting the dough with food coloring: If you want to tint the vanilla dough a color, you absolutely can. After dividing the dough in half, beat a couple drops (depends on how vibrant you want the color) of gel food coloring into the vanilla dough. If you’re skipping the chocolate dough (see Note below), you can tint both doughs (such as 1 dough red and 1 dough green) OR you can leave 1 dough white and tint the other half (such as white/vanilla and red/peppermint—see Note below about adding flavor extract).
- Can I make these without the chocolate/add another flavor? Yes, but you’ll want to tint half of the dough so the pinwheel design shows. (See Note above.) You can keep the flavor of both dough halves vanilla, or add another extract such as peppermint or coconut. If you want the entire dough flavored, go ahead and add 1 teaspoon of your favorite flavor extract when you add the vanilla extract. If you only want to flavor half of the dough, beat 1/2 teaspoon extract into half of the dough before the 1st chill (replace step 5).
- Rolling in Sprinkles or Coarse Sugar: After chilling the logs of dough, roll in 1/2 cup (about 100g) sprinkles or coarse sugar before slicing and baking. If the sprinkles/coarse sugar are not sticking to the dough, use a pastry brush to brush the dough very lightly with a little water, and then try coating again.
- Chocolate for Dipping: The best chocolate for melting and dipping is the “baking chocolate” bars found in the baking aisle of the grocery store. I typically use Bakers or Ghirardelli brands. You can use white, semi-sweet, or dark/bittersweet. Do not use chocolate chips because they contain stabilizers, which prevent them from melting into the correct consistency.


These cookies are so beautiful and fun to make. My 2yo picked swirls of brown chocolate and white/red/green vanilla for Christmas. Everyone preferred the ones dipped in dark chocolate vs plain, even Santa. We will definitely make these again with different flavor combos. Thank you Sally and team!
These were very satisfying to make! I find Sally’s recipes are maybe the *only* recipes that explain all the steps in enough detail to give me full confidence that I am doing everything correctly. These cookies look stunning and I was so proud to have made them myself! I was hoping for a bit more flavor, though. Perhaps dipping them in the chocolate would have done the trick!
Everyone loved these! They were fun to make and delicious to eat!
Forgot to add the 5 stars. Wish I could add 10!
I almost didn’t make these cookies. I had already made 11 other types of cookies, plus candy and cakes, but I had to complete the challenge for the whole of 2022. I am so glad I did. These are delicious. They’re simple but so full of buttery goodness. This recipe is going to the top of the list for 2023.
Thank you, Sally and crew, for a year of challenges and the confidence to bake outside of my comfort zone.
Best of everything to everyone in 2023.
Loved it! Added peppermint to mine!
This cookies were a hit! I customized them for Christmas and the design turned out better than expected. Thanks for the great recipe.
This was a fun recipe to make! It is time consuming, but the final product is so pretty. Sally’s directions are so helpful. Follow them exactly and you’ll be good to go! The video was very helpful in rolling out the dough.
I messed these up by rushing, however…I really like the dough and can’t wait to experiment with it further! It was easy to work with and has stayed moist for over a week in the open air.
These are not the easiest cookies to make; however, they are well worth the beautiful results! I love that they’re not too sweet. I dipped them in dark chocolate. They actually taste better after they sit, and I love them frozen – trust me on this!
These were super tasty, and my family loved them! I made mine with mint and chocolate instead of vanilla and chocolate, because Christmas. I’ve made the checkerboard cookie variation the last couple years, and I think the taste is about the same, but these are definitely prettier. My only difficulty was getting the dough rolled out to the right size/thickness; thankfully, it was pretty forgiving and didn’t get too tough even though I had to fold one of the layers back up and redo it a couple times. And dipping them in chocolate made them just perfect!
These seemed pretty intimidating at first, but once I started it was really fun and I got a lot of compliments on them. They’re so mesmerizing and different. Definitely going to save this recipe and play around with different colors and flavors next time. So happy.
I made this for my son’s Christmas party at his work and since it’s holiday season, I wanted a little more festive so I made one layer was with vanilla and walnut, one layer was raspberry with raspberry jam and extract, and one was tinted green and flavored peppermint. The comments I got from everyone was that it’s ridiculously insanely delicious. All disappeared in 5 minutes even though I made 2 batches. Thank you very much Sally and the team for always providing us the best recipes. Happy holidays all!
These cookies were so good! At first, I was intimidated, but the whole process was easier than I thought it would be and I actually enjoyed it. It was fun to try something I’d never done before, and I was ecstatic with how they turned out. A hit with both my husband and I, as well as our extended families at Christmas gatherings. Definitely recommend, and I’d make them again.
The swirl turned out great following the recipe exactly. Was hoping for a more complex flavor. Tasted like a soft sugar cookie with a hint of chocolate.
My family really enjoyed these cookies. My daughter was so impressed at how the chocolate flavor in the cookie did not overwhelm the flavor of the vanilla cookie. We will be definitely adding these cookies as a family favorite. Another Sally recipe adored by my family. Thanks Sally!
I’ve never made pinwheel cookies before but these were so much fun to make. Especially, cutting into the dough and seeing the spiral. The cookies have the slight taste of a short bread but the softness of a cookie. I will definitely be making these again.
This recipe was a huge hit! It was surprisingly easy and everyone was complimenting them!
These cookies are delightful! The taste is sort of mild, which is good if you’re not a fan of overwhelming sweetness. The chocolate part of the cookie doesn’t stand out much (but that’s probably because I didn’t add espresso powder), so dipping it in dark/semisweet chocolate helps. Some things I discovered for those wanting to make these:
1. I had to bake these at 300F for 10 mins turning the sheets once at the halfway point; my first batch burned when I baked according to the recipe.
2. Roll the dough as tight as possible to prevent unraveling!!! I CANNOT stress this enough. The vanilla dough will most definitely crack while rolling and that’s perfectly fine, even if the swirl doesn’t look perfect, it’ll turn out fine once baked.
The pinwheel cookies are delicious and so beautiful! If you want something to make that is simple, but impressive looking, this is it!
These were fun to make and tasted great. Thanks!!
Great recipe was fun. Cookies were a great success at my Christmas party.
These were so delicious! Super soft texture and good flavor. I replaced part of the vanilla extract with almond extract which I thought was really good. They definitely take a bit more time and effort than other cookies but I just carefully followed the recipe and it was not as hard as I thought they’d be. And they look so impressive! I’ll definitely be adding these into my regular Christmas cookie repertoire!
Great recipe! Love these dipped in the chocolate. So fun to make. Thanks again Sally and team 🙂
This was so fun to make!
As always, I love Sally’s cookie recipes! I added this to my Christmas cookie collection this year and they looked stunning.
I have loved doing the baking challenges for the past two years! I certainly hope they return after the cookbook. 🙂
The pinwheel cookies are a hit with my family – especially my husband. The recipe is a bit of work but is easy to follow and so thorough – and the video is very helpful. Thank you for another great recipe!
I felt totally intimidated by these cookies but they were a lot easier than I anticipated. And they are delicious!
I have been making cookies all week to send to loved ones and bring to family gatherings, and I decided to attempt your Pinwheel Cookies to see if I could pull them off — and with your very detailed, fool-proof recipe, they were a success! Everyone in my family marveled at them. If you’re thinking about making these, don’t be intimidated by the task — Sally is setting you up for success, just make sure you chill, chill, chill! Patience is the key here. After having success with these, I think I might brave checkerboard cookies next year. Thank you for another wonderful recipe, Sally! What a fun baking challenge!
Easy and fun to make. So customizable too! The everyone loved them.