

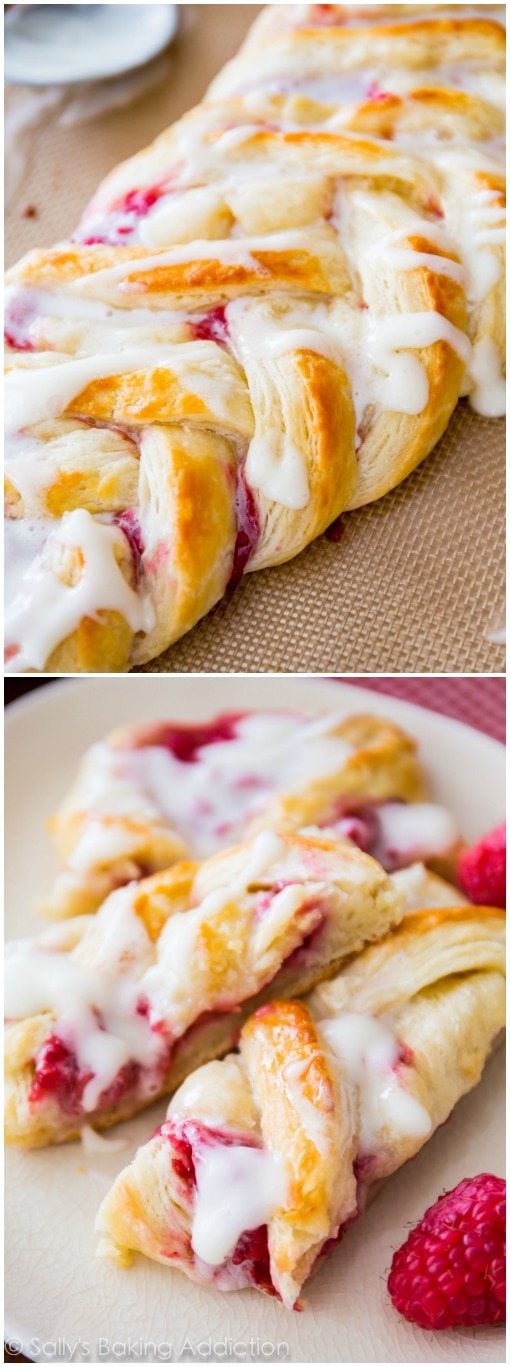
With layers of buttery flaky dough and raspberry filling, this raspberry pastry braid is undoubtedly irresistible. Though it seems intimidating, making breakfast pastries from scratch is completely doable for the home baker. Here we’re using a modified variation of classic Danish pastry dough. Follow these detailed instructions for success.
I’m excited to show you how to make a variation of Danish pastry dough today. It’s a quicker method to real Danish pastry and an adaption of several trusted sources: Cooking Illustrated, Joy of Cooking, and pastry master Beatrice Ojakangas. I combined all of the recipes I studied to produce a shortcut version of the famously flaky buttery dough.
This is a Shortcut Homemade Pastry Dough
This is not the traditional method of making real danish pastry. This dough is usually laminated several times between layers of butter, similar to how we prepare homemade croissants and croissant bread. Here we are working the butter directly into the dough using a food processor. We’re still rolling out and folding the dough, just as you do when you laminate dough with butter, but we’re not folding it up with a separate layer of butter.
I use the term “shortcut” loosely. This dough still takes at least 5-6 hours total with 2 rounds of refrigeration. Pastries made from this dough are just as buttery, tender, and flaky. I usually make individual breakfast pastries from this dough, but another option is a beautiful pastry braid like this blueberry cream cheese pastry braid or today’s raspberry version.
Follow the Pastry Dough Recipe Carefully
Before you begin to make this raspberry pastry braid, review my pastry dough recipe. The recipe takes some planning ahead. Certain ingredients must be at room temperature, certain ingredients must be warm, certain ingredients must be cold. Temperature is imperative to the success of your pastry dough. If you’re new to working with yeast, reference this Baking with Yeast Guide where I include practical answers to common yeast questions.
How to Make a Raspberry Pastry Braid
- Make the pastry dough. You can review it in detail in this pastry dough post.
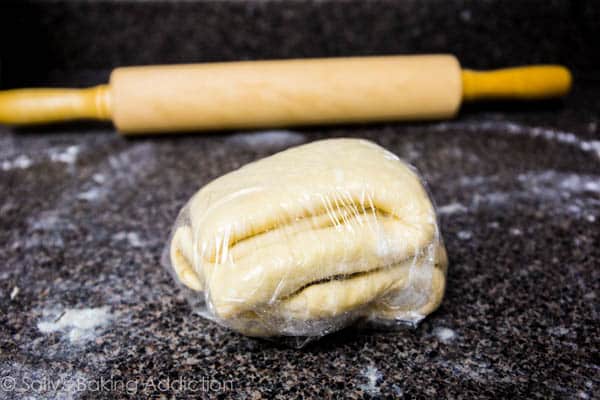
- 1st refrigeration. Wrap the sticky dough up tightly and refrigerate for at least 4 hours and up to 48 hours. This dough is very sticky and should be sufficiently chilled whenever you are working with it.
- Shortcut lamination. Now let’s do a variation of laminating aka rolling and folding dough and butter together. Remember how we make croissants and laminate the dough with a sheet of butter? The butter is IN this homemade pastry dough. So, instead, we’re just rolling and folding the dough itself. Roll it out into a rectangle. Fold it in thirds like a letter, then turn it clockwise. Roll it out into a rectangle again. Repeat the folding. Turn it clockwise again. Repeat rolling and folding 1 more time for a total of 3 times. Have extra flour on hand for this step—I use plenty of it during this whole process!
- 2nd refrigeration. Wrap the laminated dough up tightly and refrigerate for at least 1 hour and up to 24 hours.
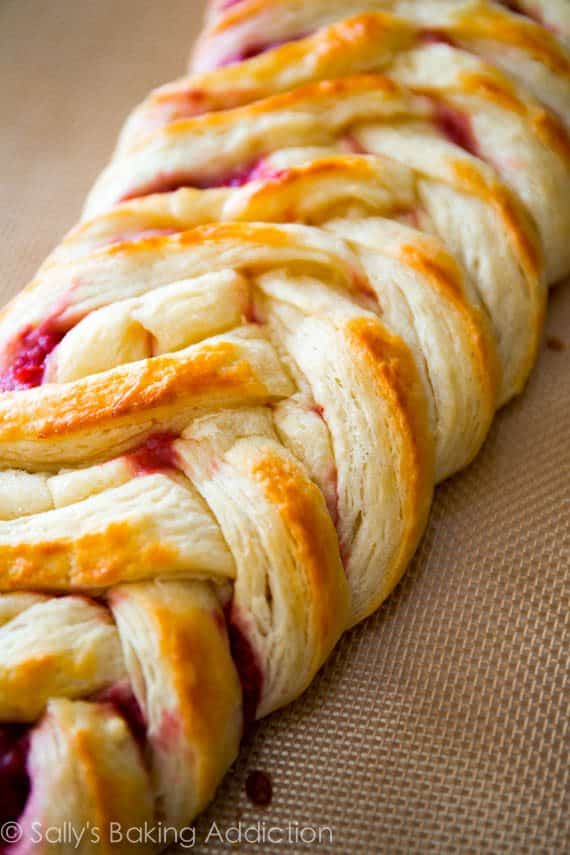
- Shape the pastry braid. This recipe yields 2 braids, so cut the dough in half. Refrigerate any dough you aren’t working with. Roll the half of dough into a 12×8-inch rectangle. Using a sharp knife, cut off two corners of the dough (on one 8-inch side) and then two small triangles 3 inches apart from each other on the other end (the other 8-inch side). Spread 1/2 of the raspberry filling down the center of the strip. Using a sharp knife, pastry wheel, or pizza cutter, cut 10 slanting strips along both sides. Fold strips over dough, alternating each side to resemble a twist or a braid. Fold the bottom end up to seal the filling inside. Repeat with 2nd half of dough and remaining raspberry filling.
- Brush with egg wash. This is a combination of egg and milk and guarantees a shiny and crisp golden crust.
- Chill. To help guarantee the braids hold their shape, chill them in the refrigerator as the oven preheats and even up to 1 hour.
- Bake until golden brown.
Because of all the chilling, this pastry is a wonderful recipe to begin the night before and serve the next morning. Or even prep the dough a few days in advance so your work is cut down the day of serving. I include freezing and make-ahead instructions below.
Raspberry Filling
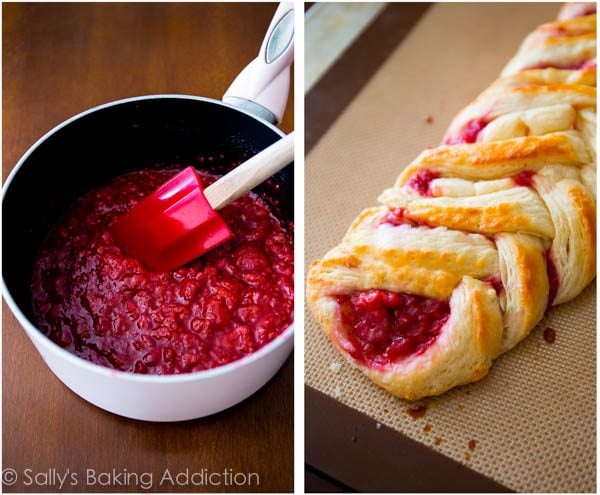
Though you could certainly use store-bought raspberry jam or preserves, I love making the raspberry filling at home. You need fresh or frozen raspberries, sugar, cornstarch, and water. That’s it! The filling must cool down before using, so feel free to get started ahead of time.

Creating danish pastries at home is totally doable. Take some time to read through the instructions before you begin. That will make the whole pastry-making-process much easier for you. You can do this!
Print
Iced Raspberry Danish Braid
- Prep Time: 6 hours (includes chilling)
- Cook Time: 20 minutes
- Total Time: 6 hours, 25 minutes
- Yield: 2 braids, 6 servings each
- Category: Breakfast
- Method: Baking
- Cuisine: Danish
Description
Follow these easy instructions and create flaky, buttery raspberry Danish braids at home. You can be a master in the kitchen too, I promise!
Ingredients
Raspberry Filling
- 2 and 1/2 cups raspberries, fresh (300g) or frozen (340g)
- 3 Tablespoons (40g) granulated sugar
- 1 Tablespoon (15ml) warm water
- 2 teaspoons cornstarch
Dough
- 1 recipe Homemade Pastry Dough
Egg Wash
- 1 large egg
- 2 Tablespoons (30ml) whole milk
Vanilla Icing
- 1/2 cup (60g) confectioners’ sugar
- 1 Tablespoon (15ml) heavy cream or milk
- 1/2 teaspoon pure vanilla extract
Instructions
- Make the raspberry filling: You can start the dough (next step) and prepare this filling during one of the refrigeration times. Whisk together the warm water and cornstarch in a small bowl. Set aside. Combine the raspberries and sugar in a small saucepan over low-medium heat. Stir and allow the raspberries to break down, about 4 minutes. Mix in the cornstarch/water. Gently simmer for 3 minutes until the sauce begins to thicken. Set aside and let it cool to room temperature before using. You can also make it 1-2 days ahead of time. Once cooled down, cover, and store in the refrigerator until ready to use.
- Make the pastry dough through step 11.
- Spread 1/2 of the raspberry filling down the length of the center of the strip, which should be about 3 inches wide. Using a sharp knife, pastry wheel, or pizza cutter, cut 10 slanting strips (3/4 – 1 inch wide each) along both sides. Fold strips over filling, alternating each side to resemble a twist or a braid. Fold the bottom end up to seal the filling inside. Repeat with the second half of the dough and the rest of the filling. The braids may seem very narrow, but they puff up and out as they bake.
- Egg Wash: Whisk the egg wash ingredients together. Brush all over the dough.
- I strongly recommend refrigerating the shaped braids before baking for at least 15 minutes and up to 1 hour before baking. The braids tend to leak more butter and/or lose more shape if they haven’t chilled.
- Preheat oven to 400°F (204°C).
- Bake each braid for 18-22 minutes or until golden brown. Some butter may leak from the dough, that’s completely normal and expected. Feel free to remove the baking sheets from the oven halfway through baking and brush the dough with any of the leaking butter, then place back in the oven to finish baking. (That’s what I do!)
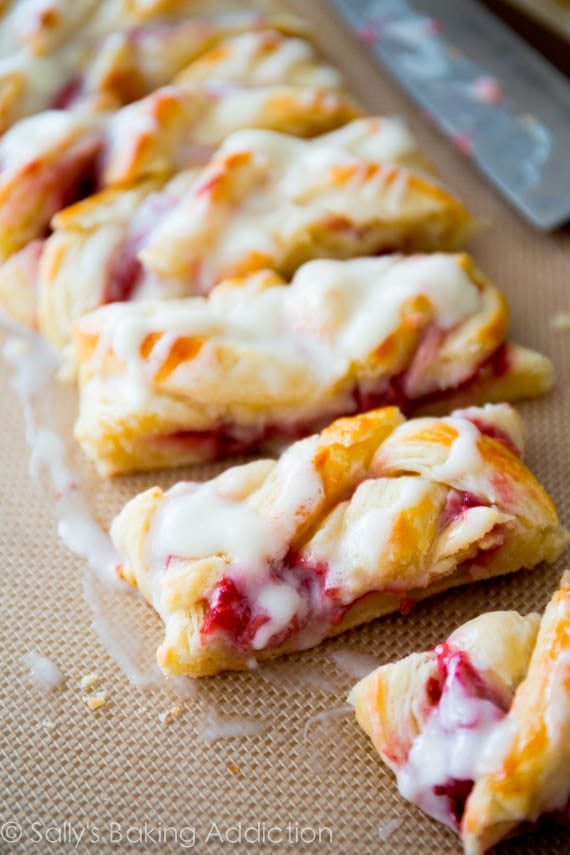
- Remove baked braids from the oven and cool for at least 5 minutes before icing, cutting, and serving.
- Vanilla Icing: Whisk the icing ingredients together. If you want a thicker icing, whisk in more confectioners’ sugar. If you want a thinner icing, whisk in more milk or cream. Drizzle over warm pastries and serve.
- Cover leftover iced or un-iced pastries and store at room temperature for 1 day or in the refrigerator for up to 5 days. Or you can freeze them for up to 3 months. Thaw before serving. Before enjoying, feel free to reheat leftover iced or un-iced pastries in the microwave for a few seconds until warmed.
Notes
- Make-Ahead & Freezing Instructions: Make-ahead and freezing instructions for the dough are included in the thorough pastry dough recipe.
- Special Tools (affiliate links): Glass Mixing Bowl | Whisk | Saucepan | Pastry Wheel or Pizza Cutter | Baking Sheet | Silicone Baking Mat or Parchment Paper | Pastry Brush
- Reference my Baking with Yeast Guide for answers to common yeast FAQs.


Reader Comments and Reviews
This recipe is SUCH a favorite in our household. I’m writing with a question about making the braids into smaller versions. Typically, I shape into two 12×8 pieces, snip as needed, braid, etc. but I would like to know: before cutting the triangles and dividing the strips, could I cut them horizontally to then have two 6×8 (and then do the rest of the steps) and yield 4 smaller braids? I want to gift them but think the braid is too large to gift when it’s in its original size. I’m just nervous to do this experiment because it can be so time-consuming to prep and looking for insight whether this is a disastrous idea!
Can you freeze them after you ice them?
Would this raspberry filling work well as a filling for your homemade poptarts?
Hi Bonny, something slightly thicker like this raspberry cake filling would be the better option. Let us know if you try it!
Thank you Lexi. I wasn’t sure if this filling could withstand the baking process. I will try it.
This turned out very well! Will make again. I used the cream cheese filling with the fruit on top (like your blueberry one). Thanks for the shortcut pastry lesson!!
This looks so good. I haven’t mad a single one of your recipes yet that I didn’t absolutely love, so thank you for these!
I don’t care for raspberry seeds in baked goods (which is weird because I will eat fresh raspberries by the handful and don’t care about seeds). If I strain the raspberry sauce, like with your white chocolate raspberry cheesecake bars (which are so amazing omg), will there still be enough sauce for this, or should I make a little more to account for what is lost during straining?
Hi Julia, yes I would definitely make a larger batch to account for the loss in volume from straining. We strain this raspberry sauce, and start with 3 cups of berries for that.
Could I use jam for filling instead of making with fresh berries….I can’t have seeds
Hi Ali, Raspberry jam would be just fine. Enjoy!
Hi! I haven’t made this yet but I am soo exited to, one quick question: do you think I could pour some melted sugar onto this to make a sugar coat/glaze? Thank you!
Hi Myla mae, Sure, these would be good with a glaze rather than the icing!