

Hello and welcome to COOKIE PALOOZA 2016.
If you’re new around Sally’s Baking Addiction, my annual cookie palooza hits right after Thanksgiving (see you next year, pumpkin pie!) and it’s a total cookie party as we countdown until Christmas. 10 cookie recipes in a row, with all the butter, sugar, chocolate, and sprinkles you can imagine. I bake up a storm each November (between endless batches of pie crust, of course) to prepare. So get your mixers ready, your ovens preheated, and belt loosened? because in year 4 (omg!), we’re doing it BIG.
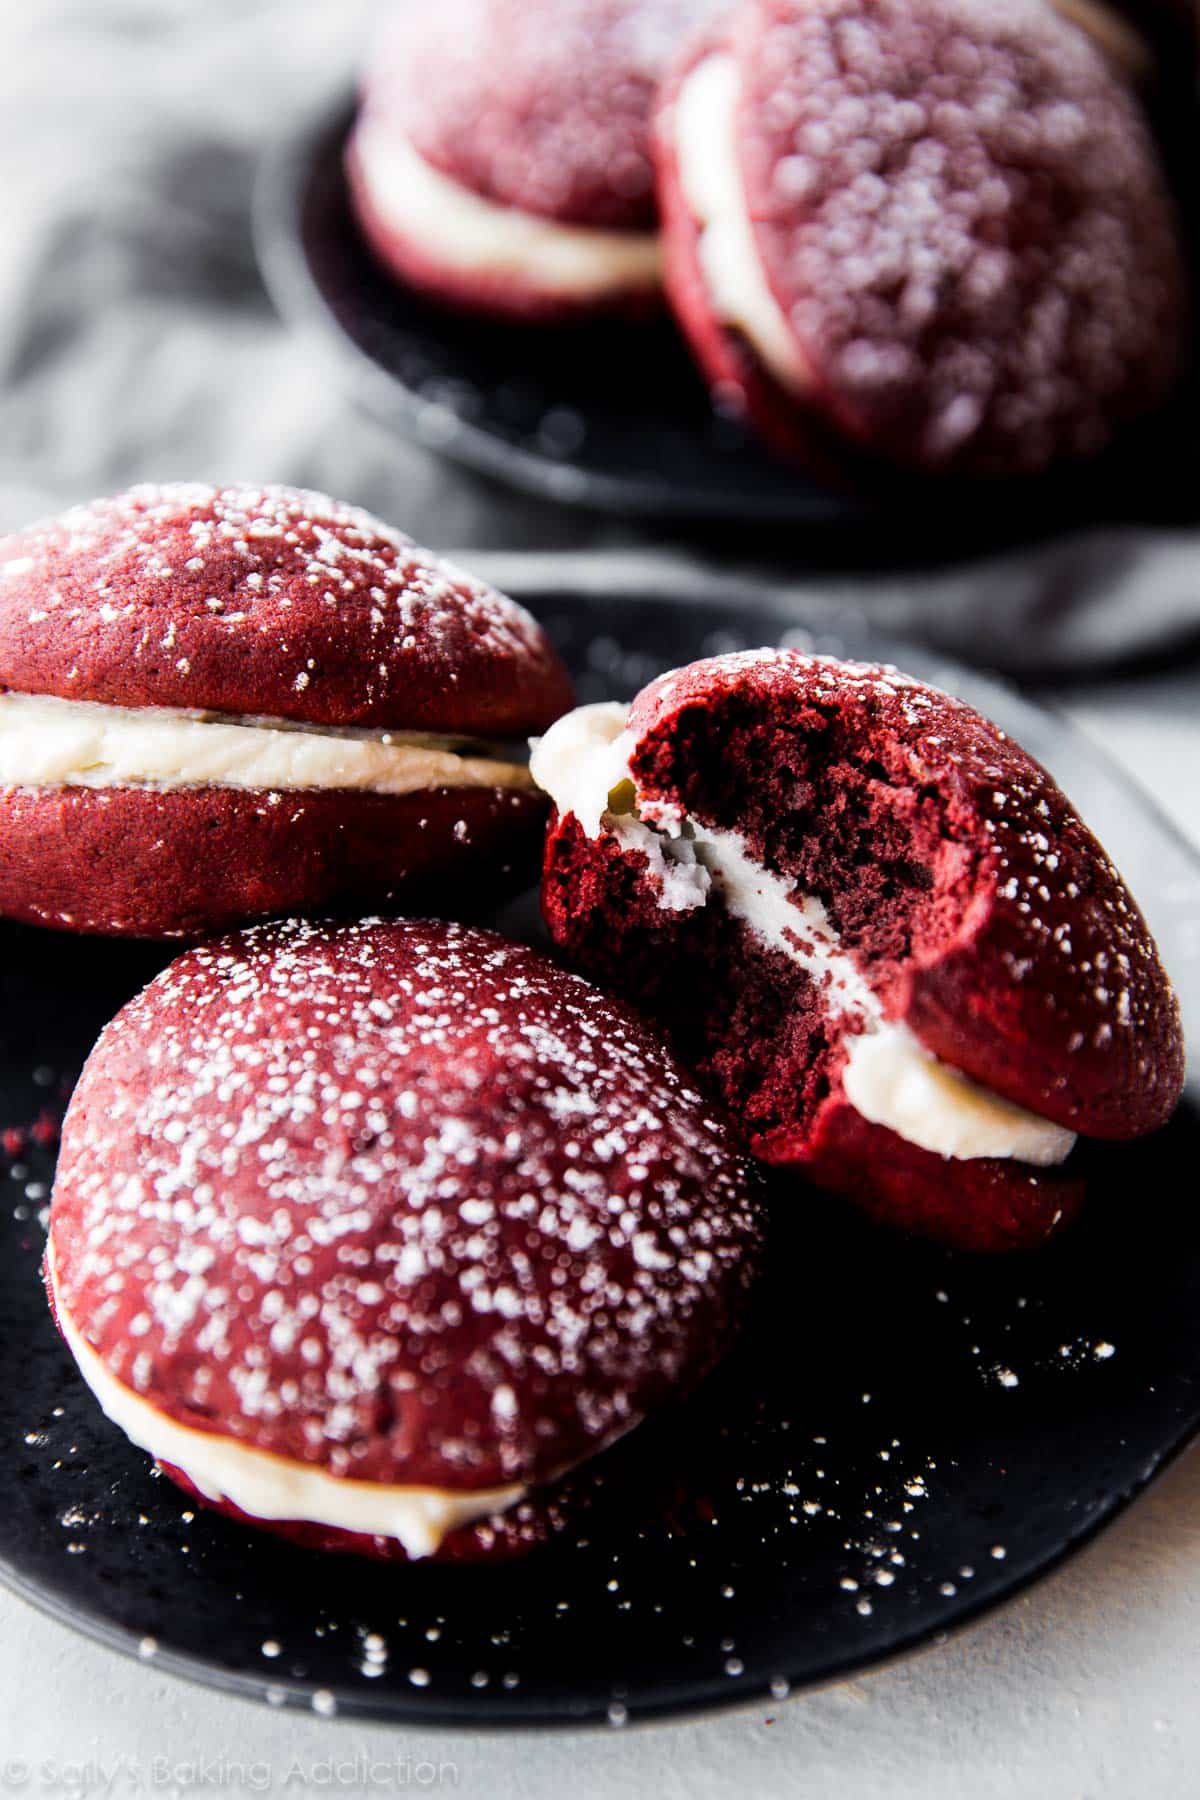
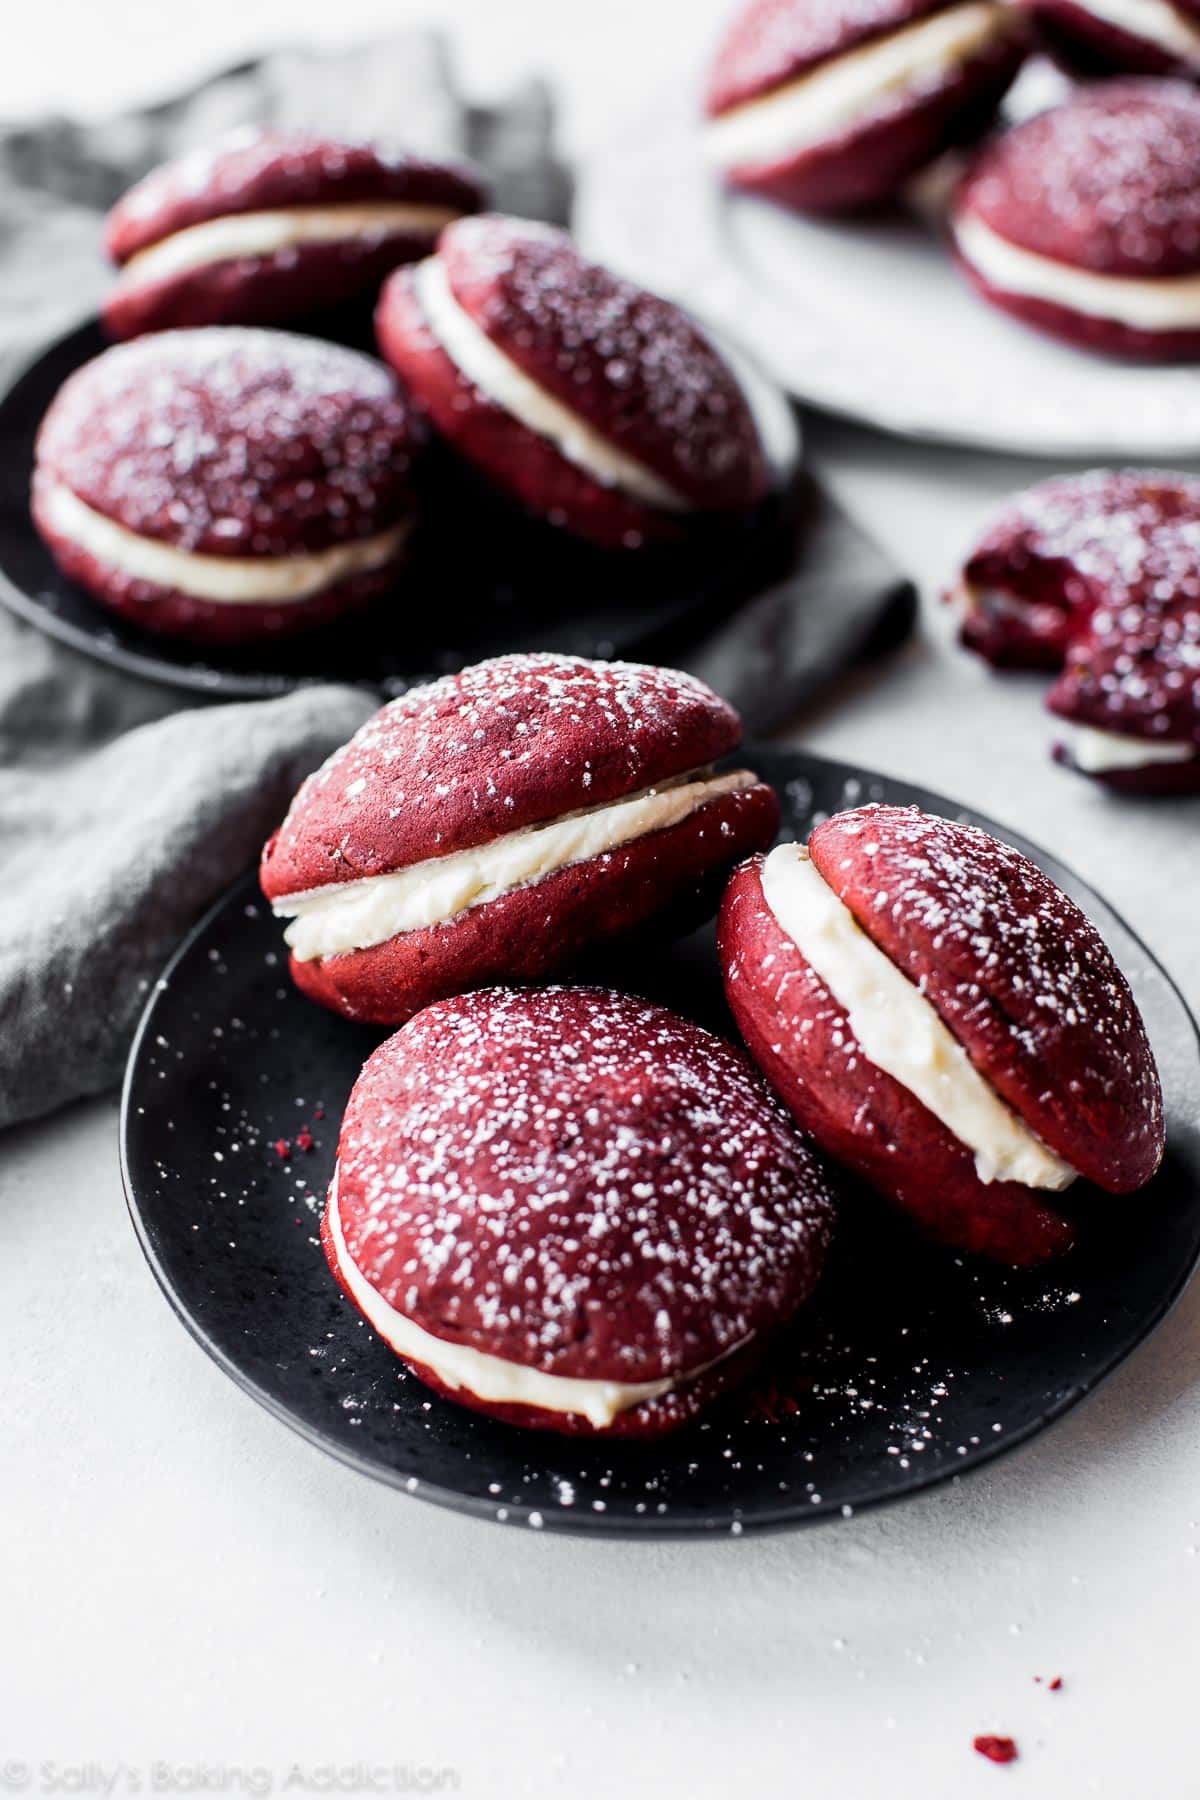
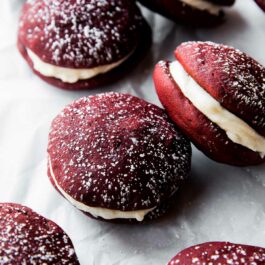
Recipe #1: red velvet whoopie pies. You asked for them!
If we’re being honest, I was inspired to include these red velvet whoopie pies in the cookie palooza after trying an incredible red velvet cookie (filled with cream cheese!) from City Cake. Many of you asked for a homemade version of a big bakery red velvet cookie and while I considered trying, I don’t think anything coming out of my oven could quite live up to City Cake’s perfection. So whoopie pies it is! Let’s check them out:
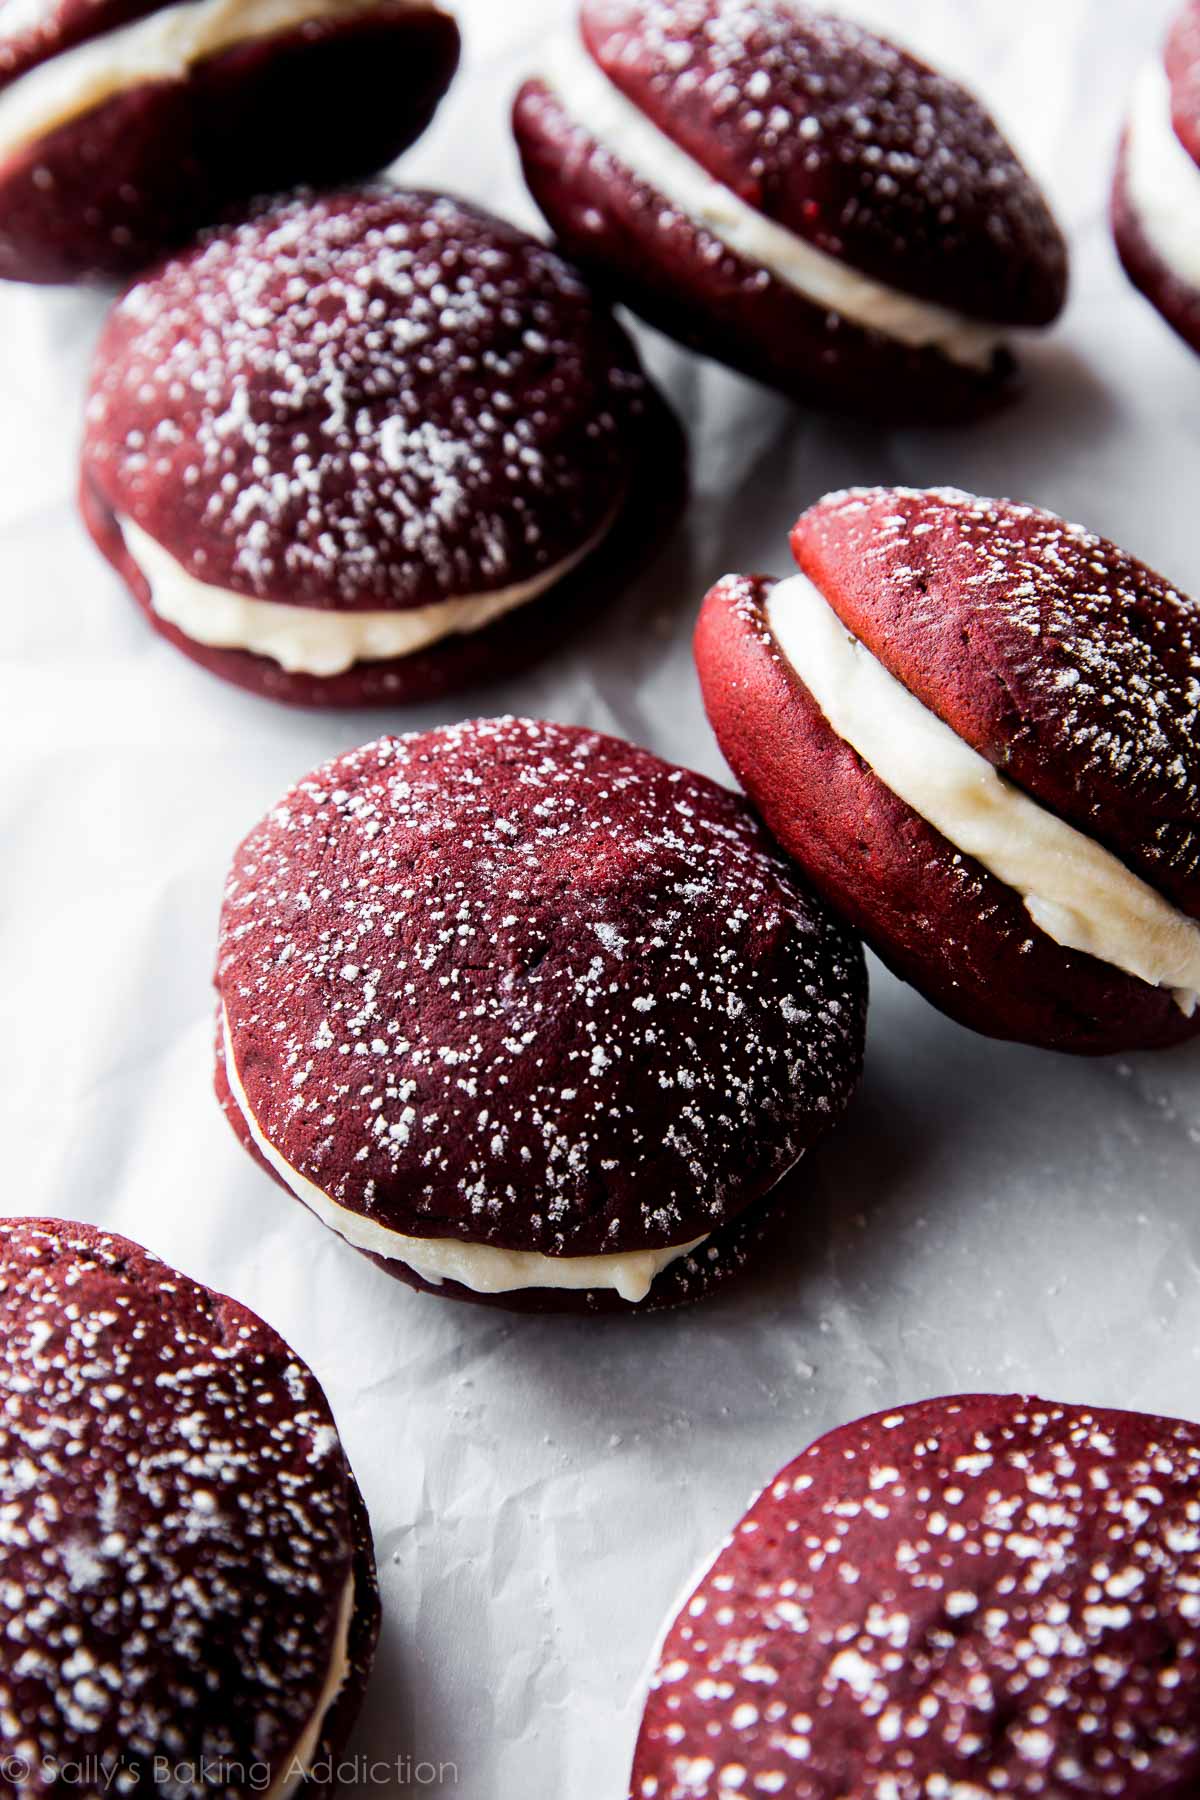
I’ve made chocolate whoopie pies more times than I can count. I love the family recipe so much that I published it in the paperback edition of Sally’s Baking Addiction—it was one of the 8 bonus cookie recipes! They’re soft and moist cakey cookies sandwiched together with sweet marshmallow frosting. Here, I switched the intense chocolate flavor with red velvet—an awesomely classic combination of vanilla, cocoa, and butter. No more marshmallow frosting, but instead a thick and tangy cream cheese filling. Think of these whoopie pies as handheld, individually portioned* red velvet cake. Like a cupcake, but more interesting.
*Portion control is good for you, remember?

Here’s the thing about whoopie pies: they’re vastly easier than they look!
The batter is quite basic using flour, a little cocoa, creamed butter and brown sugar. Brown sugar for moisture, cocoa for flavor! Make sure you’re using natural unsweetened cocoa powder. That is KEY in this red velvet recipe. Remember the difference between Dutch-process vs. natural cocoa powder? Buttermilk (or this buttermilk substitute) is essential for their flavor while a little gel food coloring creates their deep red hue. You can absolutely leave the food coloring out if you prefer.
A note about the optional food coloring: I tested this recipe with both liquid and gel food coloring. I 100% prefer the gel food coloring. It’s brighter and more intense than liquid. You’d need quite a lot of liquid to obtain that signature red color in these whoopie pies—and that added liquid isn’t ideal for a cookie. I got mine from Amazon, but you can find it at craft stores. So inexpensive!
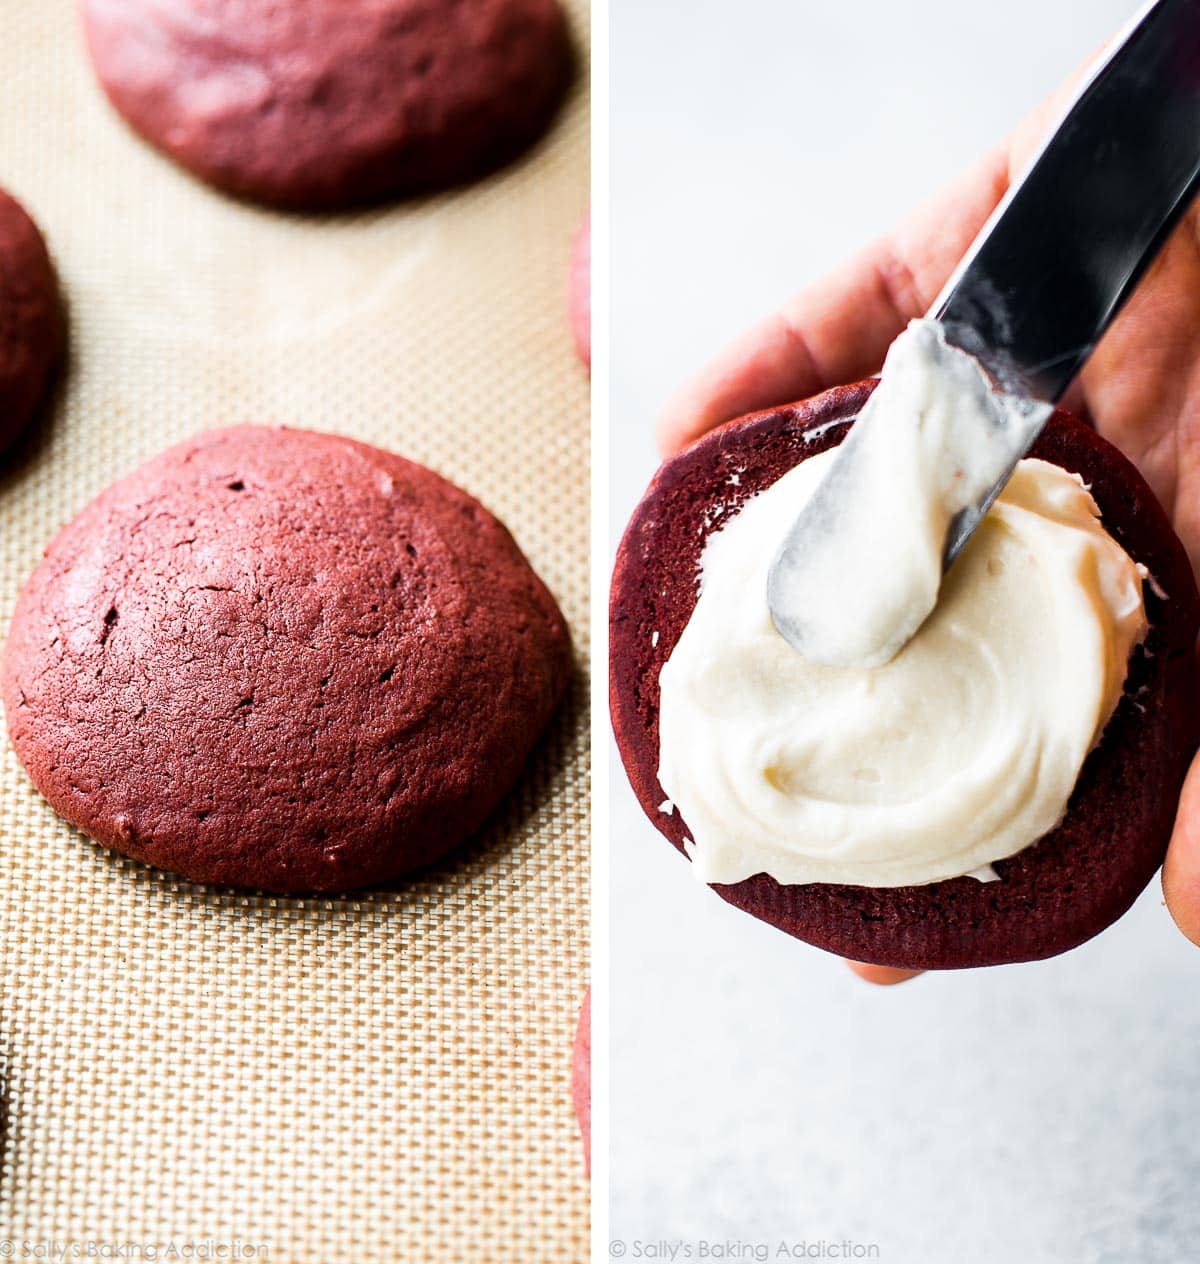
The cookies will only take about 10-12 minutes in the oven, then let them completely cool before sandwiching cream cheese filling between. Who needs turkey or a BLT? Let’s all have our sandwiches in super soft red velvet form!! Lunch is… served.
I’ve been meaning to make red velvet whoopie pies for years, so I appreciate you pushing me to do so!
Fun fact: Did you know that in western PA, where my in-laws are from, whoopie pies are called gobs? I can’t decide which name I like better. They’re both fun!
More Red Velvet Recipes
- Red Velvet Cake or Red Velvet Cupcakes
- Red Velvet Cake Roll
- White Chocolate Red Velvet Cookies
- Red Velvet Seven Layer Bars
- Red Velvet Cheesecake Swirl Brownies
- Red Velvet Chocolate Chip Cookies or Stuffed Red Velvet Cookies


Red Velvet Whoopie Pies
- Prep Time: 25 minutes
- Cook Time: 12 minutes
- Total Time: 2 hours
- Yield: 12 pies or 24 individual cookies
- Category: Cookies
- Method: Baking
- Cuisine: American
Description
Homemade red velvet whoopie pies with cream cheese filling are decadent, moist, and flavorful!
Ingredients
- 2 cups (250g) all-purpose flour (spooned & leveled)
- 3 Tablespoons (15g) unsweetened natural cocoa powder
- 1 teaspoon baking soda
- 1/2 teaspoon salt
- 1/2 cup (8 Tbsp; 113g) unsalted butter, softened to room temperature
- 1 cup (200g) packed light brown sugar
- 1 large egg, room temperature
- 2/3 cup (160ml) buttermilk, room temperature
- 2 teaspoons pure vanilla extract
- gel red food coloring
Cream Cheese Filling
- 6 ounces (170g) full-fat brick cream cheese, softened to room temperature
- 1/4 cup (4 Tbsp; 56g) unsalted butter, softened to room temperature
- 1 and 1/2 cups (180g) confectioners’ sugar, sifted (plus more for topping)
- 1/2 teaspoon pure vanilla extract
Instructions
- Preheat the oven to 350°F (177°C). Line two large baking sheets with parchment paper or silicone baking mats (highly recommended for best nonstick cookie baking surface!). Set aside.
- Whisk the flour, cocoa powder, baking soda, and salt together.
- In a large bowl using a handheld or stand mixer fitted with a paddle attachment, beat the butter for 1 minute on medium-high speed until completely smooth and creamy. Add the brown sugar and beat on medium high speed until fluffy and combined. Beat in egg on high speed, scraping down the sides and bottom of the bowl as needed. Once egg is full combined, beat in the vanilla and buttermilk. Mixture may look curdled; that’s ok.
- On low speed, slowly mix the dry ingredients into the wet ingredients until combined. Add enough food coloring to achieve a deep red hue (usually about 1 teaspoon gel). Spoon or scoop mounds of batter, about 1 and 1/2 Tablespoons each, onto prepared baking sheets—about 3 inches apart.
- Bake the cookies for 10-12 minutes or until centers appear set. Mine usually take 11 minutes. Allow to cool completely before sandwiching.
- In a large bowl using a handheld or stand mixer fitted with a paddle or whisk attachment, beat the cream cheese for 1 minute on high speed until completely smooth and creamy. Beat in the butter until combined. Add the confectioners’ sugar and vanilla and beat on medium-high speed until combined and creamy.
- Pair the cookies up based on their size. Spread cream cheese filling onto the flat side of one cookie and sandwich with the other. A small offset spatula is helpful. Repeat with remaining. Sprinkle confectioners’ sugar on top of each if desired. Cover leftover whoopie pies and store in the refrigerator for up to 1 week.
Notes
- Make Ahead & Freezing Instructions: You can prepare the batter, cover it tightly, and refrigerate for up to 3 days. Let it come to room temperature and bake as directed. You can freeze the baked whoopie pies for up to 3 months. Wrap them individually. Before enjoying, thaw overnight in the refrigerator.
- Special Tools (affiliate links): Baking Sheets | Silicone Baking Mats or Parchment Paper | Glass Mixing Bowl | Whisk | Electric Mixer (Handheld or Stand) | Medium Cookie Scoop | Small Offset Spatula
- Buttermilk: Buttermilk is required for this recipe. You can make your own DIY buttermilk substitute if needed. Add 1 and 1/2 teaspoons of white vinegar or lemon juice to a liquid measuring cup. Then add enough whole milk to the same measuring cup until it reaches 2/3 cup. (In a pinch, lower fat or nondairy milks work for this soured milk, but the whoopie pies won’t taste as moist or rich.) Stir it around and let sit for 5 minutes. The homemade “buttermilk” will be somewhat curdled and ready to use in the recipe.
- Adapted from Better Homes & Gardens.


Reader Comments and Reviews
Making for the fourth of July in PA…it will be hot and humid…any recommendation for filling that will be more stable when outside for a bit? Also assuming i can add blue coloring for half of them so will be red/white/bue?
Hi Beverly, you could use a traditional vanilla buttercream, but the whoopie pies will be quite sweet. You can definitely color it with gel food coloring. Hope they’re a hit!
Thanks…I’ve read about adding some corn starch to the Cream cheese frosting to help with stabilization…any thoughts or opinion on that?
These were fantastic! Used my own cream cheese filling recipe & piped it onto the cookies. This worked well since I was making 9 dozen
The youth group loooved them!
I just made these for teacher appreciation week… I k ow some teachers who are going to be so excited! I ended up using cream cheese flavored buttercream to be a little more shelf stable as I was giving them to the school. I also used 1/3c plain yogurt and 1/3 c milk to substitute for buttermilk. They came so tender and delicious! Thank you for always having reliable recipes.
Can you add hot water to the batter?
These baked up beautifully! Thick and gorgeous! I did add cornstarch to the cookie mix. I used my own icing since too many comments said this one was to loose. Was told they were delicious!
Can I pipe this batter into hearts for Valentine’s Day? Unsure of the consistency!
Hi Erin, we haven’t tried it, but it might be possible with a large round piping tip… if you give it a try, please let us know how it turns out!
You can! I just shaped the dough into a rough heart shape and baked them that way. Worked great!
The flavor and texture of the red velvet cookie was phenomenal! I’m giving four stars because, for me, the filling was much looser than I would like in a whoopie pie. I filled them and had to refrigerate them immediately, and even doing that, some of the cookies had slipped slightly while they were chilling. I would definitely make these again, but I’d replace the filling with the cream cheese one that I use for my pumpkin whoopie pies, as it is much more stable.
Hi,
Can I make this with leftover red velvet cake batter? (I only baked half of your recipe for a one layer cake)
Hi Kinjal, we don’t recommend it. The cake batter recipe is a bit different and won’t keep shape and rise in the same way that these do.
Hi, Sally,
I recently had a request to make these with vanilla frosting instead of cream cheese frosting. Which frosting would you recommend for this request?
Hi Kassandra, vanilla buttercream frosting would work well here!
I made these today and they are fantastic! I used Ghirardelli majestic cocoa powder so they were a very dark burgundy/brown instead of red, but that didn’t matter to anyone who tried them. I loved the texture! I will definitely be making them again very soon. My son thought they tasted like a giant Oreo
Super easy to make and delicious. I made the green-ish velvet for St Patrick’s day and added mint to the filling.
We made this recipe at school with students. They were not sweet enough. Upon further research we noticed this recipe lacked granulated sugar where your red velvet cookie recipe included granulated sugar.
Can this recipe be doubled or should I make two separate batches?
Hi Kate, for best results and to prevent over or under mixing added batter, we recommend making two separate batches rather than doubling.
Thank you for your quick response. They are always a big hit at our Rutgers (Red) Tailgate, I’m planning on two batches this year. Glad I asked.
I really like this recipe…they raised well and tasted great. I did use King Arthur’s cake enhancer with the flour. It made the gob softer and more moist. Other than that it is excellent.. thank so much. I use a Tbs measuring round spoon.
I’m from western PA and my grandma was famous for her chocolate version. We never heard of gobs. We just called them sandwich cookies
I made mini Whoopi’s pies for a pot luck and they were very well received. People loved them. I used a 1 Tablespoon scoop which basically double the outcome when making the little cookies. I also used the same scoop for the filling. Adjusted baking time to approximately 7 1/2 minutes. Delicious.
I used the recipe for the red velvet whoopie pies, omitting the food coloring. While the Cake part baked up fine and the filling turned out okay, I felt the cookie was a bit heavier in substance than I expected. The cookie part wasn’t cake like which what I expected. So what went differently than others who loved the recipe, I don’t know. I will be using a different recipe when I make these again. Wasn’t really a fan.
I really loved this recipe. That is how it’s supposed to be, though. I’ve been making them for months!