

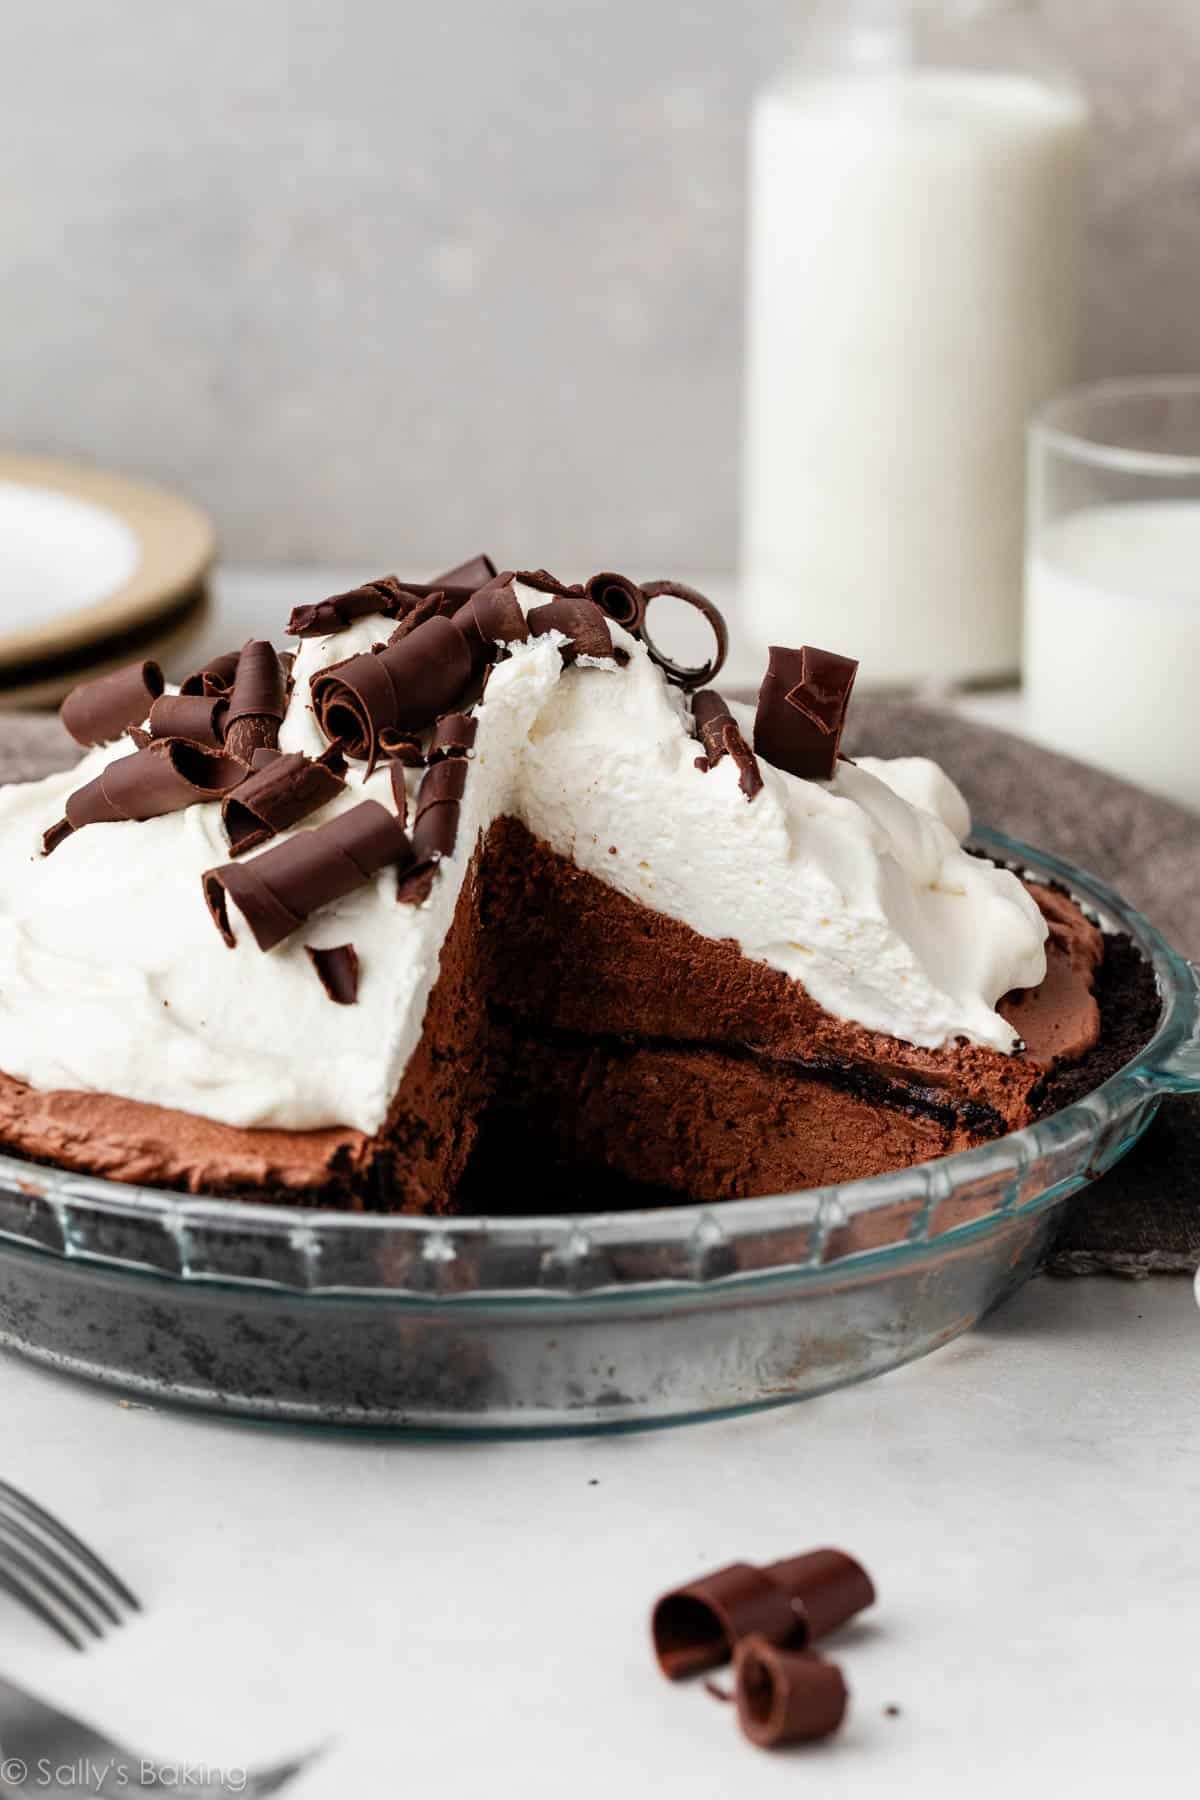
Featuring an Oreo crust, smooth chocolate mousse, and fresh whipped cream, every bite of chocolate mousse pie is irresistible! You’ll be pleasantly surprised at how manageable this towering beauty is to prepare. Be sure to check out my recipe notes for make-ahead instructions—this is a wonderful recipe to prepare 1–2 days in advance.

I originally published this recipe in 2017. It is such a personal and fan favorite, that it deserved a spot in print! You’ll also find this recipe in my New York Times best-selling cookbook, Sally’s Baking 101.
While it may look like a skyscraper of complicated steps, this sky-high chocolate mousse pie requires only a few. Everything is made completely from scratch, but none of that work is fussy. It just takes a little patience, and I encourage you to read through the recipe before starting. I include lots of step photos and a video tutorial for recipe success. Let’s get started!
One reader, Paula, commented: “Well, you did it again! You came up with the best chocolate mousse! So delicious and so easy! Not enough exclamation marks to match my enthusiasm. I made this for my daughter’s birthday, so I can’t wait to see her reaction. Thanks for sharing another great recipe. ★★★★★“
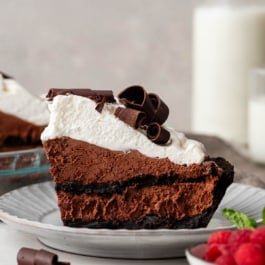
One reader, Susan, commented: “The recipe was a little time consuming, but the steps are all simple and the pie comes together beautifully. Light, fluffy, chocolate deliciousness. Everyone loved this pie. I served with fresh raspberries on the side. ★★★★★“
One reader, Rita, commented: “Fantastic for my daughter who can’t have gluten, so I subbed some gluten free sandwich cookies and did everything the same. This will be a great Christmas dessert for tomorrow. This was my first time using egg whites to make a meringue and it was flawless! Took a bit of time for the additions of ingredients, but overall an easy recipe. We will definitely keep this one handy for the future. ★★★★★“
3 Parts to Chocolate Mousse Pie
- Oreo Cookie Crust
- Chocolate Mousse (chocolate + meringue + whipped cream)
- Whipped Cream Topping
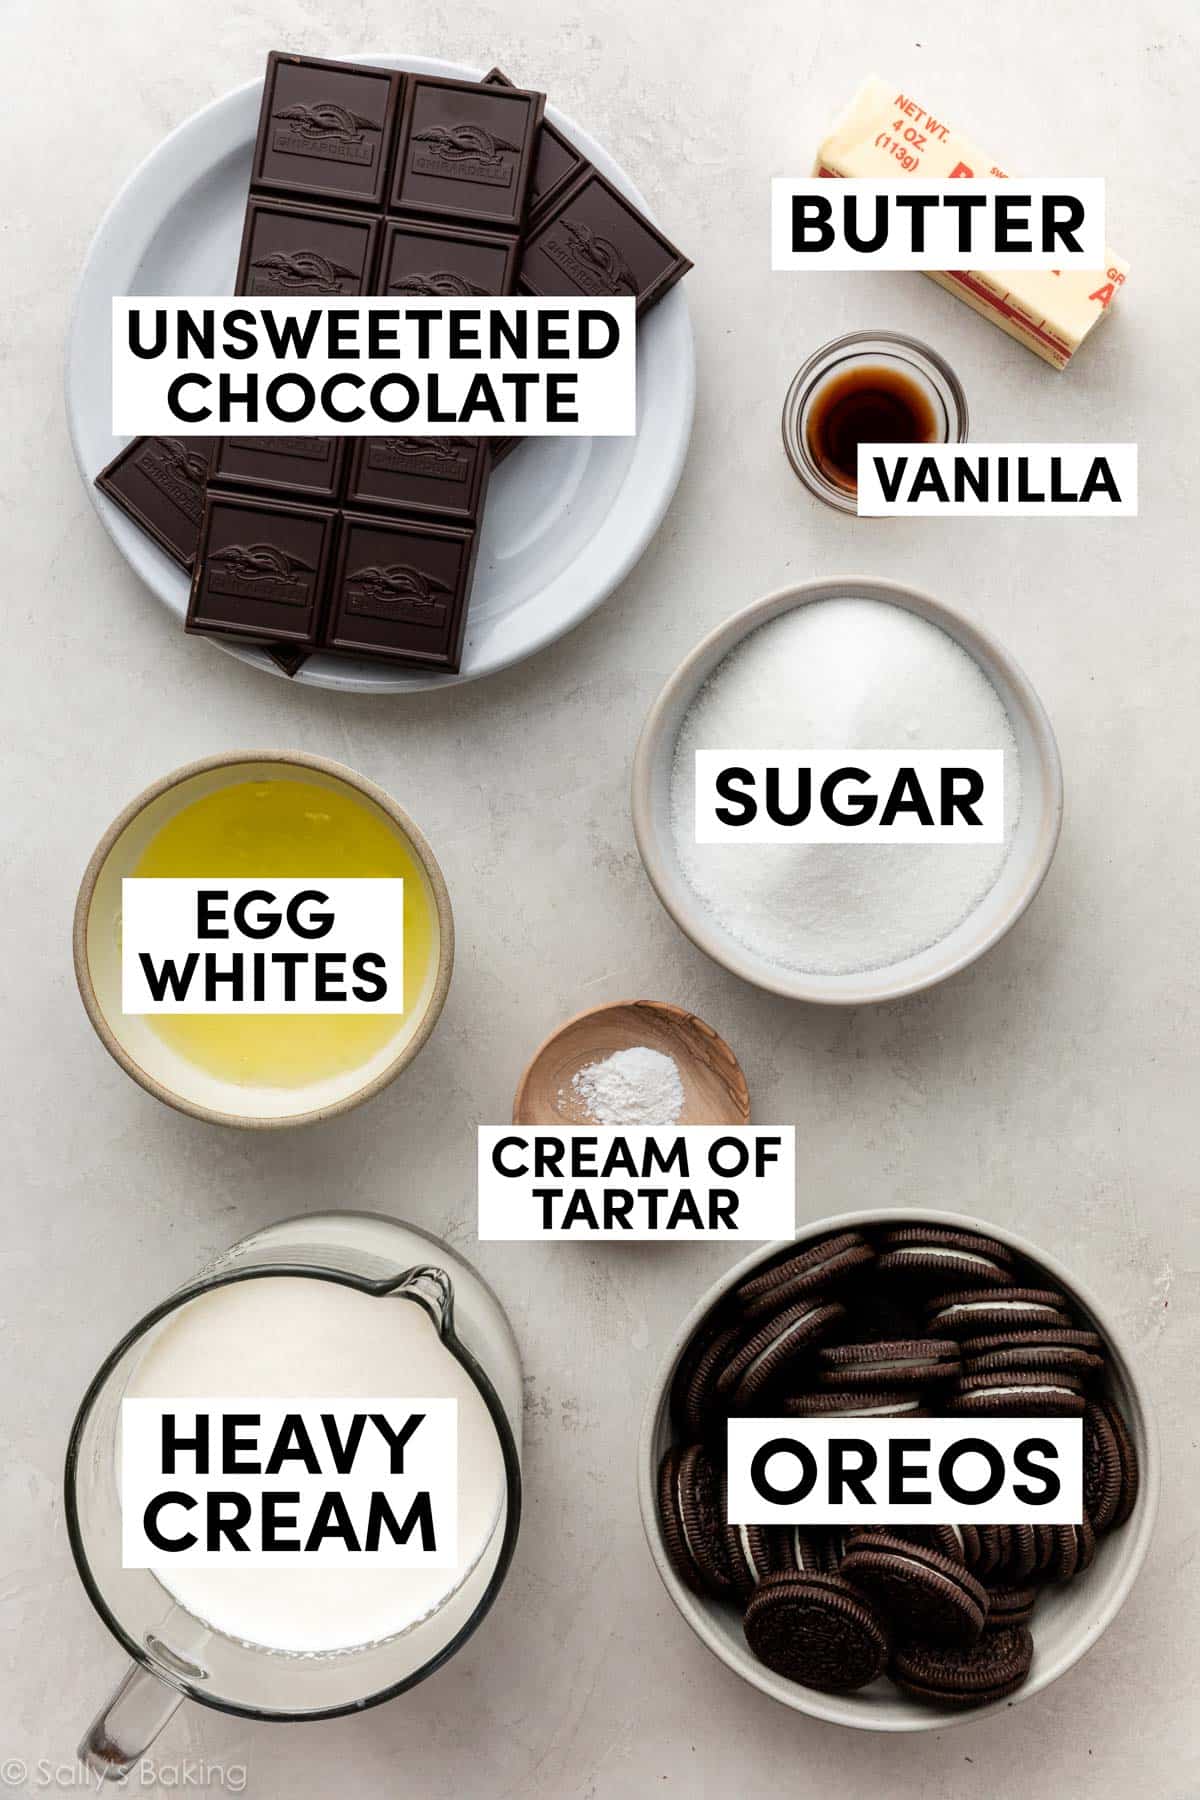
Ingredients You Need:
- Oreos: Use the regular kind, not Double Stuf. Need a gluten-free dessert? Use gluten-free Oreos!
- Butter: You need unsalted butter for both the crust and the chocolate mousse.
- Unsweetened Chocolate: Look for this in the baking aisle of the grocery store, near the chocolate chips. Baking chocolate is typically sold in 4-ounce bars (you’ll need 2). Pick up the bars labeled 100% cacao, or unsweetened chocolate. I like Ghirardelli and Baker’s brands.
- Egg Whites: A main component of the meringue. You’ll cook it on the stove so you don’t have to worry about consuming raw eggs.
- Cream of Tartar: Key for getting the meringue to whip into those glossy peaks.
- Sugar: Granulated sugar is cooked with the egg whites to sweeten the meringue.
- Heavy Cream: You’ll whip this twice: once for the mousse layer and once for the topping.
- Vanilla Extract: For flavoring the whipped cream on top.
Start With the Oreo Cookie Crust
An Oreo cookie crust is the perfect chocolatey base for our chocolate mousse pie. It’s the same crust we use for Nutella cream pie, cookies & cream pie, mocha chocolate pudding pie, and caramel turtle brownie pie.
Made from just Oreos and melted butter, this crust comes together easily. Make sure to use the whole Oreo when grinding them—both the chocolate cookies and the cream center. The cream center adds a delicious sweetness and also helps keep the crust together.
Bake the crust so it stays sturdy and intact when you slice the pie. Let it cool completely before topping with chocolate mousse. Feel free to make the crust a day ahead of time, too.

Chocolate Mousse
There are 3 parts to the chocolate mousse: chocolate (of course!), meringue, and whipped cream. Let’s review each component.
- Chocolate: When I tested this recipe for the first time, I used semi-sweet chocolate and found the mousse to be overly sweet. Reducing the sugar isn’t an option as it’s needed for the meringue, so unsweetened chocolate is the easy answer. Melt the chocolate with some butter and set it aside.
- Meringue: You’ll make a sweet whipped meringue (aka homemade marshmallow creme) and combine it with the melted chocolate.
- Whipped Cream: To add volume and a delightful texture, fold in unsweetened whipped cream.
If you skip the pie and just eat the mousse with a spoon, I understand. It’s light-as-air and remarkable all on its own.
Step-By-Step Photos of Chocolate Mousse Pie
Melt butter and chocolate together first, so it can cool a bit while you prepare the meringue:

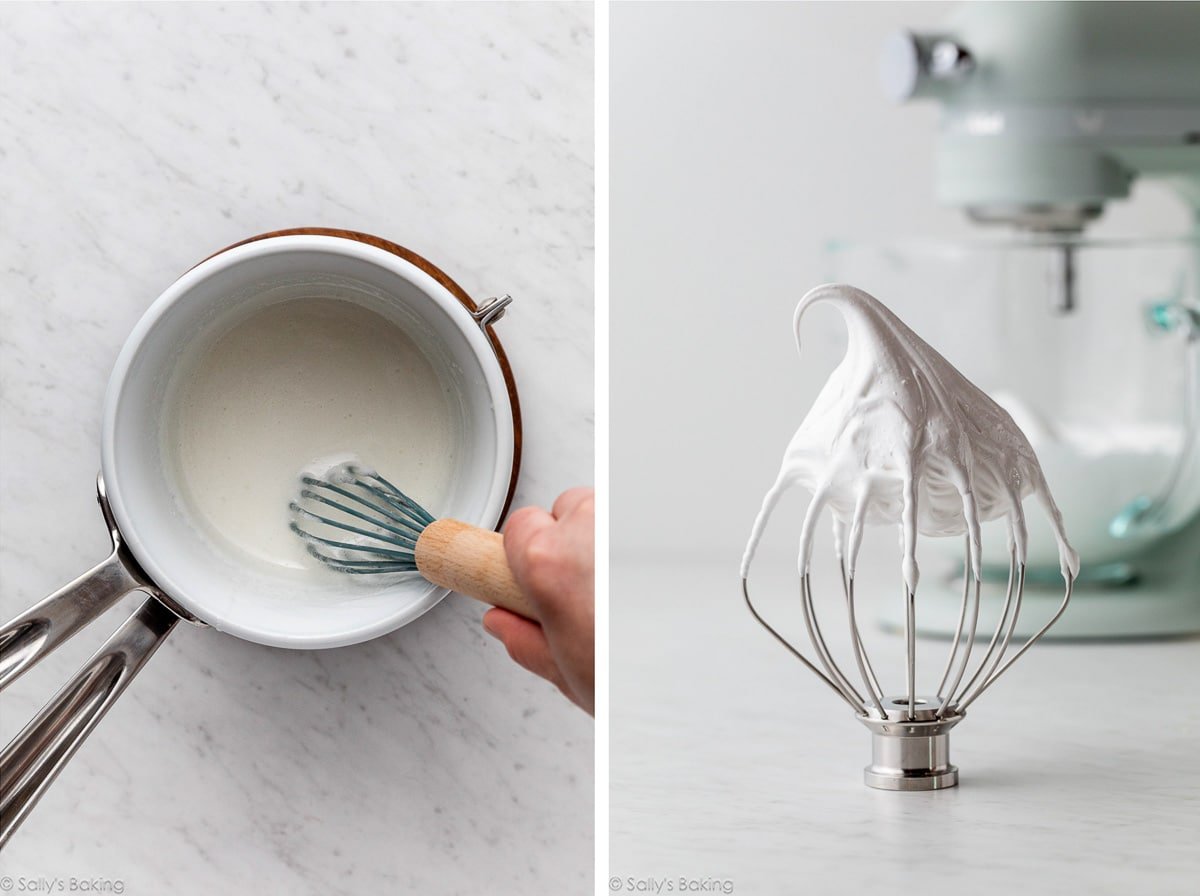
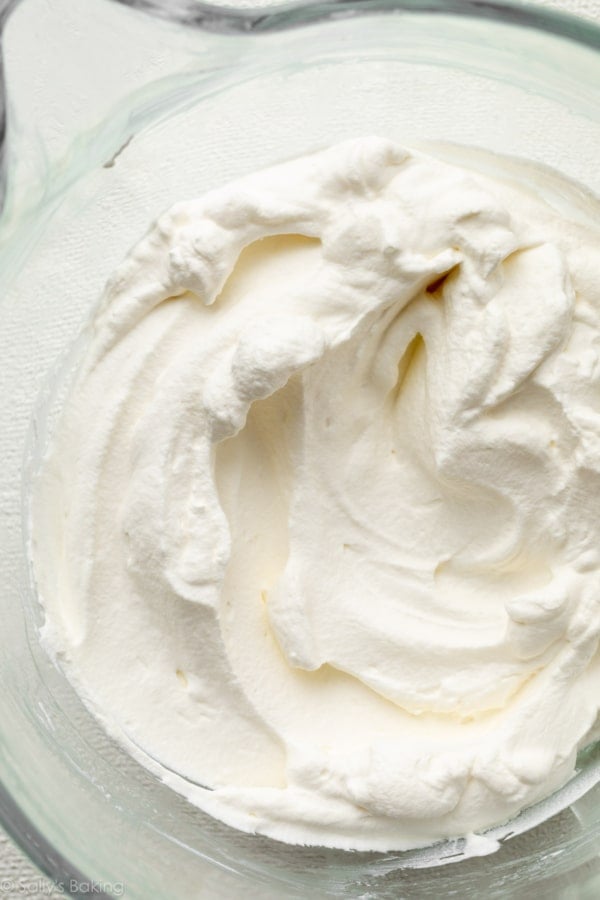
This is the meringue:
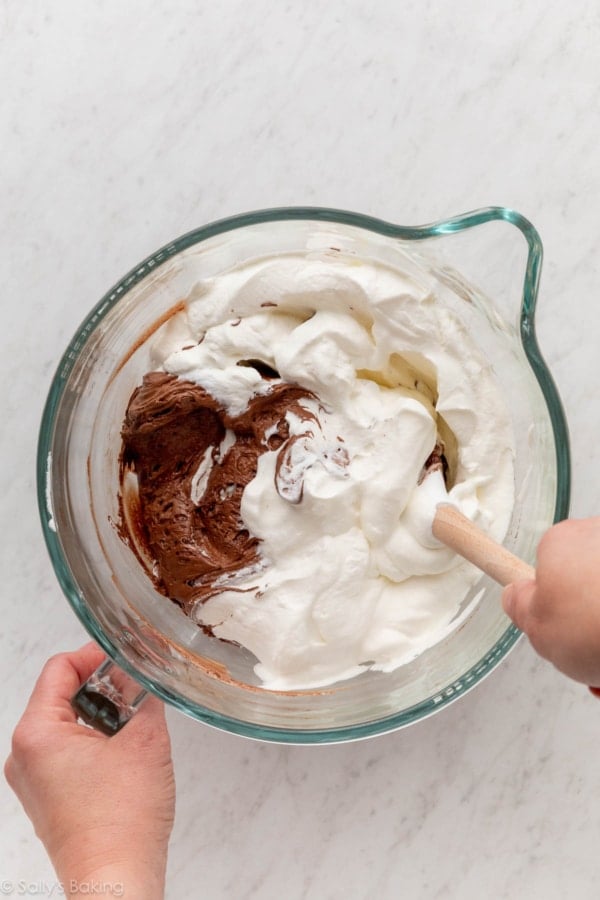
Now you’ll fold the meringue into the melted chocolate:
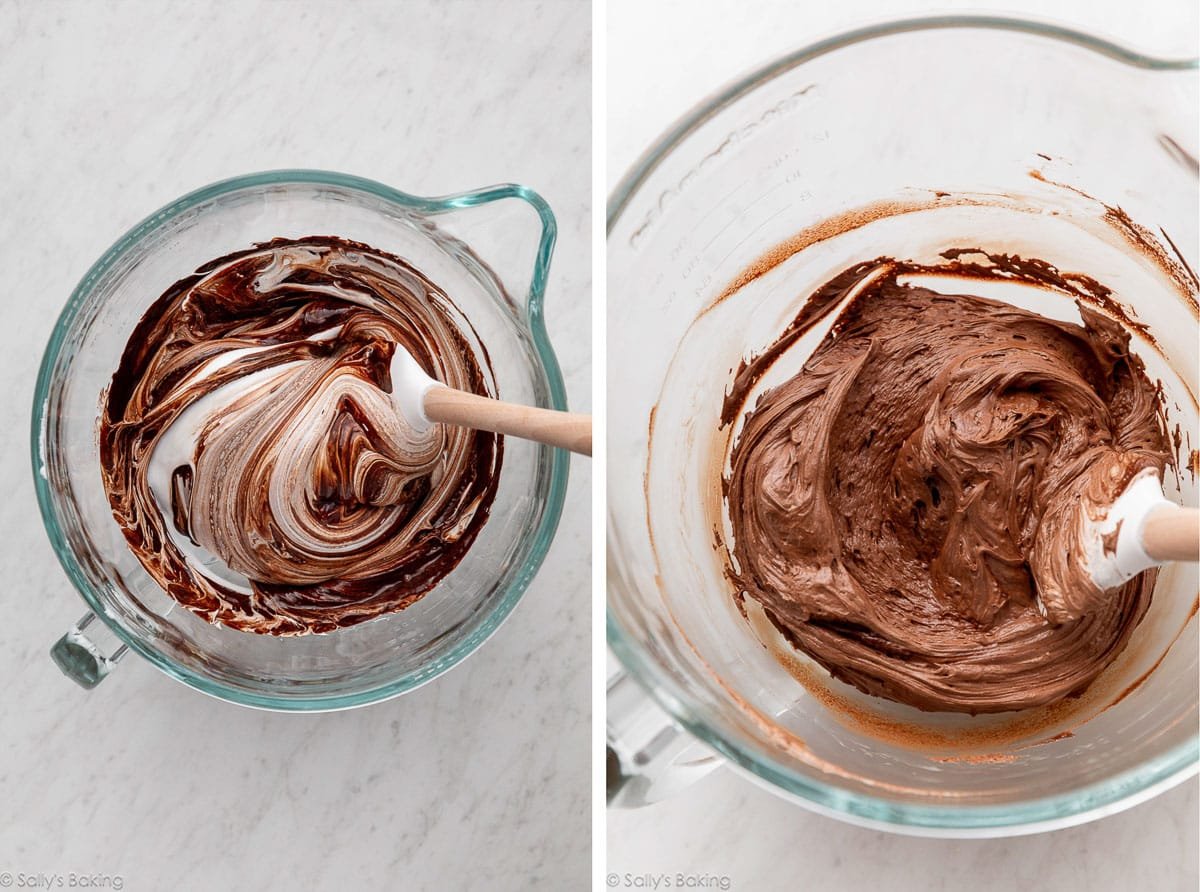
This is adding the whipped cream to make chocolate mousse:
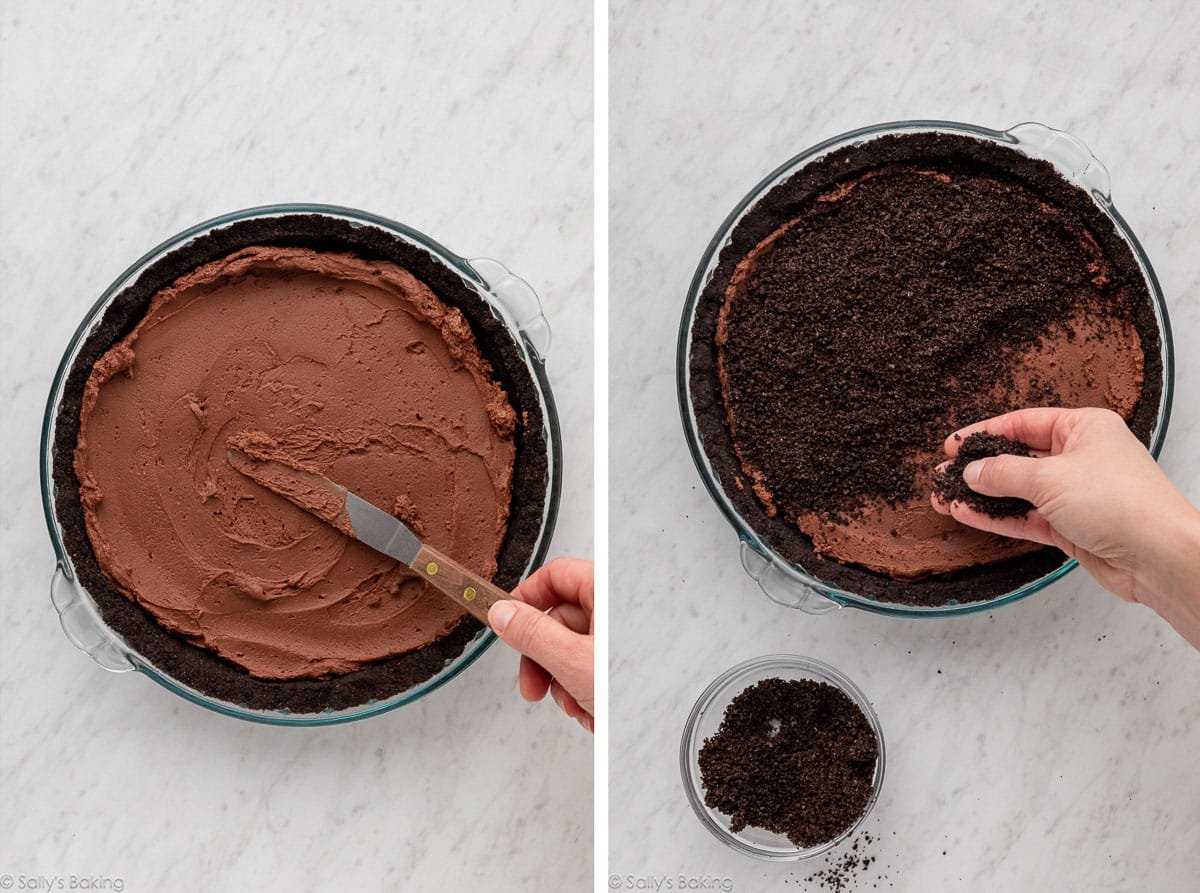
Dome that chocolate mousse so that it’s sky high in the center of the pie. This is easy and requires zero skill or special tools—you just need a spatula to spread it around and shape it into a mound. A layer of Oreo crumbs in the middle is a welcome surprise inside!
Lightly Sweetened Whipped Cream Topping
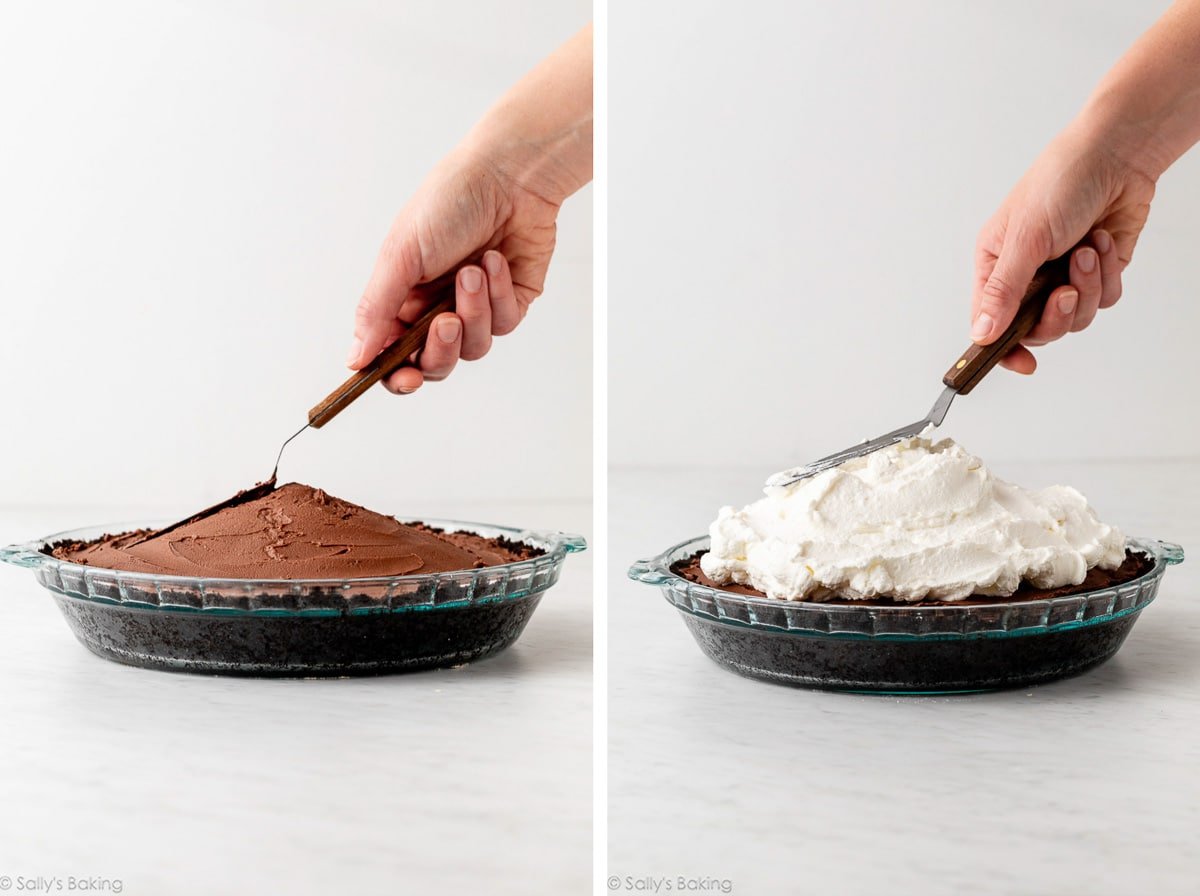
You’ll make two batches of whipped cream. One batch to fold into the mousse—simply whipped heavy cream—and one sweetened batch that we use as the third and final layer of this chocolate mousse pie. I use my favorite whipped cream recipe for the topping, made with a little sugar and vanilla for extra flavor. I like to keep the whipped cream topping on the softer side, so it spreads nicely over the top of the pie.
Place the pie in the refrigerator for a few hours to chill before slicing into it.
Today’s sky-high chocolate mousse pie is lighter and less sweet, made with an Oreo crust and an airy mousse that’s structured with cooked egg whites and whipped cream. French Silk Pie is richer and sweeter, built on a traditional pastry pie crust with a velvety filling made from whole eggs and plenty of butter.
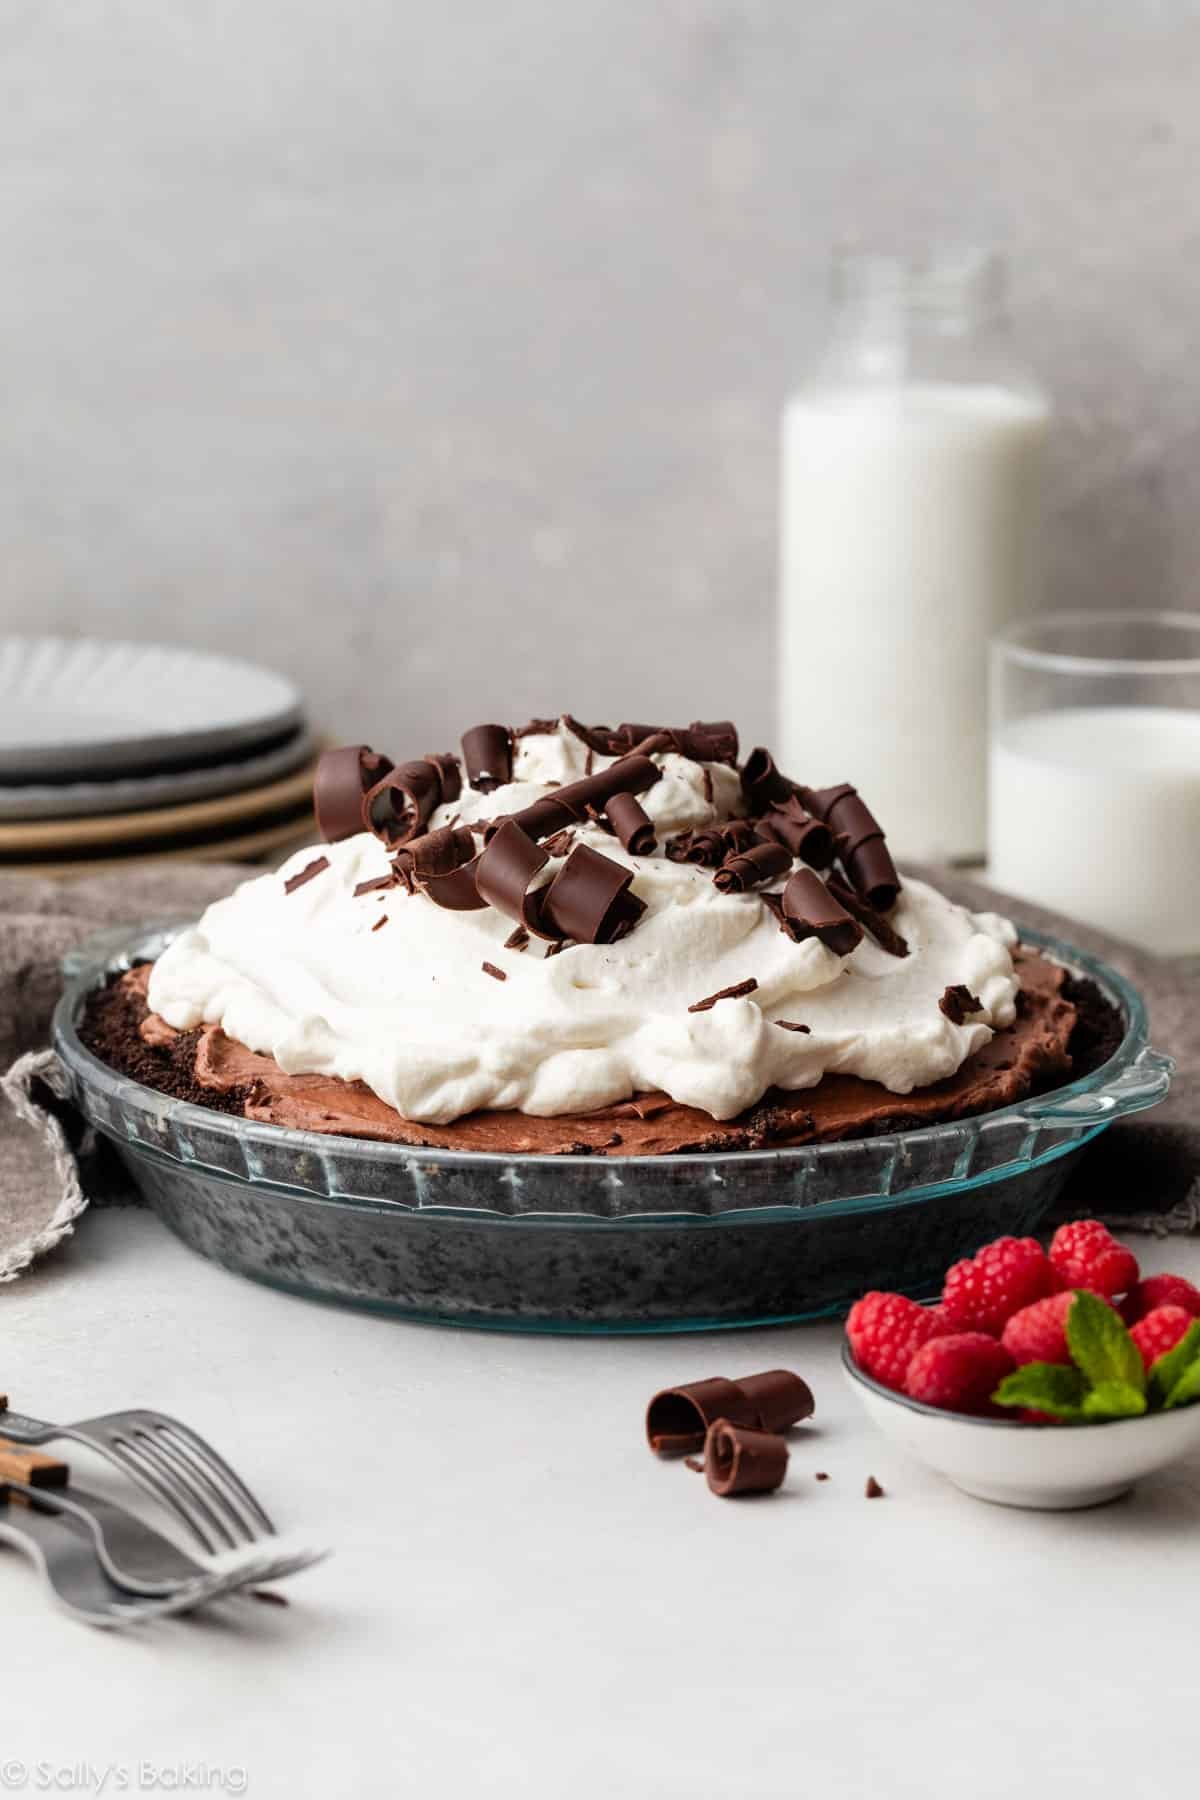
Check out this towering beauty! It’s rich and creamy with a satisfying Oreo crunch. When you’re ready to serve your chocolate mousse pie, feel free to add some chocolate curls, fresh mint sprigs, more Oreo crumbs, or even fresh raspberries or raspberry sauce.


Sky High Chocolate Mousse Pie
- Prep Time: 40 minutes
- Cook Time: 18 minutes
- Total Time: 5 hours, 40 minutes
- Yield: serves 8-10
- Category: Pie
- Method: Baking
- Cuisine: American
Description
Learn how to make sky-high chocolate mousse pie with this easy tutorial and delicious recipe! This recipe is also in my New York Times best-selling cookbook, Sally’s Baking 101.
Ingredients
Oreo Crust
- 22 regular Oreo cookies (not Double Stuf)
- 5 Tablespoons (71g) unsalted butter, melted
Chocolate Mousse Layer
- 8 ounces (226g) unsweetened chocolate, finely chopped (two 4-ounce bars)
- 2 Tablespoons (28g) unsalted butter
- 4 large egg whites* (120g)
- 1 cup (200g) granulated sugar
- 1/4 teaspoon cream of tartar*
- 2 cups (480g/ml) heavy cream, cold
- 6 whole Oreos, crushed into crumbs (68g)
Whipped Cream
- 1 cup (240g/ml) heavy cream, cold
- 2 Tablespoons granulated sugar
- 1/2 teaspoon pure vanilla extract
- optional: chocolate curls or shavings for topping*
Instructions
- Make the crust: Preheat the oven to 350°F (177°C). In a food processor or blender, pulse 22 Oreos (including the cream filling) into fine crumbs. Pour the crumbs into a medium bowl. Add the melted butter and stir to combine. The mixture will be thick and quite wet. Try to smash/break up any large chunks. Pour the mixture into an ungreased 9-inch pie dish. With medium pressure using your hand, pat the crumbs down into the bottom and up the sides to make a compact, thick crust. Bake for 10 minutes, and then place on a cooling rack to cool completely.
- Make the chocolate mousse layer: Microwave the chopped chocolate and butter together in a large heat-proof bowl, stopping and stirring every 20 seconds until completely melted. Set aside.
- Make the meringue for the mousse layer: Place the egg whites, sugar, and cream of tartar in a heat-proof bowl or the upper pot of a double boiler. Set bowl over a saucepan filled with 2 inches of simmering water. Do not let the bowl touch the water. Whisking constantly, cook the egg white mixture until the sugar has dissolved and the mixture reaches 160°F (71°C) on an instant-read thermometer.
- Transfer the mixture to a heat-safe bowl (if using a hand mixer) or the bowl of a stand mixer fitted with a whisk attachment. Beat on high speed until soft, glossy peaks form, about 5–6 minutes. See photo above for a visual. Gently fold the melted chocolate into the egg white mixture until combined. Wash the mixer bowl and whisk attachment clean.
- Make the whipped cream for the mousse layer: Using a handheld or stand mixer fitted with a whisk attachment, whip the heavy cream on medium-high speed until medium-to-stiff peaks form, about 3–4 minutes. Gently fold whipped cream into the chocolate mixture. It may seem like a lot of whipped cream, but just keep folding and it will eventually come together. Do not over-mix; it will deflate the mousse. (No need to wash or wipe the bowl/whisk attachment clean—you’ll make sweetened whipped cream in step 7.)
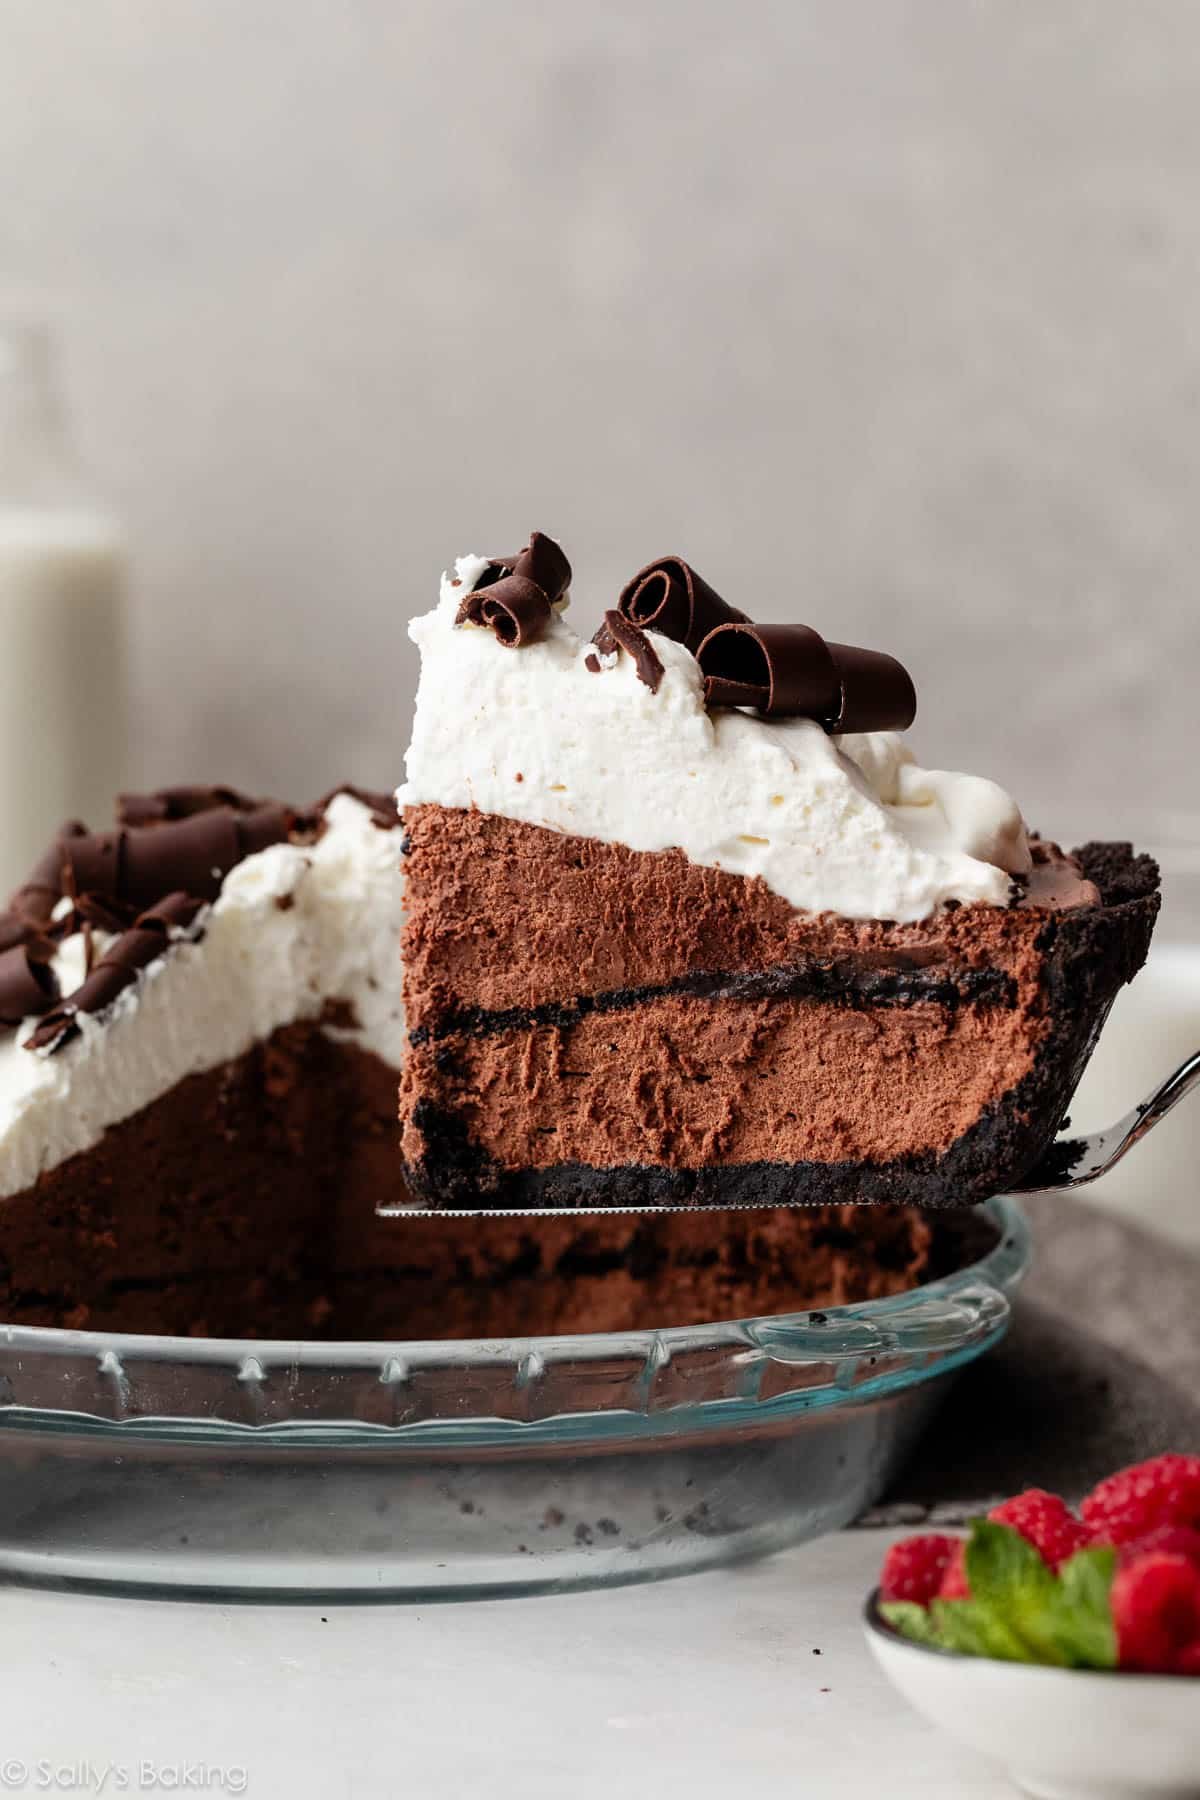
- Using a small offset spatula, spread half of the mousse in the cooled pie crust. Sprinkle the crushed cookie crumbs evenly over the top. Top with the remaining chocolate mousse, mounding it in the center to create a dome shape. Place the pie in the refrigerator while you prepare the sweetened whipped cream topping.
- Make the whipped cream topping: Using a handheld or stand mixer fitted with a whisk attachment, whip the heavy cream, sugar, and vanilla on medium-high speed until medium peaks form, about 3 minutes. You want the peaks to be somewhat soft so the whipped cream spreads nicely on the mousse.
- Remove the pie from the refrigerator and spread the whipped cream on top—keeping that dome shape in the center. Top with chocolate shavings, if using. Refrigerate the pie, uncovered, for at least 4 hours or up to 1 day. Let it sit at room temperature for 10 minutes before slicing and serving. Store leftover pie, covered, in the refrigerator for up to 4 days.
Notes
- Make Ahead Instructions: Since this pie needs to chill for several hours or overnight, it’s perfect for making a day or two ahead of time. Carefully cover it if refrigerating for longer than 1 day. You can freeze the pie for up to 3 months, but it won’t be quite as beautiful. Freezing leftovers is a great idea—simply allow to thaw overnight in the refrigerator before enjoying. Or enjoy frozen!
- Special Tools (affiliate links): Electric Mixer (Handheld or Stand) | Glass Mixing Bowls | Whisk | Saucepan | 9-inch Glass Pie Dish | Food Processor (for Oreo crust)
- Pie Crust: Feeling ambitious? Try a traditional pie crust instead and follow the instructions in this How to Blind Bake Pie Crust post. Baked pie crust/shell must cool completely before adding the chocolate mousse filling.
- Egg Whites: The egg whites are gently cooked in step 3 to 160°F (71°C), which is considered safe to eat. You can use a candy thermometer or instant-read thermometer to determine their temperature. You can use pasteurized egg whites, though keep in mind they may never reach the volume of unpasteurized egg whites.
- Cream of Tartar: Key for stabilizing those egg whites.
- Chocolate Curls: Here’s how to make chocolate curls, or you can run a vegetable peeler down the long side of a Hershey’s milk chocolate bar. Chocolate sprinkles, mini chocolate chips, fresh raspberries, or more Oreo crumbs work just as well!
- Adapted from Bon Appetit.


Reader Comments and Reviews
Could you make this “minty” with say, creme de menthe or something like that?
Absolutely. The best way, without throwing off consistency, would be to add some peppermint extract. I recommend folding 1/2 teaspoon in when you combine the meringue and melted chocolate/butter mixture, before folding in the whipped cream!
I love this recipe, but my crust is too hard. I cannot slice it to serve the pie. Any suggestions?
Hi Betty, We’re happy to help troubleshoot. Overworking the dough can lead to a tough pie crust. You want to *just* bring the dough together and not work/knead it more than that. Also make sure to start with cold fats, so they don’t melt into the dough. And careful not to add too much water. You can watch Sally’s video on our pie crust recipe (using shortening and butter) for more tips and tricks.
My question is about the Oreo crust
Hi Betty! Happy to help. When Oreo crust is too hard, it’s either been packed in too hard, or it’s just a little too cold. Try letting it warm up a bit at room temperature before slicing and serving!
I just finished making this dreamy pie and I’m SO nervous that the whipped cream topping is going to deflate by tomorrow when I serve it for Father’s Day. Should you really leave it uncovered in the fridge? Thanks!
Hi Marly, that’s what works for us! We hope you enjoy it.
What should I use to store the pie in if I’m going to freeze it?
Hi Amanda! A large plastic storage container works well to freeze pies.
Would you be able to modify this recipe with some silky tofu?
Hi Lera, we haven’t tested anything, but let us know if you do.
Do you think I could use gluten free Oreo?
Hi Kathy, that should be fine!
I’m allergic to corn and corn derivatives. Oreos in the US are, frustratingly, not safe. It seems like Oreo alternatives don’t have the same flavour or texture, or still contain corn. Do you have any suggestions for a different base that would work for this tart?
Hi Courtney, a fully blind baked pie crust, like you would use for banana cream pie, would work here. Or can you try graham cracker crust?
Made this earlier today and wow! My husband couldn’t believe it was all made from scratch. Said it was the best thing I’ve ever baked. I was a little nervous to make swiss meringue (pretty sure that’s the style here) but instructions were so easy to follow. Thank you Sally!
This is simply incredible. I love your recipes and your clear, concise directions. I occasionally go “rogue” on some recipes (of all kinds) adding what I want, usually with good results (but that’s on me!). I am an experienced baker, too, and whenever I use one of your recipes, they ALWAYS come out perfectly. I can always count on you and Ina Garten to bring me perfect results.
This made the best birthday pie but with a bit of a story. My husband made this, with me talking him through – my birthday. He followed your directions very closely, beautiful melted chocolate butter mix, perfect cooked meringue (almost marshmallow but bcs we used Demerara sugar, only used 3/4 cup). Then we got to the whipped cream…err, butter. I was folding the choc/meringue mixture and his whipped cream went to butter in less than 30 seconds. I’ve never had that happen. So we got some homemade butter and a delicious pie out of the deal – we used a tub of whipped topping I had since no more whipping cream and we didn’t want to go to the store in pouring rain/thunderstorm. Think this luscious pie is going to be my new birthday “cake”. Only other sub was we used a Diamond nut pecan graham crust. I love pecans and was tasty. We used unsweetened chocolate (5+ oz) but had to add in a bar of Alter Eco 70% cacao Sea Salt dark choc bar – our favorite eating chocolate.