

Unless you were born in Maryland, you likely have no clue what Smith Island cake is. Even if you live here, you still might not know. Heck, I had no idea what Smith Island cake was until a reader emailed me encouraging me to try it. After a little digging, recipe testing, and LOTS of taste testing, let me present you with a homemade version of the official dessert of Maryland: the Smith Island cake. Only a handful of states have an official state dessert, so you know this one is extra special!!!
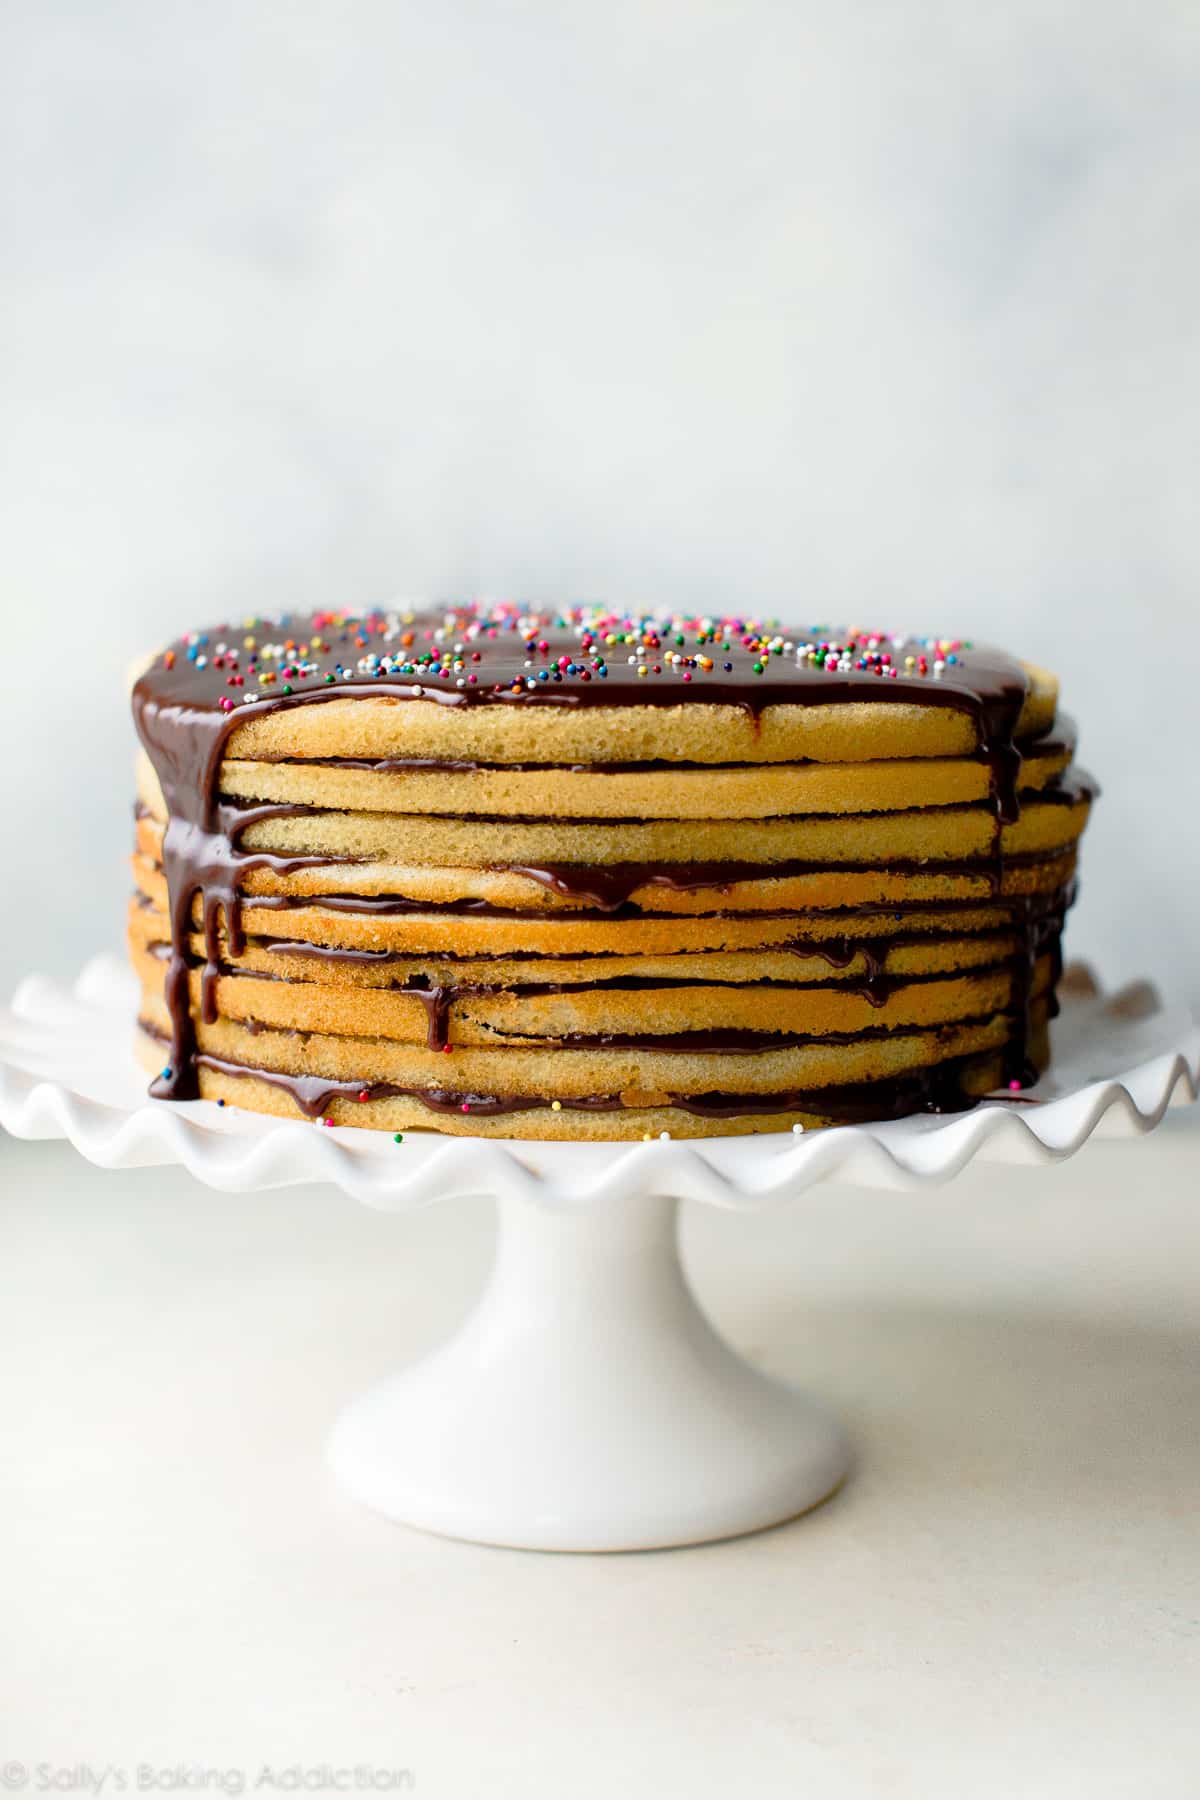
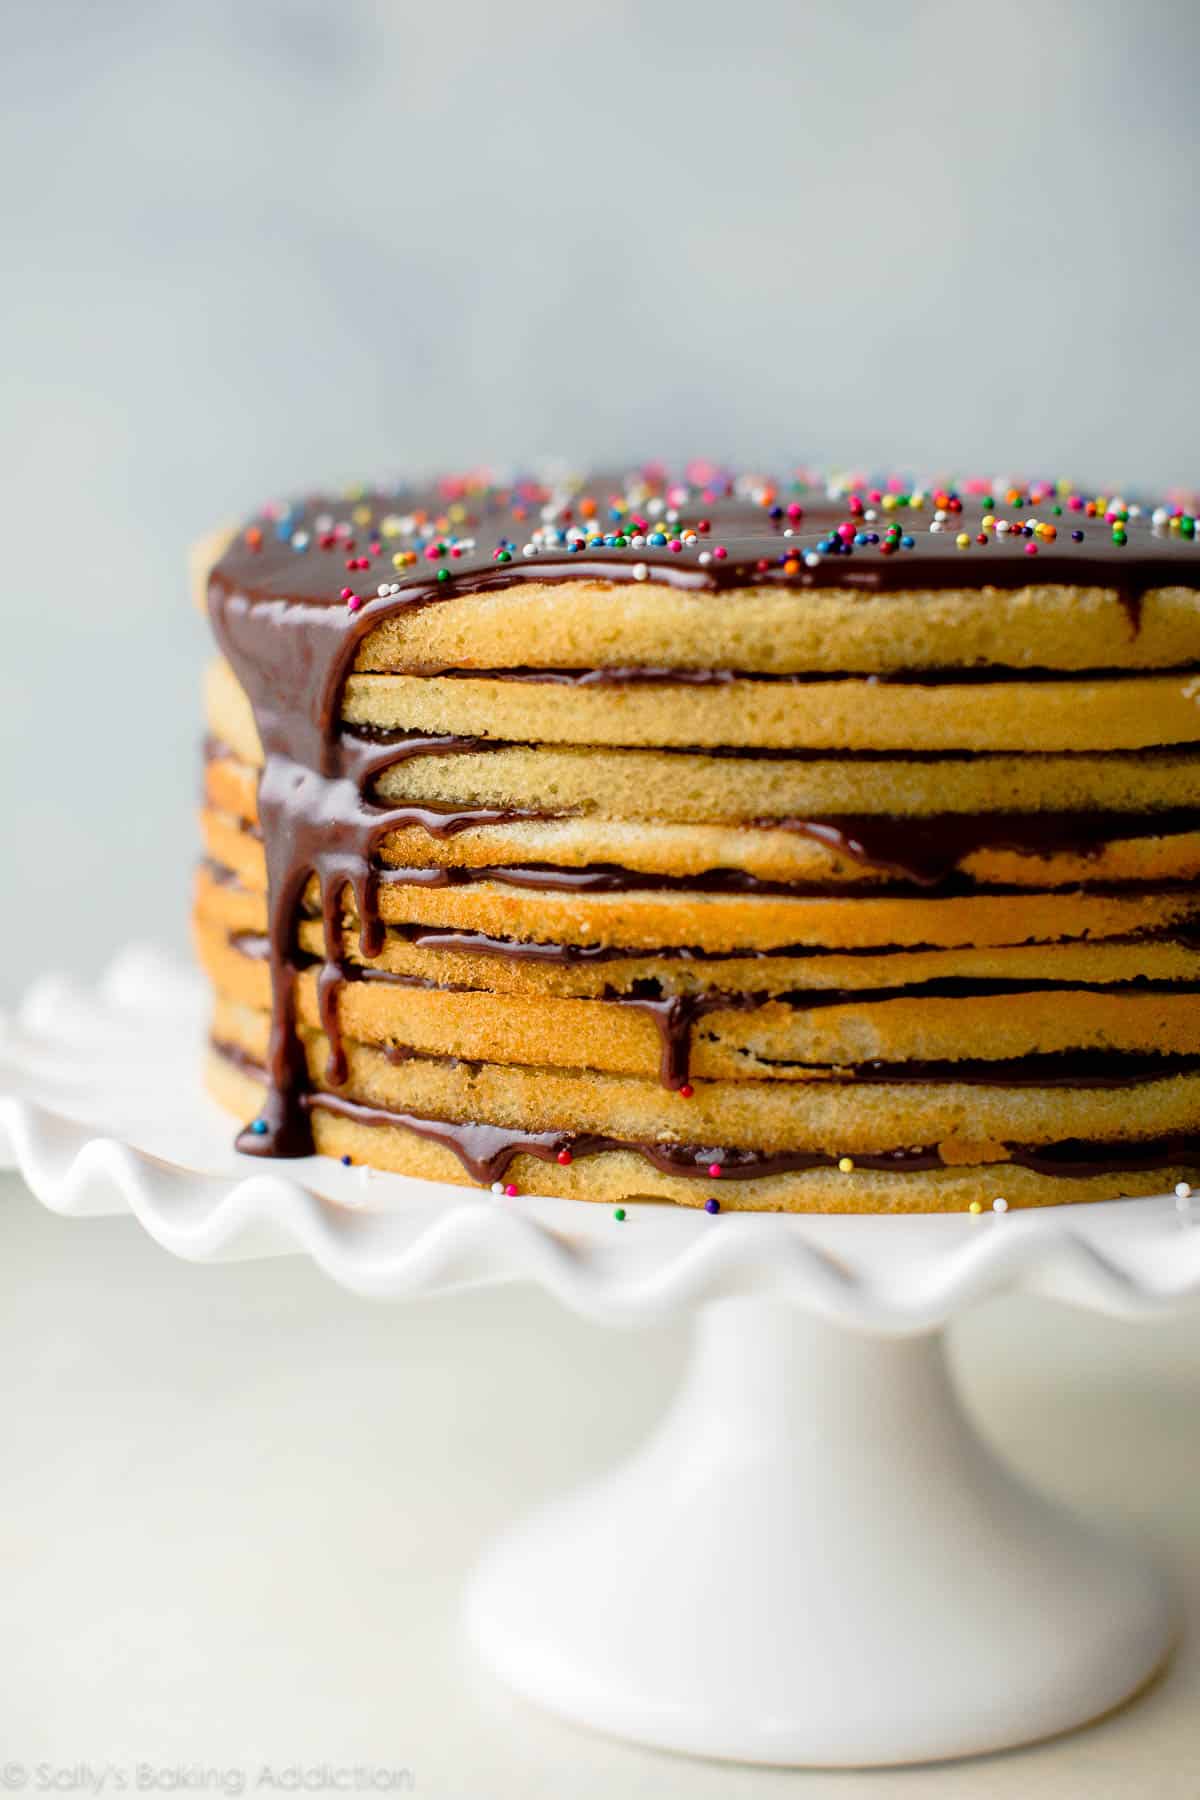
Smith Island, an island situated on the Chesapeake Bay between Maryland and Virginia and only reachable by boat, is home to this epic beauty. The cake, as I learn, dates back to the early 1800s (or even 1600s depending what you read!) when Smith Islanders would send the cake with watermen on the autumn oyster harvest. It’s frosted with fudge instead of buttercream because the fudge lasts much longer. Today the cake towers with anywhere from 8-14 ultra thin layers and comes in a variety of flavors like lemon, carrot cake, coconut, and strawberry. We’re sticking with the original Smith Island cake, a moist yellow cake with chocolate fudge icing. Sprinkles totally optional, but I always encourage a little rainbow happiness.
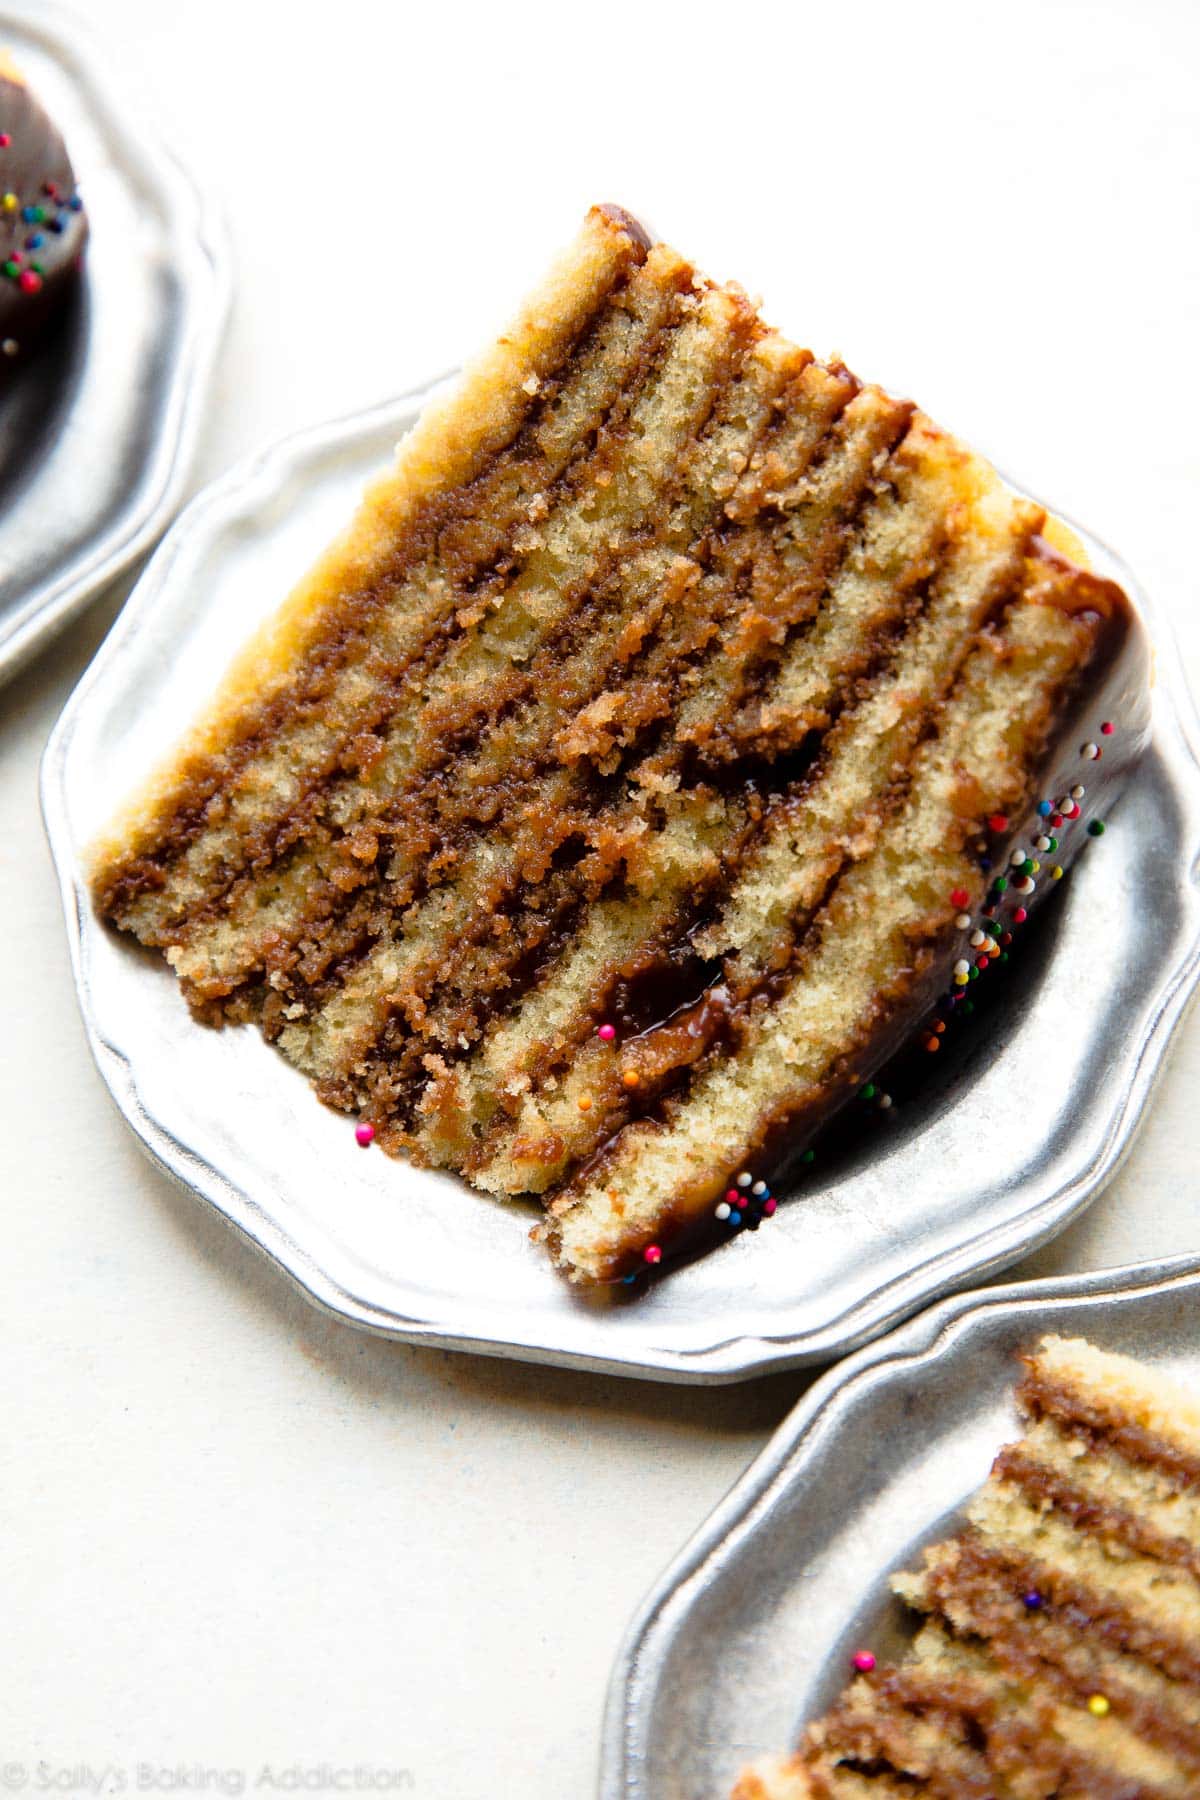
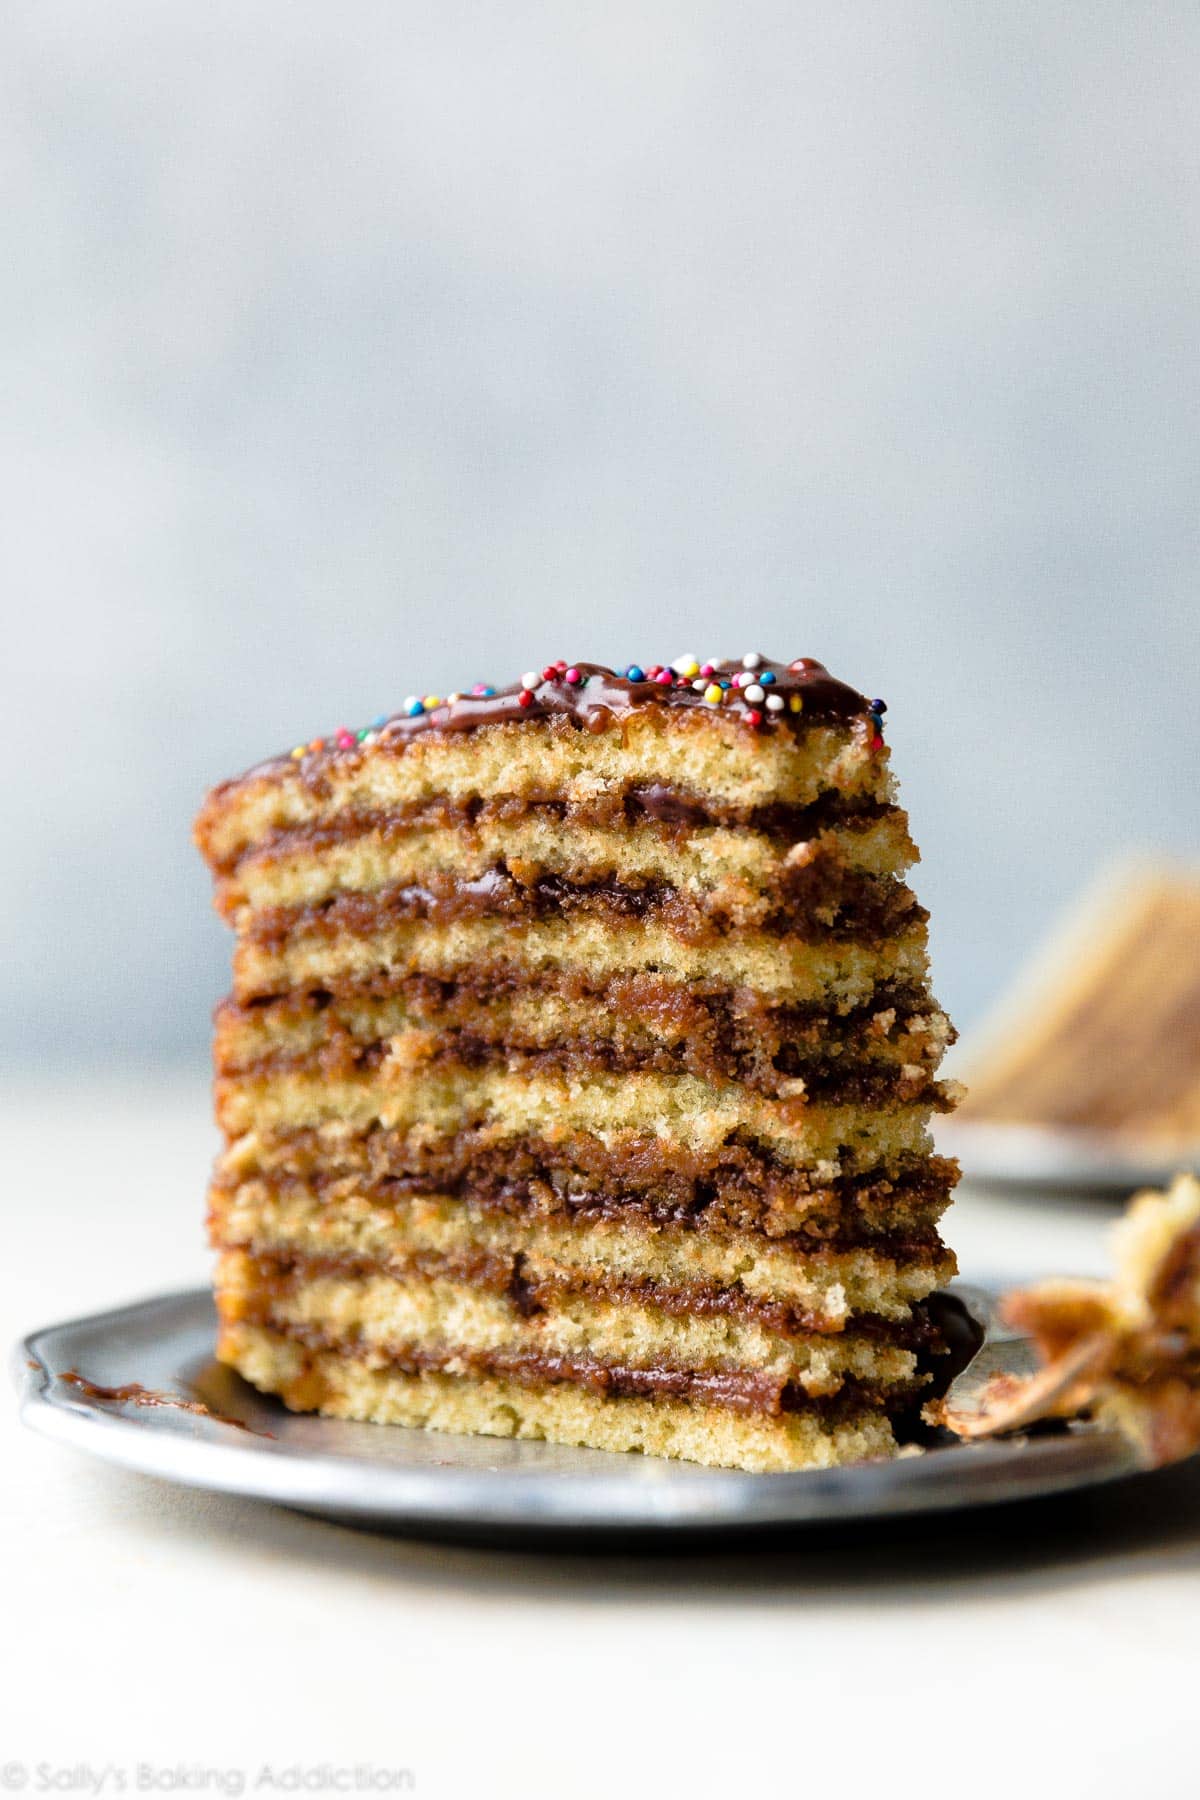
If there’s one thing to know, it’s this: Smith Island cake is decadently moist; no other cake on the planet can even compete. The chocolate icing seeps down into the pencil thin cake layers and if you start out with a moist yellow cake, there’s no denying this will be the most tender and moist cake you’ll ever experience!!!
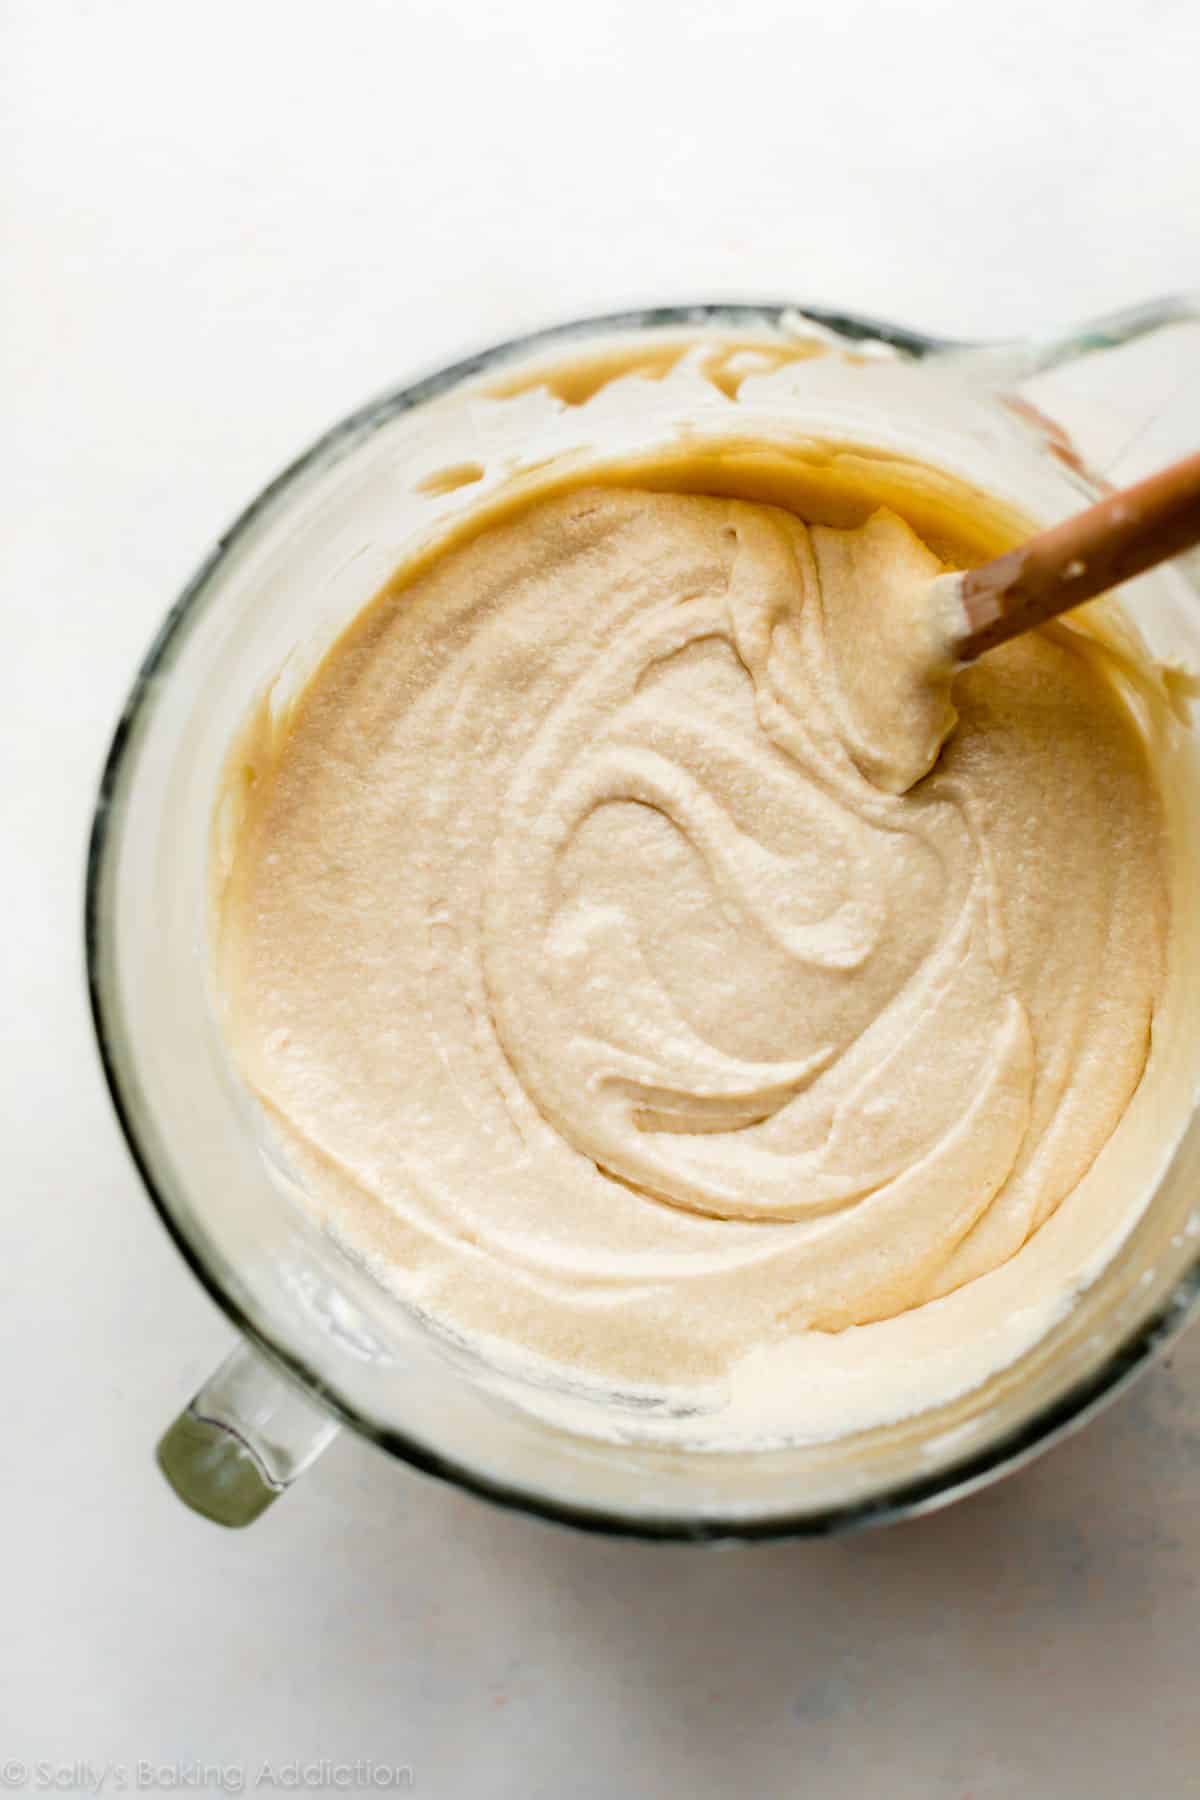
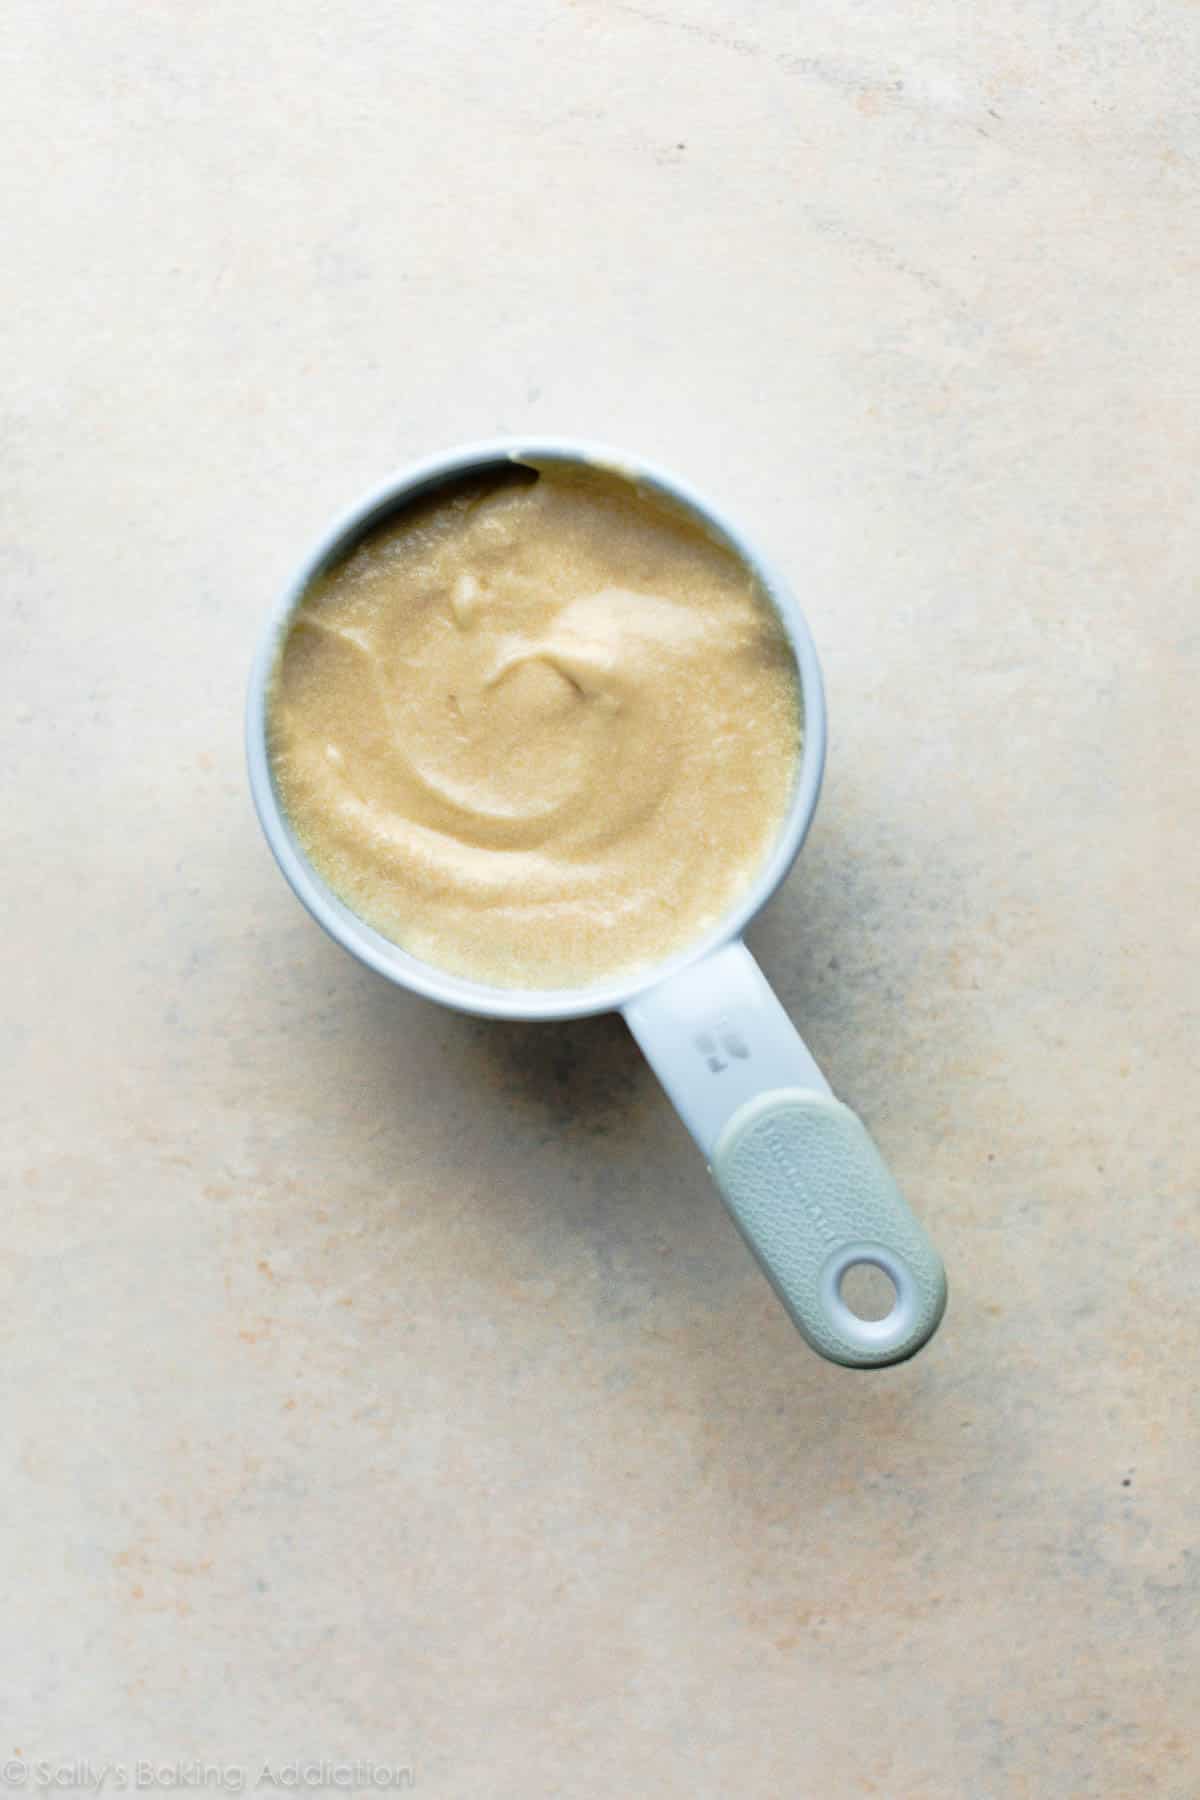
At its core, this is literally a 9 layer yellow birthday cake. Between cakes and cupcakes, I have a couple yellow/vanilla cake batters that I love but my checkerboard cake came to mind first. It produces a lot of batter which I know would spread nicely over multiple layers. I used this batter again for my vanilla naked cake. It’s a simple batter combining sifted all-purpose flour, butter, sugar, eggs, and buttermilk.
I wasn’t sure how many layers I could get from this batter, but I ended up baking 9. You’ll have about 8 cups of batter to work with, so I used a little less than 1 cup of batter per cake. You could, of course, bake 8 cakes using 1 cup of batter each.
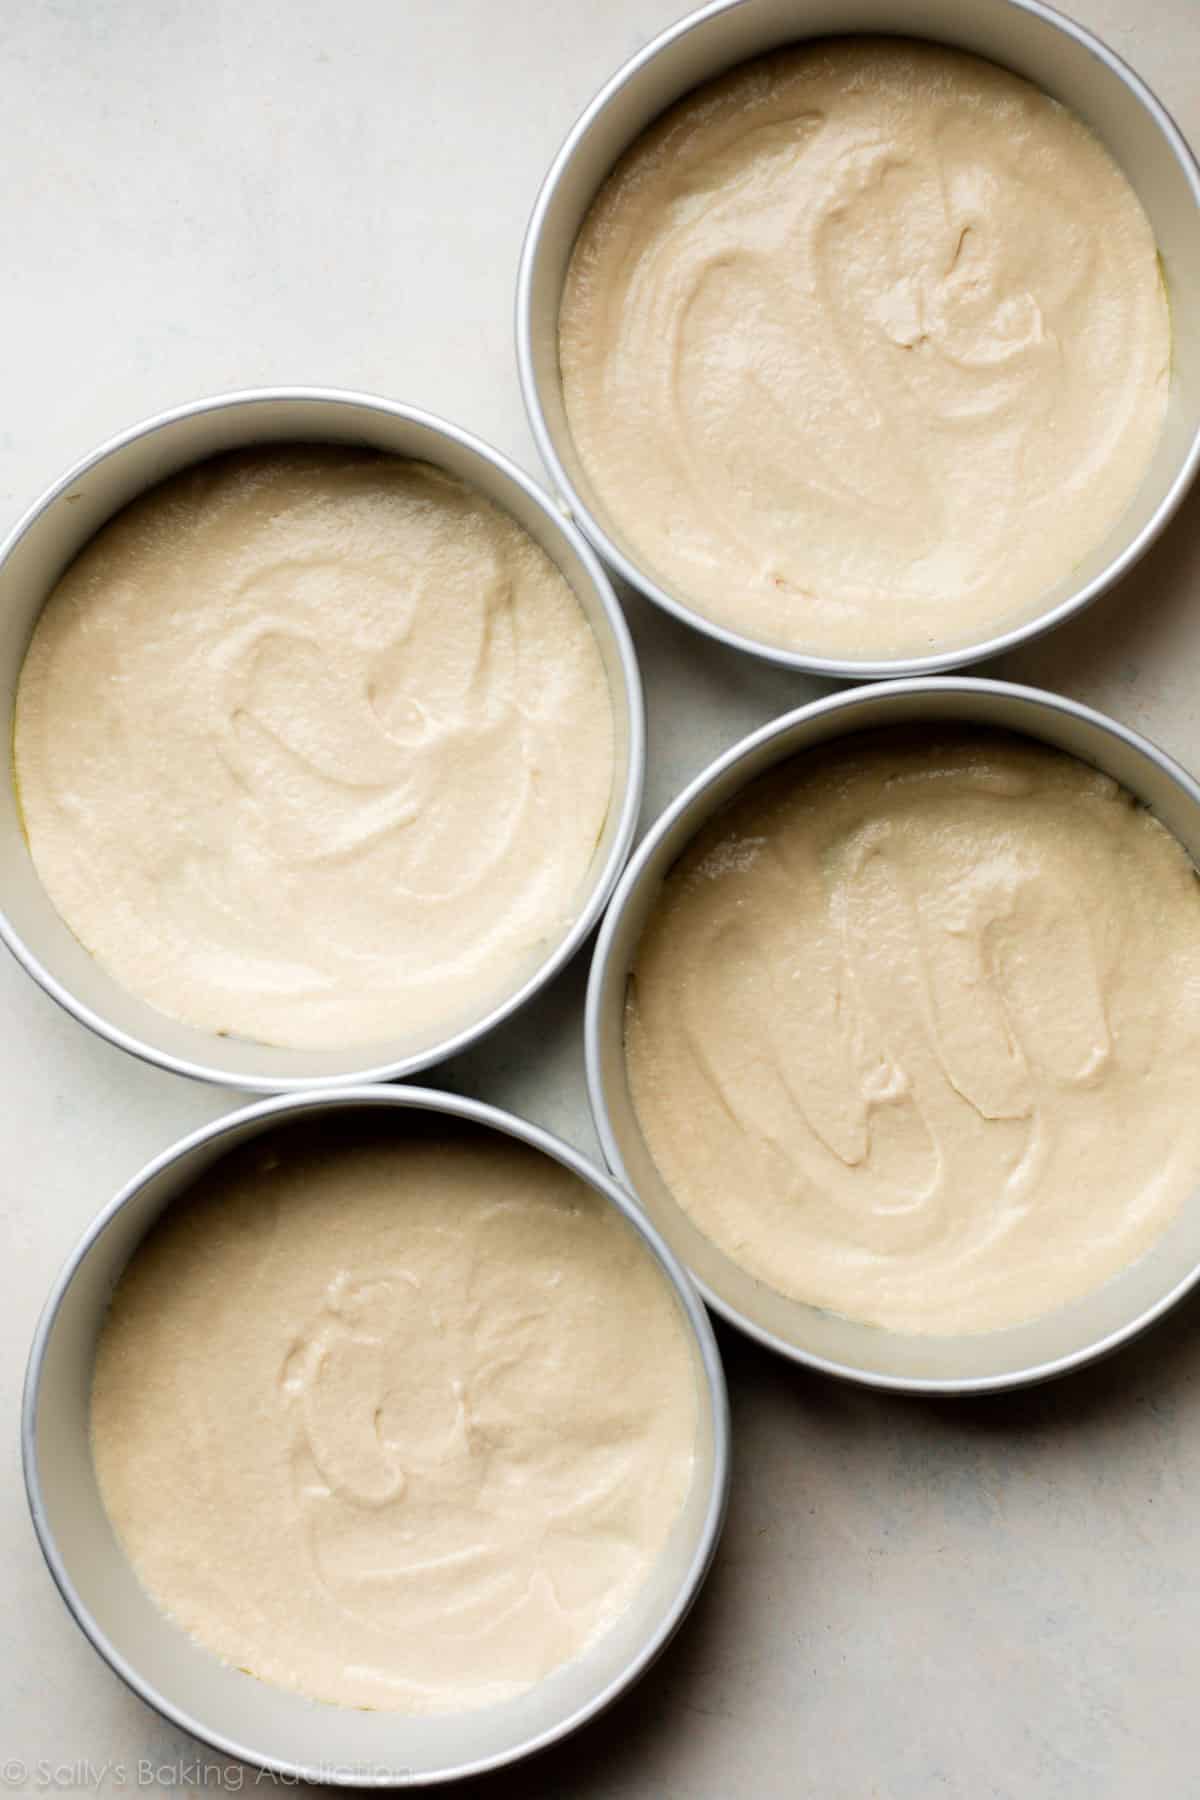
The 9 cake layers are baked individually instead of baking 3 or 4 thick cakes and precisely slicing them horizontally to create layers. Baking each cake layer individually doesn’t take any longer since the thinner cakes take less time in the oven, about 12 minutes each. Baking 3 at a time, they’ll be done in less than 40 minutes. This method also ensures that each layer is baked evenly. Baking a couple thicker cakes risks over or under-baking and the cakes are more likely to sink in the centers because they’re so thick. If you have more than 3 9-inch cake pans, bake more cakes at once. I baked 4 cakes 2x then 1 cake by itself. If you have fewer than 3 9-inch cake pans, simply bake in batches until all 9 cakes are baked.
Spread the batter across the cake pans as best you can. It’s a very thin layer of batter! To guarantee the cakes will release from the pan without breaking, line the pans with greased parchment paper.
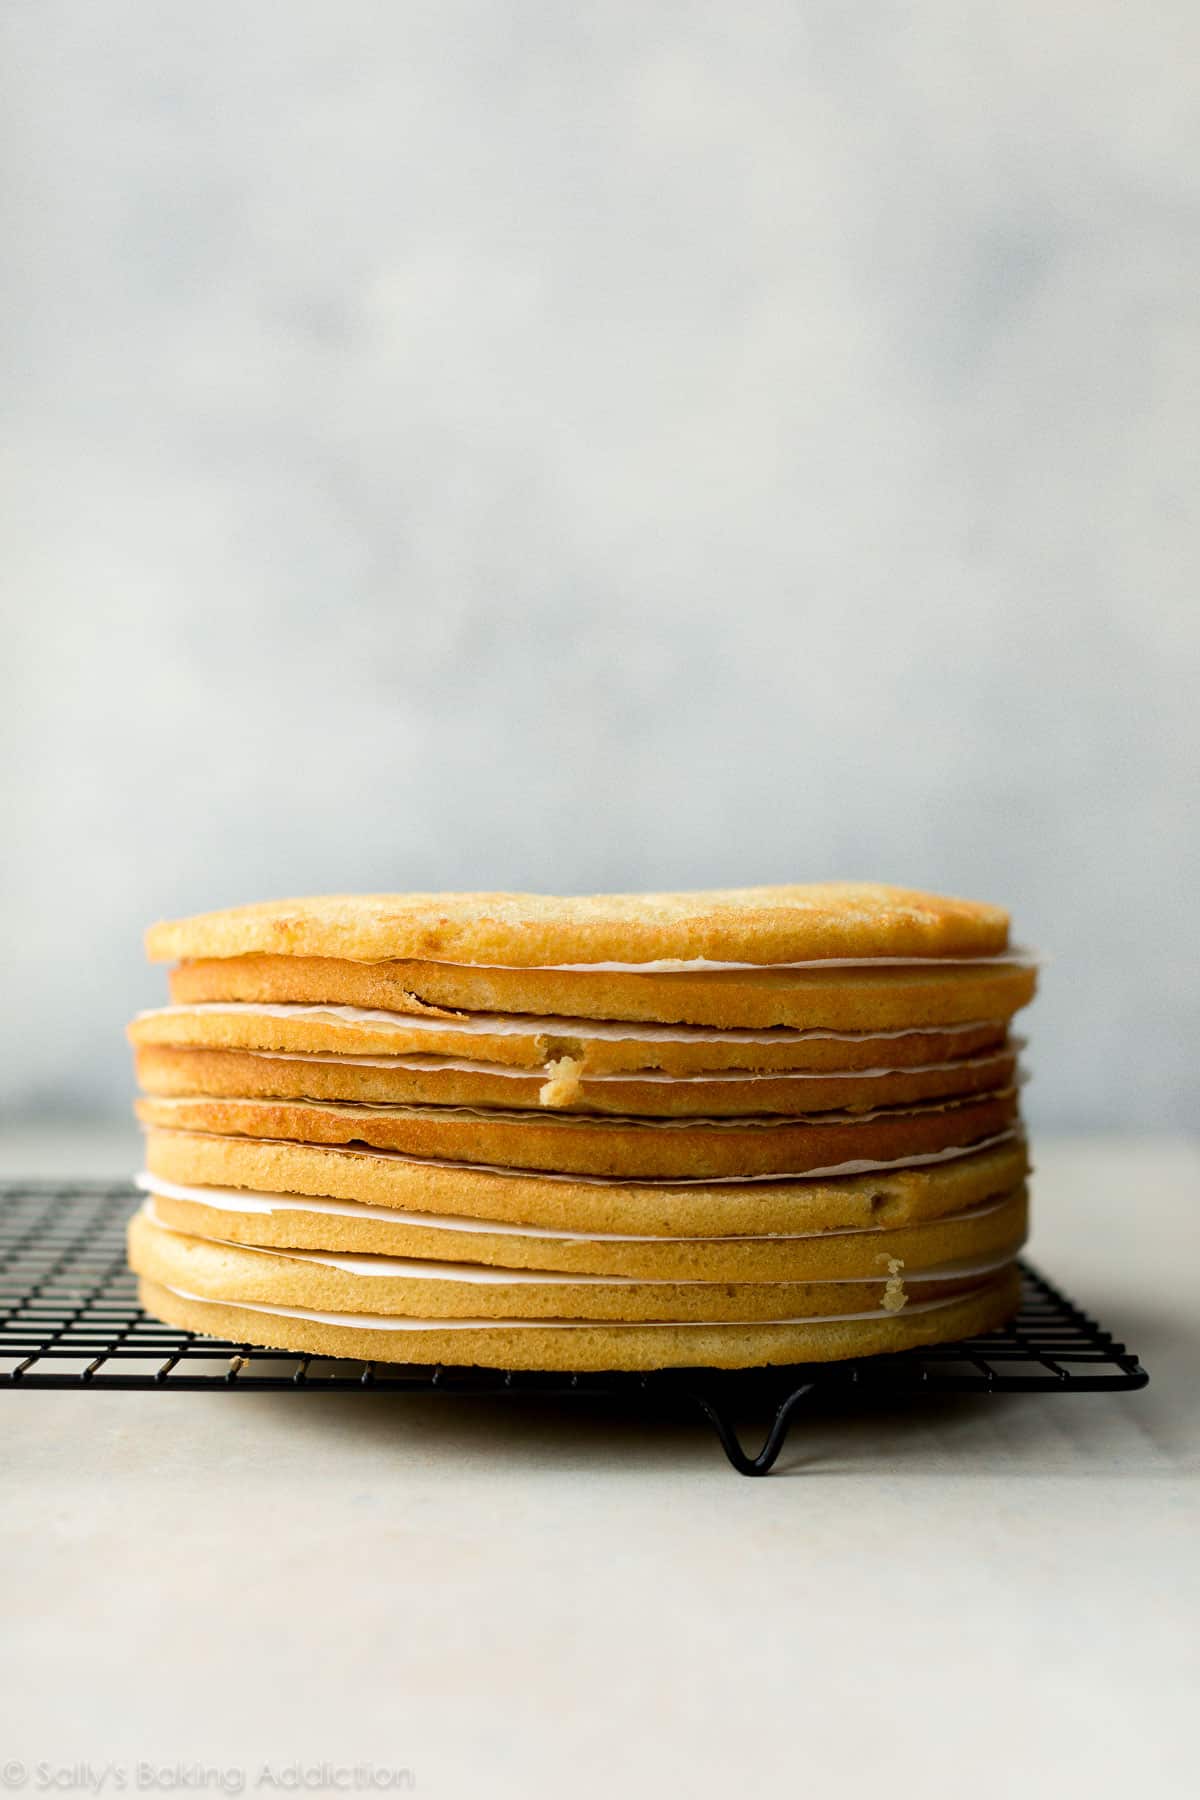
Thinner cakes not only take less time to bake, but take less time to cool as well. Just let the cakes cool on the counter. I stacked them in this picture so you could see just how thin they are without the icing applied. The cakes are fragile, so handle with care when cooling and assembling the cake.
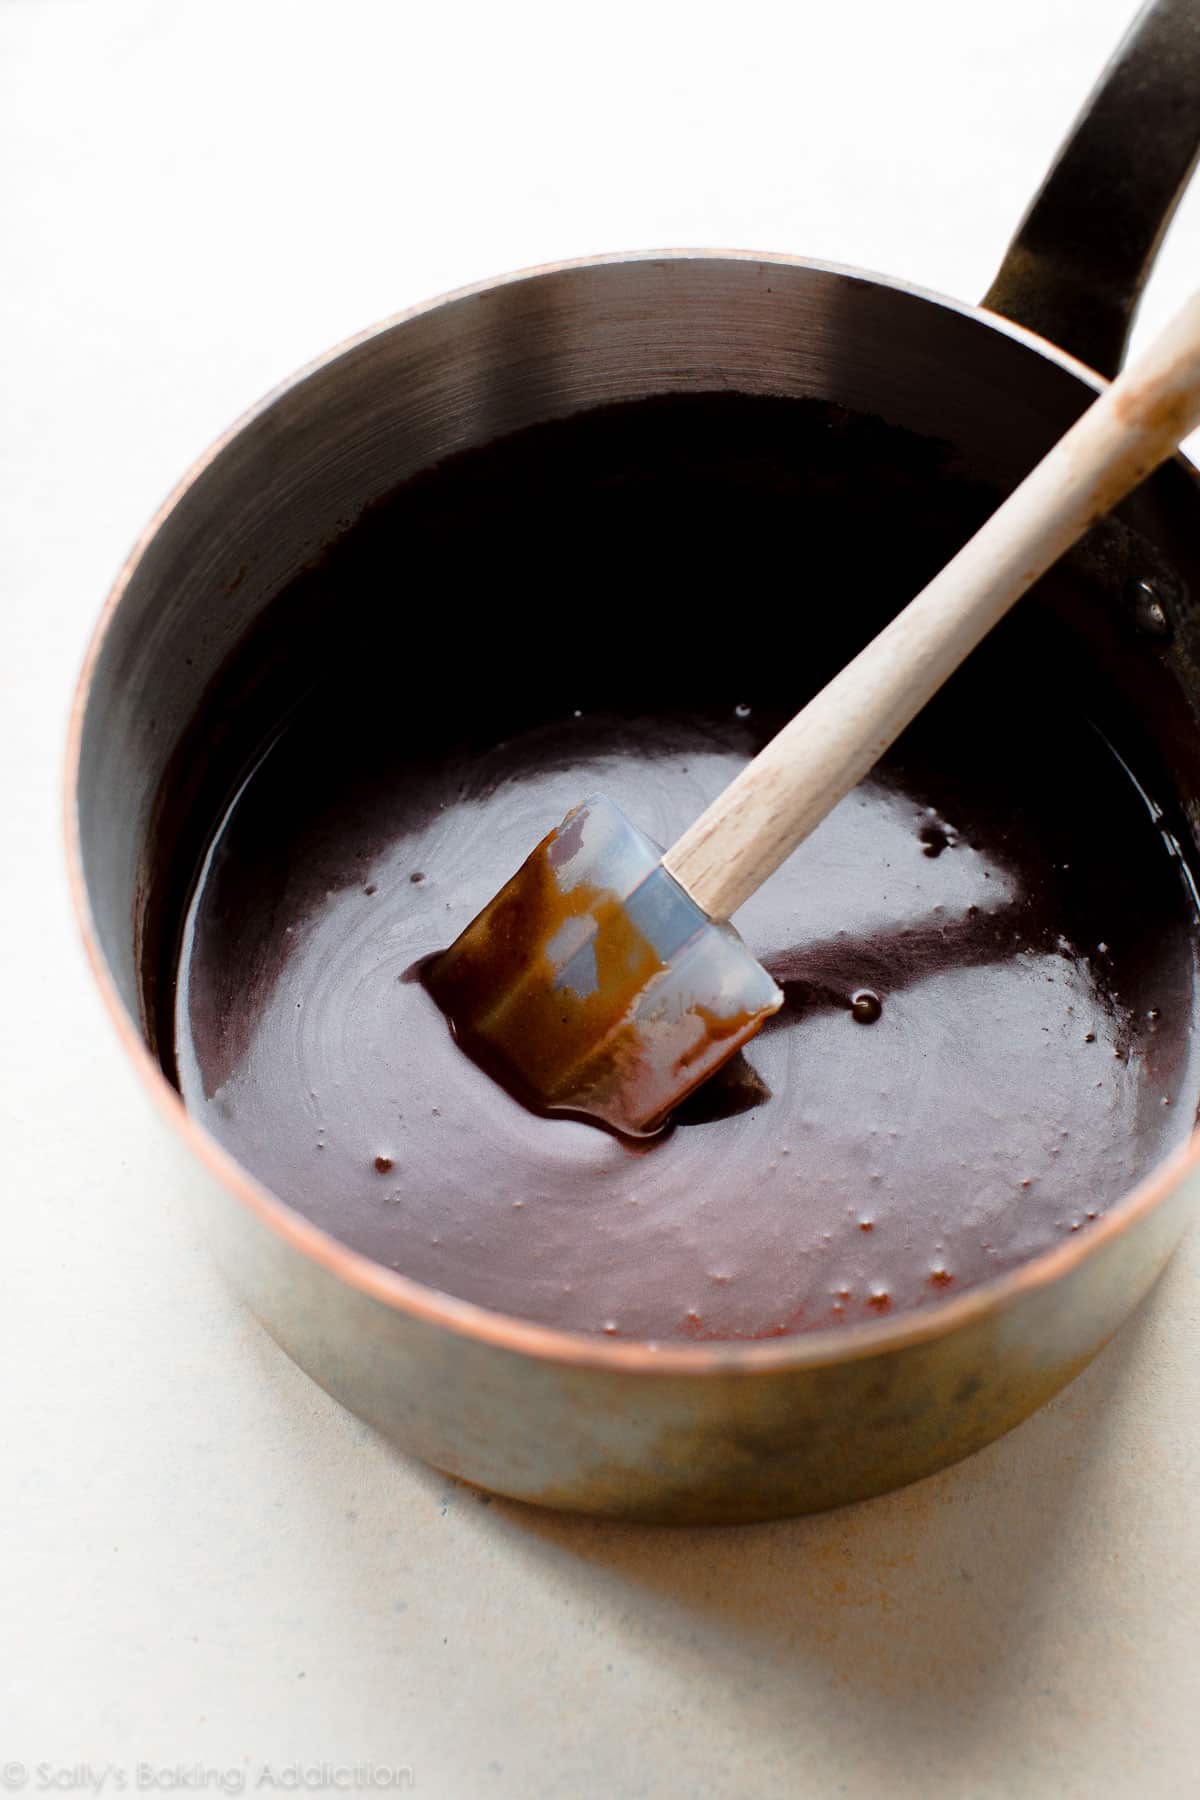
While the yellow cake layers are delicious, the cake’s hallmark is actually the chocolate fudge icing. The icing is cooked on the stovetop and must cool down before spreading between the layers. In the recipe below, I encourage you to make the icing first. Let it cool and thicken as the cake layers bake. Best way to save time!
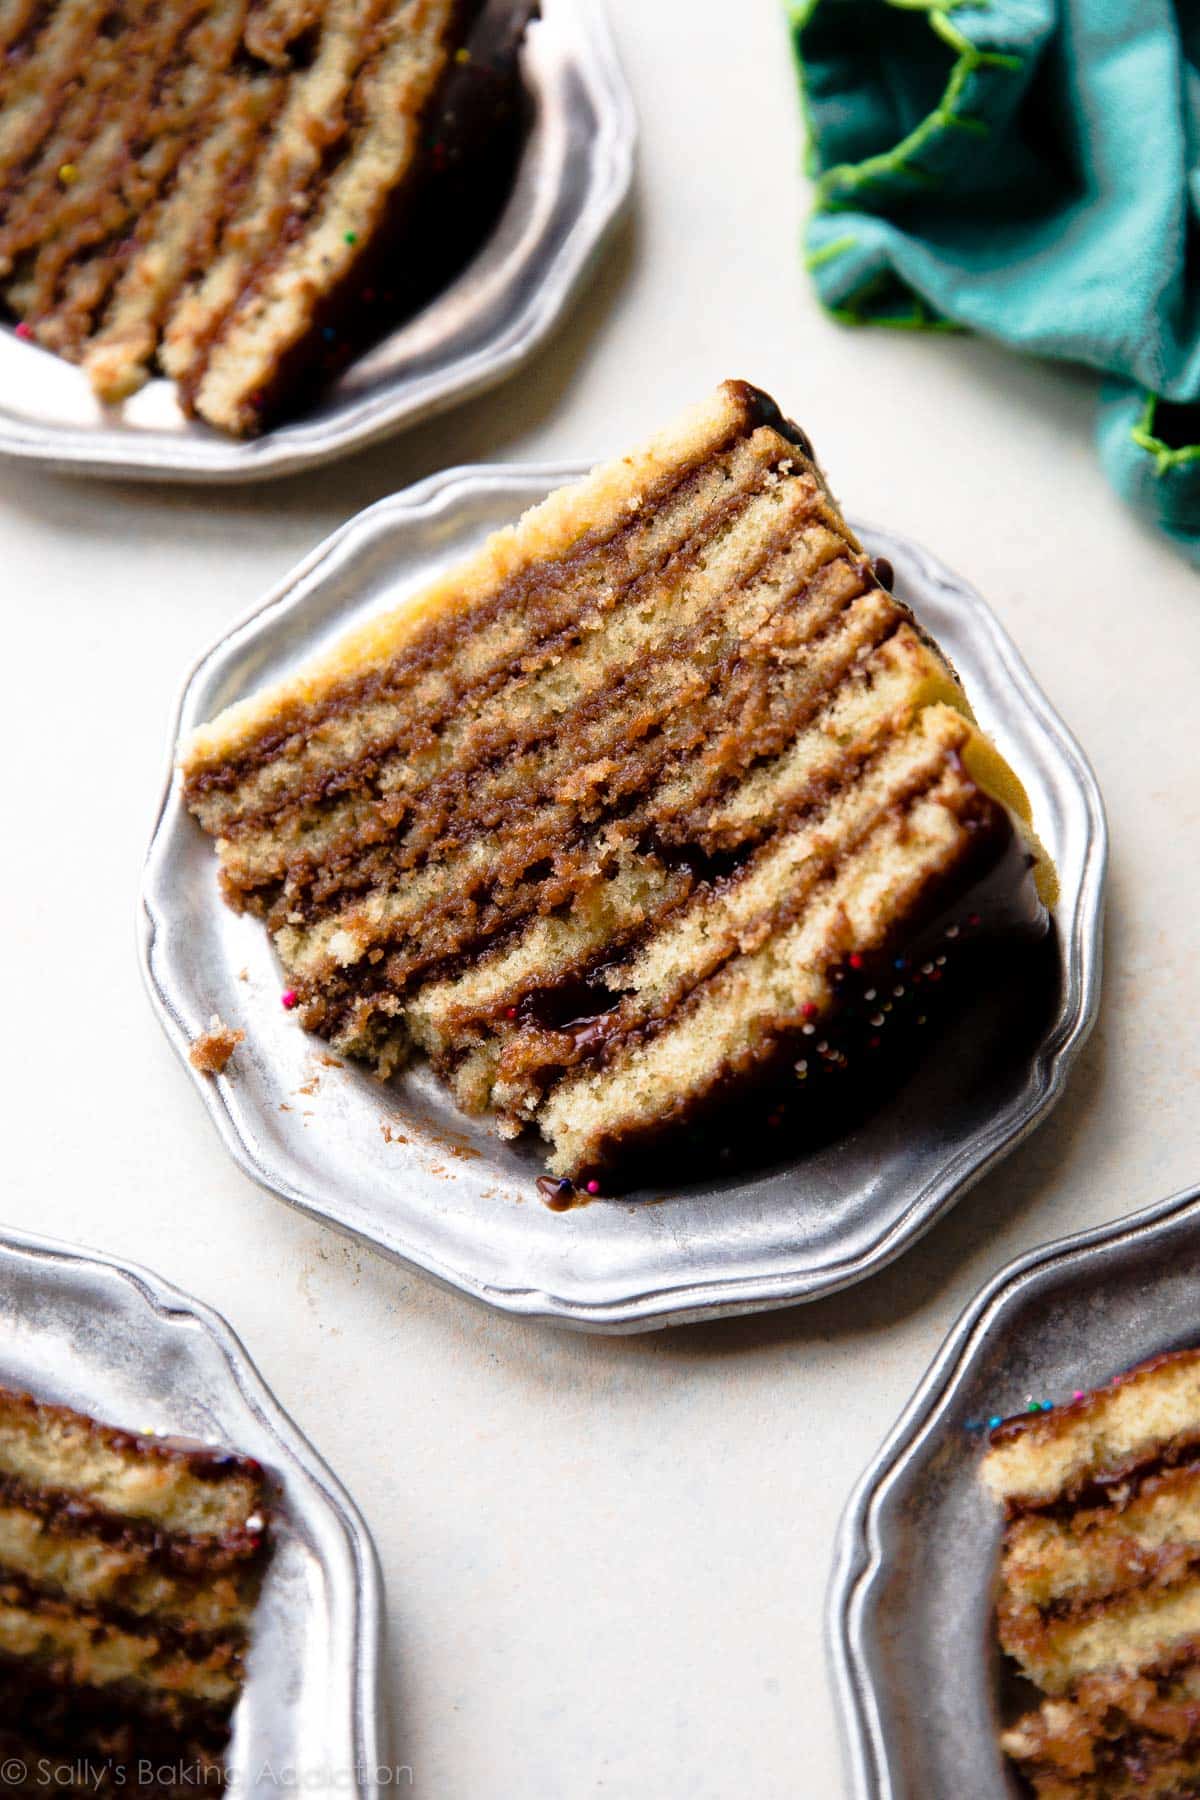
The chocolate fudge icing reminds me of hot fudge. It’ll cool down before applying to the cake, but in terms of taste and thickness, hot fudge all the way. Unlike hot fudge, though, this icing “sets” on top of the cake. Think of a thick-ish chocolate glaze. The best part? Literally every bite of Smith Island cake has cake and icing. No frosting-less forkfuls.
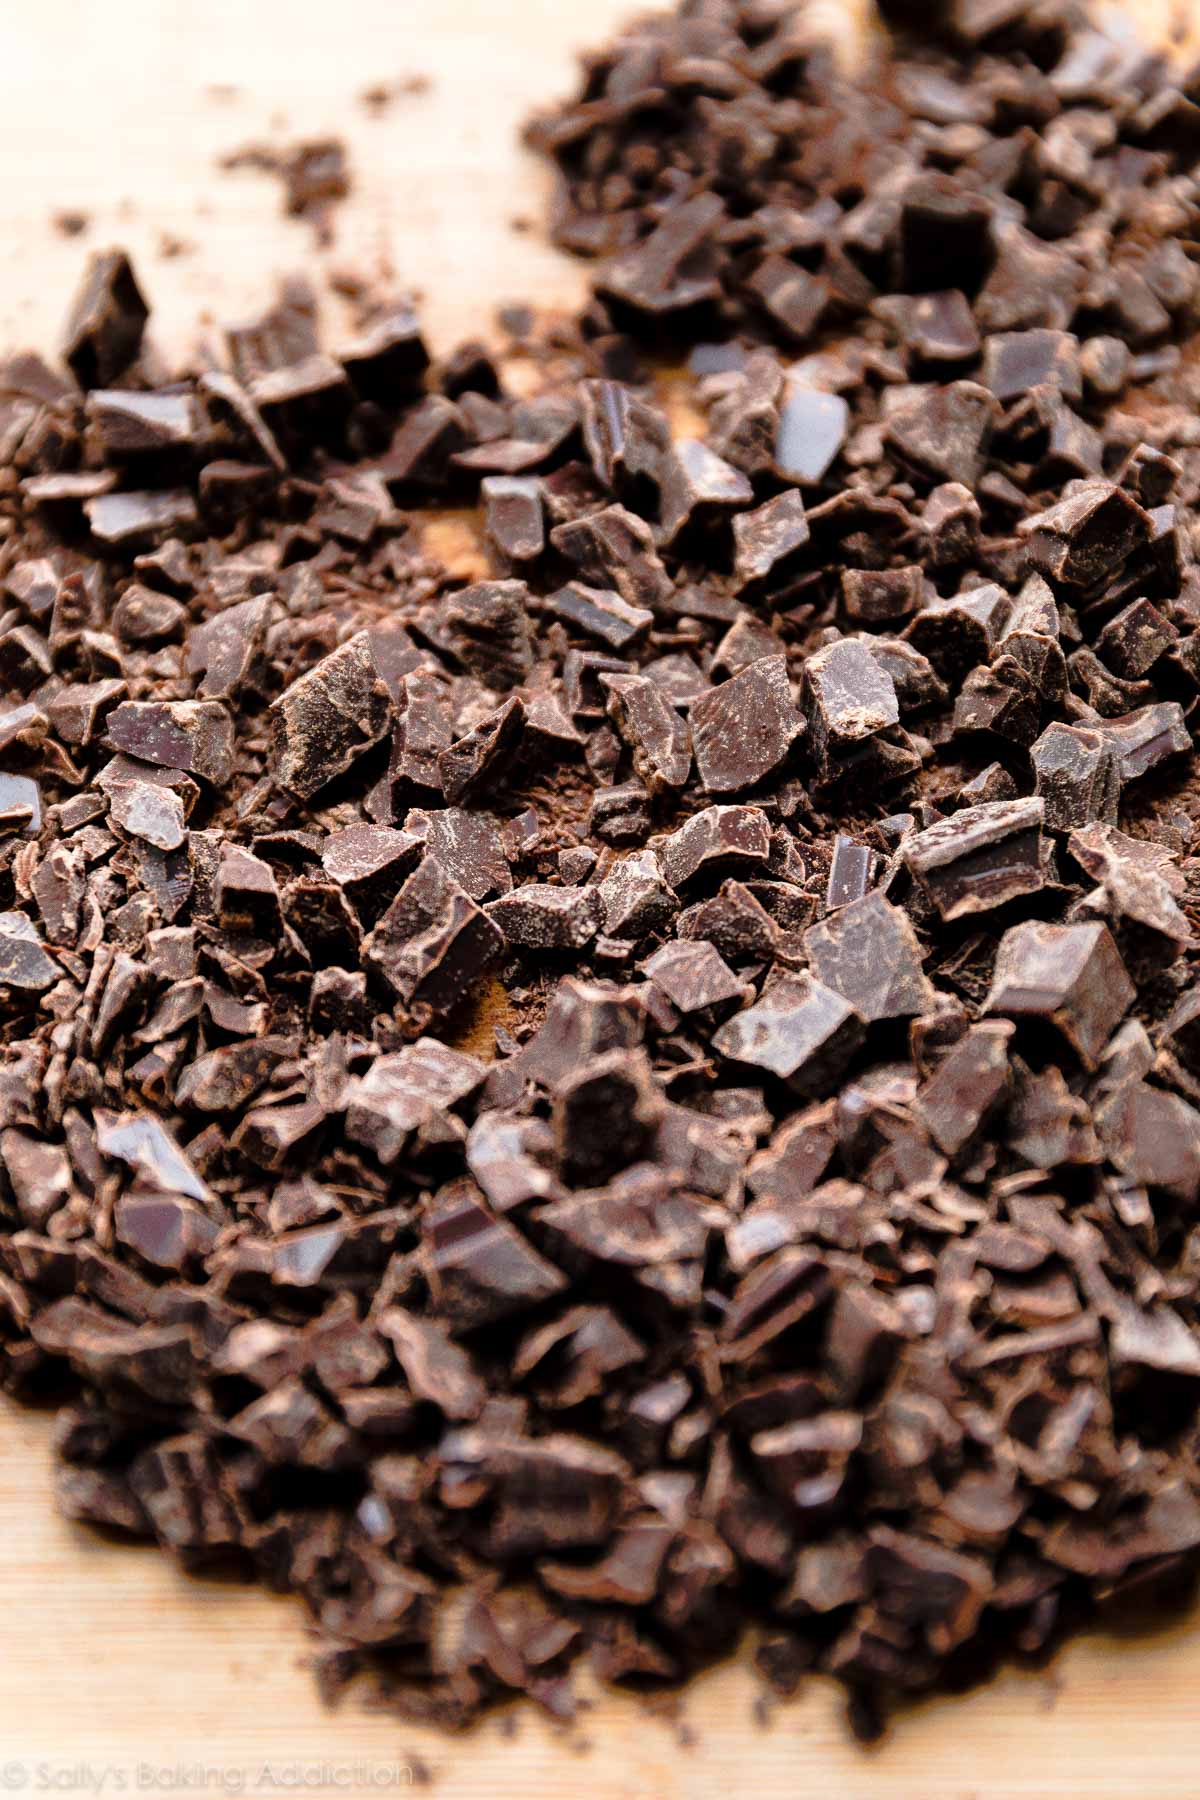
Simply combine butter, heavy cream, chopped chocolate, and sugar on the stovetop. Depending on your sweetness threshold, you can use semi-sweet, bittersweet, or unsweetened chocolate. I reach for one 4 ounce bar of bittersweet chocolate. A little corn syrup provides shine, though it’s completely optional. Finish the icing off with a little vanilla extract and a pinch of salt.
This is definitely a cake for chocolate lovers.
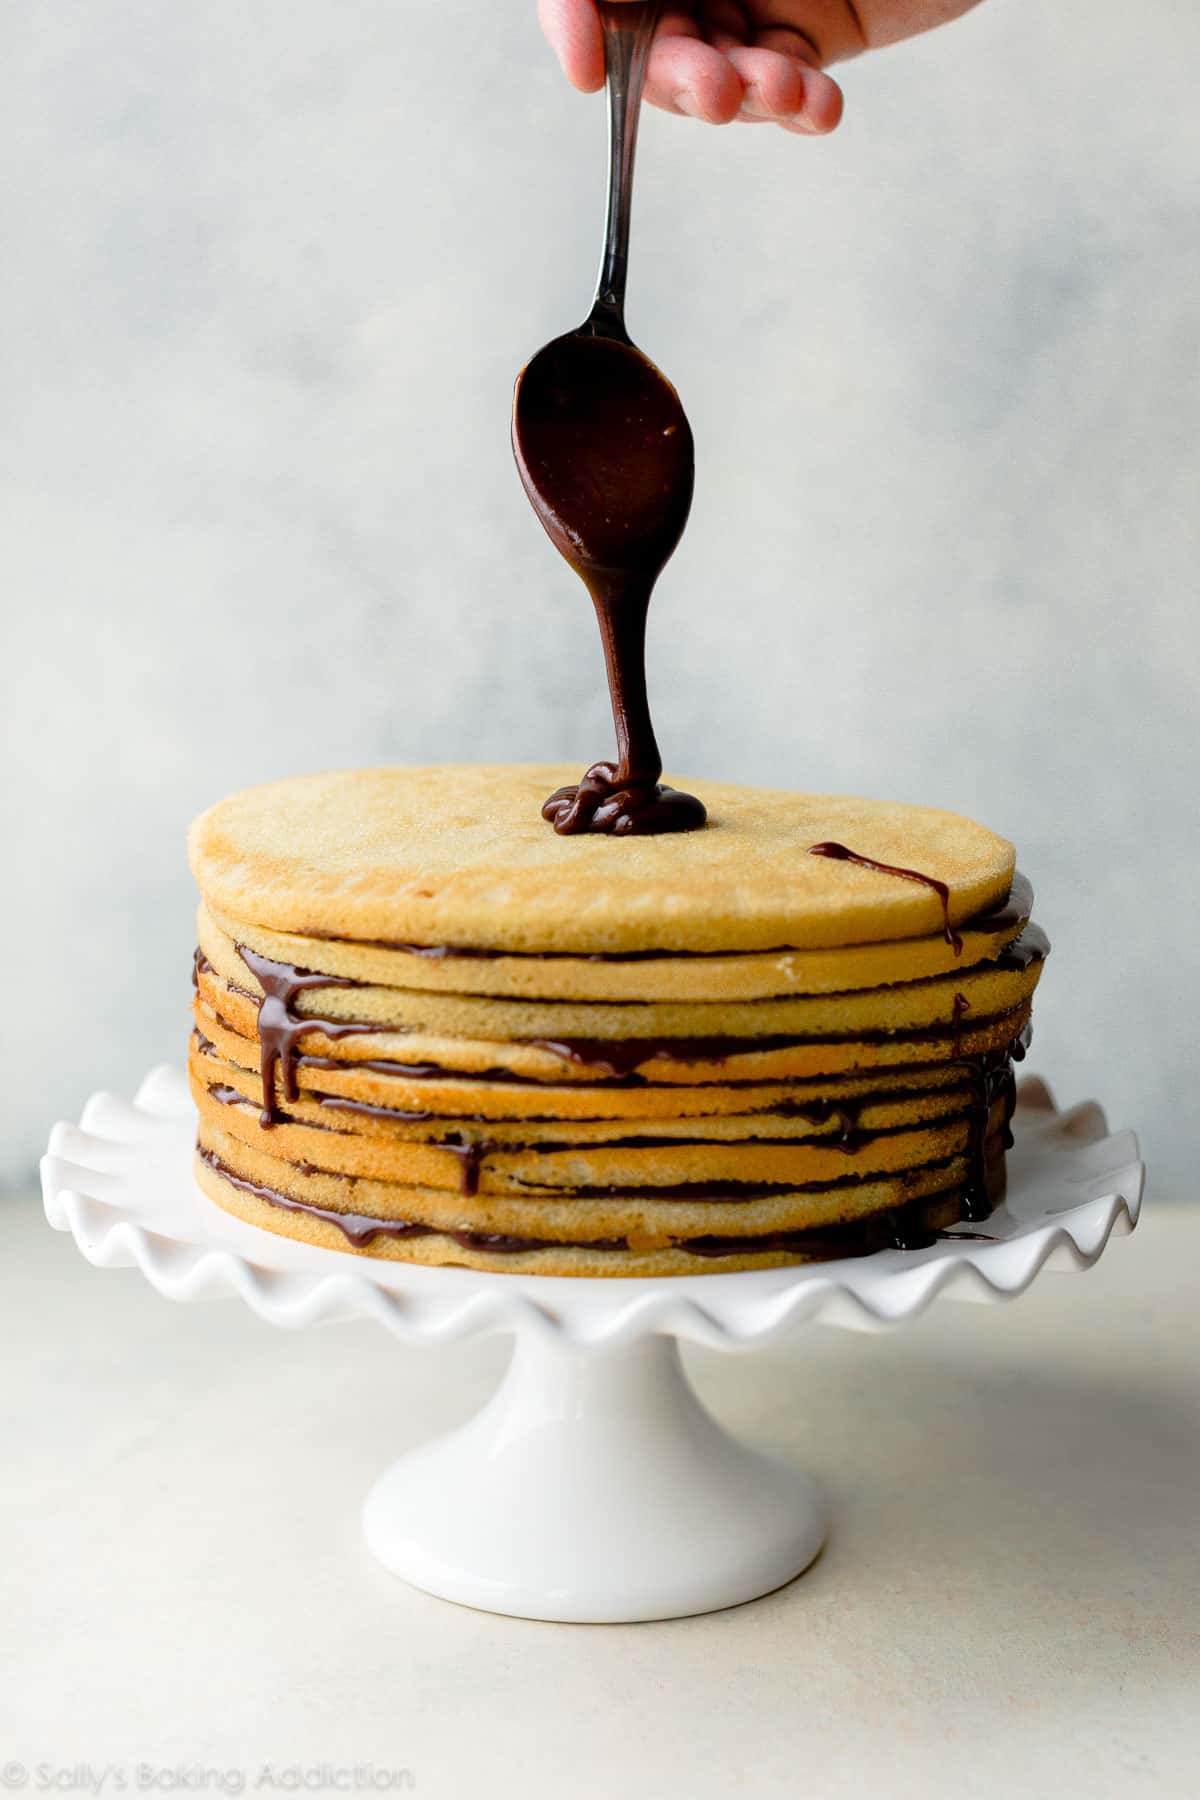
The thickened icing is very easy to work with—much easier than carefully decorating a cake with buttercream!!! Spoon and spread it over the cake layers. It’ll drip down the sides but that’s what helps create appeal, much like Boston Cream Pie and Chocolate Chip Cake.
Embrace the elegant mess.
You can literally see how moist this cake is.
An unforgettable cake if there ever was one. So impressive and taking less time to cook, cool, and decorate than most cakes. Ladies and gents, this is Smith Island cake!
Print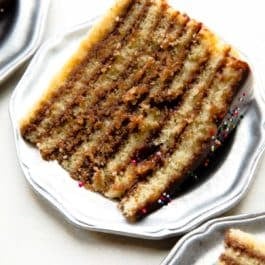
Smith Island Cake
- Prep Time: 1 hour, 15 minutes
- Cook Time: 36 minutes
- Total Time: 4 hours
- Yield: 12 servings
- Category: Cake
- Method: Baking
- Cuisine: American
Description
Smith Island cake is the official dessert of Maryland. This stunning cake features 9 delicious yellow cake layers and chocolate icing layers. The chocolate icing seeps down into the cake layers creating the most deliciously moist cake you’ll ever taste. Garnish with sprinkles for an extra special treat!
Ingredients
Chocolate Icing
- 6 Tablespoons (85g) unsalted butter, cut into 6 pieces
- one 4 ounce bar (113g) bittersweet chocolate, coarsely chopped*
- 1 and 2/3 cups (335g) granulated sugar
- 1 cup (240ml) heavy cream
- 2 teaspoons corn syrup (optional, for shine)
- 1 teaspoon pure vanilla extract
- pinch salt
Cake
- 3 and 3/4 cups (443g) sifted all-purpose flour* (spooned & leveled)
- 1 teaspoon baking powder
- 3/4 teaspoon baking soda
- 1 teaspoon salt
- 1 and 1/2 cups (340g) unsalted butter, softened to room temperature
- 2 cups (400g) granulated sugar
- 5 large eggs, at room temperature
- 2 and 1/2 teaspoons pure vanilla extract
- 1 and 3/4 cups (420ml) buttermilk, at room temperature*
- optional: rainbow sprinkles for garnish
Instructions
- Make the icing first: The icing needs to completely cool and thicken, so prepare it first. Combine the butter, chocolate, granulated sugar, heavy cream, and corn syrup together in a medium saucepan over medium heat. Stir constantly until butter has melted. Once melted, stir occasionally as the sugar dissolves and the mixture comes to a boil. Allow to boil for 1 minute. Remove from heat and stir in the vanilla extract. Taste (it’s warm, so be careful!) Add a sprinkle of salt, if desired. I always add a pinch. Leave uncovered and set aside to thicken and cool for at least 1-2 hours or until it has a spreadable consistency. This is enough time to bake and cool the cake layers. See make ahead tip if you want to prepare ahead of time. Yields about 2 and 1/4 cups icing.
- Preheat oven to 350°F (177°C). Grease three 9-inch cake pans, line with parchment paper rounds, then grease the parchment paper. Parchment paper helps the cakes seamlessly release from the pans; they may crack and crumble otherwise. (If it’s helpful, see this parchment paper rounds for cakes video & post. You can also reuse the parchment for each of the 9 cakes or cut 9 individual circles.)
- Make the cake: Whisk the flour, baking powder, baking soda, and salt together in a large bowl. Set aside. Using a handheld or stand mixer fitted with a paddle or whisk attachment, beat the butter and sugar together on high speed until smooth and creamy, about 3 minutes. Scrape down the sides and up the bottom of the bowl with a rubber spatula as needed. On medium-high speed, add 1 egg at a time, beating well after each addition. Beat in the vanilla extract. Scrape down the sides and up the bottom of the bowl with a rubber spatula as needed. Scrape down the sides and up the bottom of the bowl with a rubber spatula as needed.
- With the mixer on low speed, add the dry ingredients in three additions alternating with the buttermilk, beginning and ending with the dry ingredients, and mixing each addition just until incorporated. Do not overmix this batter. The batter will be smooth, velvety, and slightly thick.
- (There are 8 cups of batter total, so each of the 9 cakes will have slightly less than 1 cup of batter. Leave unused batter loosely covered at room temperature as cakes bake.) Pour slightly less than 1 cup of batter into prepared cake pans. Bake for 12 minutes or until a toothpick inserted comes out clean. The cakes are VERY thin, so they shouldn’t take much longer than that. Allow to cool for a couple minutes, then carefully invert the cake onto the counter. Peel off the parchment to reuse (or use a new parchment round). Grease the warm cake pans, line with parchment, and grease the parchment. Repeat with slightly less than 1 cup of batter per cake pan. Repeat baking, cooling, and releasing the cakes from the warm pans. Grease the warm cake pans, line with parchment, and grease the parchment. Repeat one final time. Allow all 9 layers to cool completely, about 45 minutes.
- Assemble cake: Carefully place one layer on a serving platter, cake turntable, or cake stand. Spoon and spread 1/4 cup of icing on top, then repeat with the rest of the cake layers and icing. Some icing will spill over the sides and that’s ok! Makes a beautiful cake! Decorate the top with sprinkles, if desired.
- Set cake aside for at least 30 minutes before slicing and serving. This gives the icing a chance to adhere to the cake and makes slicing a little easier.
- Cover and store leftover cake at room temperature for 1-2 days or in the refrigerator for up to 1 week.
Notes
- Make Ahead Instructions: The cake layers can be baked, cooled, and covered tightly at room temperature overnight. Likewise, the icing can be prepared then covered and refrigerated overnight. Set the icing out at room temperature for an hour to soften up before using. The assembled cake can be frozen up to 2-3 months. Thaw overnight in the refrigerator and bring to room temperature before serving. Tastes better fresh though!
- Special Tools (affiliate links): Medium Saucepan | 9-inch Round Cake Pans | Whisk | Glass Mixing Bowl | Electric Mixer (Handheld or Stand) | Cake Turntable | Cake Carrier (for storage)
- 9 Layers: The 9 cake layers are baked individually instead of baking 3 or 4 thick cakes and slicing them horizontally to create layers. Baking each cake layer individually doesn’t take any longer since the thinner cakes take less time in the oven, about 12 minutes each. Baking 3 at a time, they’ll be done in less than 40 minutes. This method also ensures that each layer is baked evenly. Baking 3 thicker cakes risks over or under-baking and the cakes are more likely to sink in the centers because they’re so thick. If you have more than 3 9-inch cake pans, bake more cakes at once. I baked 4 cakes 2x then 1 cake by itself. If you have fewer than 3 9-inch cake pans, simply bake in batches until all 9 cakes are baked.
- Icing: For a sweeter icing, use semi-sweet chocolate. For dark chocolate icing, use bittersweet chocolate. For very dark chocolate icing, use unsweetened chocolate. I prefer bittersweet chocolate.
- Flour: Sift flour before measuring.
- Buttermilk: Buttermilk (an acid) is required for this cake recipe. If you don’t have any, you can make a DIY buttermilk substitute. Add 1 Tablespoon of white vinegar or lemon juice to a liquid measuring cup. Then add enough whole milk to the same measuring cup until it reaches 1 and 3/4 cups. (In a pinch, lower fat or nondairy milks work for this soured milk, but the cake won’t taste as moist or rich.) Stir it around and let sit for 5 minutes. The homemade “buttermilk” will be somewhat curdled and ready to use in the recipe.


Reader Comments and Reviews
SO delicious! We bought a Smith Island cake a few months ago and everyone loved it, so when my husband’s birthday rolled around, our kids requested that I try making one. It was actually easier than a lot of other cakes, despite all the layers, because you don’t have to fuss with splitting them, and without the splits it’s much easier to make the icing go on smoothly without picking up lots of crumbs. I made eight cakes total so I could measure out a cup of batter for each pan; we already had 3 9-inch pans and we were able to borrow another, so I only had to do two batches in the oven. I think they cooked for 13 minutes each in our slightly unreliable oven. And I didn’t bother greasing the parchment paper, just the pan; the paper was pretty glossy, so it released well and came off the cake fine. After reading the reviews, I made 1.5 times the amount of icing, which was perfect to give each layer a nice coating and also frost the sides. Birthday boy, kids, and grandparents (we’re in a bubble with them) all raved. Thanks for another great dessert experience!
Yo! You obviously know that it should be baked in 9 pans, but… really? Who has 9 8″ or 9″ pans? So thanks for highlighting our state’s randomly awesome official dessert, to go along with the Checkerspot butterfly, the rockfish, the country’s BEST flag, the Black-Eyed Susan, jousting, Natty Boh (um…) and Old Bay.
It’s such a tiny, diverse, and awesome state. Thanks for showing it off!
I accepted a challenge from a friend and made this cake for a Preakness party. It was a big hit!! I realized after sparsely icing the first 4 layers there wouldn’t be enough so made some more. I think making 1 1/2 times the icing recipe is perfect!! Wanted to upload a picture but doesn’t seem possible. Glad I accepted the challenge – great cake!
Excited to try this! My husband asked for some version of a Smith Island cake for his birthday and the minute your recipe came up in search, I knew the one I was going to try. Native Marylanders and have never baked one.
I love your recipes and make them every weekend! I made and iced the Smith Island cake yesterday to have for my birthday tomorrow and forgot to put it in the fridge. It sat out overnight – about 15 hours. Did I ruin it? Can we still eat it? I’m so sad!
Hi Melissa, As long as it was covered it should be fine! After decorating anything with buttercream or cream cheese frosting, it’s fine for 1 day at room temperature. After that, I would definitely refrigerate it. I’ve never had any problems leaving frosted desserts at room temperature for a day
I’m curious about layering these very thin cakes. Would it help to partially freeze them so they wouldn’t be so prone to breaking? What do you think?
This cake was amazing! I was very hesitant to make it because I thought it looked very difficult but it wasn’t too bad! My only advice is to have at least 3 pans- I only had two and it took a long time to bake all the layers. Also I multiplied the frosting by 1.5 and frosted the whole cake. Everyone said it was one of the best cakes they ever had.
I love your blog and your recipes are great but for a true Smith Island cake the chocolate frosting is poured on the outside so it completely envelopes the cake, but just the top layer.
You’re right and thank you for sharing! This is simply my rendition of my state’s cake.
Hello from Argentina ❤️ I would love to make this cake, but we are only four in my family. Could it be possible to make it in a 6 in cake? Should i make half the batter? And how much batter in each cake? Im sorry for all the questions (and the english) but with these days where we cant leave the house, we have to bake, bake, bake!
Hi Florencia! For best results, I recommend skipping this recipe if you don’t have the right size pan. You can bake my 6 inch cake instead and use this frosting for it. Halve this frosting if doing so.
Made the Smith Island Cake for the 1st time and it was good, but I think I may have overbaked the cake layers – I would go 10 or 11 minutes rather than the 12, but it could just be my oven.
Delicious!!! Thanks for the recipe.
Can you make this cake with gluten free flour?
Hi Sally thanks for your recipe. I have a question. I have been hesitant to try multilayered cakes because I wonder what happens as you leave the batter out as you bake so many layers. I’ve always been under the impression that you have to bake right away since the baking soda & baking powder have already mixed with liquid and leaving it out could cause the cake to collapse.
Could you shed some light because obviously it’s working for you. Thank you!!
Hi Mgwn! It could only pose a problem when you’re using just baking powder. Plus, there’s no issue with these cakes since they are VERY thin without a ton of rising anyway. Hope you love it!
Getting ready to bake this beautiful Smith Island Cake for the first time. Is there any special way to stack rhe layers? Should they be bottom side up? Or does it matter? My concern is the rounded tops of a traditional layer cake could make this tall stack a little unsteady. Any advice would be greatly appreciated. Can’t wait to try this!
Hi Tori, It really doesn’t matter which way you stack them! The layers are pretty thin which means they bake more evenly and shouldn’t have the same dome shape that thicker layers usually have. I you love it!
Well, I failed, but it’s my first fail from any of your recipes, and I’m sure it was my fault. The cake was impossible to spread with 1 cup of batter in a 9 inch pan. It would never make it. I used <1.5 cups and got 5 layers. The cake came out a tad dry and dense. I probably overbaked.
The icing, once cooled, was grainy and too sweet with the cake. I definitely got the sugar amount right and used bittersweet chocolate, but I guess I didn't cook the sugar out. It was totally smooth when I tasted it hotter and then warm, but once cool it was very grainy.
I wanted to make this for my son's birthday but I might go with a different recipe that I can't ruin! This is probably the worst cake that I've ever made (but my fault!).
My daughter is turning 16, and I was thinking of making this cake for her sweet 16 celebration, and the thought of making 16 layers came to mind. Do you think it could work (doubling the recipe)?
That would be absolutely amazing!! I suggest making the recipe twice instead of doubling (working with too much batter at once leads to over or under-mixing and a dense cake). I hope she has a great birthday!
Thank you! If I get cold feet, I’ll just count the icing as a layer as well…
Hi Sally, I made this cake for my daughter’s birthday and used your advice to make 8 layers using the cup measurement. It is very tasty! I’m still struggling to create fluffy homemade cakes. This one is better but again feels too dense. I seem to be struggling between overmixing and mixing the dough enough to add ‘air.’ Any suggestions? I try and mix it as long as your recipes states but even as a seasoned (!) baker, I still am working on the balance. Thanks for the recipes, you are the one site I follow daily.
Hi Rose! One method I’ve been playing around with lately is the Reverse Creaming Method. This method of mixing cake batter sort of switches up the order that the ingredients are mixed and it produces incredible results. Some of my favorite cakes. Try this one: https://sallysbakingaddiction.com/strawberry-shortcake-cake/
I love, love, love to bake! I live in MD and have visited Smith Island. While there I purchased the Smith Island cookbook from the little museum, so I already had the recipe for the requisite 10 layers, but I like this recipe better because it calls for butter milk (official recipe calls for evaporated milk). I did use the fudge frosting from my cookbook, for some reason it makes a smidge more.
This is a great cake, and I was able to eek out 10 layers on my second pass with this recipe.
Thank you!
Hi! Making this now, but I added the vanilla extract to all the other fudge ingredients and boiled it all up on the stove together. Is that okay or do I have to restart? Hope you can respond soon!
Hi Lee, if it tastes ok then go ahead and use it!
Thanks! Now I’m curious – what’s the reason for adding the vanilla extract after the mixture is finished boiling?
Hi Lee! Most vanilla extract is alcohol based and if you add it to direct heat, the alcohol and (most of) the favor burn off.
Hi Sally, what an incredible looking cake and I can’t wait to try it! I have one question. How long can the unused batter sit at the counter, as the effect of baking soda goes down if left for long?
I’ve had the batter sit at room temperature for up to 45 minutes and it’s just fine.
Hi Sally, I made this cake for my husband’s birthday and it came out amazingly good. And it’s so easy to make! Thank you so much for sharing this recipe. Only problem I had was, the top of the layers were rounded, so i had to cut them to flatten before staking.
Hi. Sally, how would you do this in a red velvet style cake with cream cheese icing or caramel icing because you want that thin look, so the layers will show. Thanks.
Hi Eddie, I recommend starting with this red velvet cake recipe (https://sallysbakingaddiction.com/red-velvet-layer-cake-with-cream-cheese-frosting/) and baking it in thin layers like my Smith Island Cake. Let me know how it turns out!
You’re always my go to for recipes! I shared your pumpkin coffee cake just two days ago. I am SO thrilled to see this cake in your index. Also thrilled to see you have a red velvet recipe in the comments so I can try to make a Red Velvet smith island cake!!! Cant wait! Thanks for being a great resource!!
Made this and it received RAVE reviews. I also made your chocolate buttercream icing and then iced the whole cake for a more polished final look. Next time I think I’ll make a bit more batter and glaze and make another few layers for even more height.
Start to finish (with some cooling, inactive time), it took me 3 hours. Well worth it!
I’m glad it was a hit, Heather! I
Thank you so much!! I am so excited to try it!! Have you frozen this cake? I still have half left and DO NOT want to throw it away but probably shouldn’t eat it three days in a row! Haha!
Yes! It freezes beautifully.
Does this cake travel well or should the chocolate fudge frosting be made when you are about to serve? I am hoping to make this the day before a family gathering…
Hi Tanya, I recommend making the cake and frosting the day before and assembling that day. See the make ahead tips at the end of the recipe for exact directions. Enjoy!
I finally had the time to make this cake and I am so glad I did. Instead of the chocolate I made it with alternating layers of Sally’s vanilla buttercream icing and homemade strawberry jam. Now my whole my family is trying to debate whether is it just as good or better than Sally’s strawberry cake! My dad has been to Smith Island and he said it was just as good maybe slightly better than some of the cakes he has ordered there.
I know it looks like a lot of work but everyone please try making this at least once, its so easy to make it any flavor you want. You wont regret it, my cake barely lasted 24 hours.
Thanks again for such an amazing recipe!
I’m so happy your dad approved!! Vanilla and strawberry sounds like the perfect summer dessert!
OMG, this cake is AMAZING!!! Had no idea what it would taste like but was intrigued so I decided to make it. I think this might be my new favorite cake! Thank you, Sally, for another incredible recipe!