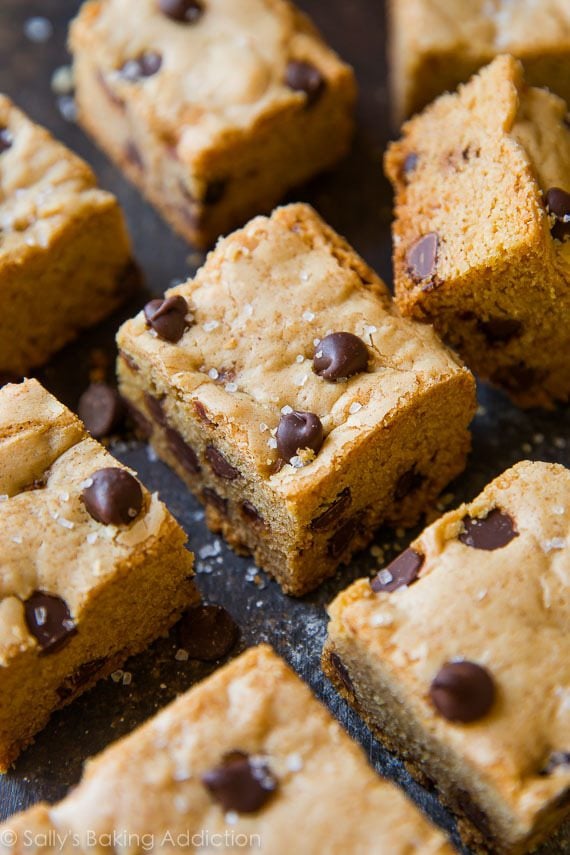
These extra soft and chewy chocolate chip cookie bars are incredibly easy to make. No dough chilling or rolling into balls required! Sprinkle with sea salt for a little something extra.
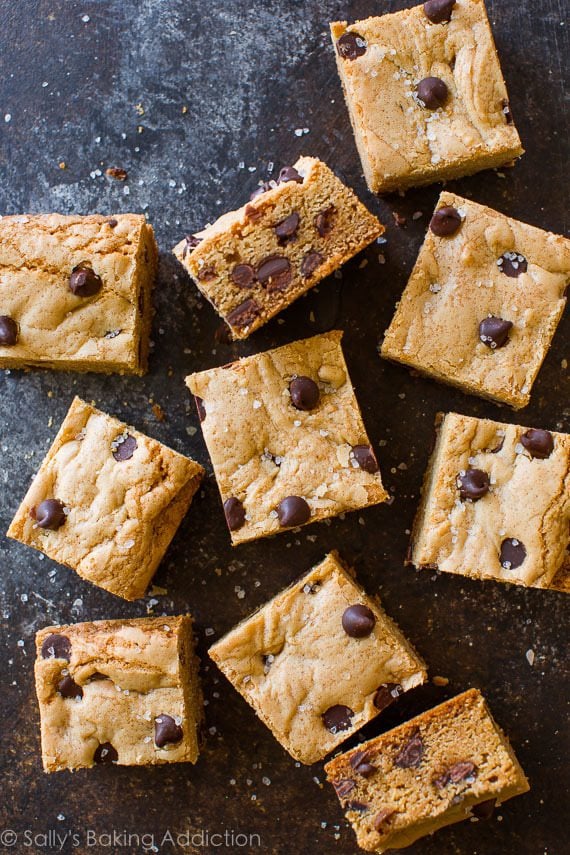
Taste testers gave these chocolate chip cookie bars a stamp of approval—and I’m so glad because this dough makes my favorite chewy chocolate chip cookies, too. We’re talking the softest, chewiest, thickest chocolate chip cookies to ever come out of my oven.
And if you can believe it, baking chocolate chip cookies as cookie bars transforms them into something even better. Plus, we don’t have to chill the cookie dough and we don’t need to roll the dough into individual cookies. So they’re homemade soft and chewy chocolate chip cookies, only easier to prepare. A lazy gal’s cookie if you will.
Why You’ll Love These Chocolate Chip Cookie Bars
- Dense and buttery
- Extra chewy and extra soft
- Just like chocolate chip cookies, but they don’t spread
- 100x easier than making cookies—no individual cookie dough rolling
- No electric mixer needed
- A quick no chill cookie recipe
- Can be easily doubled for a larger pan
- Topped with sea salt for a little something extra
- Still soft and chewy on days 2 and 3 (if they last that long!)
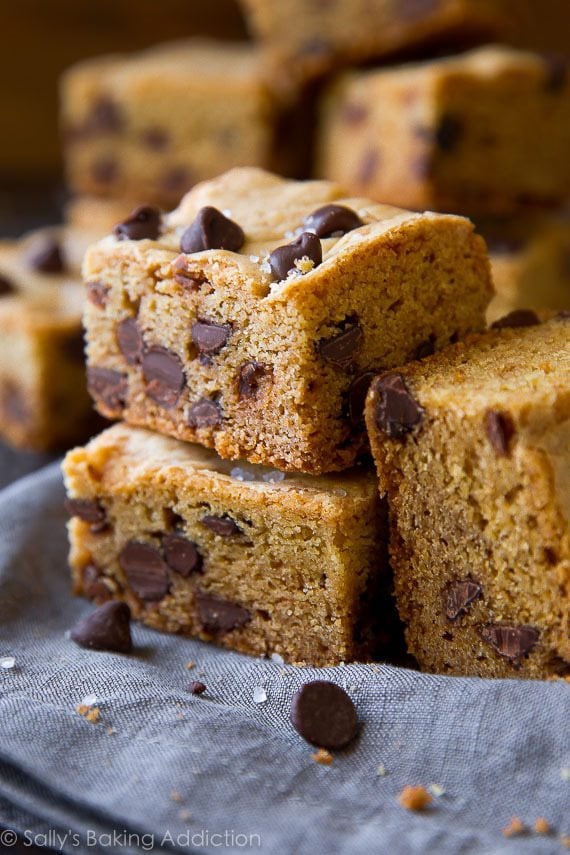
Ingredients For Perfect Chocolate Chip Cookie Bars
If you’ve tried my beloved chewy chocolate chip cookies, you’re already familiar with the ease of this recipe. We’re using the same cookie recipe, just baking them as bars. Here’s what you need:
- Flour: All-purpose flour is the base of this recipe.
- Baking Soda: Baking soda helps these bars rise as they bake.
- Cornstarch: Cornstarch gives the cookie bars that ultra soft consistency we all know and love. Plus, it helps keep them wonderfully thick.
- Salt: Salt adds flavor.
- Butter: Use melted butter in this recipe for the chewiest cookie bars. Because we use melted butter, there’s no need to get out your mixer.
- Sugar: I like to use a mix of brown sugar and white granulated sugar this recipe. More brown sugar than white granulated sugar promises an extra soft and chewy cookie bar because there’s more moisture in brown sugar.
- Egg & Egg Yolk: 1 egg binds everything together and 1 extra egg yolk adds richness and chewiness.
- Vanilla Extract: Pure vanilla extract adds flavor. If you have any homemade vanilla extract, use that!
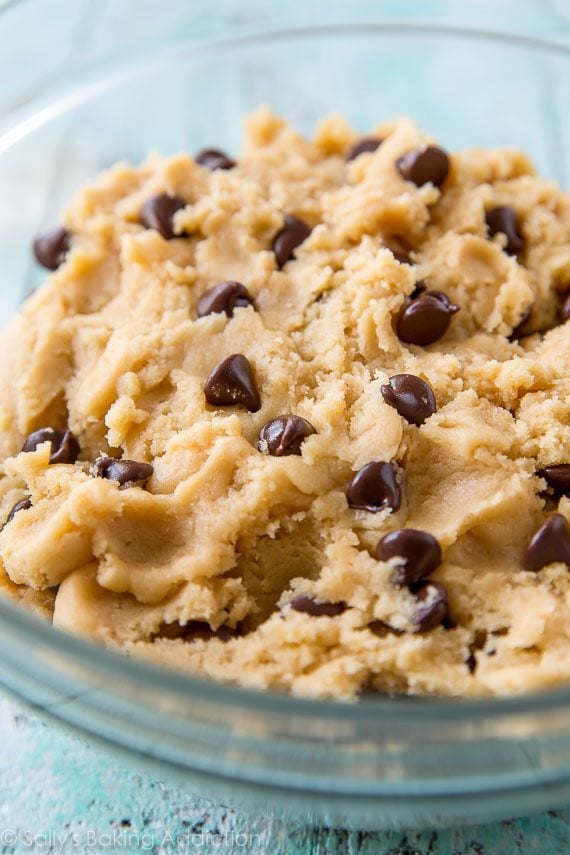
- Chocolate Chips: 1 cup of chocolate chips ensures tons of melty chocolate in each bite. Instead of semi-sweet chocolate chips, try using dark, milk, or even white chocolate chips. Or swap half of the chocolate chips for M&Ms like we do in these soft M&M cookie bars.
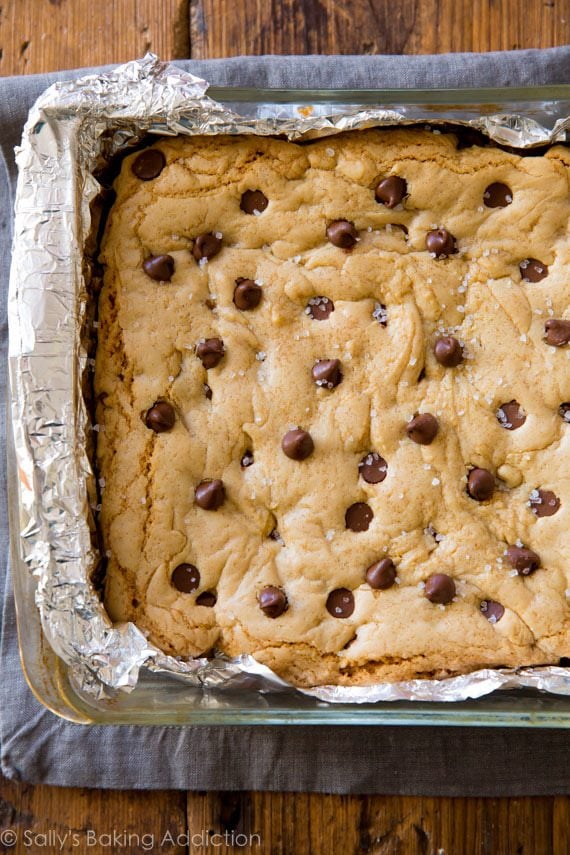
9-Inch Pan of Chocolate Chip Cookie Bars
After you prepare the cookie dough, press it into a baking pan. There’s no risk of cookie spreading with this recipe because the edges of the pan completely contain the cookies from overspreading. I love that.
- By the way, if you’re ever having spreading issues with your regular cookies, here are my top 10 tips for how to prevent cookies from spreading.
One batch of these chocolate chip cookie bars fits perfectly into a 9-inch square pan. I love using this size of pan because it yields a nice, manageable batch—about 16 super thick bars. If you want a larger batch, double the recipe and bake the bars in a 9×13-inch pan. (See recipe note.)
Baker’s Tip: I like to line my baking pans with aluminum foil or parchment paper. This way, you can lift the entire cookie bar mass out then easily cut into squares. Also makes for quick clean up! I do the same when making rice krispie treats, too.
How to Freeze Chocolate Chip Cookie Bars
Homemade chocolate chip cookie bars freeze beautifully so they’re a great make-ahead dessert option. Follow these instructions and no one will know they aren’t freshly baked the day you serve them:
- Bake and cool the cookie bars.
- Slice the bars into squares. If you lined your baking pan with aluminum foil or parchment paper, simply pull the slab of bars out of the pan, place onto a cutting board, and cut into squares.
- Layer the bars between sheets of parchment paper in a freezer-friendly container. The parchment paper ensures that the bars don’t stick to each other and that the tops of the cookie bars stay intact.
- Thaw bars overnight in the refrigerator and bring to room temperature before serving.
More Cookie Bar Flavors
- Frosted Sugar Cookie Bars
- S’mores Cookie Bars
- Gingerbread Cookie Bars
- Magic Cookie Bars
- M&M Cookie Bars
- Chocolate Chip Cookie and Brownie Bars
Classic Chocolate Chip Cookie Bars
- Prep Time: 15 minutes
- Cook Time: 35 minutes
- Total Time: 2 hours
- Yield: 16 bars
- Category: Dessert
- Method: Baking
- Cuisine: American
Description
No mixer required and there’s no waiting for cookie dough to chill with these soft & chewy chocolate chip cookie bars!
Ingredients
- 2 and 1/4 cups (281g) all-purpose flour (spooned & leveled)
- 1 teaspoon baking soda
- 1 and 1/2 teaspoons cornstarch
- 1/2 teaspoon salt
- 3/4 cup (12 Tbsp; 170g) unsalted butter, melted and slightly cooled
- 1 cup (200g) packed light brown sugar
- 1/4 cup (50g) granulated sugar
- 1 large egg plus 1 large egg yolk, at room temperature
- 2 teaspoons pure vanilla extract
- 1 cup (180g) semi-sweet chocolate chips
- optional: sprinkle of sea salt
Instructions
- Preheat the oven to 350°F (177°C). Line the bottom and sides of a 9-inch square baking pan with aluminum foil or parchment, leaving an overhang on all sides to easily lift the bars out of the pan when cool. Set aside.
- Whisk the flour, baking soda, cornstarch, and salt together in a large bowl. Set aside.
- In a medium bowl, whisk the melted butter, brown sugar, and granulated sugar together until no brown sugar lumps remain. Whisk in the egg, then the egg yolk. Finally, whisk in the vanilla extract. The mixture will be thick. Pour the wet ingredients into the dry ingredients and mix together until combined. The dough will be very soft, yet thick. Fold in the chocolate chips. The chips may not stick to the dough because of the melted butter, but do your best to combine them.
- Transfer dough to the prepared baking pan and press/smooth into an even layer. Sprinkle the top with sea salt if desired. Also, I like to press a few more chocolate chips on top of the dough before baking (I do this just for looks!). Bake for 32-35 minutes or until lightly browned on the sides. Use a toothpick to test for doneness; if it comes out clean from the center of the pan, the bars are done.
- Allow the bars to cool in the pan set on a wire rack for at least an hour. Once relatively cool, lift the foil out of the pan using the overhang on the sides and cut into squares. Store in an airtight container at room temperature for up to a week.
Notes
- Make Ahead & Freezing Instructions: You can make the cookie dough and chill it in the refrigerator for up to 3 days or freeze for up to 3 months. Allow to come to room temperature and continue with step 4. Baked cookie bars freeze well for up to 3 months. Thaw bars overnight in the refrigerator and bring to room temperature before serving.
- Special Tools (affiliate links): 9-inch Square Baking Pan | Glass Mixing Bowl | Whisk | Rubber Spatula | Cooling Rack
- 9×13 Pan: You can double this recipe to fit into a 9×13-inch baking pan. The bars will take longer to cook through, about 40 minutes at 350°F (177°C). Use a toothpick to test for doneness.


Im giving it a 3-star because of the way they came out; I doubled the recipe, used a 9×13, took them out at 35 as the wooden chopstick came out clean. Let them cool before cutting. They taste papery, powdery, and not very sweet. The texture is perfect, but the cake is not sweet, only the chips.
These turned out great. Nice and chewy. My kids wanted chocolate and strawberries so I added a cup of lightly crushed freeze dried strawberries. I doubled the recipe and baked in a sheet pan. Put in first 5 minutes at 350
And then turned down to 325 for maybe 17 minutes. Basically when edges were lightly browned and the top was dry a light brown. They are a great thickness and chewiness.
Wow for half of above recipe, how any eggs required?? Please reply. I wish to try it so badly
Hi Jeen, Our general rule for halving an egg is to crack it open, beat the yolk and white together with a fork, measure the volume (should be a few Tbsp), then use half. You can do the same thing with the yolk. Hope this helps!
I don’t usually post a comment to recipes but these bars are probably the best chocolate chip bar cookies I have ever made, and I have made A LOT! I followed the recipe to a T, other than they were done perfectly at only 25 minutes in a 9×9 glass pan.
Hello Sally,
I wanted to know if there’s any way I can add rolled oats to this particular recipe to make Oatmeal cookie bars?
If it’s possible how much rolled oats would I need to add in order to make this recipe work?
Would I be able to use gluten free rolled oats?
Would I be able to use
Hi Jessica! We recommend using the dough from our chewy oatmeal chocolate chip cookies instead for cookie bars. A 9×13 inch pan would be best. We’re unsure of the exact bake time. Gluten free oats should work fine. Enjoy!
I have made these before in a 9×9 pan and they were great but needed a double batch. I thought the 9 x 13 pan would make them too thick so I used my larger lasagna pan and that worked well
I needed an easy dessert for company and didn’t feel like using my stand mixer, so I decided to try this recipe. I’m glad I did! It was easy and yummy. I liked the suggested sprinkling of sea salt. Approved by kids and adults!
Pan just came out of the oven, so not sure on the taste. Ease, is another story. As always details were easy to follow.
If this helps anyone, I doubled the recipe and baked in a 1/2 sheet pan. Took just around 30 mins, and I have a “wonky” oven…..I have it figured out though.
One thing I did do was mix the chips in literally by hand. I have at least 2 more double batches to make (need at least 150 servings) and thinking of maybe using my hand mixer.
I have made these cookies many times! We love them! Sometimes I add craisins or nuts along with the chocolate chips. I love that I can pull out the bowl and not have to use a mixer. I have made them salted but my family prefers them without the sprinkle of salt on the top.
These are BOMB! I add a cup of coconut, walnuts and sometimes caramel. They’re AMAZING. Sally is the best!
I always type in this address for all my cookie recipes. Every recipe is awesome! Thanks Sally
I liked the bars and they were easy to make. I warmed them and served them with with a little vanilla ice cream. Everyone enjoyed them.
I personally found that they were missing a little flavor somehow.
These are one of my goto recipes when I don’t want to fuss with individual servings. I have only baked them in a 9×9 pan and the results have been amazing each time. And I’m a sucker for adding salt flakes!
Of all the similar recipes I saw, I came to this site because I have had good results with some of your other recipes, so I know our tastes are similar. I’m a huge fan of a good bar cookie, not just for convenience, but for the texture. This tastes delicious; I used your base but added in some nuts and toffee bits, just because. The problem, and I was debating how many stars to knock off for this, is in the details.
The base to me is a five star delicious cookie. The instructions are what ruin it for several of the commenters I saw, and for myself, too.
I’m an experienced baker, use an oven thermometer, and weigh my ingredients religiously as a preference. So, why on earth did this thing not bake properly in the 9×13, as many have noted? Took mine well over an hour of fussing over it to get there, even though my high quality oven thermometer said we were at the right temp.
Simple math. A 9×9 pan is not half the size of a 9×13. I first became alarmed when I was pressing my dough into a pyrex 9×13 lined with parchment (since I saw you used a Pyrex in your photo, lined w foil). There was over an inch of dough from the doubled recipe. I was concerned, but this is my first time making this, and I just wanted to find out why you said this would work. Sometimes baking is about faith. Not this time.
I should have taken out 1/4 of the doubled recipe—or only increased the recipe by 50% for the 9×13 pan. (My 9x9s are in a box somewhere in storage.) Then the baking time might have been somewhere close. I abhor dry cookies, which is why I like bars anyway, but the edges here were lovely after 40 minutes, the toothpick completely pristine despite multiple dips into various parts of the middle, and yet… the middle was a gooey mess (the toothpick comes out clean anyway, because there’s so much butter). I had wondered why someone asked what toothpicks you use; I think they might have been asking sarcastically, though, given what happened when I made this.
So, much as I love your site and the tasty cookie base (from the bits that cooked properly), there are some revisions needed to this recipe, I think:
1. Increase ingredient amounts by 50% for a 9×13 pan, not more. Then the 40 min baking time has a prayer of being correct. But it all depends on the type of pan, too (see #3)
2. Don’t judge doneness with a toothpick; that’s not going to do it in such a buttery base. Try a paring knife, or a fork, so it has a better chance of telling you what you really want to know, which is whether the dough is still raw in the middle.
3. Specify what kind of baking dish you recommend for the listed baking times; most cookies and bars benefit from metal pans, not glass, but that alters the cooking time. Glass pans are more traditionally used for lasagnas, casseroles, etc—wet dishes that are less fussy and can handle a long bake.
I will make this again, but next time I’ll either dig my 9x9s out of storage, or I’ll use a metal 9×13 and increase recipe only by 50%, not double. The sling is definitely necessary for these, not just nice, because of the tender nature of the bar cookies. I think the pyrex pan was part of the challenge, because the glass heats up more slowly and stays hot longer than a metal pan will, and that makes the edges crispy before the middle has a chance to bake.
Anyway, thanks for another really tasty recipe! Just hope the kinks get worked out next time.
We followed some of the commenters’ recommendations for baking it for 22 minutes instead of the full recipe time. We are at higher altitude, so we used less baking soda, though most likely we should also have lowered the amount of sugar because it was still a little crispy and maybe a little tiny tiny bit too sweet. I think that also maybe after the first few minutes we should lower the baking temperature and bake a little longer after the higher temperature sets the dough.
For the people who have issues with the middle not cooking thoroughly, if you are at high altitude, you’ll want to add some extra flour to strengthen the dough and use less baking soda so that it doesn’t over-rise and then fall. Then you want to bake at 350 for like 10 minutes and then lower the temp without opening the oven at all when you do, to 325 for the remaining time. See if that works.
If you are at higher altitude and the bars are too crispy and they seem slightly saccharin, use less sugar because sugar condenses at a higher level at higher altitudes so you really just need to use less.
I made and baked these exactly as written, as they were wonderful! So easy and so good. Thank you Sally!
This is my go to cookie bar recipe!! I have tried 3 others and they never compare to this so I’m done trying any others lol! I come to Sally’s baking addiction for all my desserts and have yet to be disappointed!!
I didn’t want to make a bunch of cookies. This was a very easy recipe and came out beautiful and delicious. I will be making this again.
I gave this recipe 34 minutes in the oven & it came out fine. Toothpick in centre was clean. The middle fell a bit as it cooled – not sure why, but I cut it up into squares & we’ve been munching on them very happily. In looking at others’ reviews, I’m not sure why a number of people seemed to experience difficulties. I followed the ingredients & directions to a T. No problems with texture or anything. Thank you, Sally for another superb recipe.
I made it and it was not chewy. It was dry and crumbly like a biscuit. I baked it for 30 mins on 325F as my oven temp runs higher than it should be .
I just finished making these and they turned out perfect. I live at high altitude so I did add a bit of cooking time. I also added in heath bar bits. OMG toffee and chocolate heaven.
My question: Is there a toothpick brand you recommend for checking bars and cakes doneness? Last night I made these delicious choc. chip bars, did the toothpaste test, which came out clean. Later, when I cut the bars they were not cooked in the middle…at all! (My oven may need to be recalibrated to make sure the temp. is correct.) The bars were brown on top so the oven was probably too hot.
The past few months I have been trying out many of your recipes and always get rave reviews. The cornstarch in cookies and bars really help make them chewy!
Hi Ellen, sounds to us like your suspicion is correct that your oven is running too hot. We don’t use any certain brand of toothpicks, though Diamond brand has worked well in the past.
I’m very conflicted about this recipe. I doubled it and put it in a 13×9 inch pan and the middle just would not cook through. After 35 minutes I covered the pan with foil as the top was getting too dark. In total, the bars were in the oven for 1 hour and 10 minutes, and the middle never set up. They taste alright, but the top is very crunchy and the middle is a soft and moist. I just want to know what I did wrong!
I have made these two times now, and are so much easier than regular cookies. They taste awesome! One thing I did notice was that the first time around I baked for the suggested time but they came out hard and kind of dry. The second time I made them I put them in for 22 minutes and they were perfect! Soft and gooey. Thanks Sally!
Wow these are perfect. Was looking for a bar recipe that actually cooks through in the middle and this was perfect! Followed the recipe exactly. Took 32 min. in the oven. Thank you Sally!!!
I did a normal batch and took over 45 minutes before the middle was not liquid, despite the recipe calling for 32-35 minutes. Also, the middle ballooned up and then collapsed when I took it out of the oven, so there’s a giant crater in the middle.
I had the same issue when I tried to make these this past weekend …. but, I had doubled the recipe to bring to a fourth of July party. It was a lot of dough … seemed like I did not follow the recipe right (or made an error in doulbling it)!!!
YUMMMM. This are ridiculously easy to make and mine came out great. I made a few adjustments. I used salted butter for extra flavour (didn’t add sea salt on top though) and used dark brown sugar for extra caramel-y deliciousness. I cut the total sugar back to just 1 cup, 3/4 dark brown and 1/4 white, and they were definitely sweet enough for me. I also only used one egg because it was all I had. I also added about 1/2 cup of broken pecan pieces when I stirred in choc chips because I needed to use them and I love pecans. Most importantly, I only baked these for 20mins as I know my oven runs very hot. I took them out of the oven and left them in the baking dish for about 20 mins, then when they were a bit sturdier I lifted them by the edges of the baking paper onto a rack to cool completely before I cut them. As I said, these are dangerously easy to make and SO tasty: soft and chewy like a perfect cookie but without having to roll or chill any dough. I may never mess around with making actual cookies again.
I’ve never written a recipe review until now; just wanted to confirm what others have said about this being incredible!! Followed recipe as instructed except I used leftover Christmas candies instead of chocolate chips and they were to DIE FOR good! Also reduced baking time by just a few minutes. Did not double, would rather make 2 pans I think as they were perfect. Candies happened to be Reese’s Christmas bells (just like miniature peanut butter cups). So good — making them again today with leftover kisses as soon as I get off the treadmill
These bars are amazing! I’ve made them at least 4 times in the last 2 months, my new addiction! Only change was I decreased the baking time by a couple of minutes per other comments.
I usually love you recipes but these did not come out well for me. I doubled the recipe and the instructions said to bake for 40 minutes. I knew that would be too long, so I only baked for 25. Unfortunately, they were still overdone and dry, very cakey and not chewy and moist like I hoped. I topped them with green and red sprinkles for Christmas gifts for my neighbors and I almost decided to make them something else. Its really a shame. 40 minutes is way too long to bake anything like this.