

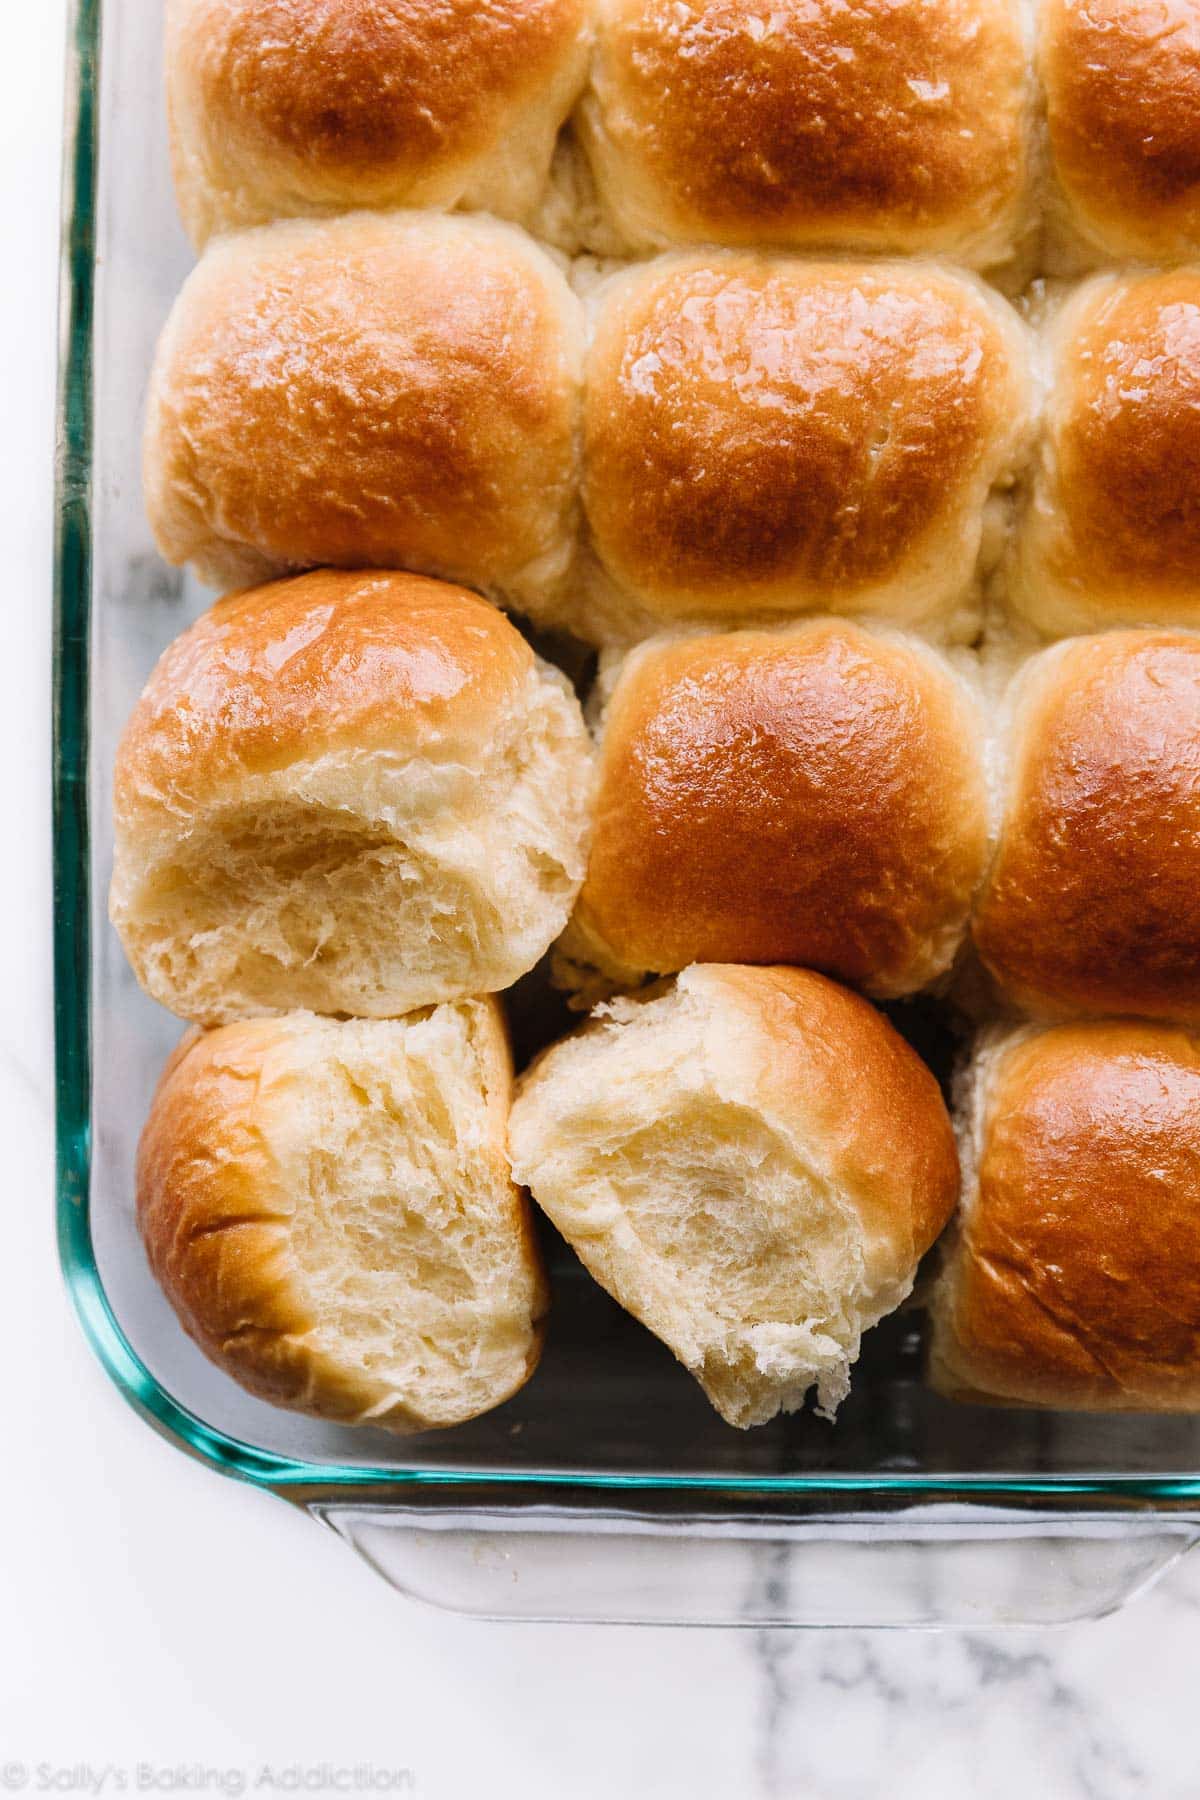
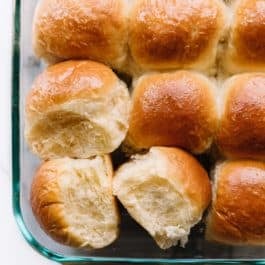
You only need 7 ingredients to make these dinner rolls. Flaky, soft, and buttery, these fresh dinner rolls outshine any main dish. If you’re a bread beginner, read this blog post to learn more about the yeast rolls recipe, including how to prep the rolls ahead of time. You can also reference my Baking with Yeast Guide for answers to common yeast FAQs.
This recipe is brought to you in partnership with Red Star Yeast.
- Do you long to bake homemade bread but are too intimidated to start?
- Does yeast dough send you running for the hills?
- Do bread recipes seem overly complicated and confusing?
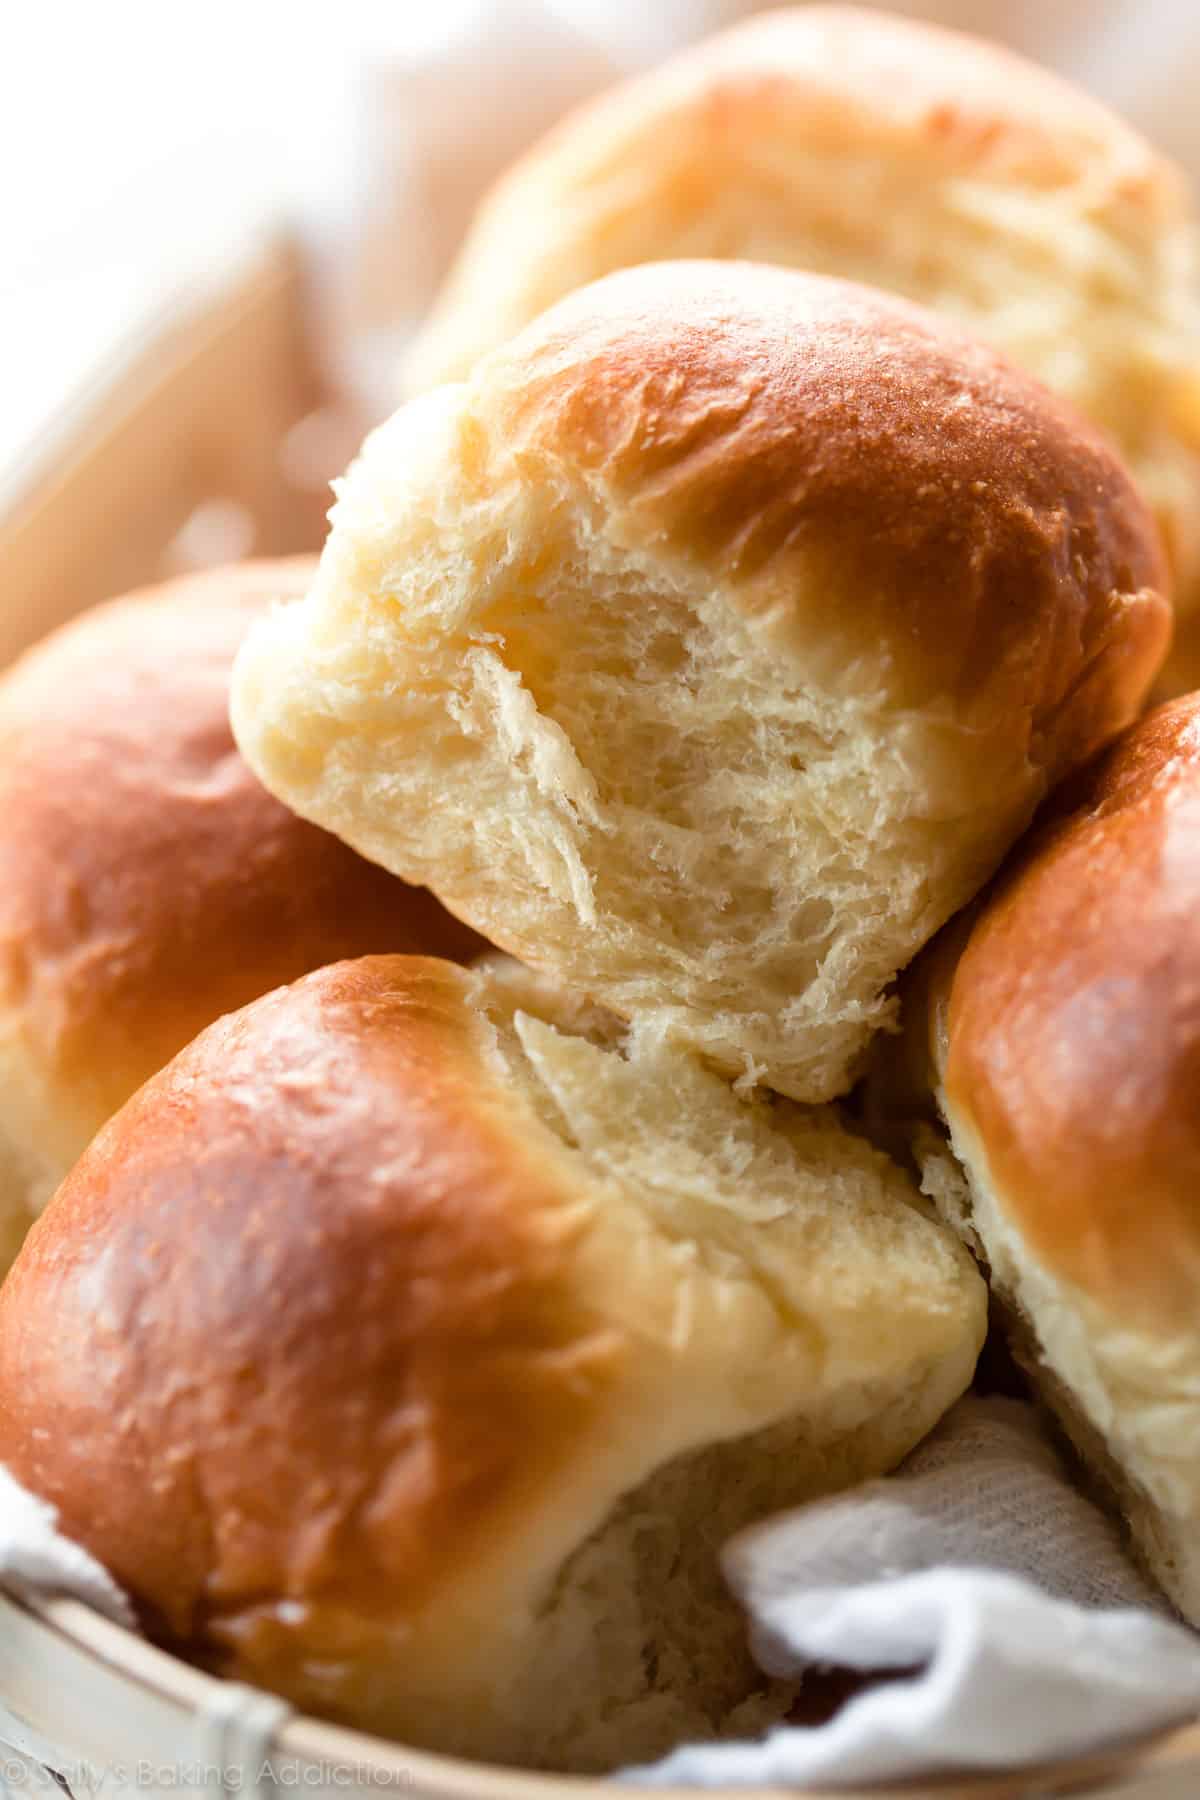
I’m teaching you how to make homemade dinner rolls. These are the best homemade dinner rolls I’ve ever had and it all starts with a straightforward 7-ingredient dough. I make these rolls whenever I get the chance and even brought a pan to our friends who just welcomed a baby. They’re pillow-soft with the most delicious flaky and buttery texture. Everyone will demand you bake them on repeat.
And with this recipe, I guarantee you will finally feel confident baking bread. 🙂
This recipe is such a fan favorite, that it deserved a spot in print! You’ll also find this recipe in my cookbook, Sally’s Baking 101.
Video Tutorial: Dinner Rolls
Let’s start with a video tutorial.
Overview: How to Make Homemade Dinner Rolls
- Make the dough. Continue below to learn more about this dough recipe.
- Knead the dough. Reference my How to Knead Dough video tutorial if you need extra help with this step.
- Cover the dough and let it rise. The dough rises in about 1-2 hours in a relatively warm environment.
- Punch down the dough to release the air and shape into rolls.
- Let the rolls rise for about 1 hour.
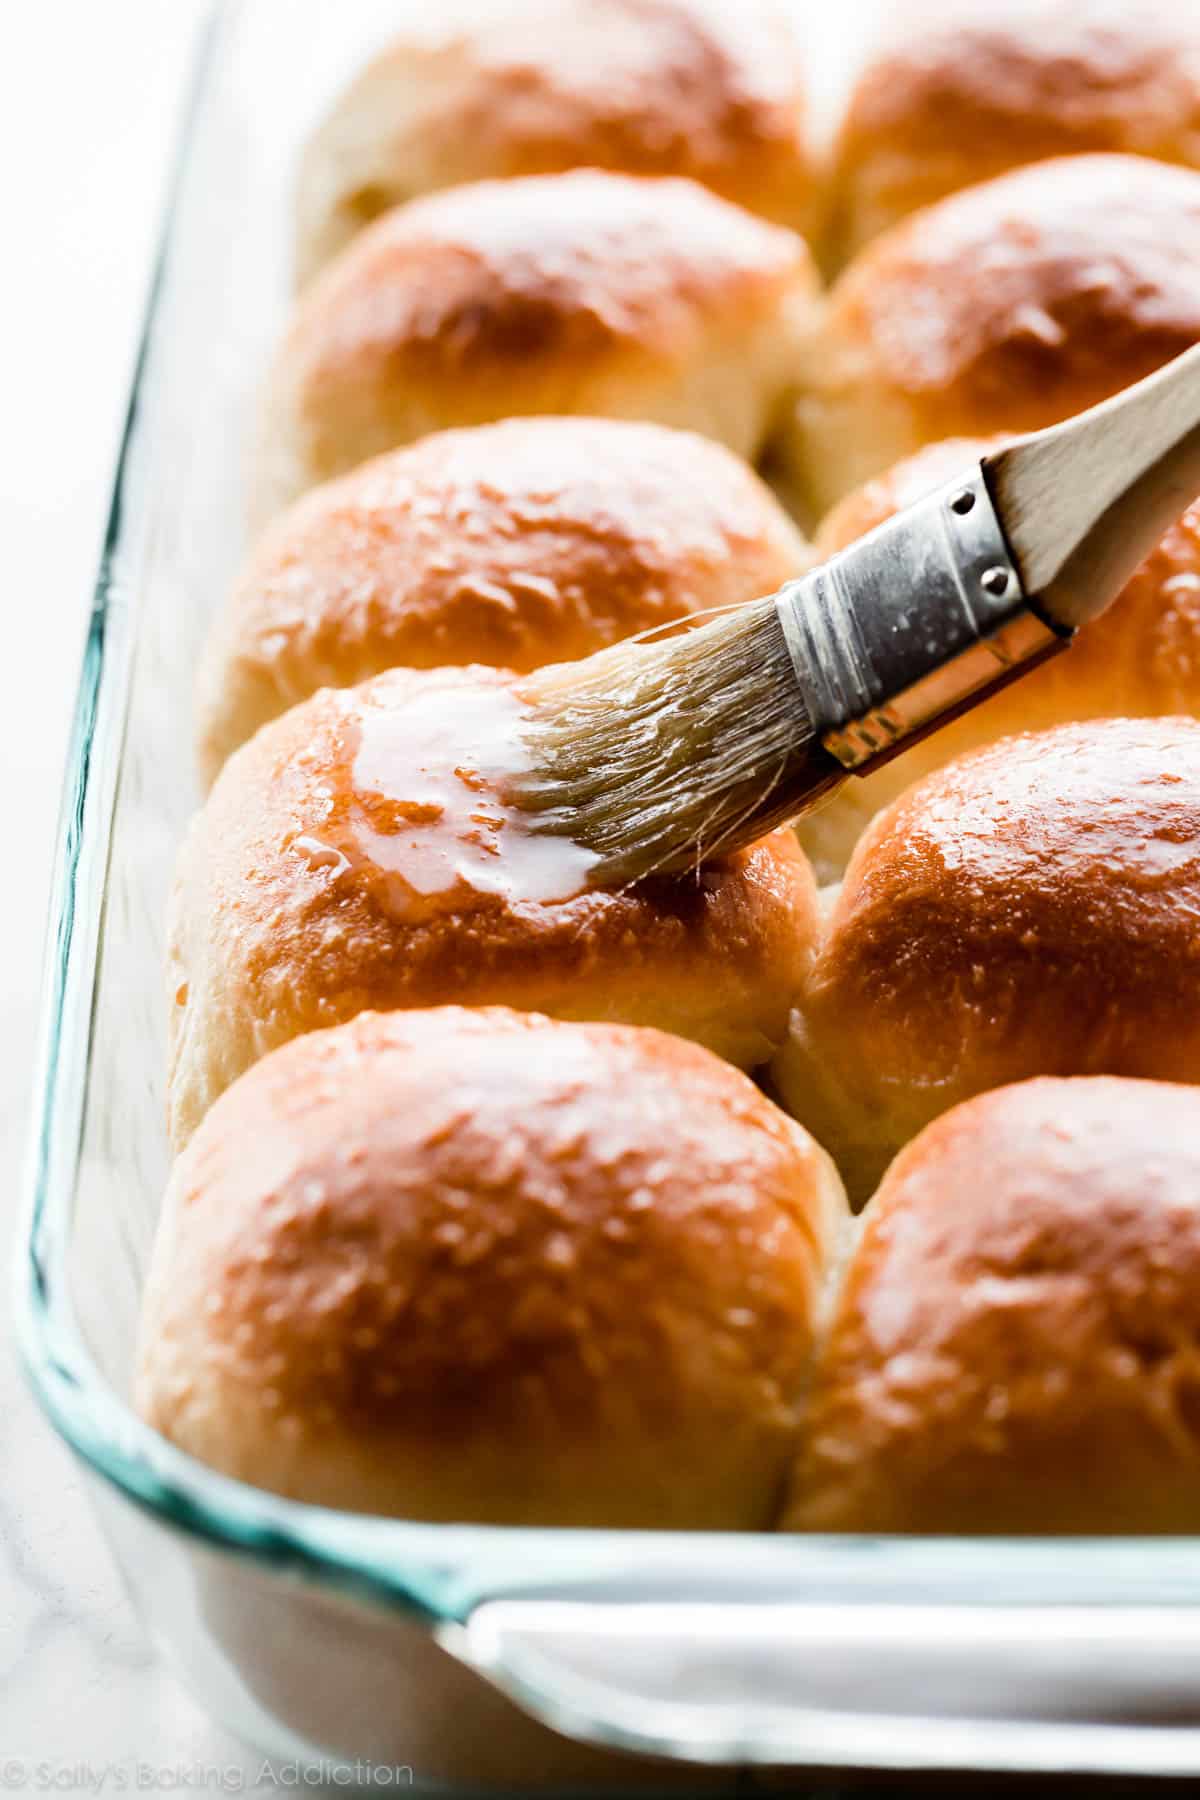
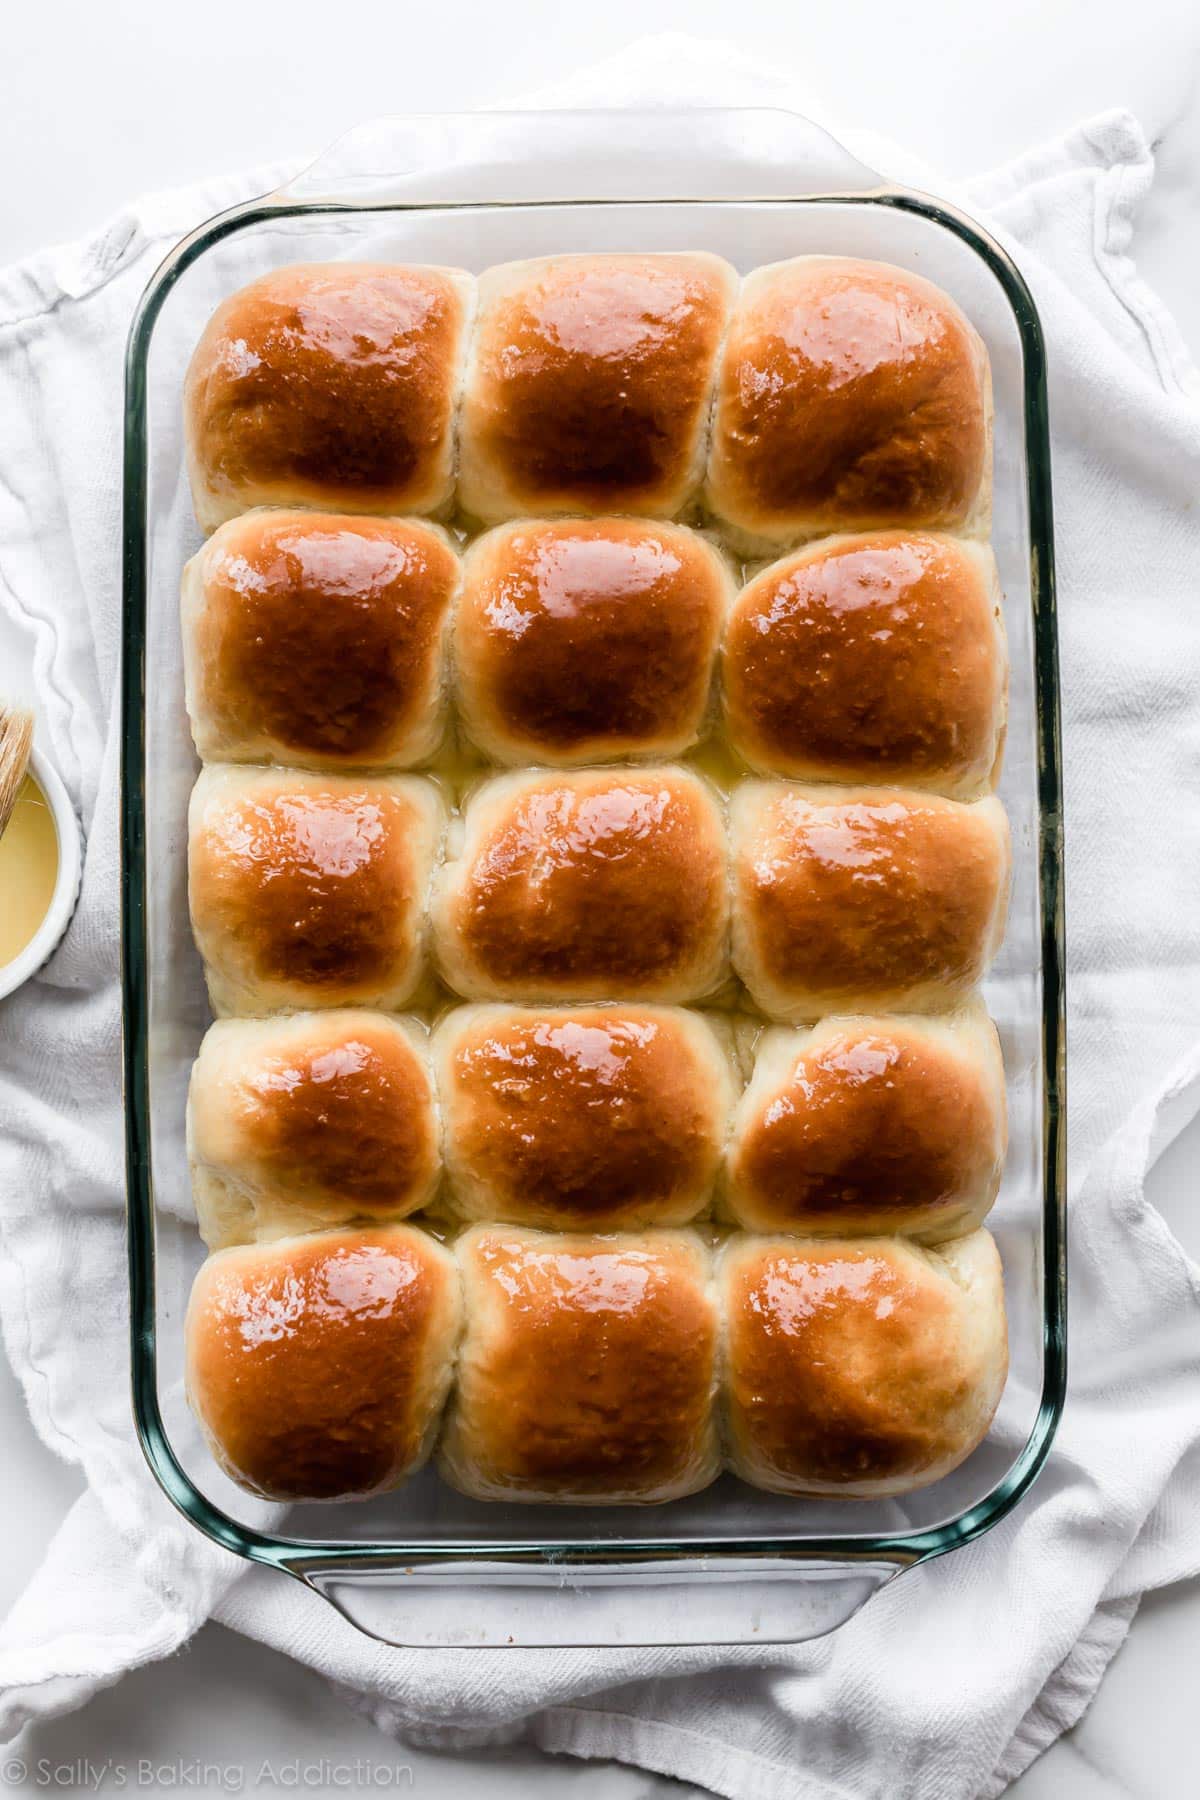
- Bake for 20-25 minutes until golden brown. If desired, brush the warm rolls with a little honey and melted butter for extra flavor.
As shown in the video tutorial, the dough comes together with a mixer. You can use a paddle attachment or a dough hook. You can also make the dough by hand, but it requires a bit of arm muscle. After the dough comes together in the mixing bowl, it’s time to knead. You can simply continue beating the dough with the mixer for this step or you can knead the dough by hand. I chose to knead the dough by hand so you can see me doing it in the video above.
If you’re new to bread making, my How to Knead Dough post and video can help even more with this step. And my Baking with Yeast Guide is a wonderful resource for all bread beginners!
Soft Dinner Rolls Require a Rich Dough
The crustier and chewier the bread, the less fat in the dough. This is known as a lean dough. The softer and richer the bread, the more fat in the dough. This is known as a rich dough. Unlike chewy homemade bagels, focaccia, ciabatta, and my artisan bread, soft dinner rolls require a rich dough. Unfortunately, this doesn’t mean that the dough is swimming in cash. Rather, “rich” correlates with the amount of fat. For example, this dough has milk, butter, and egg.
You need 7 ingredients total. They’re the same ingredients in my easy cinnamon rolls and homemade brioche, which are also rich doughs. (Though I use more sugar for sweeter cinnamon rolls, of course.)
- Milk: Liquid activates the yeast. For the softest dinner rolls, use whole milk. Nondairy or low fat milks work too, but whole milk produces phenomenal flavor and texture.
- Yeast: You can use active dry yeast or instant yeast. If using active dry yeast, the rise times will be a little longer. I recommend Platinum Yeast from Red Star, which is an instant yeast blended with natural dough improvers.
- Sugar: Sugar feeds the yeast, increases its activity, and tenderizes the dough.
- Egg: 1 egg provides structure and flavor.
- Butter: Butter promises a flavorful and soft dinner roll. Make sure it’s room temperature.
- Salt: You can’t make flavorful bread without salt!
- Flour: You can use all-purpose flour or bread flour in this recipe. All-purpose flour is convenient for most, but bread flour produces chewier dinner rolls. There are no other changes to the recipe if you use bread flour.
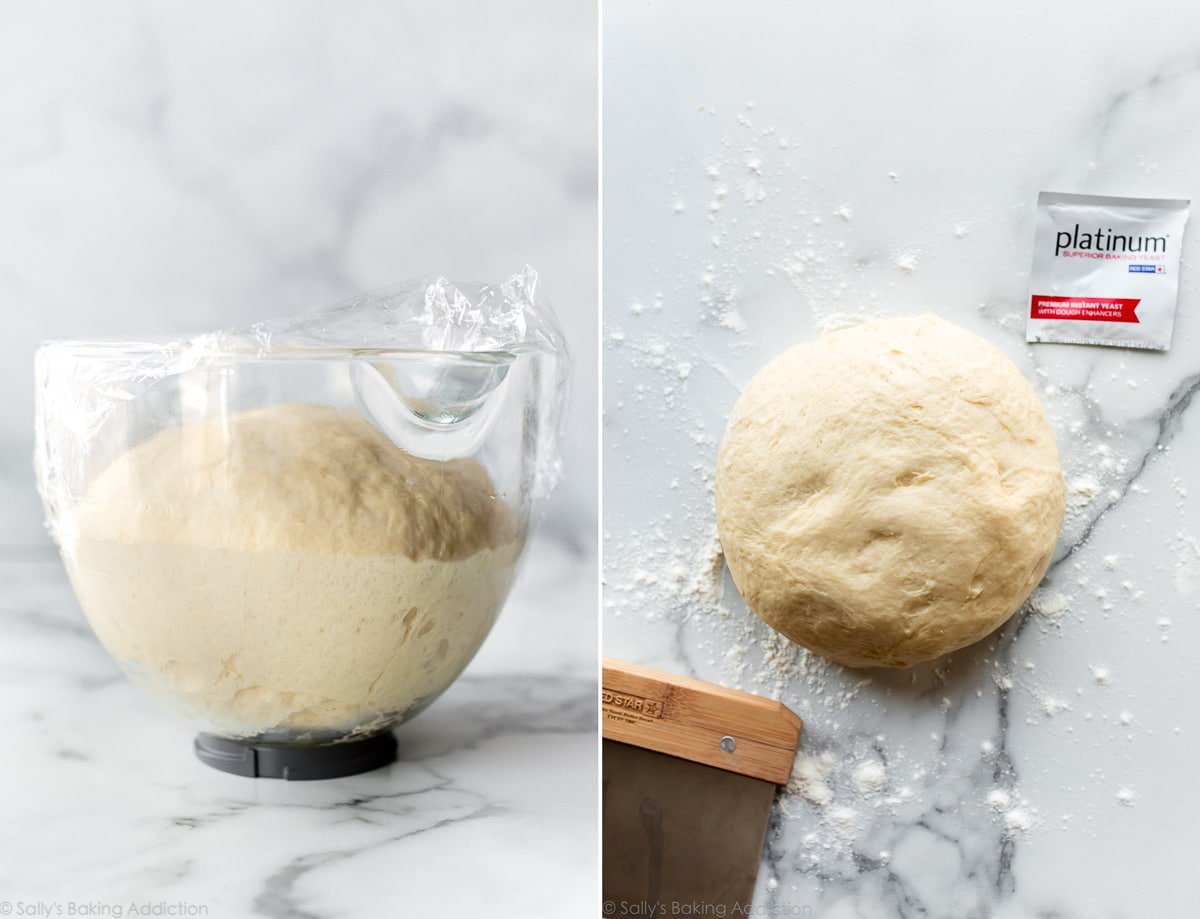
Once you make the dough, let it rise:
After that, punch down the risen dough. Shape into balls and arrange in a baking pan. Don’t worry if they’re not all uniform in size.
Let the shaped rolls rise before baking. Look how puffy they get after 1 hour of rising:
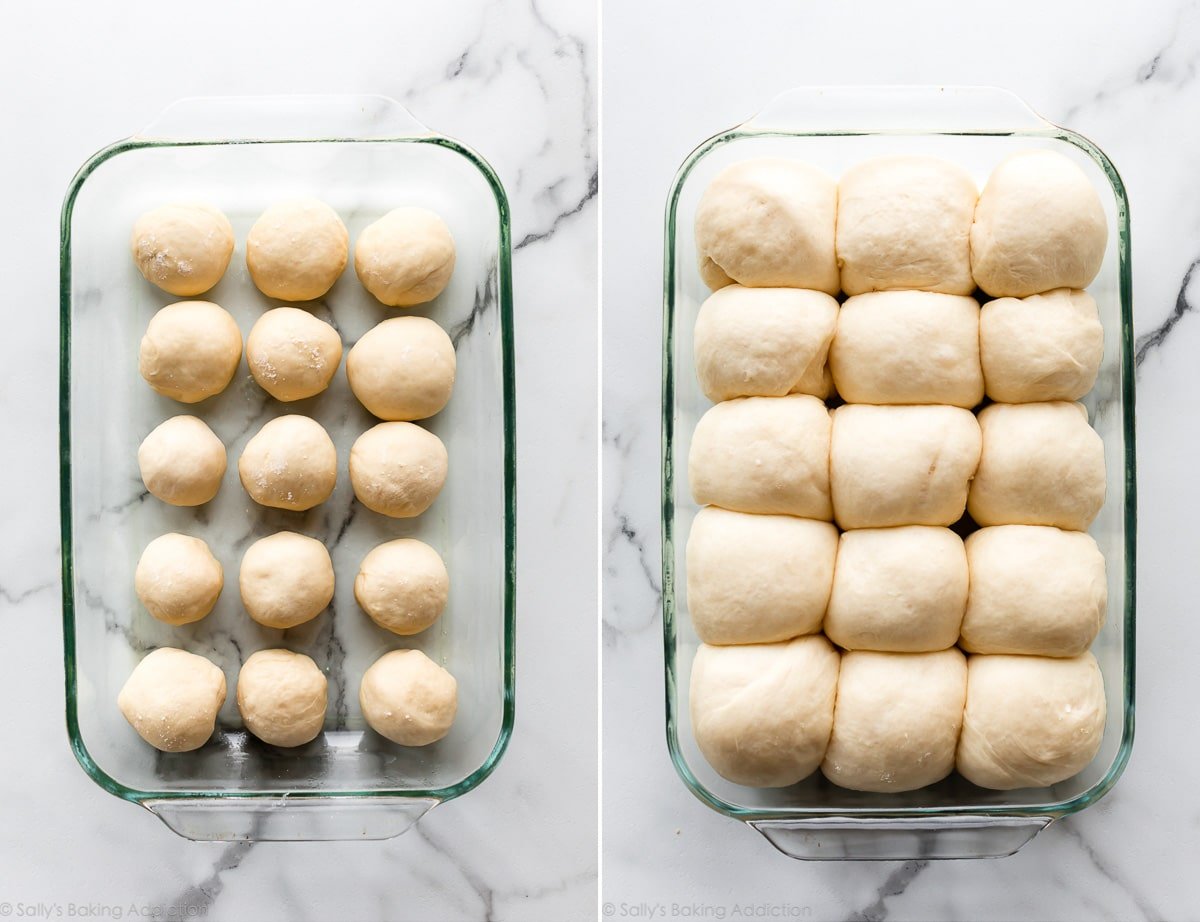
How to Shape Dinner Rolls
You can shape this dough many different ways including twisted rolls, knotted rolls (how I shape garlic knots), cloverleaf rolls, or even hot dog buns. Let’s stick with the basic round shape. Divide the dough into 14-16 pieces. Take a piece and stretch the top of the dough while pinching and sealing the bottom. Make sure the rolls are smooth on top and sealed on the bottom. I shape hot cross buns the same exact way.
How to Make Yeast Rolls Ahead of Time
The rolls require around 3 hours of rising. Not everyone has 3 hours to spare, so let’s discuss another option! Prepare the dough, let it rise, and shape the rolls. Cover the shaped rolls tightly and refrigerate for up to about 16 hours. At least 3 hours before you need them the next day, remove the rolls from the refrigerator and allow to rise on the counter for about 1-2 hours before baking.
And here’s how to freeze dinner rolls: Follow the make-ahead instructions and instead of refrigerating overnight, freeze the rolls in a baking pan. Once frozen, they won’t stick together anymore and you can place them in a freezer bag. Let them thaw and rise for about 4-5 hours, then bake. You can also freeze the baked dinner rolls. Therefore, if you want a smaller batch, you can make the entire recipe and bake only a few fresh rolls at a time.
These make-ahead options are especially helpful if you want fresh-baked rolls for Easter brunch, Thanksgiving dinner, or on Christmas.
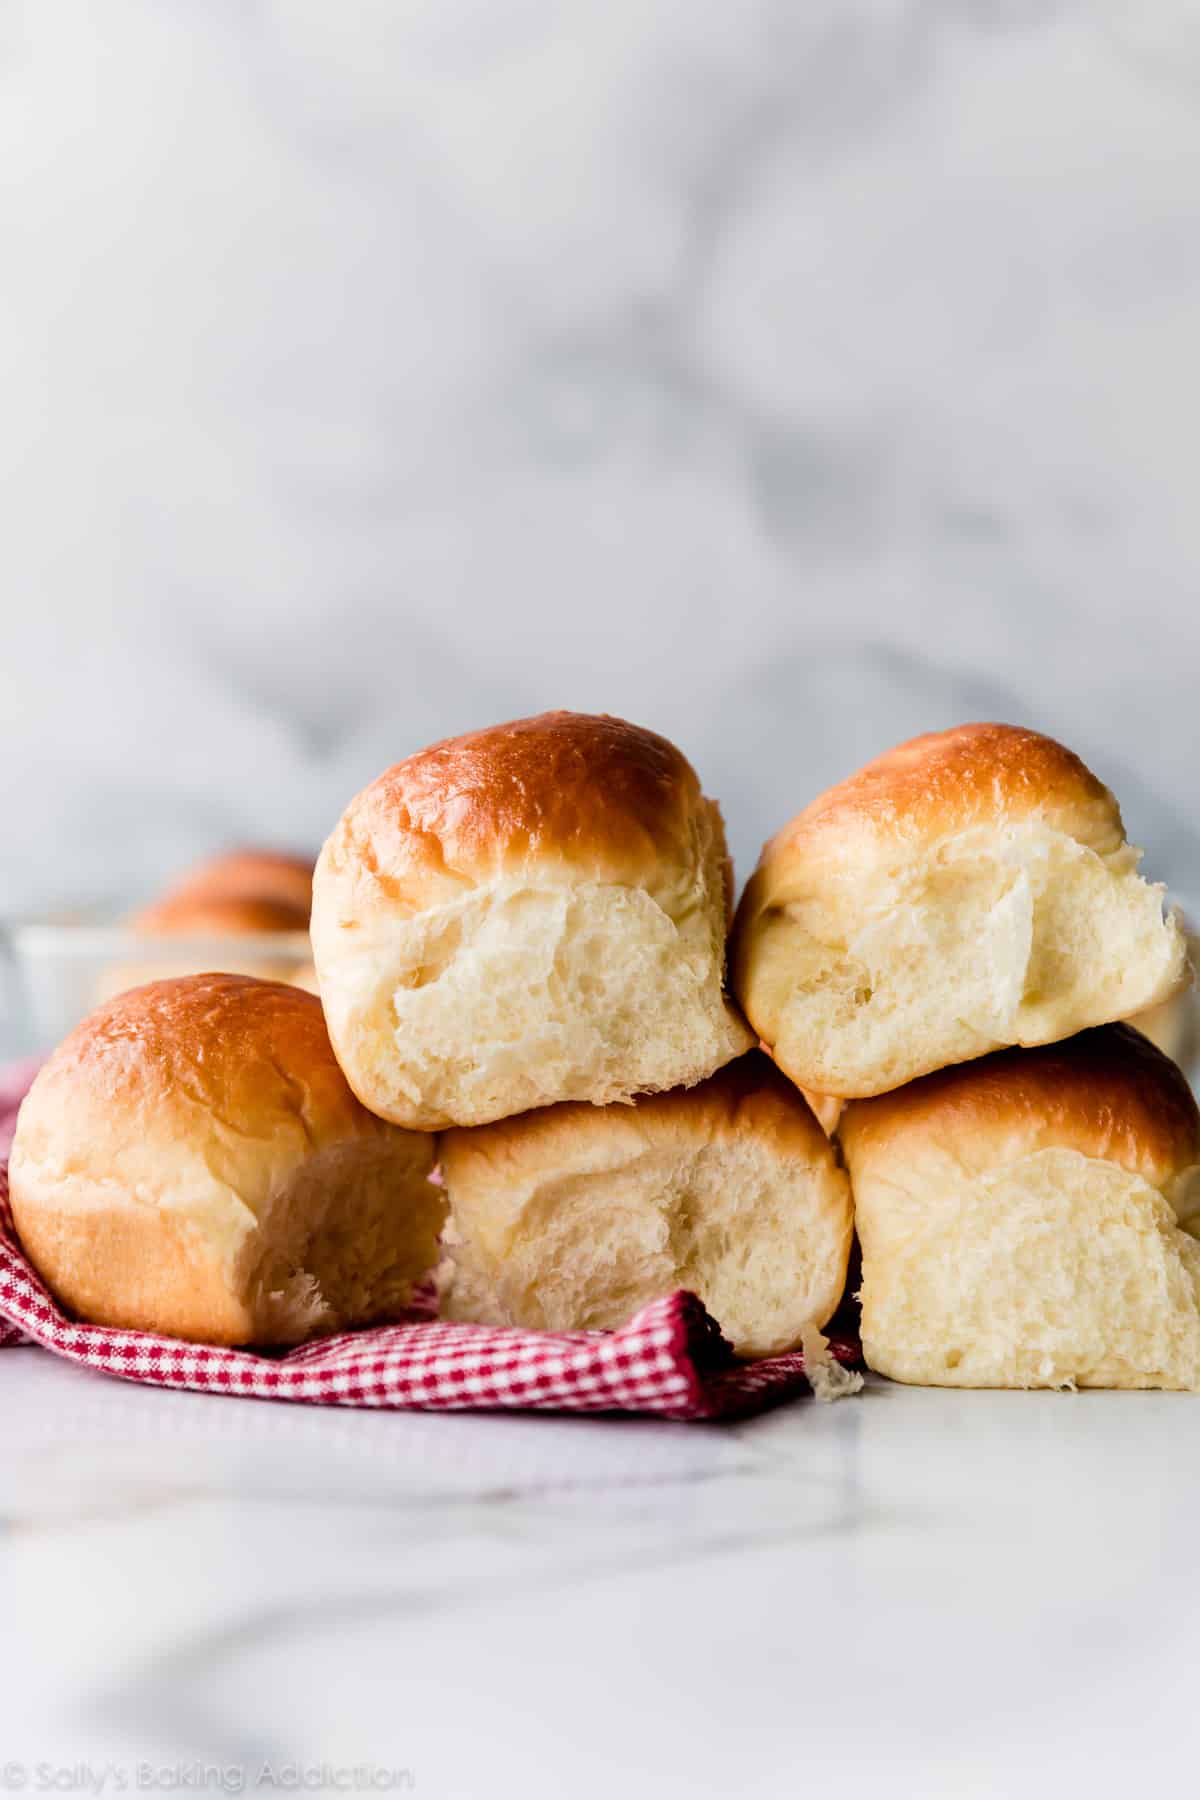
Dinner Roll Flavors
How about some pizazz? Mix in these ingredients when you add the flour.
- Rosemary Dinner Rolls – 2 Tablespoons fresh or dried chopped rosemary.
- Cheddar Dinner Rolls – 1 cup shredded cheddar cheese. Other cheese varieties work, but avoid super soft cheeses.
- Garlic & Herb Dinner Rolls – 2 teaspoons each: dried rosemary, dried basil, & dried parsley, along with 1 teaspoon garlic powder.
- Whole Wheat Dinner Rolls
- Brown Butter Sage Dinner Rolls
- Honey Butter Rolls
- Sweet Potato Dinner Rolls
- Oatmeal Molasses Dinner Rolls
- Multigrain Rolls – Here is my Multigrain Bread recipe that you can turn into rolls.
They’re also fantastic with a simple swipe of homemade honey butter or homemade cinnamon butter.
This dough is not ideal for a big loaf of bread. Instead, I recommend using a leaner dough, such as my sandwich bread or whole wheat bread recipes. If you need an egg free dough, try homemade breadsticks instead. And if you love pizza, try these pizza pull apart rolls next!
3 Success Tips
- Reference my Baking with Yeast Guide, which answers many common yeast FAQs.
- Make sure your yeast isn’t expired. Expiration date is on the package.
- Directly from the pros at Red StarYeast: Measuring flour correctly is key to avoiding a dense dough, which leads to heavy (not soft!) rolls. Spoon and level your flour, do not scoop it out of the package.
My final piece of advice? Don’t limit these rolls to suppertime. They’re welcome anywhere, with any meal, any time of day. Use for sliders, breakfast sandwiches, soaking up your favorite tomato sauce with slow cooker turkey meatballs, alongside salad, or dunking into a bowl of creamy chicken noodle soup. Above all, don’t doubt yourself because you, too, can become a bread baking pro.
Soft Dinner Rolls Recipe
- Prep Time: 3 hours, 25 minutes
- Cook Time: 22 minutes
- Total Time: 3 hours, 45 minutes
- Yield: 14-16 rolls
- Category: Dinner
- Method: Baking
- Cuisine: American
Description
You only need 7 ingredients to make these dinner rolls. Flaky, soft, and buttery, these fresh dinner rolls outshine any main dish. See recipe notes for freezing and overnight instructions. You can also reference my Baking with Yeast Guide for answers to common yeast FAQs. This recipe is also in my cookbook, Sally’s Baking 101.
Ingredients
- 1 cup (240ml) whole milk, warmed to about 110°F (43°C)
- 2 and 1/4 teaspoons Platinum Yeast from Red Star instant yeast (1 standard packet)
- 2 Tablespoons granulated sugar, divided
- 1 large egg
- 1/4 cup (4 Tbsp; 56g) unsalted butter, softened to room temperature and cut into 4 pieces
- 1 teaspoon salt
- 3 cups (390g) all-purpose flour or bread flour* (spooned & leveled)
- optional topping: 2 Tablespoons (28g) melted unsalted butter mixed with 1 Tablespoon (21g/15ml) honey
Instructions
- Prepare the dough: Whisk the warm milk, yeast, and 1 Tablespoon of sugar together in the bowl of your stand mixer. Cover and allow to sit for 5 minutes. *If you do not own a stand mixer, you can do this in a large mixing bowl and in the next step, mix the dough together with a large wooden spoon/silicone spatula. It will take a bit of arm muscle. A hand mixer works, but the sticky dough repeatedly gets stuck in the beaters. Mixing by hand with a wooden spoon or silicone spatula is a better choice.*
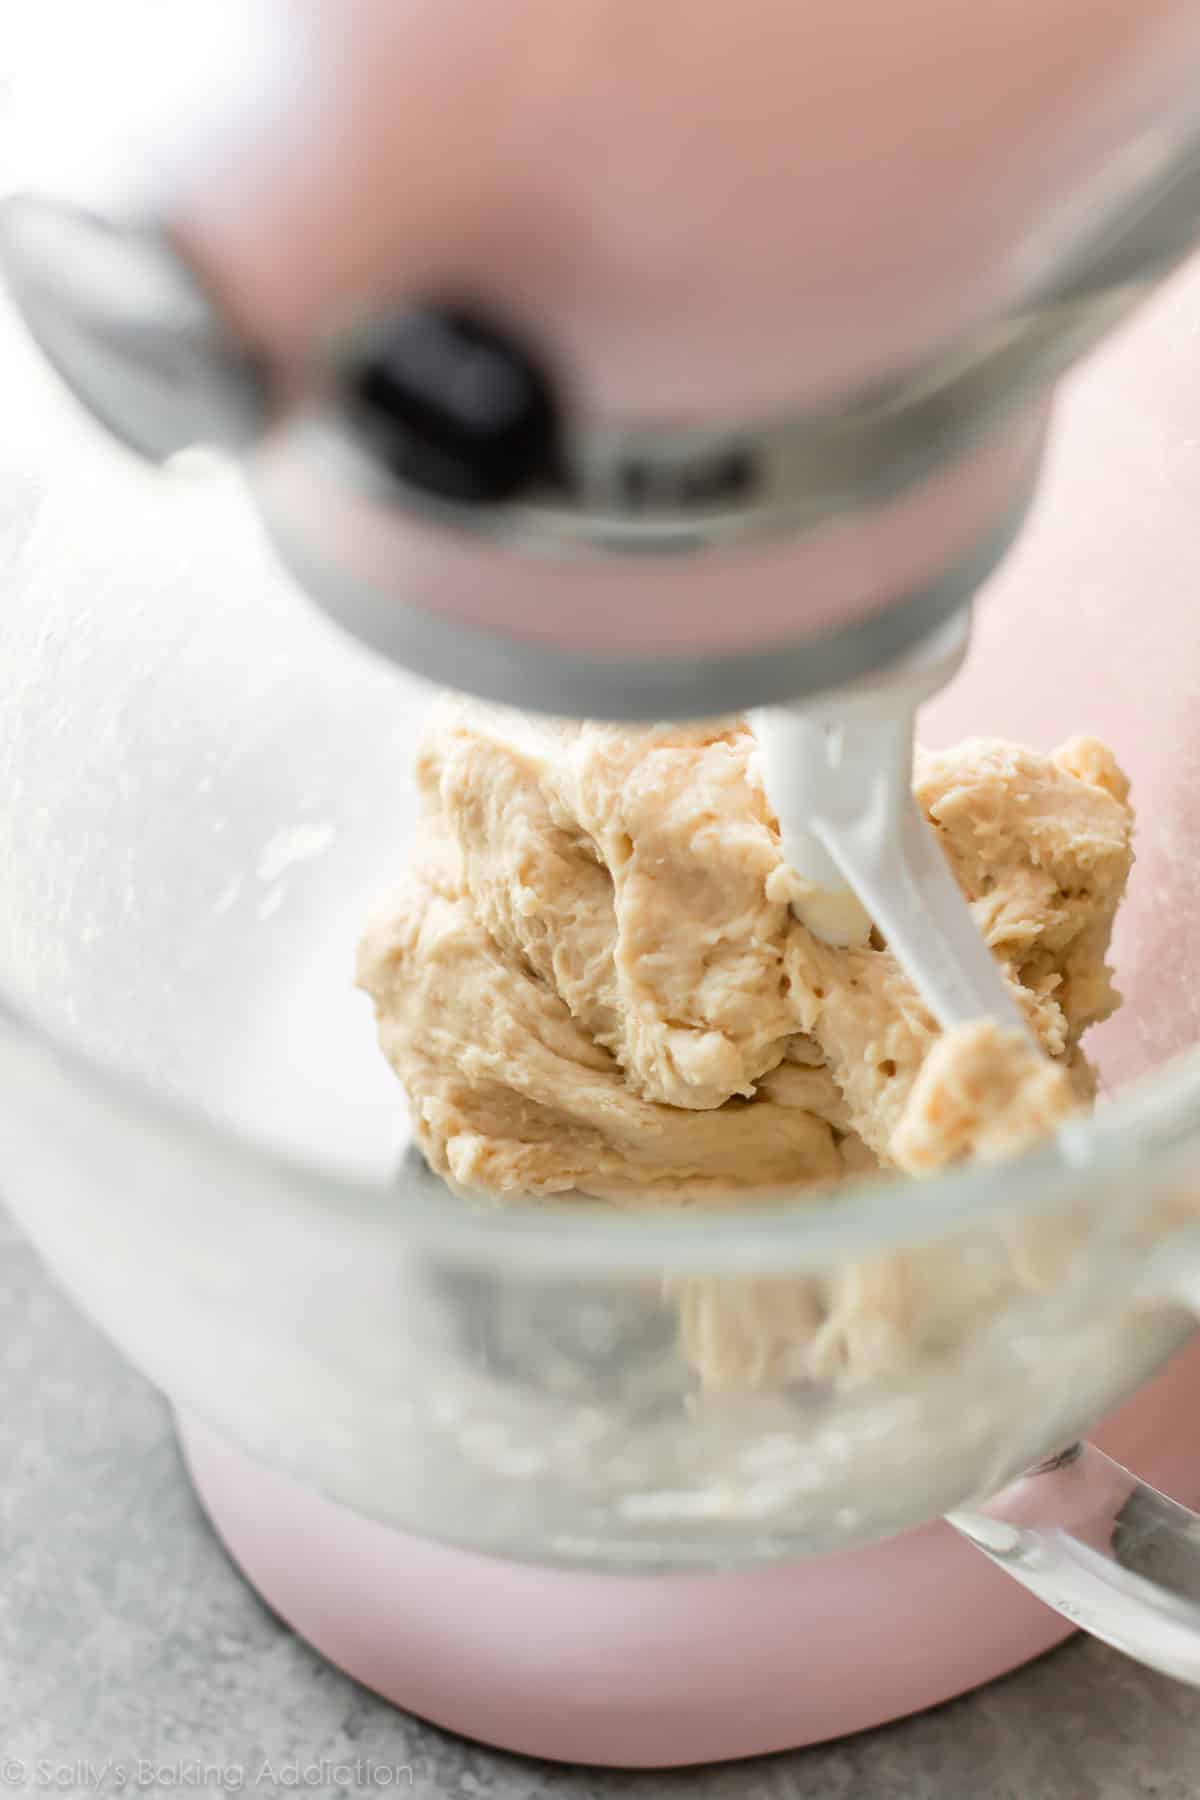
- Add the remaining sugar, egg, butter, salt, and 1 cup flour. With a dough hook or paddle attachment, mix/beat on low speed for 30 seconds, scrape down the sides of the bowl with a silicone spatula, then add the remaining flour. Beat on medium speed until the dough comes together and pulls away from the sides of the bowl, about 2 minutes. If the dough seems too wet to a point where kneading (next step) would be impossible, beat in more flour 1 Tablespoon at a time until you have a workable dough, similar to the photos above. Dough should be soft and a little sticky, but still manageable to knead with lightly floured hands.
- Knead the dough: Keep the dough in the mixer and beat for an additional 5 full minutes, or knead by hand on a lightly floured surface for 5 full minutes. (If you’re new to bread-baking, my How to Knead Dough video tutorial can help here.) If the dough becomes too sticky during the kneading process, sprinkle 1 teaspoon of flour at a time on the dough or on the work surface/in the bowl to make a soft, slightly tacky dough. Do not add more flour than you need because you do not want a dry dough. After kneading, the dough should still feel a little soft. Poke it with your finger—if it slowly bounces back, your dough is ready to rise. You can also do a “windowpane test” to see if your dough has been kneaded long enough: tear off a small (roughly golfball-size) piece of dough and gently stretch it out until it’s thin enough for light to pass through it. Hold it up to a window or light. Does light pass through the stretched dough without the dough tearing first? If so, your dough has been kneaded long enough and is ready to rise. If not, keep kneading until it passes the windowpane test.
- 1st Rise: Lightly grease a large bowl with oil or nonstick spray. Place the dough in the bowl, turning it to coat all sides in the oil. Cover the bowl with aluminum foil, plastic wrap, or a clean kitchen towel. Allow the dough to rise in a relatively warm environment for 1-2 hours or until double in size. (I always let it rise on the counter. Takes about 2 hours. For a tiny reduction in rise time, see my answer to Where Should Dough Rise? in my Baking with Yeast Guide.)
- Grease a 9×13 inch baking pan or two 9-inch square or round baking pans. You can also bake the rolls in a cast iron skillet or on a lined baking sheet.*
- Shape the rolls: When the dough is ready, punch it down to release the air. Divide the dough into 14-16 equal pieces. (Just eyeball it– doesn’t need to be perfect!) A bench scraper is always helpful for cutting dough. Shape each piece into a smooth ball. Arrange in prepared baking pan.
- 2nd Rise: Cover shaped rolls with aluminum foil, plastic wrap, or a clean kitchen towel. Allow to rise until puffy, about 1 hour.
- Adjust oven rack to a lower position and preheat oven to 350°F (177°C). (It’s best to bake the rolls towards the bottom of the oven so the tops don’t burn.)
- Bake the rolls: Bake for 20-25 minutes or until golden brown on top, rotating the pan halfway through. If you notice the tops browning too quickly, loosely tent the pan with aluminum foil. Remove from the oven, brush with optional honey butter topping, and allow rolls to cool for a few minutes before serving.
- Cover leftover rolls tightly and store at room temperature for 2-3 days or in the refrigerator for up to 1 week.
Notes
- Freezing Instructions: Prepare recipe through step 6. Place shaped rolls in a greased baking pan, cover tightly, and freeze for up to 3 months. Once frozen, the dough balls won’t stick together anymore and you can place them in a freezer bag if needed. On the day you serve them, arrange the dough balls in a greased baking pan, cover tightly, then let them thaw and rise at room temperature for about 4-5 hours. Bake as directed. You can also freeze the baked dinner rolls. Allow them to cool completely, then freeze for up to 3 months. Thaw in the refrigerator or at room temperature, then reheat as desired. If reheating the whole pan, lightly cover and reheat in a 300°F (149°C) oven for about 10 minutes or until warm.
- Overnight Instructions: Prepare the recipe through step 6. Cover the shaped rolls tightly and refrigerate for up to about 15 hours. At least 3 hours before you need them the next day, remove the rolls from the refrigerator, keep covered, and allow to rise on the counter for about 1-2 hours before baking. Alternatively, you can let the dough have its 1st rise in the refrigerator overnight. Cover the dough tightly and place in the refrigerator for up to about 15 hours. Remove from the refrigerator and allow the dough to fully rise for 2 more hours. Continue with step 5.
- Special Tools (affiliate links): Electric Stand Mixer or Glass Mixing Bowl and Wooden Spoon / Spatula | 9×13-inch Glass Baking Pan | Bench Scraper | Pastry Brush
- Baking Pan: I prefer baking the rolls in a glass 9×13 inch baking pan because I find they brown a little too quickly in metal. As long as you bake the rolls on a lower oven rack and keep your eye on them, any pan is great.
- Yeast: Platinum Yeast from Red Star is an instant yeast. You can use Red Star Yeast active dry yeast instead. Rise times will be slightly longer using active dry yeast. Reference my Baking with Yeast Guide for answers to common yeast FAQs.
- Flour: You can use all-purpose flour or bread flour. All-purpose flour is convenient for most, but bread flour produces chewier dinner rolls. The rolls are still soft and fluffy no matter which you use. Either flour is fine and there are no other changes to the recipe if you use one or the other.
Adapted from Homemade Bread Bowls and Honey Butter Rolls












Reader Comments and Reviews
Have made these a few times now and they turn out perfect every time! I do use almond milk and dairy free margarine to make them dairy free and have had no issues whatsoever!
Highly recommend, very beginner friendly!
These are my go to, so good. I often double the recipe and it works fine. They are buttery and delicious and I haven’t had a failure yet! Different toppings such as sunflower seeds, oats or whatever I fancy I sprinkle on half the buns and leave the rest plain. Freeze well for school lunches and taste so good. Love this recipe and so does my family.
It felt a bit intimidating to make my own rolls, but these came out great. I measured out 60 grams and ended up with only 12 rolls, but I just added 2 minutes of cooking time and they came out just fine. Looking forward to trying the sage and brown butter variety!
I rarely comment on a recipe unless it is outstanding. These rolls are next level soft and fluffy. Made as per recipe for a dinner party today and everyone raved about them. Will be on my list of regular bakes in future
Absolutely lovely bread rolls Sally’s recipes are so very good. Thanks very much
Followed it exactly and came out perfectly! Was wondering if there’s a reason for adding 1 cup of flour at first instead of all at once? Thanks!
Hi Mithi, adding it in increments helps to prevent from over- or under-mixing the dough. We’re so glad you enjoyed the rolls!
How many calories per roll please
Hi Ellen, we don’t usually include nutrition information as it can vary between different brands of the same ingredients. Plus, many recipes have ingredient substitutions or optional ingredients listed. However, there are many handy online calculators where you can plug in and customize your exact ingredients/brands. Readers have found this one especially helpful: https://www.verywellfit.com/recipe-nutrition-analyzer-4157076
I was busy yesterday morning, making a lemon tart for Thanksgiving dessert and I wanted a batch of these amazing dinner rolls which I had made before using my stand mixer.
I was short on time so I decided to just put all the ingredients into my bread maker and let it take care of the kneading and the first rise. I took the dough out of the bread maker and shaped it into 18 dinner rolls and they turned out perfectly! I don’t know if you want to add the bread maker into the instructions, but I think it will be my go-to from now on.
Everyone raved about the rolls and I just ate one this morning and on the second day it’s still soft and delicious, especially with butter and turkey in it lol.
Thanks for posting this!! Sallyl doesn’t have any “bread machine” recipes that I have found so THANK YOU!! I will try using my bread machine with this recipe in the next few days. You answered my prayer. God bless!
The 3 cups of flour doesn’t seem to be nearly enough. The dough is extremely sticky and can’t window pane after the amount of kneading indicated. Did I miss something?
Hi Amy, Thank you for trying these rolls. The kneaded dough should be soft and slightly tacky, but it sounds like yours was just too sticky. There are a lot of variables that go into the consistency of dough, even down to the weather and humidity in the air. There’s nothing wrong with adding just a little more flour to bring the dough into a less sticky and knead-able consistency.
I made these rolls but can’t get them to brown, any idea why??
Hi Zoe, if your rolls aren’t browning, it could be that you simply need to adjust the oven rack so they’re a little closer to the heat source. A simple fix for next time!
I am making these dinner rolls for a family dinner. My niece can’t have dairy. Can I substitute plant based milk and butter?
Hi Julie, some readers have made those substitutions with fine results. When using non-dairy milk, we find oat milk is the best choice.
Works best and tastes delicious
My favorite bread recipe
Hello! I would like to make a double batch. Will my rolls turn out the same if I use double of everything?
Hi Mona, for best results, we recommend making 2 separate batches rather than doubling.
I tried these Dinner Rolls and they wet the easiest recipe. They are amazing. Thanks for sharing. I will be serving them this weekend if they last that long.
Love these! Soft and chewy… yum! All of them were a different size but still delicious!
My kids loved these rolls with chicken soup! Have you doubled the batch before? Thank you!
Hi Kate, we recommend making two batches instead of doubling for best results.
Thank you so much for your speedy reply!
I made these today. I used 2% instead of whole mild because that’s what I had. They turned out perfect, and tasted great.
I commented earlier today about using buttermilk in this recipe. Turned out beautifully. Soft, fluffy, wonderful buttery taste. Thank you for another great recipe.
I have made your sandwich bread and it is the only bread recipe that consistently comes out perfect. I am trying the dinner rolls today but am wondering if whole fat buttermilk will work instead.
Hi Sarah, yes, you can use buttermilk in place of the whole milk, with no changes to the recipe. We hope you enjoy the rolls!
Can I use evaporated milk instead of regular milk?
Hi Olivia, that may be too heavy for this dough. Best to stick with whole milk if possible!
I probably reviewed this recipe before, but I’m gonna do it again. Just took them out of the oven and man they are so good!! So soft and so much flavor. I egg washed and then topped half of them with Trader Joes Aglio Olio seasoning blend and a bit of pretzel salt. If you haven’t made this recipe yet, you are missing out. It’s really easy to put together too. Don’t worry if you have to add a bit more flour to have it come together–just a little at a time, as Sally suggests. Oh and I got 14 rolls at about 55 grams each. Time in oven was exactly 20 minutes.
This is my go to when I want to show someone that home made is better. If I could give more stars I would. Best rolls ever. No steak house even comes close.
Such a wonderful recipe! I made mine with a orange spiced butter to brush on top and the rolls tasted exactly like the ones I order at a fancy french bar! feather light with a rich and butter mouthfeel. Just a warning to others, you do have to add a few tbsp of flour in it but stop immediately when the dough holds together(it will be very soft) so that your buns stay fluffy! I also applied the tangzhong technique in this batch! highly recommend!
The basic recipe of these buns is really good, and I will be making them again. I adjusted them for Australian tastes, so left out the sugar. Activate the yeast with some flour from the amount in the recipe, (I use baking/strong flour), some of the milk and yeast. Being a lazy (and experienced!) bread maker, after the yeast was activated I put all the ingredients into a stand mixer and mixed it. I had to add a little more flour (which I failed to measure… doh!) and mixed it with a dough hook for about 8 minutes. Then 5 minutes rest, then 5 minutes mix. I left it to rest covered in the mixing bowl (no extra oil or another bowl to clean – told you I was lazy) for about an hour or so until it had doubled in size. I made the dough into hamburger buns, because that’s what I wanted/needed to make. 20 minutes at 175C fan forced. They were really, really good and perfect for homemade hamburgers! Soft and fluffy without being dry inside – soo good! Very impressed, and an absolute keeper recipe.
Between this recipe and the baking with yeast guide these were super easy! They did feel a little under-flavored though, could I add a little more salt without affecting the structure of the bread? I added salt on top but felt like they needed a bit more inside.
Hi Rachel, absolutely!
I accidentally added 2 eggs ☹️. Do I have to start over?
Hi Whitney, you could continue with the dough, just know the flavor/texture may change a bit with an extra egg!
Can you use 2% Milk instead of whole milk?
Hi Darlene, a lower fat milk or non-dairy milk will work in a pinch. The rolls may not be quite as soft and fluffy.
Sally, I love reading your recipe’s BUT the adds covering your recipe is just too much. Some almost take the whole page and you cannot get rid of them. Are you aware????
Hi Hennie, we’re so sorry you’re having issues with ads! They should never be covering our recipes or posts. Did you notice this issue just on the soft dinner rolls post, or on others across the site? We will certainly look into this.
The best rolls I’ve ever made, I have written this recipe and method down in case I can’t find it again 🤍 Thank you!!
Hi Sally,Thank you for your perfect wheat bread recipe.
Sally,Can I substitute anything for egg in this dinner rolls recipie? As we don’t eat egg always.
Thanks
Hi Jaishree, Other bakers have reported success using a “flax egg” substitute in this recipe but we haven’t tested it ourselves. You can leave the egg out completely, but they won’t be as soft. The texture will be closer to our sandwich bread (which doesn’t have any eggs).