

These soft pretzel knots are exactly like regular homemade soft pretzels, but shaped and tied like garlic knots. There’s more compacted surface area, which means there’s more room for toppings such as cinnamon sugar, garlic parmesan, or jalapeño cheddar. The dough requires just 6 ingredients and there’s hardly any rise time, so this is a wonderful recipe for yeast beginners. Have fun shaping the knots (they don’t need to be perfect!) and enjoy warm, flavorful homemade pretzels within an hour.
One reader, Renee, commented: “I can now mark making pretzels off my bucket list… and I’ll definitely be making them again. Who knew it was so easy?! Loved them! ★★★★★”
Warm pretzels! Toppings! Dips! All the good stuff in life is right here today!
Soft Pretzel Knots Details
- Flavor: If you enjoy soft pretzels, you’ll love today’s soft pretzel knots. They’re completely homemade, so unlike store-bought frozen soft pretzels, each has that soft, warm, and fresh-from-the-oven taste and texture. You can keep the pretzels traditional with a sprinkling of coarse salt or try various toppings. There’s a detailed list of options below.
- Texture: The difference between pretzel-shaped (or knot-shaped) bread and soft pretzels/soft pretzel knots is an alkaline bath. This is when shaped soft pretzel dough takes a dip in boiling water and baking soda, a surprisingly easy step that provides the iconic chewy pretzel texture and adds a deeper, richer color to the baked pretzels. The boiling water also locks in the shape so they don’t over-puff in the oven. (Without the baking soda bath, you lose texture, that deep brown color, and flavor. So, basically, you will have bread instead of a pretzel.) We do this key step when making regular soft pretzels, soft pretzel rolls, and soft pretzel bites, too.
- Ease: My recipe for soft pretzels has become one of the most reader-loved recipes on this website because the pretzels are relatively quick, extremely easy, and deliver great taste. Same story with these pretzel knots! Though the recipe requires yeast, I always say that this pretzel dough is a terrific starting point for yeast beginners because there’s very little rise time. Shaping takes a little practice, but the knots do NOT need to be perfect. No matter the shape, they’ll still taste like pretzels. Still, if you’re a perfectionist, this recipe yields 14-15 knots so you have opportunity to get the shape right.
Soft Pretzels with a Slightly Different Shape
The goal for today’s soft pretzel knots recipe was to make a soft pretzel with more compacted surface area for toppings and for holding onto dips and sauces. I never stray from the original soft pretzel dough, so that’s what you’ll use as the base for these pretzel knots. You need just 6 basic ingredients to get started including warm water, yeast, a little sugar to feed the yeast, melted butter, salt, and all-purpose flour. (If you have it, the same amount of bread flour works too!)
The dough doesn’t require extended rise time and the baking soda bath is pretty quick, so besides the baking step, the longest stretch of time this recipe requires is shaping.
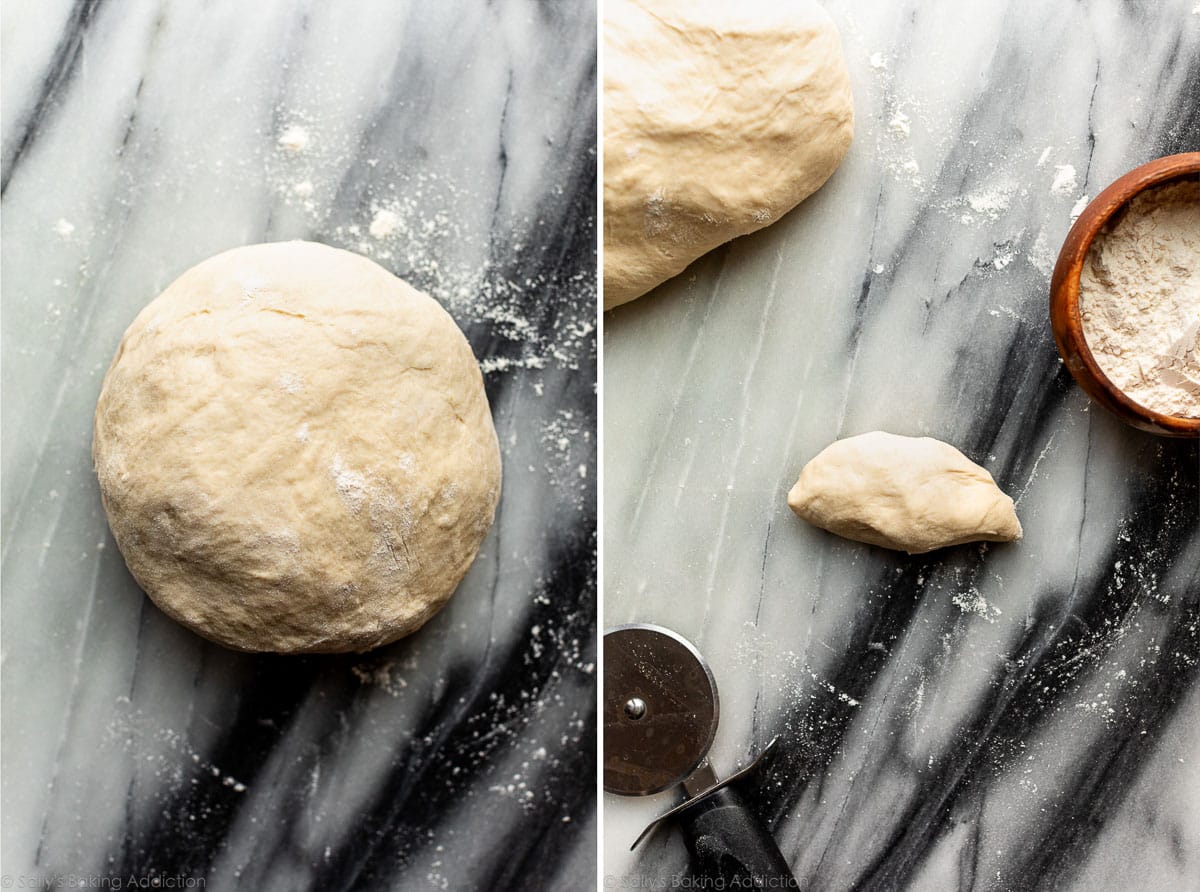
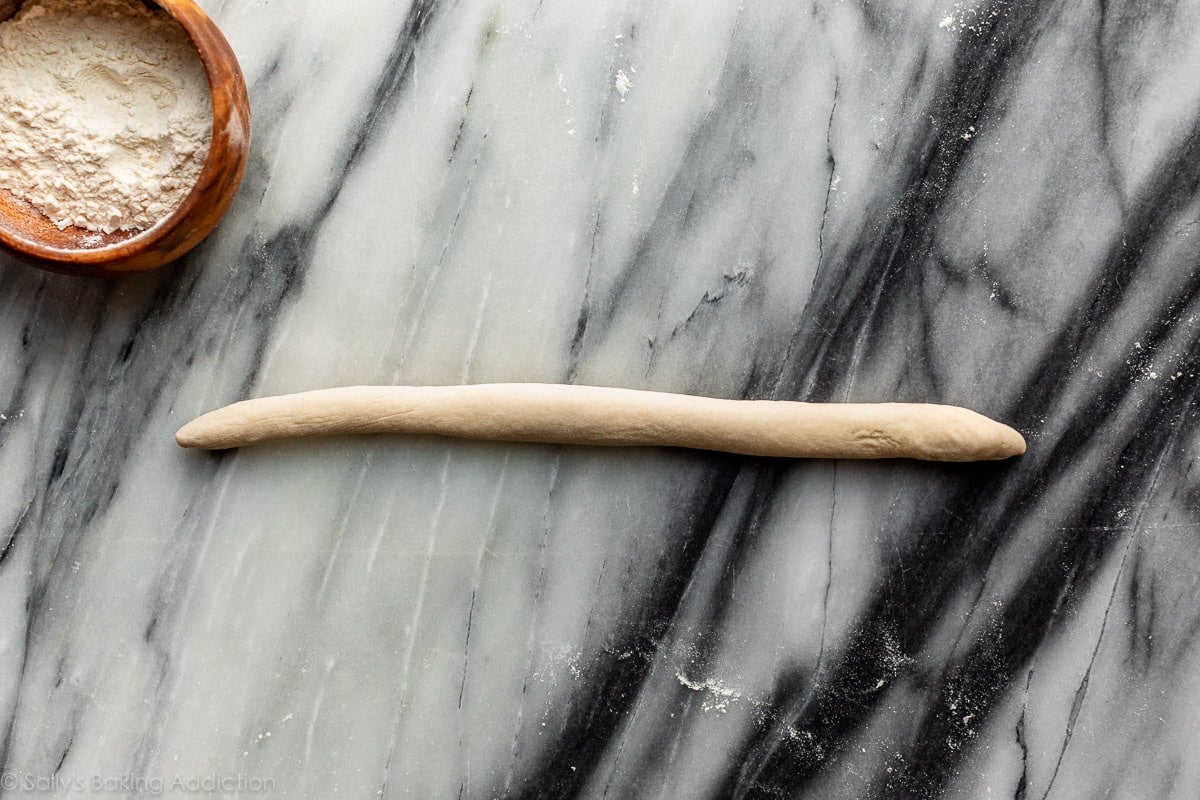
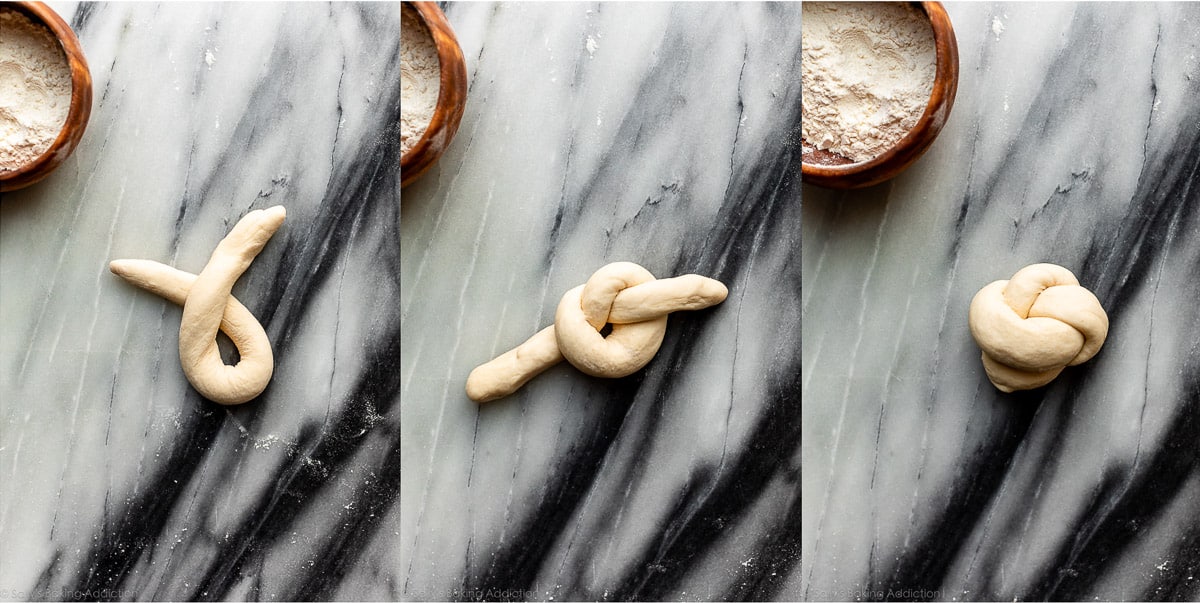
- Divide the dough into 14-15 pieces, which is about 1/4 cup (about 2 ounces) of dough each. Roll each into 14-inch ropes. Tie the ropes into a knot like you do when making garlic knots, then tuck the ends underneath. The ends are quite long so rather than tucking the ends straight underneath, I curve them around the pretzel before tucking under. You can see me do that in the video below.
Here are photos so you can visualize the process:
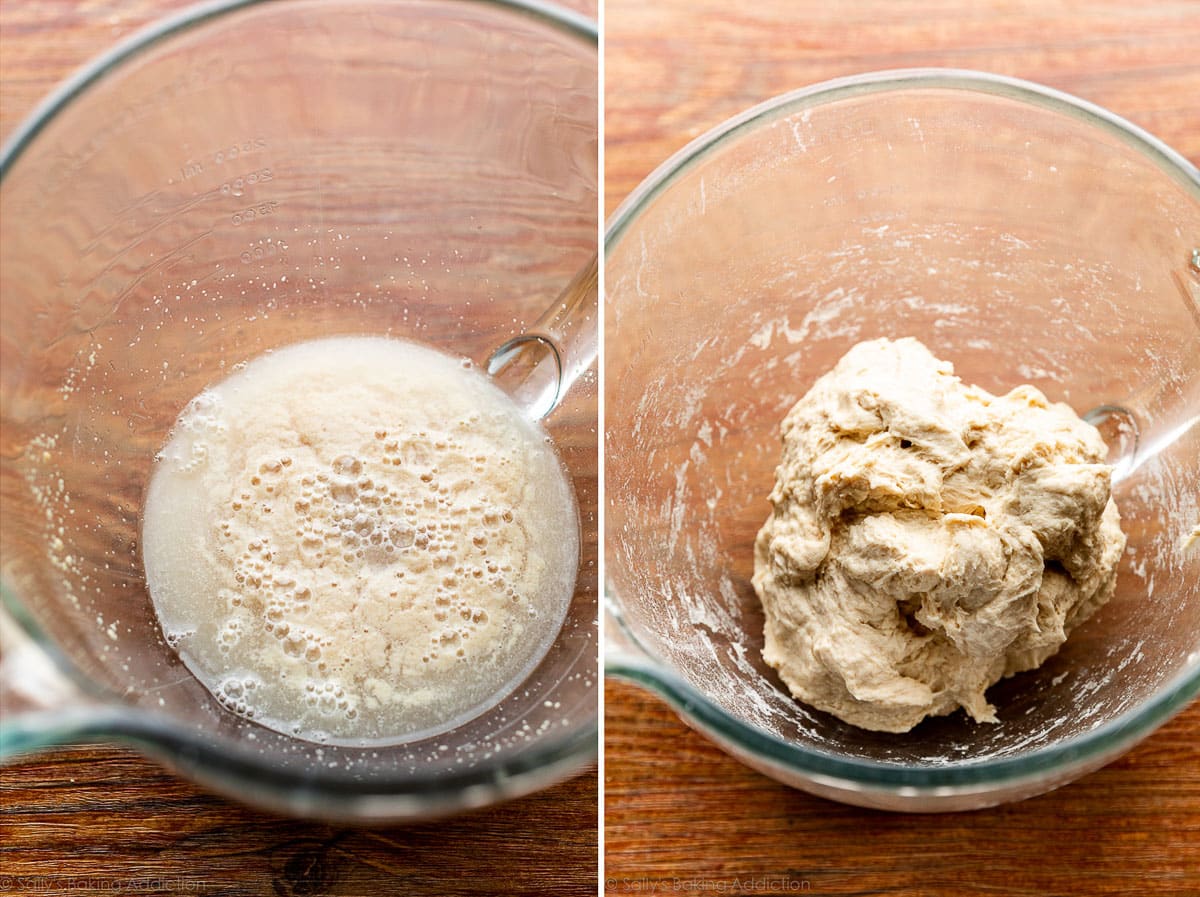
Whisk the warm water, yeast, and sugar together. Cover and let the mixture sit for a few minutes until foamy on top. Waiting for it to foam isn’t totally necessary, but it helps us see that the yeast is ready and active. The right photo below shows the dough before kneading.
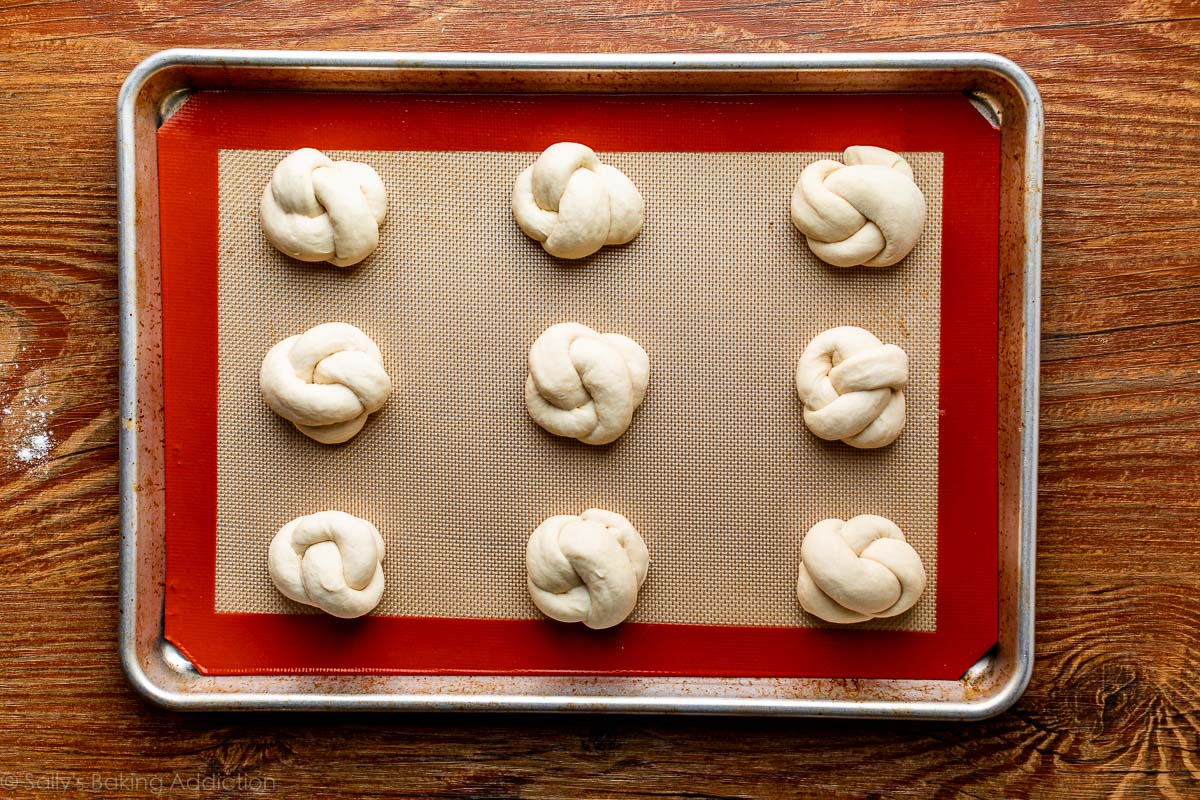
Knead the dough, using my How to Knead Dough video tutorial as needed. Cut the kneaded dough into 14-15 sections, roll into ropes, and then shape into knots. The video tutorial located in the recipe shows these steps as well.
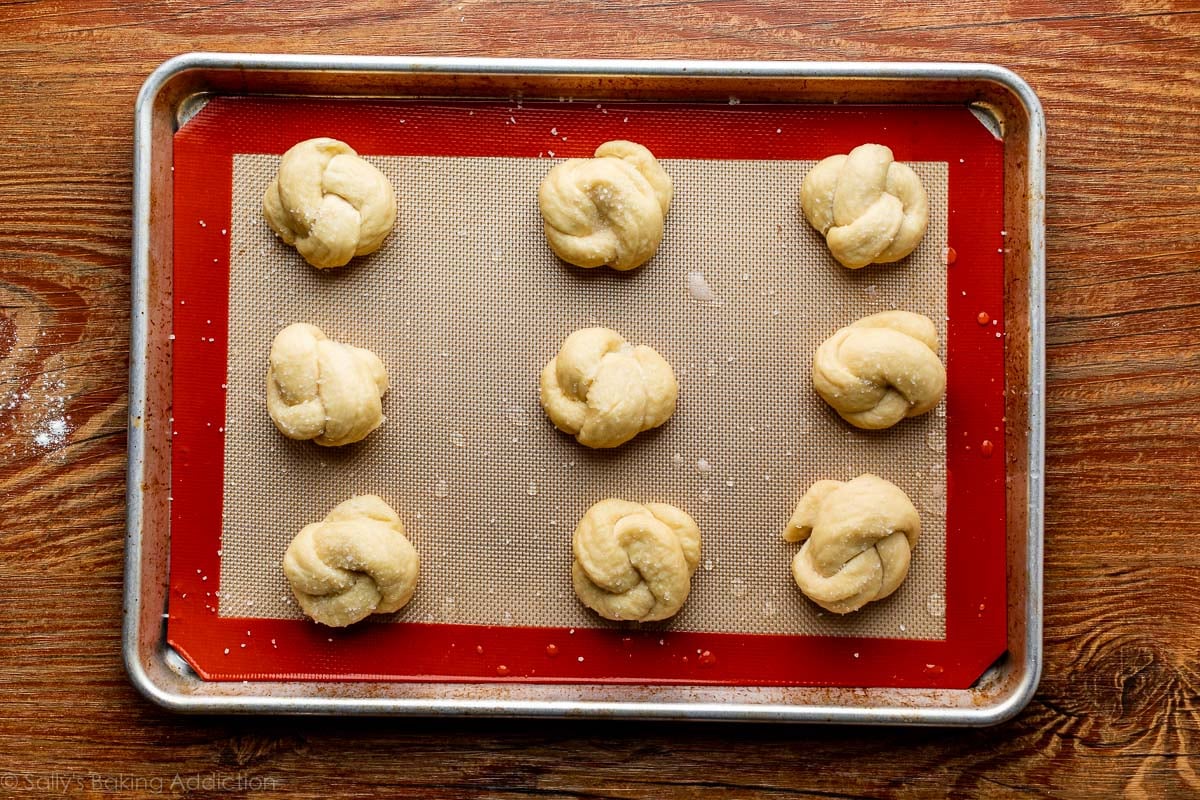
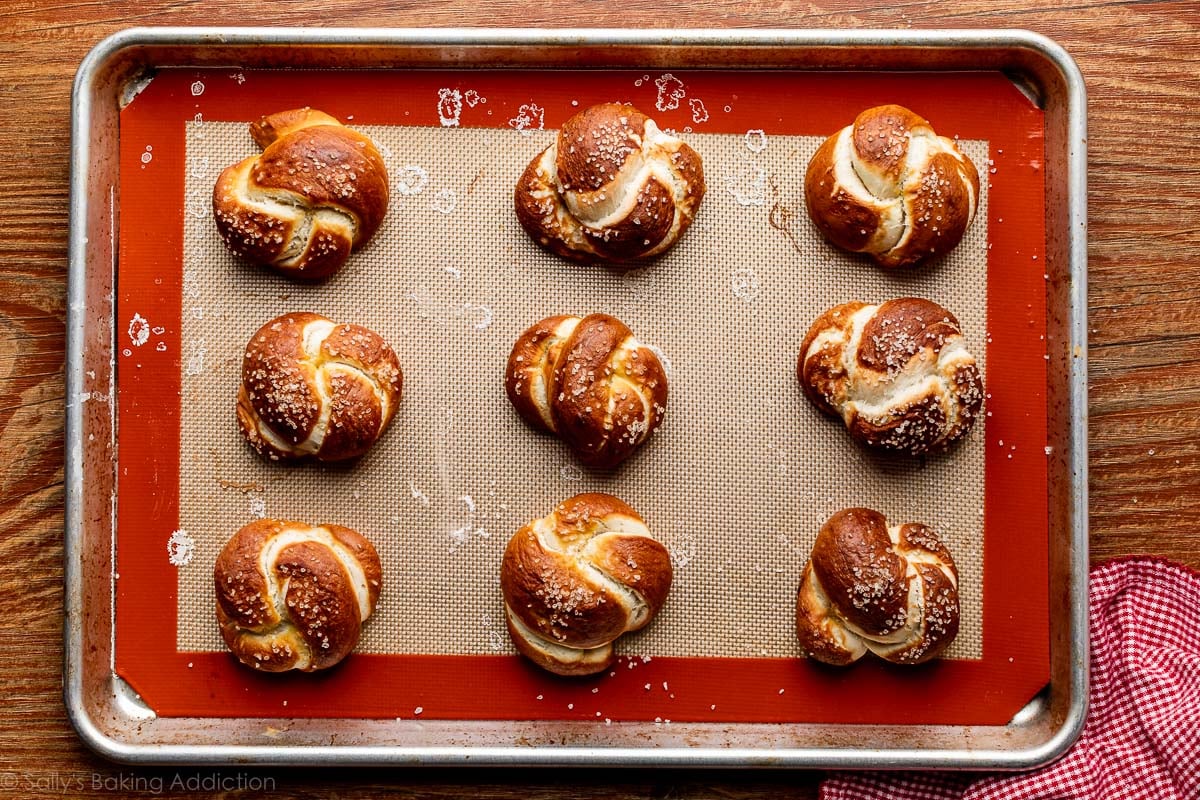
The following photo shows the knots after the baking soda bath. At this point, they are ready to bake.
Topping Options
Immediately after the baking soda bath while the pretzel knots are still wet, sprinkle with coarse salt. Or if you’d like a different topping, skip the coarse salt and try:
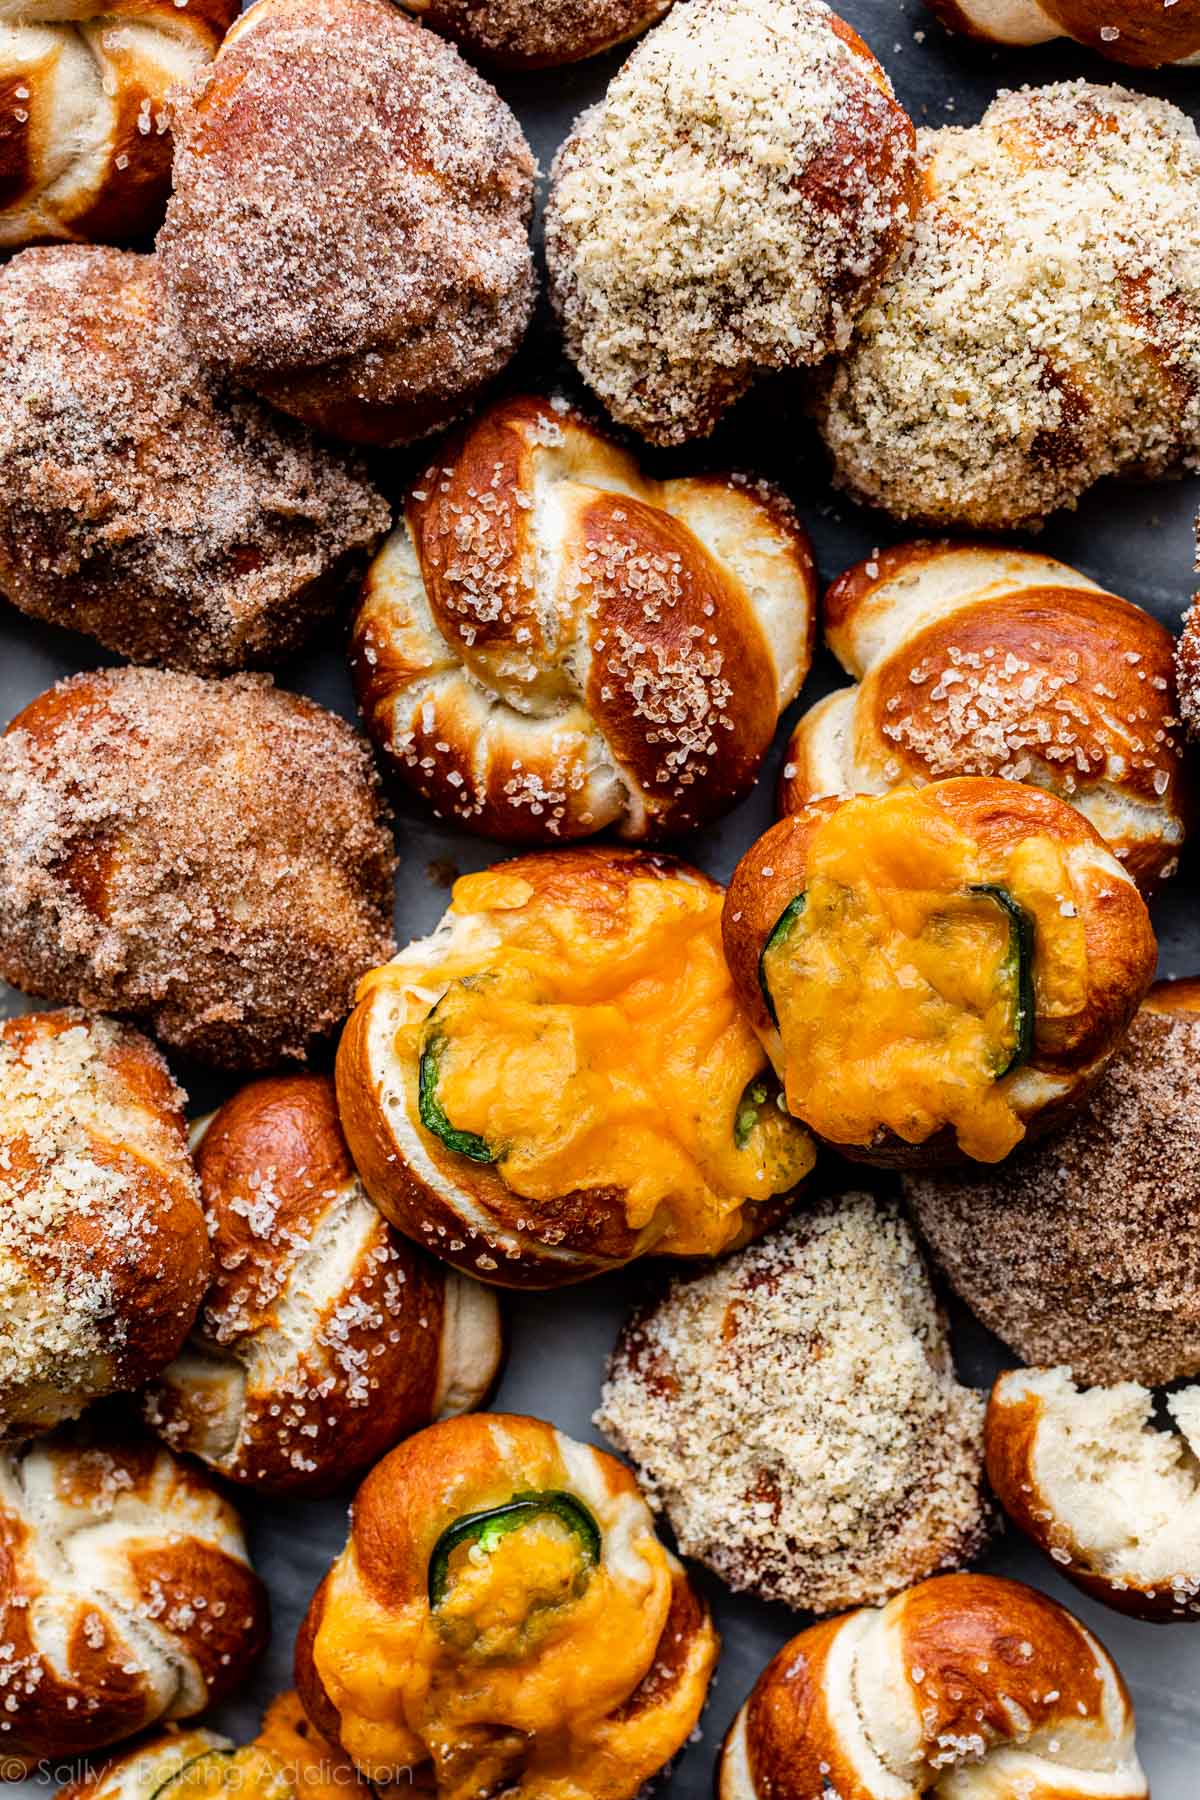
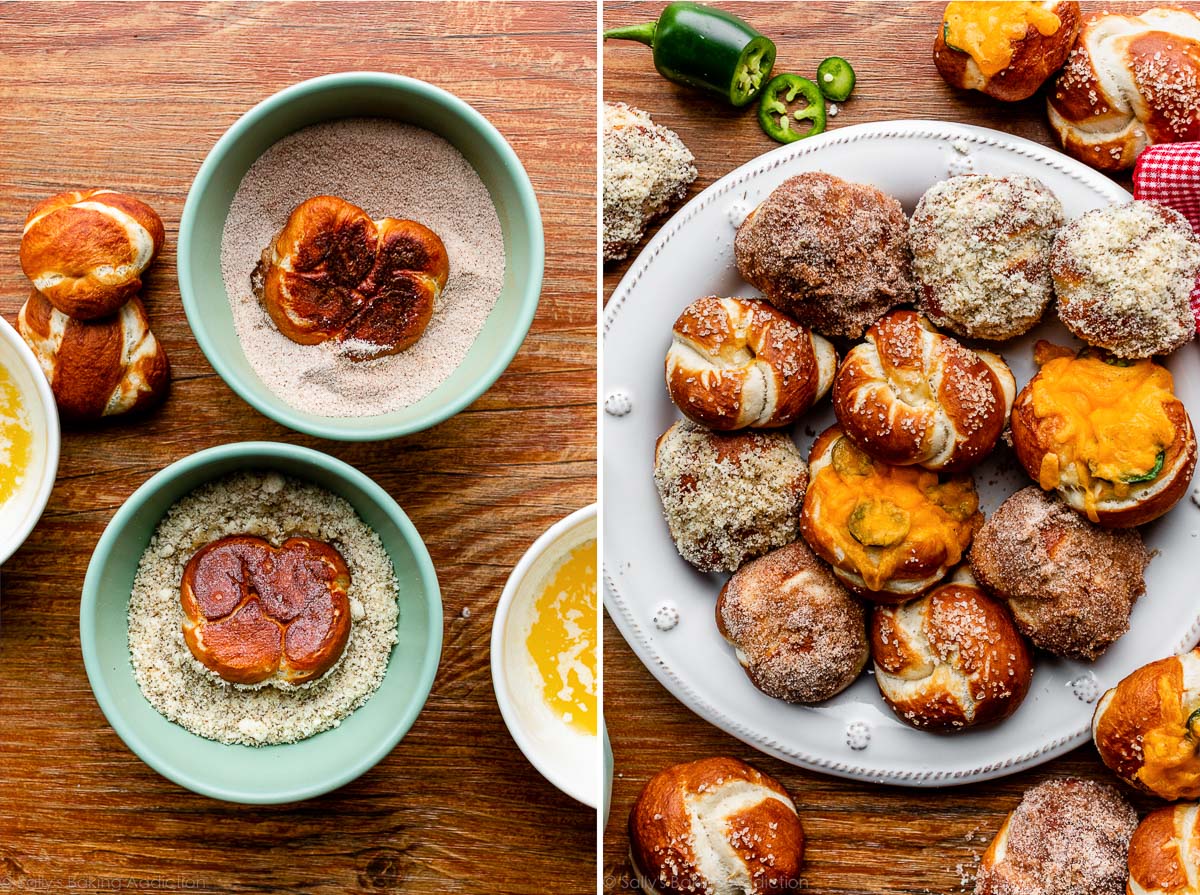
- Cinnamon Sugar: Bake the pretzels completely plain without salt. Once done and still warm out of the oven, brush with melted butter then dip into a mix of cinnamon and granulated sugar.
- Garlic Parmesan: Bake the pretzels completely plain without salt. Once done and still warm out of the oven, brush with melted butter then dip into a mix of grated parmesan cheese, garlic powder, salt, and Italian Seasoning. Italian Seasoning is a store-bought item, but you can make your own homemade Italian seasoning. You need 1 and 1/2 teaspoons.
- Jalapeño Cheddar: When the pretzels are still wet from the baking soda bath, sprinkle with coarse salt as if you were making plain salted pretzels. Just like when you make regular jalapeño cheddar pretzels, arrange 2-3 thin slices of jalapeño on top and bake for 15 minutes. Remove from the oven, sprinkle with cheddar cheese, then return the oven to finish baking.
Detailed instructions for these toppings are available in the recipe Notes below. I bet you could have fun with even more toppings such as everything bagels seasoning instead of coarse salt. Heavily sprinkle on the pretzels while they’re still wet from the baking soda bath before baking.
Make-Ahead Tip
If you are making pretzel knots in advance, do not top them with coarse salt before baking. The salt draws the moisture out of the pretzels, and once you’ve placed the baked and cooled pretzel knots in an airtight container or bag, it doesn’t take long before you’ll notice water droplets forming inside and the pretzel knots become soggy and wrinkled. Yuck!
If you won’t be serving the pretzel knots the same day you bake them, omit the salt-topping step. Bake as directed, then allow to cool completely before placing them in an airtight container, and store at room temperature. When you are ready to serve them, place the pretzel knots on a baking sheet and brush them lightly with water, then sprinkle with coarse salt. Bake them in a 350°F (177°C) oven for 5–10 minutes, or until warmed through.
Same goes for freezing soft pretzel knots: wait to top with salt until you’re ready to serve them. Cool the unsalted baked pretzel knots completely, then freeze in an airtight freezer-safe container or zip-top bag for up to 3 months. To reheat, brush frozen pretzel knots (no need to thaw) with water and sprinkle with coarse salt, then bake at 350°F (177°C) for 20 minutes or until warmed through.
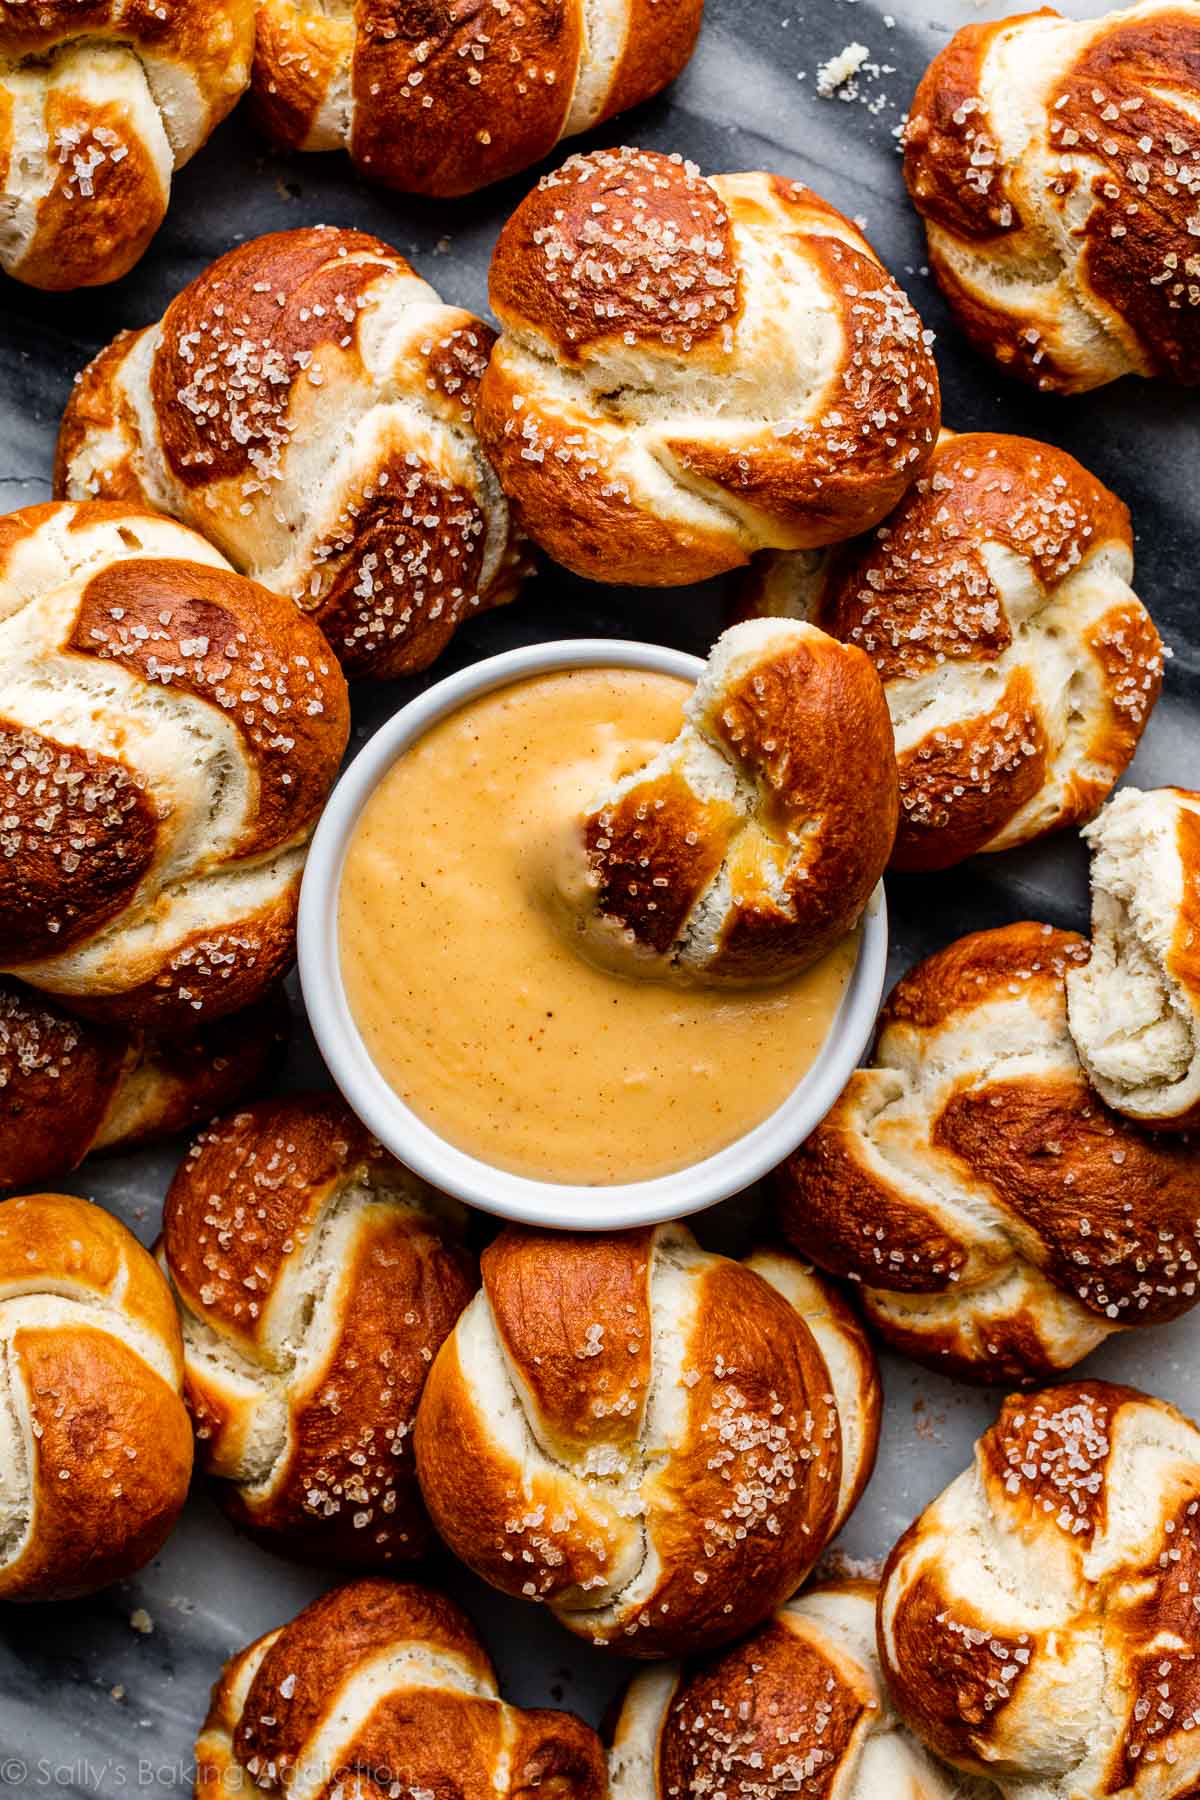
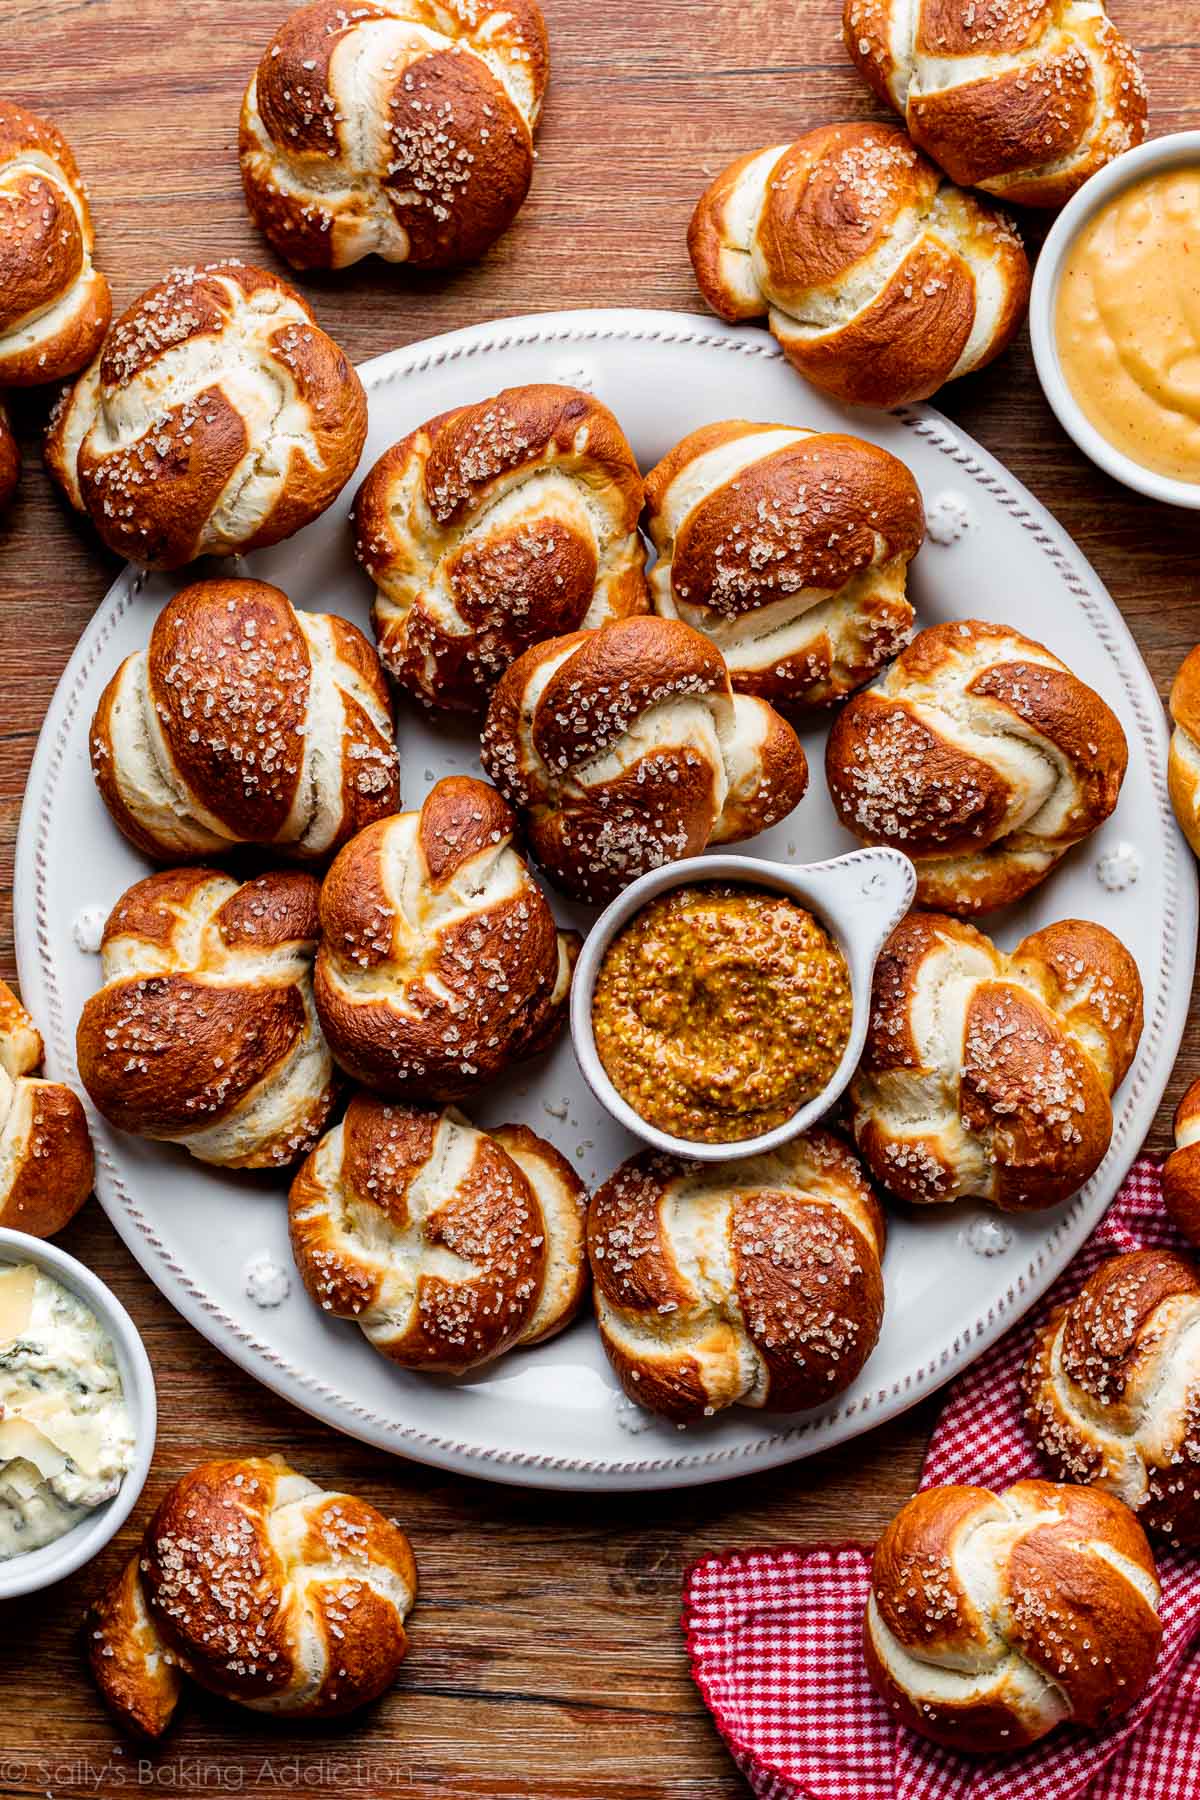
Great for Dipping & Soaking Up Sauce
The knot shape yields a doughier pretzel than the traditional soft pretzel shape, so they require longer in the oven. And because they have more interior, pretzel knots are perfect for dipping and soaking up sauce. Serve with:
- Tomato Sauce (great with the garlic parmesan pretzels)
- Garlic & Bacon Spinach Dip (tasty with the salted pretzels)
- Spicy Nacho Cheese Sauce (pictured above and delicious with the jalapeño cheddar or salted pretzels)
- Pepperoni Pizza Dip (wonderful with the garlic parmesan or salted pretzels)
- Stone Ground Mustard (always great with salted pretzels)
- Homemade Pesto (try with the garlic parmesan or salted pretzels)
- Maryland-Style Crab Dip (love this with salted pretzels)
I always serve cinnamon sugar pretzels plain, but you could try vanilla icing if you wanted to serve them with a dip. Lots of options here, so have fun!
See Your Soft Pretzel Knots!
Many readers tried this recipe as part of a baking challenge! Feel free to email or share your recipe photos with us on social media. 🙂
Print
Soft Pretzel Knots
- Prep Time: 35 minutes
- Cook Time: 22 minutes
- Total Time: 1 hour
- Yield: 14-15 knots
- Category: Snack
- Method: Baking
- Cuisine: American
Description
These soft pretzel knots are exactly like regular homemade soft pretzels, but shaped and tied like garlic knots. There’s more compact surface area, which means there’s more room for toppings such as cinnamon sugar, garlic parmesan, or jalapeño cheddar. Review recipe notes and watch the video tutorial before starting.
Ingredients
- 1 and 1/2 cups (360ml) warm water (lukewarm around 100°F (38°C))
- 2 and 1/4 teaspoons (7g) instant or active dry yeast (1 standard packet)
- 1 Tablespoon brown sugar or granulated sugar
- 1 teaspoon salt
- 1 Tablespoon (14g) unsalted butter, melted and slightly cooled
- 3 and 3/4 – 4 cups (469-500g) all-purpose flour (spooned & leveled), plus more for hands and work surface
- toppings: coarse salt/coarse sea salt or toppings described in notes
Baking Soda Bath
- 1/2 cup (120g) baking soda
- 9 cups (2.13L) water
Instructions
- Make the dough: Whisk warm water, yeast, and sugar together in the bowl of your stand mixer fitted with a paddle or dough hook attachment. (If you do not have a stand mixer, just use a regular large mixing bowl and a wooden spoon or silicone spatula.) Cover yeast mixture and allow to sit for 5 minutes or until foamy on top. Add salt, melted butter, and 3 cups (375g) of flour. Beat on low speed for 1 minute, scrape down the sides of the bowl with a rubber spatula if needed, then add 3/4 cup (95g) of flour. Beat on low speed until the dough comes together and pulls away from the sides of the bowl, about 2 minutes. If dough is extremely sticky after 1 minute of mixing, add remaining 1/4 cup of flour and continue to beat for 1 more minute. (You can see in the video that I add the remaining flour.)
- Knead the dough: Keep the dough in the mixer (and switch to the dough hook if using the paddle) and beat for an additional 5 full minutes, or knead by hand on a lightly floured surface for 5 full minutes. (If you’re new to bread-baking, my How to Knead Dough video tutorial can help here.) If the dough becomes too sticky during the kneading process, sprinkle 1 teaspoon of flour at a time on the dough or on the work surface/in the bowl to make a soft, slightly tacky dough. Do not add more flour than you need because you do not want a dry dough. After kneading, the dough should still feel a little soft. Poke it with your finger—if it slowly bounces back, your dough is ready to rise. You can also do a “windowpane test” to see if your dough has been kneaded long enough: tear off a small (roughly golfball-size) piece of dough and gently stretch it out until it’s thin enough for light to pass through it. Hold it up to a window or light. Does light pass through the stretched dough without the dough tearing first? If so, your dough has been kneaded long enough and is ready to rise. If not, keep kneading until it passes the windowpane test.
- Cover lightly with a towel and allow to rest for 10-30 minutes. (Meanwhile, I like to get the water + baking soda boiling as instructed in step 5.)
- Preheat oven to 400°F (204°C). Line 2 baking sheets with parchment paper or silicone baking mats. Silicone baking mats are highly recommended over parchment paper. If using parchment paper, lightly spray with nonstick spray or grease with butter. Set aside.
- Shape: With a sharp knife, pizza cutter, or bench scraper, cut dough into 14-15 pieces, which is about 1/4 cup (2 ounces) of dough each. Sprinkle work surface very lightly with flour. (Tip: The heavier you flour the work surface, the harder it is to roll the dough. A little stickiness actually helps. You only need *a very light* dusting of flour.) Roll each piece of dough into a 14-inch rope. Tie the ropes into a knot, then tuck the ends underneath. The ends are quite long so rather than tucking the ends straight underneath, I curve them around the pretzel before tucking under. You can see that in the video below.
- Baking Soda Bath: Mix water and baking soda together in a large pot. Bring to a boil. Place 2-3 pretzels into the boiling water for 20-30 seconds, flipping halfway through. (Any longer than 30 seconds and your pretzels could take on a metallic taste.) The knot shape makes the dough heavy, so if the pretzel knots are sinking, use a spatula to get them off the bottom of the pot. Using a slotted spatula or spoon, lift the pretzel knots out of the water and allow as much of the excess water to drip off. Place pretzel knots onto prepared baking sheets. Sprinkle each with coarse sea salt while each are still wet or leave plain if using other toppings detailed in the notes below (you still need to salt them if doing the jalapeño cheddar pretzels). Repeat baking soda bath with remaining pretzel knots. If needed, you can cover and refrigerate the boiled/unbaked pretzels for up to 24 hours before baking.
- Bake for 20-24 minutes or until golden brown. I usually bake mine for the full 24 minutes to obtain a very deep color as pictured.
- Remove from the oven and serve warm.
- Cover and store leftover pretzels at room temperature for up to 3 days. They lose a little softness over time. To reheat, microwave for a few seconds or bake at 350°F (177°C) for 5 minutes.
Notes
- Make Ahead & Freezing Instructions: If planning to freeze baked pretzel knots, do not top them with coarse salt before baking. Cool completely, then freeze in an airtight freezer-safe container or zip-top bag for up to 3 months. To reheat, brush frozen pretzel knots (no need to thaw) with water and sprinkle with coarse salt, then bake at 350°F (177°C) for 20 minutes or until warmed through, or microwave frozen knots until warm. The prepared pretzel dough can be covered and refrigerated for up to one day or frozen in an airtight container for 2–3 months. Thaw frozen dough in the refrigerator overnight. Refrigerated dough can be shaped into pretzel knots while still cold, but allow some extra time, about 1 hour, for the pretzel knots to puff up before continuing with the baking soda bath and baking.
- Special Tools (affiliate links): Stand Mixer or Large Glass Mixing Bowl | Rubber Spatula | Baking Sheets | Silicone Baking Mats or Parchment Paper | Sharp Knife, Pizza Cutter, or Bench Scraper | Large Pot, such as a Dutch Oven | Metal Slotted Spatula | Coarse Salt
- Flour: If you have it, the same amount of bread flour works instead of all-purpose flour. Do not use whole wheat flour.
- Cinnamon Sugar: Bake the pretzels completely plain without salt in step 7. As the pretzel knots bake, melt 4 Tablespoons (60g) unsalted butter. Set aside. Combine 3/4 cup (150g) granulated sugar and 1 and 1/2 teaspoons ground cinnamon. Set aside. Once the pretzels are done and still warm out of the oven, brush each with melted butter then generously dip into cinnamon sugar. Cinnamon sugar pretzel knots are best served that day because the melted butter topping causes them to become soggy after a few hours.
- Garlic Parmesan: Bake the pretzels completely plain without salt in step 7. As the pretzel knots bake, melt 4 Tablespoons (60g) unsalted butter. Set aside. Combine 3/4 cup (about 68g) grated parmesan cheese, 2 teaspoons garlic powder, 1/4 teaspoon salt, and 1 and 1/2 teaspoons store-bought or homemade Italian Seasoning. Set aside. Once the pretzels are done and still warm out of the oven, brush each with melted butter then generously dip into parmesan garlic mixture. Garlic parmesan pretzel knots are best served that day because the melted butter topping causes them to become soggy after a few hours.
- Jalapeño Cheddar: When the pretzels are still wet from the baking soda bath, sprinkle with coarse salt as if you were making plain salted pretzels. Place 2–3 very thin slices of jalapeño on top of each, pressing them down to adhere as best they can. Bake for 15 minutes in step 7. Remove from the oven, use 1 cup (125g) shredded cheddar cheese and sprinkle each partially baked knot evenly with cheese, then return the knots to the oven to finish baking for the remaining time in step 7.


Reader Comments and Reviews
So easy to make and they were great! I used the garlic Parmesan topping with a Tuscany herb blend that I had in the cupboard.
Great!
So much fun with these and they were so easy! This was my 1st time using the dough hook on my KitchenAid. I baked for 22 minutes, then brushed with some melted butter while they were hot. I froze half the dough and now will do a batch with cinnamon sugar
next. I baked 8, and before I could return to get a pic, there were only 3 left!
This recipe was easy to follow and much easier that I thought it would be. The best part though was how delicious they were! Yum!!
These were amazing!! I’m 15, I made these and brought them out to my neighbors and they were a hit! The garlic parmesan topping was my personal favorite but we also tried jalapeño cheddar and plain. Thanks so much for the amazing recipe!
So yummy! Took me until the last pretzel to get the shape right . Next time I’ll kneed by hand so I can get a better feel on whether or not it needs extra flour. My dough was a bit sticky. I recommend the same for others.
Awesome recipe and so easy!
The family devoured all of the pretzel rolls in one sitting with cheese sauce and spicy mustard, but they were fantastic on their own!
This recipe worked perfectly for me! Usually scared of yeast recipes but I threw these together before NFL games got underway on Sunday and had no issues. Delicious!
My daughter and I baked these together and had such a good time. She loved when the shaped rolls puffed up in the water bath. I think the batch lasted around 5 minutes after they were baked and cool enough to touch. We will definitely make these again.
Better than Disney’s soft pretzels according to my kids! We dipped ours in soup, so good. Easy to make and even easier to eat! A WINNER!!!
This recipe was so easy to follow and produced delicious pretzels. I made salted, cinnamon sugar and garlic Parmesan. 24 minutes was a bit to long in my oven, so next time (yes, there will definitely be a next time) I’ll leave them in for about 2
Minutes less.
Fast, easy, and yummy! Served with warm queso dip
Made these with my granddaughter and knew it would be a fun project. I did not expect them to taste as good as they do. We made Sally’s cheese sauce to go with them and served to friends. They were a big hit!
We loved the recipe. Easy to follow, quick and yummy! I immediately made a second batch.
I made the typical pretzel/salt topping version of the today and loved it! The recipe was easy to follow and the pretzel knots were delicious! I also made the pepperoni dip and both recipes will be in my regular rotation! I will definitely be trying this recipe with the different topping options! Highly recommend!
These pretzels were amazing! Recipe was very easy to follow. I just topped them with sea salt and dipped in spicy mustard. Will definitely be making these again!
Thank you Sally – first time making pretzels and these tasted just perfect. I may have gone a bit overboard with sprinkling the salt as I needed to dust some off afterwards (I think my salt may have been too coarse) but besides that these were totally yummy!
Loved making this recipe. Very simple and tasted delicious!
Easy, delicious, and so fun to make!! Topped mine with some sea salt, and they were fantastic. I’ll have to try with cinnamon sugar next time.
Lovely recipe! Turned it into vegan by replacing butter with vegan one! Sprinkled a few with salt and others generously dipped in cinnamon sugar! Comforting on rainy day like today!
Did it once ! Redid triple the portion to freeze. Always good to have those ready to warm up in the oven.
So yummy! I struggled with getting the shape right but the flavor and texture made up for the misshapen knots! Paired them with the bacon garlic spinach dip!
I made these today & doubled it! Best. Decision. Ever. They were gobbled up before I could make the cheese sauce. I guess I’ll *have* to make them again tomorrow to try that combo out.
Easy recipe. Quick Bake. Highly recommend.
Wow are these delicious! The rise time isn’t long at all and the baking soda bath is super simple. I only used salt as a topping this time, but I will be trying others in the future!
I made the cinnamon pretzel knots. They were delicious! I did find the dough a little tricky to work with. It seemed pretty wet, so I added additional flour, but I think it also needed more kneading. However, that really only affected the appearance of the pretzel knots, not the taste, and they ended up covered in cinnamon anyway so it wasn’t that obvious. I will definitely make them again!
Very easy to make and tasty. I sort of messed up the shape but they still tasted delicious. I stuck with plain salt this round, definitely going to try garlic parmesan and other flavors next time.
Made these today as written. Super easy and delicious! Will definitely make again. Thanks for the challenge and great recipe!
I’m giving it 4 stars because it was easy (especially if you watched the video closely for how to tie the knot). However, I had to add a lot of extra flour because the dough was so wet. Maybe because I used the dough hook rather than the paddle (the instructions said you could use either). I left off the salt because I wanted to dip them in the cheese sauce (plus I have to watch my sodium intake). Everyone loved them. Not sure about how long they last because they were eaten the first day.
Hi Jill, thank you so much for giving this recipe a try! There are a lot of variables that go into the consistency of dough, even down to the weather and humidity in the air. There’s nothing wrong with adding just a little more flour to bring the dough into a less sticky and knead-able consistency.
These pretzels were delicious and very easy to make! We served them plain salt with spicy mustard and honey butter.
This recipe was so easy to follow. I made three different flavors: salted, Cinnamon sugar and Cardamom sugar. So good! My family is in love and my kids loved helping make this treat.