

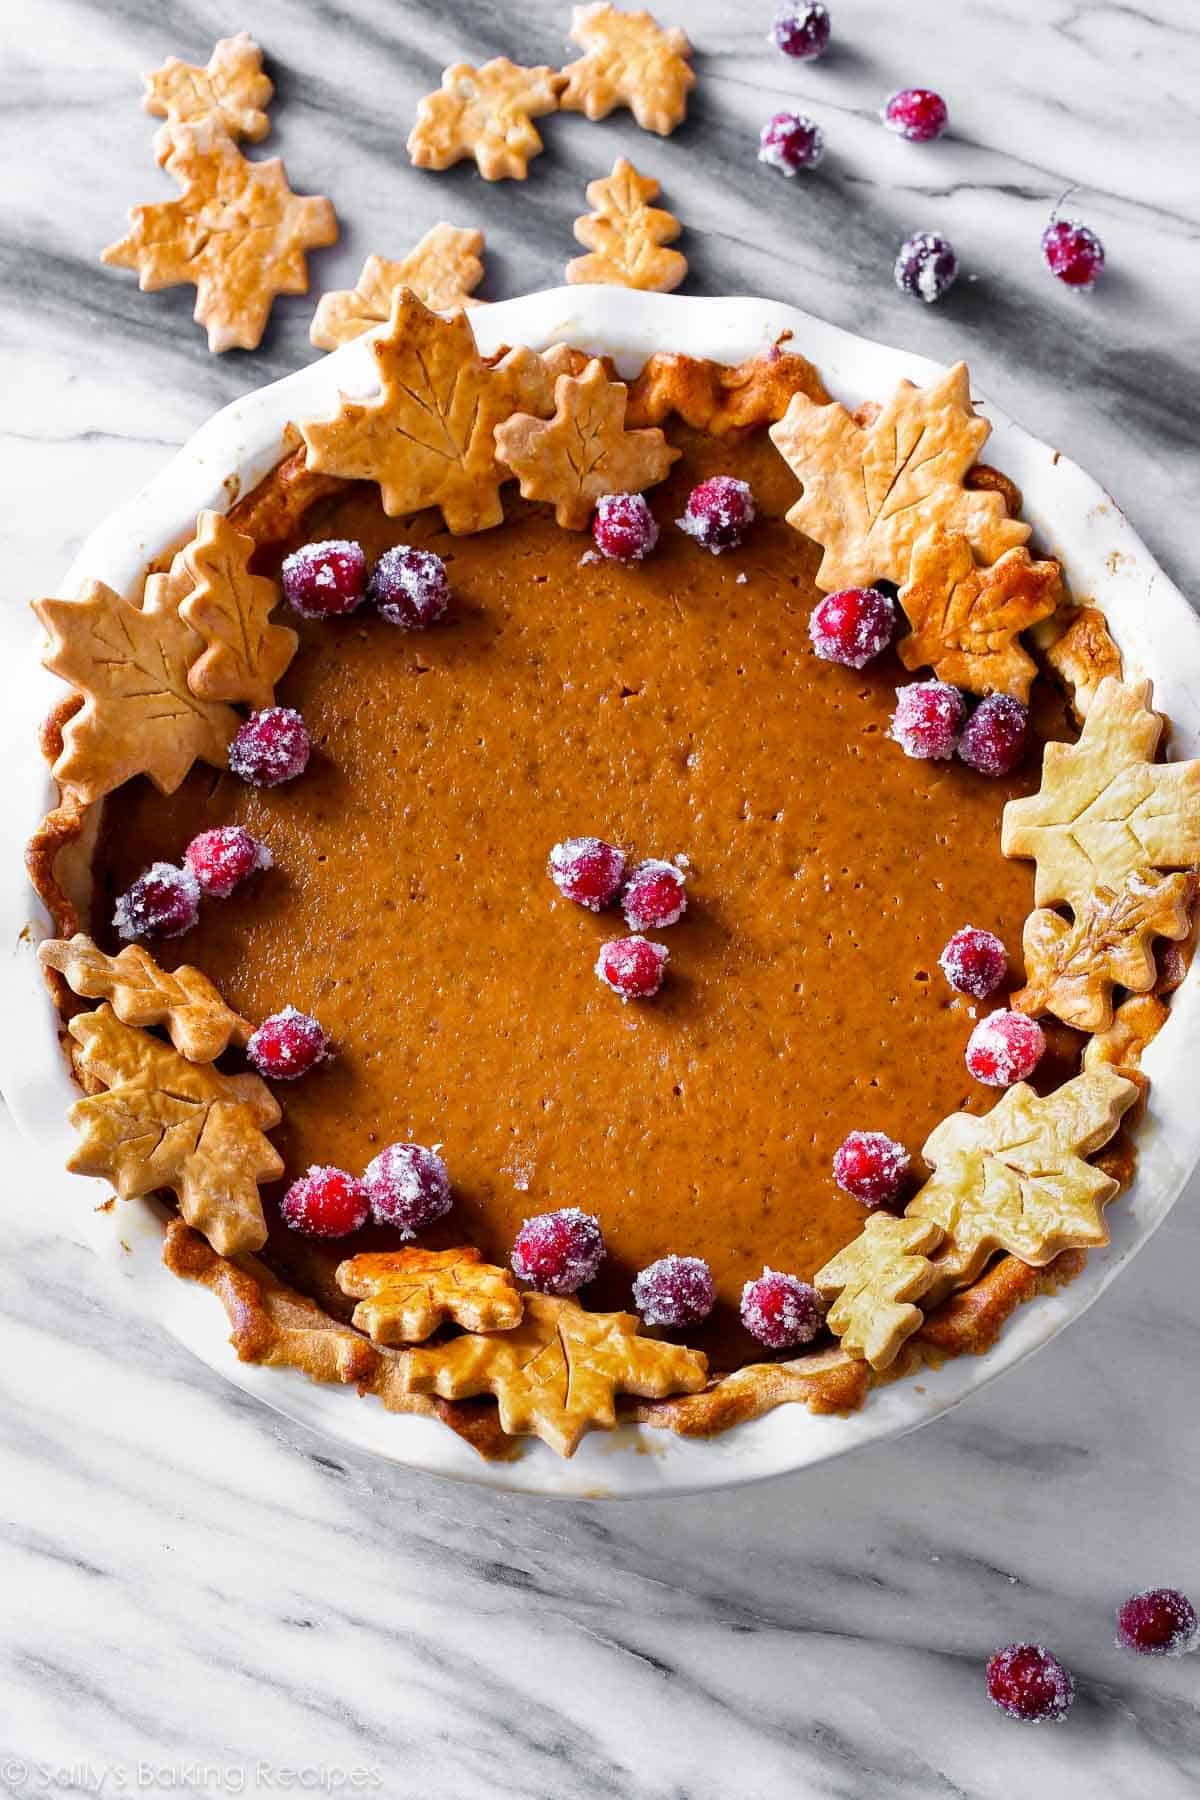
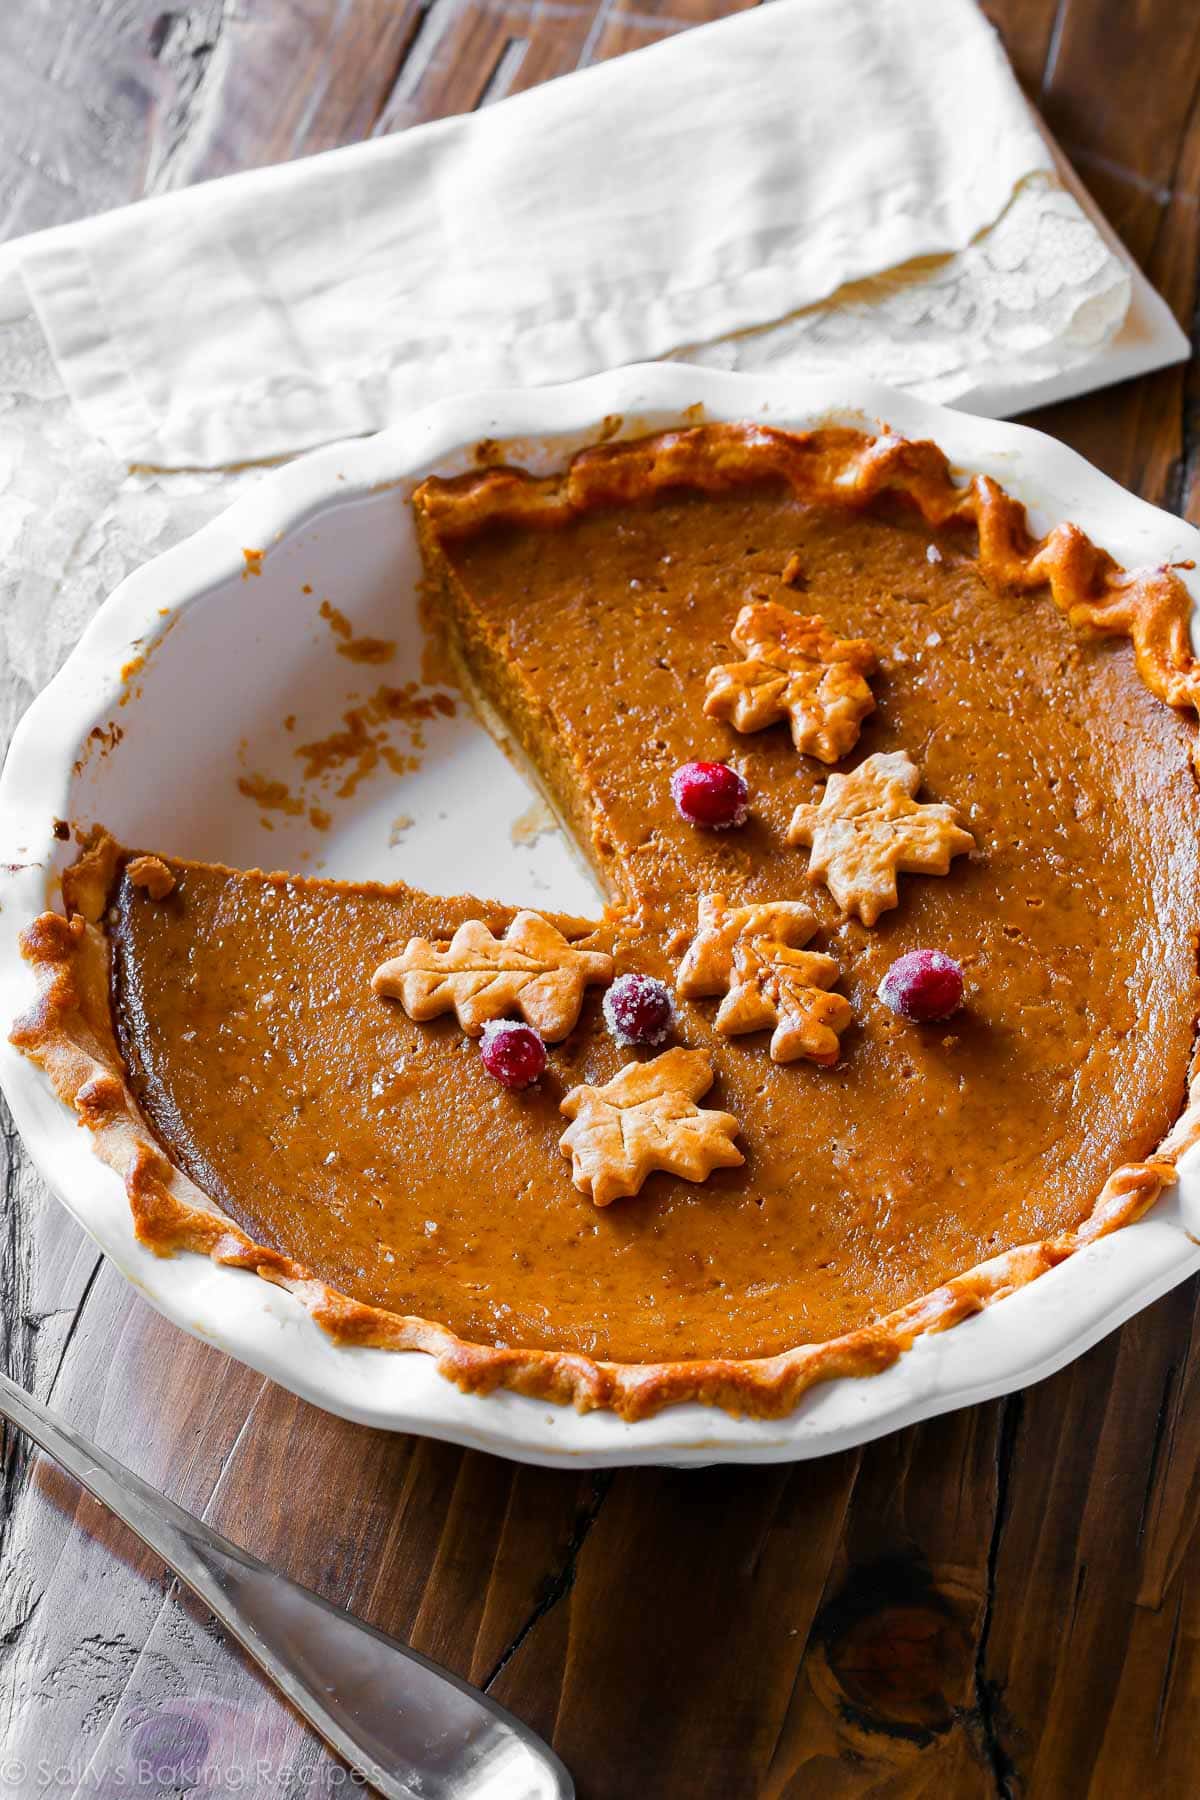
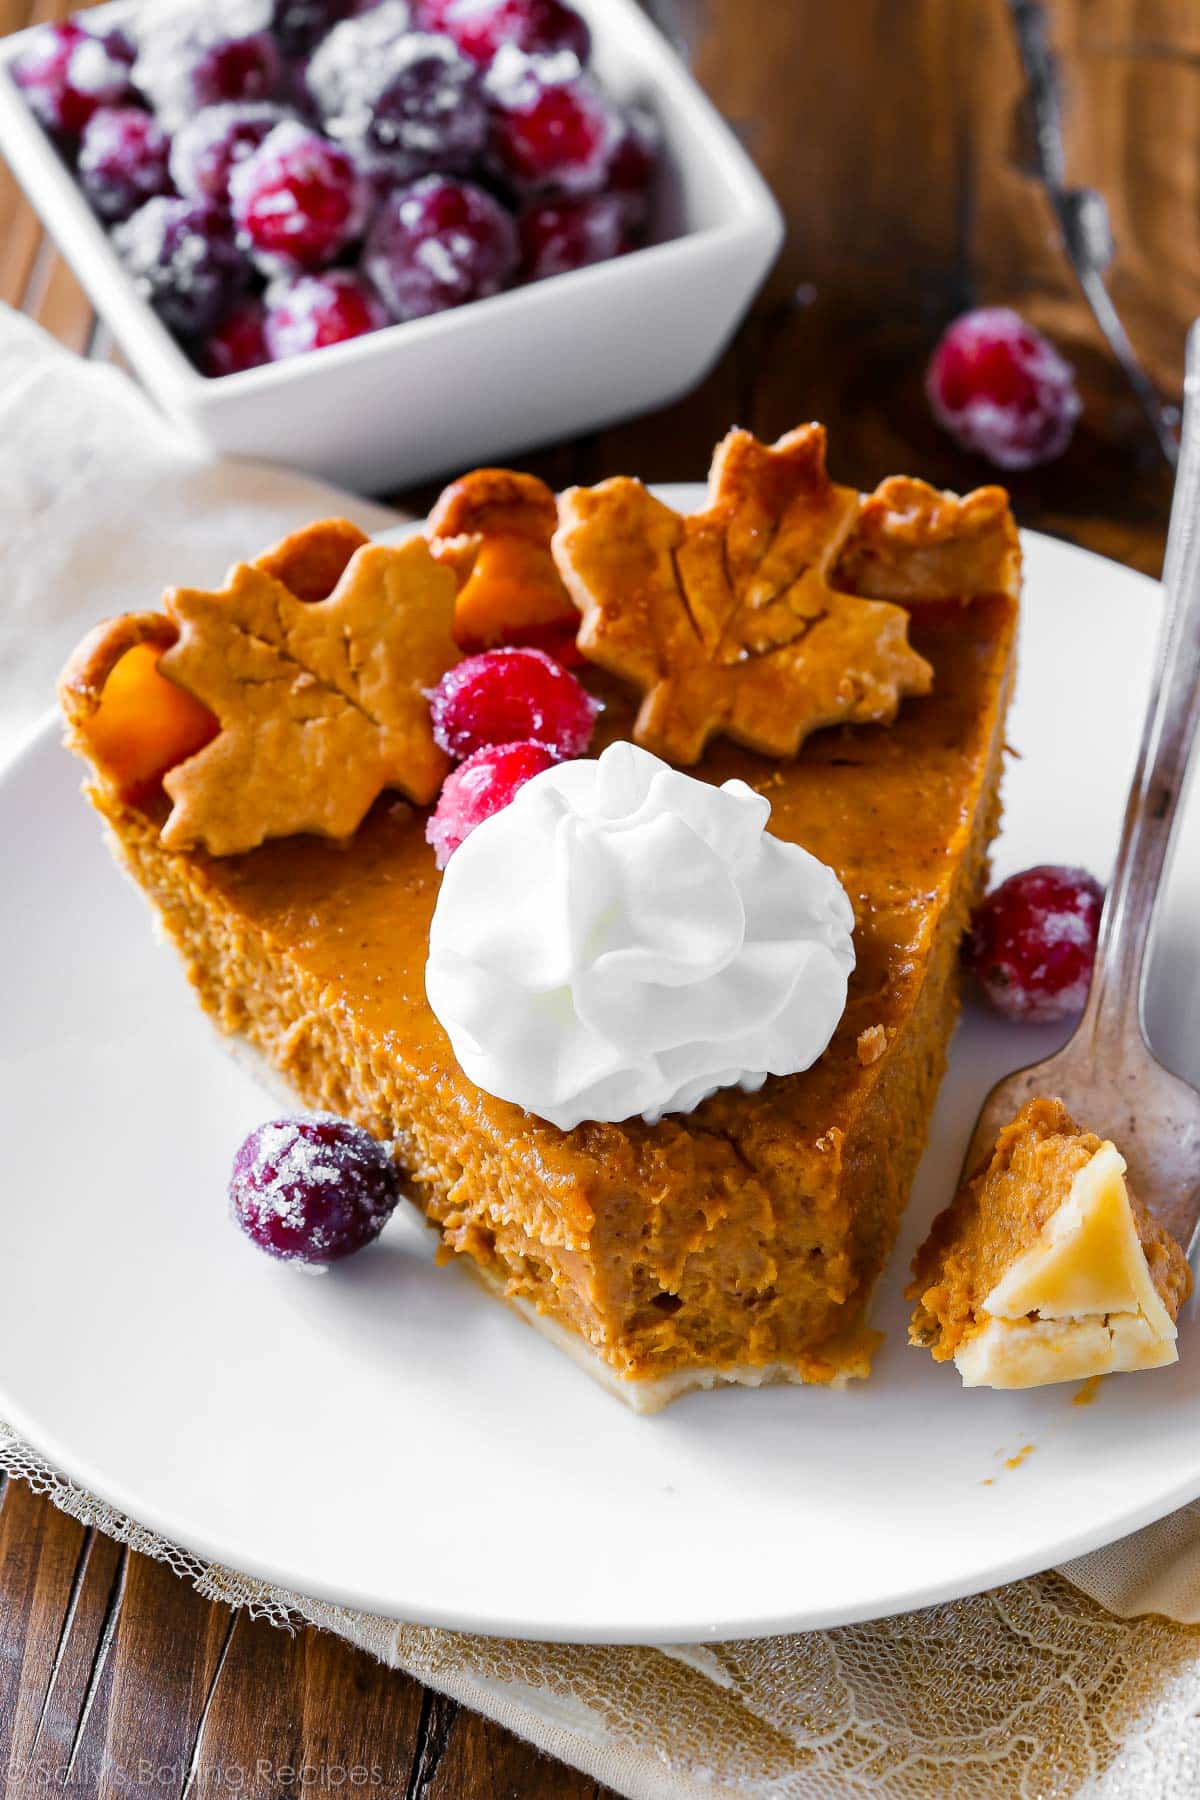
Bursting with flavor, this pumpkin pie recipe has been a personal and fan-favorite since I originally published the recipe in 2014. It’s rich, smooth, and tastes incredible on my homemade pie crust and served with sugared cranberries and whipped cream.

One reader, Denise, commented: “This might sound dramatic, but this is the best pumpkin pie I’ve ever had, like ever! Honestly, I was nervous because of the amount of spices… I was afraid of it being too ‘spicy’ but it’s perfect. The texture is smooth… but not mushy, there are so many different flavors happening at one time, it’s awesome! ★★★★★“
Pumpkin cookies, pumpkin bars, pumpkin lattes, pumpkin cupcakes, pumpkin bread, pumpkin smoothie, pumpkin cake, pumpkin Bundt cake, and so on. Pumpkin pie deserves a moment, and perhaps the biggest moment of all!
Developing a truly great pumpkin pie recipe is a lot more challenging than it seems. Should you use fresh pumpkin or canned? Brown sugar or white? Ginger or no ginger? Cornstarch, flour, both, or neither? Back in 2014, I tested nearly every possible iteration I could think of and came out with today’s recipe. Trust me, my pumpkin pie standards are high and I’m really happy to announce that this is THE great pumpkin pie.
The recipe below has become so popular that I decided to publish it in my New York Times best-selling (!!!) cookbook, Sally’s Baking 101. In that version, I very slightly scaled down the filling recipe to perfectly fit a standard (non deep dish) pie dish. The recipe today is the original version and excellent if you have a deep pie dish.
One reader, Ellie, commented: “I’ve made pumpkin pies for decades and none have been as good as this. The frosted cranberries and little pastry leaves were a superb addition. The homemade pie dough was amazing, too. We had some leftover filling and baked it in ramekins. Excellent all around. ★★★★★“
Pie Crust
Let’s start with the pie crust. Every pumpkin pie has to start with a stellar pie crust. My homemade pie crust uses a mix of shortening and butter so you get the most buttery tasting, tender, flaky (so flaky) pie crust. It’s easy to make. And I have a video tutorial and step-by-step photos in my pie crust recipe.
If you skip the leaf decorations on top, you’ll have a 2nd pie crust you can use to make leftover turkey pot pie, mini pecan pies, or even a simple pear tarte tatin! Or if you like extra thick pie crust, use some of your 2nd pie crust to make a decorative crimped or fluted edge. My how to crimp and flute pie crust tutorial will walk you through all the steps.
Fresh or Canned Pumpkin in Pumpkin Pie?
I tested this recipe with both and I truly liked the pie using canned pumpkin better. The canned pumpkin pumpkin pie (say that 3 times fast) was a little more sturdy when baked for the same amount of time. The pie baked with fresh pumpkin puree tasted grainy and a little… herbaceous? I prefer using fresh pumpkin puree in savory recipes, not desserts. This is your call, you can use either fresh or canned pumpkin.
Other Ingredients in Pumpkin Pie
- Eggs. Eggs set up the pumpkin pie filling. They give the filling its rich, luxurious texture.
- Heavy cream. Heavy cream makes pumpkin pie silky smooth. It’s thick, creamy, and absolutely heavenly in this pumpkin pie recipe. I use 1 cup of heavy cream and 1/4 cup of milk. I found that 1 and 1/4 cups of heavy cream (or more) was simply too much. Too thick, too gloppy! You can also use the heavy cream to make homemade whipped cream for the topping.
- Cornstarch. A starch thickener is one of the most important ingredients in a pie filling. I use a touch of cornstarch in my pumpkin pie because it helps set up the pie. Makes it a little sturdier and firm, while keeping everything smooth.
My Secret Ingredient
This sounds so incredibly weird, but I add freshly ground black pepper to my pumpkin pie filling. It’s bizarre, I know. But I’m being serious. I got this tip from the genius kitchen crew over at King Arthur Baking. And I am forever grateful. Because this little addition turns your pumpkin pie into the BEST pumpkin pie. No one will know it’s there except for you. And they will all be wondering what makes this spiced pie so good… it’s a pinch of pepper.
I actually add it to my homemade pumpkin pie spice blend, too! Feel free to replace the ginger, nutmeg, cloves, and black pepper below with my homemade spice. (Keep the cinnamon in the filling though!)
How to Avoid Cracks in Pumpkin Pie
Silky yet thick, this pumpkin pie cuts beautifully as long as it is baked for the right amount of time. The bake time is about 55-60 minutes. At this time, the center of the pumpkin pie will be slightly wobbly. It will set as it cools. Careful not to overcook; overcooking it will cause the filling to crack.
P.S.: For some fun twists on this classic, try this recipe as mini pumpkin pies, with a crunch topping on pecan praline pumpkin pie, or with extra spices in chai pumpkin meringue pie. You can also make pumpkin hand pies, pumpkin cheesecake pie, or pumpkin pie in a jar!
So from my kitchen to yours, enjoy The Great Pumpkin Pie Recipe. And if you’re looking for more inspiration for your dessert table, here are all of our favorite Thanksgiving pies and a list of 30+ best pumpkin dessert recipes.
Print
The Great Pumpkin Pie Recipe
- Prep Time: 45 minutes
- Cook Time: 1 hour, 5 minutes (includes blind bake)
- Total Time: 5 hours (includes cooling)
- Yield: serves 8-10; 1 cup sugared cranberries
- Category: Pie
- Method: Baking
- Cuisine: American
Description
Bursting with flavor, this pumpkin pie recipe is my very favorite. It’s rich, smooth, and tastes incredible on my homemade pie crust and served with whipped cream. The pie crust leaves are purely for decor, you can leave those off of the pie and only make 1 pie crust. You can also leave off the sugared cranberries.
Ingredients
Sugared Cranberries
- 1 cup (100g) fresh cranberries (do not use frozen)
- 3/4 cup (180ml) water
- 1 and 1/4 cups (250g) granulated sugar, divided
Pumpkin Pie
- Homemade Pie Dough (full recipe makes 2 crusts: 1 for bottom, 1 for leaf decor)
- egg wash: 1 large egg beaten with 1 Tablespoon milk
- one 15-ounce can (425g) pumpkin puree*
- 3 large eggs
- 1 and 1/4 cups (250g) packed light or dark brown sugar
- 1 Tablespoon (8g) cornstarch
- 1/2 teaspoon salt
- 1 and 1/2 teaspoons ground cinnamon
- 1/2 teaspoon ground ginger*
- 1/4 teaspoon ground or freshly grated nutmeg*
- 1/8 teaspoon ground cloves*
- 1/8 teaspoon fresh ground black pepper
- 1 cup (240ml) heavy cream
- 1/4 cup (60ml) milk
Instructions
- If garnishing with sugared cranberries, make those first: If you want to decorate the pie with sugared cranberries, start them the night before because they need to sit for several hours. Place cranberries in a large heatproof bowl. Set aside. In a medium saucepan set over medium heat, bring the water and 3/4 cup (150g) of sugar to a simmer, whisking until the sugar has dissolved. Remove the pan from heat and allow to cool for 5 minutes. Pour the sugar syrup over the cranberries and stir. Cover the bowl and set aside for 15 minutes. Line a baking sheet with parchment paper or a silicone baking mat. Using a slotted spoon, transfer the cranberries from the sugar syrup and place them on the prepared baking sheet. Allow to dry, uncovered, for 1 hour. Pour remaining 1/2 cup (100g) sugar into a large bowl. Toss the cranberries in the sugar, coating them all the way around. Place on a parchment paper- or silicone baking mat-lined baking sheet and let them dry uncovered for at least 1 hour at room temperature or in the refrigerator. Cover tightly and store in the refrigerator for up to 3 days. For more uses, see how to make sugared cranberries.
- Make the pie crust through step 5 according to my directions and video tutorial in my pie crust recipe. Or use your favorite pie dough or store-bought.
- Preheat oven to 375°F (190°C).
- Roll out the chilled pie crust: Remove 1 disc of pie dough from the refrigerator. On a lightly floured work surface, roll the dough out into a 12-inch circle. Make sure to turn the dough about a quarter turn after every few rolls. Carefully place the dough into a 9×2-inch deep dish pie dish (this is the one I use; it is 1.75-inches deep). Tuck it in with your fingers, making sure it’s tightly pressed into the pie dish. Fold any dough overhang back into the dish to form a thick rim around the edges. Crimp the edges with a fork or flute the edges with your fingers. Review my how to crimp and flute pie crust tutorial if you need extra help with this step. Brush edges lightly with egg wash mixture.
- Par-bake the crust: Line the pie crust with parchment paper. Crunching up the parchment paper is helpful so that you can easily shape it into the crust. Fill with pie weights or dried beans. (Note that you will need at least 2 standard sets of pie weights to fit.) Make sure the weights/beans are evenly distributed around the pie dish. Par-bake the crust for 10 minutes. Carefully remove the parchment paper/pie weights. Prick the bottom of the crust all over with a fork to create steam vents and return crust (without weights) to the oven for 7-8 more minutes or until the bottom is *just* starting to brown. (Review this how to par-bake pie crust page if you need extra help with this par-baking step.)
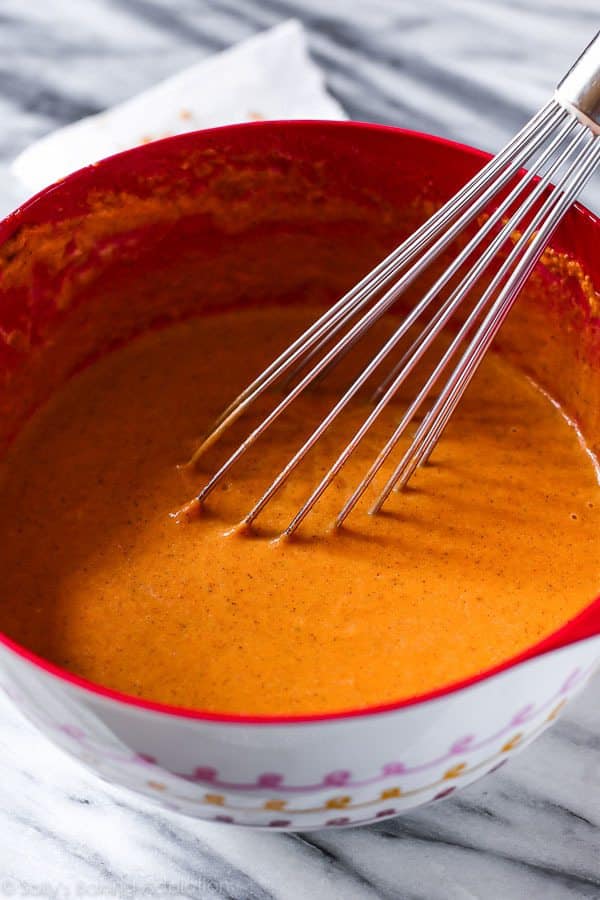
- Make the pumpkin pie filling: Whisk the pumpkin, 3 eggs, and brown sugar together until combined. Add the cornstarch, salt, cinnamon, ginger, nutmeg, cloves, pepper, heavy cream, and milk. Vigorously whisk until everything is combined.
- Pour pumpkin pie filling into the warm crust. Only fill the crust about 3/4 of the way up. (If using a deep dish pie dish as instructed, you should only have a little filling leftover. Use extra to make mini pies with leftover pie dough scraps if you’d like.) Bake the pie until the center is almost set, about 55-60 minutes give or take. A small part of the center will be wobbly—that’s ok. After 25 minutes of baking, be sure to cover the edges of the crust with aluminum foil or use a pie crust shield to prevent the edges from getting too brown. Check for doneness at minute 50, and then 55, and then 60, etc.
- Once done, transfer the pie to a wire rack and allow to cool completely for at least 3 hours before garnishing and serving.
- Decorate with sugared cranberries and pie crust leaves (see note). You’ll definitely have leftover cranberries… they’re tasty for snacking. Serve pie with whipped cream if desired.
- Cover leftovers tightly and store in the refrigerator for up to 5 days.
Notes
- Make Ahead & Freezing Instructions: Pumpkin pie freezes well, up to 3 months. Thaw overnight in the refrigerator before serving. Pie crust dough freezes well for up to 3 months. Thaw overnight in the refrigerator before using. If decorating your pie with sugared cranberries, start them the night before. You’ll also begin the pie crust the night before as well (the dough needs at least 2 hours to chill; overnight is best). The filling can be made the night before as well. In fact, I prefer it that way. It gives the spices, pumpkin, and brown sugar flavors a chance to infuse and blend. It’s awesome. Cover and refrigerate overnight. No need to bring to room temperature before baking.
- Special Tools (affiliate links): Glass Mixing Bowls | Saucepan | Baking Sheet | Silicone Baking Mat or Parchment Paper | Rolling Pin | 9-inch Pie Dish | Pastry Brush | Pie Weights | Whisk | Pie Crust Shield | Cooling Rack | Fall Cookie Cutters
- Cranberries: Use fresh cranberries, not frozen. The sugar syrup doesn’t coat evenly on the frozen berries, leaving you with rather ugly and some very plain shriveled cranberries.
- Pumpkin: Canned pumpkin is best in this pumpkin pie recipe. I use and recommend Libby’s brand. If using fresh pumpkin puree, lightly blot it before adding to remove some moisture. The bake time may be longer.
- Spices: Instead of ground ginger, nutmeg, cloves, and pepper, you can use 1 teaspoon of pumpkin pie spice. Be sure to still add 1 and 1/2 teaspoons of cinnamon.
- Pie Crust: No matter if you’re using homemade crust or store-bought crust, pre-bake the crust. (Step 5.) You can use graham cracker crust if you’d like, but the slices may get a little messy. Pre-bake for 10 minutes just as you do with regular pie crust in this recipe. No need to use pie weights if using a cookie crust.
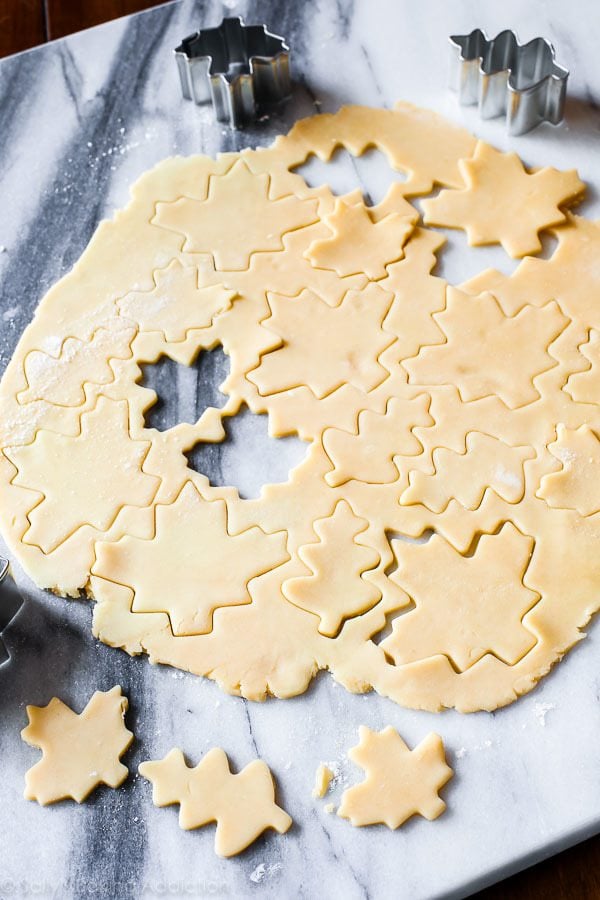
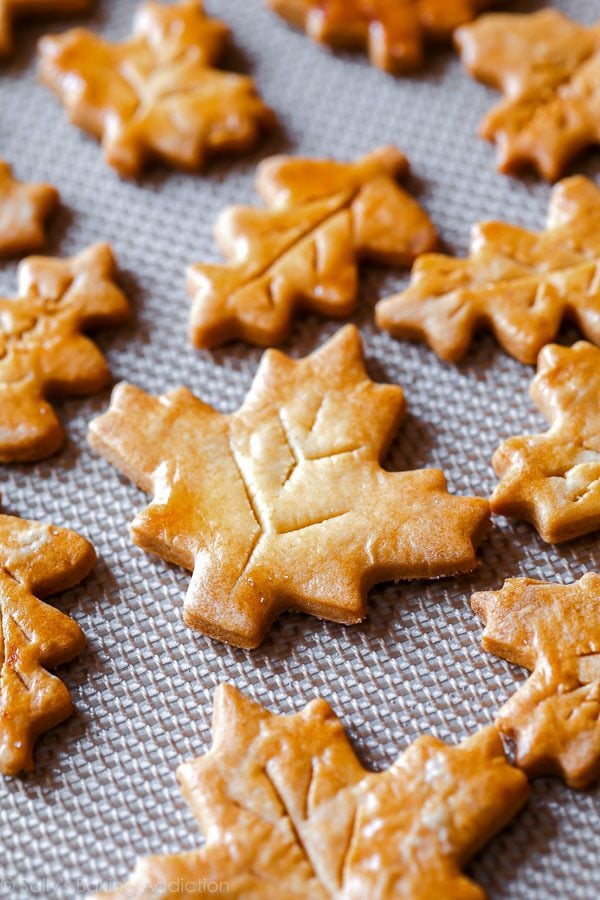
- Pie Crust Leaves: On a floured work surface, roll out one of the balls of chilled dough (keep the other one in the refrigerator). Roll out into any shape you really want (doesn’t matter) and 1/8 inch thickness. Using leaf cookie cutters, cut into shapes. Brush each lightly with the beaten egg + milk mixture. Cut leaf veins into leaves using a sharp knife, if desired. Place onto a parchment paper or silicone baking mat-lined baking sheet and bake at 350°F (177°C) for 10 minutes or until lightly browned. Remove and set aside to cool before decorating pie.
- Mini Pumpkin Pies: Many have asked about a mini version. Here are my mini pumpkin pies. They’re pretty easy—no blind baking the crust!
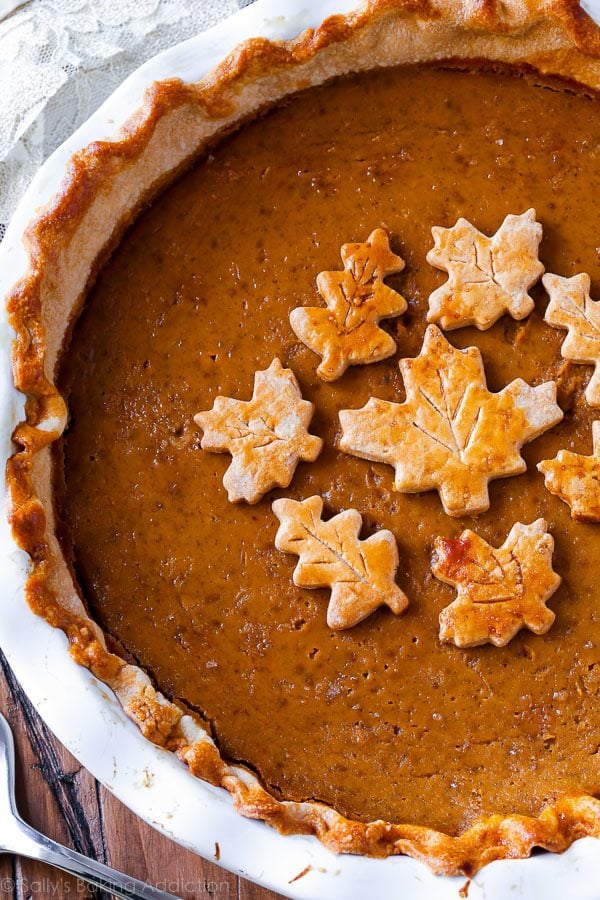
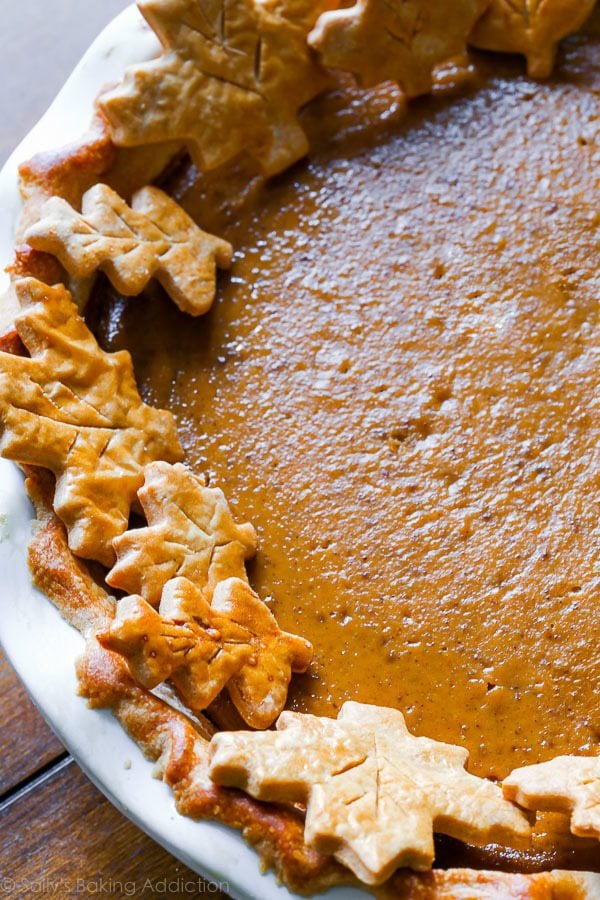
Pie Crust Leaves
My pie crust recipe makes enough for two crusts. So with the extra dough, you can make adorable leaves for decoration on your pumpkin pie. Or any pie, really. I’ve seen the pie crust leaves baked directly on top of the rim of the pie—and I tried that—but was not thrilled with the results. Too much uneven baking. The underside of the leaves weren’t really cooked through and the tops got a little burnt (even through my pie shield). So, to make things easier, just bake the pie crust leaves separately and place them on top of your pie before serving. You can also sprinkle them with a little cinnamon-sugar right before baking. I was going to do that, but I forgot.
My leaf cookie cutters (affiliate link) don’t have “veins” so I made leaf veins myself using a sharp paring knife. It’s tedious, but if you want authentic looking leaves you can go ahead. Don’t worry if your veins aren’t perfect. That’s a weird sentence.
My directions for the leaves are in the print-out recipe above.


Reader Comments and Reviews
This is very similar to the recipe I’ve used to years. People who say they hate pumpkin pie love it! It’s the heavy cream I think that makes the difference, as well as the addition of nutmeg. I hope everyone tries this out. They don’t be disappointed.
hiiii!! i just made this and it was SO GOOD. i was so nervous about making pie dough from scratch but your instructions were so helpful and it turned out perfect! the filling was also truly the best i’ve ever had. I do have some leftover filling though, as expected, and I did see your recommendation to make mini pies, but I probably won’t be making them right away – how long do you think I can keep the leftover filling in the fridge?
Hi!
Well I am about to make this recipe but I already have graham cracker pie crust… could I use that instead of making it from scratch?
Absolutely! See recipe note.
This may be a silly question and asked before, but if I make the pie filling the day before, do I need to let it get to room temperature before putting it in the crust and baking it the next day?
Hi Amy! It can be cold.
How long will the extra sugared cranberries stay fresh?
I’m starting this beautiful recipe today!! Doing all the advanced preps that you suggest. Thank you! But I suspect I’ll have a lot more cranberries than I need for the pie decoration.
Hi Cathee! There’s a lot of leftover cranberries, but they’re wonderful for eating or as garnish for other dishes too. Cover tightly and store for up to 3 days in the refrigerator.
Do you recommend a particular brand of canned pumpkin? I know that some are wetter than others.
I really love using Libby’s. See recipe note.
My pie crust melted when I pre baked it 🙁 I used all butter and let it sit in the fridge for 30 min before baking. What did I do wrong? Help ! Thank you!
Hi Camille! Try using more pie weights (I recommend at least 2 standard sets) and pushing them against the sides of the rim so that the crust doesn’t slide down and melt. Also, make sure you’re not adding too much water to the pie dough.
Hello,
I made this a few times and I must say it is THE BEST. My husband asked for it specifically. Thank you
We make this without the crust and it is still so delicious. I didn’t like pumpkin pie till my son made this one…
I made this for my family last night! Really loved the flavor! However, it cracked and sank a bit in the middle. I took it out at 50 minutes. Could I have underbaked it? I know it said it cracks when you overbake but I don’t know if that was the case?
Hi Leah, pumpkin pies can sink in the middle if they haven’t been baked long enough. It sounds like the pie baked a little unevenly if it also cracked on the edges. If you try the recipe again, see if you can tent the entire pie with aluminum foil after about 25 minutes of baking. Lowering the oven rack should help too.
Hi. I followed every step of this recipe. My crust burnt. I think it’s not advisable to pre bake for 10 minutes.
Thank you for trying this recipe. If you try it again, make sure that after 25 minutes of baking to cover the edges of the crust with aluminum foil or use a pie crust shield to prevent the edges from getting too brown.
I was tasked with making the dessert for my friend’s birthday dinner, and he wanted a pumpkin pie instead of a cake. I had never made one before (and I’m old) but your directions were the perfect guide as to what to do.
Hi Sally,
I have made this pie before and it was amazing! This time I’m making it for a friend, who can’t eat eggs. Any suggestions to replace the eggs with something else? Thank you!
Hi Christine, We are so happy you enjoyed this pie! We have not tested this recipe with an egg substitute but let us know if you try it!
In the photo, your pie dish appears to be a deep dish one? I have both regular 9 inch pie pans, and deep dish ones. Which do you recommend for your recipe? I haven’t made it yet, but plan to; and based on some of the comments, decided to clarify beforehand. Thanks!
Hi Margo, The pictured pie pan is between 1.5 – 2 inches deep. I hope this helps!
We were given a pie pumpkin. My daughter instantly wanted to make a pumpkin pie with it. So, we made it together this evening. It was fantastic. She was so proud to make a homemade pie.
Everyone agrees that this tastes very delicious! However, the crust turned out soggy in the center and crispy on the sides. I would prefer all the crust to be crispy throughout. I followed the recipe – prebaked the crust for 10 min with pie weights on parchment paper. The pie weights completely covered the bottom in one layer. What is an adjustment I can make to the prebaking to make a uniform, dry crust? For example – should I poke holes in the bottom and bake the crust for 10 min without any parchment paper or pie weights? Should prebake for 10 min as indicated, remove parchment paper / pie weights and bake an extra 10 min? What is your suggestion?
Hi TK, it may be helpful to partially blind bake the crust the same way I partially blind bake it for my chocolate pie. Doing just as you say– removing the weights and returning to the oven after pricking with a fork. See the chocolate pie for detailed instructions if you need them.
The ingredients for the filling don’t match a 9 inch tray. I had to DOUBLE the quantities. Also the crust, even if it’s pre-baked 10 min, still gets soggy and wet in the middle.
The result is a spongy fluffy pie, no consistency.
Hi Mistique, thanks for trying this pumpkin pie recipe. I’m concerned that you had to double the ingredients for 1 pie. This is more than enough volume to fit one 9-inch pie shell. Doubling the quantities without making baking adjustments would definitely leave a soggy crust and wet, spongey pie.
I made this with a gluten free crust and it came out perfectly! Now I’m trying it again with the leaves and cranberries. Would you recommend waiting until the last minute to decorate, or will the sugared cranberries be okay on the pie overnight? Thanks!
Hey! If I wanted to make only one pie, would I have to split ALL ingredients in half? Or only the pie crust?
Hi Gabby, this recipe yields 1 pie as written. Just split the pie dough ingredients in half or make the pie dough as written and freeze half.
I have a lot of extra filling. Could I use with a graham cracker crust for mini pies (kind of like mini-cheesecakes?) or will it not hold?
Hi CR, Yes! You can definitely use a graham cracker crust for the mini pies. This post on Mini Pumpkin Pies was just posted two days ago if you wish to read that.
I didn’t know pumpkin pie could taste this good! My entire family has always beent “meh” about pumpkin pie. That is until I tried this recipe. All three kids raved and had seconds. My husband told me to write down the recipe and store it in my permanent collection. BEST PUMPKIN PIE EVER!
Would I be able to substitute heavy cream for evaporated milk? If so, would I use the same amount, and should I add more cornstarch?
Hi Elsie, I don’t recommend it– best to stick with the written recipe. The pie filling is much thicker and creamier using cream/milk.
Have you ever done a ginger snap crust for this recipe?
Hi Annabel, You can use a gingersnap crust with this pie filling. Make sure you pre-bake the crust for 8-10 minutes.
I am planning to make this recipe this weekend, but with a top crust (with cutouts to look like a jack-o-lantern/Jack Skellington). Do I need to adjust the cooking time or baking temp to account for the top crust? Has anyone else tried making this as a double-crust pie? Thanks!
Hi Morgan, pumpkin pie isn’t ideal as a double crust pie. You can certainly try it but the filling is pretty wet and the top pie dough may sink down or simply not crisp up at all (remain a little wet where it touches the filling). You could bake the pie for about 15 minutes so it has a head start, then add your top pie dough decor. It may be easier to just bake the jack-o-lantern eyes, nose, and mouth separately like I do with the pie crust leaves and place them on top for presentation.
Hi Sally, can I use heavy whipping cream instead of heavy cream? I ran out of heavy cream:(
Yes you can, Stacey! As long as the word “heavy” is in the title, the names are often used interchangeably….heavy cream and heavy whipping cream both contain 36% milk fat.
I absolutely loved this recipe, i don’t even liked pumpkin after i tried it! But I have a question, all of your pie recipes are made in deep dish style pans? Because I have made several of them and I had to cut down by half them to not have leftover filling. With this recipe I was able to make one 9×1.25” pie and 7 mini pies.
The recipe is brilliant, but I am not, LOL. I never made a pie before, so the pie crust was certainly challenging. I followed the flaky pie crust recipe mentioned in the recipe above, but alas, I just couldn’t get it to come out right. Actually, the hard part was rolling out the dough. The dough seemed to start cracking as I rolled it out and then it got stuck to my baking mat, so getting it into the pie dish was near impossible. I basically had to scoop up all the pieces and just mold it into the pie dish. Then as I was baking the pie, the crust at the top was falling off and onto the bottom of my oven, LOL. The end result: a hot mess appearance-wise, but the sides and bottom of the crust came out really good, as did the filling. Is there any way a video for making the pie crust, including rolling it out and putting it into a dish can be made? I think that would be super helpful.
Hi Sally, I just tried this recipe and it was an absolute hit !!!! So much better than store bough pumpkin pie ! I tried the flaky butter pie crust but felt like it did not go well with this pie type or maybe I just did not bake it properly. Any tips on how to improve the crust?
Hi Isha! So glad you enjoyed this pumpkin pie recipe. What didn’t you like about the pie crust? Were you sure to pre-bake it?
I loved the recipe ! I was just wondering if I wanted to get the crust a little bit crunchier, should I just pre bake it a bit longer?
You can pre-bake it for a few extra minutes, yes!
I made this recipe last year and want to get a jump on my holiday baking. I seen where you can freeze the baked pie but what about the made filling? I’m not sure due to the eggs. Let me know! Your my go to for pie baking!
Hi Katherine, You can freeze the unbaked pie. Thaw in the refrigerator, then bake as directed.
Ok, so before today I had NEVER baked a pie completely from scratch. I decided to take the plunge this year, as our COVID-Canadian Thanksgiving was limited to our household (less pressure!)
It. Was. PERFECT.
The instructions were so clear and easy to follow. Dried beans work perfectly for pie weights. Tip: use a sandwich plate to cut out a circle to create a crust shield — it worked really well!
The crust was crisp and flaky throughout. The filling was perfectly spiced. Even my re-rolled dough leaves were delicious! 5 stars from everyone at the table; my toddler ate her entire piece like a slice of pizza.
Since lard is easy to come by around here, I might try this with all lard at some point.
One thing is for sure; pie crust doesn’t scare me anymore! I’ll be making homemade crust for ALL the pies now!
Thank you for a great recipe!