

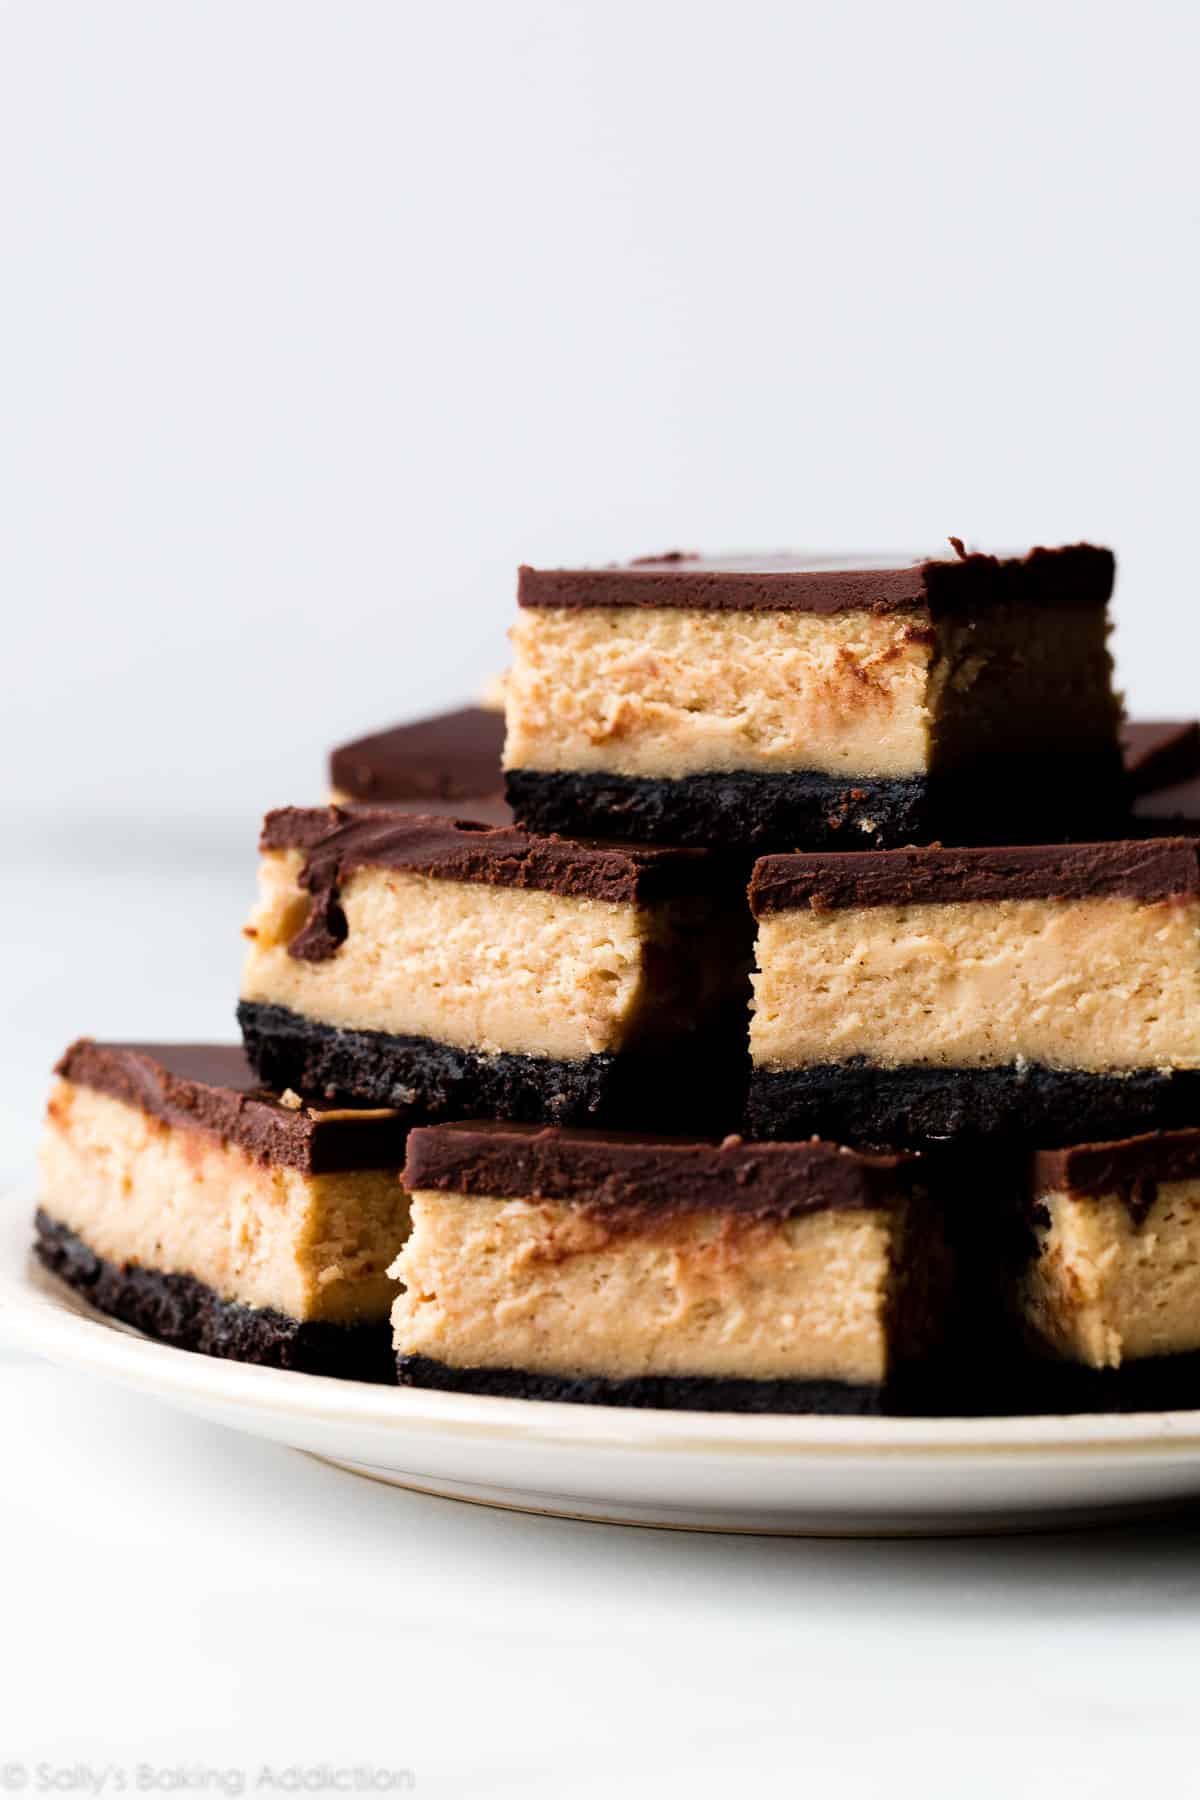
Seriously indulgent and creamy, these chocolate peanut butter cheesecake bars are like eating a peanut butter cup in cheesecake form. Quicker to bake and chill than a full cheesecake, these layered bars are the perfect choice when you need a crowd-pleasing dessert that’s also portable, easy to serve, and handheld.
I’m an author, food photographer, baker, and blogger. And as of today, I can add Cheesecake Ambassador to my list of professional titles too. 😉 This chocolate peanut butter cheesecake bars recipe is sponsored by PHILADELPHIA Cream Cheese, whose products I’ve long admired and trusted in my baking. I’m thrilled to show off their quality cream cheese today and, as always, all opinions are 100% my own. (You know I never steer you wrong!)
Today I’m breaking down the barrier to making real cheesecake, showing you that it’s not only delicious, but approachable for all home bakers. A little more special than a batch of cookies and not nearly as overwhelming as a tall layer cake, cheesecake bars are the perfect solution when you need a crowd-pleasing dessert without complicated ingredients.
After testing the recipe, I made them for girls night the other week. I chose this recipe because they’re really easy to prep ahead of time and are extra convenient for serving. No fork needed! Each person literally said these are the best dessert they’ve ever had.
(And they’ve tasted many of my creations! Total win!)
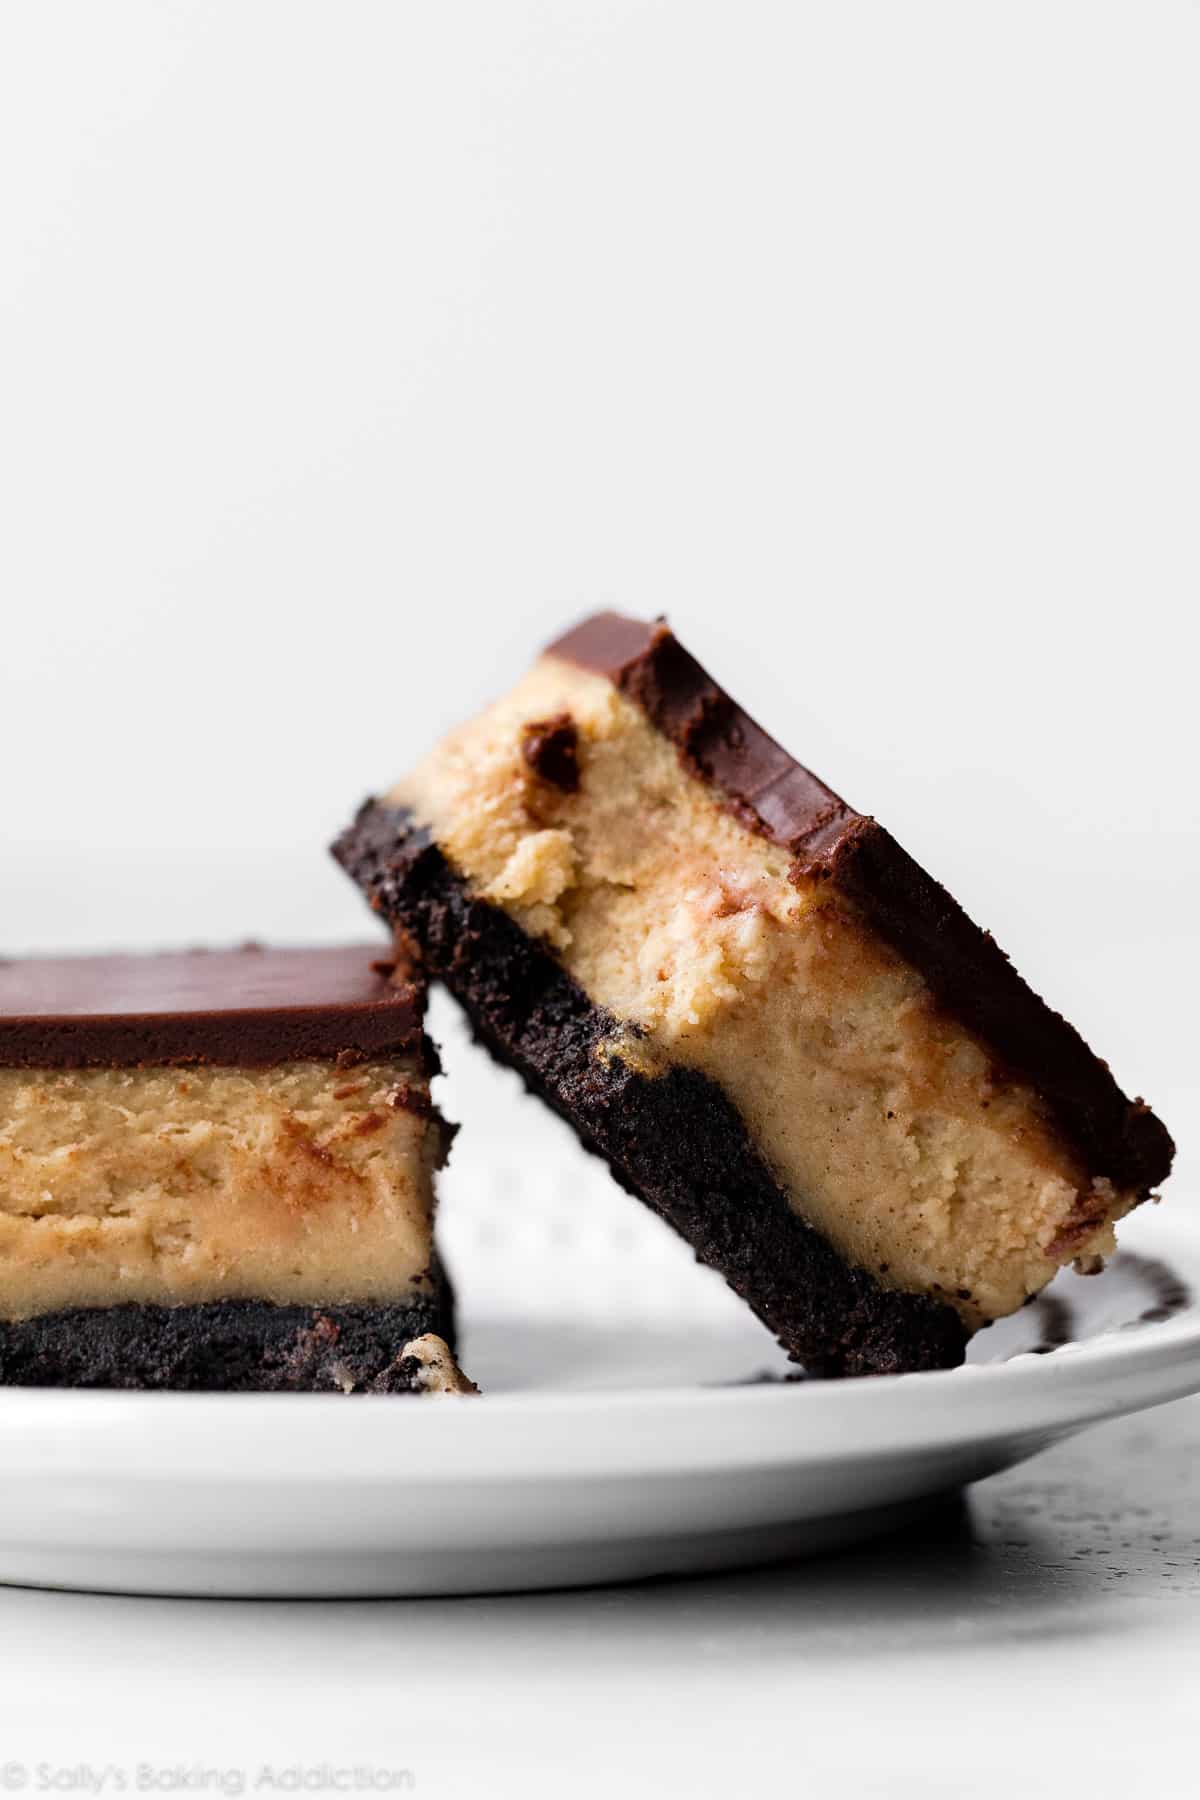
These Chocolate Peanut Butter Cheesecake Bars Are:
- Indulgently rich and creamy
- Like a peanut butter cup in cheesecake form
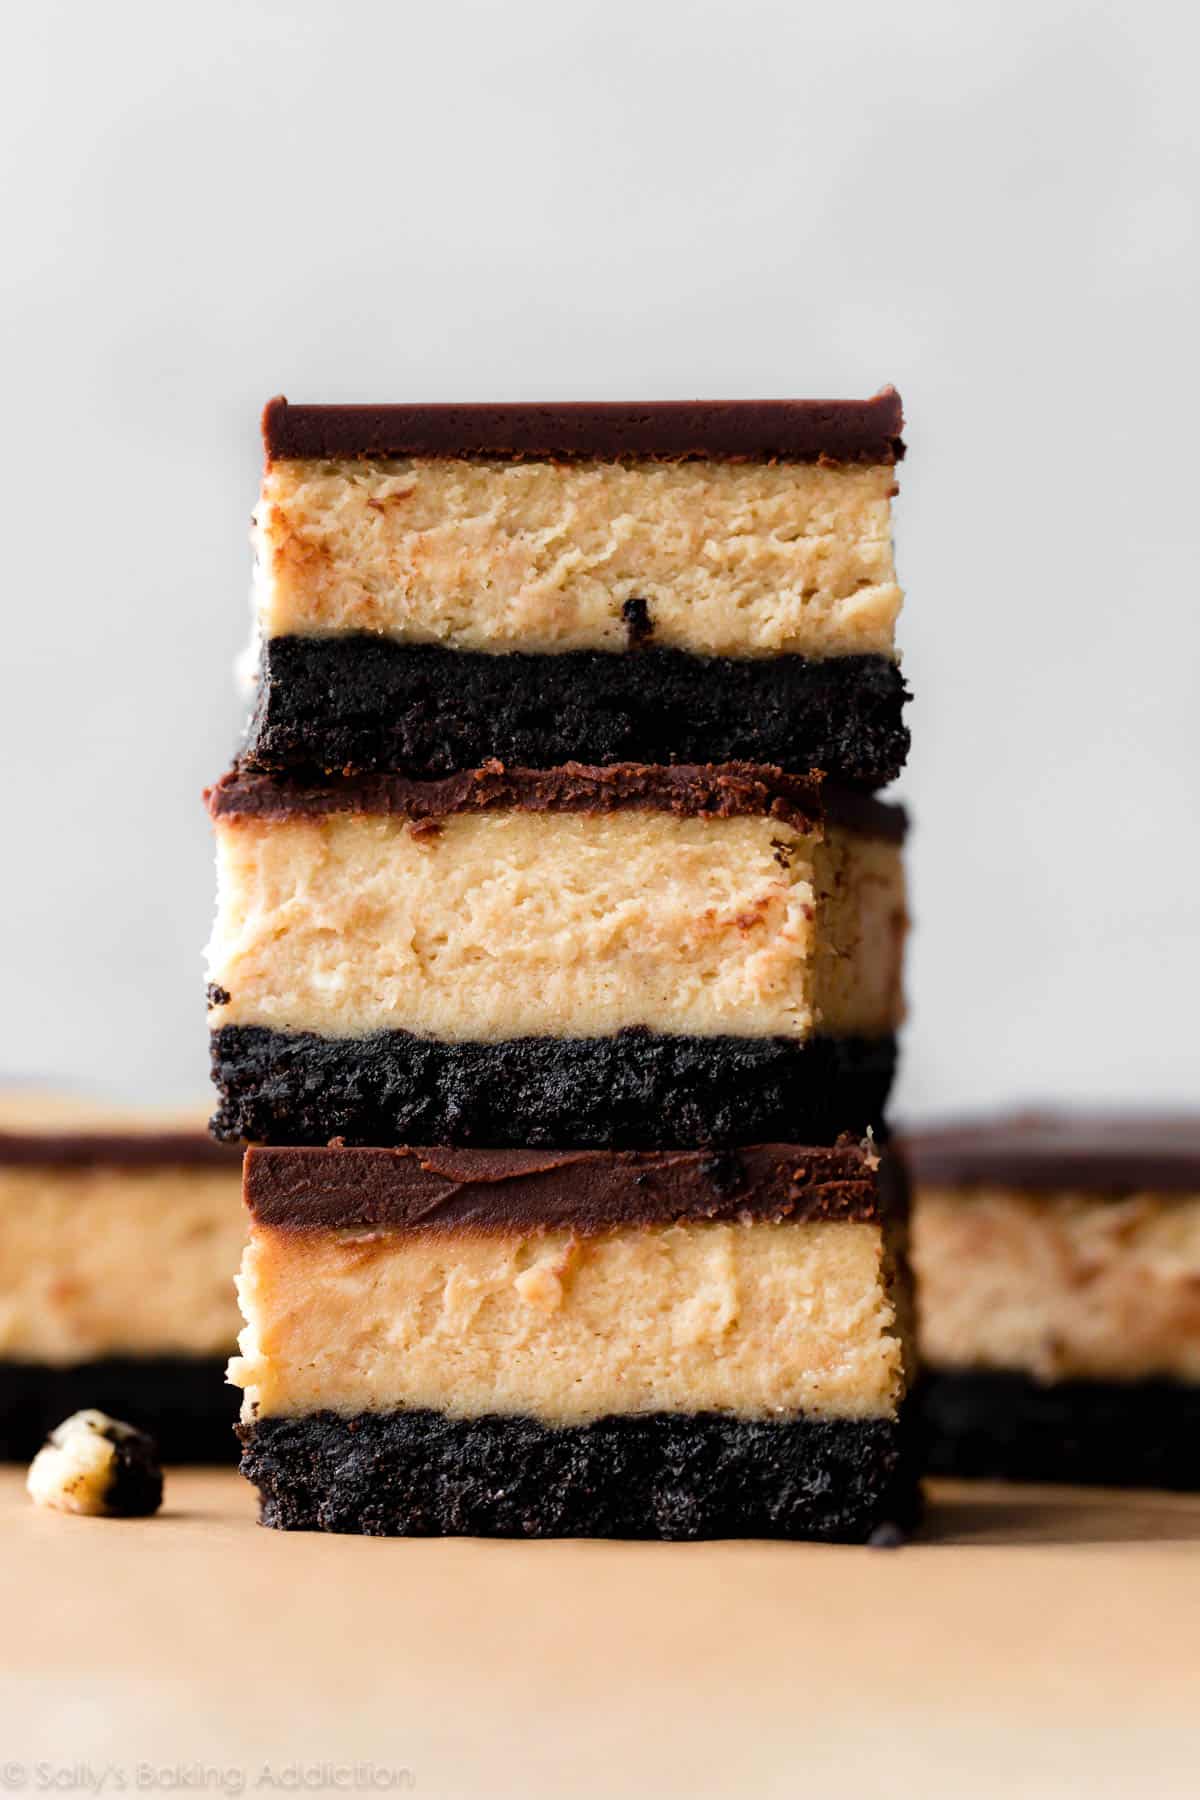
- Sitting on a buttery chocolate cookie crust
- Topped with chocolate ganache (that sets!)
- Quicker to bake & chill than a full cheesecake
- Handheld individual servings (but you need that napkin!)
- Devoured whenever I make them, whether that’s for a party, Mother’s Day, Father’s Day, baby shower, Halloween (top with crushed Reese’s Pieces!), etc.
Plus, there’s no need for a water bath. Let me show you how to make them.
One reader, Sheila, commented: “I wish I could give this more stars. It’s heavenly. I’ve made them twice. The first time I got nothing but good reviews. Someone even asked for the recipe. I never got a taste, so I didn’t comment. But with this second batch, I finally got to have one. Man! They are so good. ★★★★★“
How to Make Chocolate Peanut Butter Cheesecake Bars:
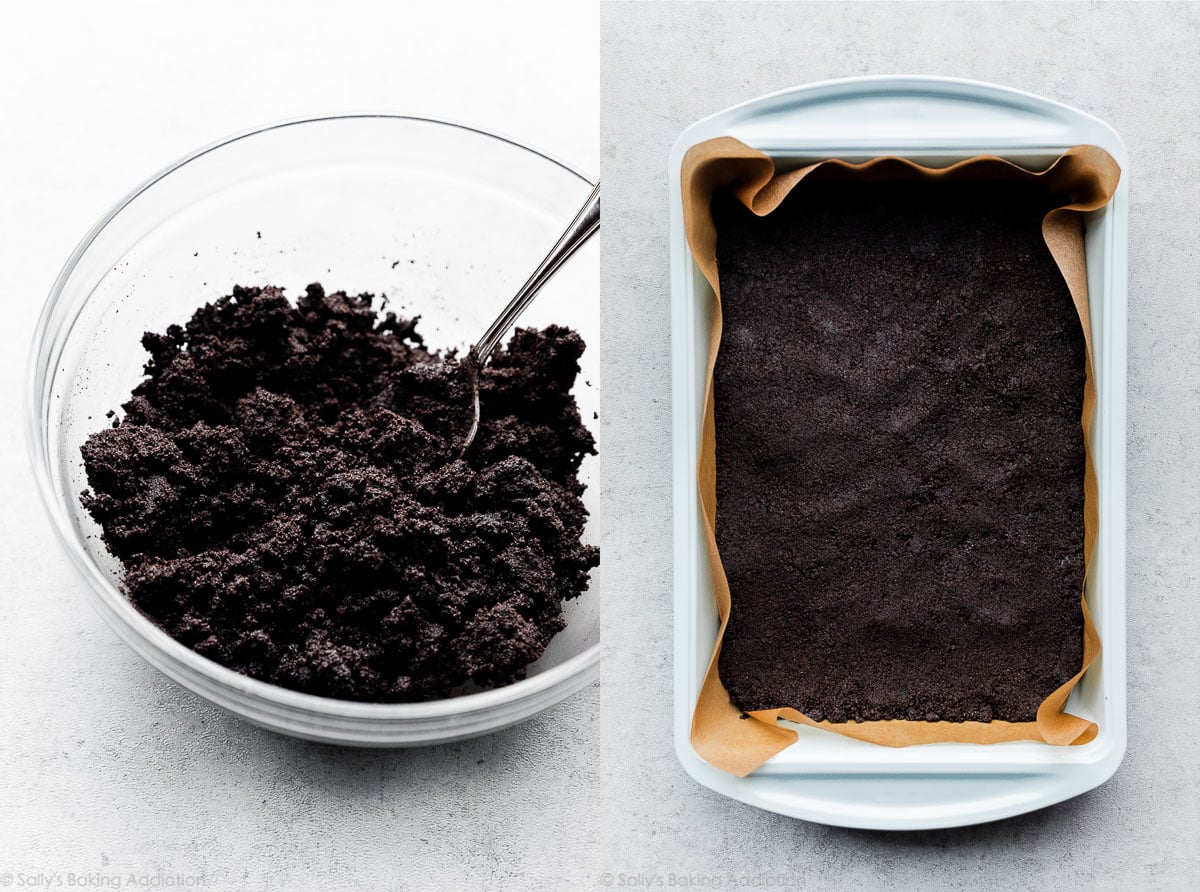
- Make the crust: You only need 2 ingredients for the crust: Oreo cookies and butter. Grind the cookies into a crumb (the cookie AND the filling), then mix with melted butter. Since this recipe fits a 9×13-inch pan, I slightly scaled up my regular Oreo cookie crust. Same fantastic crust we use for this peanut butter Butterfinger cheesecake, too.
- Pre-bake the crust: Press the crust mixture into a lined 9×13-inch baking pan. Simply line with a piece of parchment paper. If you leave enough overhang on the sides, you can lift the chilled cheesecake bars out of the pan as a whole, which makes cutting squares REALLY easy. Pre-bake crust for 10 minutes.
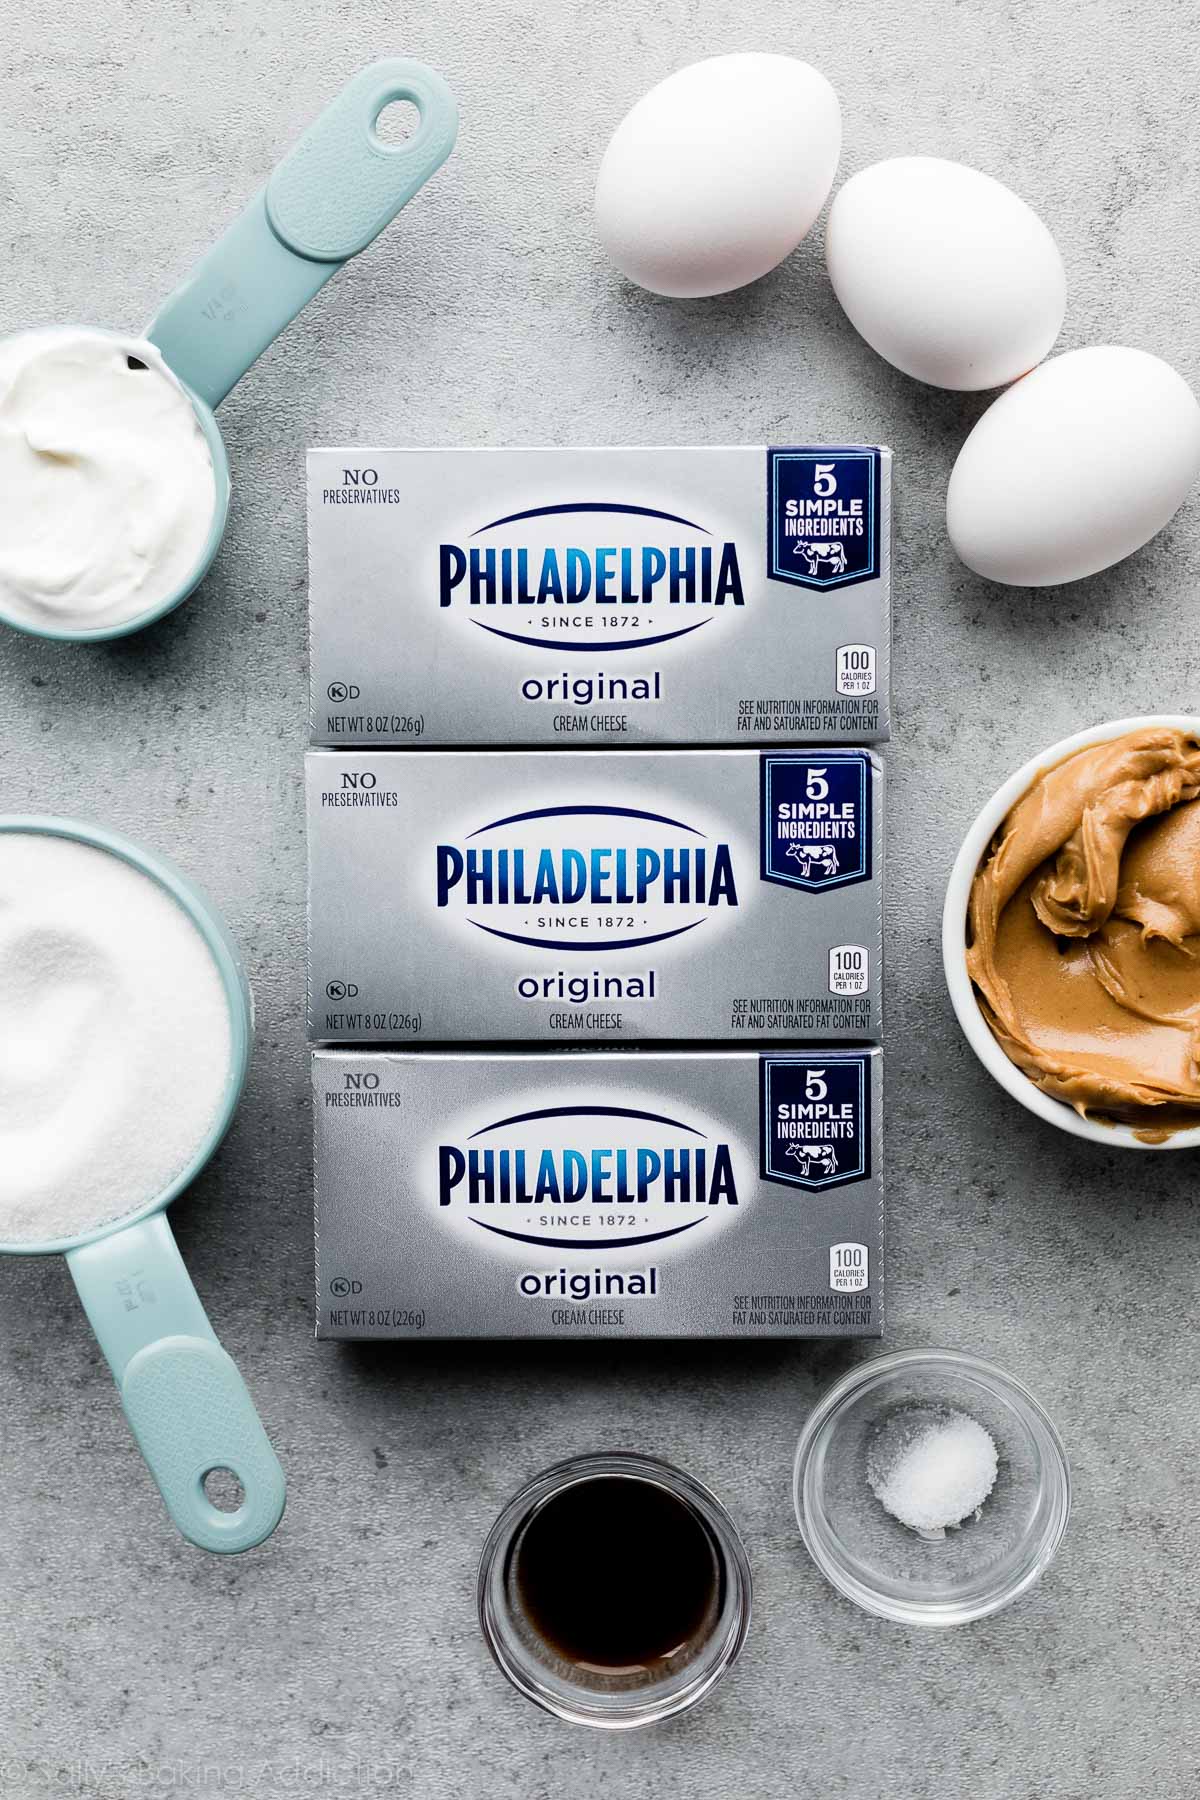
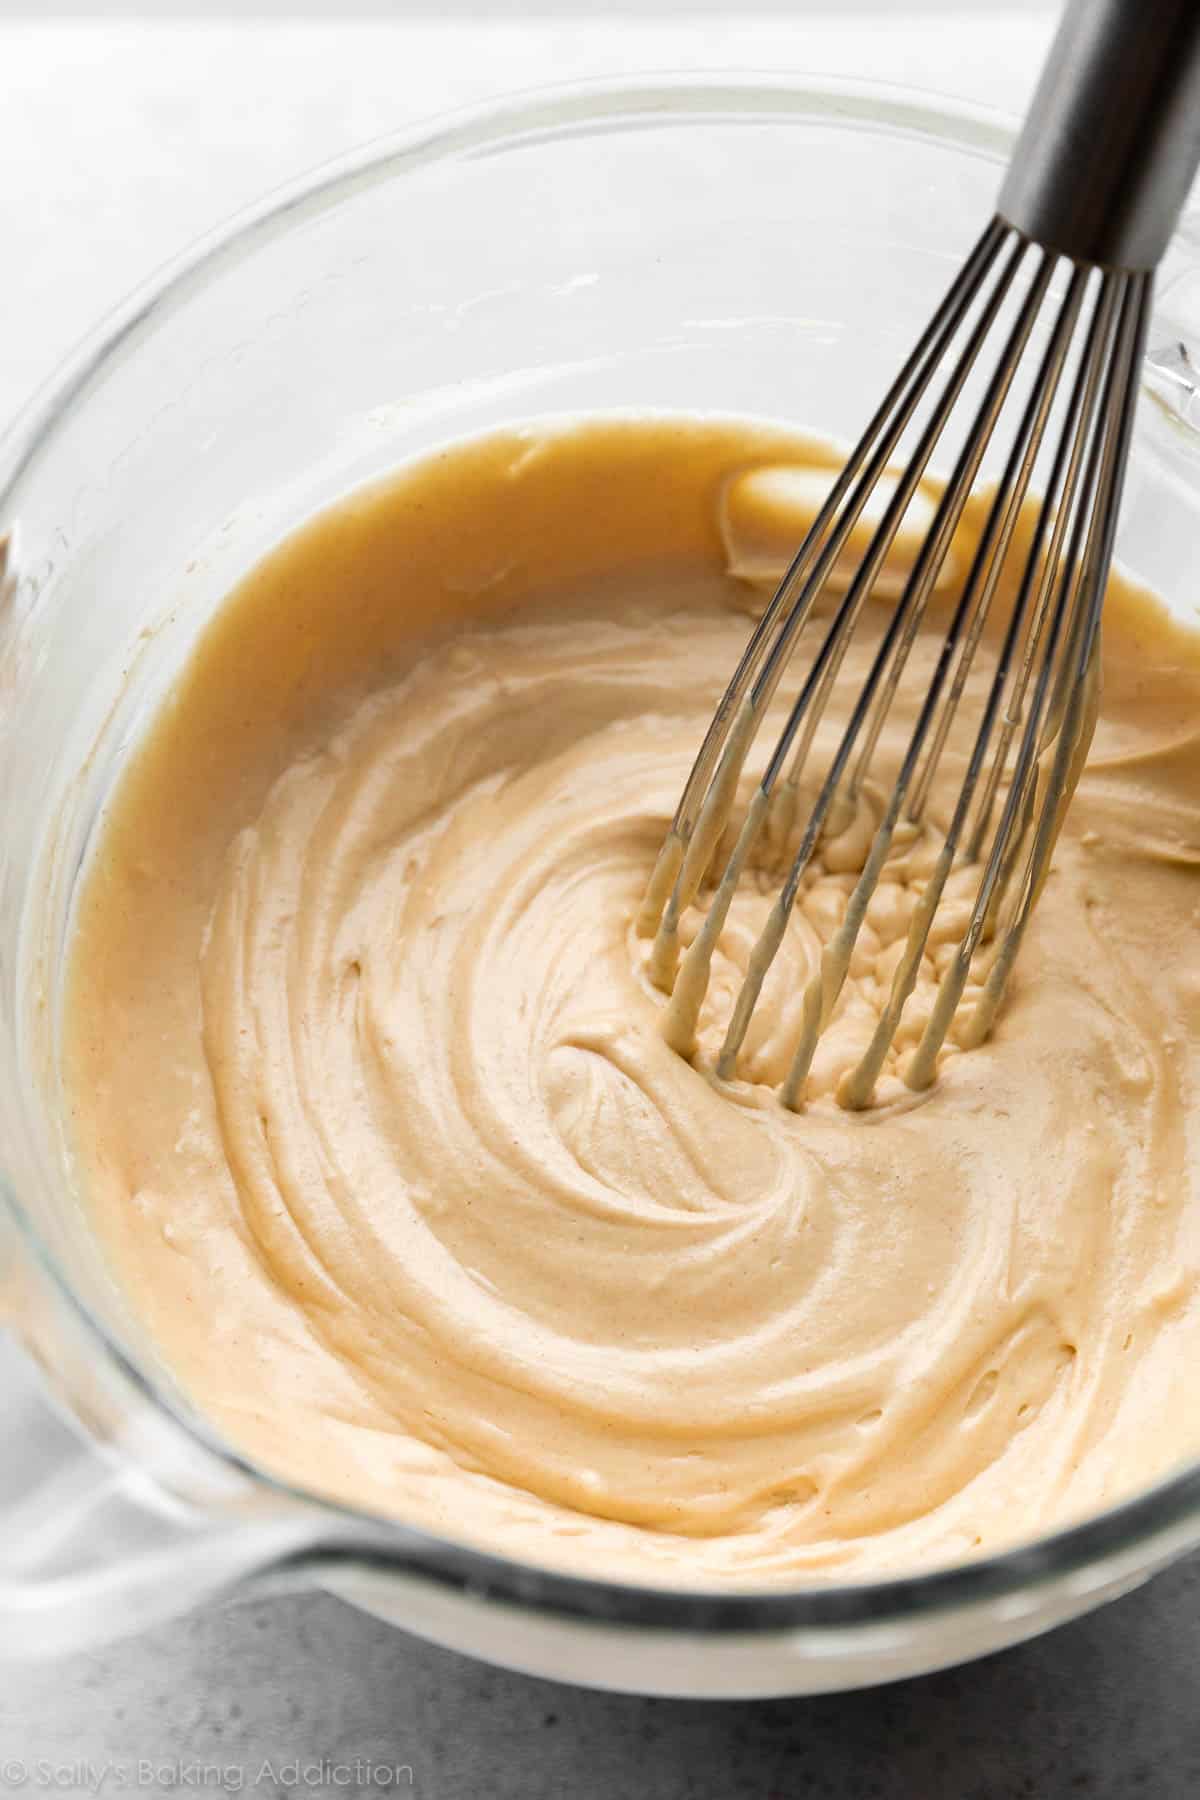
- Make the peanut butter cheesecake filling: You need brick-style cream cheese, sugar, sour cream (for a little extra creaminess), peanut butter, vanilla extract, salt, and eggs. Good rule of thumb for any and all cheesecake baking: always add the eggs last. You can mix the other ingredients as much as you want, but as soon as you add the eggs, mix just until they’re combined. Over-mixing eggs results in overly dense cheesecake.
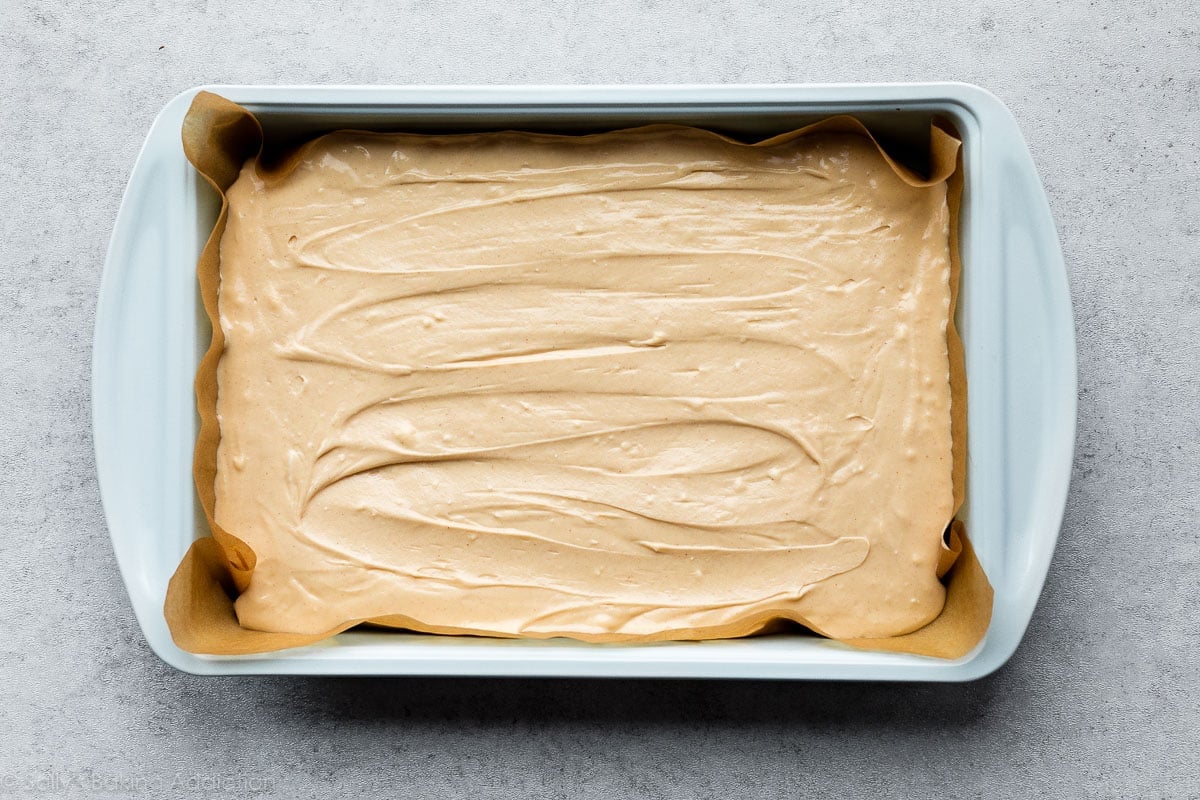
- Bake: Spread the filling over the warm crust. Bake until only slightly jiggly in the center. Each of my test batches took 35–37 minutes.
- Cool bars at room temperature.
- Chill: After cooling at room temperature, place the pan in the refrigerator for at least 3–4 hours until sufficiently chilled. Cold cheesecake bars not only taste better, but they cut much easier too.
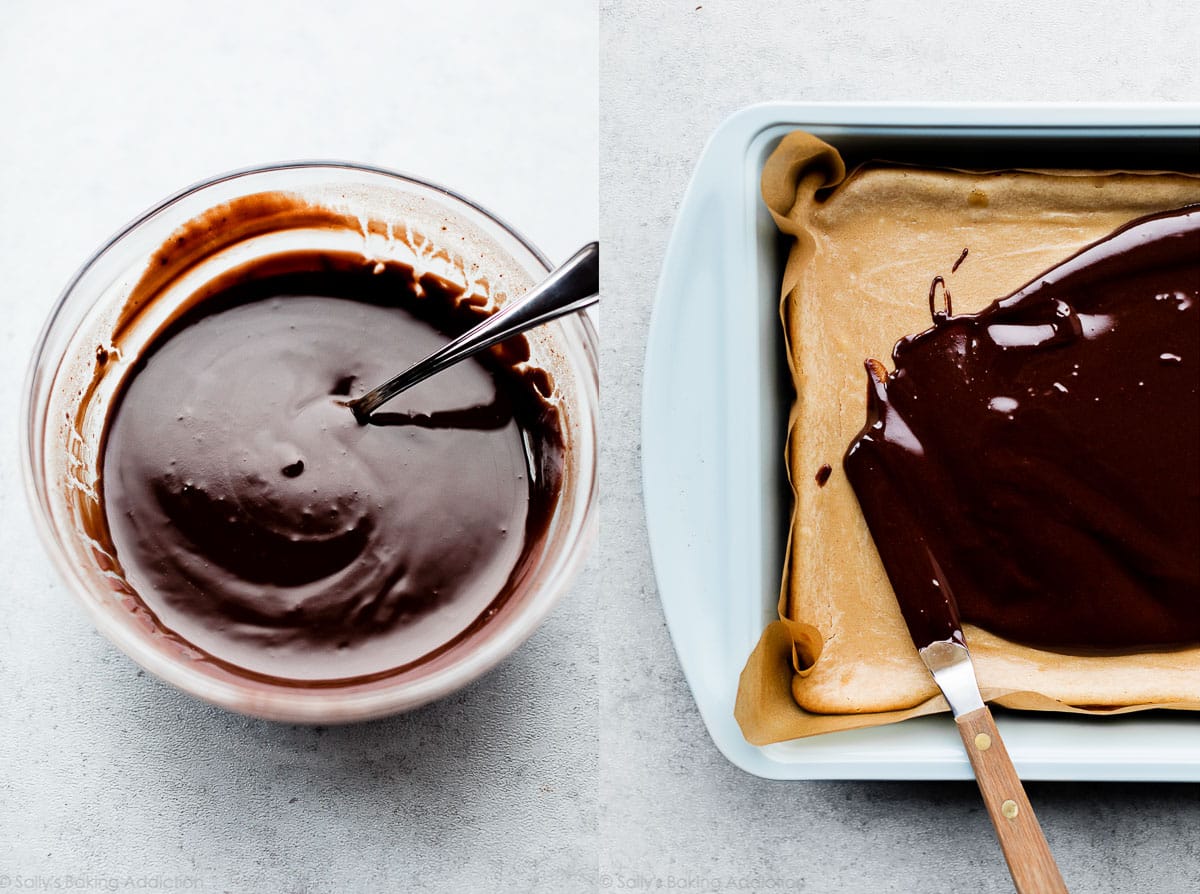
- Make the ganache topping: We usually make chocolate ganache with chocolate and cream, right? Well, we want a sturdier ganache that will set, so use a fat that’s solid at room temperature: BUTTER! Melt the butter and chocolate together. You can use baking chocolate or chocolate chips. I usually use chocolate chips. This is exactly how I top my mint chocolate brownies, too!
- Let the topping set: Pour and spread the ganache over the chilled pan of cheesecake bars. Let it set completely in the refrigerator, at least 45–60 minutes.
- Cut into squares: Lift the bars out of the pan using the parchment paper overhang on the sides. For neat slices, wipe your sharp knife clean between each cut.
Different Size Pans
This recipe yields a 9×13-inch pan of cheesecake bars. If this is too big, you can easily halve the recipe for an 8-inch square baking pan. Want to bake a full cheesecake from this recipe? You definitely can. See my recipe notes below. I also give instructions for turning these into individual mini cheesecakes.
I’d obviously never deprive you of chocolate, peanut butter, and cheesecake. The possibilities are endless!!!
3 Success Tips for Chocolate Peanut Butter Cheesecake Bars
- Use Bricks of Cream Cheese: Cheesecake won’t set up properly if you’re not careful about the type of cream cheese you use. Make sure you use 8-ounce bricks of full-fat cream cheese. Do not use low-fat cream cheese or cream cheese spread that’s sold in a tub. (Save that for bagels!)
- Use Creamy Peanut Butter: Unless otherwise noted, it’s best to use thick and creamy peanut butter in baking recipes, including cheesecake. Avoid natural style or oily peanut butters, which will change the texture of the baked cheesecake. Chunky peanut butter is usually a little drier and thicker, so I recommend avoiding that too.
- Chill the Cheesecake Bars: Like a full cheesecake, these bars must cool down and chill in the refrigerator before slicing. Unlike regular cheesecake, though, you don’t need to cool them in the cooling oven. And since they’re thinner, they take about half the time to cool down as a full cheesecake. That’s always a nice bonus, especially if you’re serving these as dessert when you’re entertaining!

More Cheesecake Recipes
If you need more recipe inspiration, here are plenty of cheesecake recipes to try next:
- White Chocolate Raspberry Cheesecake Bars
- No Bake Cheesecake
- Blueberry Swirl Cheesecake
- Salted Caramel Chocolate Chip Cheesecakes
- Cinnamon Swirl Cheesecake (can make this as cheesecake bars, too!)
- Lemon Blueberry Cheesecake Bars or Lemon Cheesecake
- Nutella Swirl Cheesecake Bars
And if you can’t get enough of the peanut butter + chocolate combination, try this peanut butter ice cream pie or unbelievable peanut butter pie next.
Print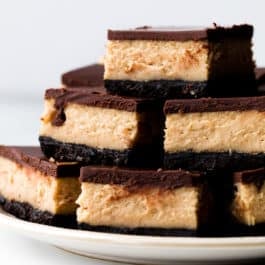
Chocolate Peanut Butter Cheesecake Bars
- Prep Time: 30 minutes
- Cook Time: 36 minutes
- Total Time: 6 hours, 5 minutes (includes chilling)
- Yield: 24 squares
- Category: Dessert
- Method: Baking
- Cuisine: American
Description
Quicker to bake and chill than a full cheesecake, these chocolate peanut butter cheesecake bars are the perfect choice when you need a crowd-pleasing dessert that’s also portable, easy to serve, and handheld. For best results, follow the recipe as written including sufficiently cooling and chilling the bars.
Ingredients
Crust
- 30 regular Oreos
- 1/2 cup (8 Tbsp; 113g) unsalted butter, melted
Peanut Butter Filling
- 24 ounces (678g) full-fat brick PHILADELPHIA Cream Cheese, softened to room temperature
- 1 cup (200g) granulated sugar
- 1/4 cup (60g) sour cream or plain yogurt, at room temperature
- 1 cup (250g) creamy peanut butter (not natural style)
- 1 teaspoon pure vanilla extract
- 1/8 teaspoon salt
- 3 large eggs, at room temperature
Chocolate Topping
- 1/2 cup (8 Tbsp; 113g) unsalted butter
- 1 heaping cup (around 200g) semi-sweet chocolate chips
Instructions
- Preheat oven to 350°F (177°C). Line the bottom and sides of a 9×13-inch baking pan with parchment paper, leaving an overhang on the sides to lift the finished bars out (makes cutting easier!). Set aside.
- Make the crust: In a food processor or blender, pulse 30 Oreos (including the cream filling) into a fine crumb. You should have about 3 cups crumbs, or 330g. Pour crumbs into a large bowl. Add the melted butter and stir to combine. The mixture will be thick and quite wet. Try to smash/break up any large chunks. Pour the mixture into prepared pan. With medium pressure using your hand, pat the crumbs down into the bottom to make a compact, thick crust. Pre-bake for 10 minutes. Remove from the oven and set aside. Leave oven on.
- For the peanut butter cheesecake filling: Using a handheld or stand mixer fitted with a paddle attachment, beat the cream cheese and granulated sugar together on medium-high speed in a large bowl until the mixture is smooth and creamy, about 2 minutes. Add the sour cream and beat until fully combined. Then add the peanut butter, vanilla extract, and salt and beat until fully combined. On medium speed, add the eggs one at a time, beating after each addition until just blended. After the 3rd egg is incorporated into the batter, stop mixing. A few small lumps can remain. Whisk the filling a few times by hand to rid any large lumps at the bottom of the bowl.
- Pour the cheesecake filling onto the crust. It’s ok if the crust is still warm. Spread evenly on top with a rubber spatula or back of a spoon. (It will seem like a thick layer of cheesecake filling; that’s ok.)
- Bake for 35–38 minutes or until the cheesecake appears set on top and the edges are browned. The edges may slightly crack. (Mine do!) The bars will be puffy, but will sink slightly down as they cool. Place pan on a wire rack. Cool for 1 hour at room temperature, then chill in the refrigerator for at least 3–4 hours (and up to 1 day) before topping with chocolate. If you’re in a rush, place in the freezer for 2 hours (or until chilled throughout.) If you plan to chill the bars for longer than a few hours, loosely cover with aluminum foil after 3–4 hours of chilling.
- For the chocolate topping: Cut the butter into Tablespoon-size pieces. Place into a heat-proof bowl. Pour chocolate chips on top. Place in the microwave and melt in 30-second increments until smooth, stopping and stirring after each. You can also melt together on the stove, stirring constantly until smooth. Let the mixture cool for 2–3 minutes, then pour and spread evenly over chilled cheesecake bars. The cheesecake bars usually have a lip around the border since the center slightly sinks down, so it’s easy to spread the chocolate topping, stopping around the border/lip. If yours don’t have a raised lip around the edges, don’t worry and just spread the filling evenly all over the top.
- Chill in the refrigerator for 45–60 minutes or in the freezer for 30 minutes until the chocolate topping has set. If chilling for longer than 1 hour, loosely cover with aluminum foil after 1 hour of chilling. Chocolate topping must be completely set and solid on top of the cheesecake bars before slicing.
- To slice, lift the bars out of the pan as a whole using the parchment overhang on the sides. Cut into squares with a sharp knife. For extra neat squares, wipe the knife clean between each cut.
- Cover and store leftover cheesecake bars in the refrigerator for up to 1 week.
Notes
- Make-Ahead & Freezing Instructions: Prepare recipe through step 4 up to 2 days in advance. Cover unbaked cheesecake bars and store in the refrigerator until ready to bake. Continue with step 5. Since they’re cold, bars will take a few extra minutes to bake. To freeze: cool, chill, and slice bars as instructed. Freeze bars between layers of parchment paper for up to 3 months. Thaw overnight in the refrigerator before serving.
- Special Tools (affiliate links): 9×13-inch Baking Pan | Food Processor or Blender | Glass Mixing Bowls | Silicone Spatula | Electric Mixer (Handheld or Stand) | Cooling Rack
- Chocolate Cookie Crust: You need about 30 whole regular Oreos, which pulse down into about 3 cups, or 330g, of crumbs. If desired, you can substitute 3 cups of graham cracker crumbs, which is about 22–24 full-sheet graham crackers.
- Peanut Butter: Natural-style peanut butter isn’t ideal for peanut butter cheesecake. The filling will be too dry, crumbly, and/or won’t set up properly. I do not recommend crunchy style peanut butter for that same reason. It’s too thick.
- Smaller Pan or Full Cheesecake: For an 8-inch square pan (9-inch is too big), follow the recipe as instructed, but halve the crust, filling, and topping. For the filling, use 1 egg + 1 egg yolk. Bake time is closer to 30 minutes. For a full cheesecake in a 9-inch springform pan, use the filling recipe as written. Halve the crust recipe (use 15 cookies and 1/4 cup (57g) butter) and chocolate topping recipe (1/4 cup (57g) butter and 1/2 cup (90g) chocolate chips). I recommend following the baking and cooling instructions, including using a water bath, as found in my regular cheesecake recipe. After the cheesecake has chilled completely, top with chocolate topping then chill for at least 45–60 minutes as instructed in this recipe (step 7) before slicing and serving.
- Mini Individual Cheesecakes: Use the baking and cooling instructions found in my mini cheesecakes and use this recipe as written. Recipe makes about 4 dozen cheesecakes in a muffin pan. Line 12-count muffin pans with liners. Firmly press 1.5 Tablespoons of crust mixture into each. Pre-bake for 5 minutes. Pour filling on top, about 1 Tbsp filling for each. Again, use the baking and cooling instructions found in my mini cheesecakes. Once chilled, top each with chocolate topping then chill in the refrigerator to set it before serving.


Reader Comments and Reviews
Can any cheesecake be made into bars?
Hi Sammy, Not every cheesecake recipe can be made into bars, but we do have a lot of cheesecake bar options on our site. https://sallysbakingaddiction.com/?s=cheesecake+bars&submit= Let us know if you give any of these a try!
Can these be frozen? We love to find a treat in the freezer.
HI Sammy, To freeze these bars– cool, chill, and slice bars as instructed. Freeze bars between layers of parchment paper for up to 3 months.
I am curious to know if any readers have made this recipe in a muffin pan. I think that is a darling idea if the ingredients do not stick to the paper liners. Thank you for your help!
Sally, these cheesecake bars are amazing! My family and I loved them! I appreciate all the work you do to create these fabulous desserts.
Yummy! So good but I do have a quick question! My husband bought the store brand block cream cheese, rather than the Philadelphia brand, I didn’t think this would make a huge difference as it’s still the block cream cheese but wanted to ask if there’s a necessity in using Philadelphia !
I made this as written and they were AMAZING! Do you have any recommendation for adapting this recipe to a 9 inch pie dish?
Hi Jacqueline, if you can, a 9 inch springform pan would be best (it will be difficult to cut the slices from a pie dish). See recipe notes for full 9 inch cheesecake instructions!
Hi Sally,
I have problem with the chocolate topping – it’ll crack once cut into it n the topping will come off, literally separated from the rest of the cake. How to solve that issue? Thanks
Hi Adam, The chocolate topping can crack and break if it’s a little too hard and cold. Obviously we want it cold since these cheesecake bars are chilled, but what may help for next time– to soften it up– is to add 2 Tbsp of creamy peanut butter to the butter/chocolate topping. Simply add it, then melt everything together. The topping will be softer and shouldn’t really crack.
I made this in a 9 inch springform pan, using half measures for the base and chocolate topping, and two thirds of the cheesecake filling mix, baking it for about 30 mins. It got a huge crack in it as it cooled, but who cares when it’s this delicious! Every day I am eating a bigger slice.
HI! Ive made these bar before and they were absolutely delicious so i want to make them as a birthday cake,… how big of a round pan u suggest I use?
Hi Sintija! We recommend using a 9 inch springform pan – see recipe notes for full cheesecake instructions!
I made these bars for my parent’s 69th wedding anniversary dinner. They were a huge success. I’ve told friends about this recipe and sent the link to at least 5 people. I love to bake and the directions and hints in this recipe were perfect. Thanks!!!
I wish I could give this more stars. It’s heavenly. I’ve made them twice. The first time got nothing but good reviews. Even someone asked for the recipe. Never got a taste, so didn’t comment. But this second batch I finally got to have one. Man! They are so good.
My daughter requested something with peanut butter and chocolate for her birthday cake. I sent her a few different desserts and she picked this recipe. I’m always hesitant to try something new for a special event, but, the reviews and comments were great so I jumped in. It is cooling now and it was super easy to make. I make a killer cheesecake for holidays so expectations are high. This was much quicker. Fingers crossed it gets rave vreviews.
This is such a good recipe! I made them dairy free using Tofutti cream cheese (it’s not a spread, so a fantastic substitute for block cream cheese) and Tofutti sour cream. They turned out amazing, I brought them into work and no one could even tell they didn’t have real cream cheese 🙂
Hi Sally,
can I reduce the peanut butter at all without compromising the outcome?
thank you
NIna
Hi Nina, it would take some recipe testing in order to give you a confident answer. If you reduce the peanut butter, we fear the cheesecake won’t set up properly.
I made these chocolate PB cheesecake bars and they came out so delicious — Sally’s recipes never fail me! The only slight change I made was using gluten free Oreos in the crust to accommodate for a gluten sensitivity, and the change was completely unnoticeable. My cheesecake layer had a small lip as Sally mentioned in her directions, but with the chocolate ganache topping it looked totally fine. I will 11/10 be making this again!
Absolutely delicious and much less fussy than a water bath and a springform pan. Thanks!
I’m an Australian, but I live in the UK now, and the only type of cream cheese we get here is the spreadable type in tubs
None of my Australian cheesecake recipes work well with this type of cream cheese, and I’m discovering most US recipes won’t either ☹️
Is there any way around this? In the past I have tried draining the cream cheese on paper towels/using a cheesecloth to reduce the moisture content, which helps, but not enough.
Hi there! I wish we could help more, but block cream cheese is necessary for this recipe (and our other cheesecake recipes). Let us know if you find a trick that works!
Just delicious! Definitely feeds a crowd. Very rich small slices are best!
Hello Sally,
I wanted to know could I just buy the Oreo Crumbs that is meant to be used for cheesecake crust or is it better to buy Oreos and do as you suggest to in the recipe?
If I can use the already crushed Oreos in a box will I have to do anything different for the crust?
Hi Jessica! We haven’t tested this recipe with pre-crushed Oreo crumbs, but it should work just fine. You’ll need about 3 cups of crumbs. Let us know if you try it!
Perfect!
I wish I could say first hand, how good these were, but I was a day late and a dollar short. I made these for a Memorial Service/Memorial Day cookout at the VFW Post.
These things flew out of the pan and out the door. People weren’t taking 1 or 2 home, they were taking 3 or 4.
Had one guy ask me to make a batch and mail to him. Which of course was out of the question. One friend came over and just smiled……can I please have the recipe? Of course, when I got home, I sent him the link. I found out later from someone, that Richard (the above mentioned friend) had one and actually started moaning. Jo told me, she was getting ready to call EMS as she thought he was having a seizure.
If anyone who sees this, is on the fence about making them, jump off that fence and make them. Follow the recipe and things will go as should be. BTW, I used a cheese knife to cut the squares and they were perfect. There’s a pic of them on FB, if interested.
Made the fudgy brownies also, didn’t get one of those either.
Made these for Mother’s day. Oh my!! Awesome! So good. And easy. The best cheesecake bars ever! Thank you for a wonderful recipe. BTW, we add whipped cream on top
I received your email today. This was a featured May recipe. In the parking lot of the grocery, I realized I needed dessert for last minute company driving through.
This was a perfect quick fix. Started at 6, and by 9:30 we dipped in decaf coffee and enjoyed our peanut butter (& strawberry) late night dessert.
Thank you for delivering again—a perfect recipe!!!
Seriously, love your blog!!!
Hi Sally,
I made these and they were absolutely incredible and so easy to make! I am looking to do plain vanilla cheesecake squares with Graham cracker crust and cherries on top. Would I make the filling the same and just leave out the peanut butter? Thanks!
Hi Megan! For plain cheesecake bars, you can try this classic cheesecake recipe as bars. We recommend halving the recipe. Follow the pan size, pre-baking crust, and baking instructions for our white chocolate raspberry cheesecake bars. Or you may love our mini cheesecakes!
Hi there! I’m just curious – why do you encourage readers to loosely cover the cheesecake if its over 3-4 hours of chilling?? =)
Thank you! Excited to try these.
These a five stars! So delicious. My family went crazy for them. Wouldn’t change a thing about the recipe! Excellent!
hi Sally! If i’m doing this in a springform pan, do you suggest taking the chilled cheesecake out of the pan before adding the chocolate topping and chilling again? Or can i add the topping while still in the pan? I’m just worried about how it smoothly it will come out with the topping already on.
ps. your recipes are always my go-to! none have failed me yet!
Thanks,
Kaye
Hi Kaye! Either should work fine, but we’d recommend allowing the cheesecake to fully cool in the pan, then adding the chocolate topping while still in the pan. Make sure the chocolate is fully set before taking it out of the pan and slicing to serve. Hope you enjoy this one!
I am SOOOOO happy! I bake cookies but very rarely something like cheesecake. I tried this recipe and – wow – what a success. Great recipe. Many, many thanks!
My company LOVED this dessert!! So excited to make it for my son’s rehearsal dinner coming up. Easily done ahead of time and travels well. Before I added the peanut butter I took a small amount of the cream cheese filling out and made a small bread pan of peanut free bars for a few people with allergies. That came out excellent as well.
Hi Sally,
I have natural peanut butter that I’ve made at home. Would the cheesecake absolutely not hold up if I use this and completely ruin the taste?
Hi P, I’m just seeing your comment/question now so my apologies on the delay responding to you. I strongly recommend using processed peanut butter such as Jif or Skippy. It’s not my 1st choice in terms of a healthy choice, but it’s truly what works best in desserts including this one.