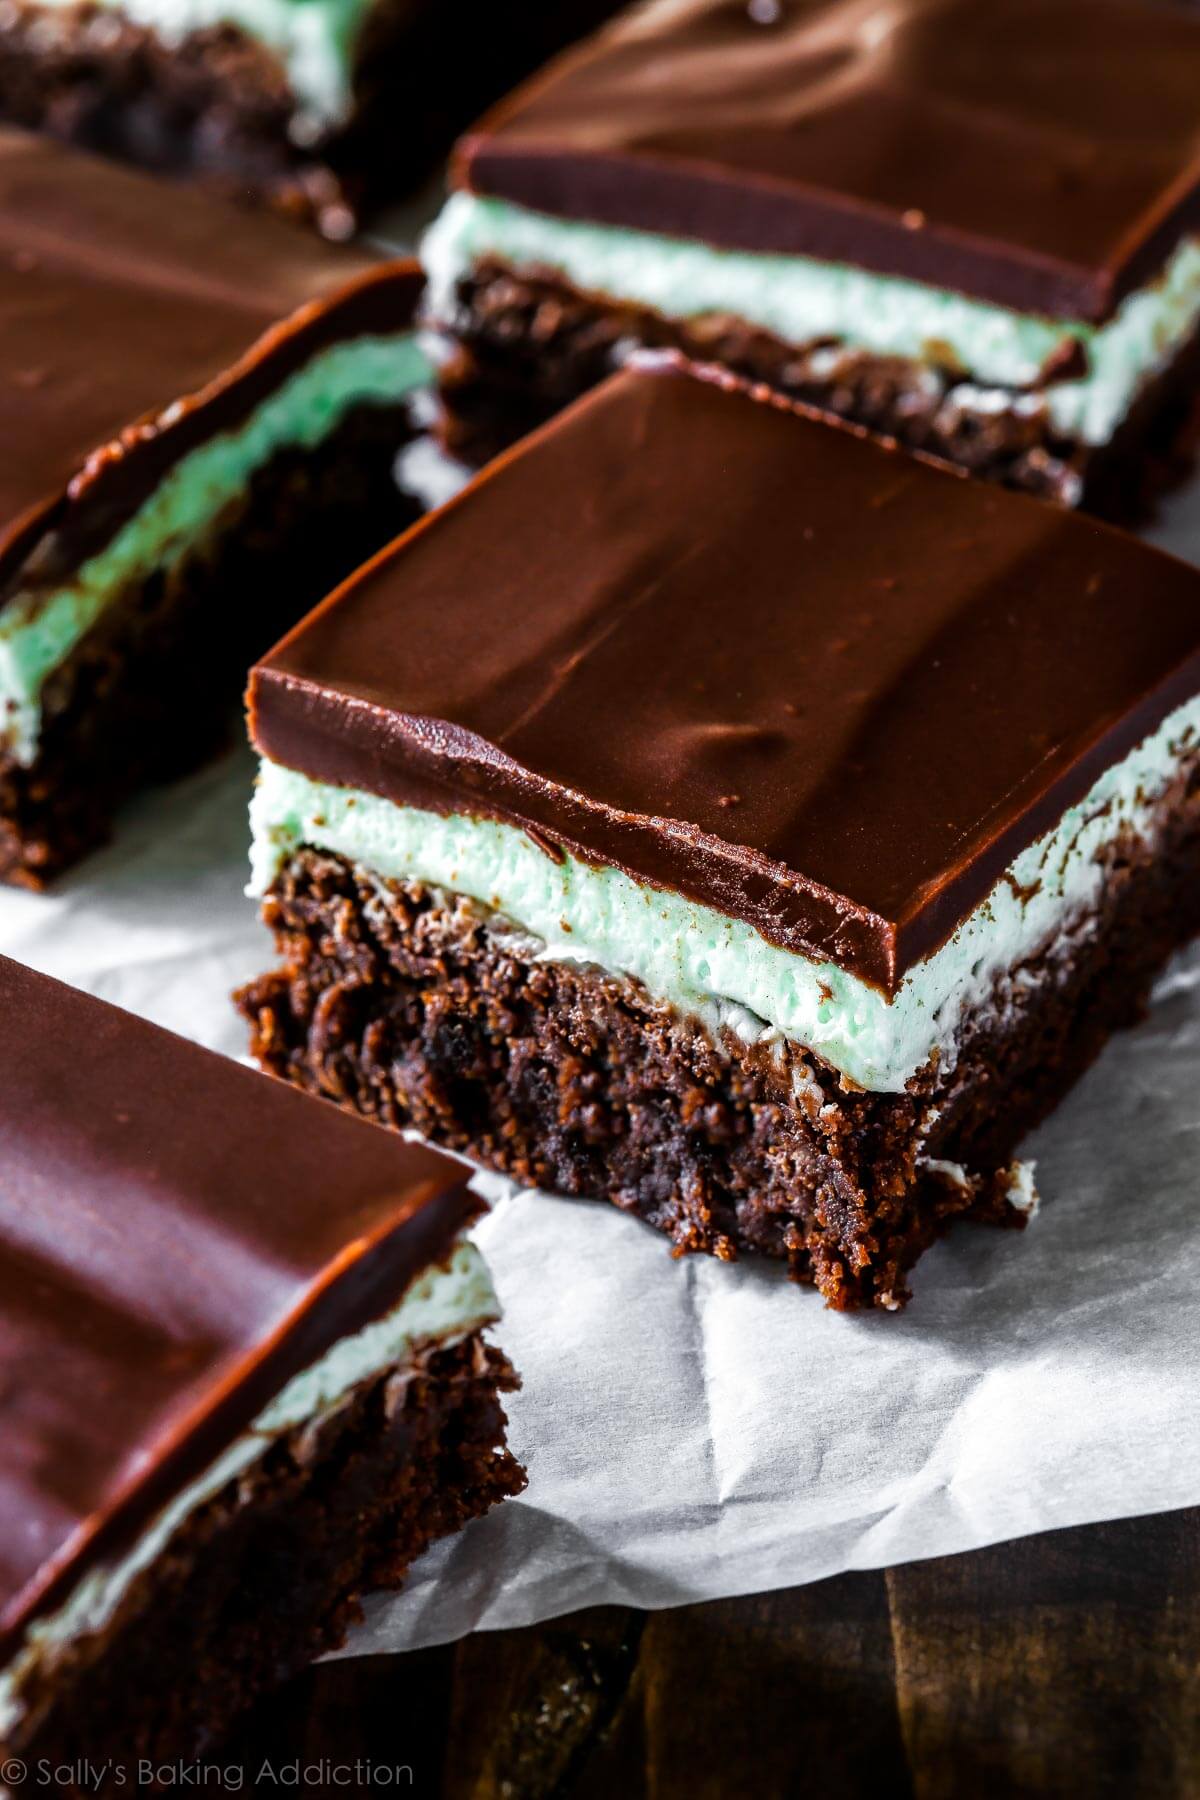
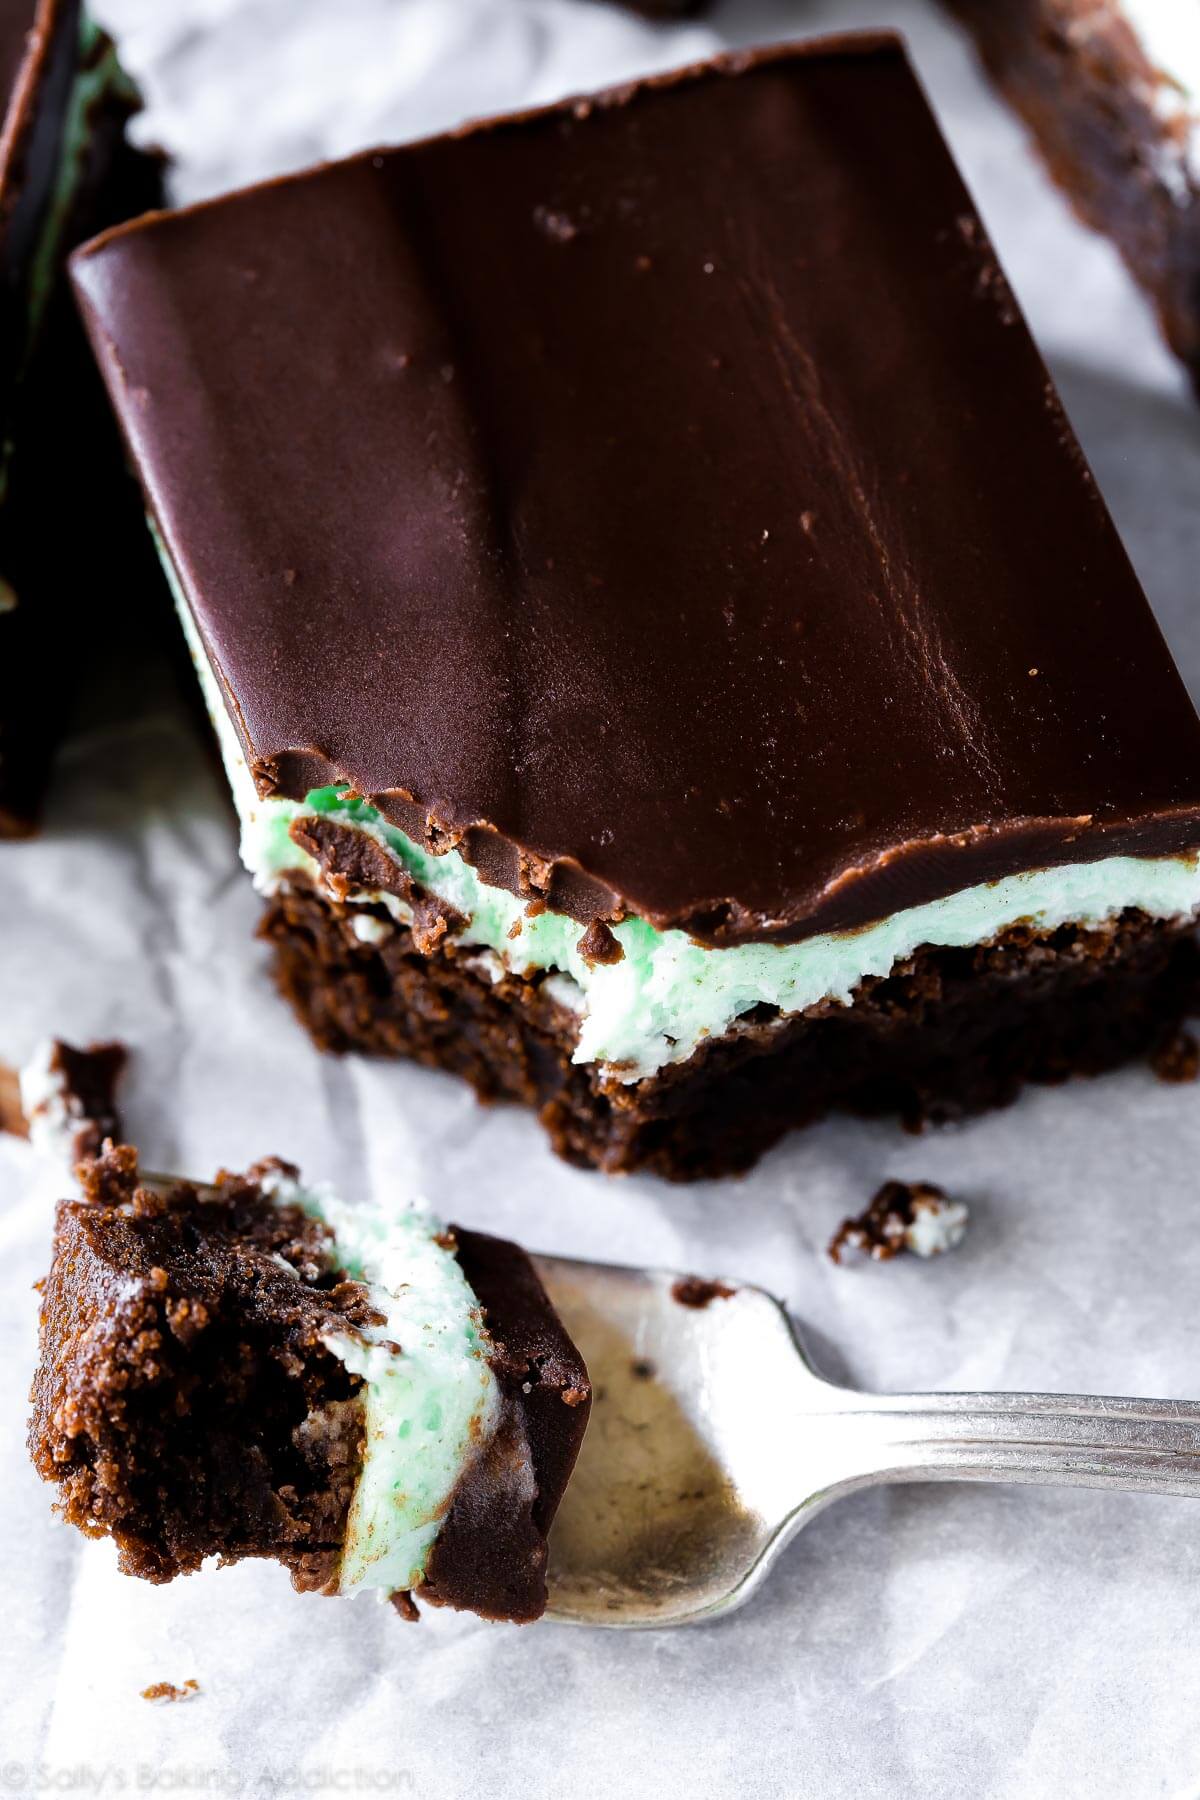
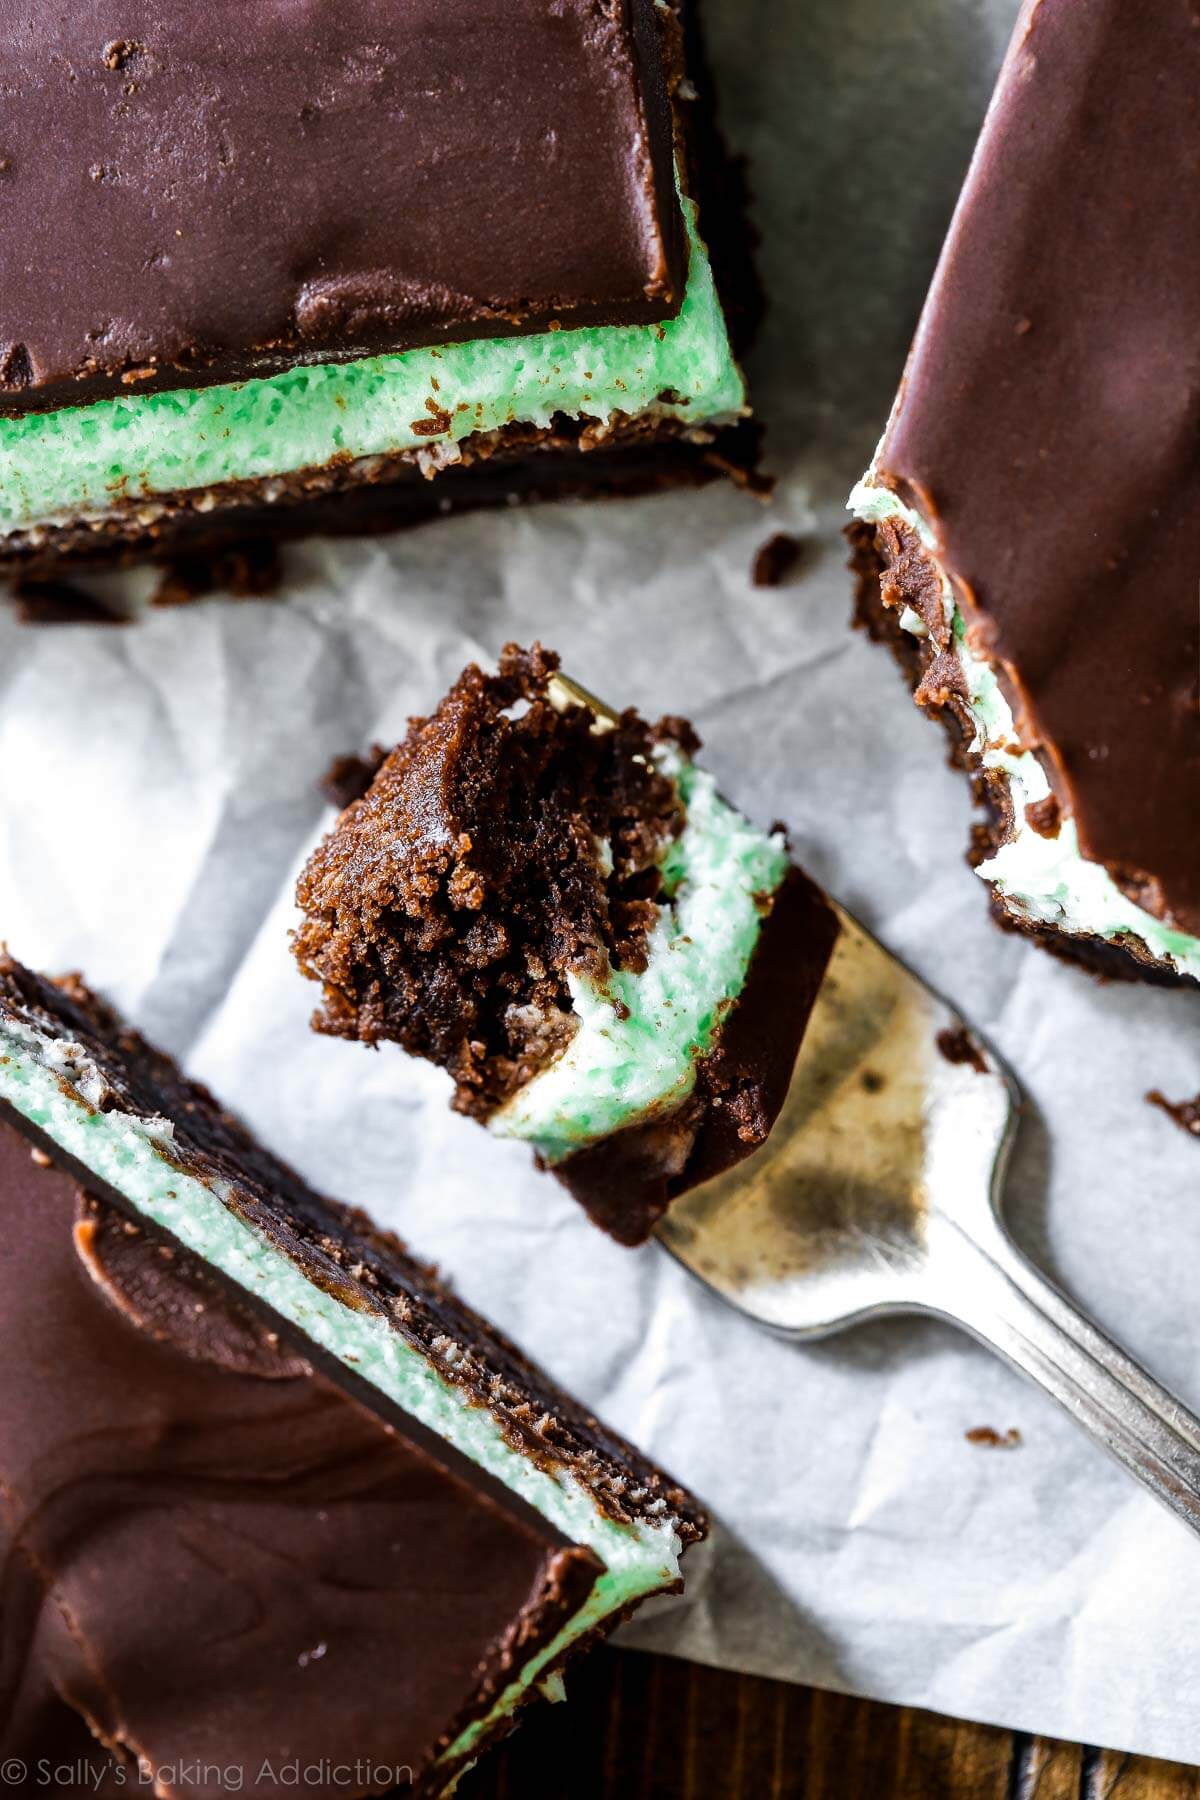
Thick and fudgy brownies layered with sweet mint frosting and easy chocolate ganache. The classic mint chocolate combination!
Recipe #3 of my annual Cookie Palooza combines the mighty forces of mint and chocolate. I’m aware that brownies aren’t technically cookies but sometimes dessert just doesn’t have to make any sense.
I remember making these brownies for a Christmas party years ago. When I was a single lady without a food blog because food blogs were (are?) nerdy and weird. Along with my chocolate covered pretzels (one of the first recipes published on my blog!), these classic mint chocolate brownies disappeared. Shocking.
I decided to make the mint chocolate brownies again this year for three reasons. I mean three people. Me, Kevin, and my friend Katy who is turning 30 this weekend. We are serious mint chocolate lovers and I know you are too. Come on, I know you’ve eaten the frosting from these chocolate cupcakes with mint chocolate frosting with a spoon before too. Or is that just me?
I usually make a batch of these mint chocolate chip cheesecake brownies for us to devour, but I wanted something a bit different this time.
Let’s get down to the mint-brownie-nitty-gritty. These classic mint chocolate brownies are made completely from scratch; no brownie mix in sight. In a pinch, you may absolutely use a box mix instead. But baking brownies from scratch really isn’t that difficult at all! In fact, the brownie layer is all mixed together in one bowl and doesn’t require many ingredients. Just your typical chocolate, eggs, sugar, and flour.
A little more on the chocolate: Brownies can be made with cocoa powder or solid chocolate. If using all cocoa powder, you’ll typically need more fat in the batter because cocoa powder does not contain the cocoa butter that solid chocolate does. My brownie recipe uses both cocoa powder and solid chocolate, which makes them extra chocolate-y. I prefer mint brownies with semi-sweet chocolate, though milk chocolate would be just fine if you want a sweeter brownie. (They’re plenty sweet as is!) I don’t suggest using unsweetened or bittersweet chocolate unless you love deep, dark chocolate.
A little more on the sugar: New readers might find this weird, but I’m sure you regular dessert lovers know how much I love brown sugar. It’s my favorite ingredient not only for its robust molasses flavor, but for all the moisture it brings baked goods. And it does the same for brownies! Brown sugar in brownies isn’t very typical, so if you think this is odd—it totally is. I use a mix of white sugar and brown sugar here. These combined sugars sweeten the brownies, while also enhancing their moist, fudgy texture.
A little more on the flour: I’ve typed this about 100 times in all my brownie recipes over the past 3 years. But let me repeat it real quick in case you’re new. More flour = a more cake-like brownie. Less flour = fudgier brownie. I prefer my brownies chewy and fudgy. So dense, it’s like eating fudge. Cakey brownies just aren’t my thing, so I use as little flour as I can without having the brownie fall apart.
These brownies are incredibly rich, fudgy, and moist. I know most of you hate that word.
Moist.
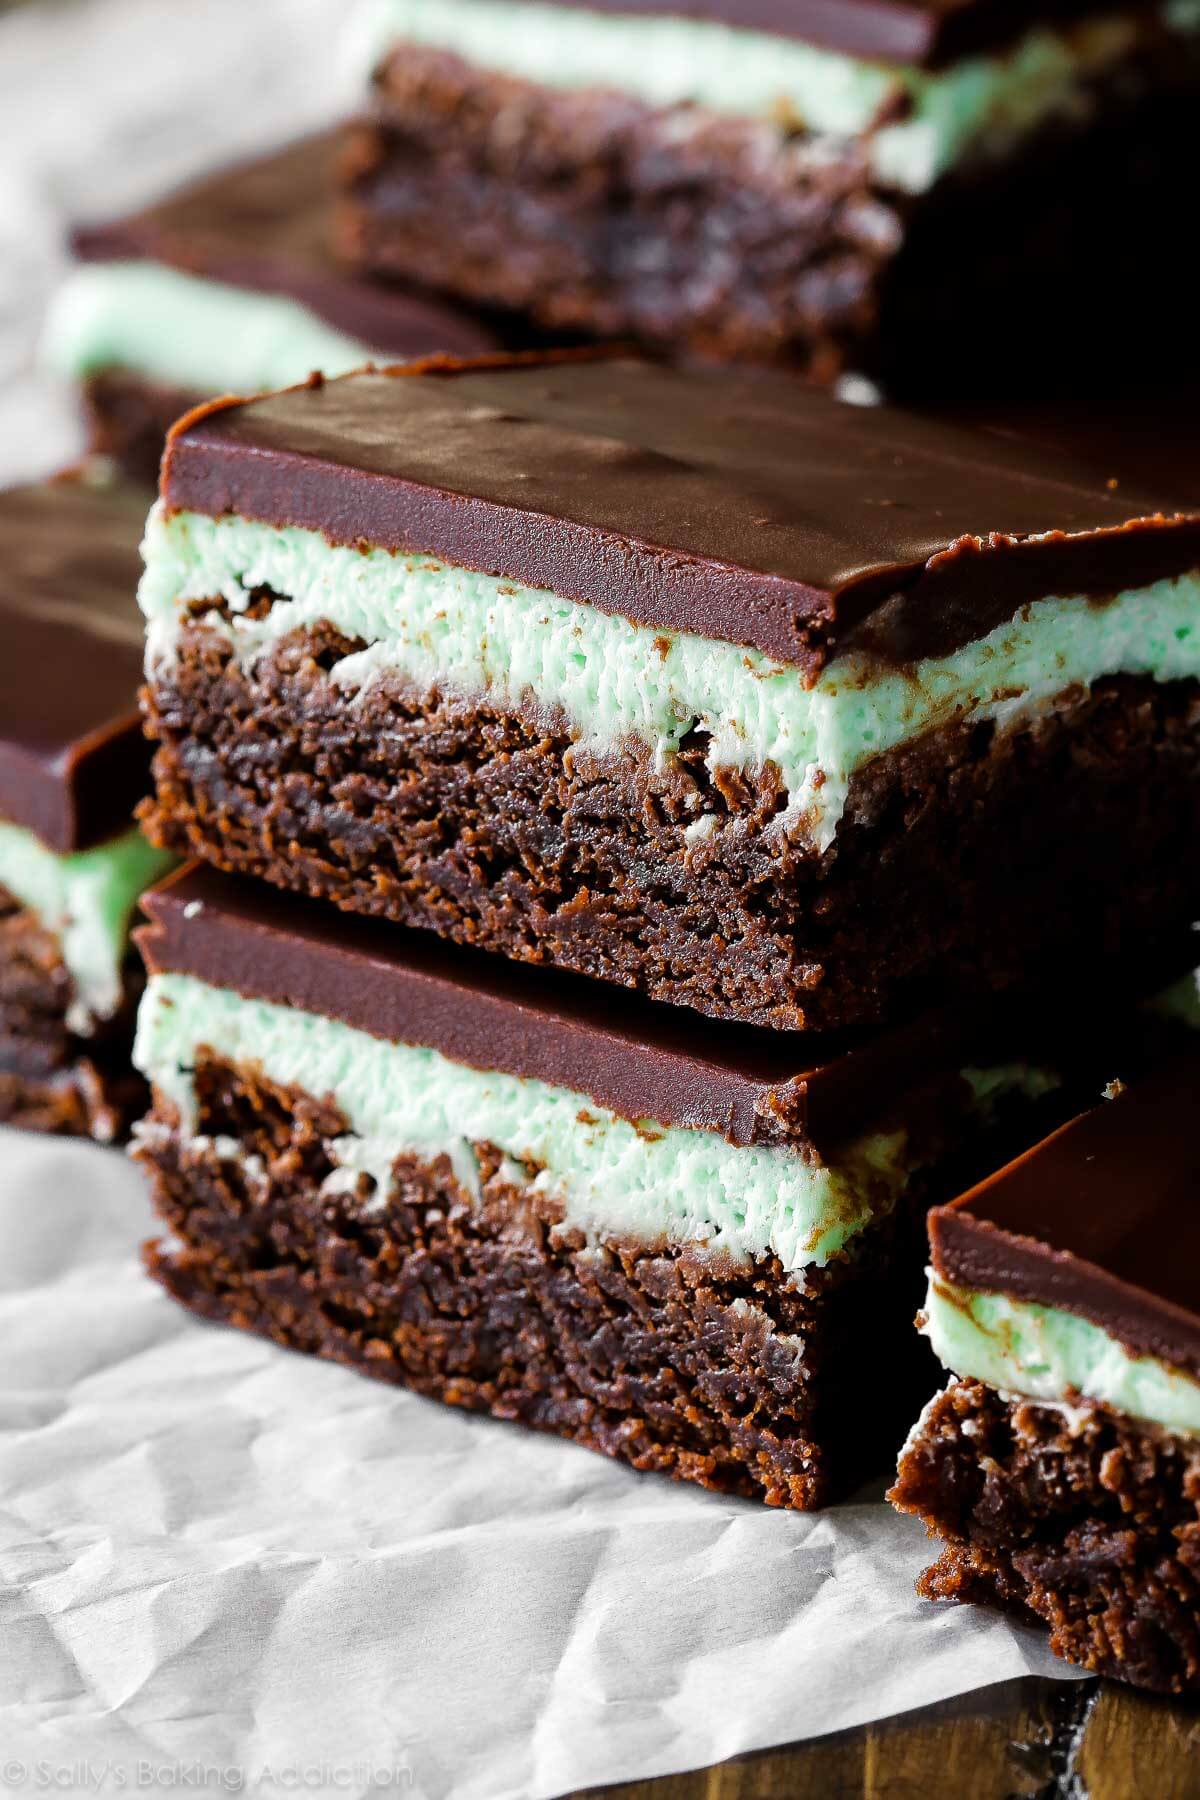
Let’s move onto the other layers. I promise I’ll make the rest short. I can’t believe how much I just typed about brownie ingredients.
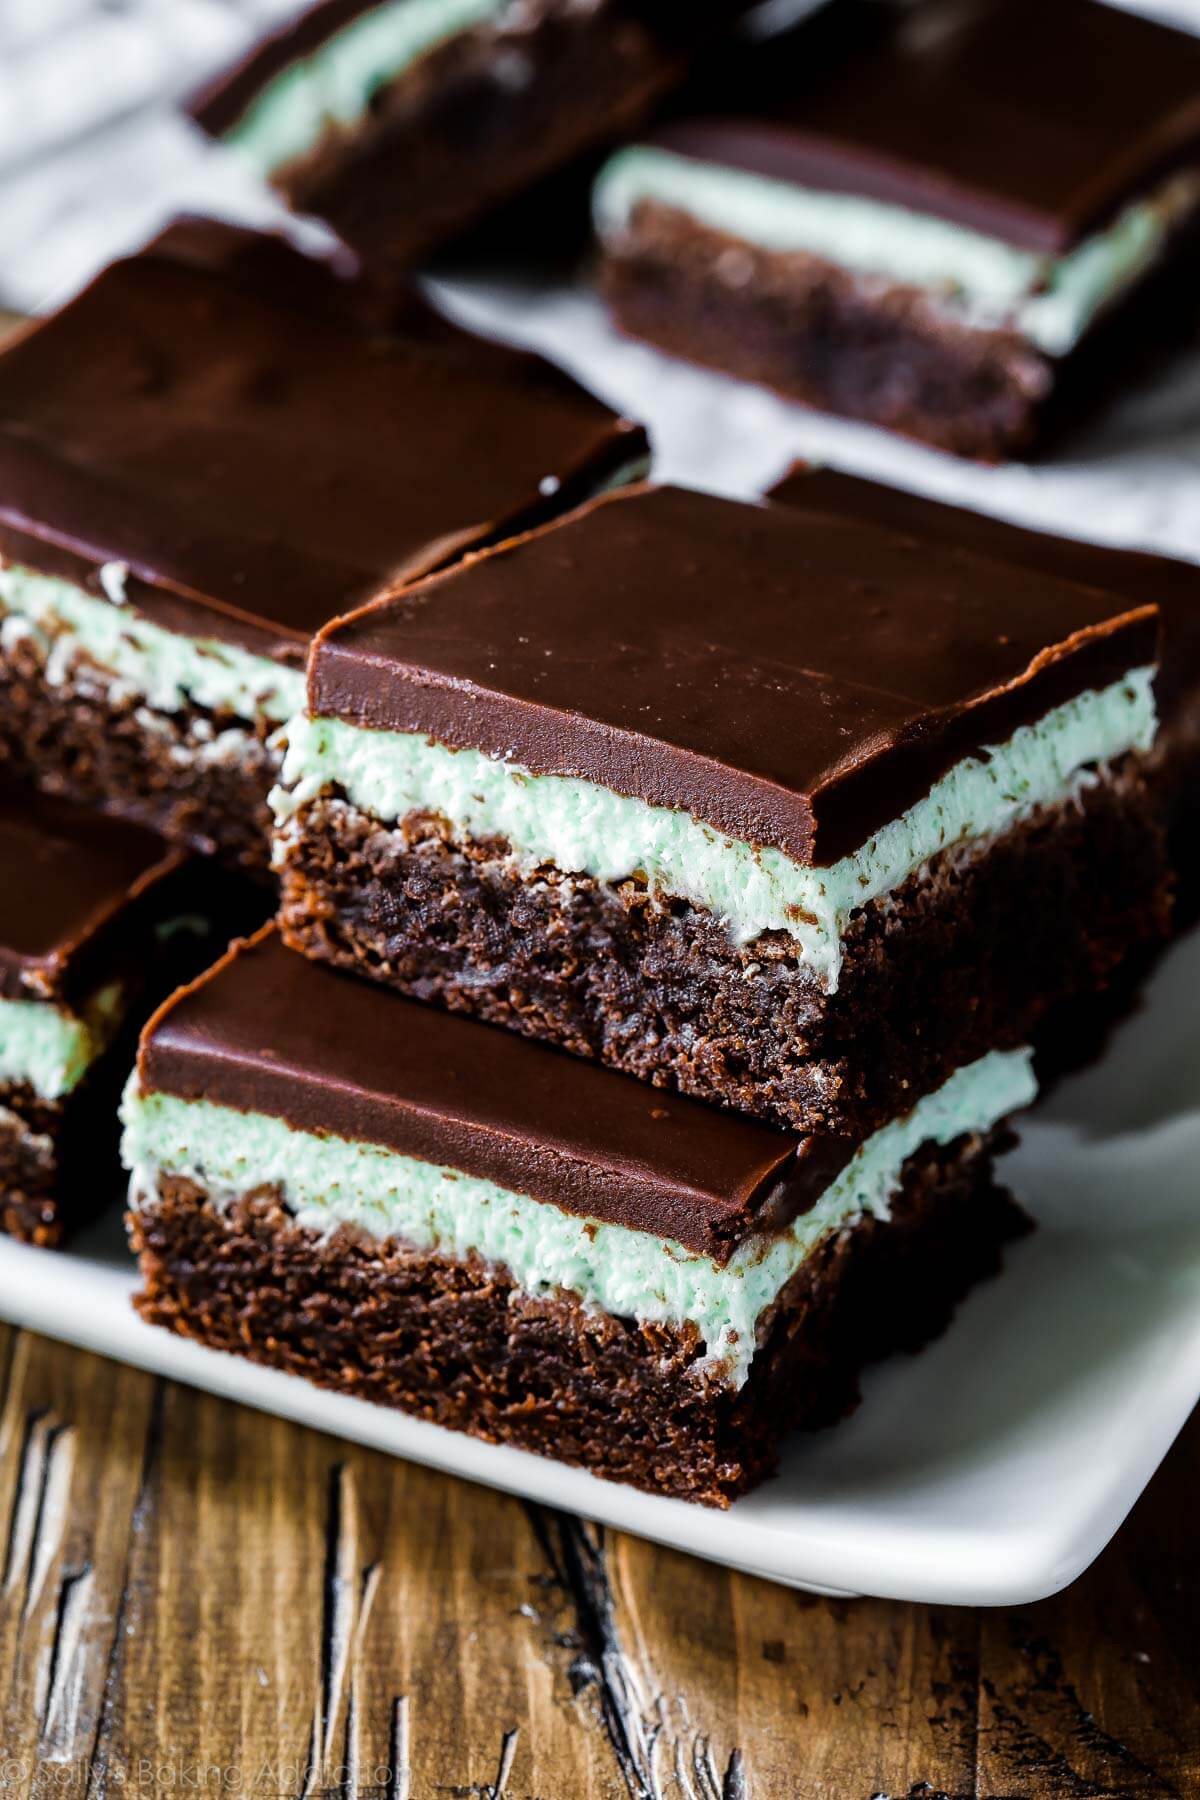
Once the brownies are completely cooled off (–> completely cool! that’s important.), frost them with a simple mint chocolate frosting. I use just over 1 teaspoon of peppermint extract in the frosting. If you like things a little more minty, feel free to add a little more. But be warned! Peppermint extract is incredibly potent; you don’t want the frosting to taste like toothpaste. I add 1 drop of green food coloring to give the frosting a very light mint green color, but feel free to leave the mint frosting layer completely white. After frosting the batch of brownies, make sure you set the whole thing in the refrigerator so the frosting can set. This makes for neater cutting.
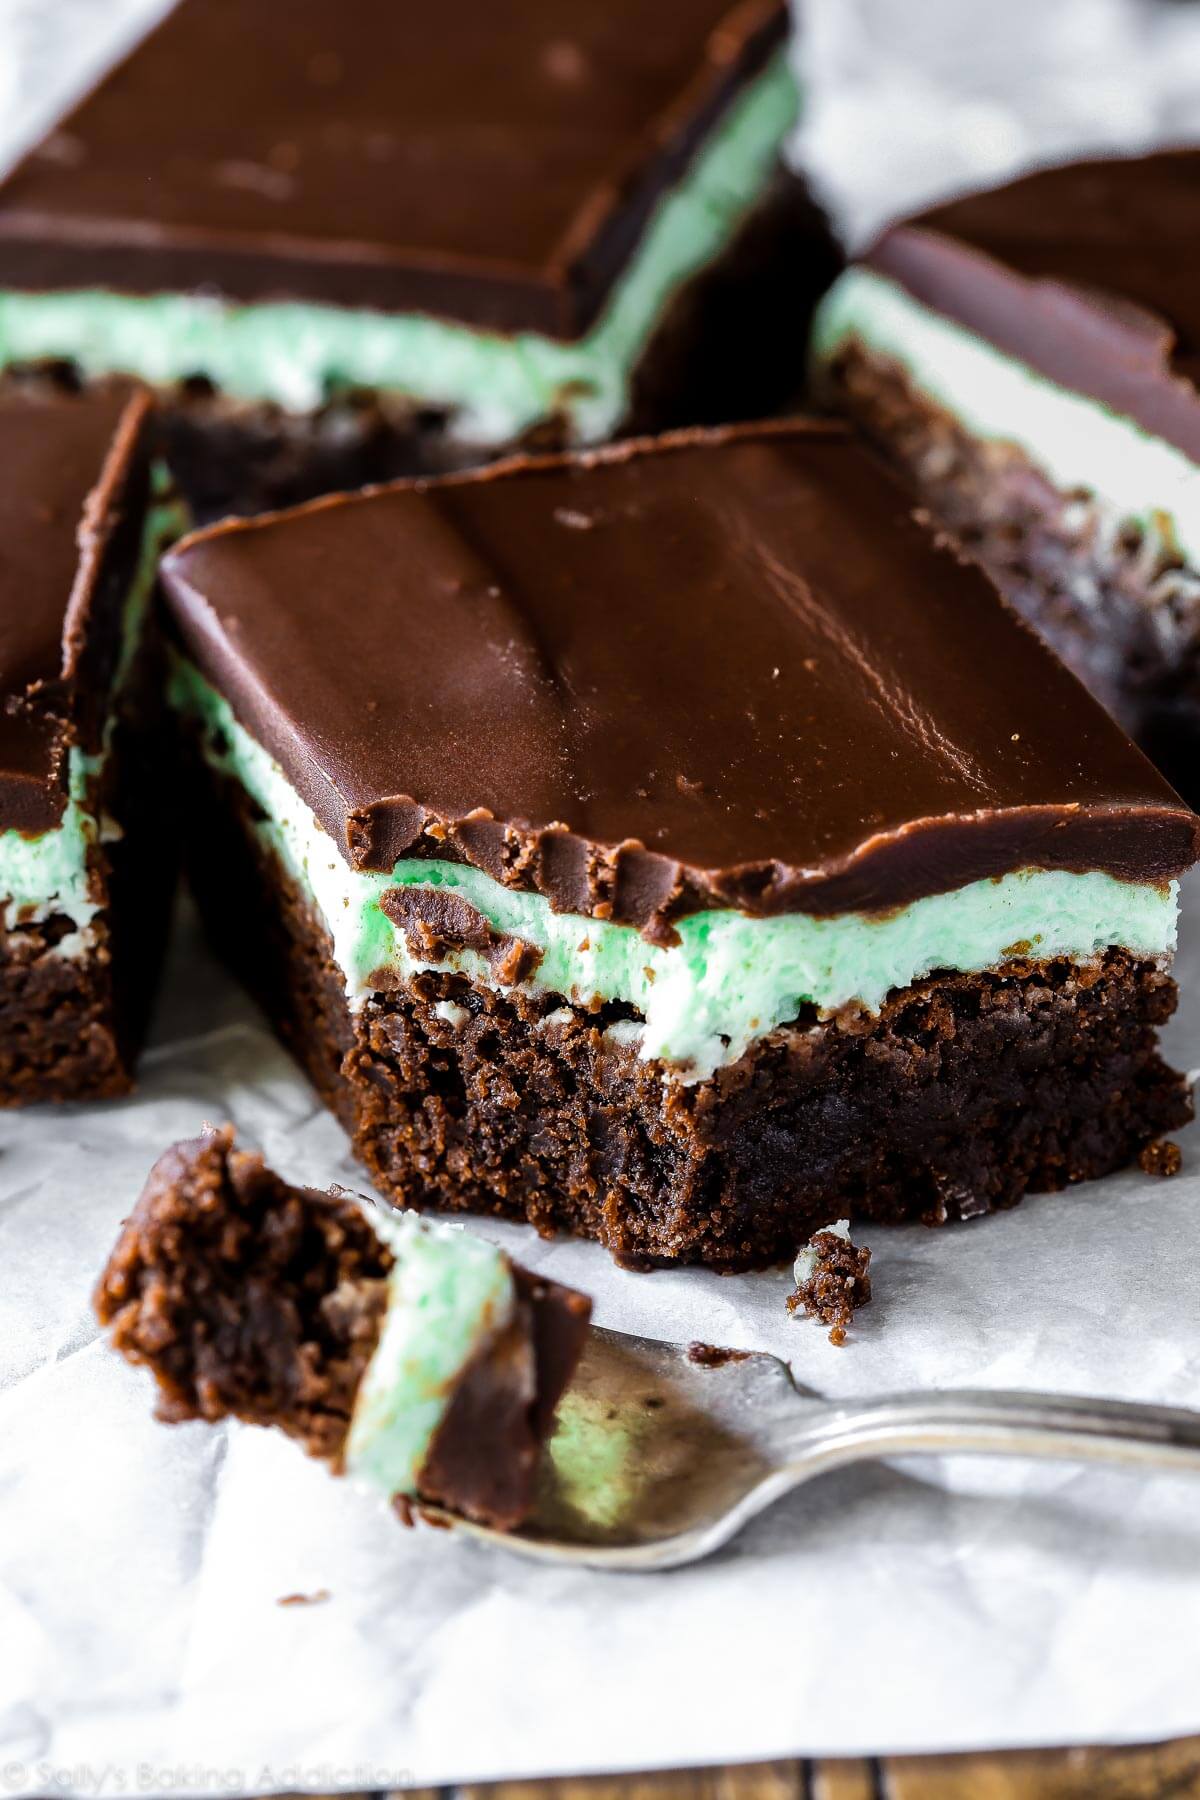
Speaking of cutting! I’m a little psycho about this. I’m convinced that anyone who says they can cut these mint layered brownies perfectly with absolutely no smears is lying. I’ve been making these for about 8 years now and there is no way around a few messy spots. Unless you know a secret? If so, please share. All I do is make very quick cuts, using a very sharp large knife, and wiping the knife off with a paper towel between cuts. And this is what the brownies looks like. But, it’s good enough for me.
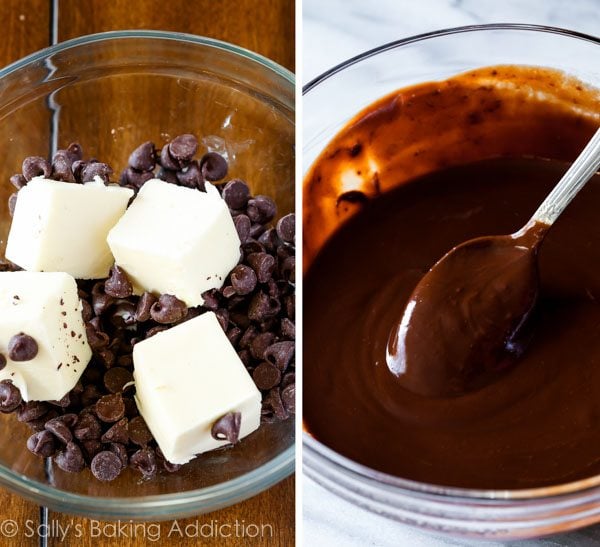
The chocolate layer on top is a lot like chocolate ganache. Instead of chocolate and cream, we’re using chocolate chips and butter. I normally urge you to never melt chocolate chips, but this is an exception. Chocolate chips make the chocolate layer so easy. I combine them with butter because you want a softer chocolate topping. As opposed to a hard, heavy chocolate layer on top. The soft chocolate is easier to cut without messing up the frosting underneath.
Finally! I’m done. Please go make these classic mint chocolate brownies. And grab a glass of milk while you’re at it. They’re devilishly rich. And, might I add, the perfect addition to Santa’s plate of Christmas cookies!
Print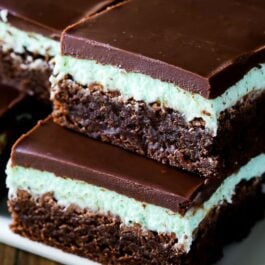
Classic Mint Chocolate Brownies
- Prep Time: 1 hour
- Cook Time: 35 minutes
- Total Time: 6 hours (includes cooling and chilling)
- Yield: 24-30 brownies
- Category: Brownies
- Method: Baking
- Cuisine: American
Description
Thick and fudgy brownies layered with sweet mint frosting and easy chocolate ganache. The classic mint chocolate combination!
Ingredients
Brownies
- 1 cup (16 Tbsp; 226g) unsalted butter
- 8 ounces semi-sweet chocolate, coarsely chopped
- 1 and 1/2 cups (300g) granulated sugar
- 1/2 cup (100g) packed light brown sugar
- 4 large eggs, at room temperature
- 2 teaspoons pure vanilla extract
- 1/2 teaspoon salt
- 1/2 cup + 3 Tablespoons (86g) all-purpose flour (spooned & leveled)
- 1/4 cup (21g) natural unsweetened cocoa powder
Mint Frosting Layer
- 1/2 cup (8 Tbsp; 113g) unsalted butter, softened to room temperature
- 2 cups (240g) confectioners’ sugar
- 2 Tablespoons (30ml) milk
- 1 and 1/4 teaspoons peppermint extract*
- optional: 1 drop liquid or gel green food coloring
Chocolate Layer
- 1/2 cup (8 Tbsp; 113g) unsalted butter
- 1 heaping cup (around 200g) semi-sweet chocolate chips
Instructions
- For the brownies: Melt the butter and chopped chocolate in a medium saucepan on medium heat, stirring constantly, about 5 minutes. Or melt in a medium microwave safe bowl in 20 second increments, stirring after each, in the microwave. Remove from the heat, pour into a large mixing bowl, and allow to slightly cool for 10 minutes.
- Adjust the oven rack to the lower third position and preheat oven to 350°F (177°C). Line the bottom and sides of a 9×13-inch baking pan* with parchment paper, leaving an overhang on all sides. Set aside.
- Whisk the granulated and brown sugars into the cooled chocolate/butter mixture. Add the eggs, one at a time, whisking until smooth after each addition. Whisk in the vanilla. Gently fold in the salt, flour, and cocoa powder. Pour batter into the prepared baking pan and bake for 35-36 minutes or until the brownies begin to pull away from the edges of the pan. A toothpick inserted in the center should come out with only a few moist crumbs when the brownies are done. All ovens are different, so keep an eye on them after 30 minutes and use the toothpick test to see when yours are finished. Allow the brownies to cool completely in the pan set on a wire rack. Once completely cooled, lift the foil out of the pan using the overhang on the sides. Place the whole thing on a baking sheet as you make the frosting. Do not cut into squares yet.
- For the mint frosting layer: In a medium bowl using a handheld or stand mixer fitted with a paddle attachment, beat the butter on medium speed until smooth and creamy, about 2 minutes. Add the confectioners’ sugar and milk. Beat for 2 minutes on low speed, then increase to high speed and beat for 1 additional minute. Add the peppermint extract and food coloring (if using) and beat on high for 1 full minute. Taste and add a drop or two more peppermint extract if desired. Frost cooled brownies, that you placed on the baking sheet, and place the baking sheet in the refrigerator. This allows the frosting to “set” on top of the brownies which makes spreading the chocolate layer easy. Keep in the refrigerator for at least 1 hour and up to 4 hours.
- For the chocolate layer: Melt the butter and chocolate chips in a medium saucepan on medium heat, stirring constantly, about 5 minutes. Or melt in a medium microwave safe bowl in 20 second increments, stirring after each, in the microwave. Once melted and smooth, pour over mint layer. Gently spread with a knife or offset spatula. Place the brownies, that are still on the baking sheet, in the refrigerator and chill for 1 hour (and up to 4 hours or even overnight) to set the chocolate.
- Once chilled, remove from the refrigerator and cut into squares. For neat cutting, make very quick cuts, using a very sharp large knife, and wiping the knife off with a paper towel between each cut. Brownies are OK at room temperature for a few hours. Cover tightly and keep leftovers in the refrigerator for up to 5 days.
Notes
- Make Ahead & Freezing Instructions: I recommend freezing the baked brownies, then thawing overnight in the refrigerator, then frosting with the mint and then the chocolate topping. This way the topping is nice and fresh. OR you can freeze the finished brownies, thaw overnight in the refrigerator and cut into squares.
- Special Tools (affiliate links): Saucepan | 9×13-inch Baking Pan (Glass or Metal) | Glass Mixing Bowls | Whisk | Silicone Spatula | Cooling Rack | Electric Mixer (Handheld or Stand) | Offset Spatula
- Peppermint Extract: I always recommend using peppermint extract in these brownies—I find that mint extract tastes more like spearmint toothpaste than true mint flavor.
- Smaller Pan: This brownie recipe is a combination of these frosted brownies and these raspberry cheesecake brownies, only made into a larger batch for a bigger pan. If you’d like to make today’s recipe in a 9-inch or 8-inch square baking pan, you can halve the frosting and the chocolate topping. Then use these frosted brownies (just the brownies, not the frosting) as the bottom layer.
Keywords: mint chocolate brownies


I have a bag of mint chocolate chips…Should I leave off the mint in the frosting layer….It they are what I’ll be using in the brownie layer and the ganache? I don’t seem to have any other chocolate in the house except for cocoa…Maybe I’ll use the cocoa + butter for the cake and chips in the ganache. Please advise. I’ve been trying to use up these mint chips since Christmas…And I have an unopened bag to consume.
Hi Mary! Instead of trying to adapt this recipe to use those chips (it may not work well), we would add your mint chocolate chips to our plain brownies for a mint chocolate brownie.
I was excited to make this recipe. Three things I experienced was:
1. I thought the brownies looked pretty even when I put them in the oven, but when it was time for it to come out, it didn’t look even. So when I added the mint frosting, I tried to make it look even, but I wished I had more frosting.
2. For the chocolate glaze, I followed the recipe & waited 5-10 min, but then it was too thick to spread. I added 2 T. Milk & mixed it up & that helped.
3. Also when I went to add the chocolate glaze, the mint frosting had not set yet, & then I was frustrated with how messy it looked. Any suggestions? I am supposed to serve this at a family dinner tomorrow night.
Hi Connie, thanks for trying these! I’d say to let the frosted brownies chill a little longer, to really help set that frosting layer. And then add the chocolate topping. Did you wait at least 1 hour? Up to 4 hours is fine, or a few hours longer. (This is a great make ahead recipe.)
This is a holiday favorite because they are too delicious to have around all the time! We died them pink instead of green and gave small boxes to neighbors for Valentine’s Day!
★★★★★
To say this recipe is delicious is an understatement. They are PERFECTION! I The texture of the brownie, the creamy frosting and the soft ganache on top are just right.
To perfectly slice the brownies, I covered it with plastic wrap and popped it in the freezer for a few minutes. Took it out of the bakeware and onto a cutting board. Then I cut the pieces with my large chef’s knife and had it HOT, clean and dry for each slice.
They are beautiful.
★★★★★
I made just made this recipe and I would definitely recommend it …. It one of the best brownies I have ever made ! The only this that was a bit off for me was the mint layer was a bit thin.
★★★★★
I don’t have chocolate bars to chop up for the brownie ingredient, what can I use as a substitute? TIA.
Hi Konnie, pure baking bars are best, but high quality chocolate chips should work in a pinch.
Thanks, do you know how much I would need to make an accurate substitute?
Same amount — 8 oz. or about 1 cup.
This recipe was so delicious. The brownies are addictive! I have a question, however. The last time I made them, I let them cool overnight, as usual. The problem occurred when I went to cut them. The chocolate topping peeled right off the mint layer, and I had to just set the chocolate back on top of the mint layer. As a result, although they tasted wonderful, they didn’t look so professional. Should I have let them rest a few minutes before cutting, or what did I do wrong? Thanks for your help.
★★★★★
Hi Mary, butter is hard when it’s cold, so the butter-filled chocolate topping will be hard after chilling. If you try the recipe again, let them sit out on the counter for 5-10 minutes before cutting. This gives the chocolate topping a chance to slightly soften. So glad you enjoyed these!
Made exactly as directed and they came out perfect! We are going crazy eating these! Cut perfectly with wiping knife off. They look like a professional baker made them. Oooooh so delicious! Thank you for the recipe!!!
★★★★★
I have been making this recipe for about 2 years. These brownies are amazing when made as directed. Use them regularly as St Patrick’s Day treats but they are often requested throughout the year.
Love to watch my friends reactions when they taste their first brownie. Everyone loves them!
★★★★★
I need to make a bunch of mint brownies for a piano recital I’m having. Have you ever tried doubling the recipe and baking them in a big cookie sheet?
Hi Merianne, we haven’t tested it, but this cake pan sizes and conversions post should help determine how much brownie batter you’ll need for different pans. Enjoy!
I can’t wait try your recipe. Your brownies look beautiful. I have had issues in the past cutting the brownies. I was told to dip the knife in warm water before cutting and wipe the knife after each cut. It really cuts down the jagged slices.
I only have a bottle of Simply peppermint flavor, rather than peppermint extract. Do you have a recommendation for what measurement of peppermint flavoring to use as a substitute for the peppermint extract?
Hi Katie, peppermint oils/flavoring are typically much stronger than extracts. We’d recommend starting small (perhaps 1/2 teaspoon), tasting the frosting, and then adjusting for more if you’d like a stronger taste.
My brownies didn’t come out so well. I followed the recipe exactly, but my brownies got WAY too hard on the outside and stayed raw on the inside. I couldn’t even cut through them they were so hard. I baked them for 30 minutes and my toothpick came out with just a few moist crumbs. Thinking they were fine, I continued with the rest of the recipe; However, when I tried to serve them, my knife couldn’t cut through the hard brownie. The part I was able to spoon out was delicious, so I’m definitely ready to try this recipe again… I’m just wondering what went wrong. Any words of advice?
Hi Beth, Thank you for trying this recipe. If your brownie tops are baking unevenly, this can be be fixed by changing your oven settings. Try lowering your oven rack, lowering your oven temperature a bit and extending the bake time. Also if you still notice the tops baking quickly, tent with foil half way through.
Hey! These brownies look absolutely stunning, and as a mint chocolate lover my mouth is watering. I am planning on making one of your recipes for St. Patrick’s day. I am thinking about either going with this recipe or your Mint Chocolate Checkerboard cookies. Which do you think I would be able to make if I were to bake them this afternoon?
Thanks!
Hi Sarah! Both recipes are so delicious, you can’t go wrong with either. They both take some time and have multiple chilling steps so check out the total time needed for each recipe before beginning. Happy baking!
I haven’t made your recipe, but my family has been making Chocolate Mint Brownies for decades! I’m going to give this recipe a try next time I make them, which is quite often. They’re the most requested dessert for birthdays, holidays, weekends, a good day, a bad day, you name it. This family loves these things! One trick for cutting them that I’ve found works is to use a plastic knife 🙂 Thanks for sharing this!
Love the plastic knife trick! Hope you enjoy these mint brownies, Nichole 🙂
I cut brownies frozen. Perfect straight lines
I have been making a similar recipe for over 30 years! It was fun to see your version. And I have never been able to make totally clean cuts. It doesn’t matter! Just put the squares in a festive muffin tin paper liner! I have always trimmed the edges around the pan so I don’t have any crunchy sides…..the family has always benefitted with these scraps! I use the clear crème de menthe and have colored for the occasion ( red and green, pink and blue, or just green). I wonder what they’d be like with peanut butter in the middle instead! These freeze fabulously once cut and most of my family prefers them frozen.
★★★★★
Do you have a suggestion on how I could gift wrap the mint brownies?
Hi Anna! Perhaps small clear plastic bags with a decorative ribbon? Let us know what you try!
Do u think Creme de Menthe extract would taste good instead of peppermint, because that’s what I have on hand. I’m excited to make the brownies! Thanks for the recipe!
Definitely!
The taste of the brownies was very good and they looked like the picture when I was done, however, the aluminum foil stuck to the bottom and was difficult to remove. I also thought the process took awhile and my error did not plan for all the chilling in between steps. Now I know and will do better next time!
★★★★★
Do you have a gluten free option for these brownies?
Hi Denise! We haven’t tested these brownies with Gluten Free flour, but let us know if you do!
I have made these brownies with “Cup for cup” gluten free baking blends (C4C and Bob’s Red Mill) and they both worked beautifully.
★★★★★
Hello! I looked up this recipe because semi sweet mint chocolate bars were on sale and I got plenty and am now looking for things to do with it. I’ll try making the brownies with these mint bars and let you know how they turn out!
Hi, I’m planning to travel these brownies and serve on an event. Will not include the mint layer but will the chocolate layer on top hold onto its place for 8 hrs? Thanks in advance.
Hi Sheena! We would keep these bars chilled for as long as possible, only leaving at room temperature for up to a couple hours. Perhaps you could travel with them in a cooler? Let us know what you try!
these look so good. i wish i had peppermint extract. is there a way we could use mint leaves or something
I made these and fell in love with them. I am wondering what size pan to use if I want to make a half batch.
Hi Suzy, You can cut the recipe in half and bake in a 8×8 or 9×9 pan. I’m unsure of the bake time needed though. Happy baking!
This recipe is absolutely amazing!!! The brownies came out perfectly and ended up being one of the best desserts I have ever eaten! They were a big hit- everyone loved them! Thank you, Sally! 🙂
★★★★★
These came out awesome!! One thing I did was leave in fridge overnight after the frosting layer and then overnight again after the ganache layer. The BEST way to cut brownies without worrying about the sharpness of your knife or any wiping is using a bench scraper. I’ve been doing it a while now, it’s amazing how well this cuts brownies with no wiping whatsoever!
★★★★★
I did reduce the white sugar a bit and the crane de menthe liquor instead of extract! Addicted!!!
★★★★★
Hi Sally! This recipe looks amazing! I am planing to make it for a picnic and I was wondering if I could mix a little espresso powder with the vanilla extract to make them coffee? Thanks for all the awesome recipes!! I am twelve and adore your cookbooks and blog! Hope you have a great day!
Hi Sofia! Definitely. You can add it in with the dry ingredients like we do with these mocha cheesecake brownies.
Amazing. Delish!!!! Lots of rich, buttery goodness.
★★★★★