

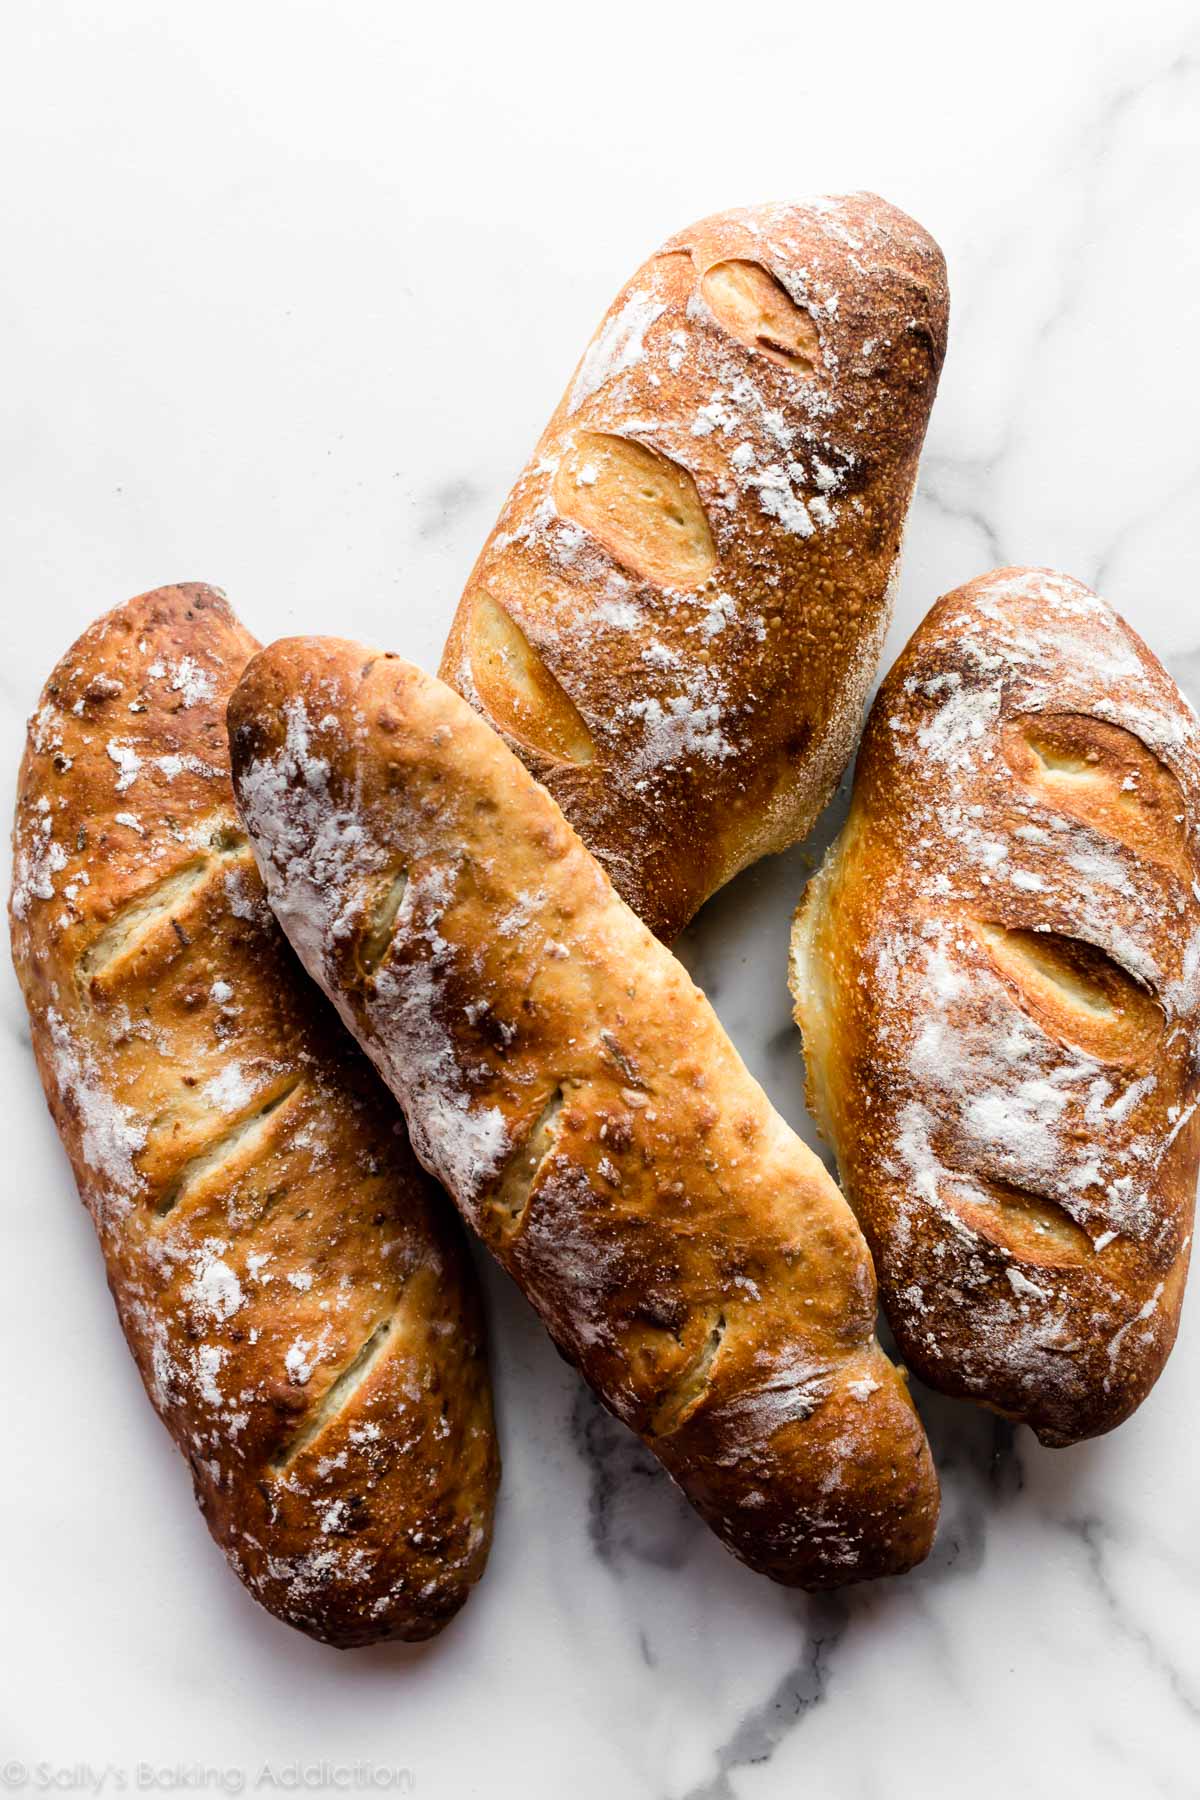
Even if you’ve never made homemade bread or worked with yeast before, this homemade crusty artisan bread is for you. It’s the perfect beginner recipe because it only requires 4 ingredients without any special pans or mixer, there’s no kneading or complicated shaping involved, and 95% of the work is hands-off. Bread masters will appreciate this recipe too because it delivers with delicious flavor, a slightly crisp and mega chewy crust, and those signature soft holes inside like ciabatta or French bread.
Bread Beginners—Start Here
Have you ever wanted to master homemade bread? Real, crusty, chewy, delicious bakery-style loaves that taste incredible with dips, soups, sauces, and comforting dinners? This is where you start. This artisan bread recipe is for beginners, but even bread masters will appreciate its flavor and ease. It’s so fresh, so flavorful, and so surprisingly easy because it basically makes itself.
You only need 4 ingredients without any special pans or mixer, there’s no kneading, no poolish or dough starter required, and you can add herbs, cheeses, and spices to make a variety of bread flavors.
This base recipe will soon be on repeat in your kitchen. After you realize how easy it is to make real homemade bread, you’ll find any excuse to bake a loaf. You can even turn it into garlic bread and homemade croutons.

What is Homemade Artisan Bread?
When it comes to bread, the term “artisan” doesn’t mean 1 particular thing. But, generally, artisan bread is homemade, fresh, crusty, and deliciously rustic-looking. An artisan is a skilled worker, one who works with their hands. But ironically, there isn’t much “work” involved with this recipe.
Why You’ll Love This Bread Recipe
- Easier than you ever imagined
- Soft + flavorful
- Chewy, slightly crisp crust
- Shape however you want
- No special pans, poolish, or dough starter required
- Only 4 ingredients
- You decide the length of time it rests
One reader, Mena, commented: “Wow! I had never made bread until I tried this recipe. Followed instructions carefully and watched the video. Beautiful golden crust and airy center. It was delicious! Thank you, Sally! ★★★★★”
Another reader, Marliz, commented: “Love the bread and I really enjoy the flexibility of leaving the dough in the refrigerator. Will definitely make this on the regular! No need to carefully plan rising times with cooking and eating times. Just prepare a few days ahead and put it in the refrigerator. Works so well! Very easy and tasty. I kept it as one big loaf. ★★★★★”
Another reader, ACM, commented: “One word: Outstanding! Fantastic recipe and can accommodate your favorite herbs and spices, nuts and fruit, or cheese. Make one! ★★★★★”
Like sandwich bread, whole wheat bread, focaccia, homemade English muffins, seeded oat bread, and homemade bagels—the process is surprisingly easy. If you’re new to yeast, reference my Baking with Yeast Guide for answers to common yeast FAQs.
Only 4 Ingredients
The crustier and chewier the bread, the less fat in the dough—also known as a “lean dough.” We’re using a lean dough for our artisan loaf today. (If you’re curious, a “rich dough” is a soft bread dough with the presence of fat, such as butter and eggs—the kind we need for overnight cinnamon rolls, sweet potato dinner rolls, brioche, and honey butter rolls.) Without fat, we’re left with the basics.
- Bread Flour: While you can use all-purpose flour in this recipe, I strongly recommend using bread flour. Just like when we make olive bread, pizza bread, and asiago-crusted skillet bread, bread flour produces a stronger, chewier bread and that makes a big difference in a recipe with only 3 other ingredients.
- Instant Yeast: Instant yeast is key in this recipe. While you can use active dry if that’s all you have, any quick rise or instant yeast will produce flavorful results in less time. I use more yeast in this recipe compared to my cranberry nut no-knead bread and no-knead jalapeño cheddar bread. Why? Those doughs rest and rise at room temperature. However, for more flavor and just as much rise, I use more yeast and let this dough rest in the refrigerator. (Cool air slows the fermentation process.)
- Salt: You can’t make good bread without salt and for best flavor, I recommend a coarse salt, such as coarse sea salt. I find the bread’s flavor lacking with regular table salt.
- Water: I normally encourage you to use warm liquid with yeast because warm liquid helps the yeast work faster. However, use cool or room temperature water here. Not freezing cold, not super warm—cool to touch. 70°F (21°C) is great, but the exact temperature doesn’t matter as long as it’s not hot or warm. The cooler the water, the longer the dough takes to rise and, usually, the better the bread’s flavor. (This is important since there are so little ingredients to add substantial flavor!) We use the same cool water method for no knead honey oat bread.
- Optional Cornmeal: Dusting the pan with cornmeal adds a pop of flavor and a little crunch to the bottom crust. This is completely optional. If you have it, use it. If you don’t have it, don’t worry about it.
You can also add herbs and seasonings such as garlic, rosemary, dill, chopped onion, jalapeño, shredded cheese, chopped nuts, dried cranberries, etc. My no yeast bread is the quick bread alternative here—you can add flavors to that loaf, too!
Baker’s Tip: Avoid adding too much flour to the dough as you work with it. The stickier it is—and the longer it sits in the refrigerator—the more likely you’ll have those big airy pockets of air in the crumb.
How to Make Homemade Artisan Bread in 5 Steps
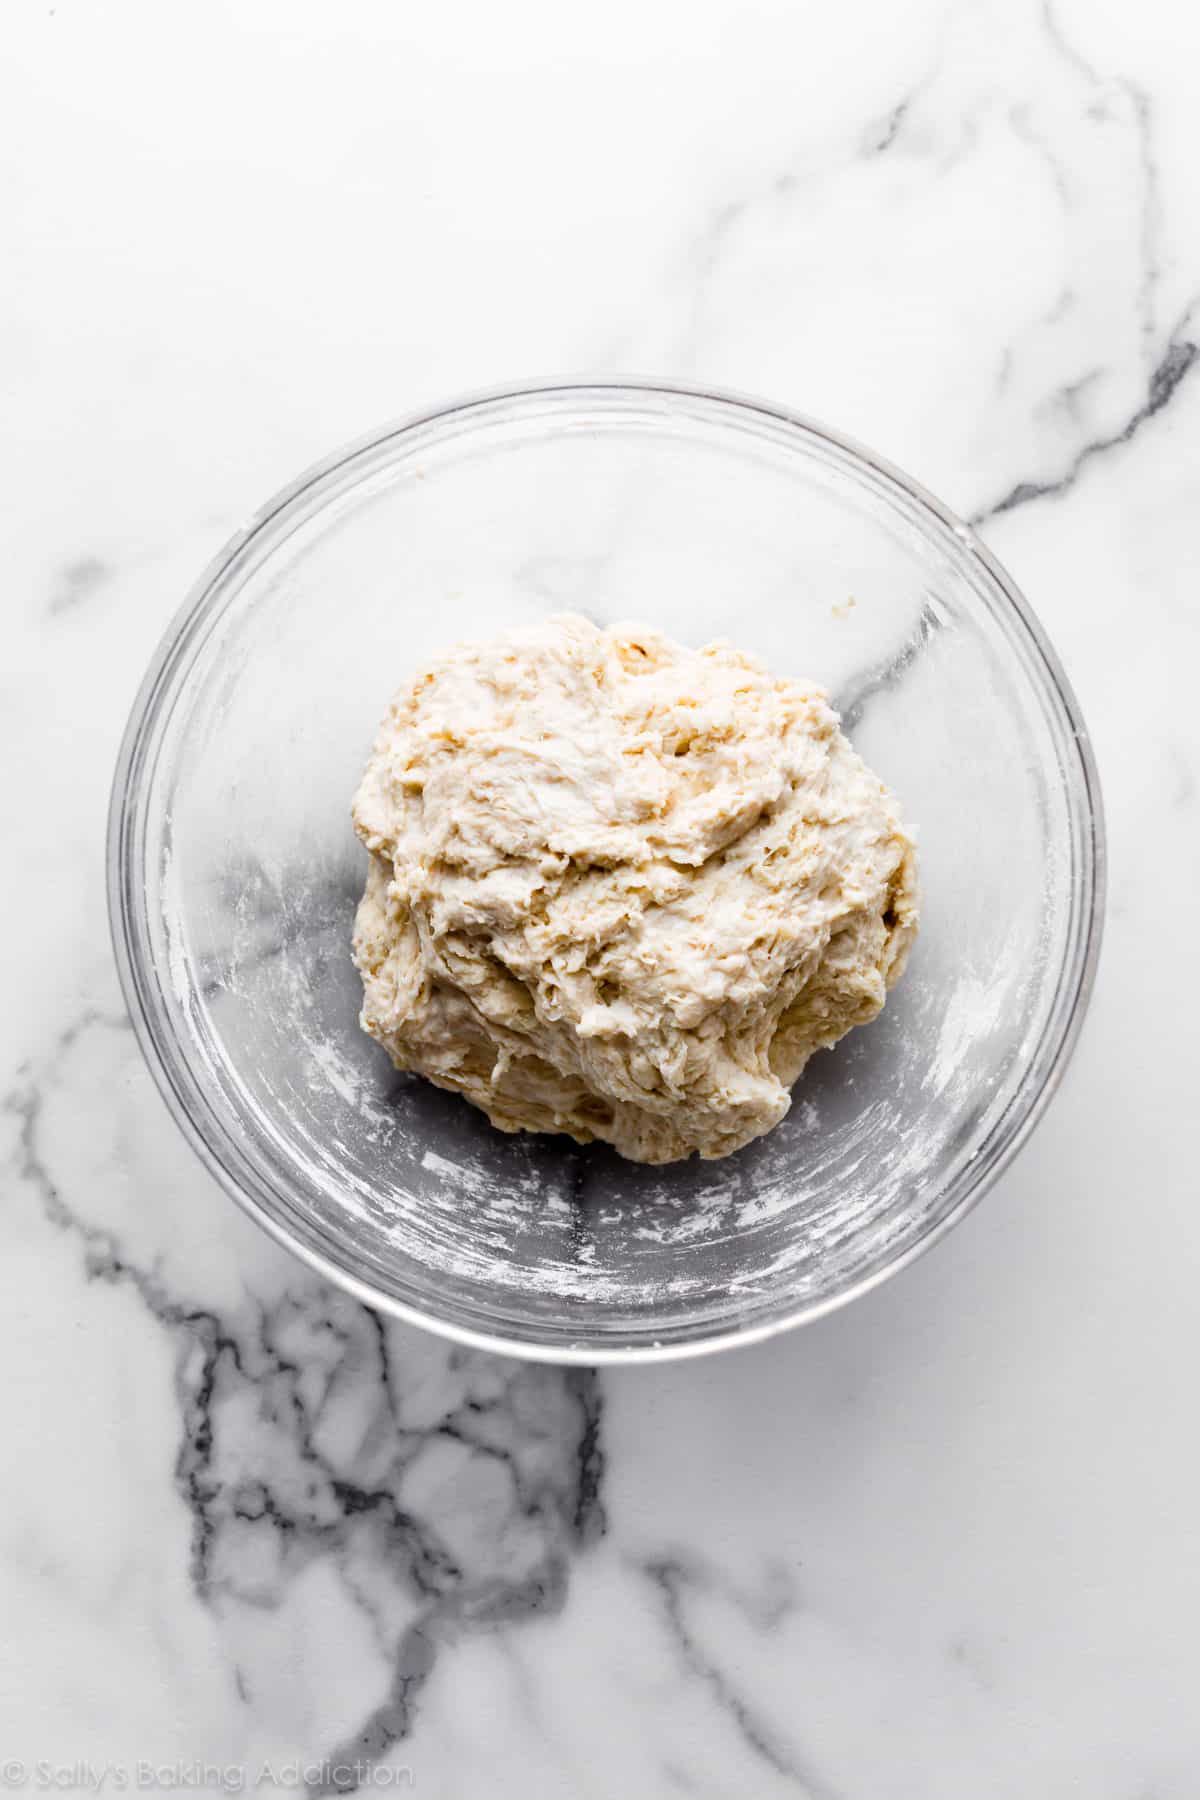
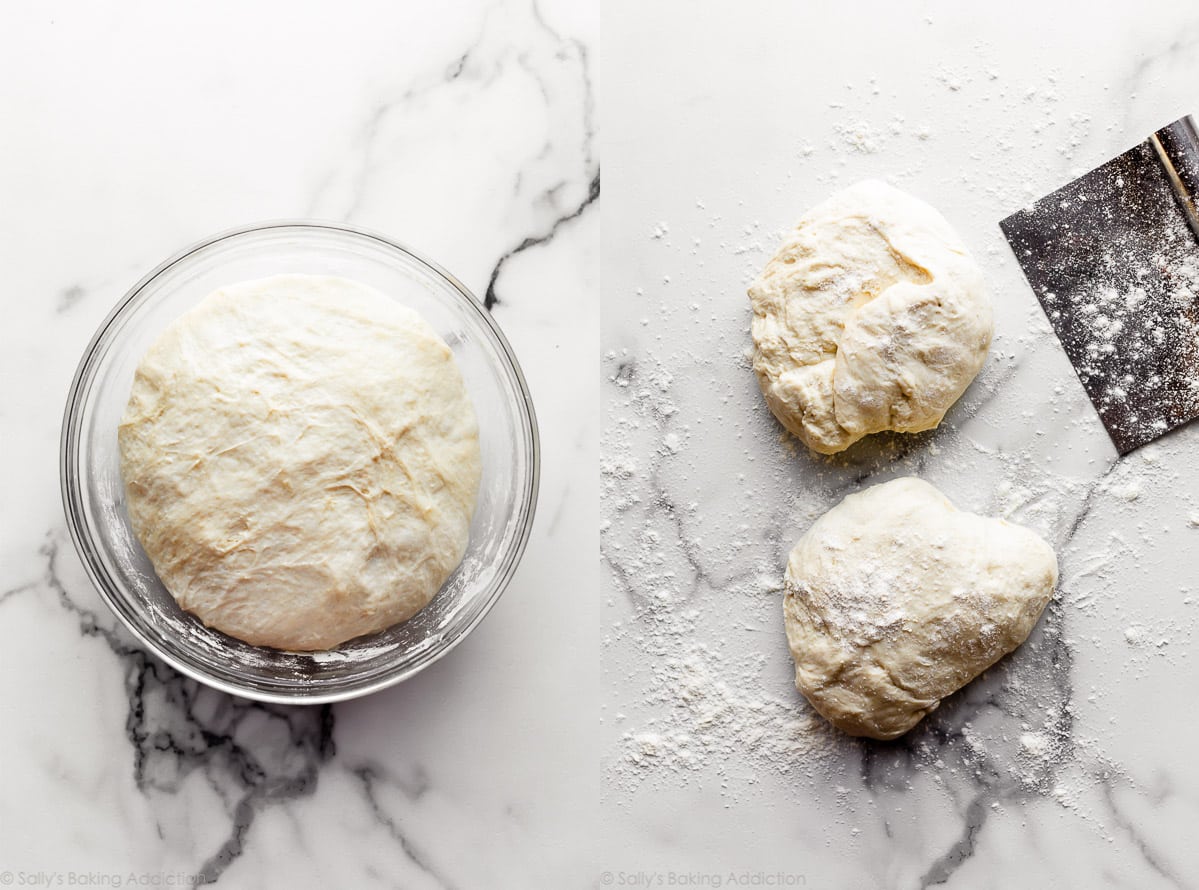
- Mix the dough ingredients together. At first the dough will seem very dry and shaggy and you’ll question if it will even come together. But it will. Use a spatula at first, then switch to your hands to ensure all of the flour is moistened. The dough is actually a little sticky after it’s thoroughly mixed.
- Let it rise at room temperature for 2-3 hours. Cover the dough and let it rise at room temperature for about 2-3 hours until doubled in size.
- Use right away or refrigerate. After 2-3 hours, you can immediately continue with the next step. However, for ideal flavor and texture, I strongly recommend letting the dough sit in the refrigerator for at least 12 hours and up to 3 days. Yes, 3 full days! I usually only let it rest for about 18 hours. During this crucial step, the cold air slows the fermentation process and adds so much flavor and texture. So, you can bake bread in 2-3 hours or in 3 days. The longer it sits, the better it tastes. 🙂
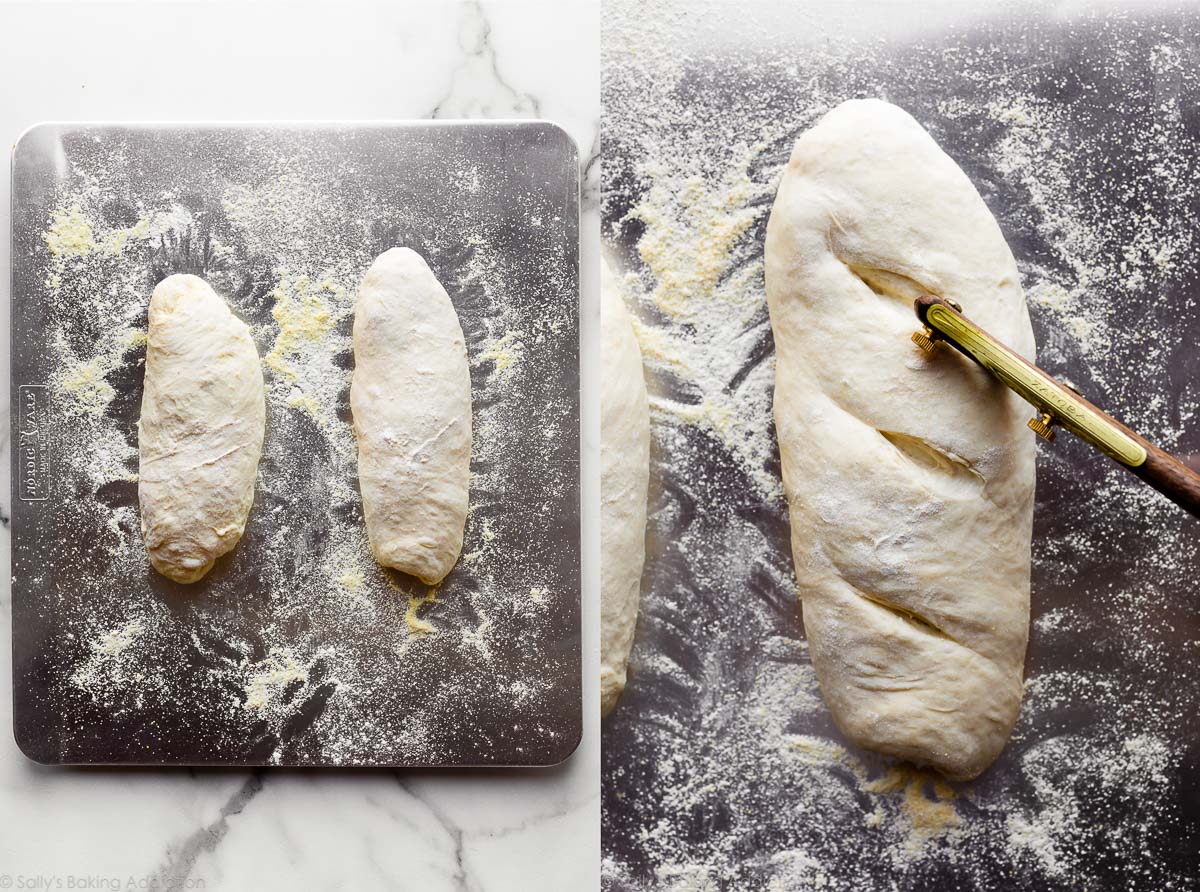
- Shape into 2 loaves or 1 boule. Rest as oven preheats. You can shape the bread into a round loaf (boule) or two longer loaves. I usually make two longer loaves side-by-side on a flat baking sheet, about 9×3 inches each. Preheat the oven to a very hot 475°F (246°C). The extremely hot air will immediately set the crust so the bread rises up instead of spreading all over. Score the loaves on top right before baking. Scoring also helps control the bread’s expansion. To help ensure a crispier crust, after the oven preheats, pour boiling water into a metal or cast iron baking pan on the bottom oven rack. Immediately place the baking sheet inside and shut the oven door to trap the steam. The steam will help create that coveted crisp crust.
- Bake until golden brown, about 20-25 minutes. Gently tap the loaves because if they sound hollow, they’re done.
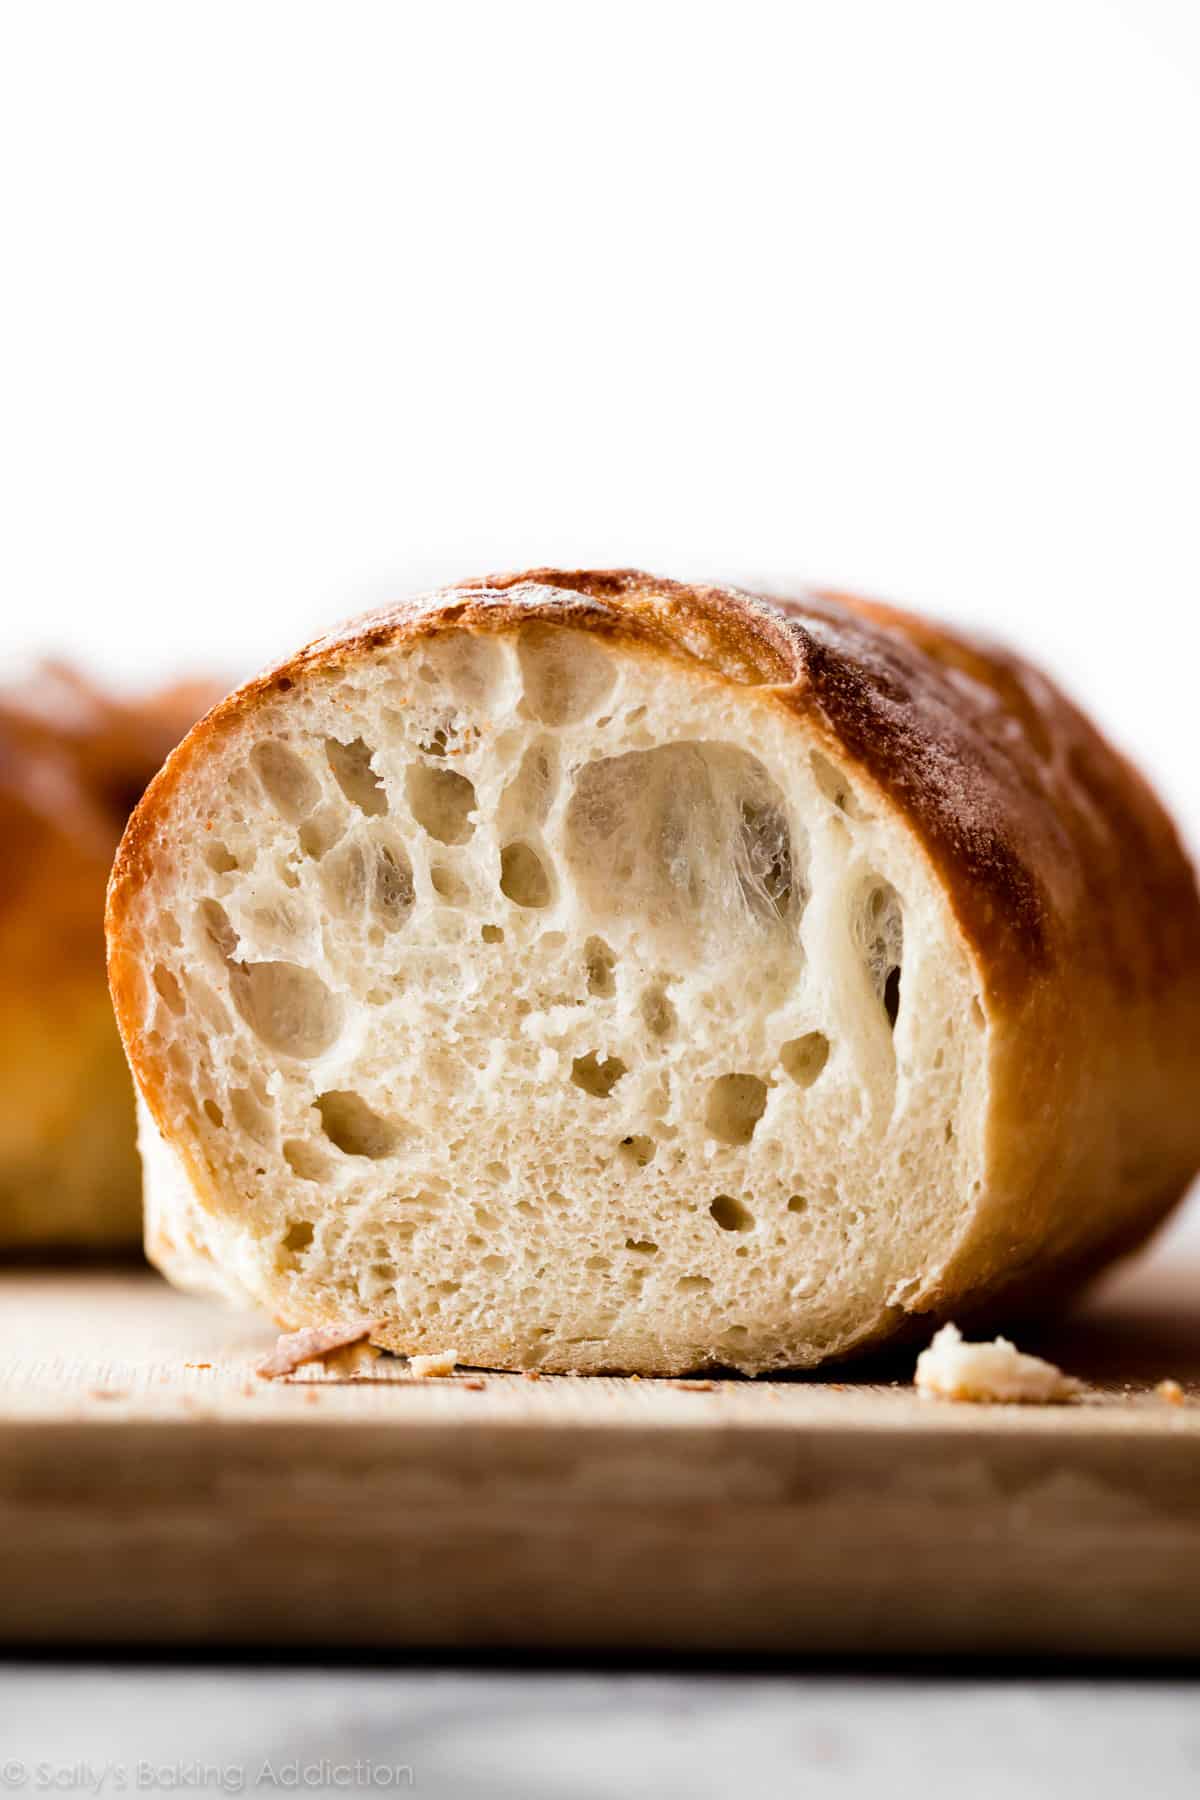
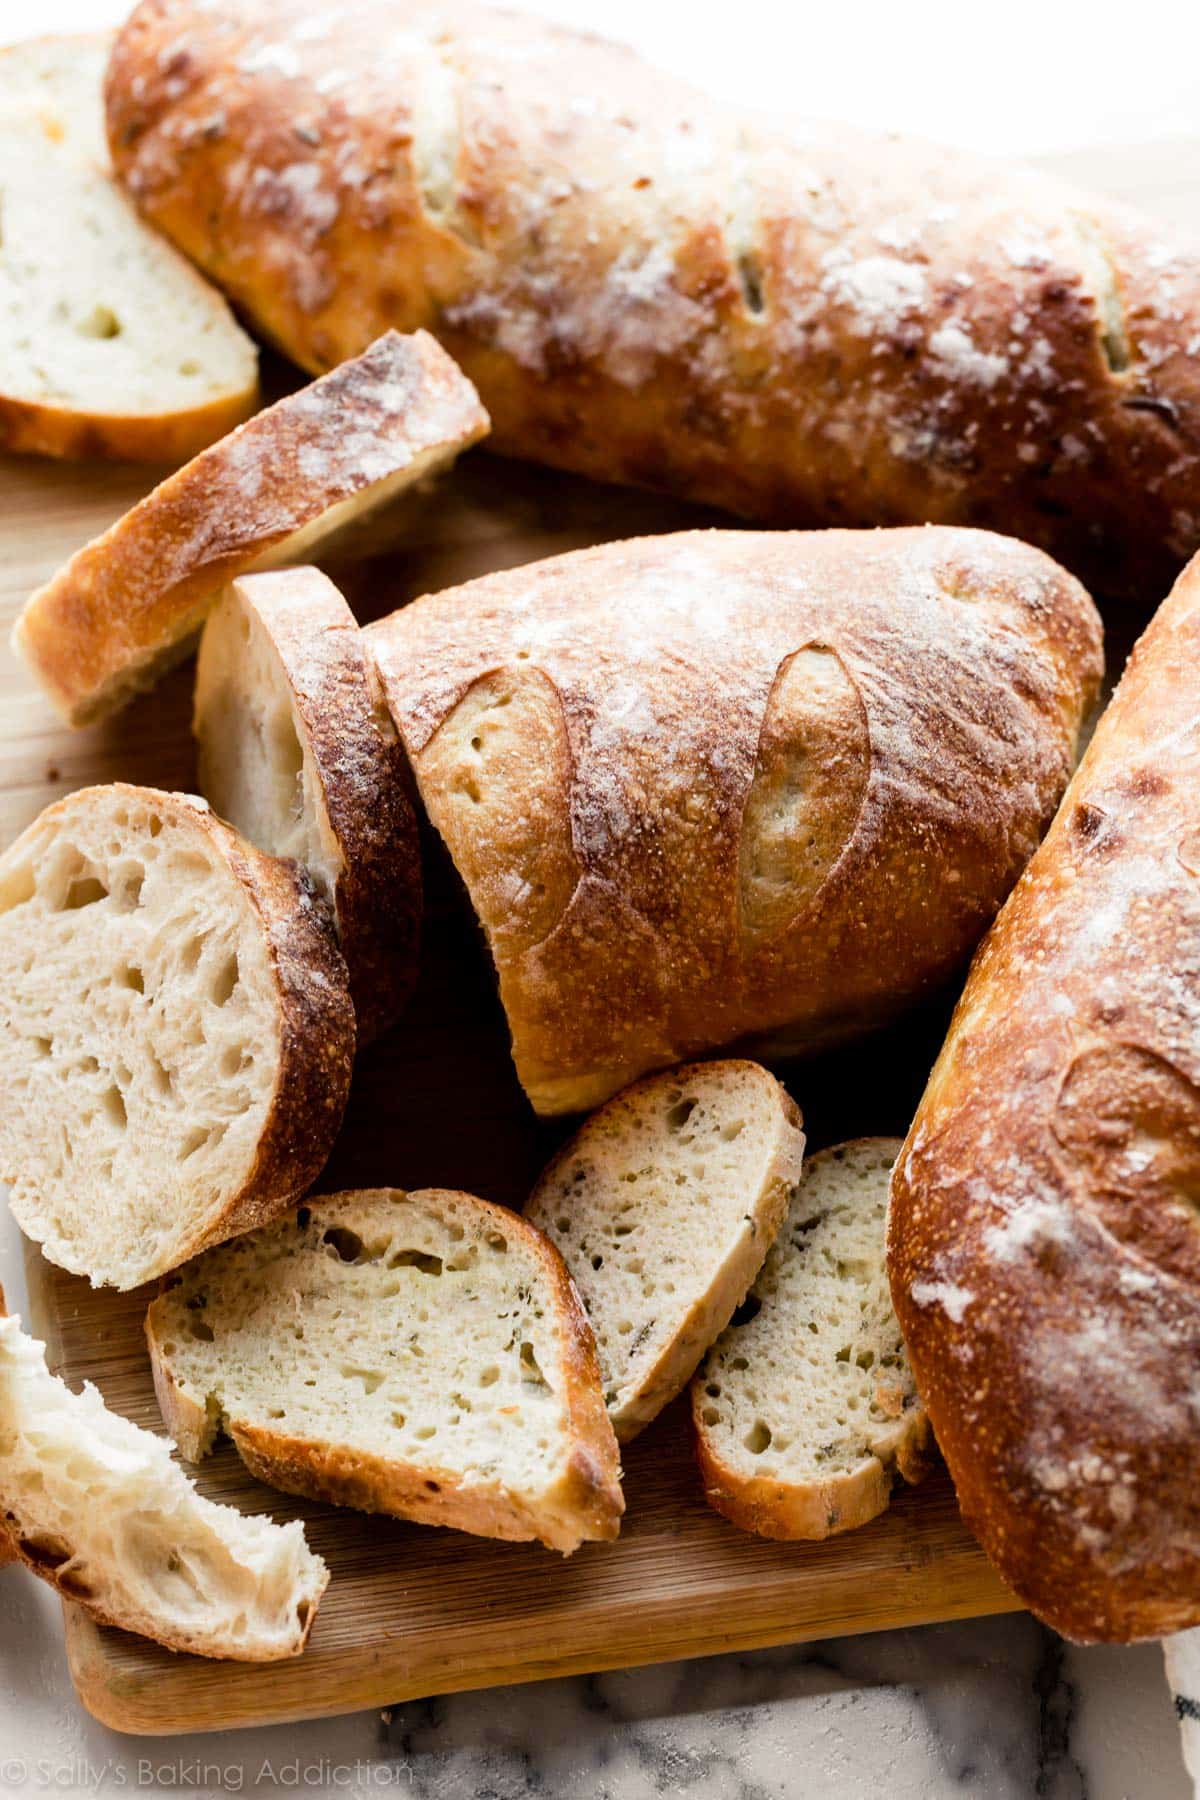
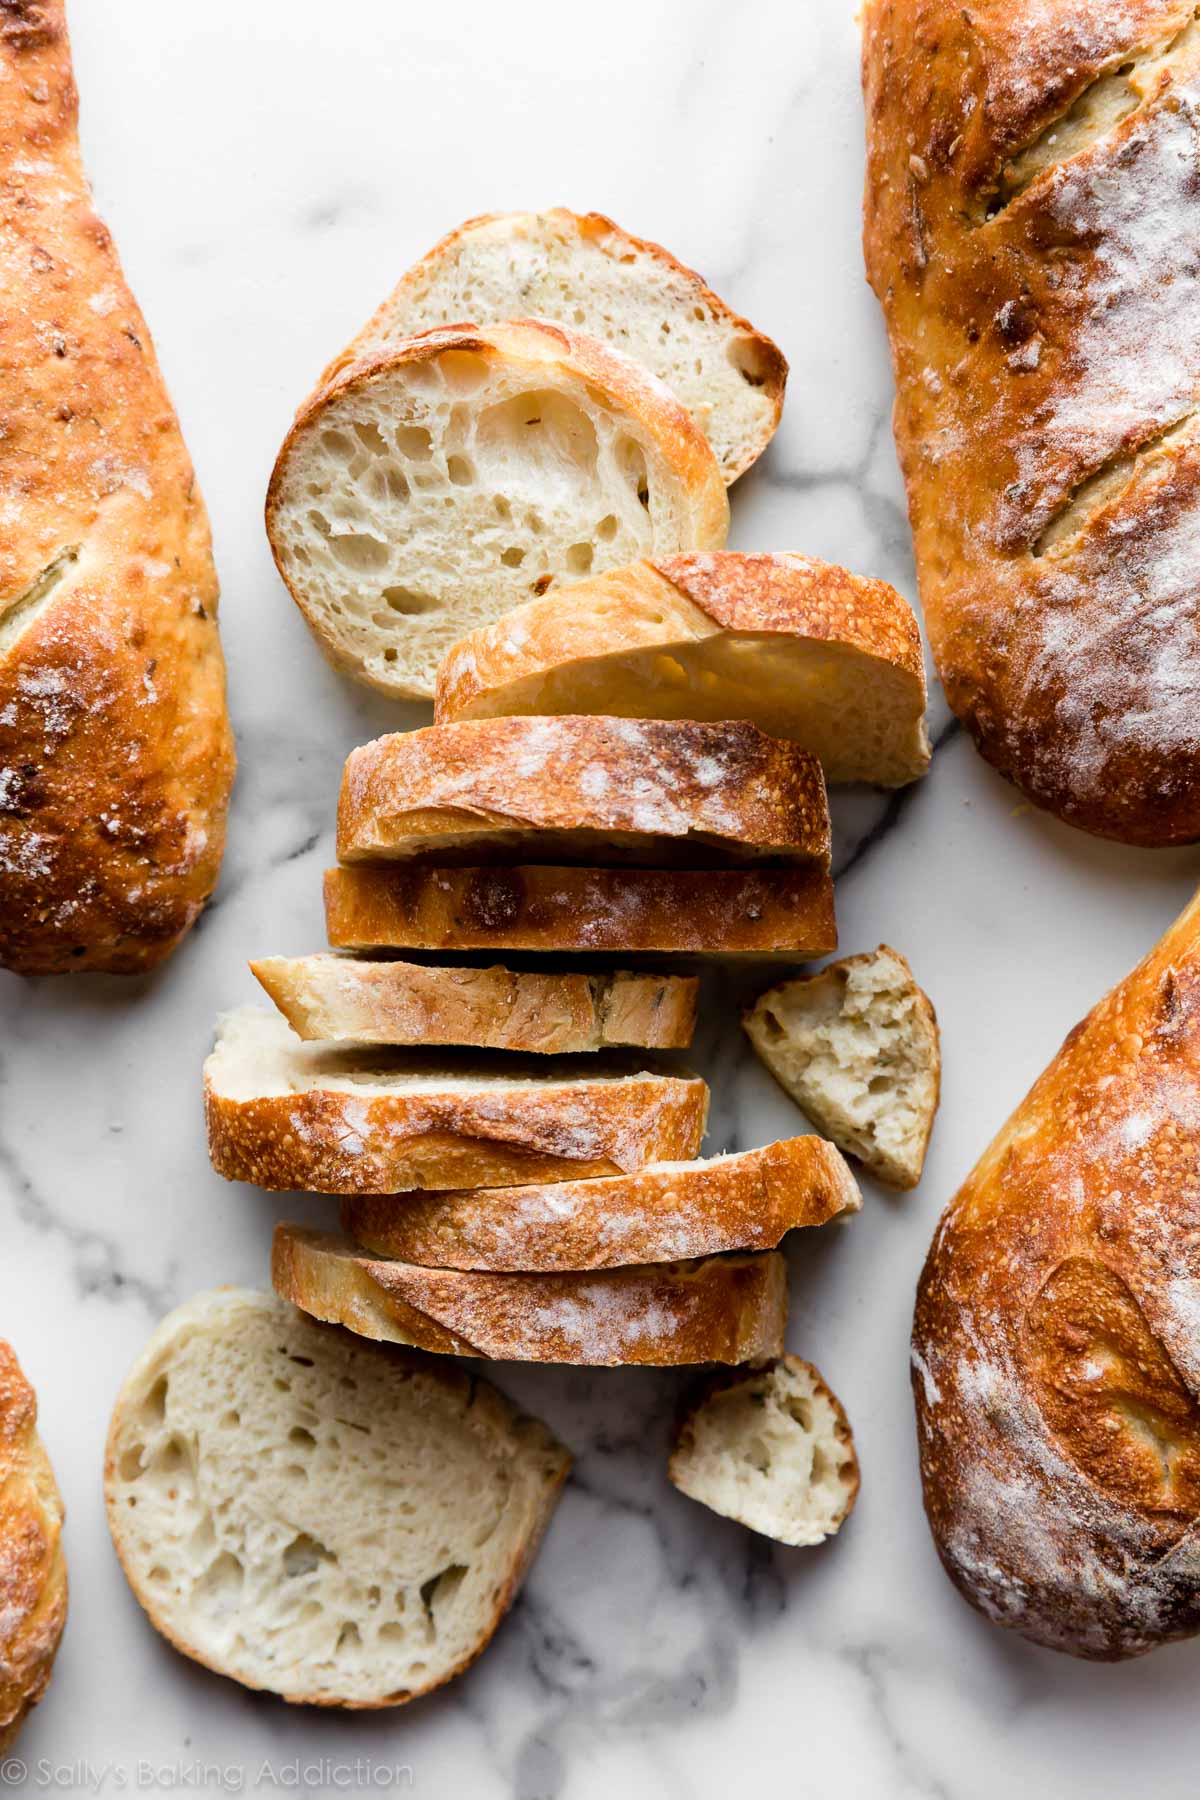
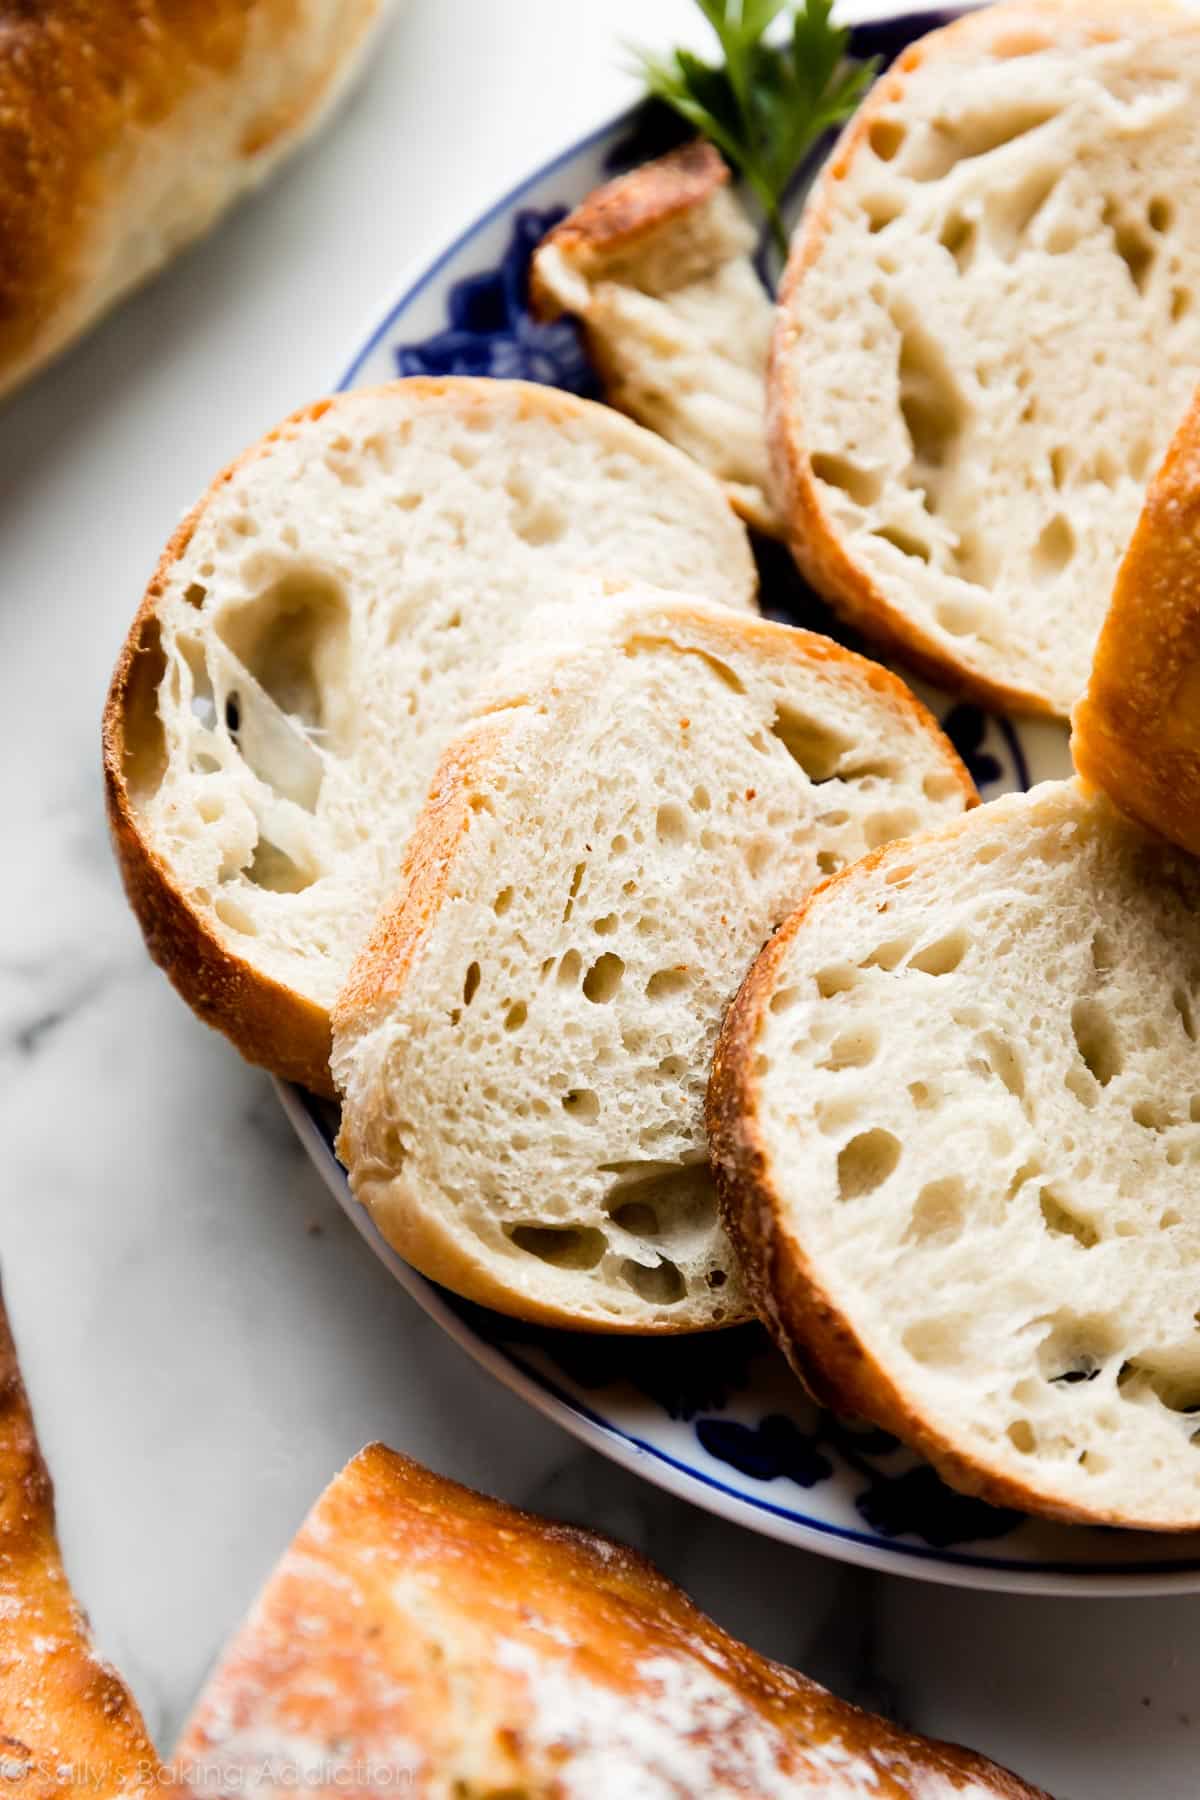
Look at those deliciously soft holes inside! Reminds me of ciabatta or a French baguette, both of which can be a little more complicated to make.
Serve Artisan Bread With
- Slather with homemade honey butter or cinnamon butter
- Slice and dunk in crab dip, beer cheese dip, garlic & bacon spinach dip, or even homemade Italian dressing
- Serve alongside slow cooker chicken chili or pumpkin chili
- As a dunker for homemade tomato soup, creamy cauliflower potato soup, minestrone soup, creamy chicken noodle soup, crab soup, or slow cooker creamy chicken & corn soup
- With a big bowl of mac & cheese or spaghetti with slow cooker turkey meatballs
- It’s the perfect starch in breakfast casserole or baked apple cider French toast
- Use it to make homemade garlic bread or homemade croutons
- With anything because homemade bread is everything’s best friend
No, this recipe works well with and is written for a standard baking sheet. If you would like to use a Dutch oven, see recipe Notes for details.
When bread fails to rise, it’s usually due to inactive yeast or insufficient rest time. See my Baking with Yeast Guide for more helpful yeast troubleshooting tips.
Artisan bread will form a crispy crust when it is baked in a steamy oven. See step 7 in the recipe instructions for details on using a pan of hot water in the oven to create a steamy baking environment.
Yes, the same amount of all-purpose flour will work in a pinch, but I strongly recommend using bread flour for a chewier texture.

Homemade Artisan Bread Recipe
- Prep Time: 4 hours
- Cook Time: 25 minutes
- Total Time: 4 hours, 25 minutes
- Yield: 2 8-inch loaves
- Category: Bread
- Method: Baking
- Cuisine: American
Description
Even if you’ve never made homemade bread or worked with yeast before, this homemade artisan bread is for you. Watch the video tutorial below and review the recipe instructions and recipe notes prior to beginning. If you’re new to working with yeast, reference my Baking with Yeast Guide for answers to common yeast FAQs.
Ingredients
- 3 and 1/4 cups (about 430g) bread flour (spooned & leveled), plus more for hands and pan
- 2 teaspoons (about 6g) instant yeast
- 2 teaspoons (about 9g) coarse salt (see note)
- 1 and 1/2 cups (360ml) water, close to room temperature at about 70°F (21°C)
- optional: cornmeal for dusting pan
Instructions
- In a large ungreased mixing bowl, whisk the flour, yeast, and salt together. Pour in the water and gently mix together with a silicone spatula or wooden spoon. The dough will seem dry and shaggy, but keep working it until all the flour is moistened. If needed, use your hands (as I do in the video tutorial below) to work the dough ingredients together. The dough will be sticky. Shape into a ball in the bowl as best you can.
- Keeping the dough in the bowl, cover the dough tightly with plastic wrap or aluminum foil and set on the counter at room temperature (honestly any normal room temperature is fine!). Allow to rise for 2-3 hours. The dough will just about double in size, stick to the sides of the bowl, and have a lot of air bubbles.
- You can continue with step 4 immediately, but for absolute best flavor and texture, I strongly recommend letting this risen dough rest in the refrigerator for at least 12 hours and up to 3 days. Place covered dough in the refrigerator for 12 hours – 3 days. I usually let it rest in the refrigerator for about 18 hours. The dough will puff up during this time, but may begin to deflate after 2 days. That’s fine and normal—nothing to worry about.
- Lightly dust a large nonstick baking sheet (with or without rims and make sure it’s nonstick) with flour and/or cornmeal. Turn the cold dough out onto a floured work surface. Using a sharp knife or bench scraper, cut dough in half. Some air bubbles will deflate as you work with it. Place dough halves on prepared baking sheet. Using floured hands, shape into 2 long loaves about 9×3 inches each (doesn’t have to be exact) about 3 inches apart. Loosely cover and allow to rest for 45 minutes. You will bake the dough on this prepared baking sheet.
- During this 45 minutes, preheat the oven to 475°F (246°C).
- When ready to bake, using a very sharp knife or bread lame (some even use kitchen shears), score the bread loaves with 3 slashes, about 1/2 inch deep. (“Score” = shallow cut.) If the shaped loaves flattened out during the 45 minutes, use floured hands to narrow them out along the sides again.
- Optional for a slightly crispier crust: After the oven is preheated and bread is scored, place a shallow metal or cast iron baking pan or skillet (I usually use a metal 9×13-inch baking pan) on the bottom oven rack. Carefully and quickly pour 3-4 cups of boiling water into it. Place the scored dough/baking pan on a higher rack and quickly shut the oven, trapping the steam inside. The steam helps create a crispier crust.
- Place the shaped and scored dough (on the flour/cornmeal dusted pan) in the preheated oven on the center rack. Bake for 20-25 minutes or until the crust is golden brown. Gently tap the loaves—if they sound hollow, the bread is done. For a more accurate test of doneness, the bread is done when an instant read thermometer inserted in the center reads 195°F (90°C).
- Remove the bread from the oven and allow to cool for at least 20 minutes before slicing and serving. Store leftovers loosely covered at room temperature for up to 5 days or in the refrigerator for up to 1 week.
Notes
- Make Ahead & Freezing Instructions: The dough can sit in the refrigerator for up to 3 days, so this is a wonderful recipe to begin ahead of time. You can also bake the bread, allow it to cool, and freeze for up to 3 months. Thaw at room temperature before serving. You can also freeze the dough. Complete the recipe through step 3. Wrap in plastic wrap and place in a freezer-friendly container. To bake, allow dough to thaw overnight in the refrigerator, or for 2-3 hours at room temperature. Continue with step 4 and the rest of the recipe instructions.
- Special Tools (affiliate links): Glass Mixing Bowls | Silicone Spatula or Wooden Spoon | Baking Sheets | 2-cup Measuring Cup | Bread Lame | Instant Read Thermometer
- Flour: For absolute best flavor and chewy texture, I strongly recommend using bread flour. You can use a 1:1 substitution of all-purpose flour in a pinch with no other changes to the recipe. I recommend avoiding whole wheat flour in this dough. If necessary, use half bread flour and half whole wheat flour. The bread will taste dense.
- Yeast: You can use instant or active dry yeast, but I highly recommend an instant (aka “rapid rise” or “quick rise” yeast). The bread will rise faster. I usually use Platinum yeast by Red Star, which is an instant yeast. 2 teaspoons is a little less than 1 standard packet. If using active dry yeast, there are no changes needed to the recipe. The rise time in step 2 may take longer.
- Salt: Use a coarse salt, such as coarse sea salt, in this bread. I find the flavor slightly lacking when using regular table fine salt. If you only have fine salt, reduce to 1 and 1/2 teaspoons.
- Water: Use cool water. 70°F (21°C) is great, but the exact temperature doesn’t matter as long as it’s not hot or warm.
- Round Loaf: If you want to shape the dough into a boule (round loaf) simply shape into a round ball instead of 2 loaves in step 4. Baking instructions are the same, but the loaf will take a few extra minutes in the oven. If you want to bake the boule in a dutch oven, see next note.
- Using a Dutch Oven: Follow this dough recipe through step 3, then follow the simple shaping/baking instructions (steps 2-5) in my Cranberry Nut No Knead Bread recipe including using the parchment paper. If your parchment paper can’t withstand heat this high, you can either lower the oven temperature and bake the bread for longer or grease the Dutch oven instead.
- Using a pizza stone: If you want to bake your bread loaves on a pizza stone, place pizza stone in the preheating oven. In step 8, place the shaped and scored dough on your preheated pizza stone. If the bottom of the shaped dough is pretty sticky, dust the hot pizza stone with some extra cornmeal. Bake as directed.
- No Nonstick Pan: If you don’t have a nonstick baking sheet, line it with parchment paper instead. Coat with a dusting of flour and/or cornmeal before placing the dough on top. Parchment paper can burn, so it’s best to check the box to see how much heat yours can tolerate. Lower your oven heat if necessary and bake the bread for longer until golden brown and when gently tapped, sound hollow.
- Flavor ideas: Before pouring in the water in step 1, add any of the following ingredients/combination of ingredients to the dry ingredients in the bowl: 4 cloves minced garlic + 3 Tablespoons chopped rosemary, 3 Tablespoons your favorite fresh herb (chopped), 1 cup your favorite shredded cheese, a diced jalapeño, 3/4 – 1 cup dried cranberries and/or chopped nuts, 2 teaspoons garlic powder, etc.
- Reference my Baking with Yeast Guide for answers to common yeast FAQs.
- Recipe adapted from King Arthur Flour & Red Star Yeast, similar method originally from Jim Lahey.
Nutrition
- Serving Size: 2 slices
- Calories: 136
- Sugar: 0.1 g
- Sodium: 389.8 mg
- Fat: 0.7 g
- Carbohydrates: 27.2 g
- Protein: 4.7 g
- Cholesterol: 0 mg


Reader Comments and Reviews
I am really wanting to make this bread. Do you preheat the Dutch oven while the oven is preheating? When I make sourdough, the Dutch oven is preheated.
Hi Marilyn! Yes, we do preheat the oven with the dutch oven in it. See recipe notes for instructions on baking this bread in a dutch oven!
Thank you!
As a COMPLETE amateur, I’ve now made bread 3 times, and 2 of those times have been with the use of this recipe. BOTH of the latter bakes were, amazingly enough, simply OUTSTANDING and super easy!
In a large mixing bowl I first put in the salt, then the flour, then the instant yeast (to keep the salt & yeast separated). I then whisked the dry ingredients together just before pouring in the pre-measured 70 degree F water and, using a large wooden spoon, mixing the ingredients until everything was just incorporated. Then still using the spoon, I got the VERY sticky dough into something of a large ball-shape in the bottom of the mixing bowl. I next covered the bowl tightly with cling-wrap and set it in a warmer area of my home (since the kitchen’s a bit chilly) for 3 hours, where it rose nicely.
I then retrieved and dumped the still-very-sticky dough onto a lightly floured kitchen surface and followed the recipe’s instructions for shaping it – with the help of floured hands, a bread-scraper, and a MINIMUM of handling – into the semblance of 2 loaves, which I next very lightly dusted with flour and covered loosely with cling-wrap, so they could sit for another 45 minutes. Then I scored the loaves and used the bread-scraper and a wide spatula to lift them onto a lightly-floured, 3-loaf, non-stick baguette baking pan (leaving the center part of the pan empty in order to space the loaves out). Finally, I very gently stretched the loaves into slightly longer, thinner shapes, following the contours of the baguette pan, and I used the boiling-water-in-a-baking-pan-on-the-bottom-oven-rack method for baking.
At the 20 to 22 minute mark, all four loaves (baked in two different batches) were beautifully golden-brown, had wonderful, crackly, crunchy crusts and light, airy, chewy interiors. They were a feast for the eyes AND the palate and, again, they were SO incredibly easy to make!
I HIGHLY recommend this recipe for terrific, EASY-to-make, Parisian-bakery-style results (and having visited a number of boulangeries in Paris, I really mean it)! Thanks so much for your excellent recipe, Sally!
Fantastic bread, I’ve made a lot poolish and Biga breads, this is way better. I followed recipe and left in fridge at 4 degrees C for 52 hours before baking in Dutch oven at 250 Deg C for 25 minutes. I left the bread to reach room temperature of about 18 Deg C for about a hour prior to baking. Light dusting off fine ground semolina prior to baking too after balling up into a boule. Super soft inside with a lovely golden crust. Simply delicious!
Followed instructions but the dough was wet. I added more flour but still damp. Fingers crossed!
Hi, jane. The first time I made the dough, it was very wet and sticky. I let it rise at room temperature for 3hrs then left it in the fridge for 8 hrs. It wasn’t easy to shape into a boule and looked like focaccia before it went into the oven. I used the steam bath, and the bread developed a nice crust. The bread tasted terrific but was not boule-shaped, even after baking. I assumed I didn’t measure something correctly even though I used a scale. I made another batch of dough which was still wetter in appearance than the dough in Sally’s video but a little drier than the first. I plan to let it rest in the fridge for closer to 18hrs; hopefully, this will firm up the dough a smidge. How did your actual bread turn out?
I live at 6600 feet elevation, any recipe adjustments recommended?
Hi Cecil, We wish we could help, but we have no experience baking at high altitude. We know some readers have found this chart helpful: https://www.kingarthurflour.com/learn/high-altitude-baking.html
Hello! I made this recipe and it came out very dry and tough. Is there a reason this happened? One more thing I let my bread rest in the fridge for 3 days. The top of the dough was almost hard when I uncovered it. Is there something to prevent that?
Hi Jane, It doesn’t sound like you did anything wrong, just that the dough dried out. We have never had this happen to us but what might help for next time after you shape it in a ball at the end of step one, brush the top with a very light layer of olive oil and make sure it’s covered tightly if you plan to let it rise for three days.
If I don’t have red star instant yeast can I substitute with red star active yeast? If so what changes need to be made to the recipe?
Absolutely – see recipe notes for details on yeast 🙂
Killer bread, the bomb!!!
I have made this recipe twice in the last couple of weeks. Loaves turn out just like the pics. Not using any more store bought bread.
Thanks for making this available.
HCI
Question about the weight of the bread flour. The flour I use is 120 grams for 1 cup. Should I keep to the weight given (423 grams) in the recipe or weigh according to the flour I use?
Hi Marykay, the recipe is tested using the weights given so that is what I recommend.
Bread didn’t rise in the oven, was left with flat loaves! Wouldn’t recommend this recipe at all. Followed instructions except for the fridge proving.
Hiya! I love this bread so much! I have made this recipe several times and it has always worked beautifully without fail – such a big hit with friends and family and rarely lasts more than five minutes! Sadly I have had to start avoiding gluten and I was wondering if you had any advice for swapping the flour for a gluten free bread flour? Many thanks!
Hi Maisie, we’re so happy to hear that you love this bread recipe! We haven’t tested a gluten free version. If you try anything let us know how it turns out!
Like you I love this recipe and get perfect results every time! My son has to start to avoid gluten, have you tried swapping out the regular flour for Gluten-Free flour yet???
Loved this bread so much! Was shocked at how easy it was! I did not use Dutch oven…which way do you enjoy the bread the most??
Hi Carol, Using a steam bath in the oven will create the same golden brown crust, which means we love it either way! If you have a dutch oven it’s certainly one less step to not have to make the water bath 🙂
Made this the other day baking after the initial rise. We loved it!
Today I am baking dough that I put in the fridge for 3 days. Do I leave it out or bake it right away?
Thanks!
Hi Jennifer, you can shape the cold dough, then let it rest for 4 5minutes before baking (see step 4) – enjoy!
I made this tonight and it came out great. Didn’t look like a lot of bubbles inside the bread. Was very dense. Amy suggestions or is that how it’s supposed to be? Thank you for this recipe.
Hi Ryan, Scoring the bread helps it cook in the center and expand. Use a very sharp knife, kitchen shears, or a bread lame (recommended) to make a few large slashes. This is key! It could be dense from over-baking and adding too much flour as well. I hope all this helps for next time!
Mine also was more dense, no large air pockets, but I think it was my mix of flours (see my review-and I measured, but I am a bit loose about it LOL). Def wasn’t over baked and wasn’t unpleasant in any way, just didn’t have those large air holes.
Hi!! I absolutely love this recipe, and your personality it quite lovely! But I was wondering what to do if the crust on my bread came out really tough and hard, almost burnt?? Do you have any advice as to what to do??
Hi Ale! Sounds like your bread may have simply baked for too long – an easy fix for next time! You can also try moving the bread away from the heating element in your oven.
Ale, you can also peek into the oven at around the 17 to 18 minute mark to see if the bread’s already the perfect golden-brown color, and if it is and you don’t want it to get any darker, just quickly and loosely cover the bread with one large sheet of aluminum foil (ie, quickly contour the one sheet over the top & sides of both loaves, but *DON’T* remove the loaves from the oven and/or pan and DON’T wrap them individually, completely, and/or tightly in foil). Continue to bake the foil-topped loaves for the additional minutes needed to ensure the bread is fully baked inside.
Hey! Thanks so much for a great easy recipe! My only question is after the 2-3 hour resting time are you supposed to knead the dough again or just go right into cutting it in half and shaping it into 2 loaves?
Hi Brittany, don’t knead after rising – you want to keep all the air bubbles in the dough!
My first attempt was a flop. Bread tasted yeasty and was underbaked. All my mistakes. Tried again with better success on #2.
This time I again traded 1 C of bread flour for whole wheat. I formed loaves on parchment on back of cookie and slid onto pizza stone in hot oven. Bread rose a little during rest but not much in oven. Is that normal?
Turned out pretty good.
The first time was a success! Can I add cheese or herbs after I’ve added the water?I forgot
Hi Robert! You should be able to incorporate the cheese and herbs just after adding the water. But if the dough has already been sitting/rising for a while, we wouldn’t add them after that.
My bread turned out super tasty. It’s not nearly as brown as yours. Should I bake it on a higher rack? I did put the pan of boiling water on the bottom shelf. Thank you!
Hi Cristen! Yes, moving the bread toward the heat source in your oven should help it brown more. Glad you enjoyed it!
Hi Sally, I made this bread twice and both times it was gone in 2 days. My family loved it. Can the recipe be doubled?
Hi JoAnne, We are so glad you love this recipe! For absolutely best taste and texture, we strongly recommend making each batch of dough separately instead of doubling.
I’ve made several batches of this and cook up either 2 loaves or 8 small rolls in my Ooni Pro 16 wood fired pizza oven using Oak Wood at around 400-500 degrees. Absolutely to die for. It’s to the point now that I make at least 3 batches a week and store in wine-cooler until I cook up during the week.
Question: Can I use my kitchenaide mixer or is wooden spoon/hands the best way to form it up.
Thanks.!
Hi CAHuff, So glad you love this recipe! We do not recommend a mixer for this particular dough– it’s very loose and sticky. A mixer wouldn’t be doing you (or the dough!) any favors.
So many great reviews, and I must add another one! So easy, so yummy, and it turned out exactly as described. I was especially excited to read about the steaming method because I have a new range that has a steam element in the oven and have been anxious to try it out. I followed the instructions
Adding the proper amount of water to the fill area, and baked away. The bread steamed perfectly!
So happy to have found this recipe, and the fact that you added the steaming idea. I’ve made several of your recipes, and they’re all keepers. Forgot to mention the fact that you can leave the dough in the fridge for up to 3 days, so awesome especially if you’re planning for a special dinner, etc. Thank you
Sally’s Baking Addiction for another winner!
I tried the 4 ingredient bread recipe – I’ve had mixed results in past baking breads with yeast and starters,, but this was easier. I substituted 1/3 whole wheat flour, then split the recipe 2/3 in dutch oven and 1/3 on baking stone w/corn meal to prevent sticking. Both turned out about the same. I forgot to heat the dutch oven before adding bread so will do that next time. Bread is slightly yeasty so next time will try adding a bit of honey. Crust texture and crumb was good.
Questions: Am I supposed to put risen dough in fridge untouched, still risen? That is what I did but only for about 20 – 24 hours and it seemed OK.
Hi Lucy, We are glad you enjoyed this bread recipe! Correct, don’t punch down the dough before placing it in the refrigerator. That will help maintain those beautiful air bubbles.
Love this recipe Sally. Thank you. I have made it 4-5 times now with bread flour and it always comes out great (apart from the first time, when I messed up the recipe myself). My question is, can I use a wholemeal or rye flour with this recipe or is it going to inhibit the rise and quality of the final bread? I wanted to have a darker bread and generally create variations.
Hi Sadia, so glad you enjoy this bread. My team and I have not tested this recipe with wholemeal or rye flour. I have, however, swapped out 1 cup (125g) of bread flour for the same amount of whole wheat flour with no issue. You could even do half bread flour and half whole wheat flour.
This is a terrible recipe. First of all, you need to proof yeast before adding it to the dough. And adding salt before the yeast has been activated will kill the yeast and your bread will not rise and therefore not bake properly. Loaf will be hard as a rock.
Hi Anna, if the quantity is too high, salt can indeed kill yeast. However, in this dough, it retards the yeast’s activity which is why the rise/rest is so long. You do not always need to proof yeast– yeast these days is already active but it may be a good idea if the yeast is near its expiration date.
Hi Sally,
Love love this bread but we eat it so quickly!! Can the recipe easily be doubled to make 4 loaves or 2 larger ones? Thanks!
Beth Q. Reynolds
Sure can! For the shaping step, divide into 2 boules or 4 loaves.
This was my first attempt at making bread and I was blown away by how easy and how good this came out! I started a new batch as soon as I cleaned the bowl from the first! I was wondering how if Iand how I could double the recipe and if after halving the dough could I freeze that dough for later????
Sure can!
tried this and it was so good. is it okay if i knead the dough then rest it on the fridge?
Hi Gary! This particular dough shouldn’t be kneaded – see the post above for details on this hands-off method.
Me and my husband loved it! This is our new favorite bread recipe. I made it with homemade loaded potato soup. It was sooo good!!
Recipe was very easy to follow, and my bread tasted great!
The only issue I had was that the dough didn’t shape very well, leading to the dough and therefore bread being quite flat. Any tips on how to avoid this? Thank you!
Hi Imogen, what may help for next time is carefully folding more flour into the cold dough during that shaping step (step 4). You still want a wet dough for steps 2 and 3, so that is why I suggest working in a little more flour after the rising.
Incredible loaf for a first-time baker!
I made this bread yesterday and it came out good but the bread did. Not brown on top. I sprayed oil on top and returned it to the oven again. Why didn’t it. Brown?
Hi Emily, Keep it in the oven for a few extra minutes if desired OR raise the oven rack!