

Learn how to make real homemade caramel apples with my success tips, video tutorial, and carefully explained recipe. This from-scratch caramel is buttery, sweet, and if cooked a little longer, is also excellent for soft caramel candies. This festive fall dessert is always fun to make, decorate, serve, and eat!
Fall is in full swing and what better way to celebrate than with a traditional county fair inspired treat?! Besides with a slice apple pie or pumpkin pie, of course.
I originally published homemade caramel apples in my cookbook Sally’s Candy Addiction. There you’ll also find candy how-to’s and recipes including toffee, candy apples, caramels, fudge, truffles, chocolate bark, taffy, and marshmallows. I decided to slightly adapt my original recipe, adding a little more butter and corn syrup for a softer, silkier caramel coating.
Real Homemade Caramel Apples
Apple cupcakes with salted caramel frosting are certainly a favorite, but today we’re making real homemade caramel apples with caramel cooked completely from scratch on the stove. No store-bought caramel candies or coatings because you can truly taste the difference between that and homemade. If cooked a little longer, this real caramel can be made into soft caramel candies like these soft caramel candies. Today I’m sharing the recipe, all my recommended tools, tips for success, and showing you a video tutorial so you can see just how easy it is to make real caramel for homemade caramel apples.
Caramel Apples Video Tutorial
What Does the Caramel Taste Like?
My salted caramel is perfect for garnishing desserts, filling cakes, and as a dip for apple slices. However, it’s not suitable for coating apples because it’s too thin and won’t set properly—it’s missing corn syrup and the proper sugar to fat ratio.
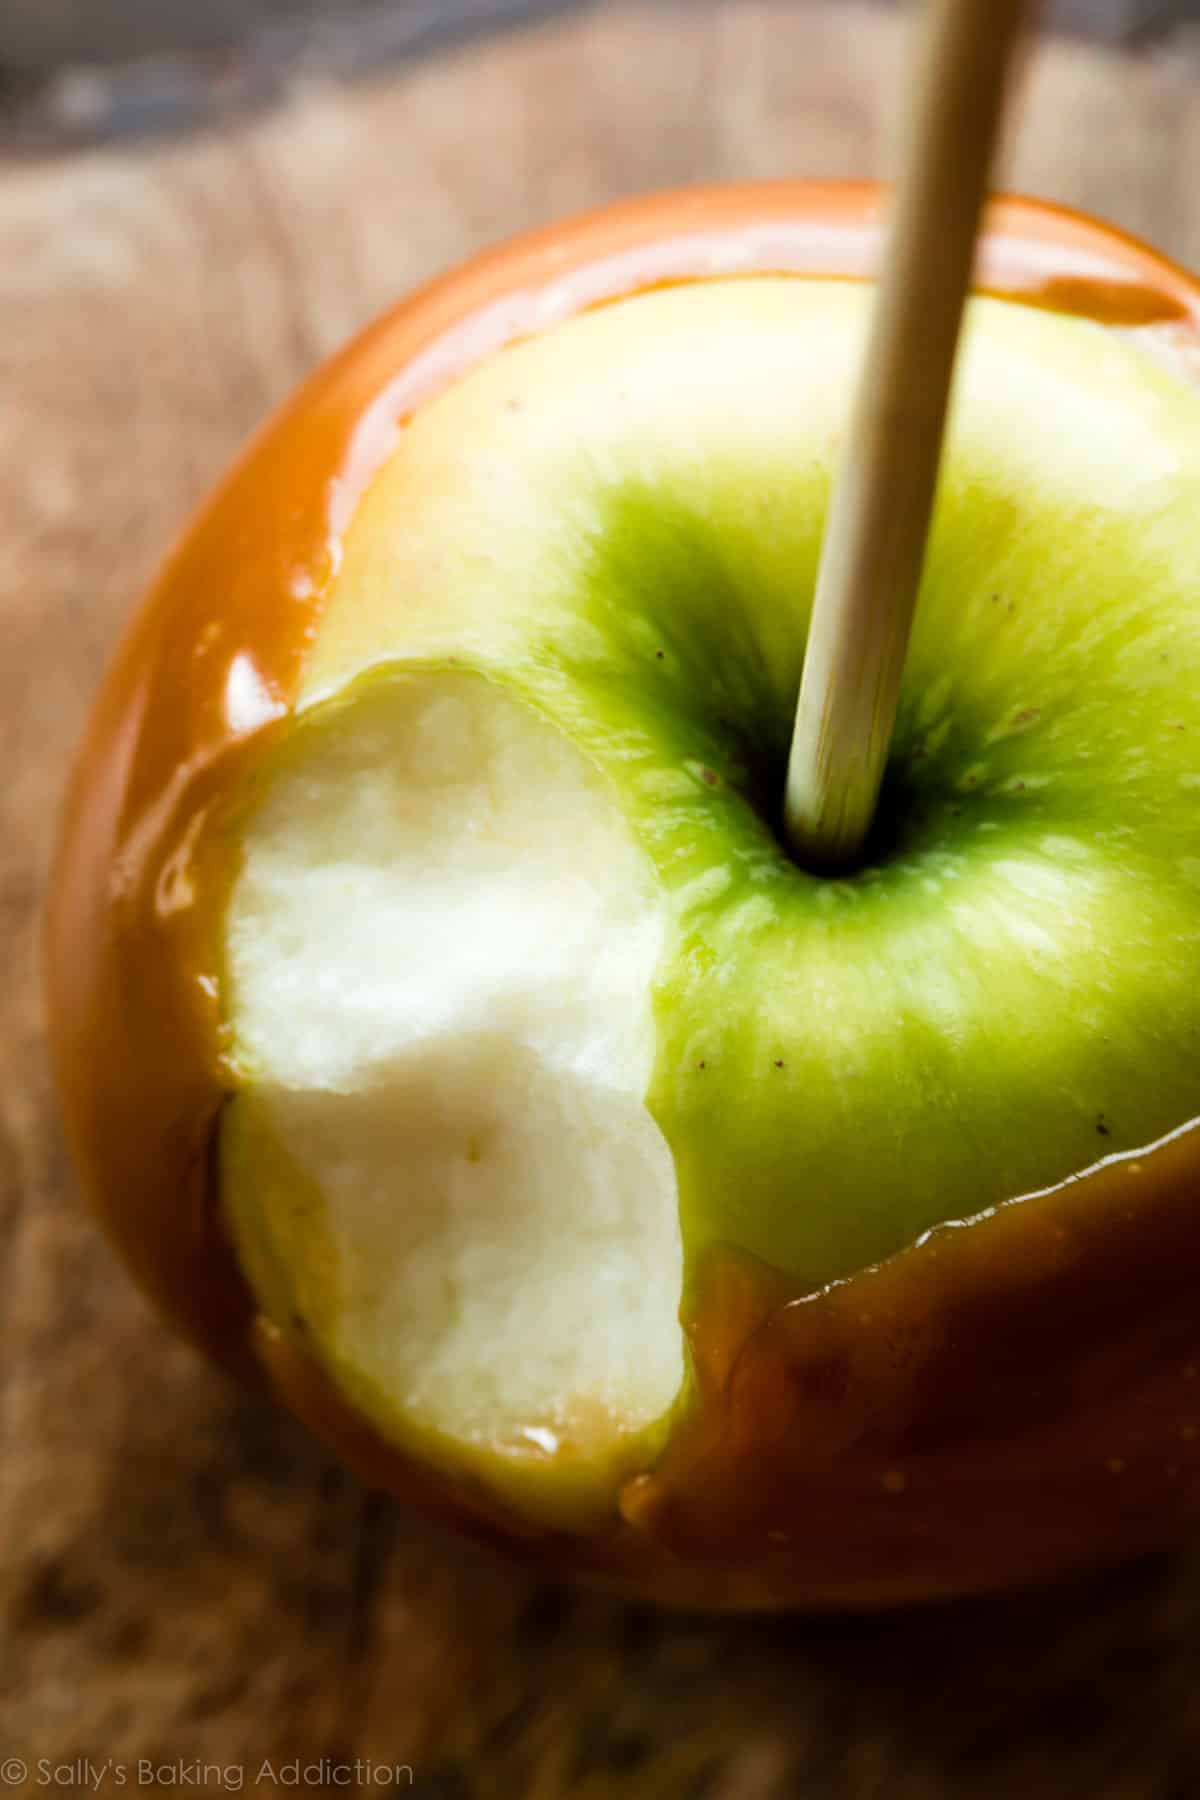
The homemade caramel we’ll use for caramel apples is soft, chewy, buttery, a little taffy-like, and adheres to the apple easily. If applied lightly, the caramel won’t pool down at the bottom of the apple. Let’s break down the ingredients you need for homemade caramel coating and why each are imperative to the taste and texture. Cooking candy is actual chemistry, so there’s no room for substitutions.
Ingredients in Real Homemade Caramel
- Heavy Cream: Heavy cream/heavy whipping cream is the base for caramel. Any milk or half-and-half are too thin and won’t cook properly.
- Light Corn Syrup: Corn syrup is liquid sugar made from corn. Like all refined sugars, corn syrup doesn’t have an ideal nutritional profile. (Corn syrup used in home kitchens is not high-fructose corn syrup. HFCS goes through an additional refining process.) Corn syrup is required as it acts as the sticky, taffy-like base for caramel apples. Without it, the caramel will slide right off the apple (just as my salted caramel would). Though other liquid sweeteners can sometimes be substituted for corn syrup, candy making is not one of those instances. It’s necessary when making homemade marshmallows, too. For organic non-GMO corn syrup, I like Wholesome brand.
- Brown Sugar: Brown sugar is softer and more flavorful than regular white sugar, so I love using it in caramel coating recipes.
- Butter: Butter adds unbeatable flavor and a desirably soft texture.
- Salt & Vanilla Extract: Both ingredients add incredible flavor. Add the vanilla extract after you remove the cooked caramel from heat.
How to Make Homemade Caramel Apples
Now that you have your ingredients, let’s make caramel apples. First, rinse and dry the apples. Apples have a waxy coating that will prevent the caramel from sticking, so it’s important to wash and dry it off. Make sure the apples are cold, which helps prevent the caramel from slipping off.
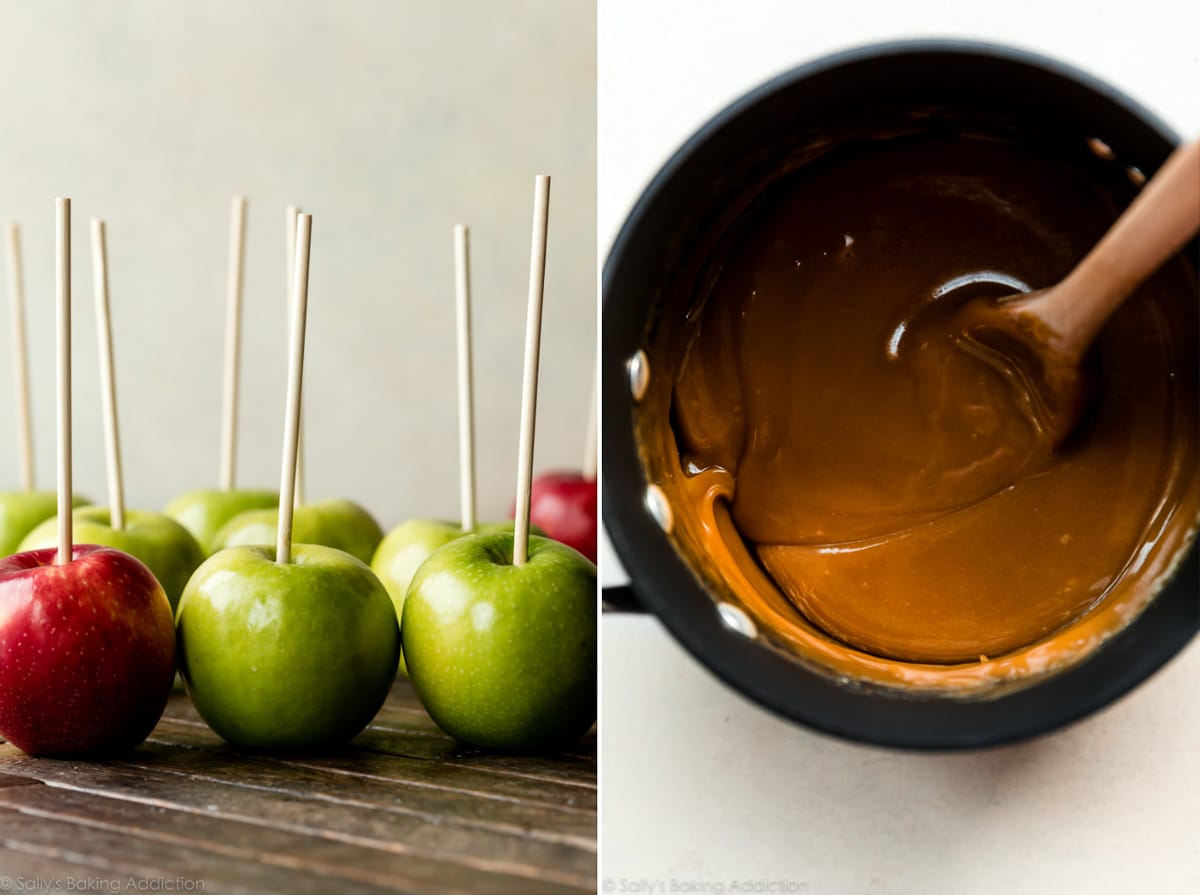
Pull out the apple’s stem and insert a caramel apple stick.
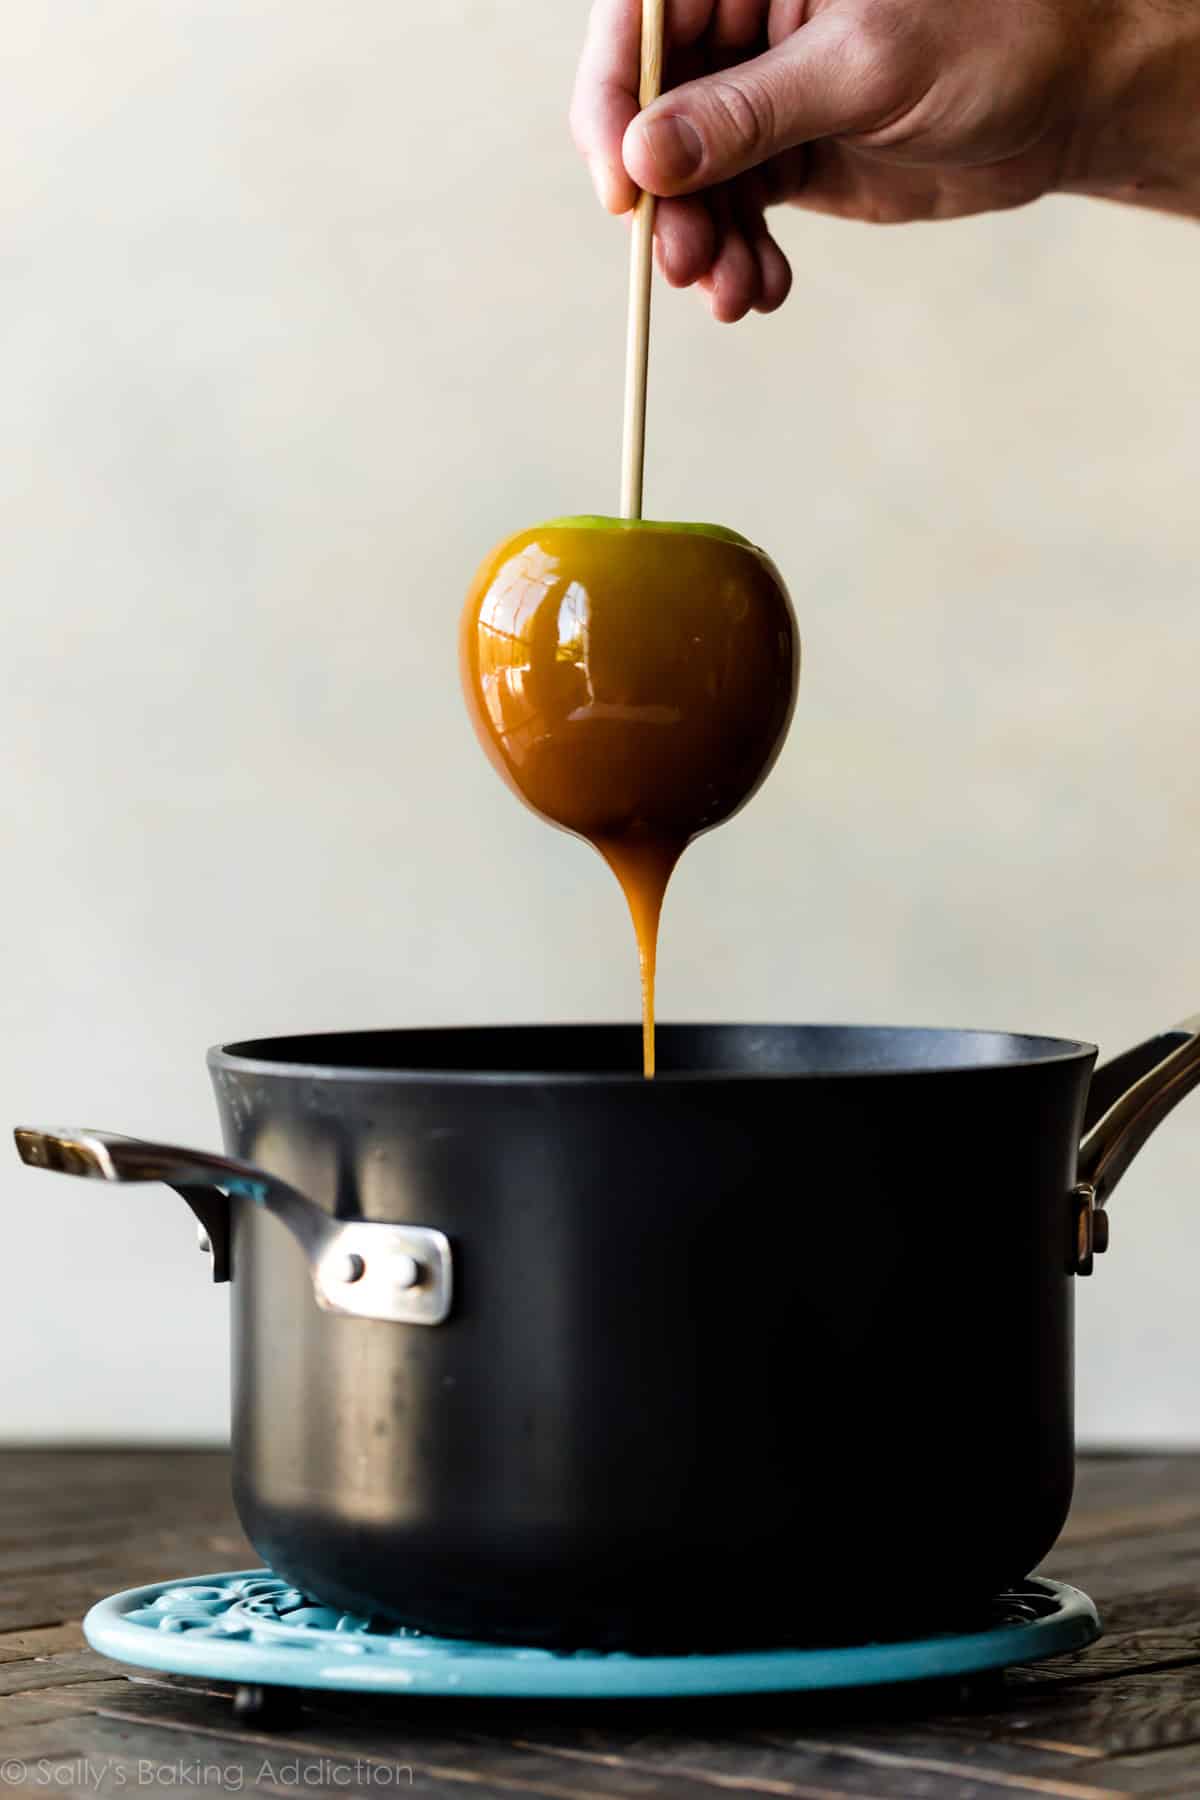
For the caramel, cook the first 5 ingredients on the stove until the candy reaches 235°F (113°C), known as the Soft Ball Stage in candy cooking terms. Reaching 235°F (113°C) should take about 15 – 20 minutes, though don’t use the time as your stopping point because it really depends on your stove—electric stoves may take a little longer than gas stoves. But you won’t mind waiting because this caramel smells INCREDIBLE as it cooks. Some readers have been cooking to 240°F (116°C) and saying the caramel sticks much better to the apples that way. Stick with anywhere between 235°F – 240°F.
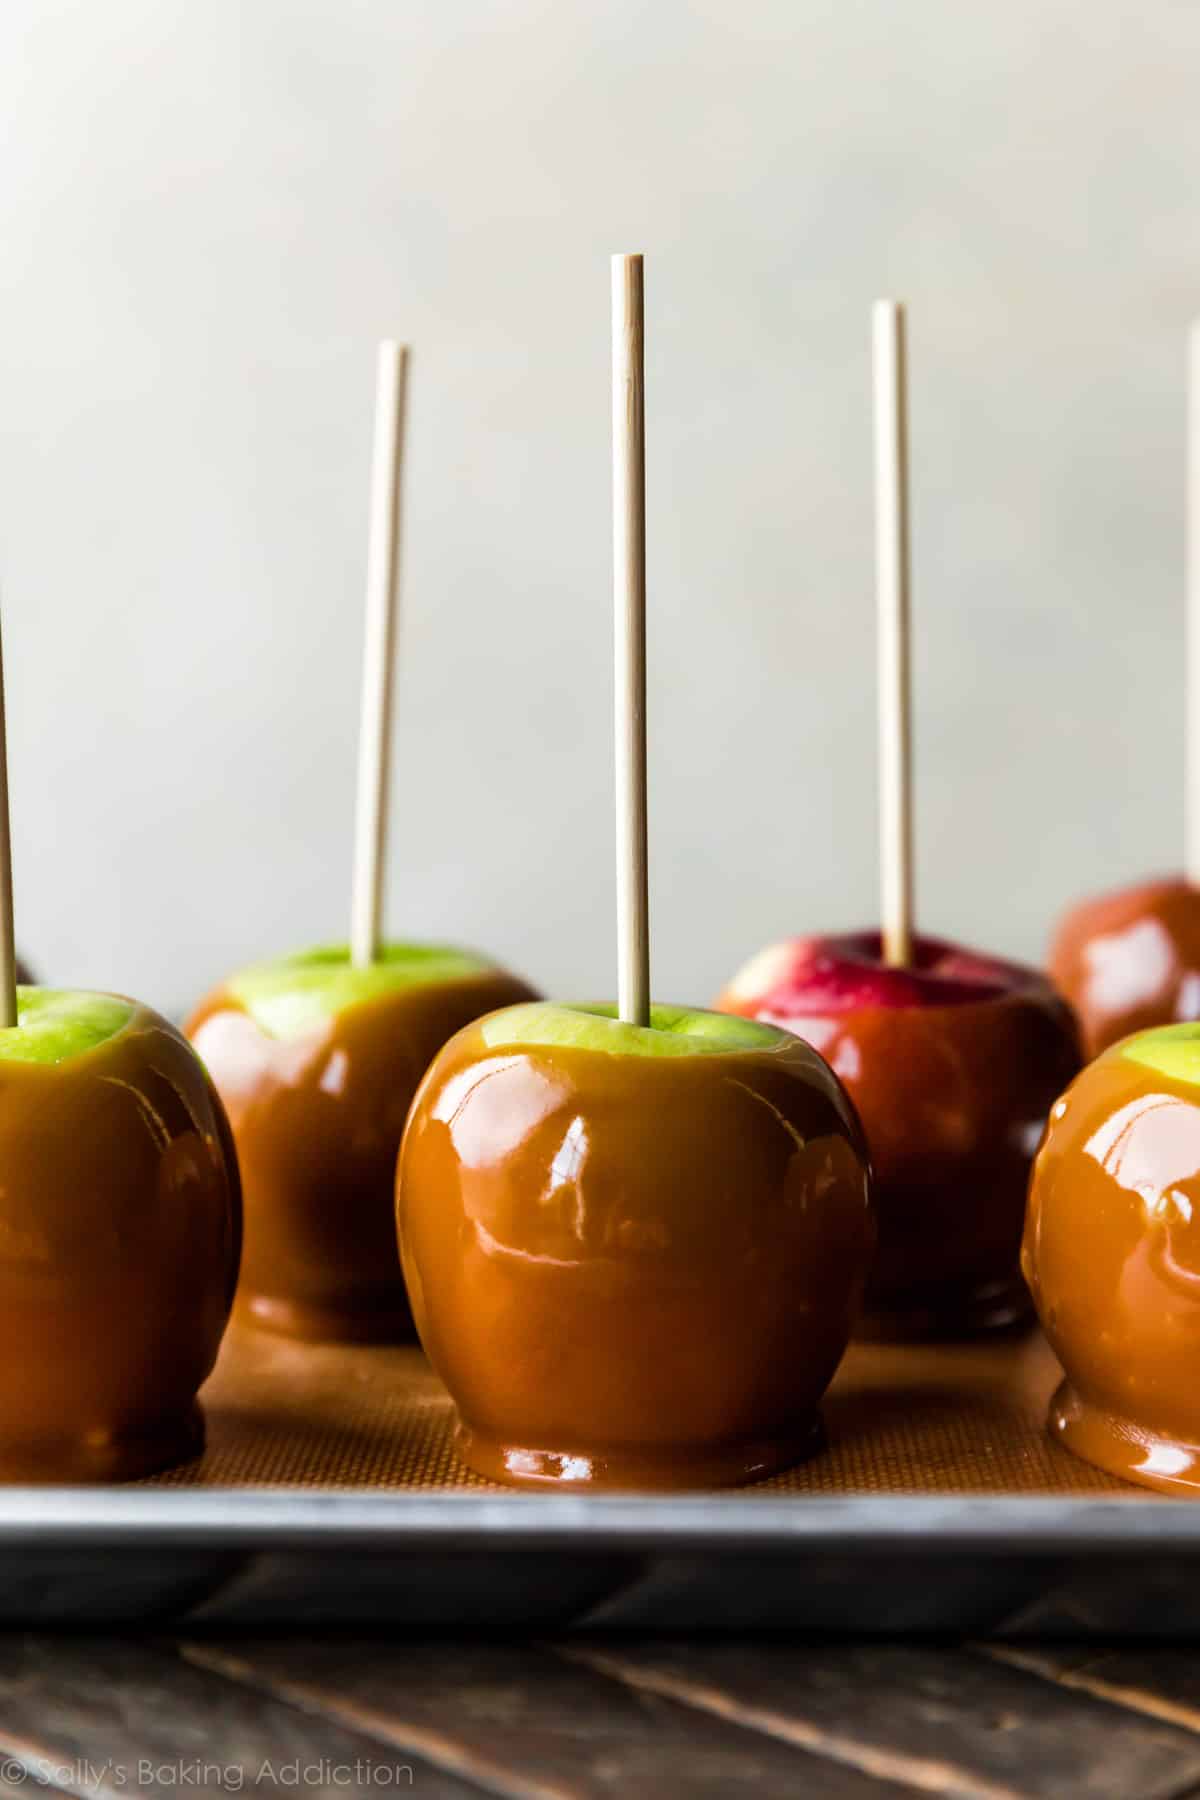
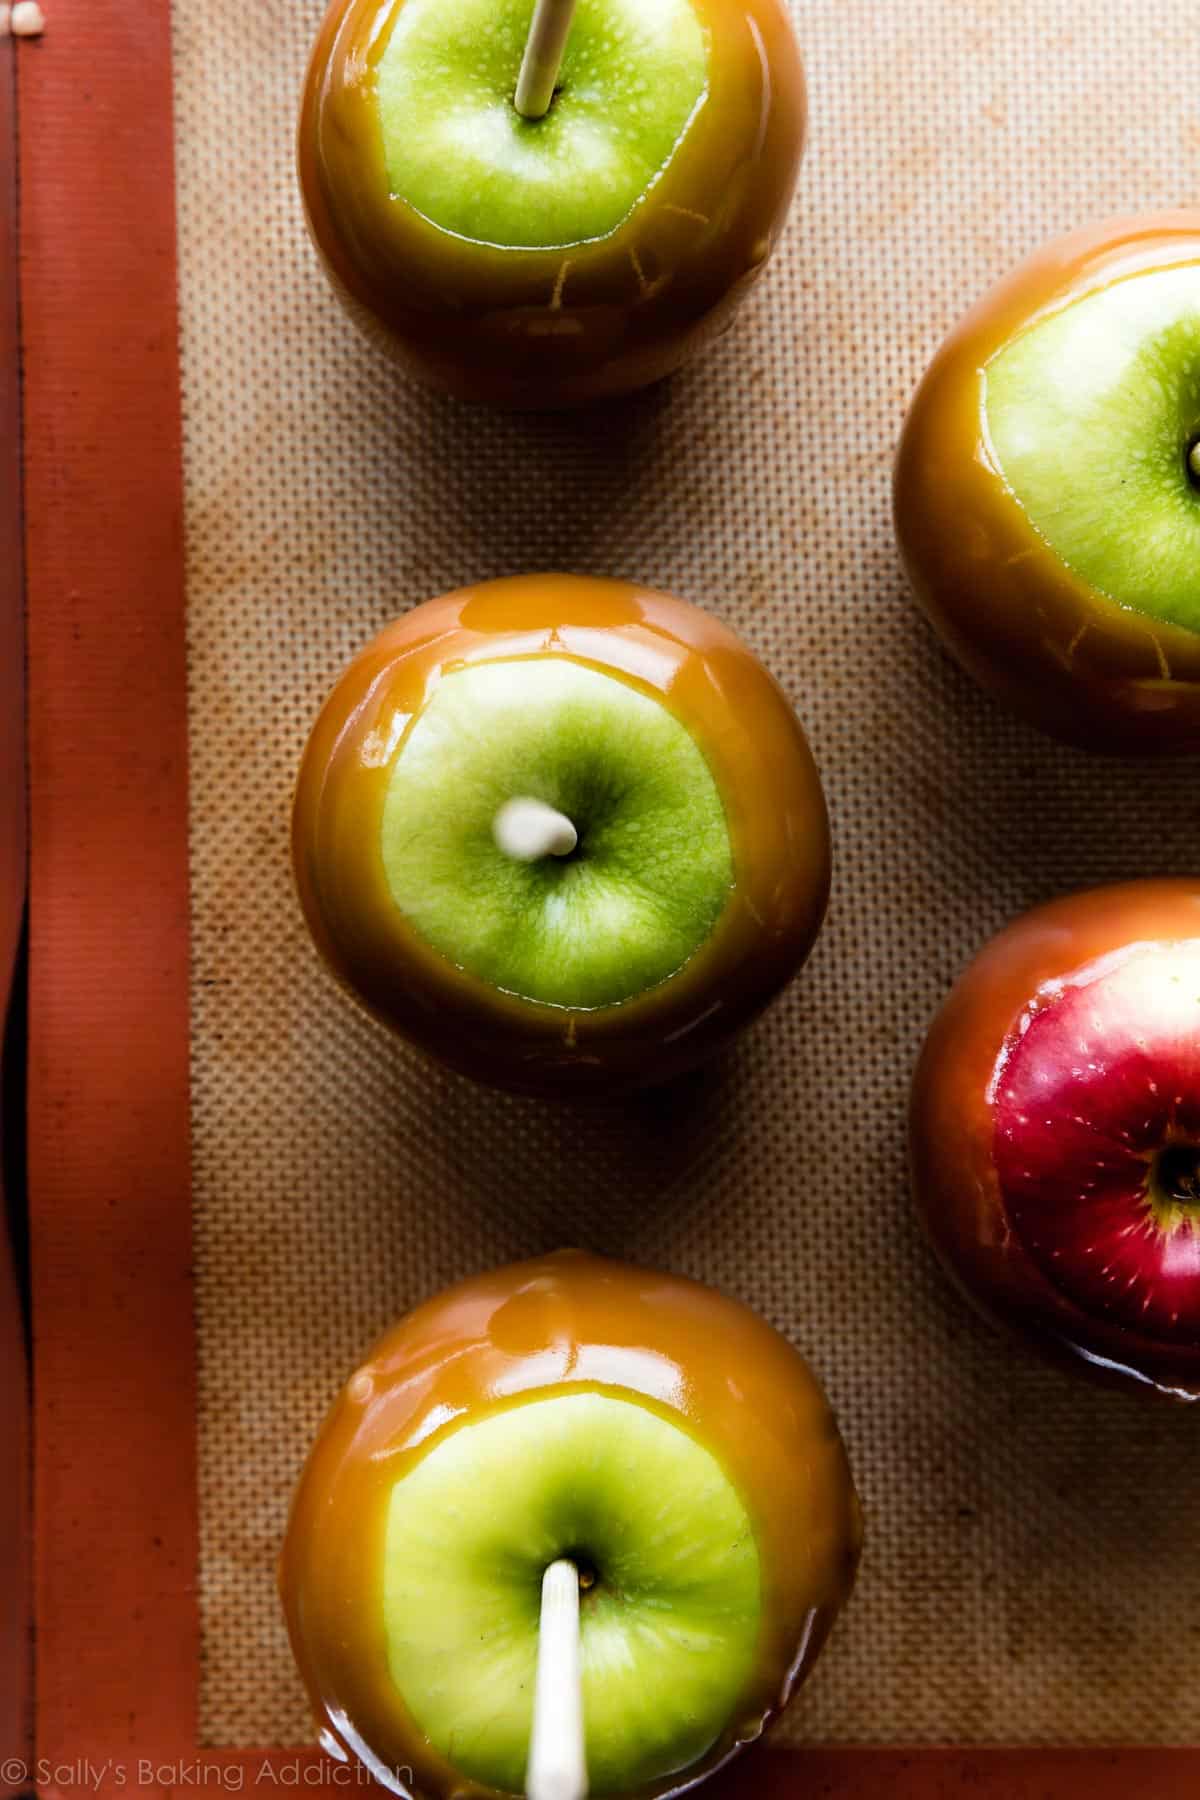
Remove caramel from heat, then stir in the vanilla. Allow caramel to cool for a few minutes, then dip your apples. Let the excess caramel drip off, then place on a nonstick surface such as a silicone baking mat lined baking sheet.
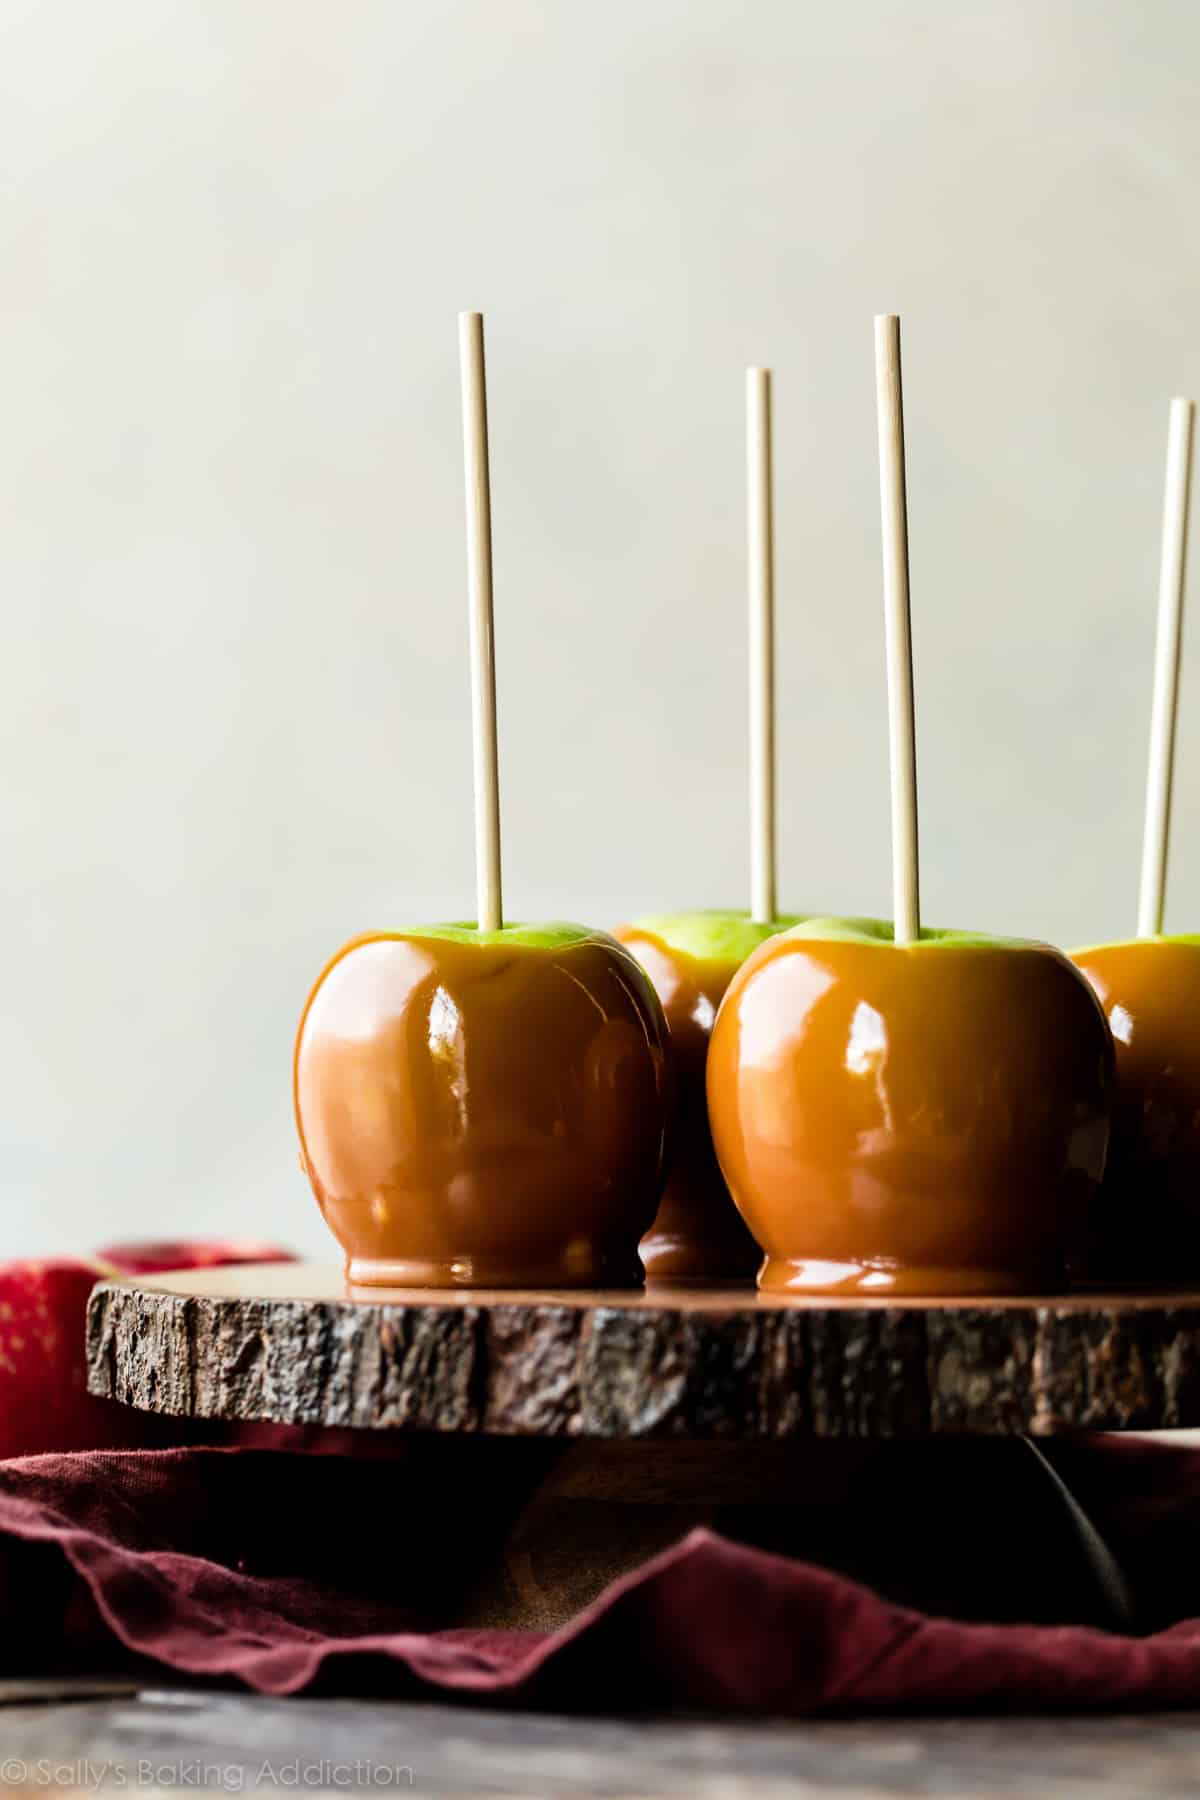
Enjoy immediately or let the caramel set, about 45 minutes. Once set, you can wrap the caramel apples in cellophane for travel or gifting. Stand the apples in these adorable cellophane bags, then wrap the cellophane around the stick with a cute ribbon. Sweetest homemade gift around.
Slow Cooker to Keep Warm
Caramel must be prepared on the stove as instructed. However, after the caramel has cooked, you can keep it warm in a slow cooker on the low setting. Give it a gentle stir every 10 minutes to ensure the butter doesn’t separate. This is a great idea if you want to have a party where everyone can coat their own caramel apples!
Best Apples for Caramel Apples
You can use any variety of apple you enjoy such as Granny Smith, Fuji, or Honeycrisp. Granny Smith are a popular choice for caramel apples because they’re tart, which pairs perfectly with sweet buttery caramel. Whichever variety you use, look for:
- small to medium size
- as perfectly round as you can find
- firm with no soft spots
Let’s talk tools. We need the same items used for pumpkin spice toffee. In fact, most candy recipes require the same exact tools. And did you know that most homemade candy is gluten free? You don’t need flour to make caramel, toffee, chocolate truffles, or fudge.
Tools You Need for Caramel Apples
- Candy Thermometer: This tool literally makes the entire caramel cooking process EASY FOR YOU because there’s no mistaking temperature. I highly recommend a digital candy thermometer that clips onto your pot like this one or this one. If calibrated, a candy thermometer is 1000x more accurate than using your eyes to detect candy’s doneness. See My Favorite Candy Making Tools for how/why to calibrate.
- Heavy bottomed saucepan: I’ve ruined many batches of caramel because of a cheap pan. The ideal place for cooking candy is a deep and thick saucepan with straight sides. Thin pans, which often have hot spots, do not withstand the heat required for these recipes. These days I have a few pans I use for making toffee: here and here. The Cooks Standard is a great option for beginners, while the All-Clad is ideal for controlling the temperature of your candy.
- Wooden spoon: Wood has a high heat tolerance. It also doesn’t conduct heat, so it won’t suck heat out from the cooking candy which causes crystallization. I just bought this set and LOVE them. (Crystallization is the formation of lumpy, grainy sugar crystals in otherwise smooth cooking candy.)
- Pastry brush: A pastry brush helps rid the saucepan of sugar syrup that may have splashed up around the sides. This syrup could burn and crystallize, ruining your batch of caramel. Wet it with water and wipe the sides of the pan clean. It’s ok if some water drips down into the cooking candy.
- Wooden Sticks: Sticks make eating caramel apples convenient and fun, while also serving as a useful dipping tool. Some small lollipop and popsicle sticks are simply too short—I recommend sticks anywhere between 5.5 – 7 inches. I like these wooden sticks because they’re sturdy and also double as skewers for meat & veggies.
Caramel Apple Garnishes
The caramel apples are obviously fantastic plain, but it’s fun to play dress up every now and then. Immediately after coating in caramel and before the caramel sets, roll the caramel dipped apples in finely chopped nuts, toffee pieces, mini M&Ms, sprinkles, or coconut. You can even drizzle with melted chocolate and top with sprinkles, as shown below.
Used this fun Starfetti sprinkle mix!

See Your Homemade Caramel Apples
Feel free to email or share your recipe photos with us on social media. 🙂
Print
Homemade Caramel Apples
- Prep Time: 10 minutes
- Cook Time: 15 minutes
- Total Time: 1 hour, 15 minutes
- Yield: 8-9 caramel apples
- Category: Candy
- Method: Cooking
- Cuisine: American
Description
Learn how to make real homemade caramel apples with this from-scratch recipe. For best success, watch the video tutorial, read the post, and review the recipe before beginning.
Ingredients
- 8–9 cold apples
- 1 and 3/4 cups (420ml) heavy cream
- 1 cup (240ml) light corn syrup
- 2 cups (400g) packed light or dark brown sugar
- 1/4 cup (4 Tbsp; 56g) unsalted butter, at room temperature
- 1/2 teaspoon salt
- 1/2 teaspoon pure vanilla extract
Instructions
- Prep the apples: Rinse the apples with water, then wipe completely dry. Removing the slippery waxy coating will help the caramel seal to the apple. Remove the apple stem and insert a caramel apple stick about 3/4 down into the apple.
- Line a large baking sheet with a silicone baking mat (preferred) or grease the pan with butter. Caramel usually sticks to parchment or wax paper.
- Make the caramel: Combine the heavy cream, corn syrup, brown sugar, butter, and salt in a 3-quart heavy-duty saucepan over medium heat. Do not turn the temperature up or down—keep at medium the entire time the caramel cooks. Stir constantly with a wooden spoon until the butter is melted. Once melted, brush down the sides of the pan with a water-moistened pastry brush and attach a candy thermometer to the pan, making sure the bulb is not touching the bottom of the pan (as you’ll get an inaccurate reading).
- Without stirring, let the mixture cook and bubble until it reaches 235°F (113°C). Some readers have been cooking to 240°F (116°C) and saying the caramel sticks much better to the apples that way. Stick with anywhere between 235°F – 240°F. Reaching this temperature should take about 15 – 20 minutes, though don’t use time as your guide because it depends on your stove. Don’t be alarmed if your caramel is taking longer, just use the candy thermometer as your guide. The temperature will heat up slowly, then move quickly, so keep your eye on the pot. Once at 235°F – 240°F, remove caramel from heat and stir in the vanilla. Avoid over-stirring which can create air bubbles in the caramel (and then on the apple). Allow caramel to cool for 10-15 minutes until slightly thickened. If caramel is too thin to coat apples, let it cool and thicken for 5-10 minutes longer.
- Dip the apples: Holding the caramel apple stick, dip the apple into the warm caramel, tilting the pot as needed to coat all sides of the apple. Lift the apple up and swirl it around or gently tap it against the side of the pot to let excess caramel drip off. Place coated apple on prepared pan. Repeat with remaining apples. Enjoy immediately or allow caramel to set, about 45-60 minutes. If you want to wrap the caramel apples in cellophane treat bags for travel/gifting, wait until the caramel has completely set.
- If desired, you can add toppings. Immediately after coating in caramel and before the caramel sets, roll the caramel dipped apples in finely chopped nuts, toffee pieces, mini M&Ms, sprinkles, or coconut. You can even drizzle with melted chocolate or white chocolate, too.
- For displaying or serving, I recommend placing on wax paper or another nonstick surface. Even when the caramel has completely set, caramel apples may slightly stick to a serving dish. To eat a caramel apple, you can bite right into it or sit it upright on a cutting board and cut slices around the stick. (Or pull out the stick and slice.) These are great for sharing!
- Loosely cover and store the leftover dipped apples in the refrigerator for up to 1 week.
Notes
- How to clean a sticky saucepan: It’s not always easy or fun, but I have a helpful solution! When you’re finished making sticky caramel, simply fill the dirty saucepan with water until the water covers all of the candy residue. Place the saucepan on the stove over low heat. Let the warm water simmer and melt the sugar off the sides of the pan. Pour out the warm water, then let the tools sit until cool enough to handle. Rinse clean.
- Special Tools (affiliate links): Caramel Apple Sticks | Baking Sheet | Silicone Baking Mat | 3-quart Heavy Duty Saucepan (I recommend this one and this one) | Wooden Spoon | Pastry Brush | Candy Thermometer (I recommend this one or this one) | Cellophane Treat Bags
- Caramel Candies: Follow step 3 in this recipe. Then without stirring, cook the mixture until it reaches 245°F (118°C). Immediately remove from heat, then stir in the vanilla. Then follow steps 5 and 6 in my soft caramel candies recipe.
- Double Batch: I don’t recommend halving, doubling, or tripling candy recipes, especially this caramel. Increasing or decreasing the quantity may work for baking, but the extra or decreased volume could prevent the candy from cooking properly. Make separate batches instead.


Reader Comments and Reviews
These were so easy….and very good!
Can this recipe be used to add to frostings or is your salted caramel recipe better for that?
Hi Vickie! This caramel becomes quite chewy and can harden over time, so salted caramel (which is more sauce-like) is better for frostings.
I made these today, the caramel was delicious, but was really thick. I tried to coat the apples in pecans right away and had trouble getting them to stick. Still a really great recipe!
I didn’t have success with this recipe and was disappointed. My caramel boiled over in my 3qt pan (I had on medium heat) and then I lowered it down a notch (from 4 to 3 on my gas stove) and then it stalled at 320 degrees for about 10-15 minutes. I ended up turning it back up and it finally reached temp. They looked pretty after initially dipping but then the caramel mostly slid off after a few hours (my apples were unwaxed). I would eat right away or just stick to the amazing salted caramel as a dip!
Hi Julie!
Did you allow the caramel to cool down enough before dipping? Also, I tried putting mine in the fridge right after applying caramel and it seemed to help it tighten up pretty quickly. Hope this helps, happy treat making 🙂
We had a blast making this! Couldn’t get over how good it was!! With the leftover caramel, my kids dipped the big marshmallows in and made their own scotch kisses!
Delicious, creamy caramel which was the perfect coating for the orchard apples my family picked last weekend. Your directions were easy to follow and the outcome was delightful! (As always! Thanks!)
My kids and I had so much fun with this recipe!!!
I see I am not the only one who had issues with the caramel sticking to the apples despite washing my apples really well before using them. I also boiled mine to 235degrees and promptly removed it from the heat. Now I’m confused what happened to the caramel that made it run down the apple?? The taste? Incredible and beyond delious! I can never use the store-bought caramel ever again.
Hi Wendy! So glad you enjoy the flavor! If the caramel is too thin to stick to the apple, let it cool down for longer. It’s likely too thin and needs to cool to thicken up.
Sadly, my caramel scorched and overcooked despite using a good candy thermometer. However, against your advice, I tried to half the recipe, so that may be the issue. I will check the calibration of my thermometer and try again with a full batch.
Made these a couple of weekends ago and they turned out perfect! Dipped some of them in chocolate and oreo crumbs.. delicious
Loved these! Had so much fun making and decorating them. All three kids loved them.
I tried my hand at these caramel apples a few days ago. Very doable & easy to follow recipe! The caramel is SO delicious & chewy!! Mine didn’t turn out very pretty as a lot of the caramel slid right off the apples causing them to have little caramel skirts but they definitely still got eaten & enjoyed! Perfect October challenge. I’m so glad I participated.
Anything caramel is my weakness, if I could give these more than 5 stars I really would. They were so simple and they are absolutely delicious!
Thanks for the tutorial and recipe Sally! Very thorough and good info! Question: I am wanting to do caramel apples fresh at a carnival our church is having on halloween. I want to have a station where people can dip their apples fresh into warm caramel, shake some toppings on and take them away to enjoy. This would mean they won’t have any time to set. Do you think that’s going to work, or will it be a disaster since the caramel won’t have time to set? Also I may need to use packaged caramels due to the volume of apples to do and the nature of the event being outdoors under a tent. Thanks in advance for any advice!
Hi Megan, How fun! They can be enjoyed right away before they set! See my instructions in the post above for using a slow cooker to keep the caramel warm for this exact purpose 🙂
Thank you Sally! It is is nice of you to answer and so quickly! I will keep on referring people to your blog! 🙂
Gravity was not our friend with the topping but still fun and delicious! Great easy to follow directions.
As always, thank you!
Cheryl
Recipe rates 5+stars!
Made this recipe for the second time today. I used un-waxed apples from local orchard and the caramel was perfect after sitting just a few minutes. Recipe is easy to follow and both times caramel has turned out perfect. I dipped pretzel rods in the leftover caramel. I had never made homemade caramel until trying this recipe. Looking forward to using it in my holiday candies.
These were SO GOOD, Sally!!! First time using a candy thermometer, so kinda hesitant but the instructions and video tutorial were awesome….they turned out great! (Although there wasn’t quite as much caramel as there should have been due to it landing on spoons and not the apples 😉 )
Did not even get to half time and I need to make another batch. I kept the caramel warm in the crockpot and sliced up different types of apples. Put out bowls of nuts, sprinkles, mini chocolate chips and crushed pretzels. Thanks for a new game day favorite. You made me the star of the game!!!
I have half n half I need to use. Can I use that instead of heavy cream? Thanks!
Hi Wendy, no do not use half-and-half. This recipe requires cream. Here are my recipes with half-and-half: https://sallysbakingaddiction.com/tag/half-and-half/
So yummy! I actually halved the recipe, and was able to dip 4 apples. A fun fall treat!
How can I store the leftover caramel and reheat?
Hi Grace! You can store leftover caramel in the refrigerator. It will need to be reheated to soften up and the easiest method is to use the microwave. Microwave in 30 second increments, stirring when you can. It will be quite solid at first, but then will thin out.
I love caramel apples and I have never tried making my own. I am so excited to make these. Thank you Sally for another yummy recipe.
Such a great caramel, and the direction are crystal clear to follow. For my personal preference I think I’ll try cooking the caramel to a slightly higher temp maybe 240F because I like my caramel slightly thicker and chewier on my apple. Total personal preference, 5 stars as is too!
SO DELICIOUS! My kids and I had a blast making these! I was happily surprised at how easy they were to make. I always thought they would be more challenging. We topped ours with melted candy melts and sprinkles!
This caramel was absolutely delicious and easy to make! My son and I were scraping the sides of the pot for the leftovers once we finished dipping the apples. We will for sure be making the homemade sea salt vanilla caramels very soon after tasting how delicious the caramel apples came!
I’m very excited to try this recipe!! I love caramel apples. It’s one of my favorite fall treats. If I plan to take these to a party could I dip apple slices? Or would it be better to dip while apple then slice? Thanks for the recipe!
Hi Becky! Either way goes and would be fun to serve.
Is it possible to make the caramel a day in advance? Then reheat when needed to dip the apples?
Hi Jay! Yes, absolutely. You can warm it back up on the stove on a low heat. Avoid over-stirring as that can create air bubbles in the caramel, which then appear on the apples.
This caramel is amazing! It was my first time making it from scratch and it turned out great! So excited to make the sea salt vanilla caramels next!!
I can’t wait to make these! My 5 yr old grandson refuses to eat anything other than peanut butter but loves sweets. I know he won’t eat an apple so I wonder if I cover it up and make it look so enticing if he might be interested. Hey, it’s worth a try. Going to make 4 apples and the rest of the caramel will heat up higher for caramels. Yeah!