

It’s surprisingly easy to make homemade cheese bread. This soft buttery yeasted bread is twisted up with cheddar cheese, but you can use any cheese variety you love. Bake the bread in a loaf pan, then slice it to reveal the 2 cups of swirled cheese inside. For a sweet version, try our cinnamon crunch bread.
This recipe is brought to you in partnership with Red Star Yeast.

The inspiration behind this recipe comes from a local bakery, where I’ve picked up DOZENS of cheese bread loaves. Each of us love it, my almost 2 year old being the biggest fan. ♥
Cheese and bread. It’s obviously the greatest loaf of all time.
So I decided to make it myself. Brace yourself for impact!
What is Cheese Bread?
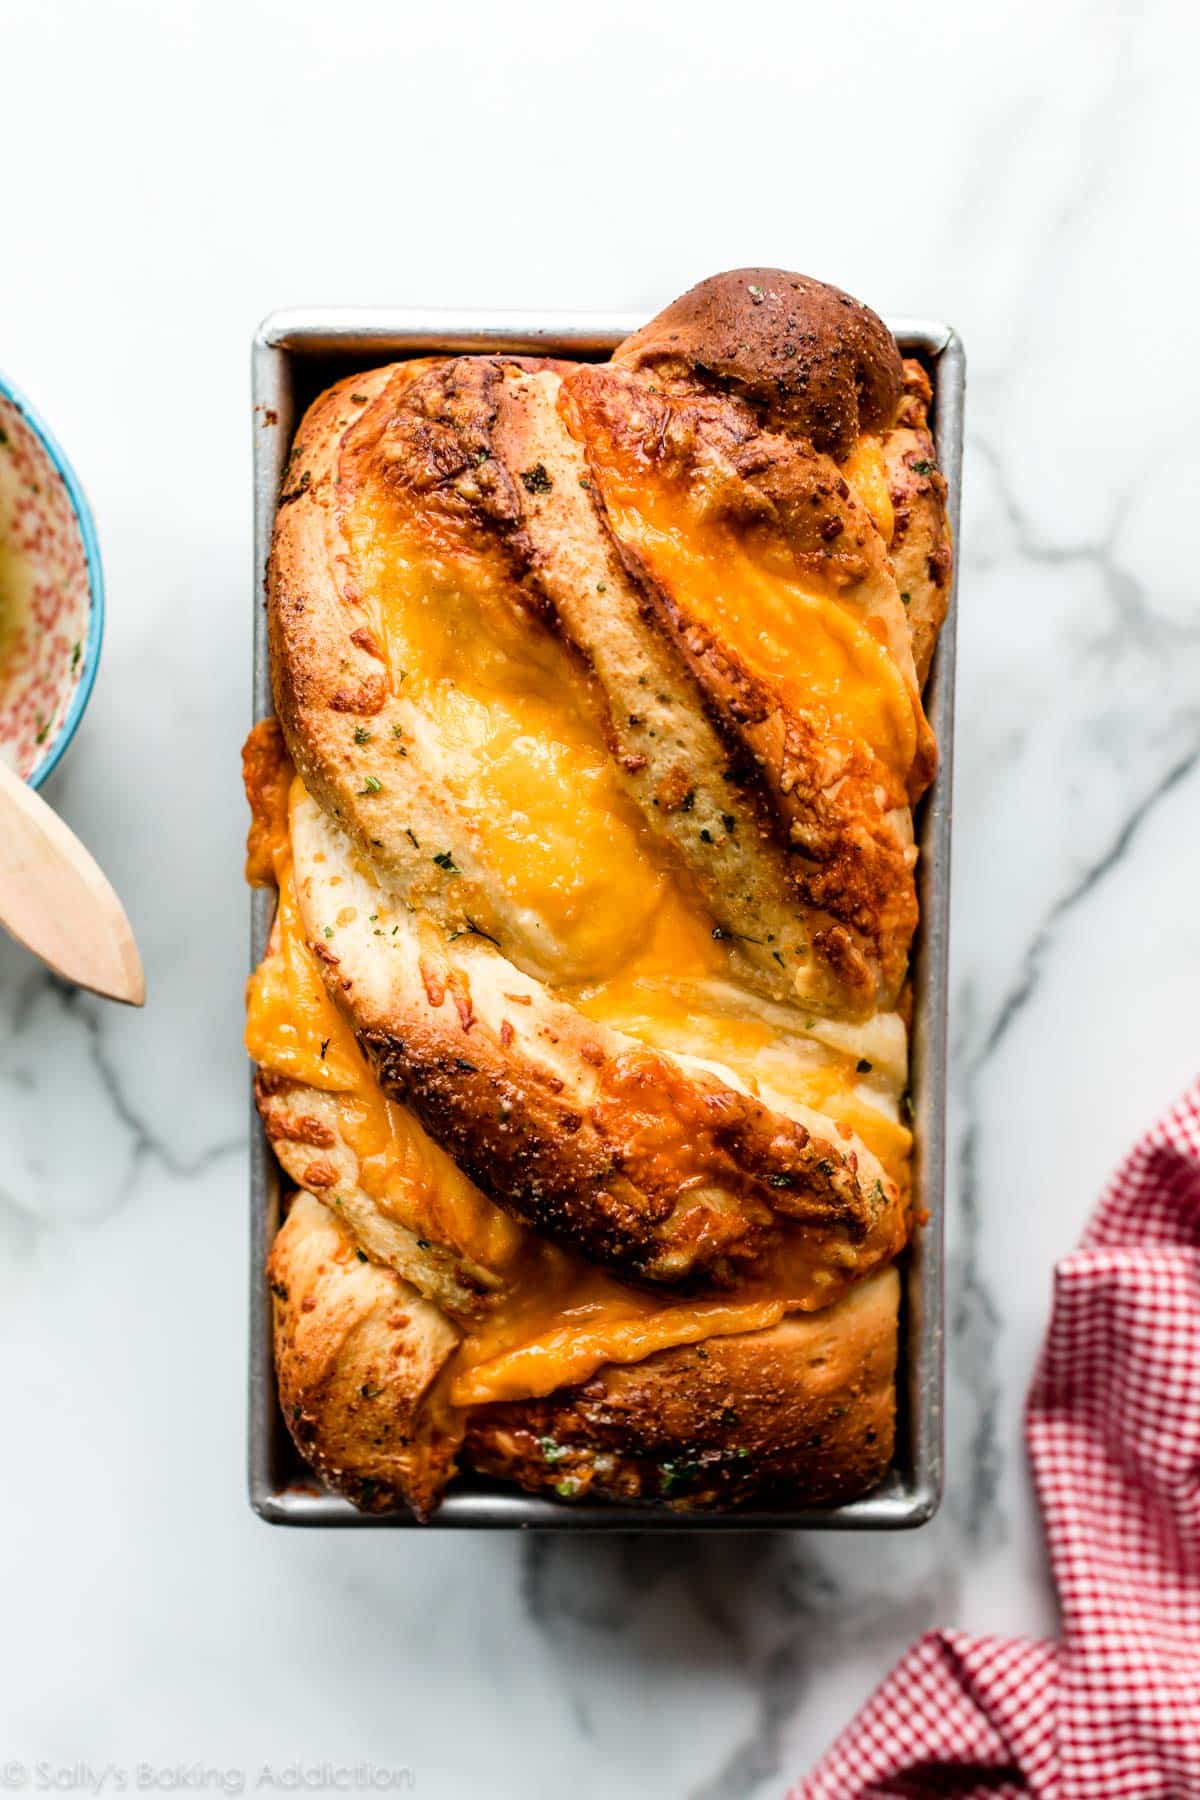
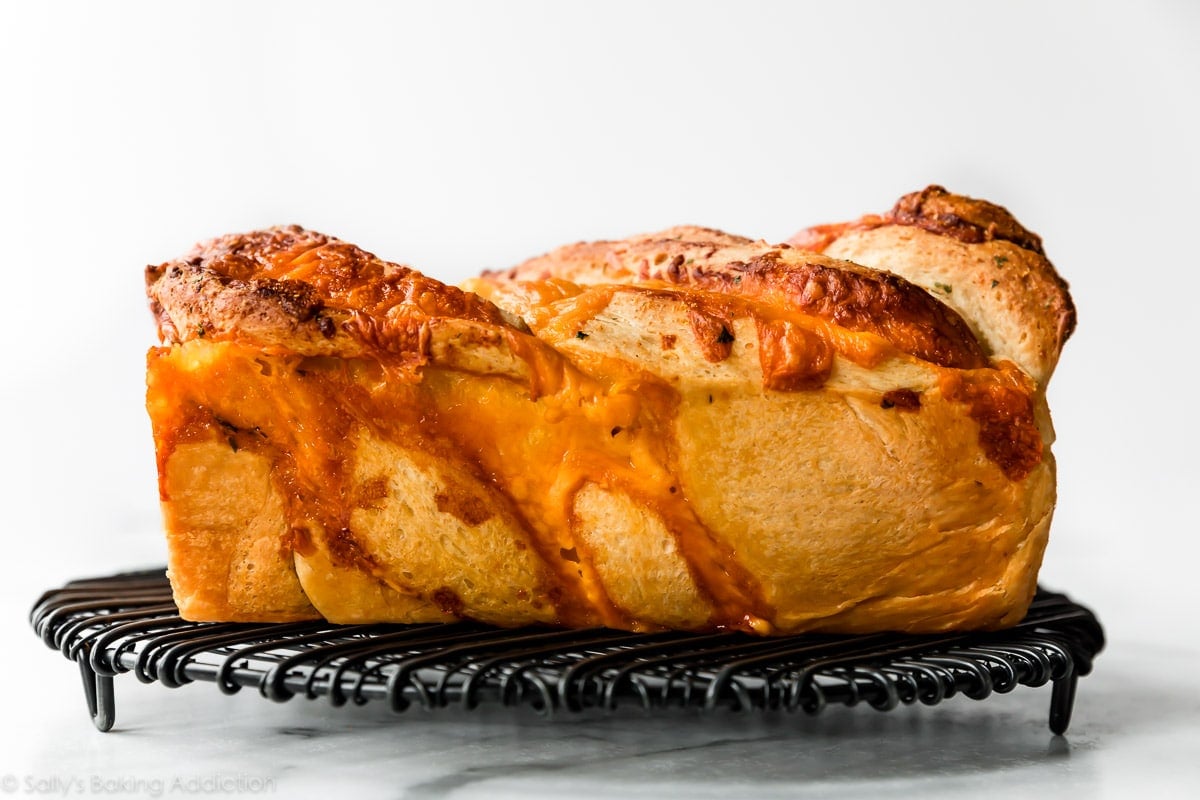
Let’s back up. This cheese bread is homemade bread swirled with real cheese. It’s a simple yeasted dough that I adapted from my sweeter homemade homemade cinnamon swirl bread and my basic sandwich bread. Each slice is extra soft with a chewy crust and ribbons of melted cheese throughout. For extra flavor, brush the top of the unbaked bread with garlic herb butter. The cheese on top crisps up, while the garlic butter infuses down into the bread.
I have 3 loaves in the freezer right now. Things would become dangerous if there wasn’t a constant stash of cheese bread in our house.
Video Tutorial: Cheese Bread
Let’s walk through each step.
Ingredients in Cheese Bread
- Buttermilk: Liquid activates the yeast. For soft, flavorful, and chewy cheese bread, use a combination of buttermilk and water. Nondairy, whole, or low fat milks work too, but buttermilk produces phenomenal flavor and texture.
- Water: Although you could use all milk as the liquid in this dough, I preferred a mix of water and buttermilk. All milk made this taste more like an overly soft dessert bread.
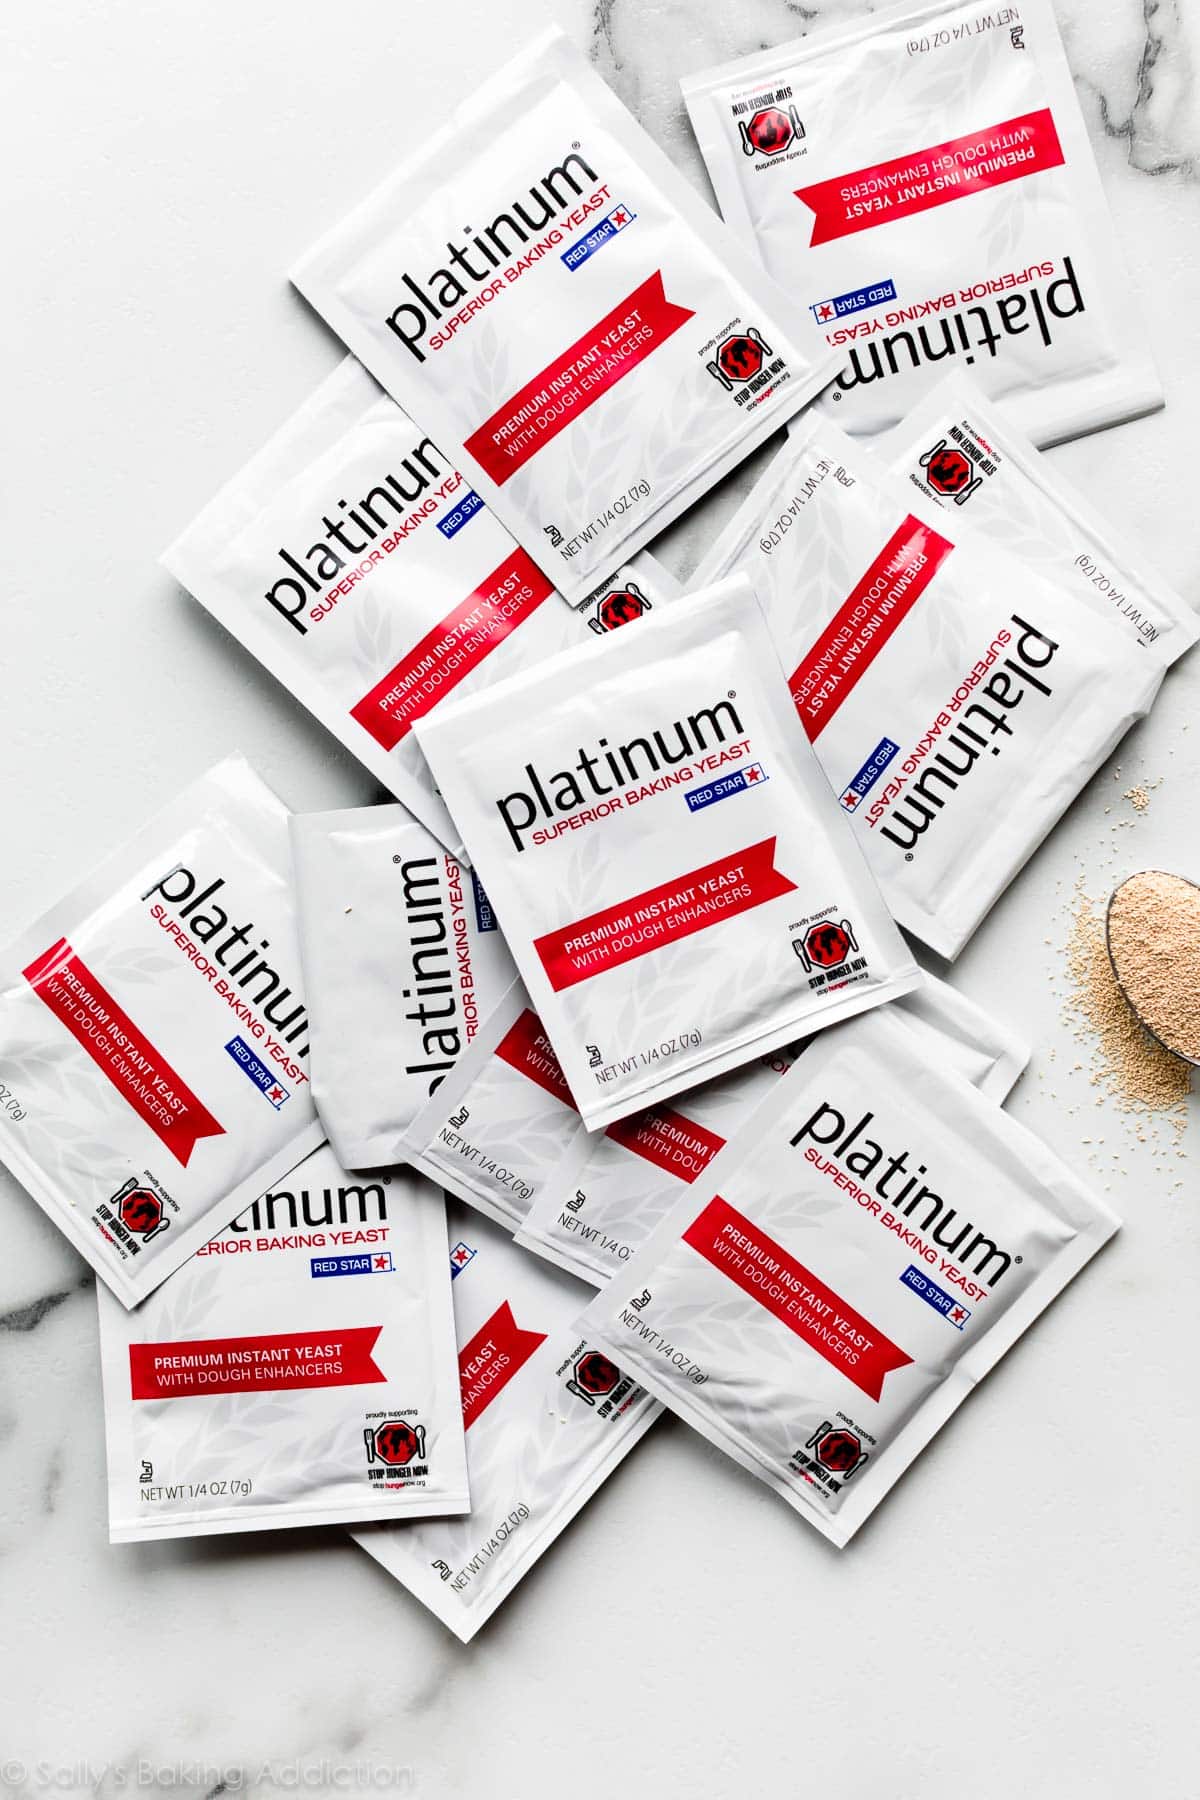
- Yeast: You can use active dry yeast or instant yeast. If using active dry yeast, the rise times will be a little longer. I recommend Platinum Yeast from Red Star, which is an instant yeast that is blended with natural dough improvers.
- Sugar: Sugar feeds the yeast, increases its activity, and tenderizes the dough.
- Melted Butter: Butter promises a soft and flavorful bread. Use melted butter. I found that room temperature butter produced a cakey-er and less flavorful end product.
- Egg: 1 egg provides structure and flavor.
- Salt: Bread would be seriously lacking flavor without salt!
- Garlic Powder: Garlic powder adds incredible flavor to the dough AND to the topping. If using fresh garlic, use 1 finely minced clove in the dough and 1 teaspoon minced garlic in the topping.
- Bread Flour: Higher protein flour like bread flour is best for this bread recipe because of its strong gluten formation and high rise. All-purpose flour will yield a flimsy bread.
- Cheddar Cheese: I recommend cheddar cheese, but you can use another harder cheese such as pepper jack, gouda, or colby cheese. Avoid very soft cheeses. For best taste and texture, shred the cheese off the block yourself with a cheese grater.
Did You Know?
The crustier and chewier the bread, the less fat in the dough—aka a lean dough. Chewy focaccia and my artisan bread are made from lean dough. The softer and richer the bread, the more fat in the dough—aka a rich dough. Monkey bread and cinnamon rolls are made from rich dough. This homemade cheese bread is somewhere in between. It’s chewy, super soft in the center, and a little crisp on top.
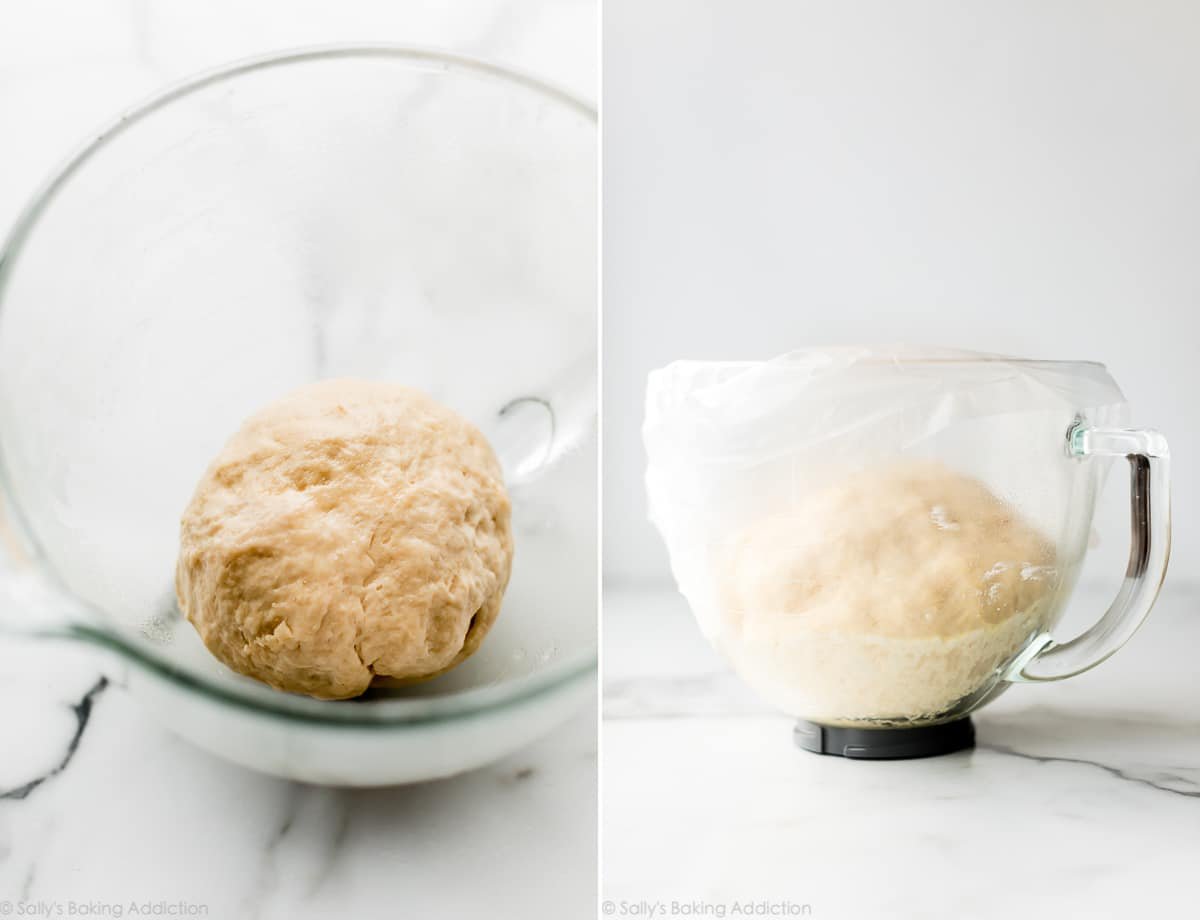
Make and knead the dough, referencing my How to Knead Dough video tutorial if necessary. After the dough comes together, let it rise for about 1 and 1/2 – 2 hours. After that, punch it down and begin assembling the cheese bread.
Baking with Yeast Guide
Reference this Baking with Yeast Guide whenever you work with baker’s yeast. I include practical answers to all of your common yeast questions.
How to Shape & Assemble Cheese Bread
Remember Nutella babka and cinnamon crunch bread? We’re doing the same thing here. Pictures and explanations can only do so much, so make sure you watch the video tutorial above before assembling.
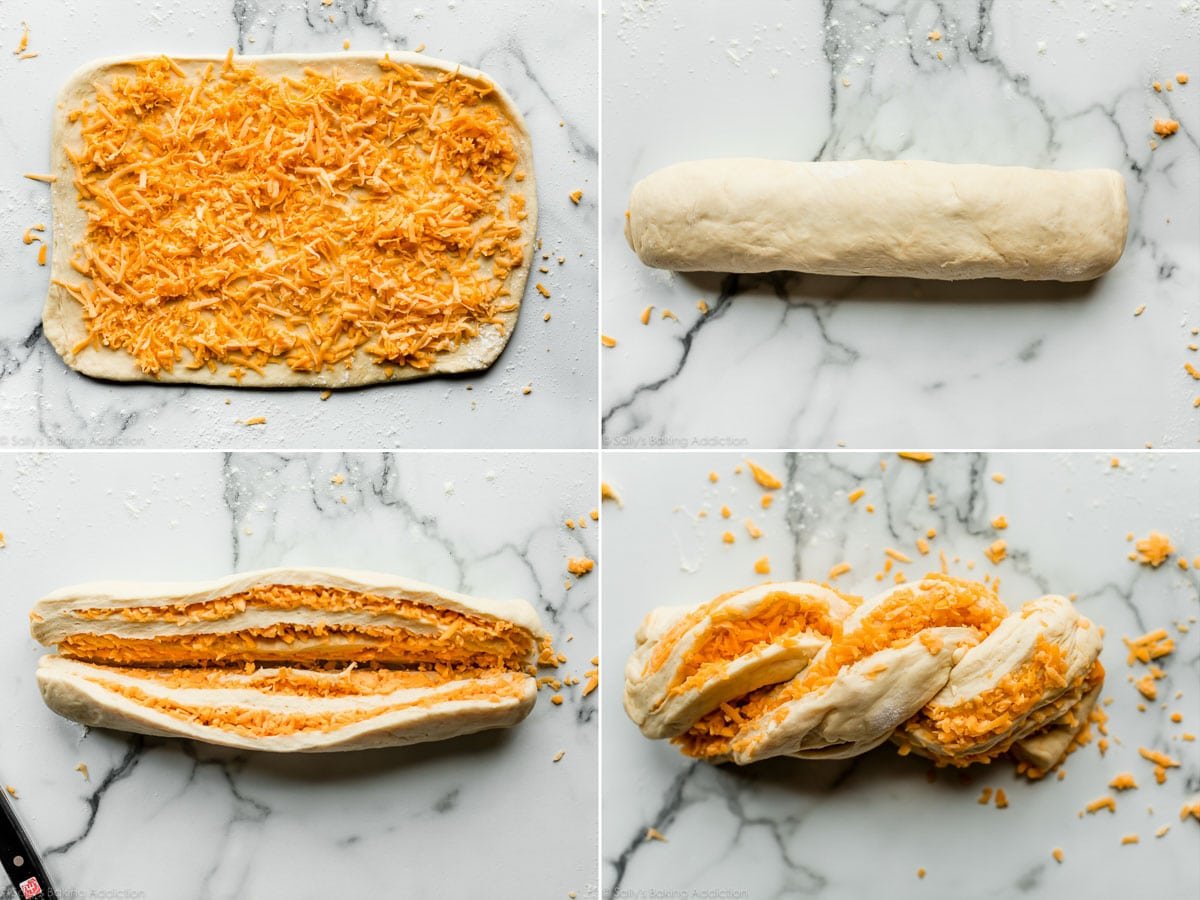
- Punch down the risen dough. Roll out into a 9×15-inch rectangle.
- Sprinkle cheese all over the top.
- Tightly roll the dough into a 15-inch log. Place the log on its seam.
- Using a sharp knife, cut the log in half lengthwise.
- Criss-cross one half, cut side down, on top of the other half– forming an X. Tightly twist the two together.
- Pinch the outer edges to seal as best you can.
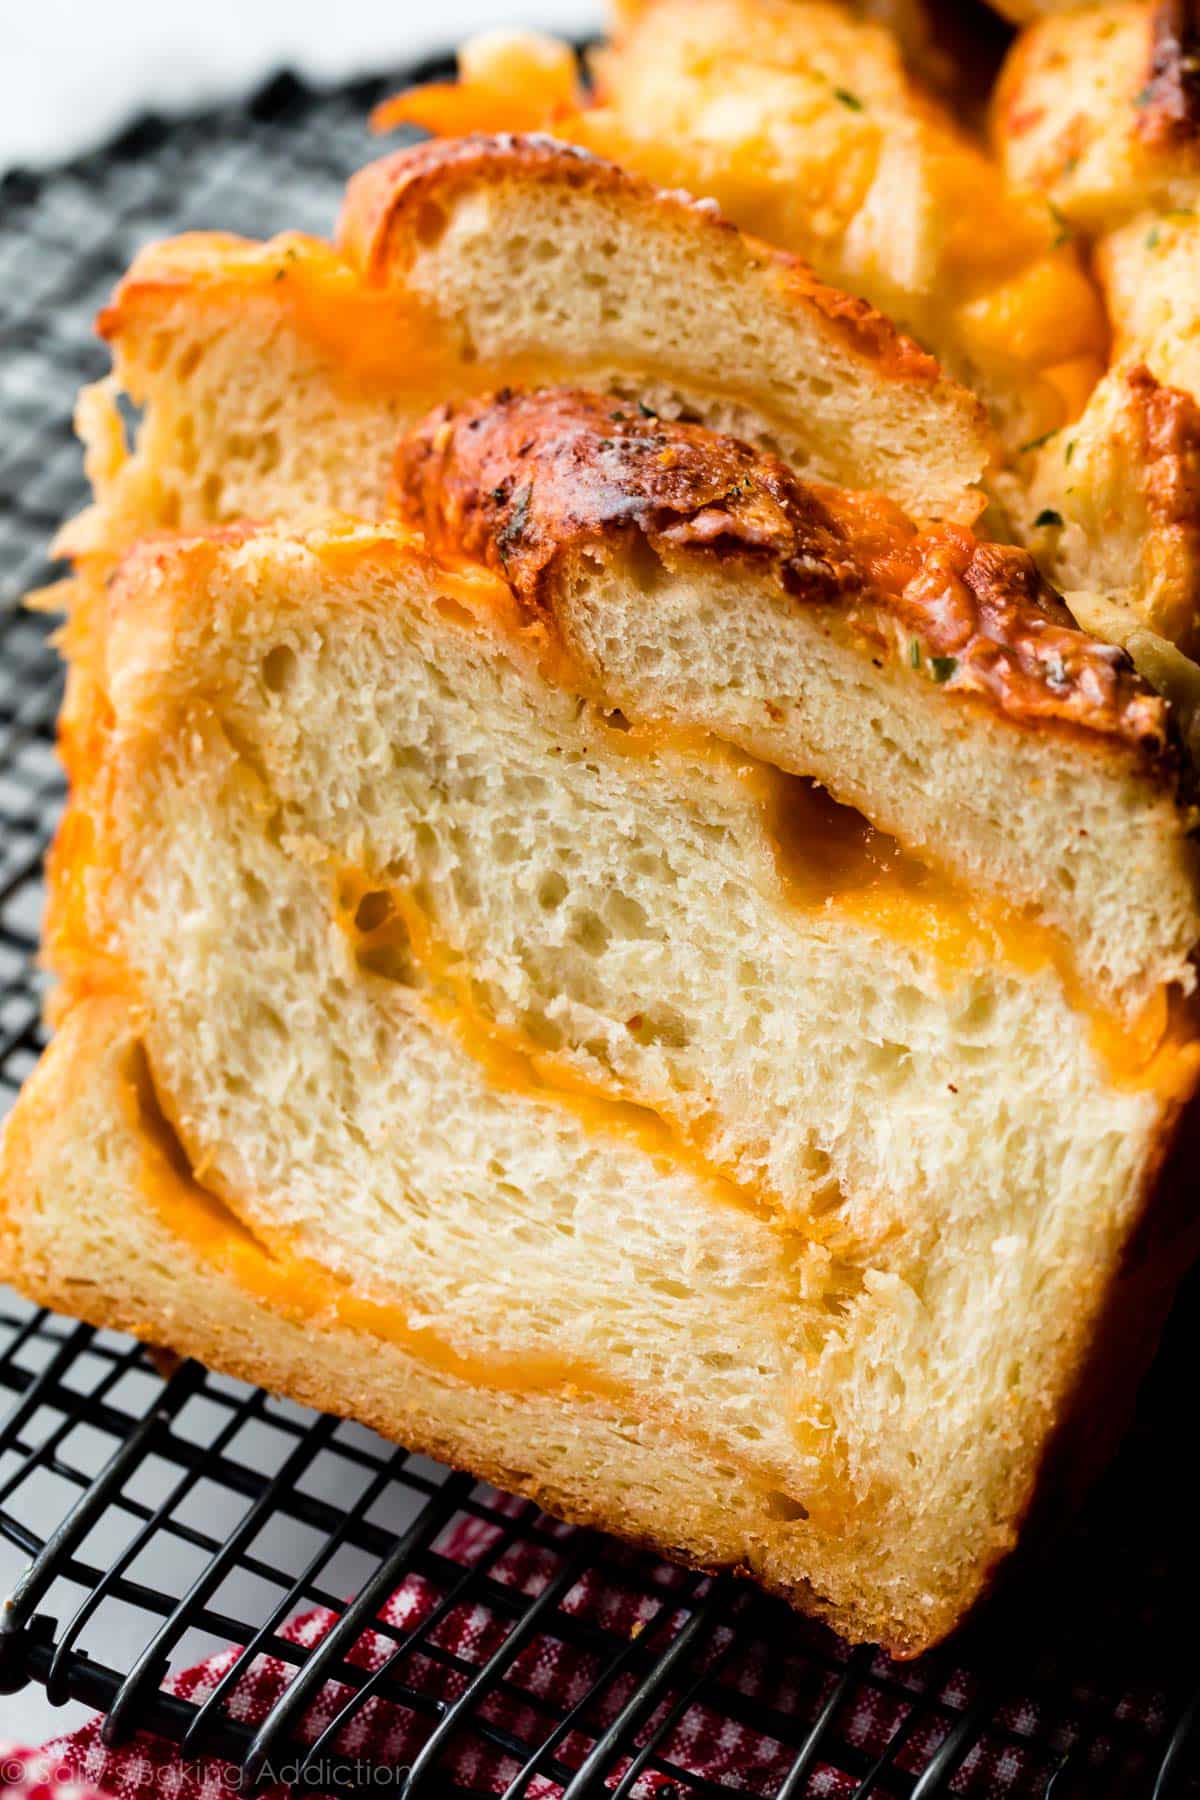
By the way, there’s 2 cups of cheese stuffed inside this bread. 🙂
After it’s shaped, loosely cover the bread and let it rest for about 30 minutes. During this time, preheat the oven. Right before baking, brush the shaped dough with melted butter, garlic powder, and chopped parsley. Chopped basil would be excellent, too!

There is no sight more beautiful. No smell more heavenly. No taste more paralleled!
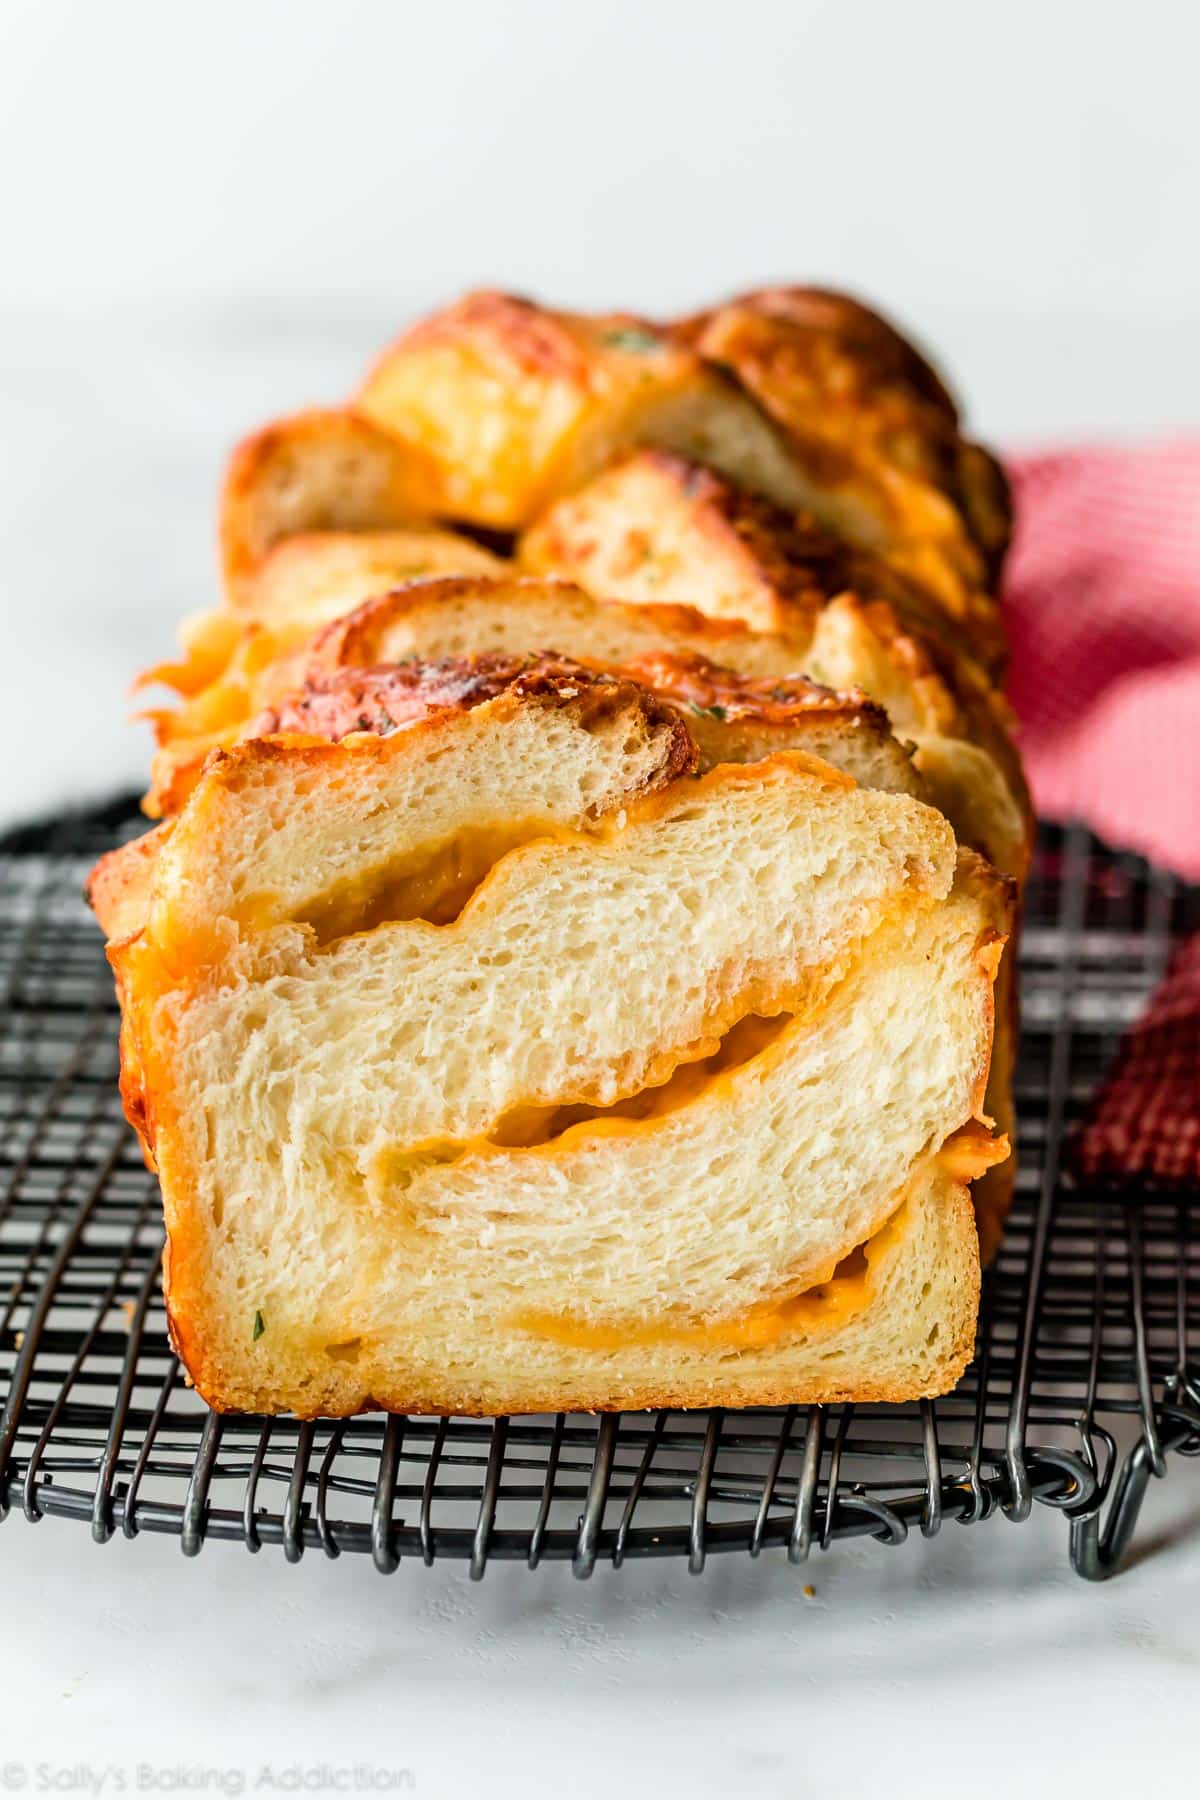
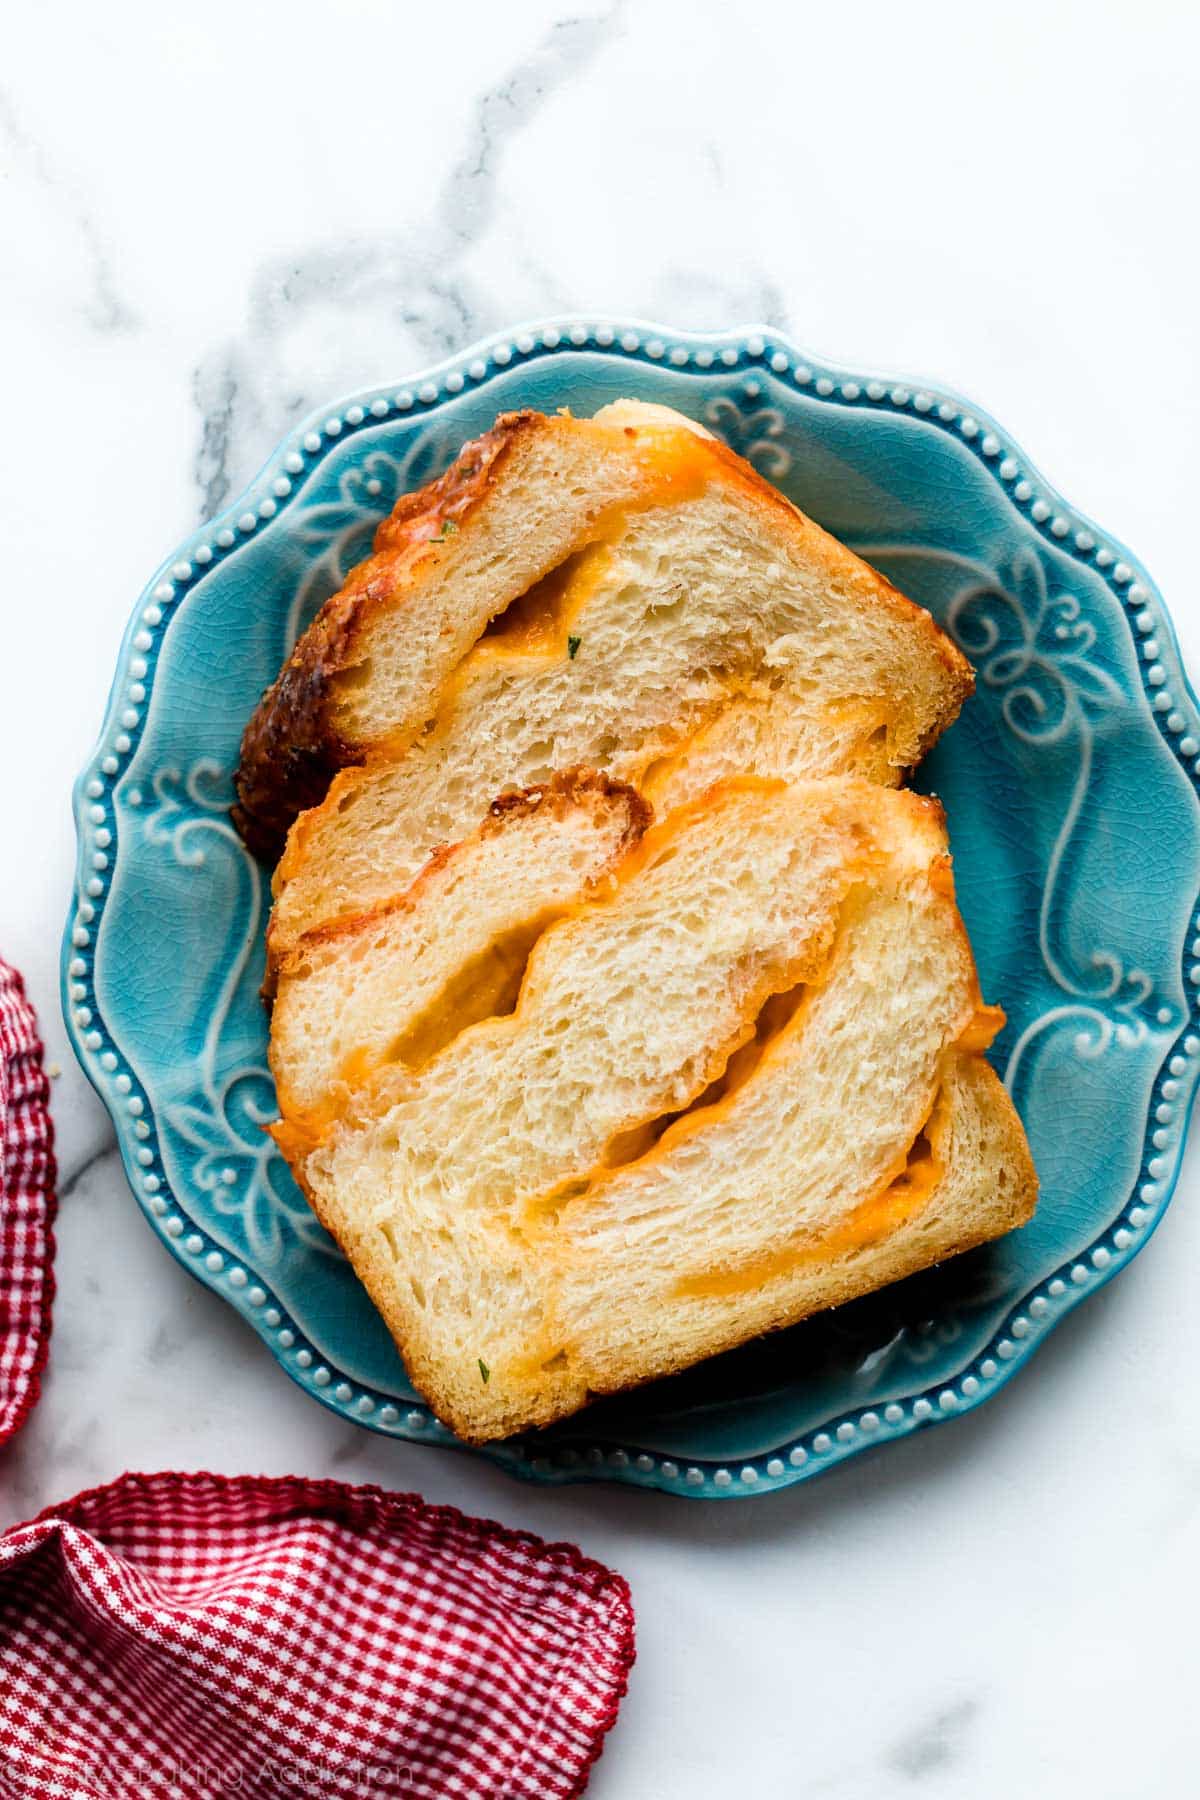
The best part, besides that first cheesy bite, is slicing into the loaf to reveal all those swirls of real melted cheese. Like I said, this is obviously the greatest loaf of all time.
If you’re looking for an equally cheesy bread without any shaping and twisting, try my asiago-crusted skillet bread instead!
More Easy Homemade Bread Recipes
- Focaccia
- Artisan Bread
- Pizza Crust (great for beginners!)
- Homemade Soft Pretzels
- Cinnamon Rolls
- Pizza Pull Apart Rolls
- Cheddar Biscuits
- Sandwich Bread & Whole Wheat Bread
See Your Homemade Cheese Bread!
Many readers tried this recipe as part of a baking challenge! Feel free to email or share your recipe photos with us on social media. 🙂
Print
Homemade Cheese Bread – Extra Soft
- Prep Time: 3 hours
- Cook Time: 50 minutes
- Total Time: 4 hours
- Yield: 1 loaf
- Category: Bread
- Method: Baking
- Cuisine: American
Description
You only need a handful of basic ingredients to make homemade cheese bread. This soft buttery yeasted bread is twisted up with cheddar cheese, but you can use any cheese variety you love. Bake the bread in a loaf pan, then slice it to reveal the 2 cups of swirled cheese inside. See recipe notes for make ahead and freezing instructions.
Ingredients
- 1/2 cup (120ml) buttermilk, warmed to about 110°F
- 1/3 cup (80ml) water, warmed to about 110°F
- 2 and 1/4 teaspoons Platinum Yeast from Red Star (1 standard packet)
- 2 Tablespoons (25g) granulated sugar
- 5 Tablespoons (71g) unsalted butter, melted + slightly cooled
- 1 large egg, at room temperature
- 1 teaspoon salt
- 3/4 teaspoon garlic powder
- 3 cups (390g) bread flour (spooned & leveled), plus more as needed and for hands/work surface*
- 2 cups (250g; 8 ounces) shredded cheddar cheese (see note)
Topping
- 2 Tablespoons (28g) unsalted butter, melted
- 2 teaspoons chopped fresh parsley (or your favorite dried or fresh herb)*
- 1/4 teaspoon garlic powder
Instructions
- Prepare the dough: Whisk the warm buttermilk, warm water, yeast, and sugar together in the bowl of your stand mixer fitted with a dough hook or paddle attachment. Cover and allow to sit for 5 minutes.
- Add the butter, egg, salt, garlic powder, and 1 cup flour. Beat on low speed for 30 seconds, scrape down the sides of the bowl with a silicone spatula, then add the remaining flour. Beat on low speed until the dough comes together and pulls away from the sides of the bowl, about 2 minutes. *If you do not own a mixer, you can mix this dough with a large wooden spoon or silicone spatula. It will take a bit of arm muscle!*
- Knead the dough: Keep the dough in the mixer and beat for an additional 5 full minutes, or knead by hand on a lightly floured surface for 5 full minutes. (If you’re new to bread-baking, my How to Knead Dough video tutorial can help here.) If the dough becomes too sticky during the kneading process, sprinkle 1 teaspoon of flour at a time on the dough or on the work surface/in the bowl to make a soft, slightly tacky dough. Do not add more flour than you need because you do not want a dry dough. After kneading, the dough should still feel a little soft. Poke it with your finger—if it slowly bounces back, your dough is ready to rise. You can also do a “windowpane test” to see if your dough has been kneaded long enough: tear off a small (roughly golfball-size) piece of dough and gently stretch it out until it’s thin enough for light to pass through it. Hold it up to a window or light. Does light pass through the stretched dough without the dough tearing first? If so, your dough has been kneaded long enough and is ready to rise. If not, keep kneading until it passes the windowpane test.
- 1st Rise: Lightly grease a large bowl with oil or nonstick spray. Place the dough in the bowl, turning it to coat all sides in the oil. Cover the bowl with aluminum foil, plastic wrap, or a clean kitchen towel. Allow the dough to rise in a relatively warm environment for 1.5-2 hours or until double in size. (I always let it rise on the counter. Takes about 2 hours. For a tiny reduction in rise time, see my answer to Where Should Dough Rise? in my Baking with Yeast Guide.)
- Grease a 9×5-inch loaf pan.
- Shape the bread: Punch down the dough to release the air. Place dough on a lightly floured work surface and with a floured rolling pin, roll the dough out into a 9×15-inch rectangle (approximately). Sprinkle cheese all over the top, leaving a 1/2 inch border uncovered.
- Watch the video above to see exactly how I do this step. Tightly roll the dough into a 15-inch log. Place the log on its seam. Using a sharp knife, cut the log in half lengthwise. I find a serrated knife works best. Criss-cross one half, cut side down, on top of the other half—forming an X. Tightly twist the two together. Pinch the outer edges to seal as best you can. If you have any leftover cheese, cut a few small squares and tuck into the dough as shown in the video above. This is optional and simply for extra cheesy pockets! Place in prepared loaf pan and cover with aluminum foil, plastic wrap, or a clean kitchen towel. (This step can get a little messy.)
- Allow the covered loaf to rest for 30 minutes. It will slightly rise during this time.
- Adjust the oven rack to the lower third position. Place a baking sheet on the lower rack to catch any cheese or butter that may drip down. Preheat the oven to 350°F (177°C).
- Topping: Whisk the melted butter, herbs, and garlic powder together. Drizzle or brush on top of dough.
- Bake: Bake until golden brown and, when gently tapped, the top of the loaf sounds hollow, about 45-55 minutes. If you find the top of the loaf is browning too quickly as it bakes, tent with aluminum foil. (I usually place foil on top after about 25 minutes.) Remove bread the oven and place on a wire rack. Cool for 10 minutes in the pan, then remove from the pan and cool loaf on the wire rack.
- Slice and serve. Cover and store leftovers at room temperature for 2 days or in the refrigerator for up to 1 week. Leftover slices taste delicious when warmed in the microwave for 10 seconds.
Notes
- Make Ahead Instructions – Overnight: Prepare the dough through step 3. Place into a greased bowl as directed in step 4. Cover the dough tightly and place in the refrigerator for up to 15 hours. Remove from the refrigerator and allow the dough to fully rise for 1-2 more hours. Continue with step 5. I don’t recommend shaping the bread the night before as it will puff up too much overnight.
- Make Ahead Instructions – Freezing: Baked bread freezes wonderfully. Wrap the cooled loaf in plastic wrap, then a layer of aluminum foil. Freeze for up to 3 months. Thaw wrapped bread overnight in the refrigerator or at room temperature, then warm to your liking. You can also freeze the bread dough. After punching down the dough in step 6, wrap the dough tightly in plastic wrap, then a layer of aluminum foil. Freeze for up to 3 months. Thaw overnight in the refrigerator, then punch the dough down again to release any air bubbles. Continue with the rest of step 6.
- Special Tools (affiliate links): Stand Mixer or Large Glass Mixing Bowl | Silicone Spatula or Wooden Spoon | 9×5-inch Loaf Pan | Rolling Pin | Whisk | Pastry Brush | Cooling Rack
- Buttermilk: Buttermilk provides the softest texture and unbeatable flavor. In a pinch, you can use whole milk instead. Lower fat or nondairy milks work in a pinch, but the bread won’t taste as moist or rich. Here are other recipes using buttermilk if you purchase a carton and need to use it up.
- Yeast: Platinum Yeast from Red Star is an instant yeast. You can use Red Star Yeast active dry yeast instead. Rise times will be slightly longer using active dry yeast. Reference my Baking with Yeast Guide for answers to common yeast FAQs.
- Bread Flour: Higher protein flour like bread flour is best for this bread recipe because of its strong gluten formation and high rise. All-purpose flour will yield a flimsy bread.
- Cheese: I recommend cheddar cheese in this recipe, but you can use another relatively harder cheese such as pepper jack, gouda, or colby cheese. Avoid very soft cheeses. For best taste and texture, shred cheese off the block yourself with a cheese grater. Pre-shredded cheese is drier than freshly shredded. If you have extra cheese, cut a few small squares to stuff inside the twisted bread, as noted in step 7.
- Herbs in Topping: Use your favorite herb in the topping. If using dried, reduce to 1/2 teaspoon.


Reader Comments and Reviews
I am a HUGE fan of yours!!! You explain and lay out recipes in an approachable, easy to follow and understand manner. What I find is the quality of the product is consistent.
That being said I made your cheese bread and loved it. Then I got really crazy and made it with left over salted caramel sauce (your recipe). Obviously I didn’t put the cheese or spices in just 1 teaspoon of vanilla. It was messy but oh so worth it.
That sounds amazing, Meagan!
Amazing. I decided to try it recently with Mozarella and then brushed the inside before I rolled it up with some fresh pesto and then also added pesto on the top… you HAVE to try it!
That sounds incredible, Chyenne!
Miss Sally, you are making me drool once again! Need to add this to my mile-long list of recipes from your blog to try. Can I make homemade garlic butter? Thanks!
This looks delicious Sally, do you think it would work with King Arthur’s AP gluten free flour or their GF Measure for Measure flour? As far as I know, no one makes a GF bread flour…
Thanks Kristine! I’m unsure, I haven’t tested this with GF flour. Results will obviously be different, but let us know if you try it.
Hi Sally! Thanks for sharing this wonderful cheese bread recipe! I tried making it today. The flavor was absolutely amazing but I don’t think my loaf was extra soft… I hand kneaded the dough for like 10 minutes. I added the extra time because my dough didn’t pass the “window pane” test at 2 minutes. It still didn’t pass the “window pane” test before first rise but I decided to go ahead. Does the dough have to pass the “window pane” test before first rise? What might be the reasons as to why my loaf wasn’t extra soft? Grateful if you could share with me your experience! Thank you! 😀
Hi Stefy, thank you so much for your question– it’s a good one! I’m breaking the rules with this dough. It doesn’t have to pass the windowpane test and it’s likely that your bread tasted dense because it was over-worked. The melted butter makes this dough extra soft, so try kneading it for only 2 minutes as instructed.
Thank you Sally! I will definitely try the recipe again! 😀
Hey Sally, I am so delighted to hear that this recipe doesn’t have to pass the windowpane test because I don’t have a stand mixer :(, and pretty much do all of my kneading by hand.
Do I have to simply double all of the ingredients to make 2 loaves of this wonderful cheesy bread?
Hi Sarah, For best results, we always recommend making two separate batches. Though some readers have doubled this dough successfully by doubling each ingredient. The first rise time will be longer since there’s more dough. Hope you enjoy the bread!
Making buttermilk is super easy…just add a tablespoon of vinegar to whole milk, wait 5 minutes and you have buttermilk
how much ratio 1T vinegar to how much milk?
1 cup milk with 1 tbs vinegar or lemon juice..wait 5 minutes
Recipe looks amazing. Quick question: I don’t have access to Platinum Yeast from Red Star where I live. Will other instant yeasts work as well.. thanks so much !
Hi Michelle, absolutely. Hope you enjoy the bread!
Hi, had to tell you, this recipe is a smash at my house. Easy to make and my grown kids and husband can’t get enough. They’re even telling their friends that they’ll bring the Cheese bread for them.
I am by no means a baker, but my husband just hubg yp his hat.
Thanks so much again.
Thrilled to hear this bread was a hit with your family, Vanessa!
This was my first try making yeasted bread. Other than me possibly not letting the bread cool enough before wrapping it up and freezing it, this came out awesome. Because I’m obsessed with cheese, this bread is great for grilled cheese sandwiches.
I also turned the braiding portion of the video into an animated gif. The “basics” recipes on Bon Appetit all have a gif for each step, and I love that because if you’re a beginner in the kitchen, you can just watch the gif as many times as you need to until you know what’s going on instead of having to rewind a video (possibly with hands covered in oil from the bread and cheese).
https://i.imgur.com/OtNekAR.gif
This was simply delicious. My family ate it all in one day. You cannot bake just one loaf of this bread, it tastes too good. The center of my loaf also fell, like one of the commentors above. Will try your advice next time, Sally, but a sure recipe keeper.
I made this bread today and it was delicious!! I am having trouble rolling it together and not sure what I’m doing wrong. I feel like it’s sticky the whole time and I have to keep putting flour. I cut it all the way through and it fell apart but I did manage to get it together quickly and get it in my pan.
Absolutely Incredible. You have to try this bread! Whoever gets the “heels” get jipped of this amazing delicious bread – worth every bite
Hi there ladies!
I am happy to report that I made this fabulous cheese bread w/ active yeast and it was incredible!
Thank you for giving the ok to use active yeast.
I doubled the recipe because I knew it would be a winner.
My niece & nephew came for Mother’s Day weekend and demolished both loaves!
You can bet I’ll be making this again.
Many thanks for sharing the recipe.
I can’t stop making this bread – I’m ADDICTED!!! The recipe is extremely easy to follow and the video made it simple to understand. I’ve done jalepeno cheddar and pepperoni bread so far. Every time, no matter what, this bread comes out perfectly. Sally, you are my spirit animal!!!
Hi, I loved how soft and easy to work with this bread dough is. My loaf came out looking beautiful but when cut there were big gaps under the crust. I like to toast bread but this made it hard to do. I reviewed the video and I think I did everything right. Any ideas?
Hi Kathy, in addition to rolling the dough up very tightly, a trick we’ve found helpful is to poke the top of the risen loaf (before baking) with a toothpick in a few spots. This helps that steam escape from the top instead of making the air pockets inside.
My favorite yeast bread ever! I like to make this with cheddar gruyère and it’s delicious!
Delicious, soft and relatively easy to make. Super clear instructions. I will be making this again with a variety of cheeses.
This bread is fantastic!
We love this recipe! The instructions were super clear which is great for inexperienced bakers. My whole family gobbles this bread up so quickly that I make 4 loaves at once so that we can have a few on hand in the freezer.
I’d love to try to make them into baguettes. Any idea what the cooking time and temp would work?
I made this today! I had a little problem with the twisting of the dough but other than that the bread came out delicious and the texture is perfect ! Hubby loved it! But I have 2 questions:
1. Do you think i can make this into 2 loaves into a much smaller pan? How long should I bake it?
2. Can i omit the cheese and just turn it into plain bread? Same baking time?
Thank you Sally! Your recipes are always a keeper❤️
Hi D, we’re so glad you enjoyed this bread! You can absolutely bake these as smaller loaves. We’re unsure of the exact bake time as it will vary by the size of pan you’re using, but keep a close eyes on it and when it sounds hollow when tapping, it should be done. You can also make this as a plain loaf if desired. Enjoy!
Hi, can I use a round pan (like those for cakes) instead of a loaf pan?
Thank you!
Hi Arielle, you can try using this dough/cheese/topping and assemble in a cake pan or springform pan just as we do with this raspberry twist bread. Let us know if you give it a try!
I love this recipe! I made it for Easter last year and wanted to try again this year. I was thinking of making mini loaves and have four mini loaf pans. Do you think splitting this 4 ways would work?
I just made this bread yesterday. It was delicious! The extra cheese on top was fantastic and made a wonderful crisp on the cheesey crust, the bread was so soft and held together well. The only thing, which was my fault since it was my first twisted bread, is that I didn’t twist it enough to get a beautiful, tasty cheesey swirl throughout the whole loaf. I’m excited to try again! I had some family taste it, they loved it and can’t wait for the next loaf. Thank you for this recipe!
Hi Sally – I have made this a few times, and given it as gifts to friends as well, it is delicious! My only problem is every single time it falls in the middle – do you have any suggestions for what I could be doing wrong? Could it possibly be because my loaf pan is glass instead of metal?
Thanks!!
Hi Jenny! The glass pan shouldn’t be an issue. Usually a loaf of bread that collapses is due to over-proofing the dough – try reducing the rise time next time. Otherwise the issue could be air getting trapped in the twists and expanding while baking, then collapsing. Make sure to roll the dough as tightly as possible to avoid too much air getting trapped. Hope this helps!
Thank you! I am relatively new to yeast bread and I do always let it proof for the full amount of time listed (and sometimes even longer) so that could very well be it! I will reduce next time and see what happens 🙂
A bakery in my area makes this amazing bread they call Cobblestone Bread. It is a delicious soft white bread marbled with butter. It makes incredible toast. I tried to recreate it by using this recipe but subbing frozen shredded butter in place of the cheese. Not the best results. The bread was perfect and very close in taste to Cobblestone, but the butter all melted and settled to the bottom of the pan and completely soaked into the bottom half of the bread. It basically became inedible. Any suggestions on how I keep the butter marbled through the bread while baking?
Hi there!
If you don’t grate the frozen butter, but instead place a frozen rectangle of butter in the centre of the dough it might come out a little better for you, freeze the butter the day before you intend to make the bread too! Ensure the whole loaf is as cold as possible (with the rest) before baking. Advice from a trade pastry chef, hope it helps!
Throwback to my absolute first attempt at making bread! However, I went rogue. I added roasted garlic to the cheese filling, and oregano, rosemary, basil, garlic powder, and onion powder to the dough. I loved how pillowly soft this bread was, and the flavours really worked well together. It’s shaped like you would shape a babka.
This bread is GREAT! I’ve made it a bunch of times, always using the homemade buttermilk option (milk +lemon juice or vinegar), since we rarely have it at home. I’ve also used a variety of cheese and herb options and they’ve all turned out well. Thank you!
Hi Sally, although I have been home baking bread for 30 years, I was never inclined to make cheese bread. I tried your cheese bread recipe and not only the taste is great but also the instructions are very clear and explicite. And every different step is on time as described. Did not have to do any adjustment. For me it’s a keeper. Thank you so much.
Hello! It will be very lucky if I can get an answer in the next two hours (I just started
My first rise), but I’m wondering if this can be made into pull-apart buns?
Either way, I’m super excited to see how this recipe turns out and will do my best to report back. 😀
Hi Erin, we don’t see why not!
I am planning on making this in the morning, I dont have a mixer, I make all my doughs, cakes, loaves etc by hand.. could you perhaps share any advice so that i am able to make this successfully? It seems absolutely divine, I would love to make it.
Hi Lauren! If you do not own a mixer, you can mix this dough with a large wooden spoon or rubber spatula and knead by hand. It will take a bit of arm muscle, hope you love this bread!
Could you use butter milk substitute, such as milk and vinegar?
Hi Julie, you can either make your own DIY buttermilk as you mention, or you can use the plain whole milk. The buttermilk gives it the best texture and flavor!