


2018 baking goal = let’s step outside our comfort zone. Let’s start with a favorite baking bucket list recipe of mine: madeleines.
Equipped with determination, I studied and tested and retested and retested some more until I figured out the big question that is madeleines. While their fancy appearance and classy name can be intimidating, these airy teacakes require the most basic ingredients. They aren’t difficult, but they do demand your attention, patience, and precision. And a solid (very detailed) recipe to produce the light texture doesn’t hurt either!
One reader, Debbie, commented: “I love the detailed instructions. That made a huge difference in the outcome. They are delicious and perfect! ★★★★★“
Another reader, Gayle, commented: “Superb! This pastry turned out well—light, delicious, and melts in the mouth. Directions and hints are outstanding. ★★★★★“
Another reader, Madeleine, commented: “This recipe is glorious! And even though it’s definitely a plus that the recipe and I have the same name, these cookies are amazing and very elegant for brunches and teatime… These cookies have been on my bucket list forever and I will definitely be making them again. Thanks, Sally!! ★★★★★“

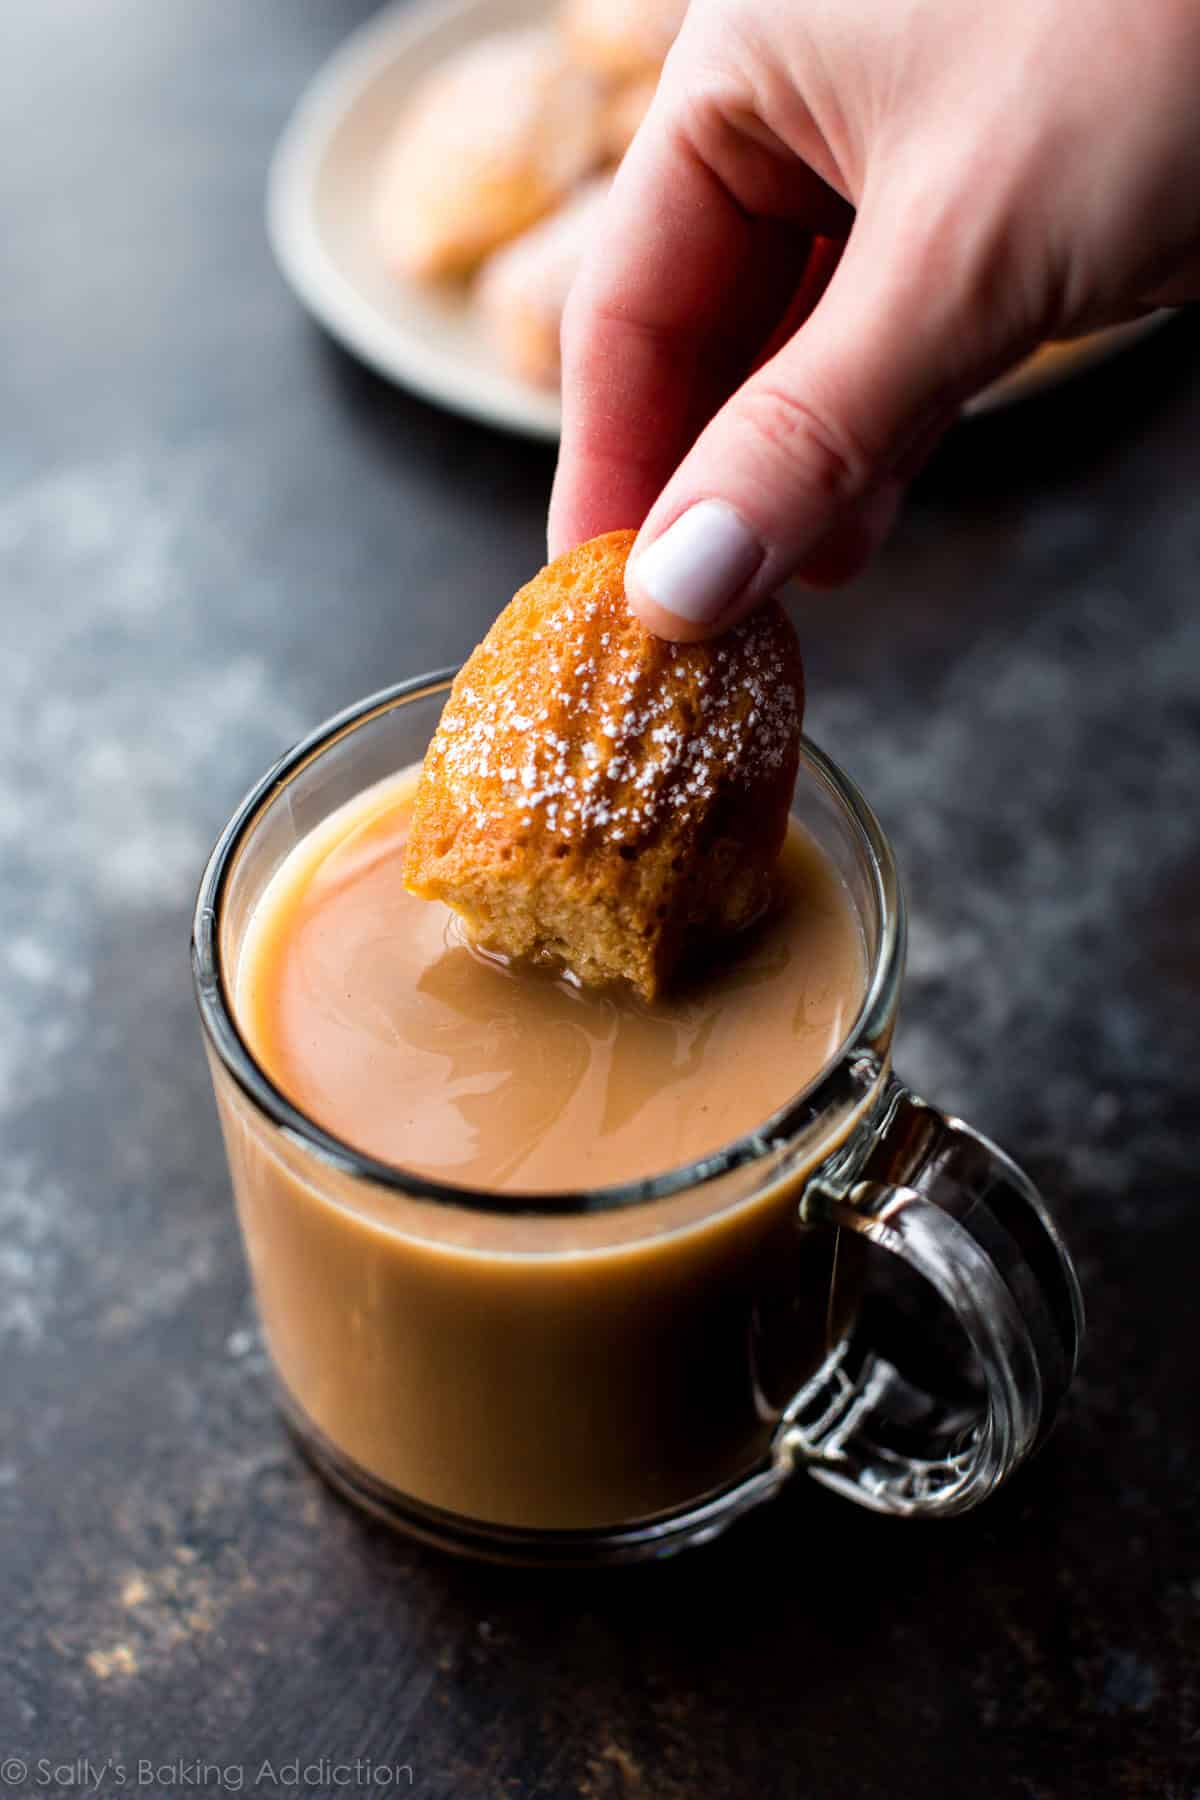
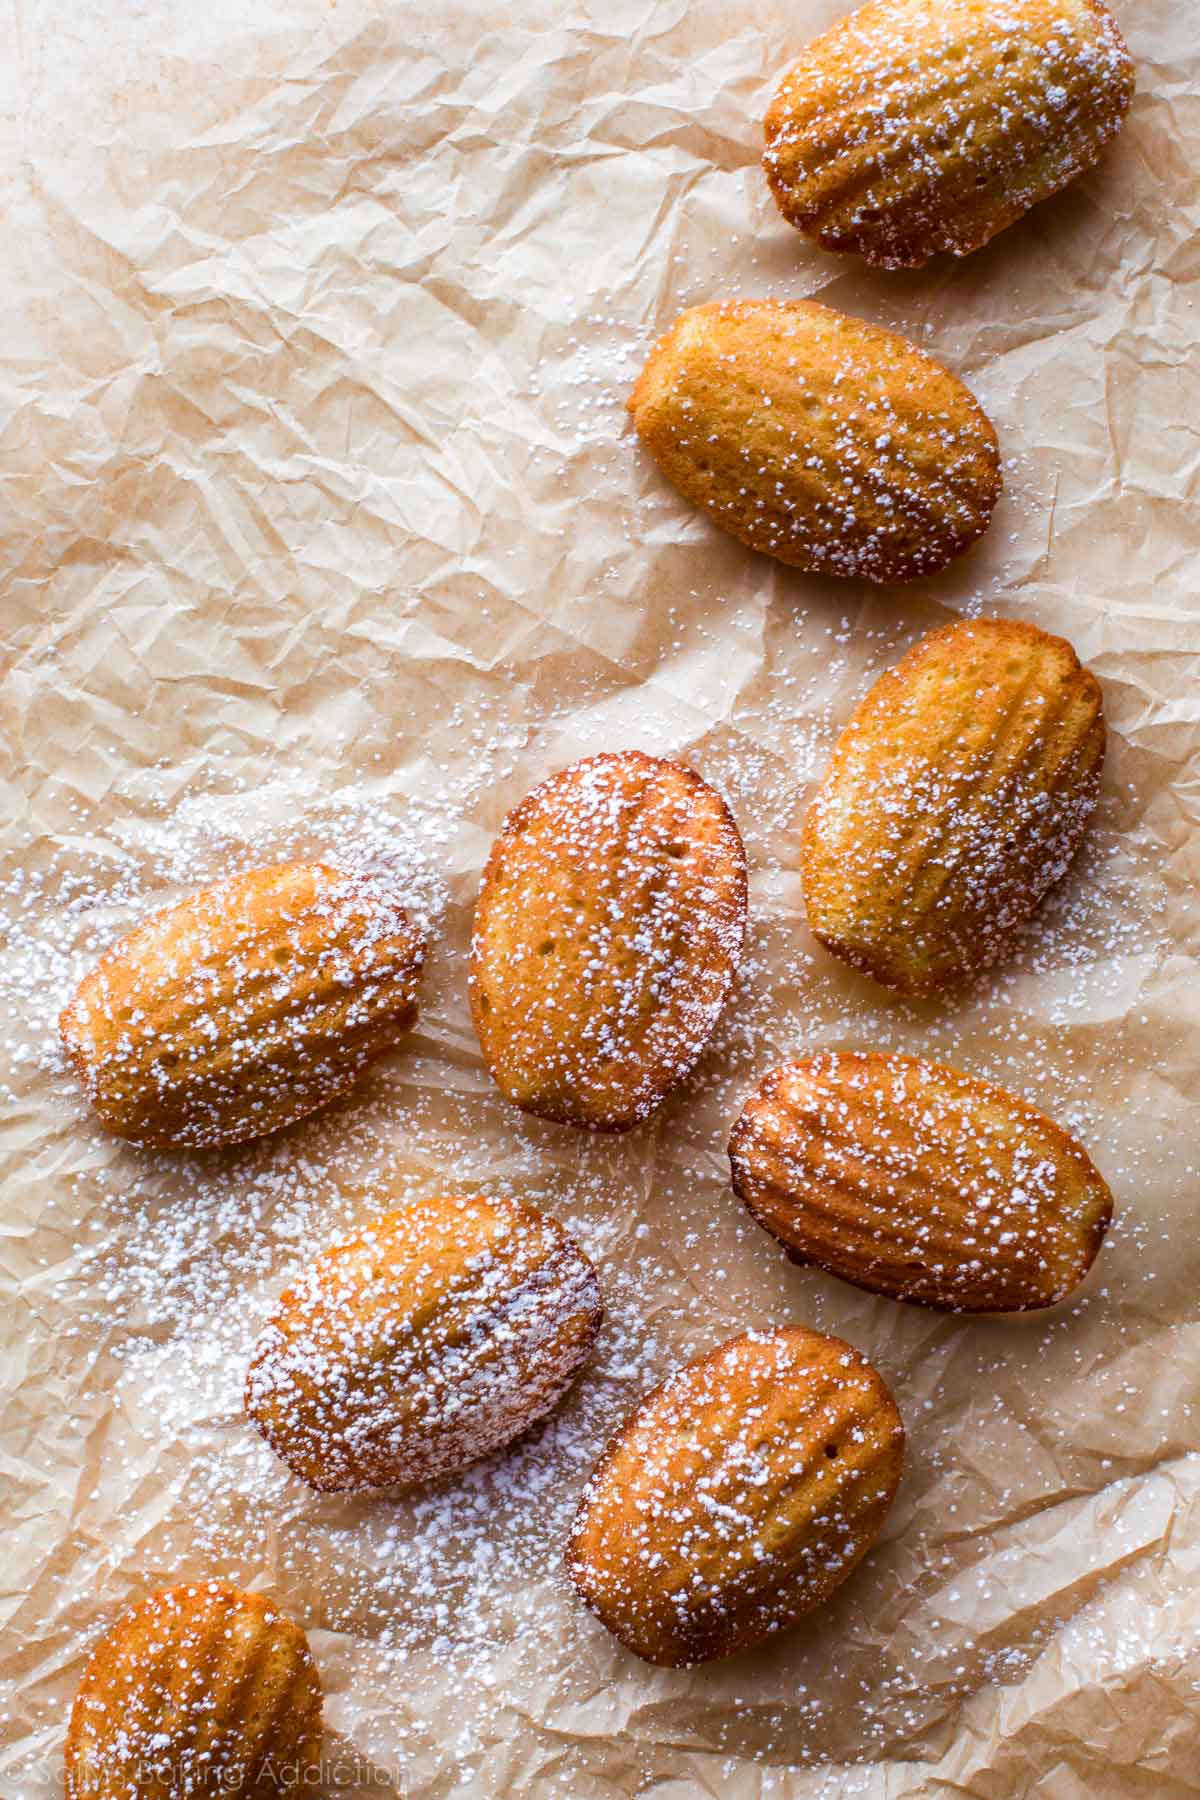
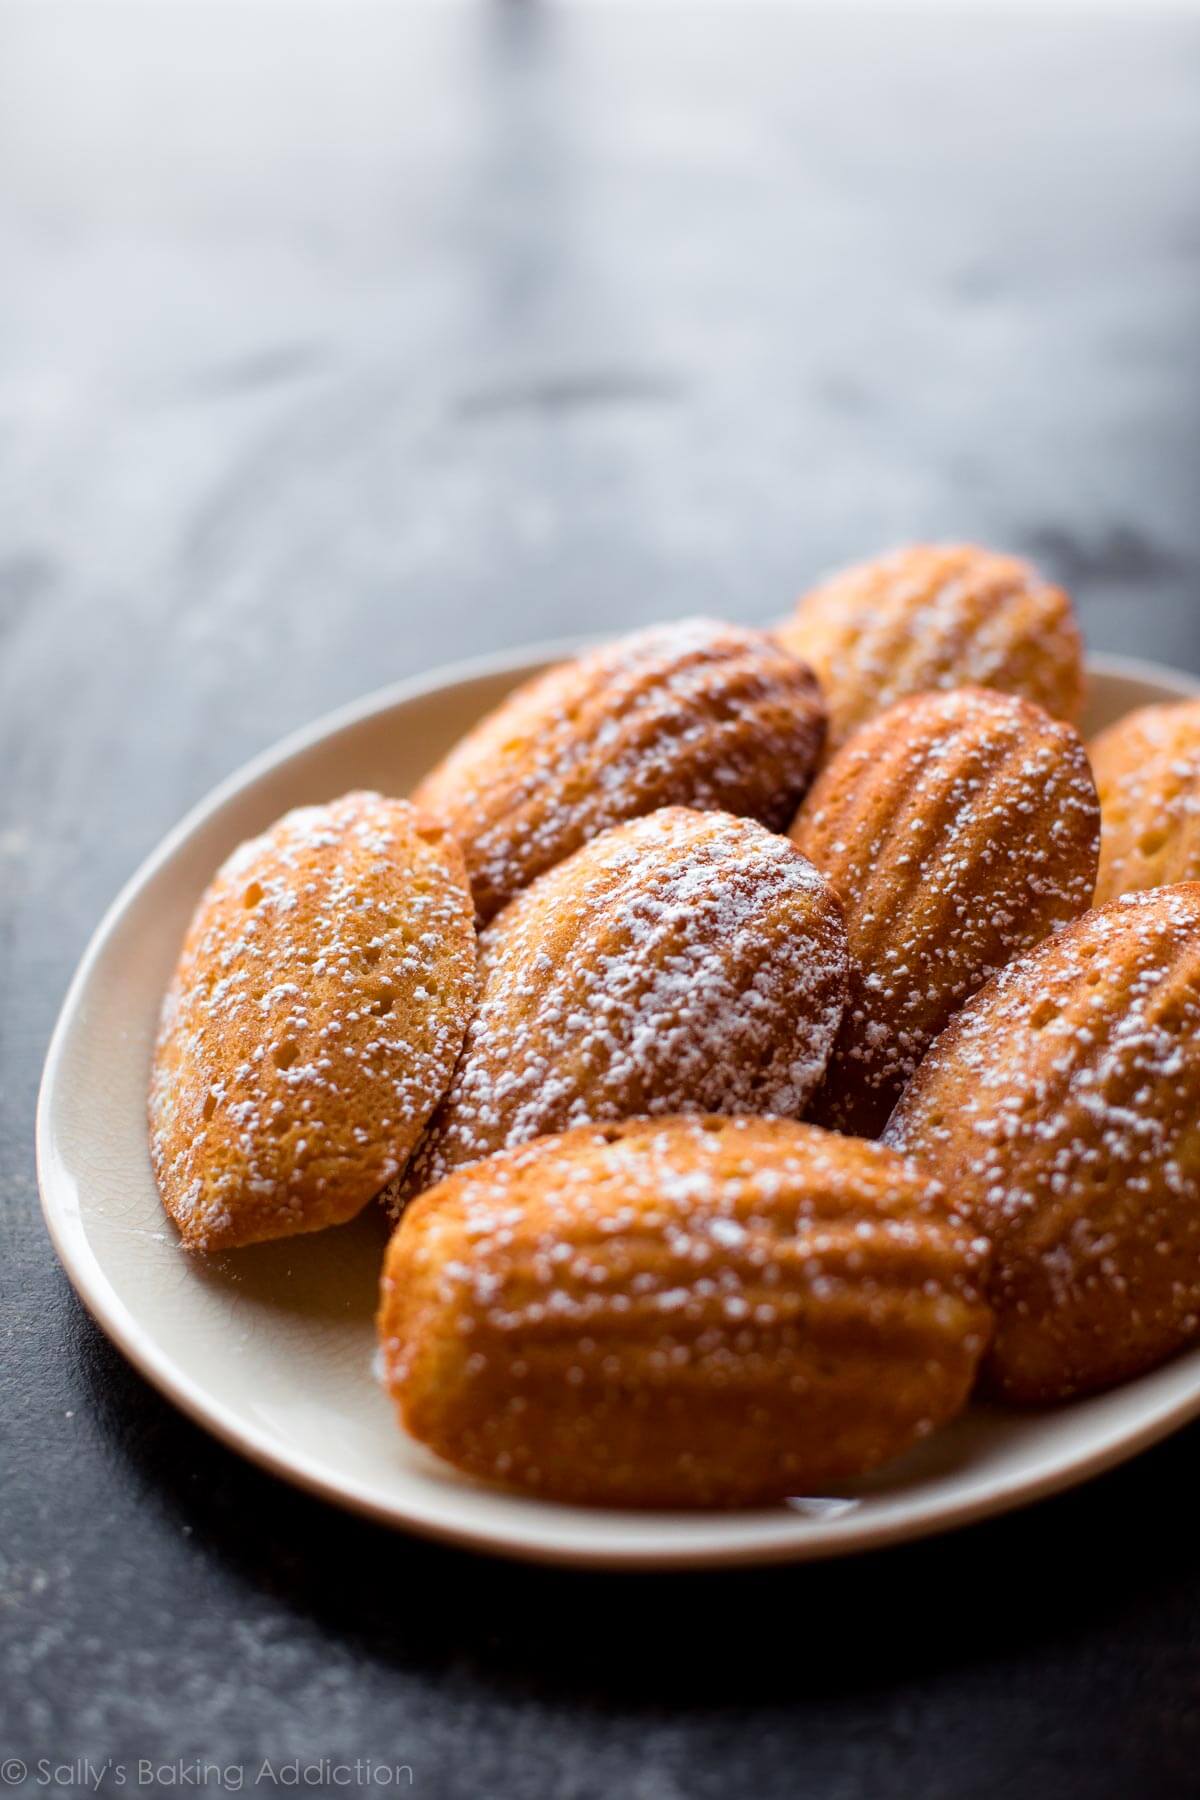
Let’s figure this out first: are madeleines cookies or itsy bitsy cakes? A big debate! They’re a delicate little butter cake that most people refer to as cookies. However you categorize them, madeleines are known for their beautiful and distinct scalloped shell shape and need nothing more than a sprinkle of confectioners’ sugar on top. Though a dunk in dark chocolate is nice too!!
Let’s dive in. This is a lengthy post, but I think it’s important to discuss what works and what doesn’t work so you can truly understand what you’re doing in the kitchen. We’re going to walk through the process together with step-by-step photos, detailed instructions, and then the madeleine recipe is at the bottom of this post. Break out your madeleine pan. We’re doing this!
Basic Process
In this great big world, there are MANY ways to make madeleines. This is how we’re doing it today, a recipe based off of Julia Child’s. Madeleines start with a sponge-like batter, called a genoise in European baking, and get most of their lift and volume from beaten eggs. The base of our desserts is usually creamed butter and sugar. With madeleines, however, beating the eggs and sugar together is the most crucial and particular step. We’ll beat them for 8 minutes to really whip in enough air. We’ll add a little flavoring to the madeleine batter: lemon zest and a little vanilla extract, both optional. Then in a separate bowl, we’ll toss a little flour, baking powder, and salt together. We will delicately fold the flour mixture into the beaten egg mixture. Why emphasis on the delicate? We don’t want to deflate the eggs we just beat, do we?? Finally, we’ll mix in some melted butter. So as not to deflate the airy batter with a whole mess of heavy melted butter, mix *some* of the madeleine batter into the melted butter, then add it all into the madeleine batter for final mixing. If that confused you, step pictures are coming. The melted butter gives mads their classic taste, as well as a lovely shiny appearance when they finish up in the oven. If you’re feeling confident, go ahead and brown the butter. Yum!
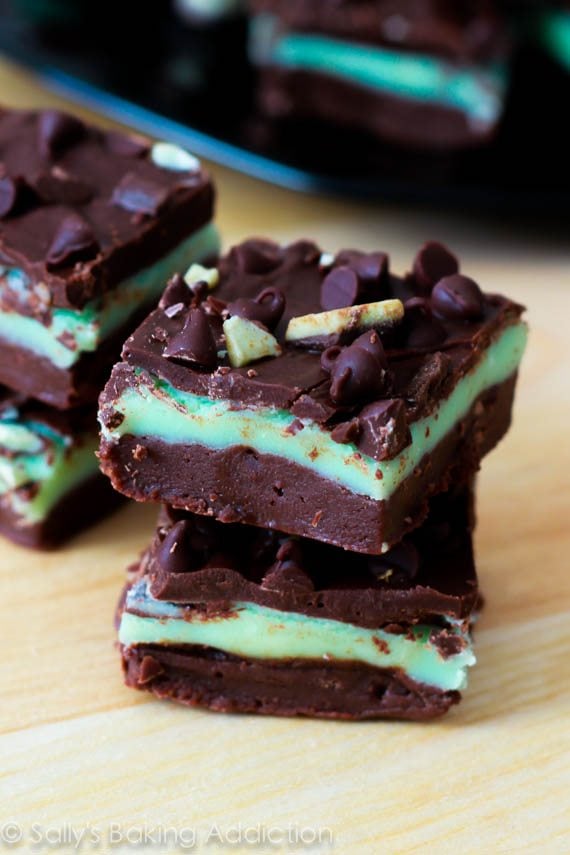
We’ll spoon the batter into a madeleine pan. And that’s the catch! You need a specific pan. I know what you’re thinking. Is it really worth buying a new pan for just 1 type of recipe? Yes. If you’re into mads, it’s worth it. And now you’ll have it to try these chocolate peppermint madeleines, next!
Can I bake madeleines in another pan? Sure! A mini muffin pan works, but the texture of the little cakes will be different, they will be similar to brown butter berry tea cakes. I found that you really need the scallop pan to produce the iconic crisp edges.
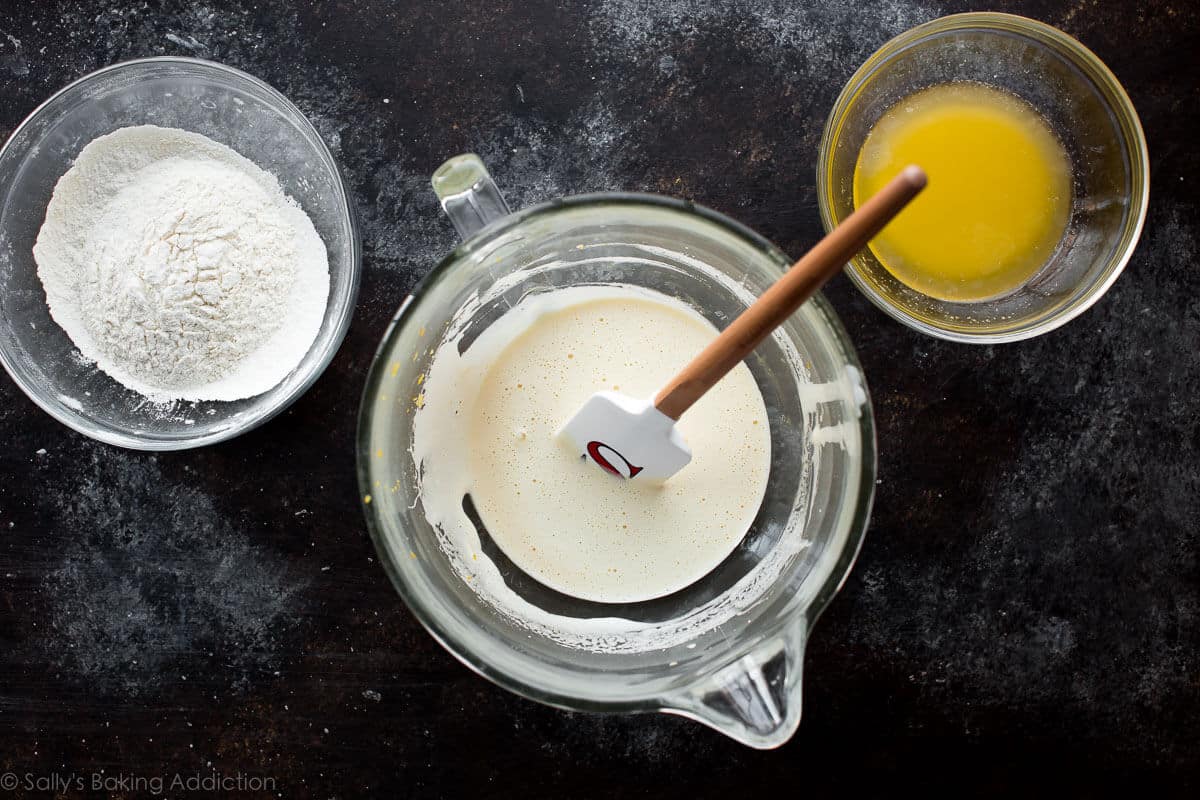
The Batter
You see the photo above? It shows that there are 3 components to the recipe. The flour mixture, beaten egg mixture, and melted butter. Tip: when you’re ready to begin, melt the butter first so it has at least 8 minutes to slightly cool before using. Remember, we are whipping the eggs for 8 minutes.
Like I mentioned, the most particular step in madeleine baking is whipping the eggs long enough. You’ll need room temperature eggs. Cold eggs won’t reach the volume we need for madeleines. You’ll know you whipped the eggs long enough when the mixture is thick and pale. And this might be the most helpful clue– when the beater is raised, a ribbon of batter will fall back into the bowl. Aka the ribbon stage!
So now that the eggs (+ sugar, lemon zest, and vanilla) are beaten… let’s continue.
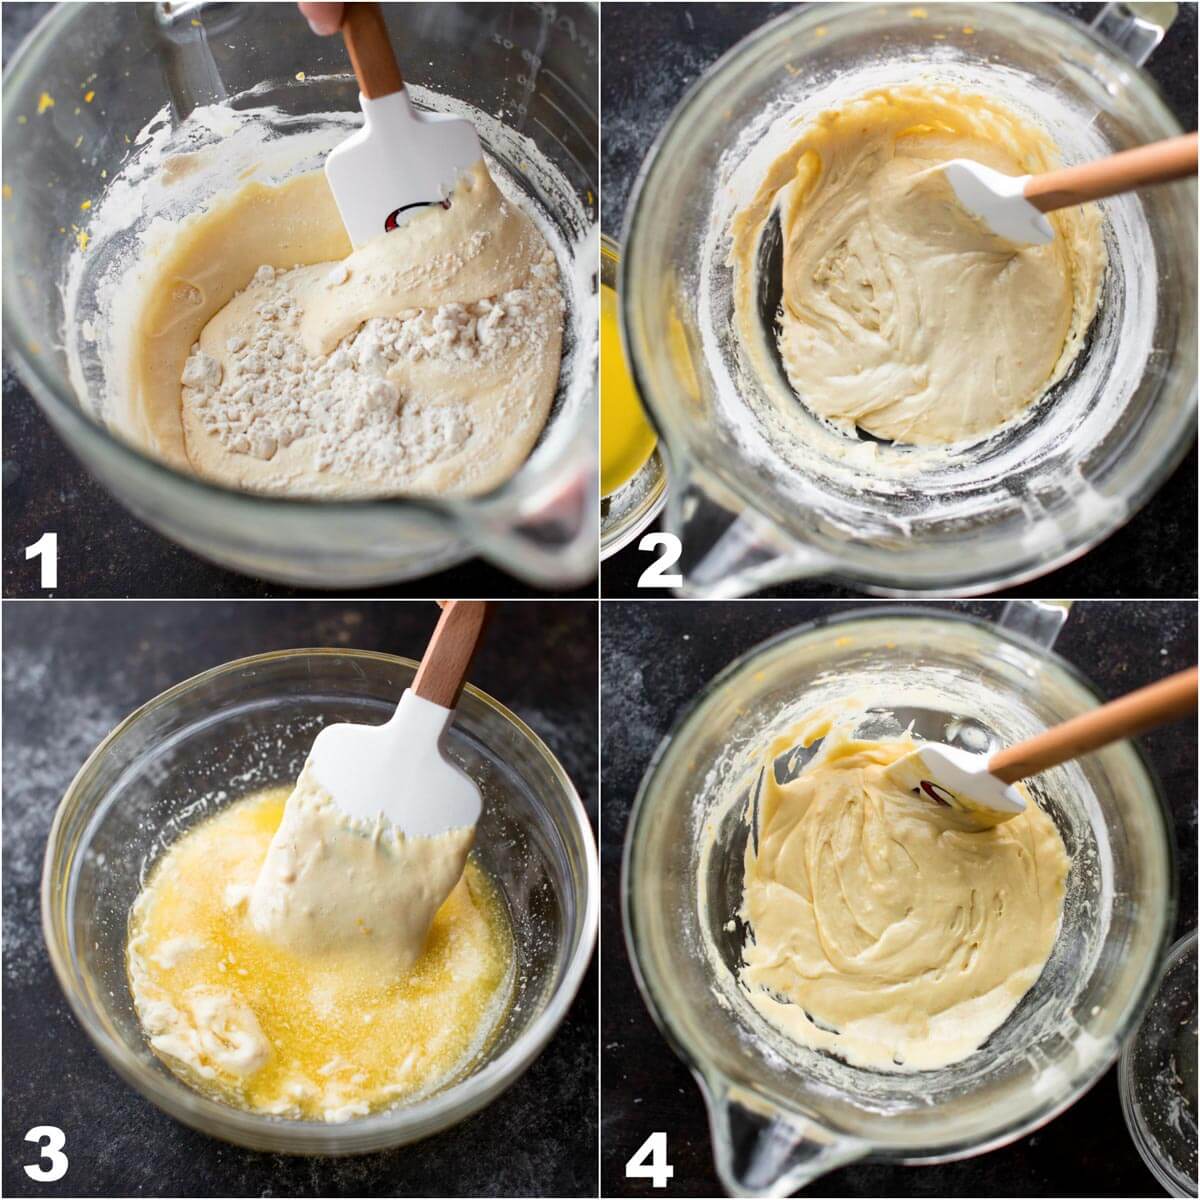
In the photo above, we are (1) folding the dry ingredients into the beaten egg mixture, making sure we aren’t deflating the eggs. When we’re all done, our batter will look like photo (2). Then (3) we’ll take some of that batter and mix it into the melted butter. Then (4) we’ll mix that into the rest of the batter.
We’re doing everything slowly and delicately.
Chilling the Batter
Just like most of the cookie doughs in our repertoires, madeleine batter needs to chill out before baking. Letting the batter rest in the refrigerator ultimately helps the mads rise up taller in the oven. Taller usually means fluffier, which is exactly what we’re shooting for. But don’t chill the batter for too long and here’s why: the butter will solidify again. And when baked, the madeleines won’t rise up as tall which negates the whole point of chilling the batter! Good thing madeleines are delicious because they sure do have lots of rules.
I find 30-60 minutes in the refrigerator is the sweet spot.
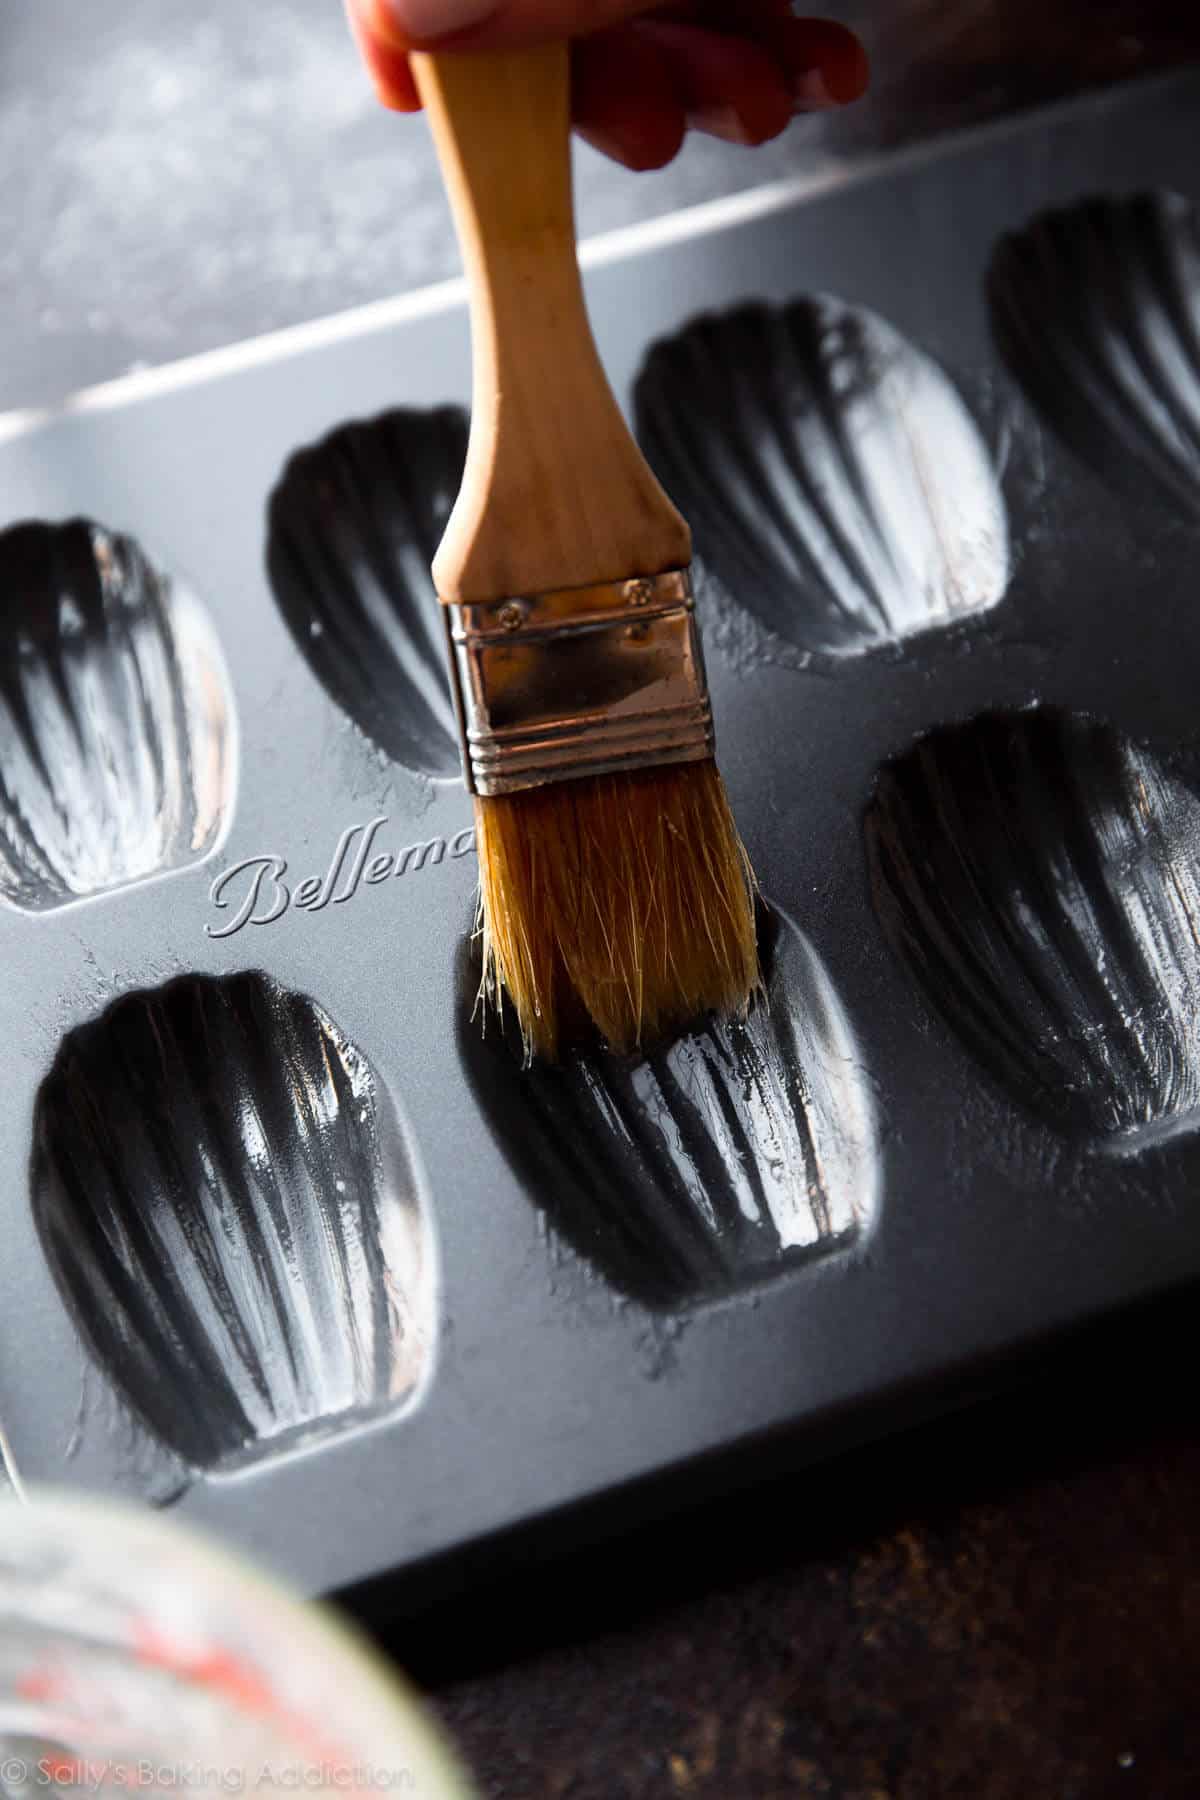
Preparing the Pan
Many madeleine recipes call for greasing the madeleine pan regardless if you’re using a nonstick madeleine pan or not. I tested a few ways: nonstick spray, buttering and flouring, and just buttering. Honestly, nonstick spray worked absolutely fine but brushing the pan with melted butter gave the mads a lovely crisp and buttery crust. I wasn’t fond of the butter + flour preparation because the flour either burned or left a residue on the baked cookies. Just my opinion.
A pastry brush comes in handy!
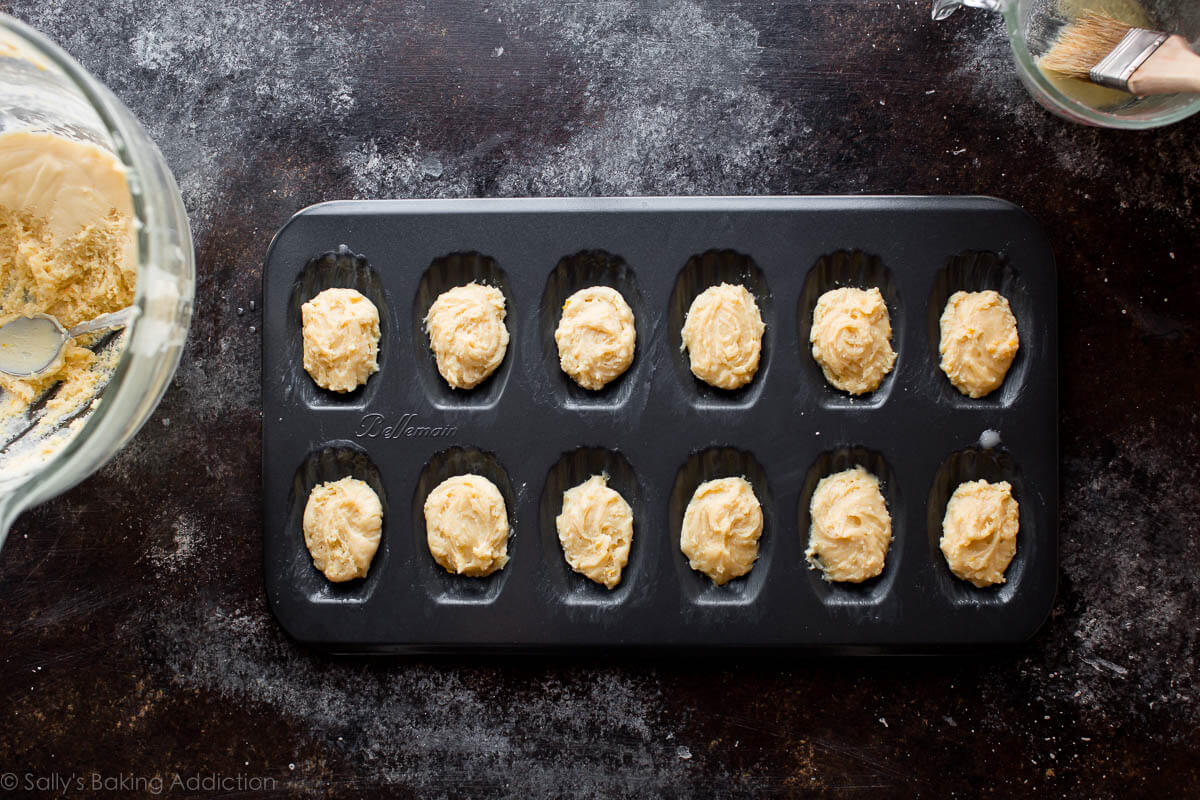
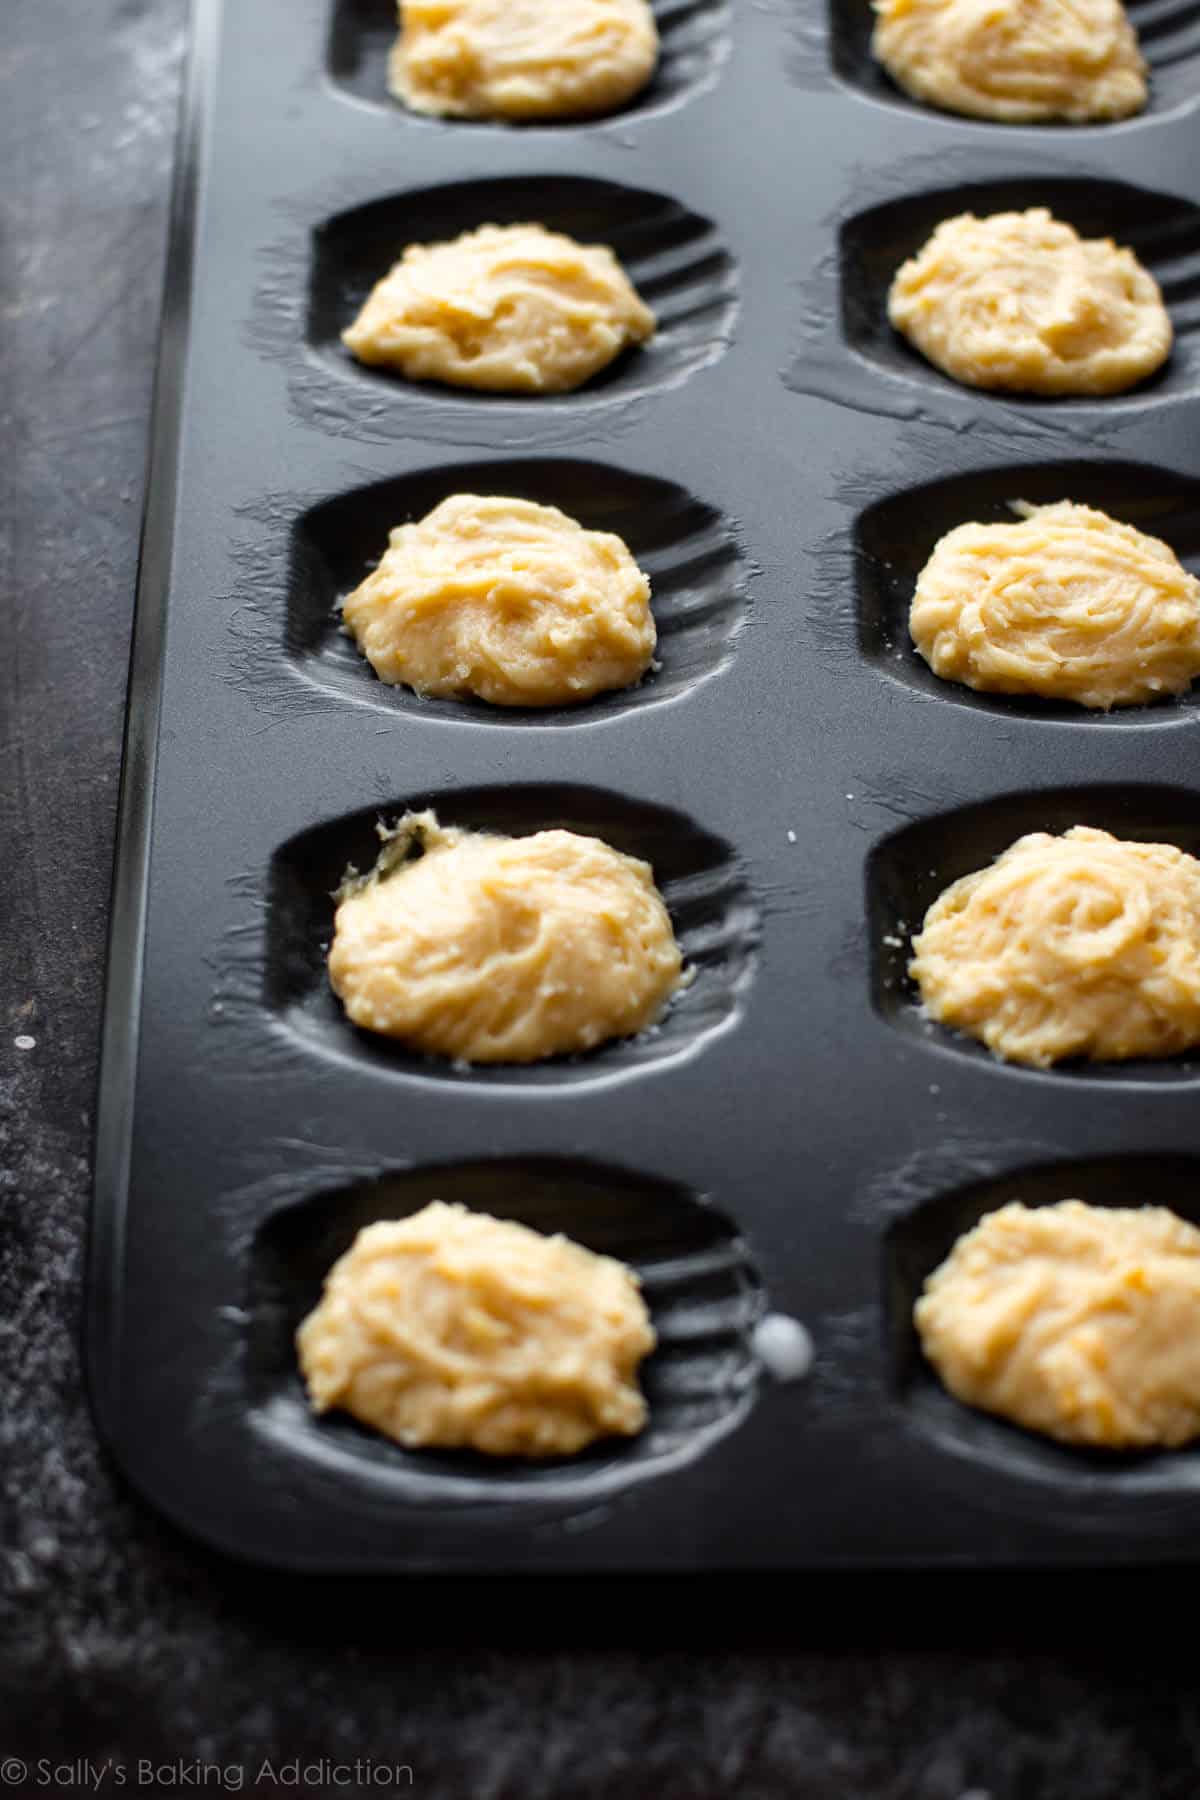
How much batter per cookie? I found 1 heaping Tbsp was plenty. Use a basic spoon and just plop it right into the center of the scallop shell, just like this:
I tested madeleines at varying oven temperatures and settled on 350°F (177°C). Anything higher than that burned the edges without properly cooking the centers.
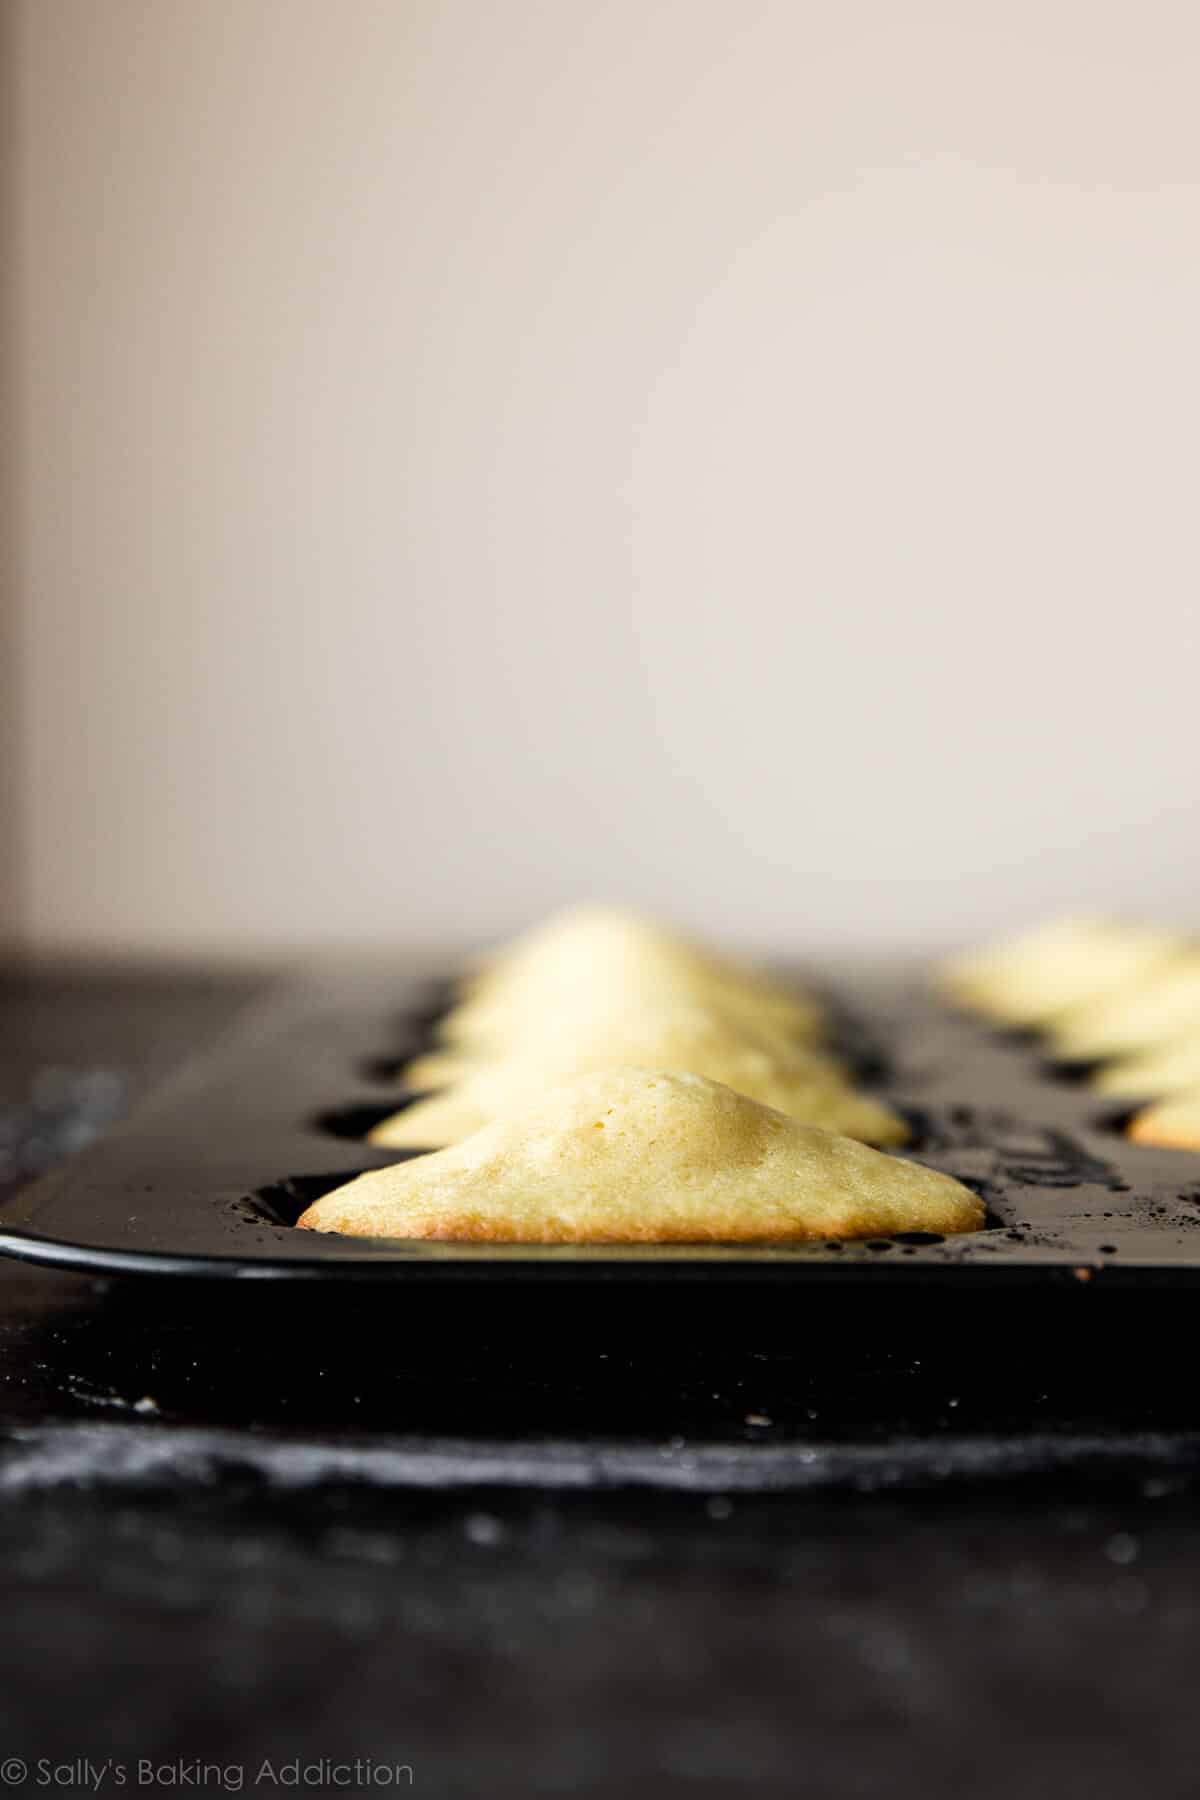
Look at that rise! This is called the belly, hump, or bump of a madeleine.
Madeleines are best right out of the oven. They’ll lose a lot of moisture overtime, so I suggest baking and enjoying them fresh. I had lots of madeleine rocks on my hands after a day or 2. (Dunk them in coffee… still good!)
So Are They Worth the Fuss?
Yes, I definitely think so! Laced with fresh lemon zest and finished with confectioners’ sugar, their texture is undoubtedly unique. Delightfully crisp edges, buttery scallops, and a subtly sweet airy teacake inside. To say they’re delicious is an understatement. They’re remarkable. A French pastry I never thought I could recreate in my own kitchen. They always on my list of Mother’s Day recipes and great for any type of shower, celebration or event. Invite some friends over, brew some coffee, pour some tea, and bake them together. It’s a fun baking experience!
If you read the recipe and use these pictures as your guide, you’ll be gifted with these fancy treats too. If, somewhere along the way, your batter gets a little too heavy—no fret. Your mads will taste more like poundcake, but they’ll still be worth it.
Do you have a favorite madeleine recipe? Or any other tips and tricks? I’m pretty happy with these, but would love learning from any madeleine experts!
By the way, I can’t finish this post without two more things:
- The history of madeleines. 🙂
- Ross: Oh really? Did she tell you he plays the recorder, recites poetry, and bakes madeleines? Monica: Ohhhh how are they? Ross: Lighter than air… but that’s not the point!

Madeleines
- Prep Time: 1 hour, 15 minutes
- Cook Time: 12 minutes
- Total Time: 1 hour, 30 minutes
- Yield: 18-20 cookies
- Category: Cookies
- Method: Baking
- Cuisine: French
Description
Light & airy homemade madeleines with delicious buttery lemon flavor.
Ingredients
- 1/2 cup (8 Tbsp; 113g) unsalted butter (plus another 2 Tbsp (28g) for the pan)
- 2 large eggs, at room temperature
- 1/2 cup (100g) granulated sugar
- 2 teaspoons lemon zest
- 1 teaspoon pure vanilla extract
- 1 cup (115g) sifted all-purpose flour* (spooned & leveled)
- 1/2 teaspoon baking powder
- 1/8 teaspoon salt
- optional: confectioners’ sugar for sprinkling on top
Instructions
- Read the post above for explanations and step-by-step pictures. It will help you!
- Melt the butter in a large bowl and set aside to slightly cool as you prepare the rest of the batter. You can melt it in the microwave or melt it/brown it on the stovetop then transfer to a large bowl.
- Using a handheld or stand mixer fitted with a whisk attachment (didn’t notice a difference using either one), beat the eggs and sugar together on high speed for at least 8 minutes. The mixture will be thick, pale, and form ribbons when you lift the beater(s). Beat in the lemon zest and vanilla extract until combined. (The remaining ingredients are mixed together by hand; you no longer need the mixer.)
- Whisk the flour, baking powder, and salt together in a small bowl. Using a silicone spatula, gently fold into egg mixture. I suggest carefully folding in half of the flour mixture, then folding in the other half. (Instead of dumping it all in at once.) Make sure you’re handling this batter with care. It’s very delicate.
- Stir 1/4 cup of the batter into the melted butter. It will take a minute to fully incorporate. Then stir it all into the rest of the batter. The batter will be thick, silky, and shiny.
- Cover the batter and chill in the refrigerator for 30-60 minutes. Try not to chill any longer than this as the butter in the batter will begin to solidify.
- During the last few minutes of chilling, preheat the oven to 350°F (177°C).
- Melt the remaining 2 Tablespoons butter. Using a pastry brush, lightly brush the madeleine pan with melted butter. I find that greasing the pan is necessary even if you’re using a nonstick pan. We want to avoid any chance of sticking.
- The batter will be quite airy and spongey after resting. This is good! Do not try to deflate it. Spoon 1 generous Tablespoon of batter into the center of each scalloped well. No need to spread it to the edges. Just plop it in the center. (Cover and refrigerate remaining batter if you do not have 2 madeleine pans to bake the batter all at once.)
- Bake for 10-12 minutes. The madeleines are done when the tops spring back after lightly pressed with your finger. Invert the pan onto the counter. Transfer the warm madeleines to a wire rack to lightly cool.
- Dust with confectioners’ sugar, if desired, before serving. Madeleines are best enjoyed right after baking, so I don’t have any make-ahead tips. They dry out very quickly; I find baked and covered madeleines lose their texture even after 1 day! For this reason, I don’t recommend freezing them either. You’ll lose a lot of texture.
Notes
- Special Tools (affiliate links): Citrus Zester | Glass Mixing Bowl | Electric Mixer (Handheld or Stand) | Whisk | Silicone Spatula | Pastry Brush | Madeleine Pan | Cooling Rack | Fine Mesh Sieve
- Flour: Sift flour before measuring.
- Adapted from From Julia Child’s Kitchen (I reduced the sugar, oven temperature, sifted the flour, added baking powder, and did not flour the pan)


Reader Comments and Reviews
First time making these and they turned out perfectly. Delicious!
Hi Sally!
I know you do not recommend shipping these, however, I’m going to give it my best! On a wing and a prayer! Can you please give me your packaging and shipping tips? Thanks!
Hi Michelle, Here is our post on how to ship cookies. You can try with these!
I had so much fun making the Madeleines and they turned out beautifully. I had made them before with a different recipe that used honey, almond and vanilla extract and orange juice. I like your recipe much better. I followed your step process and had a perfect outcome.
What are your thoughts on using cake flour. I’ve seen recipes using cake flour, so does my sister so I gave it a try. I find that the crumb is crumbly compared to all purpose flour. Am I correct? Thank you in advance.
Hi Divina, for best results here, we recommend sticking to the recipe as written and using all-purpose flour. For other recipes, it really depends — we actually have a full post on cake flour and when it’s best to use here if you’re interested!
I think I have a make-ahead tip (if you really have to, because they are absolutely better fresh but I promised a friend I’d bring him some). I put several in a container and put a piece of plain bread (potato, but white works well too) in with it. They were still very fresh and the texture was good even nearly 24 hours later.
Sharing in case someone else absolutely needs to keep them fresh for more than a couple hours!
Hello – is the temperature for a fan oven or a regular one?
Hi Megan, all of the recipes on this site are written for conventional settings. If you do use convection settings, however, lower your temperature by 25 degrees F and keep in ming that things may still take less time to bake.
Good evening! Looking forward to making these Madeline’s. They look great! I don’t have lemon zest. Could I use lemon extract in its place? Thanks
Hi Sarah! Feel free to use 1 teaspoon of lemon extract instead of (or in addition to) the lemon zest.
The recipe was very easy to follow and the cookies came out delicious! My one complaint, which I don’t know is my pan’s fault or the recipe’s fault, is that these didn’t come out very pretty. They didn’t form to the pan’s mold very well and the ridges were not very well defined. Perhaps I should have spread the batter more evenly before baking? Or perhaps I just need a new pan.
Hi Kathy, so glad you enjoyed these homemade madeleines. When this happens, it could very well be that the pan you have doesn’t have deep enough ridges. However, spreading/pressing the dough/batter more into the molds can help. (To really ensure the batter is formed into the molds before baking even begins.) Does this make sense?
These are lovely – and so easy to make there really is no excuse not to enjoy them often. Perfect with whipped cream and strawberries on the side for tea. Re: can you store madeleines? It doesn’t surprise me that they don’t recommend it. If I absolutely have to I freeze them, but that does turn them cakey. Best way to describe this is to think of pancakes. When perfect they have delicate, crisp edges and a wonderful fluffy center. Technically you can freeze them, but when you thaw them they will loose the crispy edges and fluffiness that make them special. Still good, but nothing like they are fresh.
Hi, Sally! I love your recipes. They’re very detailed but easy to follow. I bought the same pan but mine didn’t come out as pretty as yours. They retained the shape but not the lines(?) were not defined. Any idea why?
Hi Julie! Make sure that you chill the dough for at least 30-60 minutes. Colder, thicker dough will help guarantee that scalloped appearance. We’re so glad you enjoyed the madeleines!
Hi Sally. This will be my first time trying to bake these beautiful madelines. I have to bake them for a bridal shower but don’t know how to store them since I have to make them 2 days ahead. Any suggestions?
Ps. I love your website and have baked with much success many of your recipes!!
Hi Carol! Madeleines are best enjoyed right after baking, so we don’t have any make-ahead tips. They dry out very quickly; we find baked and covered madeleines lose their texture even after 1 day! For this reason, we don’t recommend freezing them either. You’ll lose a lot of texture. If you do still decide to make them ahead, the best bet would be storing them in an air tight tupperware container.
I use dove silk and smooth chocolate chips. Melted in the microwave with a little strong coffee.
1/4 cup chips plus 1 tablespoon coffee.
Hi Sally, love all your recipes! Do you have any suggestions on making a chocolate version of this? Thank you!
Hi Eunice, Cocoa powder or real chocolate are both unique ingredients and adding either would require a little recipe testing. Unfortunately, it’s not an easy swap with all-purpose flour. Let us know if you find a chocolate madeleine recipe you love or play around with this recipe.
It’s my first time baking Madeleine & I really love this recipe~ I wanted to just have one and be done for the day but I couldn’t resist and I ended grabbing more than I should!
Thank you for the recipe 🙂
OMG just like another review, this is the FIRST TIME I’ve ever made Madeleines and ever even eaten them. My husband and son buy them and they just never appealed to me. I wanted to make them and I followed the recipe and they came out fabulous. Thank you Sally, for having no-fail recipes. I’m a long time user of your site and the recipes always come out fabulous. This is also my first comment – I had to leave a comment because these are so delicious!
We’re so pleased to hear that you loved this Madeleine recipe, Venice! Thank you so much for making and trusting our recipes.
Thank you for this recipe Sally, my madeleine came out really nice. This is a major confidence booster for a newbie baker like me. Love your notes as they explain why I should not do this and that (avoiding pitfalls for newbie).
Amazing recipe!!!
I’ve made this recipe to the letter three times with perfect results each time. I didn’t know anything about beating eggs and sugar to the ribbon stage, and appreciated the detailed instructions. I’m looking forward to playing with the recipe (I see almond extract instead of vanilla in my future). Thank you!
First time making these with my new Mad tray. They are delicious. They rose like they are supposed to. I just read a few people mentioned the lack of pattern on the cake/cookie (controversial lol) I presume this is down to my tin wound it be?
I am making these tomorrow for Mother’s Day with absolute confidence. Last week I made the Biscoff White Chocolate Blondies and everyone loved them so much , I had to make more! The week before I made your simple wedding cake and put raspberry coulis between 2 layers and lemon curd between the others. The only change to your recipe was that I shaved off the outsides of the cakes to make them super moist. You are my hero!!
Absolutely love this recipe — I had been cooking madeleines for years, and couldn’t believe how the 8 minutes of beating the eggs transformed the texture of my madeleines! I’ve now been cooking *these* for years 🙂
A question — how would you recommend modifying the recipe for use with meyer lemons instead of traditional? Thank you!
Hi Stacy, we’re so glad you loved this recipe! You can use Meyer lemons with no other changes, they’ll just be a bit sweeter. Let us know how you like it!
May i ask if we have to bake it with fan or without? Thanks
I followed the recipe to the T and although I left my batter in the fridge overnight, I find that it was still firm enough to use an ice cream scoop onto the pan. It baked out well, and the taste and texture was beyond great. I finished the small cakes with a lemon glaze and a sprinkle of lavender sea salt.
I’m on my second batch. Well actually my third but I forgot to add the sugar in the 2nd so that one doesn’t count.
This recipe is great and the pictures were quite instructional – having never tried these before. This is a great template that worked so well for me that my last batch included I added 1T of poppyseed and a bit of freshly squeezed lemon (not quite half a lemon). CAREFULLY folding the dry ingredients was definitely required. Thank you!
First time making and eating madeleine’s and they were wonderful. On our pan we got 16 madeleines in 2 batches. An easy recipe overall and one we’ll be making again.
The same happened to me, but became a lot thinner after adding the melted butter.
I agree with some of the comments that chilling as long as the recipe instructs makes the batter much too hard. But, after leaving the batter at room temp for 10ish minutes, I was easily able to scoop. Also, I used a mini silicon Madeleine pan and they were springy and just beginning to brown on the edges at 11 minutes. Came out great!
Quick question: Do you sift all the dry ingredients or just the flour?
Just sifting the flour will be sufficient. Happy baking!
Excellent recipe. Well explained. My madeleines were beautiful!
In addition to my previous comment the cakes came out beautiful in color and shape. I greased my already non stick pan as required with melted butter they came out beautifully no sticking at all. I never got the icon bump on the one side but I didn’t mind and I found them. More cakey dense and a bit spongy but I enjoyed them just the same I probably will make them again cause I love anything lemon based. I also noticed I kept the dough in the fridge for 1hr as required and it was kind of firm but I still made 21 nice cakes.
I’ve had a pan for years but have never made these and found. Your recipe and their in the oven as we speak excited to try these out fingers crossed!
is there any way to make these without the Madeleine pan?
Hi Maria, a mini muffin pan works, but the texture of the little cakes will be different. We found that you really need the scallop pan to produce the iconic crisp edges.
Merci beacoup! Cette recette est parfait et j’aime bien. Mes madelines étaient beaux et ma famille a pensé qu’ils étaient délicieux. Elles étaient meilleures que les madeleines que j’achetais chez Costco.