

The best marble cake I’ve ever had. And here’s how you can make it.
It’s been a long time coming, but I finally have a marble cake recipe to share with you! This recipe is years in the making—in fact, I wanted to publish a marble cake in my first cookbook but couldn’t perfect a recipe in time. (Though there is a marble pound cake recipe in that book!) Three years, 2 cookbooks, and 23 mediocre marble cakes later, here we are.
To say I’m excited is an understatement. Things are about to get awesome.
Tell Me About This Marble Cake
- Simple and straightforward
- Tender and moist
- Soft and cakey
- Infinitely buttery
- Classic birthday cake status!
- Better than a box
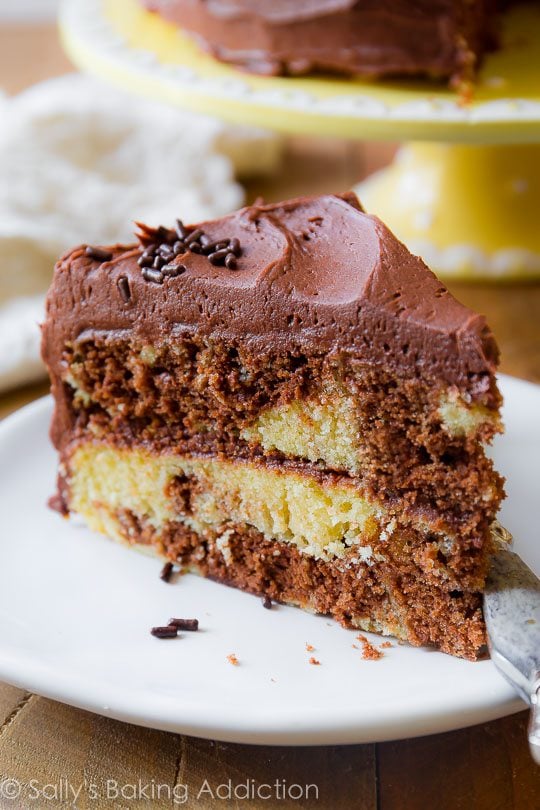
- Slathered with milk chocolate frosting
This marble cake is not:
- Difficult to make
- Dry and bland
- From a box
- Lacking chocolate flavor like most marble cakes do
- Boring!
Let’s walk through the steps real quick so you know exactly what you’re doing in the kitchen. An overload of step photos in your scrolling future.

The first thing we’re going to do is prepare a basic yellow cake batter (photo above, right). You only need 1 batter for this marble cake recipe. The chocolate batter is made from the yellow batter. So, it all starts out the same! The yellow cake batter can also be left plain to make a traditional yellow layer cake. But since I’m on a chocolate binge with my recipes lately (sorry?), we’re adding chocolate to the batter to make it a marble cake. Like, real chocolate. More on that in a sec.
The basic yellow cake batter is super straightforward. Let’s discuss the ingredients. You need cake flour, not all-purpose flour. Cake flour has a lower protein content than all-purpose, which correlates to a lighter crumbed cake. Like the light, airy cakes from box mixes. All-purpose flour will make your cake heavy, dense, and bread-like. In a pinch, you can make your own cake flour substitute. Baking powder gives the cake its lift. Even though we will be using buttermilk as the liquid in the batter, we are using baking powder. Buttermilk (an acid) is usually paired with baking soda, but the purpose of buttermilk in this marble cake recipe isn’t for its acidity. Rather, it’s for flavor and moisture. Buttermilk is the secret to the super moist texture. Whole milk makes a wonderful substitution.
Like most traditional cakes, creamed butter and sugar is the base of the entire marble cake. (Photo above, left.) And, like usual, I use a mix of granulated sugar and brown sugar in today’s recipe. You know I can’t live without my beloved brown sugar. Moisture! Flavor! You’d be silly not to use it in a giant cake like this.
Eggs. Everything! Specifically, egg yolks. Have I drilled it into your head yet? Egg yolks (fat) give baked goods their moisture, tenderness, richness, and flavor. Not to mention its color. Yellow egg yolks = yellow cake. You’ll need 2 whole eggs, plus an additional 4 egg yolks. You’ll have 4 egg whites leftover, so make yourself a super healthy egg white omelet to balance out all the slices of marble cake you’ll be eating. Is that genius or what?
Once the yellow cake batter is prepared, set 1 cup of it aside. Mix in 4 ounces of pure, high quality chocolate. We’re talking the real chocolate, not chocolate chips (save those for chocolate chip cookies) or even cocoa powder. Pure chocolate bars—the kind you find in the baking aisle, like Lindt or Ghirardelli. You can also use Trader Joe’s pound plus bar. In my recipe testing, I tried several marble cakes using cocoa powder and the results just do NOT compare to marble cake made with pure chocolate.
Pure chocolate makes the chocolate swirls taste like decadent chocolate cake.
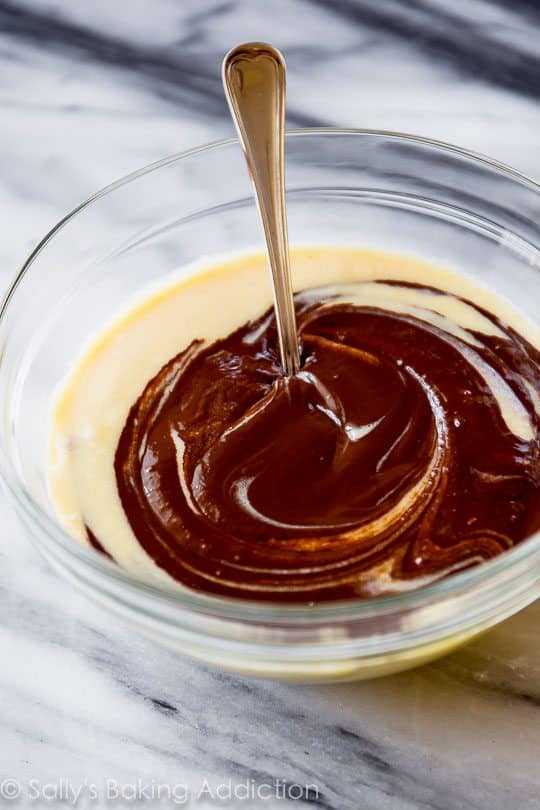
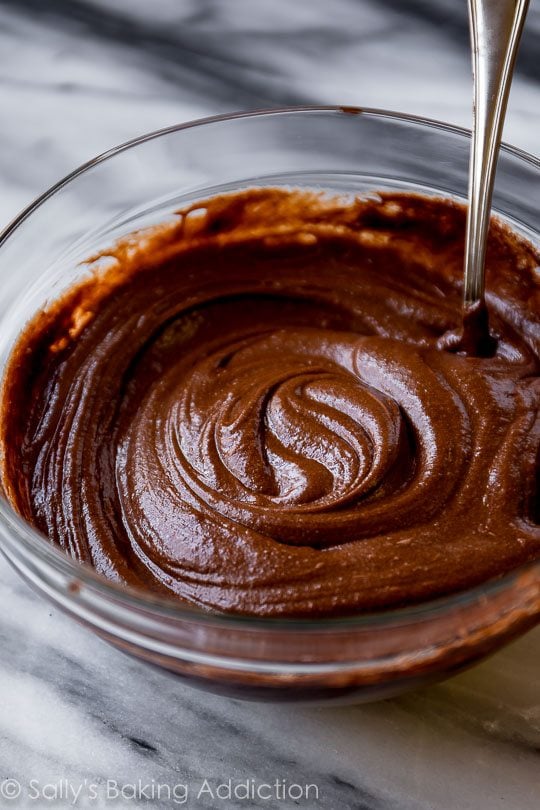
All you’ll do is melt the chocolate and stir it into 1 cup of the yellow batter. Photo above: poured in. Photo below: stirred together. The chocolate batter will be quite thick.
Now let’s create that marbled beauty! It’s so easy. Pour a base of yellow batter into each cake pan. Spoon chocolate batter on top. Spoon remaining yellow batter on top of that. Grab a knife and swirl it all around. Like so:
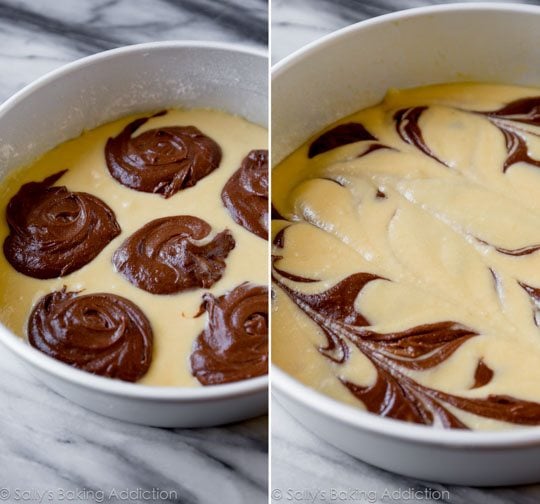
It doesn’t have to be neat or perfect. The haphazardness of the batters swirled together makes the cake extra charming.
Now it’s time to bake. The cake layers take anywhere from 22-27 minutes, give or take. All ovens are different, so I suggest using an oven thermometer to ensure your oven is at the correct temperature (my oven runs hot; thermometer saves the day!) and use a toothpick to test the cake’s doneness.
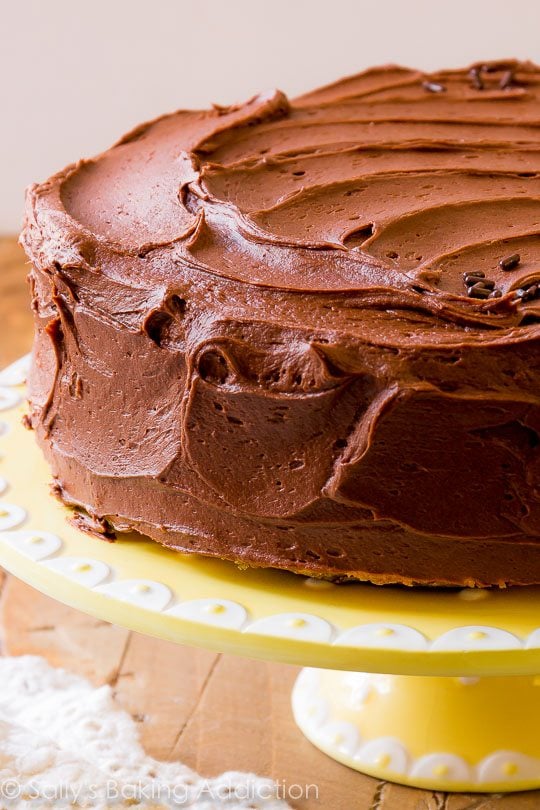
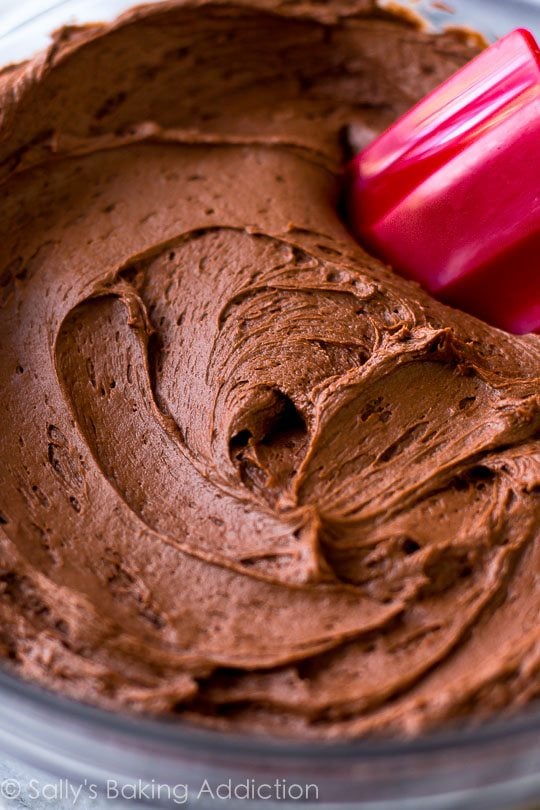
Once the cakes are baked and cooled, it’s time to assemble and frost. Speaking of, I’m sure you’ve tried my legendary milk chocolate frosting by now. It’s made several appearances in both cookbooks and on my blog as well. I’m completely obsessed. It’s like the old-fashioned chocolate buttercream my grandmother used to make. Smooth and creamy, rich and thick. Smothered between and all around homemade marble cake, it’s nothing short of extraordinary.
If you prefer, vanilla buttercream would also be fantastic here.
Welcome to my happy place.

As always, straying from the written recipe and instructions will yield different results. There’s a reason this cake took me so long to perfect… it’s all in the precision and ratio of specific ingredients and mixing techniques. I advise you to follow the recipe as directed first then make any adjustments you see fit next time.
Plenty of recipe notes for you in case you have questions. Enjoy this classic beauty!
Print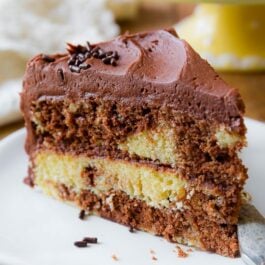
Marble Cake
- Prep Time: 1 hour
- Cook Time: 25 minutes
- Total Time: 4 hours, 30 minutes
- Yield: serves 10
- Category: Cake
- Method: Baking
- Cuisine: American
Description
The best marble cake I’ve ever had. And here’s how you can make it.
Ingredients
- 2 cups (236g) cake flour (spooned & leveled)*
- 2 teaspoons baking powder
- 1/2 teaspoon salt
- 1 cup (16 Tbsp; 226g) unsalted butter, softened to room temperature
- 3/4 cup (150g) granulated sugar
- 1/2 cup (100g) tightly packed light brown sugar
- 2 large eggs, at room temperature
- 4 large egg yolks, at room temperature
- 1 Tablespoon (15ml) pure vanilla extract
- 2/3 cup (160ml) buttermilk, at room temperature*
- 4 ounces (113g) bittersweet or semi-sweet chocolate, coarsely chopped*
Milk Chocolate Frosting
- 1 and 1/4 cups (282g) unsalted butter, softened to room temperature
- 3 and 1/2 cups (420g) confectioners’ sugar
- 3/4 cup (62g) natural unsweetened or dutch-process cocoa powder
- 1/4 teaspoon salt
- 1 teaspoon pure vanilla extract
- 1/4 cup (60ml) heavy cream, half-and-half, or whole milk
- optional: chocolate or rainbow sprinkles for decorating
Instructions
- Preheat oven to 350°F (177°C). Grease two 9-inch round cake pans, line with parchment paper rounds, then grease the parchment paper. Parchment paper helps the cakes seamlessly release from the pans. (If it’s helpful, see this parchment paper rounds for cakes video & post.)
- Make the cake: Sift the cake flour, baking powder, and salt together in a large bowl. Set aside.
- With a handheld or stand mixer fitted with a paddle attachment, beat the butter on high speed in a large bowl until smooth and creamy, about 1 minute. Add the granulated and brown sugars and beat on high speed for 3-4 minutes until creamed. Scrape down the sides and up the bottom of the bowl as needed. With the mixer running on low speed, add the eggs then the egg yolks one at a time, then add the vanilla extract. Beat on medium-high speed until combined. Scrape down the sides and up the bottom of the bowl as needed. With the mixer running on low speed, add the dry ingredients in 3 additions, alternating with the buttermilk and mixing each addition just until incorporated. Do not overmix. Use a whisk to rid any large lumps, if needed. The batter will be slightly thick.
- Remove 1 cup of yellow batter and pour into a medium bowl. Melt 4 ounces of chocolate in the microwave, stopping and stirring every 20 seconds until completely smooth. Pour chocolate into the 1 cup of yellow batter you set aside and stir until combined.
- Pour an even layer of the yellow batter into each cake pan. Spoon chocolate batter on top, as shown in the photo above. Pour remaining yellow batter on top of the chocolate. Using a knife, swirl the two batters together. Don’t worry if it’s not perfect.
- Bake the layers for 22-27 minutes, or until a toothpick inserted into the center of one cake comes out clean. Mine usually take 24 minutes. During bake time, loosely cover the cakes with aluminum foil if you find the tops are browning too quickly. Remove cakes from the oven and allow to cool completely in the pans set on a wire rack.
- Make the frosting: With a handheld or stand mixer fitted with a whisk attachment, beat the butter on high speed in a large bowl until smooth and creamy, about 1 minute. Add confectioners’ sugar, cocoa powder, salt, vanilla, and cream with the mixer running on low. Once added, increase to high speed and beat for 3 full minutes. Add 1-2 more Tablespoons confectioners’ sugar if frosting is too thin or 1-2 more Tablespoons of cream if frosting is too thick. Taste the frosting and add a pinch more salt if it’s too sweet.
- Frost and assemble cake: If needed, level cakes to create a flat surface (I usually use a knife, be careful doing this!). Place 1 cake layer on a cake stand, cake turntable, or large serving plate. Evenly spread about 3/4 cup frosting on top. Top with 2nd cake and spread the remaining frosting all over the sides and top. Decorate with sprinkles if desired. Slice and serve.
- Cover any leftover cake and store at room temperature for 2-3 days or in the refrigerator for up to 5 days.
Notes
- Make Ahead & Freezing Instructions: To prepare 1 day in advance, keep baked cakes covered at room temperature and refrigerate prepared frosting in an airtight container. Bring frosting to room temperature before spreading. Frosted cake can be frozen up to 2 months; thaw overnight in the refrigerator and bring to room temperature before serving.
- Special Tools (affiliate links): 9-inch Round Cake Pans | Glass Mixing Bowls | Whisk | Electric Mixer (Handheld or Stand) | Cake Turntable, Cake Stand, or Large Serving Plate | Straight Icing Spatula | Offset Icing Spatula | Cake Carrier (for storage)
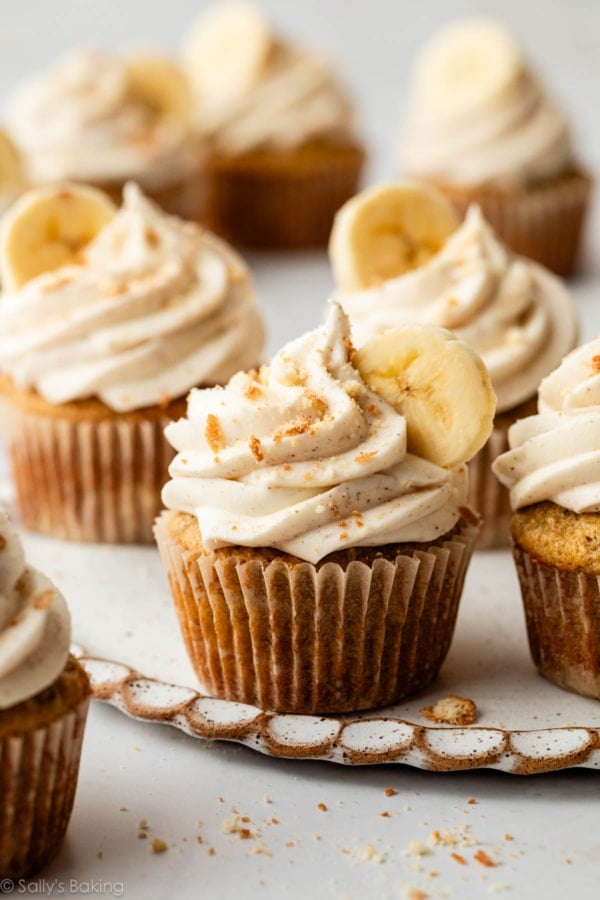
- Cupcakes: This recipe can be made into about 30 cupcakes. Simply layer a spoonful of each batter into the cupcake wrappers, filling each only halfway. Swirl with a toothpick. Bake the cupcakes for 20 minutes.
- 9×13-inch Sheet Cake: This cake can be baked into one 9×13-inch pan for about 35 minutes, give or take. Layer the batters, use a knife to swirl.
- Vanilla Frosting: Instead of chocolate, you can use the vanilla frosting from this confetti cake if desired. It is the perfect amount for thick layers of frosting.
- Room Temperature Ingredients: Here is more on the importance of room temperature ingredients.
- Cake Flour: If you can’t get your hands on cake flour, use this cake flour substitute.
- Buttermilk: You can substitute whole milk for buttermilk if desired. (Acidic buttermilk isn’t needed in order for the cake to rise since we’re using baking powder.) You can use lower fat or nondairy milk in a pinch, but the cake won’t taste as rich and moist.
- Chocolate: I recommend Lindt or Ghirardelli chocolates, or Trader Joe’s pound plus bar. Do not use low quality chocolate or chocolate chips.
- Adapted from The Great Milky Way Cake in Sally’s Candy Addiction.


Reader Comments and Reviews
Like everyone else I ended up with some short cakes – my finished 9″ layers ended up only 3/4″ thick after baking – it seemed like there was way less batter in the pans than I’d expect? I have 2″ high pans and the batter was substantially below halfway filling the pans. After dividing the yellow batter between my two pans it was a pretty thin layer at the bottom of the pan? It’s hard for me to judge from the photos what to expect in terms of volume both before and after baking the 9″ rounds.
Same thing happened to me! I followed all the directions and it was very flat and dense. Normally Sally’s stuff comes out perfect on the first try so I’m not sure where we went wrong.
Hi Christopher, we’re happy to help troubleshoot. Flat and dense cakes are usually the result of over mixing. You’ll also want to make sure your baking powder is fresh (we like to replace ours about every three months) so that the cakes will rise properly. This post on how to prevent dry and dense cakes may also be helpful to review. Thanks so much for giving this one a try!
Thank you so much! I’ll give it another shot tonight!
Hi EVERYONE
I read the comments,and just thought I’d add a couple of comments.
All of the notes accompanied w/Sally’s recipes,AND the information such as “How to prevent dry and dense cakes” has made a HUGE,HUGE difference (for the better ) in the quality of my baked goods. I’m continually getting requests for various items I baked before from this website . It’s such a good feeling .
All of the additional information provided on this website helps considerably!!! I can’t stress that enough. I know it’s extra reading,but so,so worth it !
Thank you Sally & your team !
I made this cake for a birthday party last year. Rave reviews! A great way to please both the chocolate cake and vanilla cake lovers all in one. The milk chocolate frosting is perfectly smooth and compliments the cake so well. Will be making this one again for sure!
Yes, 1 Tablespoon is correct.
Hi sally, I made this cake twice and the layers came out very short and dense. I used cake flour, weighed not scooped and followed your instructions exactly.. any ideas why this would happen?
Yep, me too. 🙁
Same thing happened to me. Very short and dense layers.
Hi! I’m making this cake next week, but was wondering if anyone has tried making it a three-layer with 8-inch pans? I really love the look of a three-layer cake, but don’t want to either overflow the pans, or not have enough batter. Thanks!
Amanda, did you do the triple cake? I was wondering the same thing. Did you adjust the cooking time? I assume you would cook less time because the layers are shorter. I’m making this cake today so I hope I hear back from you. Thank you!
I didn’t. I just ended up making a 2-layer cake. Sorry! I think if you’re planning to make a three-layer cake it may be safest to make your batter twice, fill the three pans evenly (with space so they don’t overflow) and use any leftover to make cupcakes.