

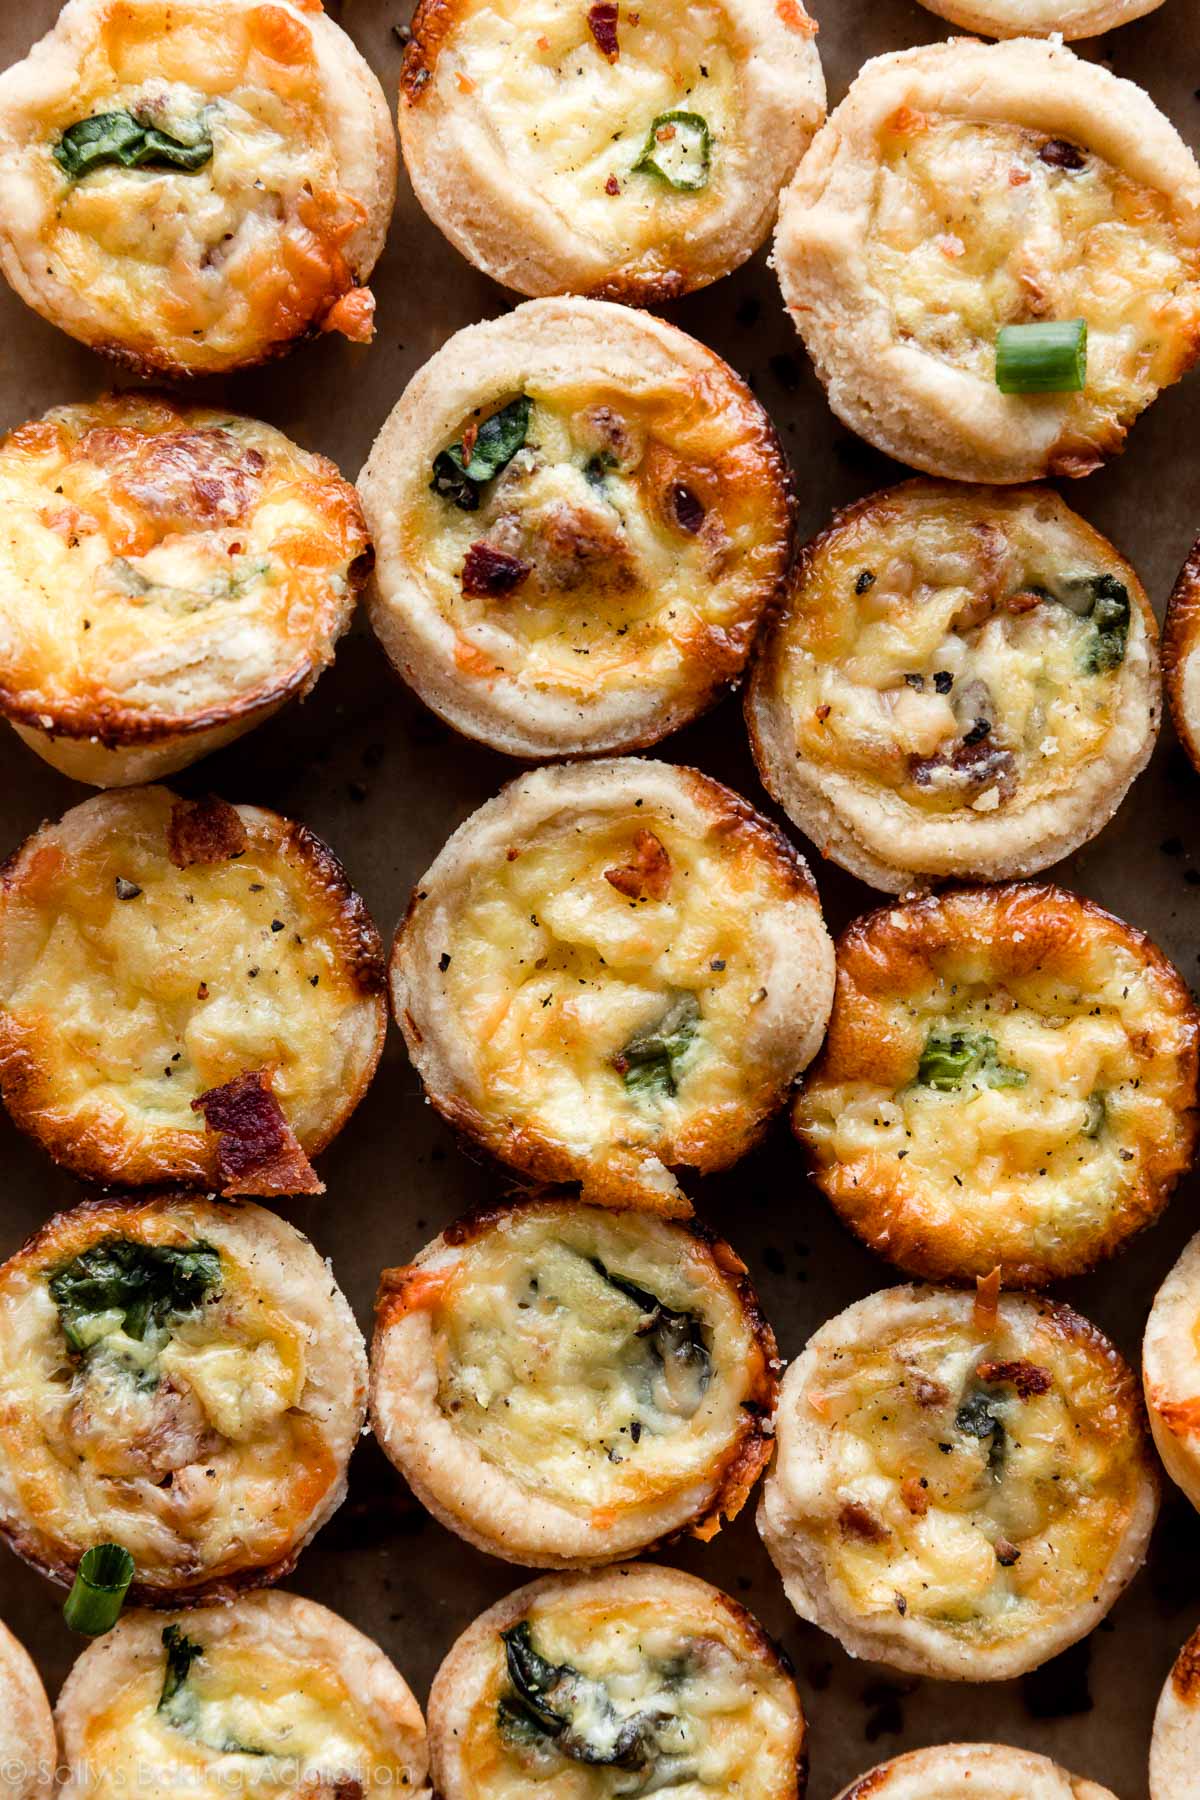
Easier and quicker than the full size version, my mini quiche uses a buttery flaky pie crust and a simple 4-5 ingredient egg filling. You can add a variety of flavors and add-ins like ham, bacon, spinach, Swiss cheese, scallions, mushrooms, peppers, and more. Bake these mini quiches in a mini muffin pan and watch them virtually disappear. I absolutely love quiche and this tiny version is even better!
One reader, Barbara, commented: “Perfect! I was worried about not blind baking the crust, but Sally is correct as the crusts are so small it’s not necessary. I followed this recipe to a “tee”—changed nothing, added nothing, and it was perfect. Nice and crispy with wonderful flavors. I made spinach, mushrooms, and gruyere cheese in one batch and sun-dried tomatoes and Swiss cheese in the second batch. Delicious! ★★★★★“
Remember my perfect ? I’ve had so many questions and requests for a mini version! Today we’re making mini quiche, a scaled down and simpler version of its full-size parent. Often underrated, quiche—no matter what size—is fantastic for lunch, dinner, Easter, baby showers, bridal showers, potlucks, tea parties, and so much more.
Even as a small family, quiche is our go-to food when we need quick and fulfilling recipe that’s delicious and adaptable to our available ingredients. As a bonus, kids love to help cutting the pie crust into mini circles. Let’s continue to get the kids in the kitchen!
Why Make Mini Quiches?
- Bite-sized
- Easier than a full quiche
- No blind-baking the pie crust
- Fun to make
- Customizable based on ingredients you have
- Easy to freeze & reheat

Mini Quiche Video Tutorial
How to Make Mini Quiche
- Make pie dough: Pie dough needs to chill for 2 hours before it’s useable, so I always recommend making it the night before. Or make it now and store it in your freezer for up to 3 months.
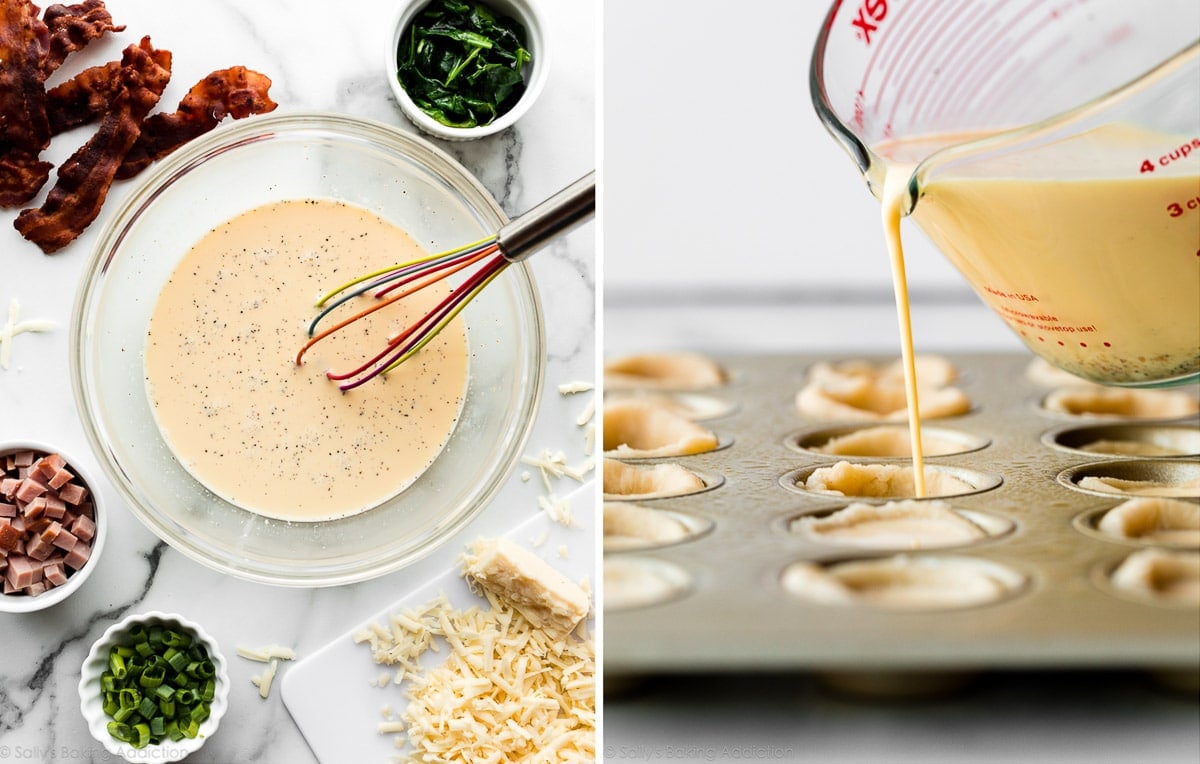
- Make the egg filling: I like to make the egg filling before I start shaping the crusts. That way it’s ready and the shaped dough isn’t just sitting there—remember, pie dough loves being cold. Chill the filling in the refrigerator as you work on the dough.
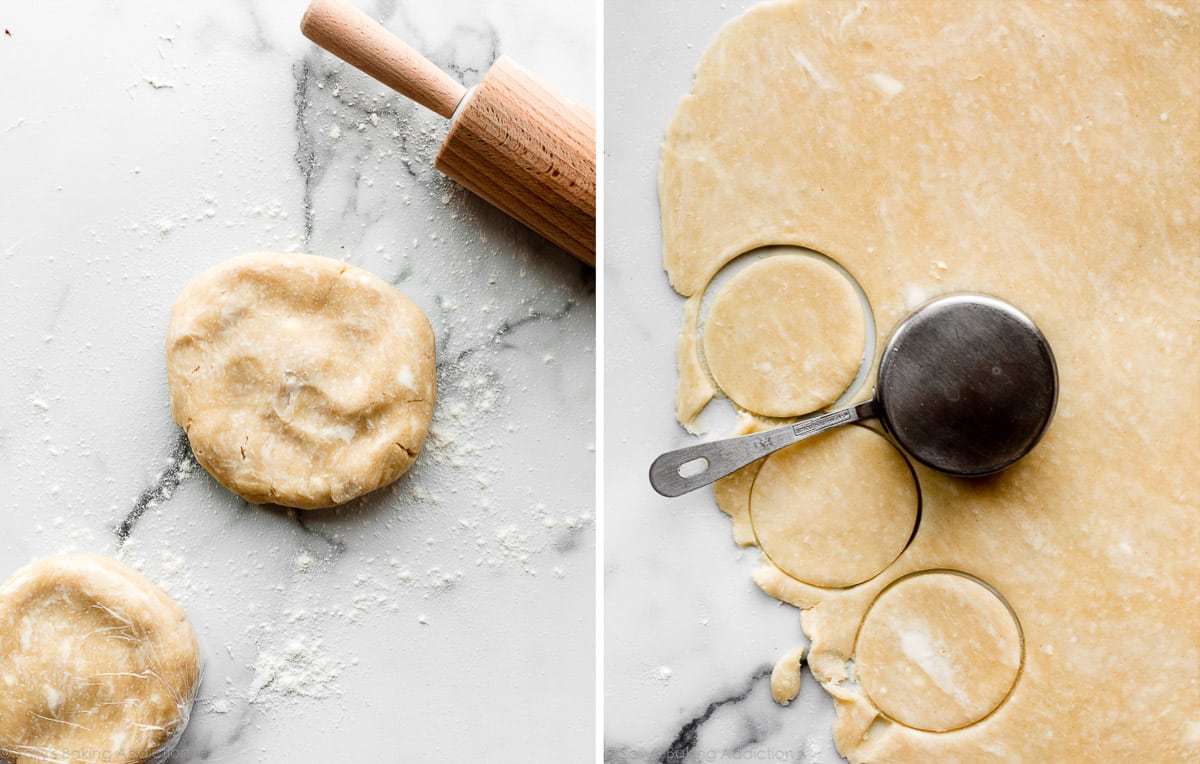
- Roll out pie dough & cut into small circles: Like my mini pecan pies, I recommend a 2.5 inch cookie cutter. If you don’t own a cookie cutter that size, use a measuring cup instead. Sometimes I use my 1/3 cup measuring cup. Re-roll the dough scraps until all the pie dough is used. You’ll have about 24 from each crust (48 total). Work quickly, as the dough becomes delicate the longer it sits at room temperature.
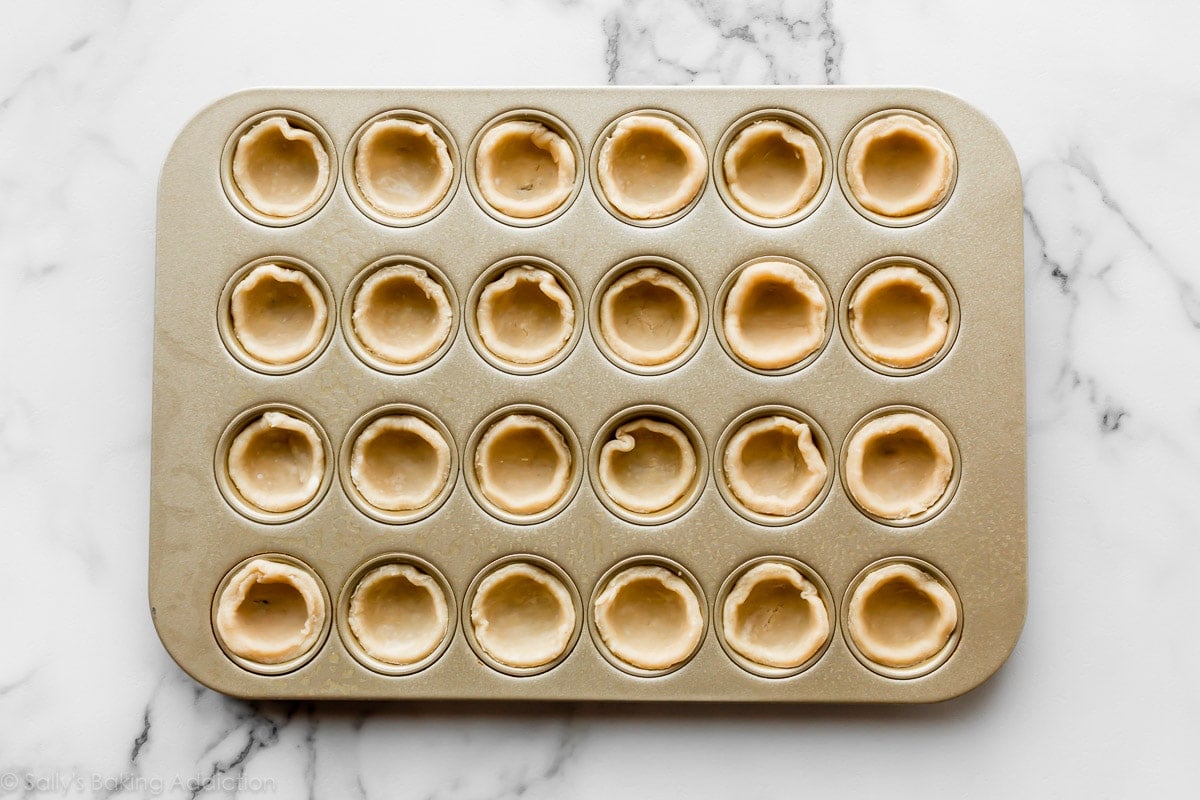
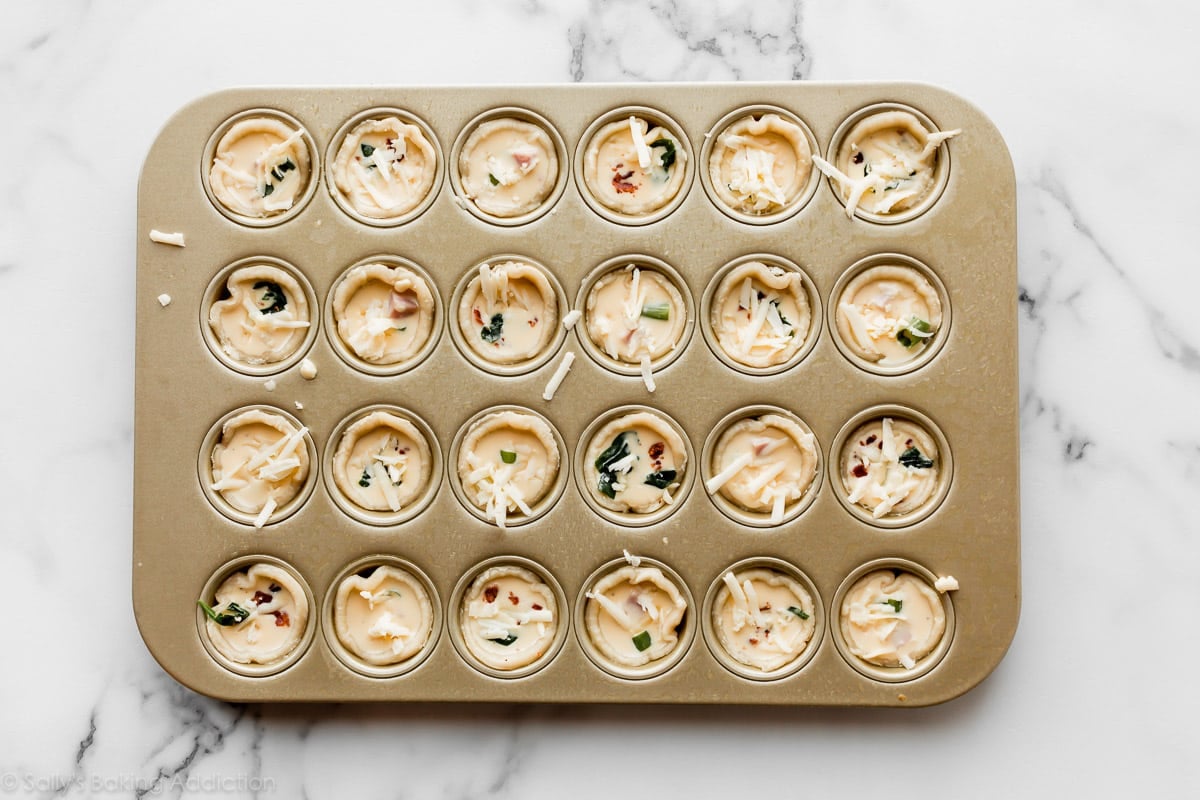
- Fit the dough rounds into your mini muffin pan: Grease a mini muffin pan. Press the dough flat into the bottom of the crevice and up the sides.
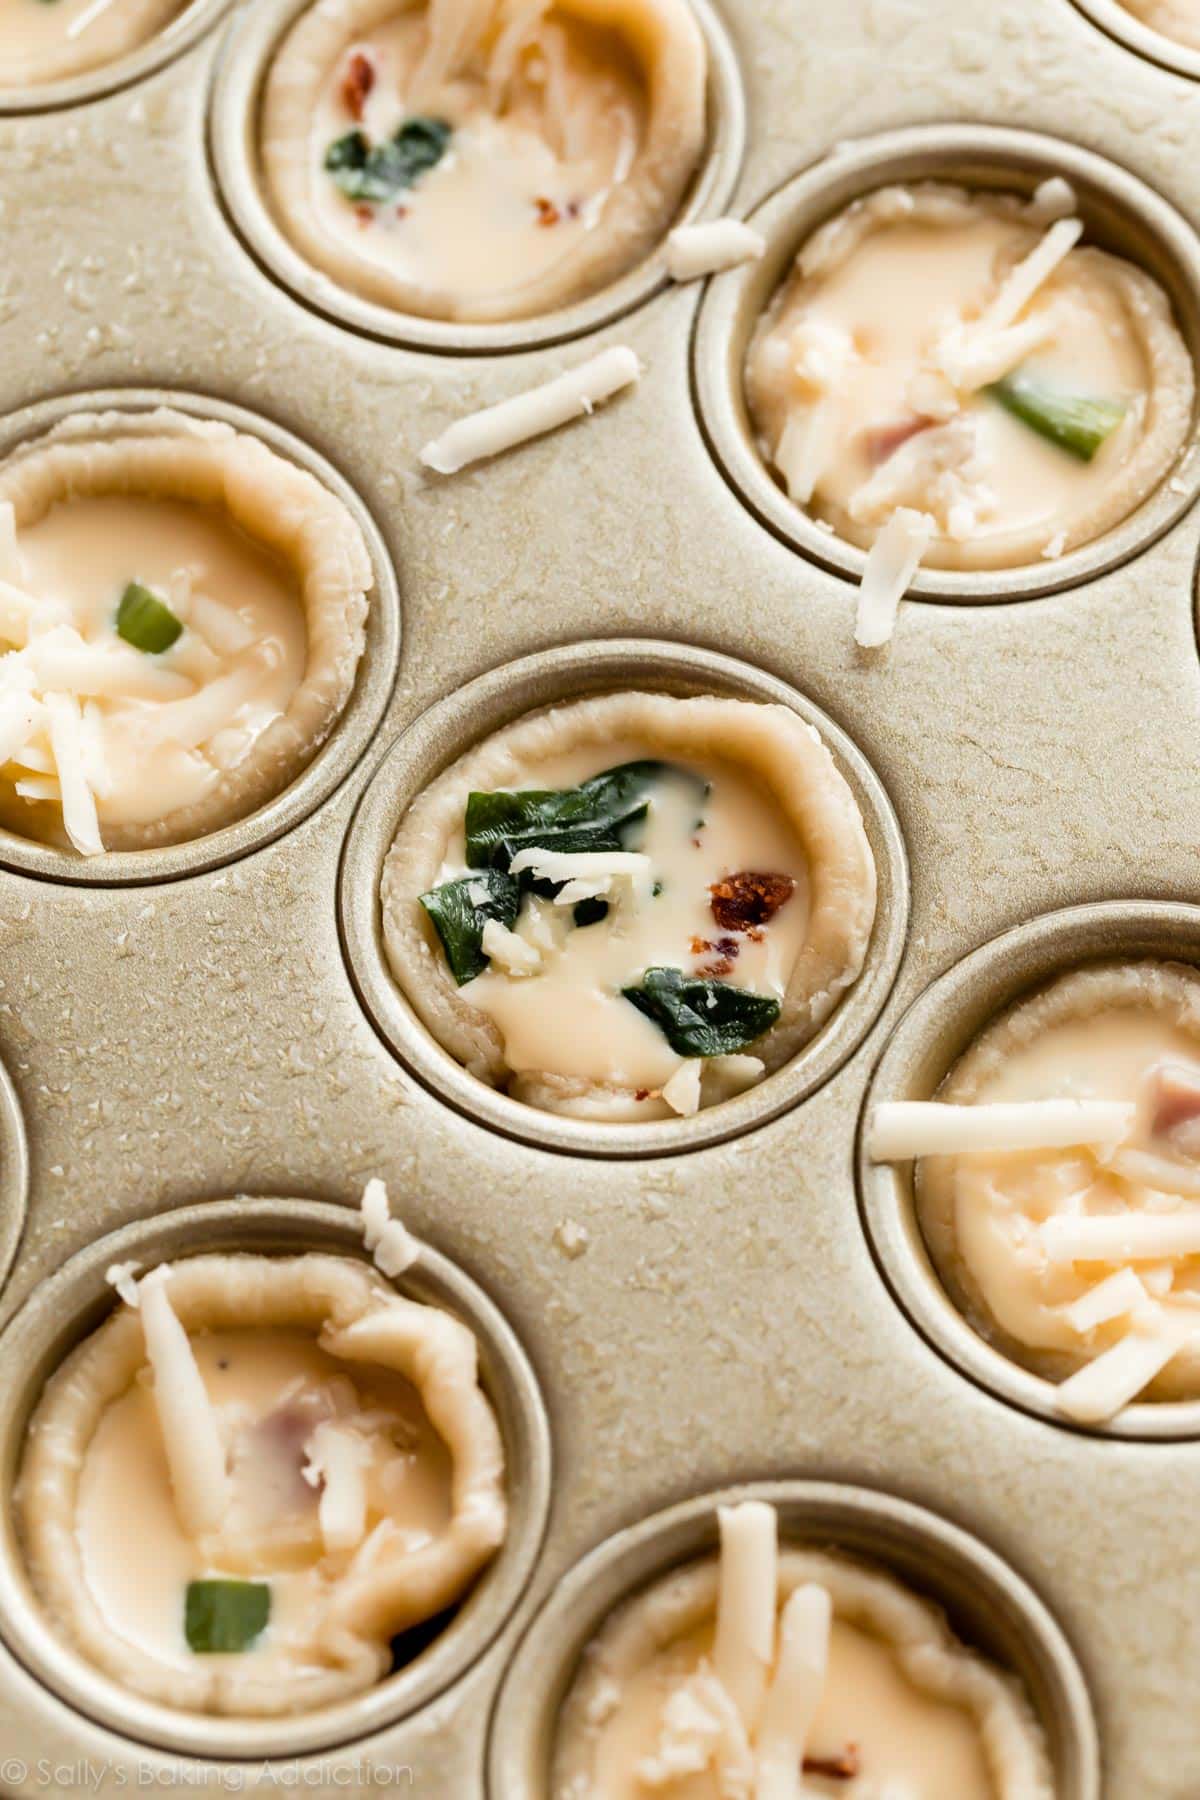
- Fill each with the egg filling: Use a mixing bowl or large liquid measuring cup to easily pour the filling into each crust. Fill just about to the top. (Best part: No pre-baking the crusts required!)
- Top with desired add-ins: Top each individually instead of mixing the add-ins into the egg filling. The add-ins sink to the bottom, so you’ll have plenty of mini quiches without any. Additionally, chunky egg filling is difficult to pour into the little cups. Sprinkling each with your add-ins is much easier, all around.
- Bake until the crust is browned: These are so much quicker to bake and cool than a full quiche. You’ll definitely appreciate that!
All of my add-in suggestions below!
Mini Quiche Recipe Ingredients
A quick overview of the ingredients you need:
- Pie Crust: Don’t skimp on flavor and texture—make homemade pie crust. My favorite pie crust recipe is straightforward and you can make it ahead of time and freeze. You need flour, salt, butter, shortening, and water. Unlike my regular quiche where you only use 1 pie crust (half of the recipe since it yields 2 crusts), you use both crusts here. Very convenient! You could also use my all butter pie crust. If you can’t make your own, store-bought pie crust works in a pinch.
- Heavy Cream and Milk: You can use any milk you have on hand including nondairy milk. The thinner (and lower fat) the milk is, the flimsier the mini quiches taste. For the best tasting mini quiche, however, use a combination of milk and heavy cream—or simply use half-and-half. Using just heavy cream produces an overly thick filling. Using only milk is great, but a combination of heavy cream and milk tastes even better.
- Eggs: Use 4 eggs per 1 cup of milk.
- Salt and Pepper
Can I Skip the Pie Crust?
You can make crustless mini quiches from this recipe. Spray your mini muffin pan or regular size muffin pan with nonstick spray—it works much better than butter here—and pour the filling directly into the pan. The bake time is a little shorter. See my recipe note below.
I also have this Crustless Veggie Quiche, Easy Frittata Recipe, and Breakfast Egg Muffins recipe. These are wonderful naturally gluten free alternatives.
Mini Quiche Flavors & Add-Ins
Now it’s time to bake! Follow the mini quiche baking instructions in the recipe below and right before baking, top with your add-ins. Remember, it’s best to add your add-ins/flavors on top of the mini quiches instead of mixing them right into the egg mixture.
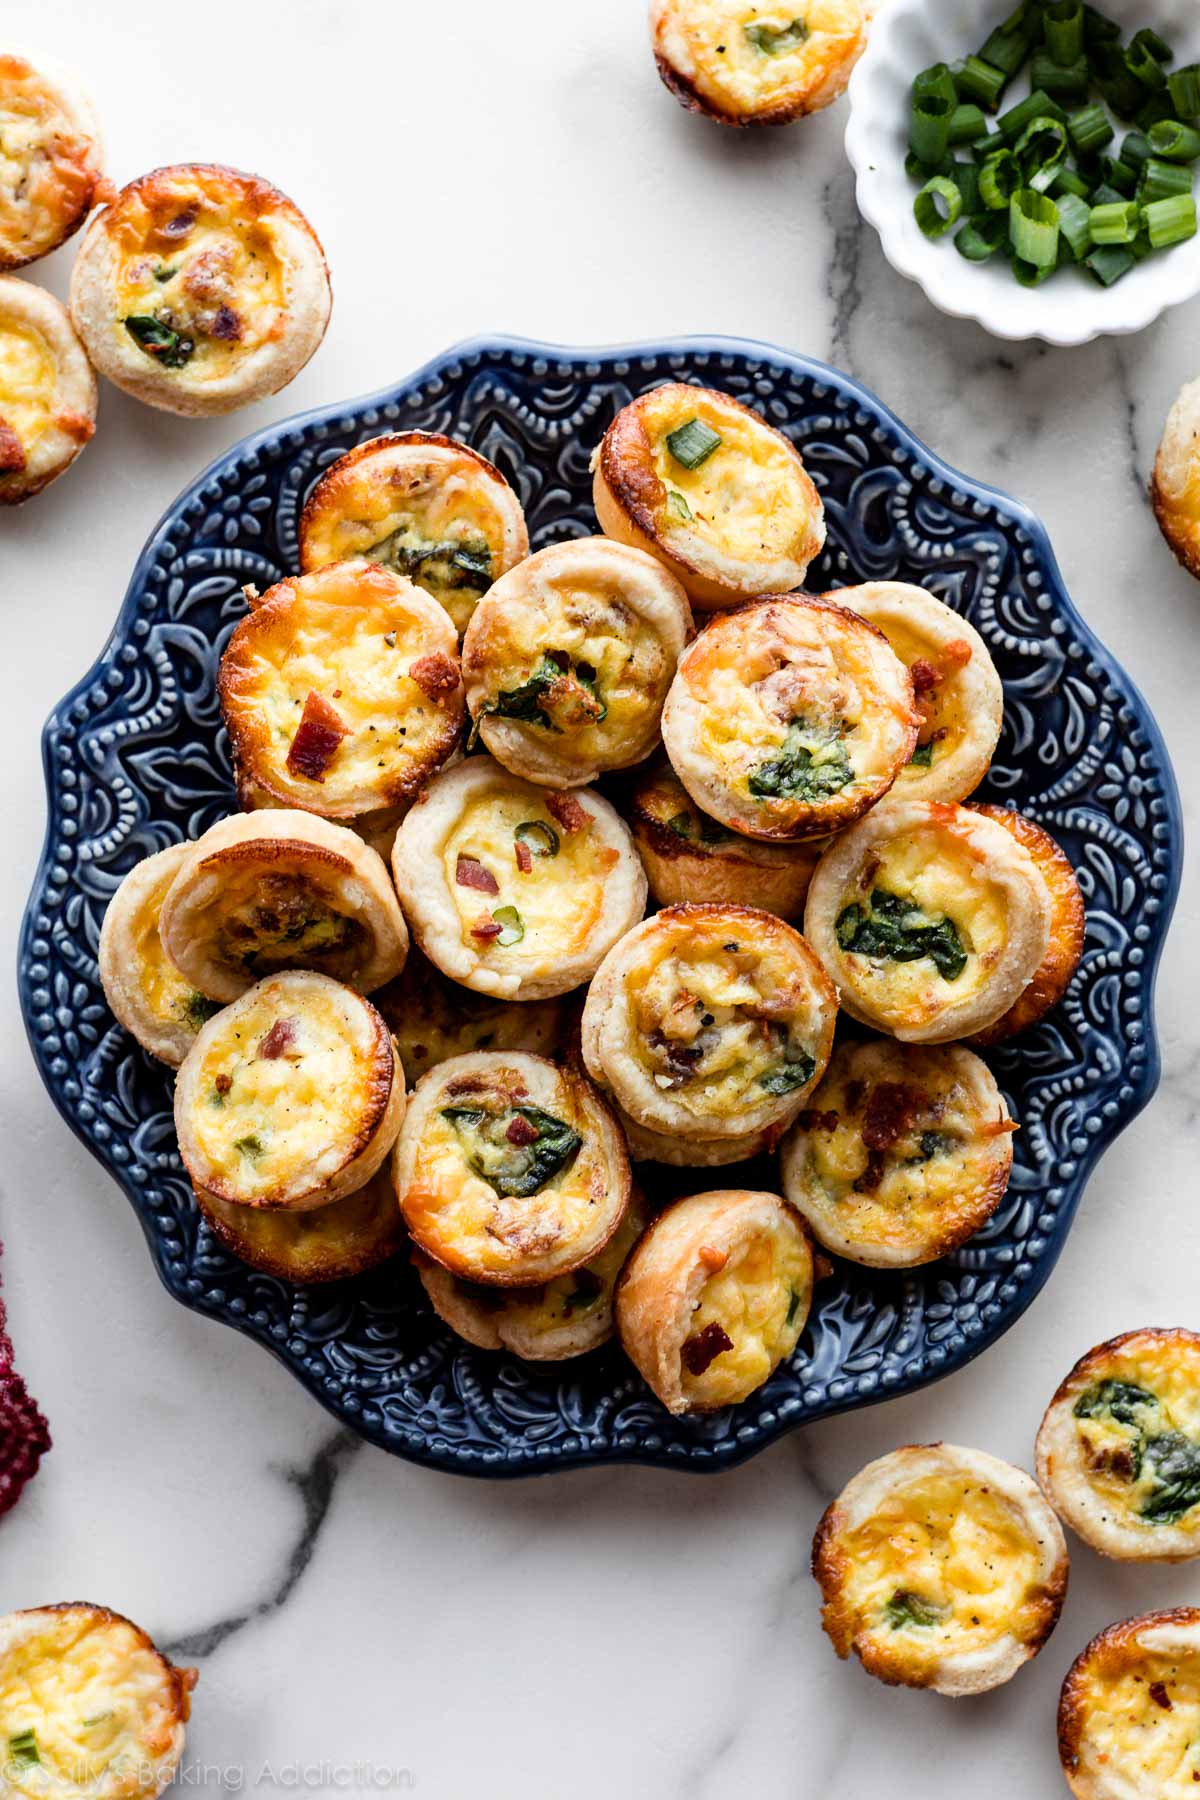
- Ham, Swiss, & Scallion (pictured): 2/3 cup cooked and cubed ham, 2 Tablespoons chopped scallion, 1/2 cup shredded Swiss cheese.
- Ham, Spinach, & White Cheddar (in video): 2/3 cup cooked and cubed ham, 2-3 Tablespoons finely chopped fresh spinach, 1/2 cup white cheddar cheese.
- Bacon, Spinach, & White Cheddar (pictured): 1/2 cup cooked and crumbled bacon (5-6 slices), 1/4 cup sautéed chopped spinach (I sautéed it in a little leftover bacon grease for 2 minutes), 1/2 cup white cheddar cheese.
- Veggie & Feta: 1/4 cup chopped fresh mushrooms, 1/4 cup chopped fresh bell pepper, 1/4 cup diced tomato, 1/2 cup crumbled feta cheese.
I also have these favorite full-size quiche recipes:
- Spinach Cheese Quiche – simple & classic!
- Goat Cheese Spinach Sun-Dried Tomato Quiche
Have fun customizing your own!

What to Serve with Mini Quiche
- Fruit Salad, Bacon or Sausage
- Strawberry Bacon Salad or any side salad
- Strawberry Feta Pasta Salad
- Coffee Cake
- Cinnamon Rolls
- Blueberry Muffins or Banana Muffins
- A Dutch baby piled high with your favorite sweet toppings
And if you’re serving mini quiche as part of an Easter spread, see even more Easter brunch recipes for inspiration.
Print
Mini Quiche (Any Flavor!)
- Prep Time: 2 hours, 30 minutes (includes pie dough chilling)
- Cook Time: 25 minutes
- Total Time: 3 hours
- Yield: 48-50 mini quiches
- Category: Breakfast
- Method: Baking
- Cuisine: American
Description
This is a perfect base recipe for mini quiches where you can add your favorite add-ins and flavors. Bake in my super flaky homemade pie crust. Review video tutorial above and read recipe notes below before beginning.
Ingredients
- 2 unbaked Flaky Pie Crust (what I used) or All Butter Pie Crust*
- 4 large eggs
- 1/2 cup whole milk*
- 1/2 cup heavy cream or heavy whipping cream*
- 1/4 teaspoon each salt and pepper
- 3/4 cup add-ins (see recipe note)
- 1/2 cup shredded or crumbled cheese (see recipe note)
Instructions
- Pie crust: I like to make sure my pie dough is prepared before I begin mini quiche. Make pie dough the night before because it needs to chill in the refrigerator for at least 2 hours before using.
- Prep the egg filling: In a large bowl with a handheld or stand mixer fitted with a whisk attachment—or simply using a whisk and mixing bowl—beat/whisk the eggs, whole milk, heavy cream, salt, and pepper together (on high speed if using a mixer) until completely combined, about 1 minute. Cover and refrigerate egg filling until step 6.
- Preheat oven to 375°F (191°C). Grease two 24-count mini muffin pans. (Nonstick spray is best.) If you only have 1 mini muffin pan, bake these in batches. Roll out first pie dough, fill, and bake then roll out the 2nd pie dough, fill, and bake.
- Shape the mini crusts: Working with 1 chilled pie dough at a time, place the dough onto a floured work surface. Roll into a large 12-inch circle. Use your warm hands to mold any cracking edges back together as you see me doing in the video tutorial above. From the circle, cut rounds using a 2.5 inch cookie cutter. (Sometimes I use my 1/3 cup measuring cup, which is 2.5 inches in diameter.) You’ll have to re-roll the dough scraps a few times. Work quickly, as the dough becomes much more delicate the longer it’s at room temperature. You’ll get about 24 rounds per pie crust. Repeat with 2nd chilled pie dough for a total of about 48.
- Place the dough rounds into greased 24-count mini muffin pan(s). Press the dough flat into the bottom of the crevice and up the sides.
- Evenly pour cold egg filling into each unbaked crust. Top evenly with add-ins, then sprinkle each with cheese.
- Bake mini quiches until the center is just about set and edges are lightly browned, about 25-28 minutes. Allow to cool for 5 minutes before removing from the pan. If greased well, the mini quiches pop right out using a spoon to scoop them up. Serve warm or at room temperature
- Mini quiches make great leftovers! Cover tightly and store in the refrigerator for up to 4 days.
Notes
- Make Ahead & Freezing Instructions: The pie dough can be prepared ahead of time and stored in the refrigerator for up to 5 days or in the freezer for up to 3 months. To freeze, cool baked mini quiches completely, then layer between sheets of parchment paper in a large freezer-friendly container. Freeze for up to 3 months. Thaw in the refrigerator or on the counter, then bake at 300°F (149°C) for 15 minutes or until warmed.
- Special Tools (affiliate links): Electric Mixer (Handheld or Stand) or Glass Mixing Bowl & Whisk | 24-count Mini Muffin Pan | 2.5-inch Cookie Cutter
- If using a 12-count standard muffin pan: Cut the pie dough into 3.5 inch circles. Other assembly instructions are the same for a 12-count muffin pan. Bake for about 27-30 minutes until the centers are set and edges are lightly browned. Yields about 16.
- Pie Crust & Crustless Option: Both linked pie crust recipes make 2 crusts. You need 2 crusts for this recipe. You can use store-bought pie crust if desired. Make sure it is thawed. For crustless quiches, spray your mini muffin pan or regular size muffin pan with nonstick spray and pour the filling directly into the greased pan. Top with add-ins, then cheese. Bake mini quiches for 16-19 minutes and regular size (in a 12-count pan) for 20-23 minutes.
- Whole Milk & Heavy Cream: Use this combination for best taste. If desired, use 1 cup of half-and-half instead. In a pinch, using all milk (whole milk, lower fat milk, or unflavored nondairy milk) works just fine.
- Add-Ins: You need about 3/4 cup add-ins including vegetables and meat/seafood. Most quiche add-ins should be pre-cooked and can still be warm when adding on top of each quiche. See blog post for my favorite add-ins. No need to pre-cook or sauté add-ins like mushrooms or bell peppers unless you want to.
- Cheese: Some favorites include feta cheese, goat cheese, white cheddar cheese, Swiss cheese, and gruyere.


Reader Comments and Reviews
I baked mine as directed above and reheated in the air fryer on 325 for 5 minutes and they were perfect.
I made these for the office and I’m very popular now. Did soyrizo/scallion/pepper jack and ham/scallion/pepperjack. Everyone loved them!’
What a WONDERFUL recipe! Sally provided so many helpful hints for success!! I have some additional suggestions from my first attempt:
– If you are using bacon as an add-in consider brushing the rendered bacon grease in the tins as a lubricant. It adds a hint of savory smokiness to the pie crusts.
– While in assembly mode, place your mini muffin tin on top of some ice packs that are nestled within a cookie sheet (to keep them from sliding around.). This helps keep the dough and egg base nice and chilled while you work.
– Use the bottom of a shot glass to press your dough into the muffin tins. This sped up the process significantly for me.
– If you have a have a milkshake blender cup with a wire whisk ball inside (often used by dieters), it is so easy to mix and pour your egg base into the mini pies!
Should asparagus add in be precooked? Thank you
Hi John, add-ins like meat or seafood should be pre-cooked, but there’s no need to pre-cook or sauté add-ins like asparagus, unless you want to!
Perfect! I was worried about not blind baking the crust; but Sally is correct as the crusts are so small it’s not necessary. I followed this recipe to a “T”–changed nothing, added nothing, and it was perfect. Nice and crispy with wonderful flavors. I made spinach, mushrooms, gruyere cheese in one batch and sun-dried tomatoes and swiss in the second batch. Delicious!
Quick question. When you defrost these to warm up the next day, do you place the quiches back in the mini muffin pan or as is on a sheet pan?
Hi Ashley, a sheet pan is fine since the quiches are set and baked.
This is such a great recipe – such perfect instructions! Absolutely crazy delicious !
Follow the instructions to the letter and you will make perfect pastry as well as perfect mini quiche!!
Making these today for xmas eve-i intend on totally cooling them then putting entire mini muffin pan with the quiches still in them into the freezer. Will that work?
Hi Mimi! We haven’t tested that, but you might have trouble removing them from the pan after defrosting.
doubt it, I will reheat them in the same pan without removing them, with spraying prior to baking and all the butter in the crust, shouldn’t be an issue. Will let you know
also wouldn’t that be the same as freezing a pumpkin pie in the pan per your recipe?
Worked out perfectly, I placed the muffin pan with the cooked quiches (cheese, bacon & chives) into the freezer a week before xmas and took it out night before and reheated the entire pan for 15 minutes and they popped right out of the pan and were perfect. No sticking whatsoever. Will def. make these again using the same method.
Hi Sally, I love your recipes . I see with the mini quiche they a not partially blind baked. Can you explain the difference between partially blind bake dough and dough that is not blind baked.
Many thanks
Hi Dee! These mini quiche crusts do not need to be partially blind baked in order to bake through properly, because they’re so small. Here’s our guide to blind baking pie crust.
Hi I’m making about 200 of these different types can I freeze these? If so how do I reheat will be in chafing dishes day of baby shower
Hi Melissa, You can absolutely do that. See the recipe notes for make ahead and freezing instructions.
Do I need to make any big changes if I only have regular sized muffin tins? I have loved your website ever since I found it years ago to make cinnamon roll pull aparts for my college bible study group.
Hi Emily, see recipe Notes for details about making in a standard 12-count muffin pan.
I found that the recommended 3.5″ cut size wasn’t big enough for standard muffin tin…I had to roll out my 3.5″ circles to get them large enough to go to the top of the standard sized muffin cup.
Hi, Sally. If I were to use 4″ tart pans for this quiche, what amount of filling would I use in each tart, and how long would I cook them for??
Hi Janice, I don’t have 4-inch tart pans to test this, so I can’t be certain of the amount. The bake time should be similar though. Let me know how they turn out.
I want to air fry the mini quiche. How long should I bake them?
Hi Patricia, we haven’t tried these in the air fryer, but let us know how they turn out if you do!
I want to make this recipe for a church gathering a couple of days ahead of time. Can I make and either freeze then reheat? If so, what would be best method? OR if I make the night before, how will it be to refrigerate and then reheat in the oven the following morning? Suggestions?
Hi Louise, either method will work just fine! See recipe Notes for freezing instructions if you want to go that route.
I’d forgotten how delicious quiche is. Thank you for inspiring me to return to this delicious goodnes! I love this recipe. My add ins were sautéed veggies with the
exception of the brocolli, frozen spinach/kale combo which I cooked and squeezed the liquid from. I added chopped mushrooms and finely chopped
red bell pepper, and a tiny bit of onion. Goat and Swiss cheese took it down field for a touchdown! I almost cried . It was that delicious. Looking forward to more inspiring recipes from you!
OMG!! I love this recipe so so much! You can do it Sally!! #lovinglife #quich4life #goquiche
Love your quiche recipes. Can I use hash brown potatoes as a crust?
Hi Patricia, we haven’t tested it, but have seen similar recipes using a hash brown crust! We would search for one with good reviews to use as a guide for baking time.
Can’t wait to try these. I don’t eat crust, so I’ll just put the mix in 12 silicone muffin cups. Should I use more eggs and filling? I love so many of your recipes. We make the key lime pie minis all the time. Big hit with everyone.
Hi Sammy, for crustless mini quiche, no need to use more eggs or filling. See recipe Notes for more baking details. You might enjoy these egg muffins as well!
Would I have to do a blind bake if I used regular size muffin pans?
Hi Elaine, no need!
Planning to make these for my son’s birthday brunch-do you have directions for using a 9” pie plate instead of minis?
Hi Miranda, here is our full-sized quiche recipe instead. Enjoy!
Really tasty!
I used store bought pie crust to make it easier bc #ToddlerLife.
I’m wondering if I did something wrong with the eggs? Maybe I blended too much? There is a large air gap between the bottom of the crust and the egg. Any thoughts?
Hi Rachel, that could be the culprit. For next time, you could also try docking the bottoms of the crust with a fork. That should help the steam escape and prevent any gaps. We’re glad you enjoyed them!
Superb recipe that turned out great! Took four dozen to a gathering and they were a total hit! Made them with shrimp (1/2 c), crumbled bacon (1/4 c), grated swiss (3/4 c), and finely chopped fresh dill (1/2 tsp).
Didn’t think I liked quiche – unitl we had these 🙂 I Googled gluten free pie crust, since our family has gluten intolerance – used Boar’s Head bacon and cheddar for the filling – turned out fabuously! Even the picky eaters ate several. I was a little concerned about skipping the prebake of the cups, but the recipe was perfect exactly as written. Thanks for a great recipe!
Excellent recipe! I made these for my physical therapy team and they loved them. They were such a hit that I made them for a lady’s luncheon and they were well received there, too. Thank you for sharing this recipe. I always look for Sally’s when I want to try something new. I know that if a recipe says Sally’s on it, it will be a hit!
Yum! Just made these this morning. They are delicious! For the very lazy among us, such as myself, Pillsbury makes pie dough now that is already perforated and portioned for muffin cups! Genius! Thanks for another winning recipe.
Flavor was delightful. Tried crustless and sprayed pan but they still stuck. Any tips? Thank you
Hi Michelle, nonstick spray works for us. You could also try parchment rounds in your muffin tins if yours keeping sticking!
I made these for a birthday brunch and they were a huge hit! I did them in silicone baking cups – A little smaller than regular muffins but larger than the mini. They allowed for more toppings. I convection baked them at 375º for 25min and they were perfect. I made a variety with Italian chicken sausage, asparagus, broccoli, mushrooms, green onions and cheddar cheese. They slid right out of the cups and were so cute on the plate. Will definitely make these over and over.
I made little balls of pastry and used the pestle thing from the mortar and pestle to press the pastry into the cups. V easy and no fiddle at all.
How did you reheat them so they were just as tasty as fresh?
I baked these the evening before, allowed them to cool completely, placed in an airtight plastic container, and refrigerated. Next day, placed quiches into disposable half steam pans (chafing dishes) without any two quiches touching. Covered with foil, leaving one-half inch on each end of pan uncovered for steam to escape. Heated for 25 minutes at 250 degrees Fahrenheit. Just as good as the night before.
Can I put this all together at night and just bake it In the morning?
Hi Diane, The pie dough can be prepared ahead of time and stored in the refrigerator. At the end of step 2 cover and refrigerate egg filling until you are ready to use it.
Can’t wait to make the Quiche for Easter!
Hi Sally, for the Flaky Pie Crust recipe, can you substitute with gluten free flour? Just wondering if you’ve tried that and if it turns out okay. I really want to try this quiche recipe with a gluten free crust and not just crustless.
Hi Randi, we haven’t tested our pie crust recipe with gluten free flour, so we’re unsure of the exact results. Let us know if you decide to give it a go!
Can’t wait to try! Can I bake the day before and refrigerate then reheat? I’d like to make for a bridal shower. Less stress if I can make ahead!
How long would you bake to reheat?