

Red velvet cake is much more than vanilla cake tinted red. This recipe produces the best red velvet cake with superior buttery, vanilla, and cocoa flavors, as well as a delicious tang from buttermilk. My trick is to whip the egg whites, which guarantees a smooth velvet crumb.
This is my forever favorite red velvet cake recipe. I published it on my blog a few years ago and decided it’s time for clearer recipe instructions and a video tutorial. Many of you love this recipe too, so let’s roll up our sleeves and rev up our mixers!
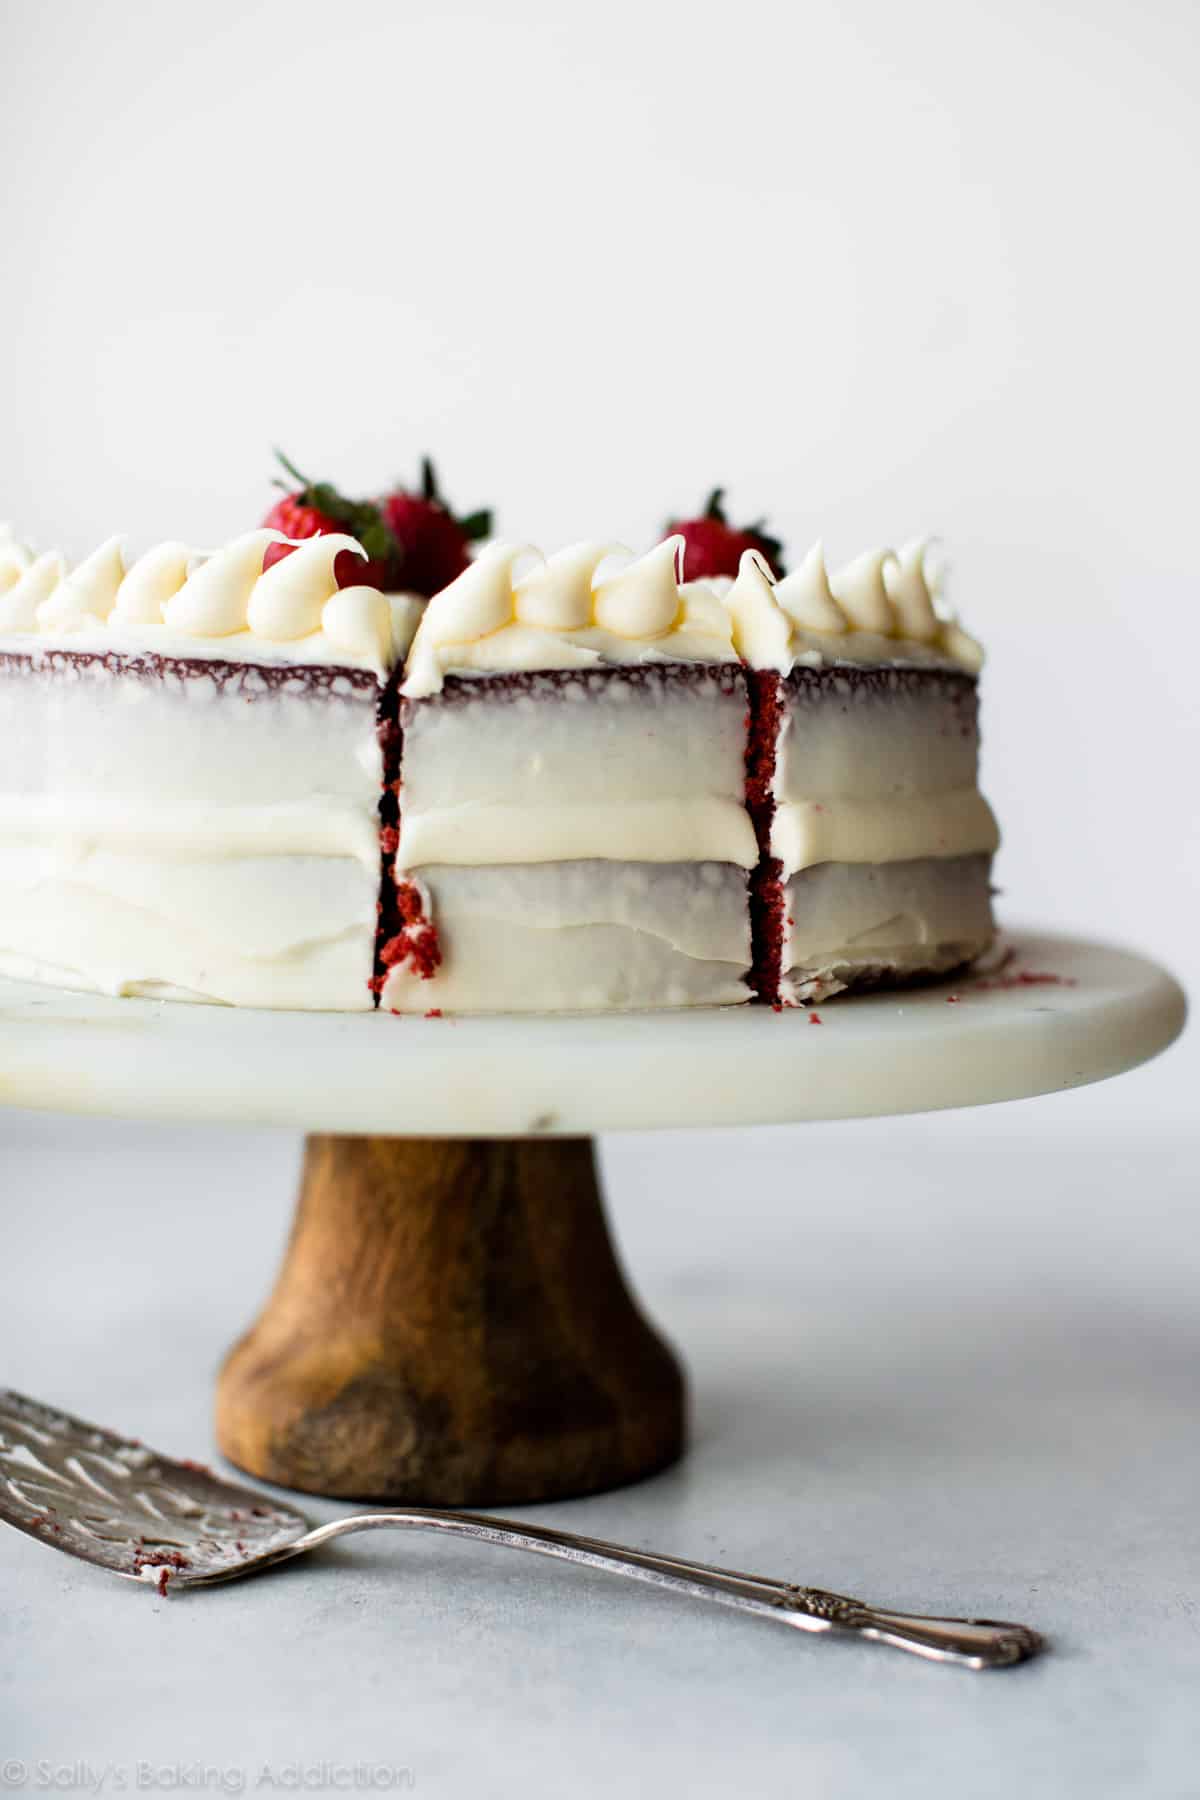
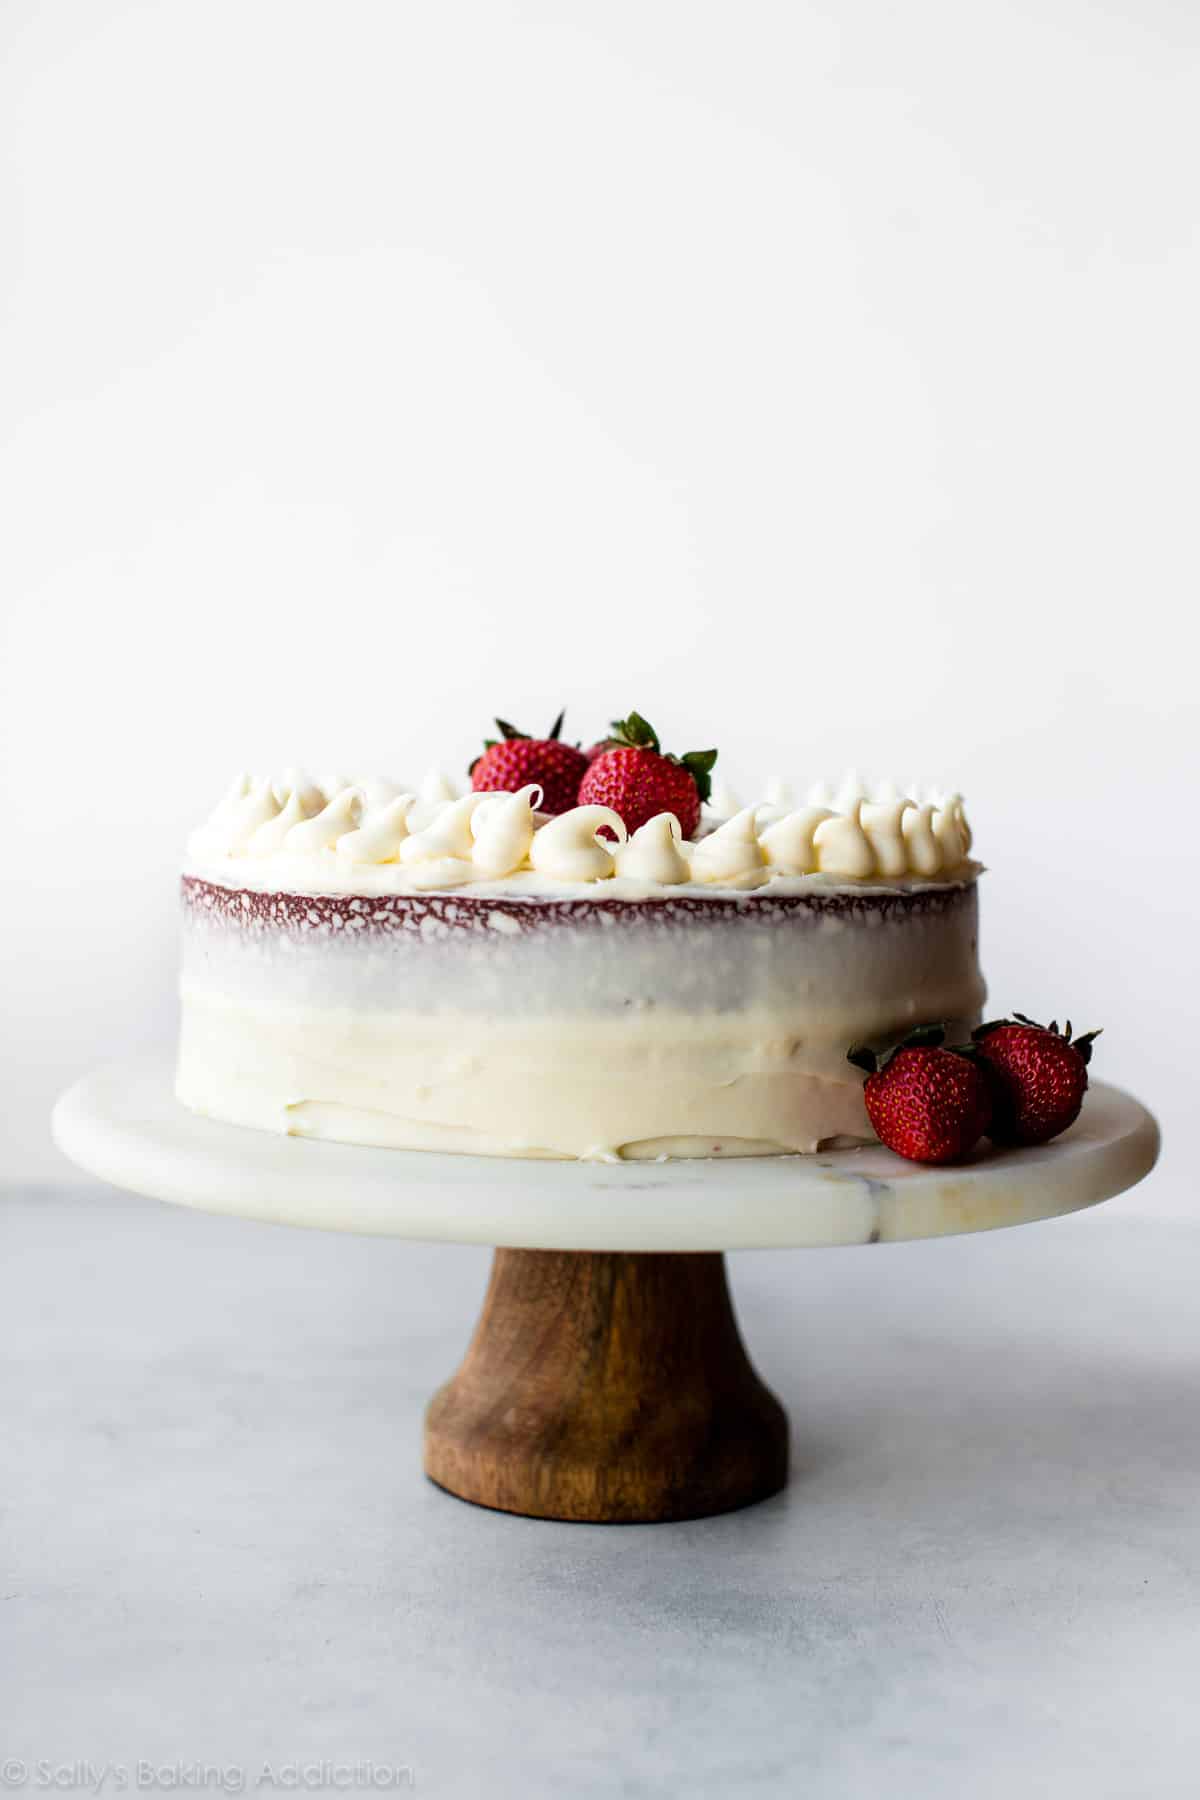
Red velvet cake is the queen of all layer cakes. The “I can’t quite put my finger on the flavor” cake. It’s the sweet marriage of buttermilk and vanilla with a little cocoa for good measure. She’s tall, dramatic, and completely covered in silky cream cheese frosting. This is my best red velvet cake.
What Does Red Velvet Cake Taste Like?
I used to be unsure about red velvet. I don’t really trust a cake that has a mystery flavor. What is red velvet? Is it more like vanilla cake, chocolate cake, or just a butter cake tinted red? From red velvet brownies and red velvet cookies and red velvet cupcakes, I’ve had a lot of fun getting to know red velvet. Red velvet is:
- Mild cocoa flavor
- Tangy buttermilk
- Sweet vanilla
- Very buttery
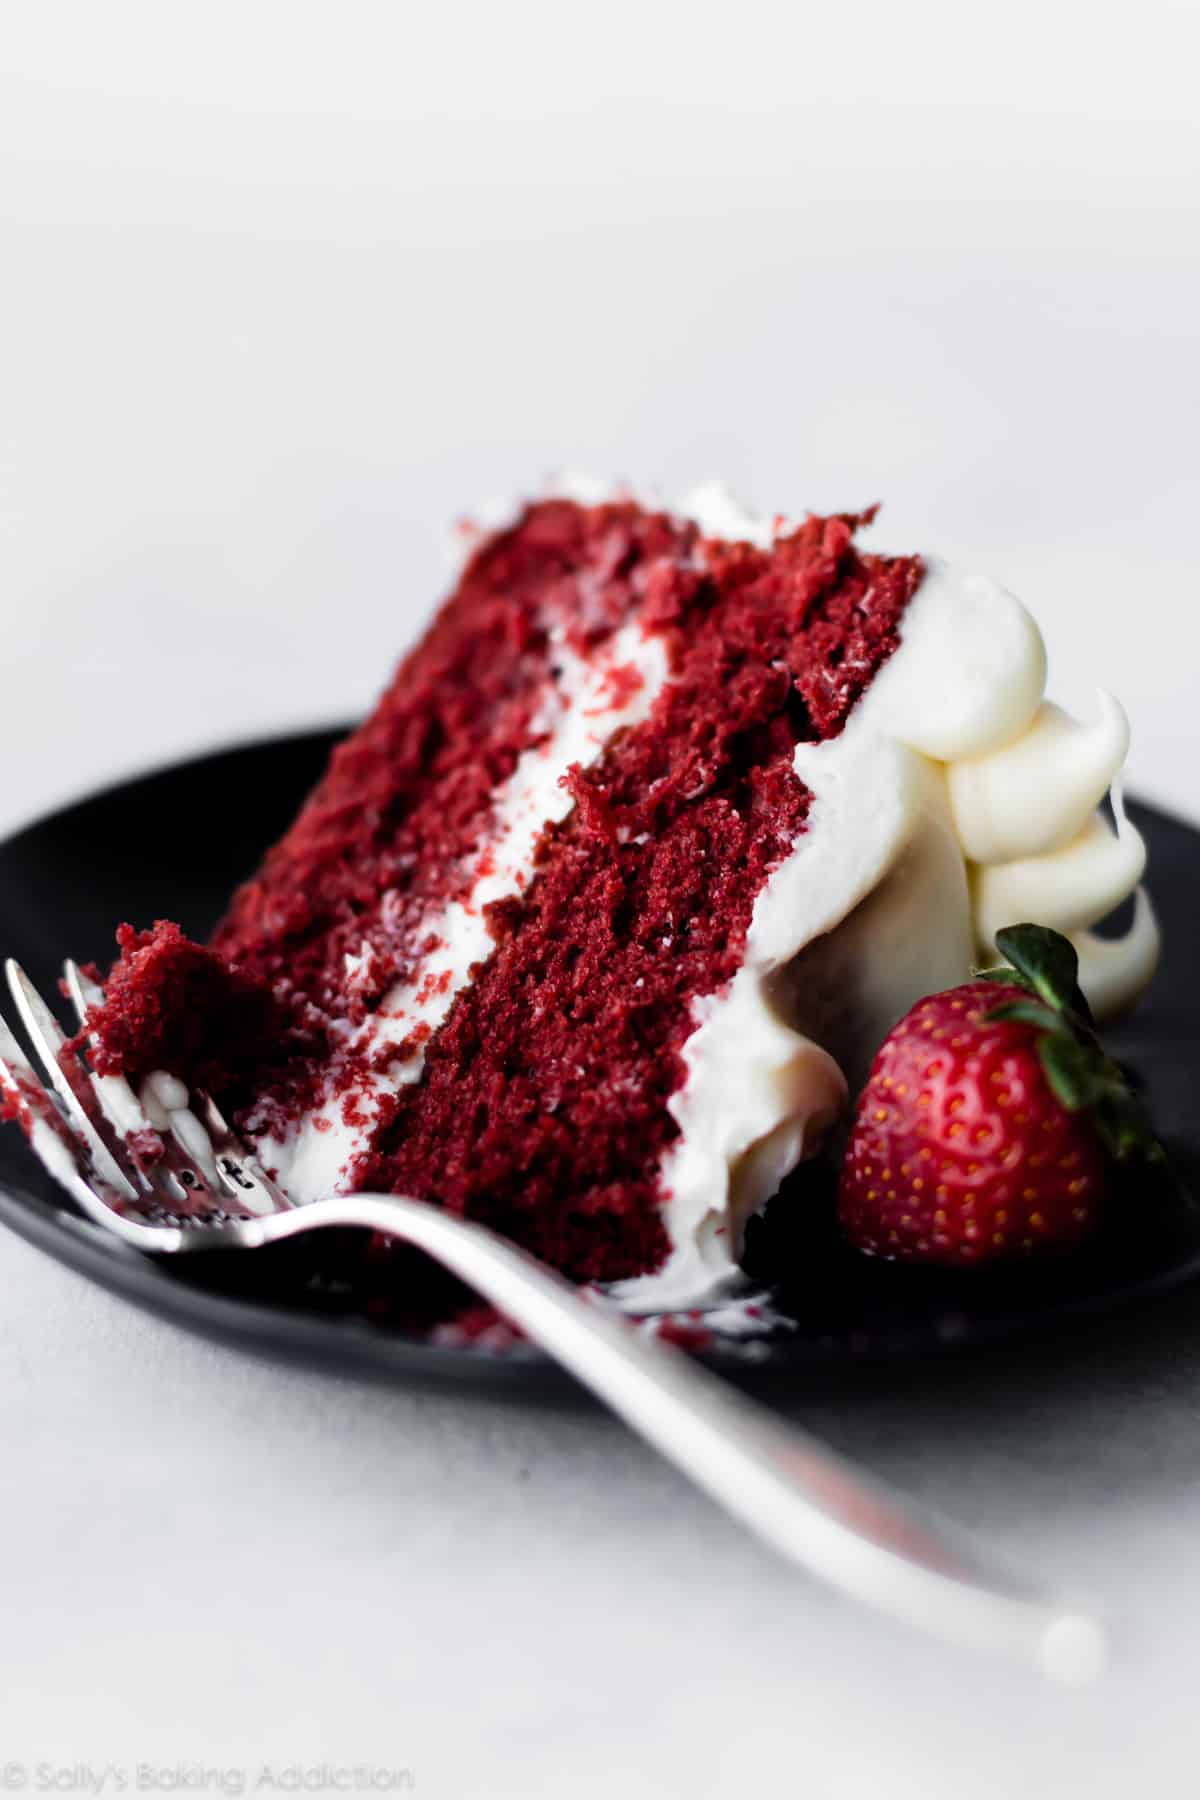
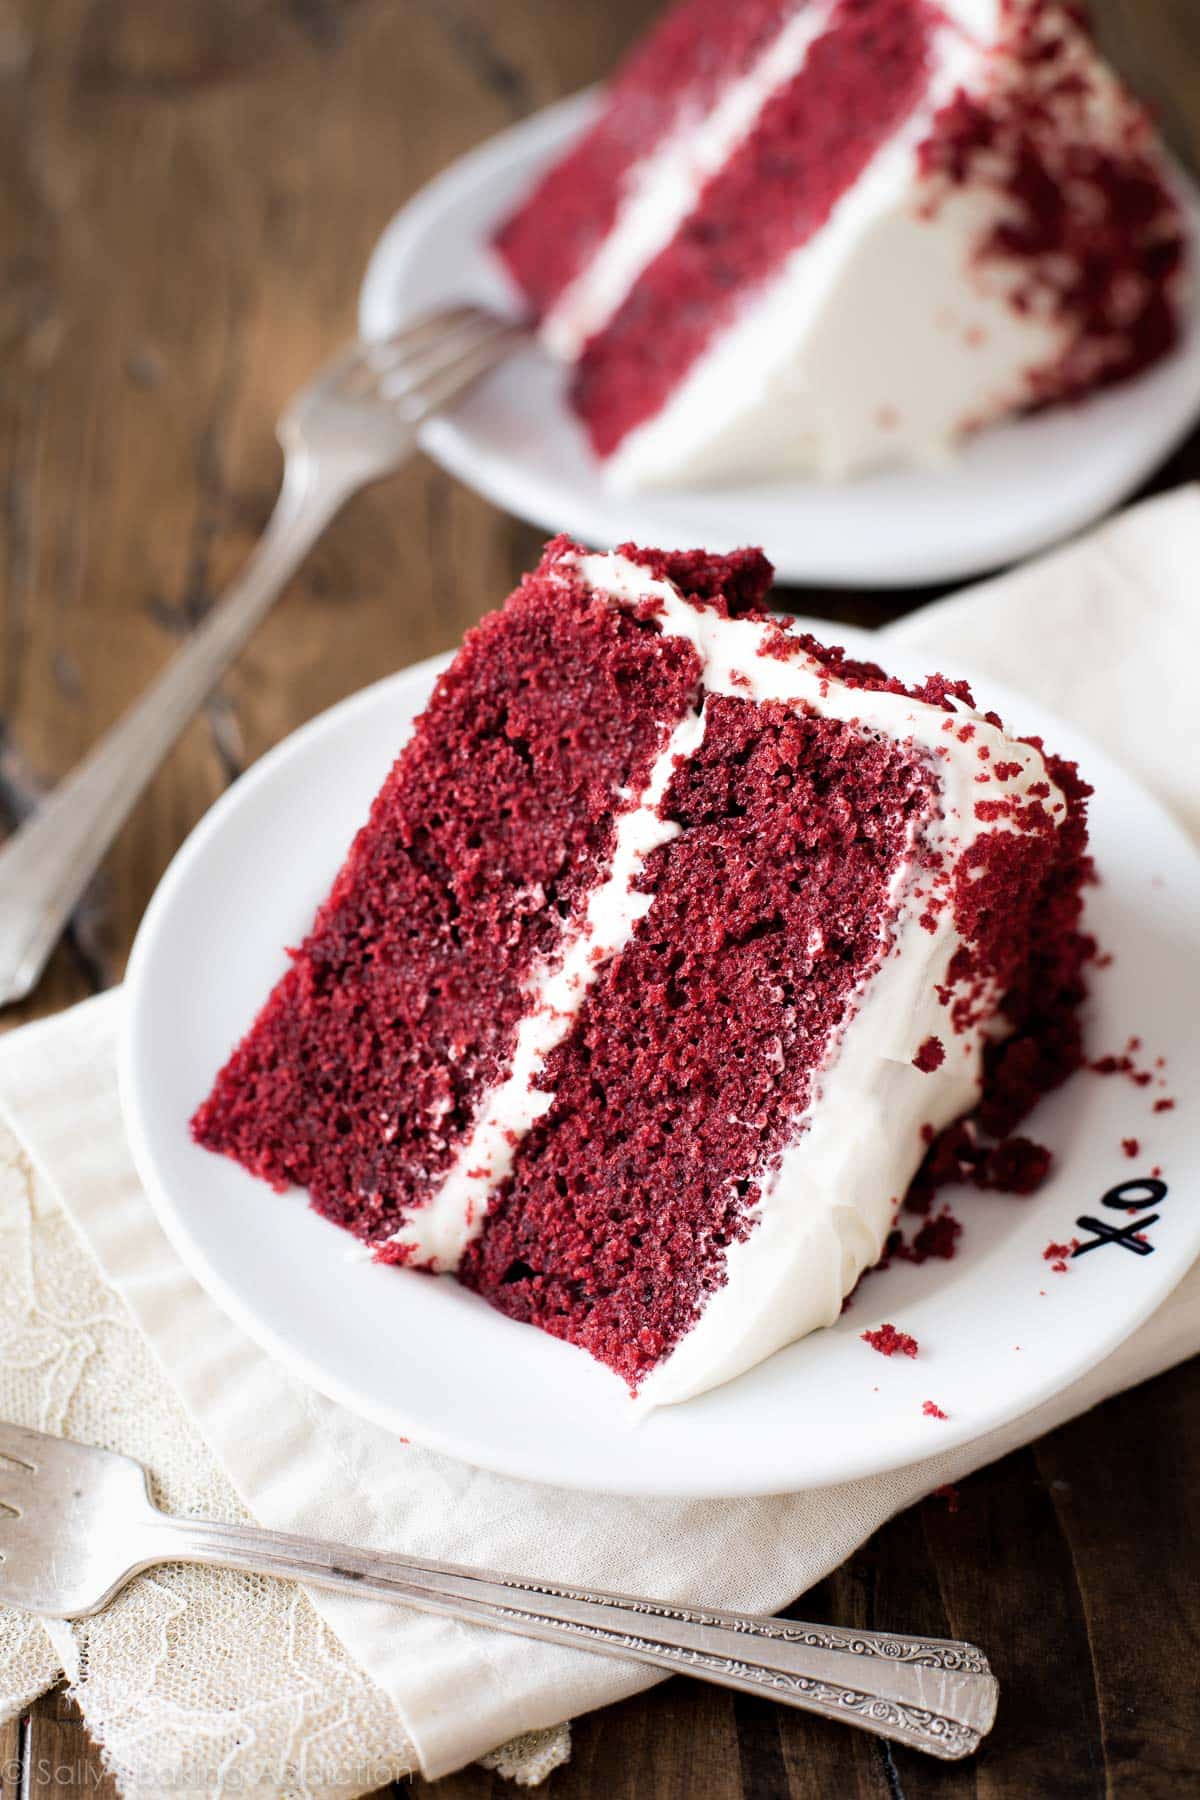
These 4 flavors are essential to the perfect red velvet layer cake. Not only is the flavor outstanding, red velvet cake’s texture is worth writing home about. It’s dense and soft with a moist and velvety crumb. However, the absolute best part about red velvet cake is the cream cheese frosting. Slathered on thick, my cream cheese frosting recipe is delicately sweet and undeniably creamy.
How to Make Red Velvet Cake
I use specific ingredients, certain amounts, and unique mixing techniques to produce my best red velvet cake recipe. Begin by whisking the dry ingredients together, then beat together the wet ingredients. We’ll combine the two, add buttermilk and tint the batter red. More on food coloring below.
- Cake Flour: I highly recommend cake flour. Cake flour is much lighter than all-purpose and the perfect base for a light, soft-crumbed cake texture. Like I mention above, red velvet’s texture is important to the authenticity of the flavor. You will thank me for the recommendation after you taste how incredibly soft this cake is. It’s the texture you find at professional bakeries.
- Unsweetened Cocoa Powder: 2 Tablespoons is plenty for a little cocoa flavor without overpowering the vanilla and butter flavors.
- Butter & Oil: What sets red velvet cake apart from chocolate is its buttery flavor. With only butter, we risk a dry cake. With only oil, we lose the butter flavor and softness that comes with creaming butter & sugar together. So all that’s to say, use both butter and oil. Moist texture, soft and cakey texture, buttery flavor.
- Buttermilk: Buttermilk is tangy, creamy, and makes baked goods extremely moist. You can’t make delicious red velvet cake without it! Additionally, buttermilk helps activate the baking soda to leaven the cake. If you’re interested, I have plenty more on this topic in my Baking with Buttermilk post (including a DIY buttermilk substitute recipe). It’s also a key ingredient in these black velvet cupcakes!
What About the Food Coloring?
Red velvet cake wouldn’t be red without food coloring. I recommend gel food coloring because the color is concentrated, so you need less of it. For natural coloring, use beet powder. If you don’t want to use food coloring, leave it out! The cake will have the same flavor and be a lovely shade of cocoa.
My #1 Trick
I add one simple step to this red velvet cake recipe and it guarantees the BEST texture.
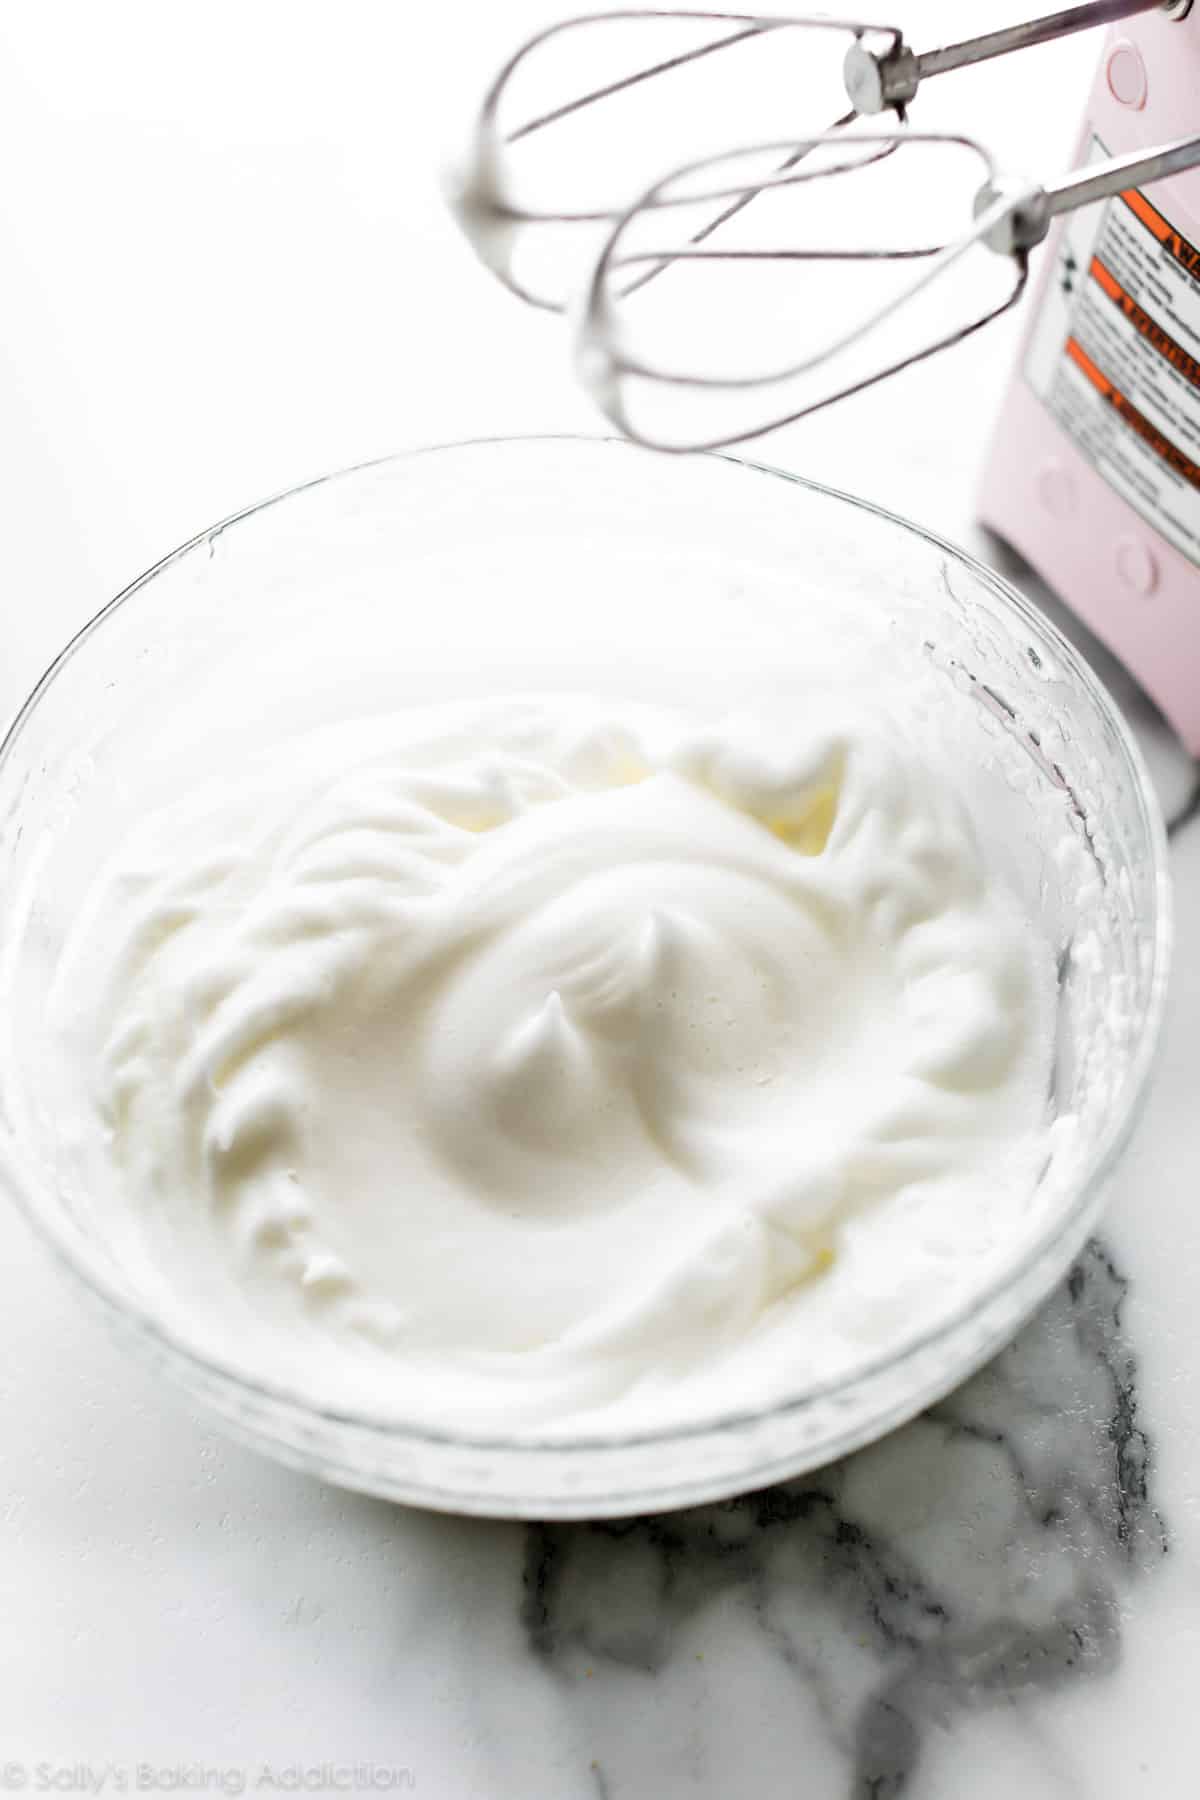
Whip the egg whites separately, then fold into the batter.
This cake recipe requires 4 large eggs. Separate the eggs before starting. Beat the egg yolks with the wet ingredients, then beat the egg whites into fluffy peaks and fold them in last. Beating the egg whites incorporates air and promises a velvet-rich texture.
You will never go back.
Red Velvet Cake Video Tutorial
Cream Cheese Frosting
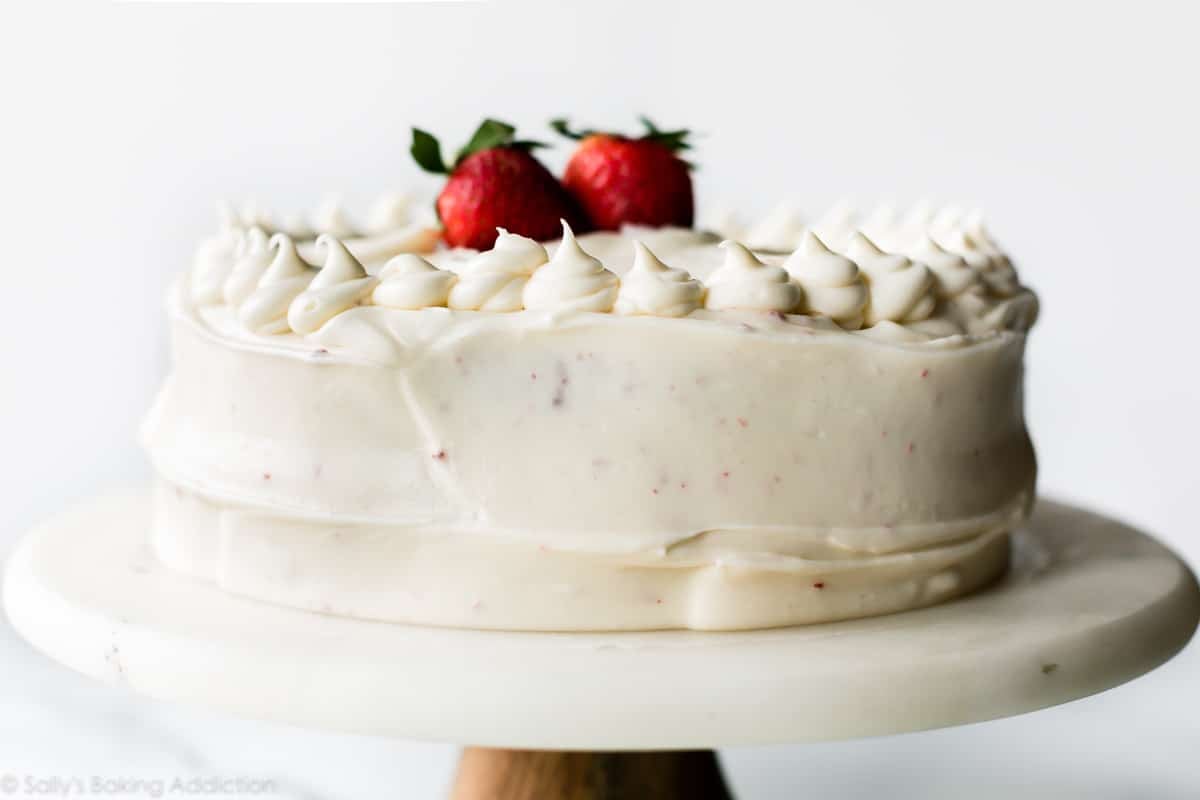
In my opinion, cream cheese frosting pairs best with red velvet’s flavor and this frosting recipe is really simple. You need brick-style cream cheese, butter, confectioners’ sugar, vanilla extract, and a pinch of salt to offset the sweetness. It glides on seamlessly and is silky smooth. If you’re looking to pipe decoration with this cream cheese frosting, chill it in the refrigerator for 20 minutes. This guarantees the creamy frosting will hold its shape.
Of course, feel free to use traditional vanilla buttercream or Swiss meringue buttercream here if you prefer. Or try white chocolate buttercream frosting!
This recipe converts red velvet skeptics. I should know because I used to be one!
Interested in turning this red velvet beauty into a tiered wedding cake? See my homemade wedding cake for details.
More Classic Cake Recipes
- Vanilla Cake
- Banana Cake
- Pumpkin Cake
- Chocolate Cake
- Strawberry Cake
- Lemon Cake
- German Chocolate Cake

Red Velvet Cake with Cream Cheese Frosting
- Prep Time: 30 minutes
- Cook Time: 30 minutes
- Total Time: 3 hours
- Yield: 12 servings
- Category: Dessert
- Method: Baking
- Cuisine: American
Description
Red velvet cake is much more than vanilla cake tinted red. This recipe produces the best red velvet cake with superior buttery, vanilla, and cocoa flavors, as well as a delicious tang from buttermilk. My trick is to whip the egg whites, which guarantees a smooth velvet crumb.
Ingredients
- 3 cups (360g) cake flour (spooned & leveled)
- 1 teaspoon baking soda
- 2 Tablespoons (10g) unsweetened natural cocoa powder
- 1/2 teaspoon salt
- 1/2 cup (8 Tbsp; 113g) unsalted butter, softened to room temperature
- 2 cups (400g) granulated sugar
- 1 cup (240ml) canola or vegetable oil
- 4 large eggs, room temperature and separated
- 1 Tablespoon pure vanilla extract
- 1 teaspoon distilled white vinegar
- liquid or gel red food coloring
- 1 cup (240ml) buttermilk, at room temperature
Cream Cheese Frosting
- 16 ounces (452g) full-fat brick cream cheese, softened to room temperature
- 3/4 cup (12 Tbsp; 170g) unsalted butter, softened to room temperature
- 5 cups (600g) confectioners’ sugar
- 1 and 1/2 teaspoons pure vanilla extract
- pinch of salt, to taste
Instructions
- Preheat oven to 350°F (177°C). Grease two 9-inch cake pans, line with parchment paper rounds, then grease the parchment paper. Parchment paper helps the cakes seamlessly release from the pans. (If it’s helpful, see this parchment paper rounds for cakes video & post.)
- Make the cake: Whisk the flour, baking soda, cocoa powder, and salt together in a large bowl. Set aside.
- Using a handheld or stand mixer fitted with a paddle attachment, beat the butter and sugar together on medium-high speed until combined, about 1 minute. Scrape down the sides and up the bottom of the bowl with a rubber spatula as needed. Add the oil, egg yolks, vanilla extract, and vinegar and beat on high for 2 minutes. (Set the egg whites aside.) Scrape down the sides and up the bottom of the bowl with a silicone spatula as needed.
- With the mixer on low speed, add the dry ingredients in 2-3 additions alternating with the buttermilk. Beat in your desired amount of food coloring just until combined. I use 1-2 teaspoons gel food coloring.
- In a separate medium bowl, vigorously whisk or beat the 4 egg whites on high speed until fluffy peaks form as pictured above, about 3 minutes. Gently fold into cake batter. The batter will be silky and slightly thick.
- Divide batter between cake pans. Bake for 30-32 minutes or until the tops of the cakes spring back when gently touched and a toothpick inserted in the center comes out clean. If the cakes need a little longer as determined by wet crumbs on the toothpick, bake for longer. However, careful not to overbake as the cakes may dry out. Remove cakes from the oven and cool completely in the pans set on a wire rack. The cakes must be completely cool before frosting and assembling.
- Make the frosting: In a large bowl using a handheld or stand mixer fitted with a whisk or paddle attachment, beat the cream cheese and butter together on medium-high speed until smooth, about 2 minutes. Add the confectioners’ sugar, vanilla extract, and a pinch of salt. Beat on low speed for 30 seconds, then increase to high speed and beat for 3 minutes until completely combined and creamy. Add more confectioners’ sugar if frosting is too thin or an extra pinch of salt if frosting is too sweet. Frosting should be soft, but not runny.
- Assemble and frost: Using a large serrated knife, slice a thin layer off the tops of the cakes to create a flat surface. Discard or crumble over finished cake. Place 1 cake layer on your cake stand or serving plate. Evenly cover the top with frosting. Top with 2nd layer and spread remaining frosting all over the top and sides. I always use an icing spatula and bench scraper for the frosting. I used Wilton piping tip #12 for decoration around the top.
- Refrigerate cake for at least 30-60 minutes before slicing. This helps the cake hold its shape when cutting.
- Cover leftover cake tightly and store in the refrigerator for 5 days. Frosted cake or unfrosted cake layers can be frozen up to 2-3 months. Thaw overnight in the refrigerator and bring to room temperature before decorating/serving.
Notes
- Make Ahead Instructions: The cake layers can be baked, cooled, and covered tightly at room temperature overnight. Likewise, the frosting can be prepared then covered and refrigerated overnight. Let the frosting sit at room temperature to slightly soften for 10 minutes before assembling and frosting.
- Special Tools (affiliate links): 9-inch Round Cake Pans | Glass Mixing Bowls | Whisk | Electric Mixer (Handheld or Stand) | Red Gel Food Coloring or Beet Powder | Silicone Spatula | Cooling Rack | Cake Stand, Serving Plate, or Cake Turntable | Icing Spatula | Bench Scraper | Piping Bag (Reusable or Disposable) | Wilton Piping Tip #12 | Cake Carrier (for storing cake)
- Cake Flour: For best texture and taste, I strongly recommend cake flour. You can find it in the baking aisle and I have many more recipes using it. If you can’t get your hands on cake flour, you can make a DIY cake flour substitute.
- Vinegar: The vinegar helps brighten the red color. Don’t get scared, a touch of vinegar is normal in red velvet desserts! You can’t taste it.
- Why is everything at room temperature? When everything is near the same temperature, they mix together easily, evenly, and produce a uniform texture. It’s important!
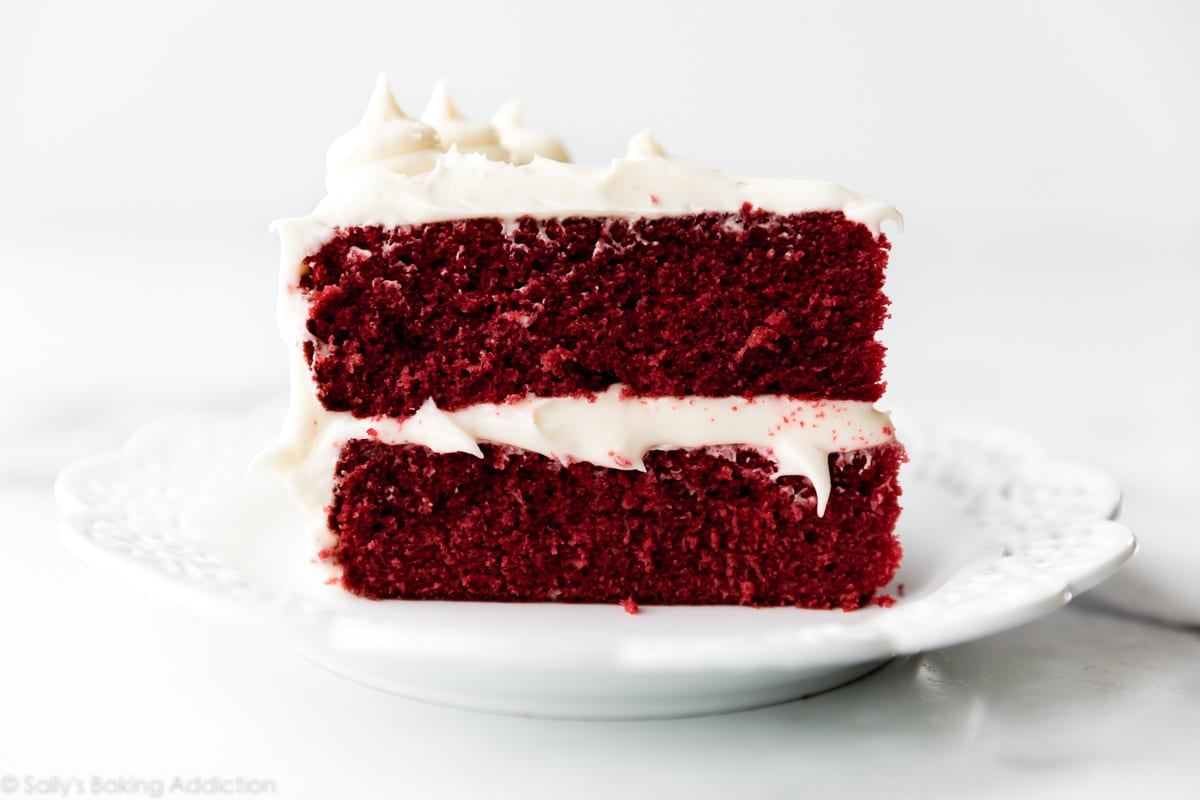
- Food Coloring: The amount of red food coloring is up to you. I tested with varying amounts. To get the dark red color you see here, use 2 teaspoons of gel food coloring. You could use liquid food coloring too, but gel food coloring is more potent. You’ll need at least 1 Tablespoon of liquid. Dye the batter until you are pleased with the color. Use beet powder for a natural alternative (mix 1/2 teaspoon beet powder with 2 teaspoons of water before adding) or leave the food coloring out completely.
- Buttermilk: Buttermilk is a key ingredient and flavor in this recipe. You can use low fat or full fat. If you don’t have buttermilk, you can make your own buttermilk substitute. To do so, add 1 and 1/2 teaspoons of fresh lemon juice or white vinegar to a liquid measuring cup. Add enough regular milk (whole milk is best) to make 1 cup. Stir the two together, then let it sit for 5 minutes before using.
- Sheet Cake: This batter fits nicely into a 9×13-inch cake pan or 12×17-inch sheet pan. Same oven temperature. Bake for about 40-45 minutes or 20-25 minutes, respectively. Keep your eye on the cake and use a toothpick to test for doneness.
- 3 Layer Cake: Prepare 3 9-inch cake pans in step 1 and divide the batter evenly between the pans. Bake for about 22-25 minutes.
- Bundt Cake: This cake batter fits into a 10-cup or larger bundt pan. I’m unsure of the exact bake time (likely around an hour), but use a toothpick to test for doneness. Same oven temperature.
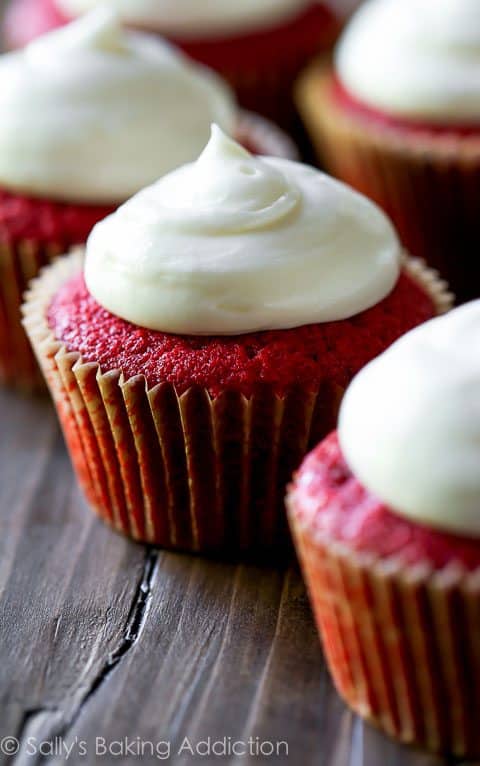
- Cupcakes: You can use this cake batter for 2-3 dozen cupcakes. Fill cupcake liners 1/2 – 2/3 of the way full. Bake for 20-21 minutes or until the tops of the cupcakes spring back when gently touched and a toothpick inserted in the center comes out clean. Use my red velvet cupcakes recipe if you need fewer.
Recipe originally published on Sally’s Baking Recipes in 2015.
Need something smaller? Here are my red velvet cupcakes!


Reader Comments and Reviews
My fried is dying of cance. Whenever we go out to eat, all she talks abound is red velvet cake. I made this for her. Was a pain, just like her, to do all the extra steps. It was worth the “pain”. Tasted wonderful and met her picky expectations. I will continue using the icing recipe as my new go to cream cheese icing.
I can only say WOW!!!!
I made these into cupcakes and I have to say they are amazing. I am so excited to share them with my friends today at the birthday party.
I knew this recipe would be perfect and I didn’t have to test it out prior to serving.
The cake was still soft even after refrigerating it.
So happy I found this recipe. So good!!!
Will definitely make again.
Hi Sally! Can the cakes be frozen for a few days before assembly? Thanks!
Yes, they sure can! This is how I freeze cakes.
This is the best red velvet recipe I’ve ever made. Followed everything exactly, it was moist, full of flavor and the icing amounts were spot on.
One question, can you freeze the cake? I’m making a three tier cake for a friends 60th birthday and I’m making three different cakes that are her favorites, so I will be freezing one layer of each cake. It’s always good to have something amazing in the freezer, I was wondering if I can freeze this cake as I want to use it as my top layer.
Thanks.
Hi Jo Ann, I’m so glad you enjoy this recipe so much! Yes, it does freeze well. These are my best tips on how to freeze cakes.
Just finished making this cake. This might be the best looking set of cakes I’ve pulled from my oven. They rose BEAUTIFULLY. I couldn’t get cake flour so I followed your recommendation to make yourself. Thank you! What great direction every step of the way. I can’t wait to decorate and give to a co-worker for her son’s birthday. Again thank you for a wonderfully written recipe!
Can this recipe be divided into 2, 8” (2” deep) cake pans? Thanks
Hi Allison, I recommend 2 9-inch cake pans OR 3 8-inch cake pans. The cakes will be very thick using two 8 inch cake pans and may not bake evenly– or may even overflow.
Hi
I made this recipe yesterday in 2, 8 in rounds I just made sure to fill the pans to the appropriate levels. About 2/3 full. I used the left over batter to make cupcakes for me and my husband. As my previous review stated the cakes cooked and rose BEAUTIFULLY!
Hi Sally.
I made the Red Velvet cake today for a friend & he shared it was the best that he has ever had. I love to bake so took my time & did not over bake it, I am
overly cautious, don’t care for dry cakes. Thanks SO much for sharing .
Pat
Are you supposed to use baking soda? Or was that a typo? Did you mean baking powder? Just wondering. Can’t wait to make this!
Hi Jessica, We are using acidic ingredients in this cake so we do in fact need to use baking soda. If you are interested in learning more about the difference you can check out this post in my Baking Basics series explaining the difference between baking powder vs baking soda.
Tastes absolutely delicious, made this for my boyfriend’s birthday and the whole cake was gone in one day. Will be making this again, thank you!
I made this last summer and it’s fantastic! I decorated it with red/white/blue sprinkles for 4th of July. I’m making this tomorrow for my office, and I notice in your top pic you piped some of the icing on top. It looks like you spread the icing a bit thinner to have more to pipe. Perhaps a silly question, but do you see a problem with making 1.5 times the icing recipe to leave enough for piping. There’s a risk that I would have a bowl of left-over icing that I would be forced to eat, and I’m OK with it! Just asking because sometimes increasing the recipe doesn’t always work well. Thanks, as always!
This is a great cake! It rose beautifully and kept just fine for several days in the fridge. I actually used a different frosting recipe and made the more old-fashioned frosting for red velvet cake– boiled milk frosting. Terrible-sounding name, but it was delicious! Sally, if you are ever looking to add a frosting recipe to your series, I would love to see your version of a boiled milk frosting! Thanks for the wonderful red velvet cake!
This Recipe was a delight. Just what I needed. I kinda tweaked it a little But you gave me just the start I needed.Thanks.
Made this as a 9×13 cake and it turned out great! Followed the recipe exactly and wouldn’t change a thing. This is my go to recipe for Red Velvet from now on! Thank you!
Holy Moly that is a good recipe! I bought the actual cake flour and the real buttermilk and the followed the recipe exactly to make it as a birthday cake. It was awesome. The cake was so silky smooth and moist and of course the frosting was awesome. Yum, Yum! It made the birthday boy feel extra special! Now I’m gonna make Sally’s buttermilk waffles to use up the buttermilk leftover. Expecting them to be great too!
I have made many Red Velvet cakes. This year I couldn’t find my usual recipe, so I tried this one. OMG…my family went crazy for it. It turned out beautiful and tasted as good as it looked. I like the look of three layers, so thanks for the different options at the end. This one is a keeper!
This is amazing. Don’t change anything. Do it exactly as she says. I made this for Christmas 2019 and it was a hit!
Hi I have had a request for an extra deep red velvet cake (9 inch round that is 3-4 inches deep (no layers)??? is this possible with this recipe… Would I need to double the recipe to achieve this and just bake it lower and slower any help would be appreciated thanks
Hi Julianne, I’m afraid a cake that thick won’t bake properly in a regular round pan but you can definitely try it. This recipe (as written, not doubled) will be enough batter. Lower the oven temperature by 25 degrees F and bake for longer. You may want to tent the cake with foil to help guarantee more even baking.
I am serving this Christmas Eve. I made a trial run a few weeks ago and I must say this is a beauty. Thank you for all the tips and instructions. If I want to make a 6″ 3 layers in the future can I half this recipe or use your cup cake?? Sally I’ve made several of your cakes and cupcakes and I’ve never been let down. I enjoy your videos, hints, and tips and yes even the whys. Thank you.
If I cannot fit in two nine inch pans at the same time, if my oven is too small for it. What do I do? Can I bake above and below and Switch them half way? ❤️
Hi Aarti, Yes you can bake one pan on the top rack and one one the bottom and rotate half way through. Enjoy!
I currently have this in the oven as a Bundt Cake AND I used the cream cheese filling from the chocolate Bundt Cake recipe in the middle! I have had the red velvet as a cake before and it is truly amazing so keep fingers crossed that this red velvet bundt with cream cheese filling comes out perfect as well!!
Made it as a Bundt cake! Turned out great at 55 minutes (or was it 65?). I substituted 1/4 cup of buttermilk for coffee to enhance the chocolate flavor. That was the only change I made. It was absolutely delicious!!! Big hit!!!
This frosting was fantastic. I added another brick of cream cheese for a bit of extra tang. My red velvet cake was a show stopper!
I have made red velvet for years. A few years ago, I decided to give this recipe a shot. Very similar to my family recipe with the addition of the cake flour. I promise, it makes all the difference in the world! I get requests for this cake year around! It is awesome.
Delicious!
Made this for my sister’s party and people said it was the best red velvet cake they’ve had. Super easy a delicious
Easy to follow, came out perfect.
Hi Sally,
Tried it and as usual it was deeelliiicious
Everyone who tried it asked mr about the recipe and said they never tasted a red velvet cake that good before.
Thanks
My son asked for a Red Velvet cake for his birthday this year.
Because his mom and I recently divorced it was on me to learn how.
I have to say that this is an amazing recipe, even for someone who is baking there very first Cake!
Thank you…
Tasted perfect. So, so fluffy! 2.5 in tall at center. Compliments on the frosting “not too cream-cheesey, great balance.” I followed as written using the “sheet cake” noted option: only one layer, 9×13 pyrex pan (buttered, parchment paper on bottom, buttered again, then floured), decreased heat to 325 F per the internet telling me to. Had to add foil cover after 40 min with top a little brown and needed 10 min more of bake time. Maybe will do two layers next time since so puffed!
I’ve made this recipe for only God knows how many times. Layer cakes, cupcakes, sheet cakes. It’s a very versatile cake and you can never go back after finding this recipe. Thank you so much for this.
Hi Sally,
My cake came out really uncooked in the middle. I followed the recipe, but used pastry flour instead of cake flour. Do you think that could be why the middle is so uncooked while the edges are cooked? I also used 8 inch round baking pans and cooked for roughly 35 minutes. Any thoughts? Thanks!
Hi Emily! If the cakes are still batter in the center, they need more time in the oven. The flour wouldn’t have caused the issue. Bake until the cakes are cooked through and use a toothpick to test doneness. 8-inch round cakes will be thicker and require more time than 9-inch cakes.