

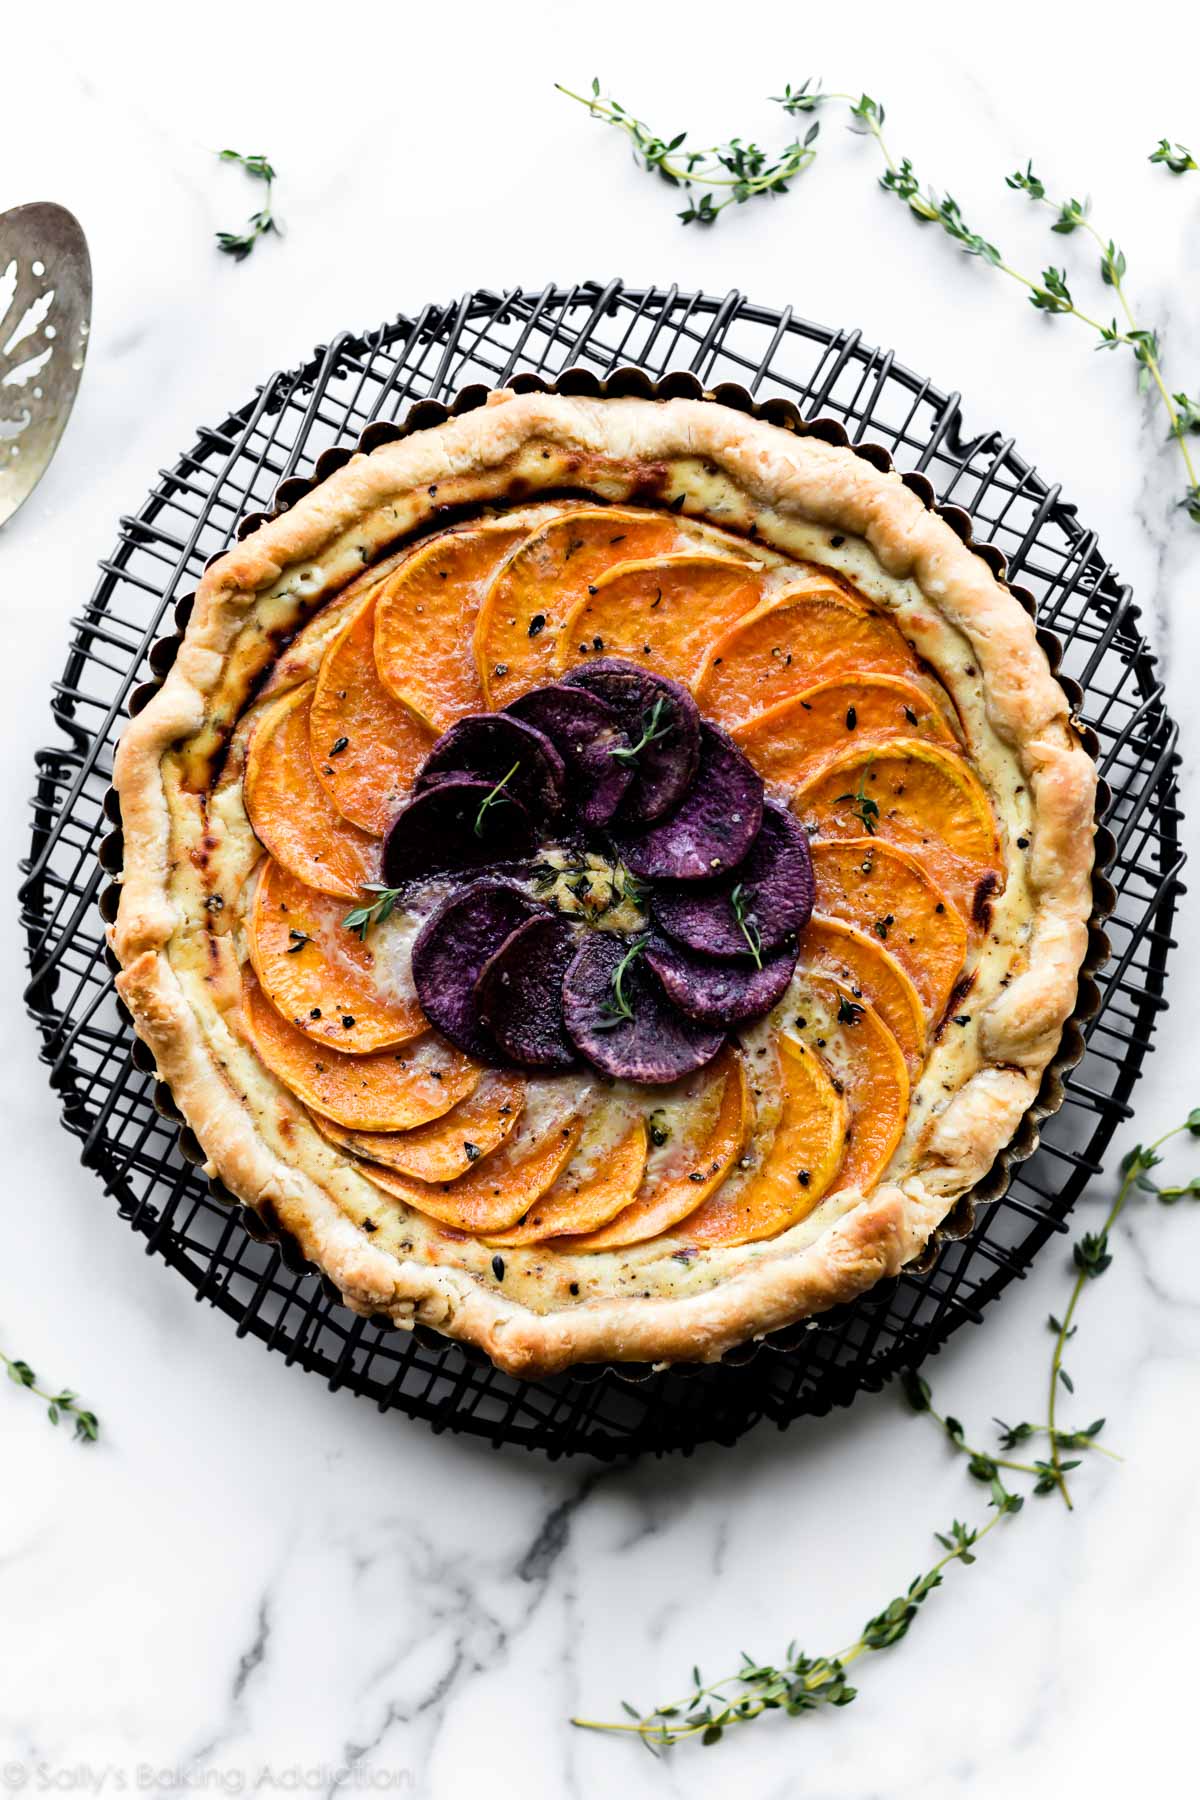
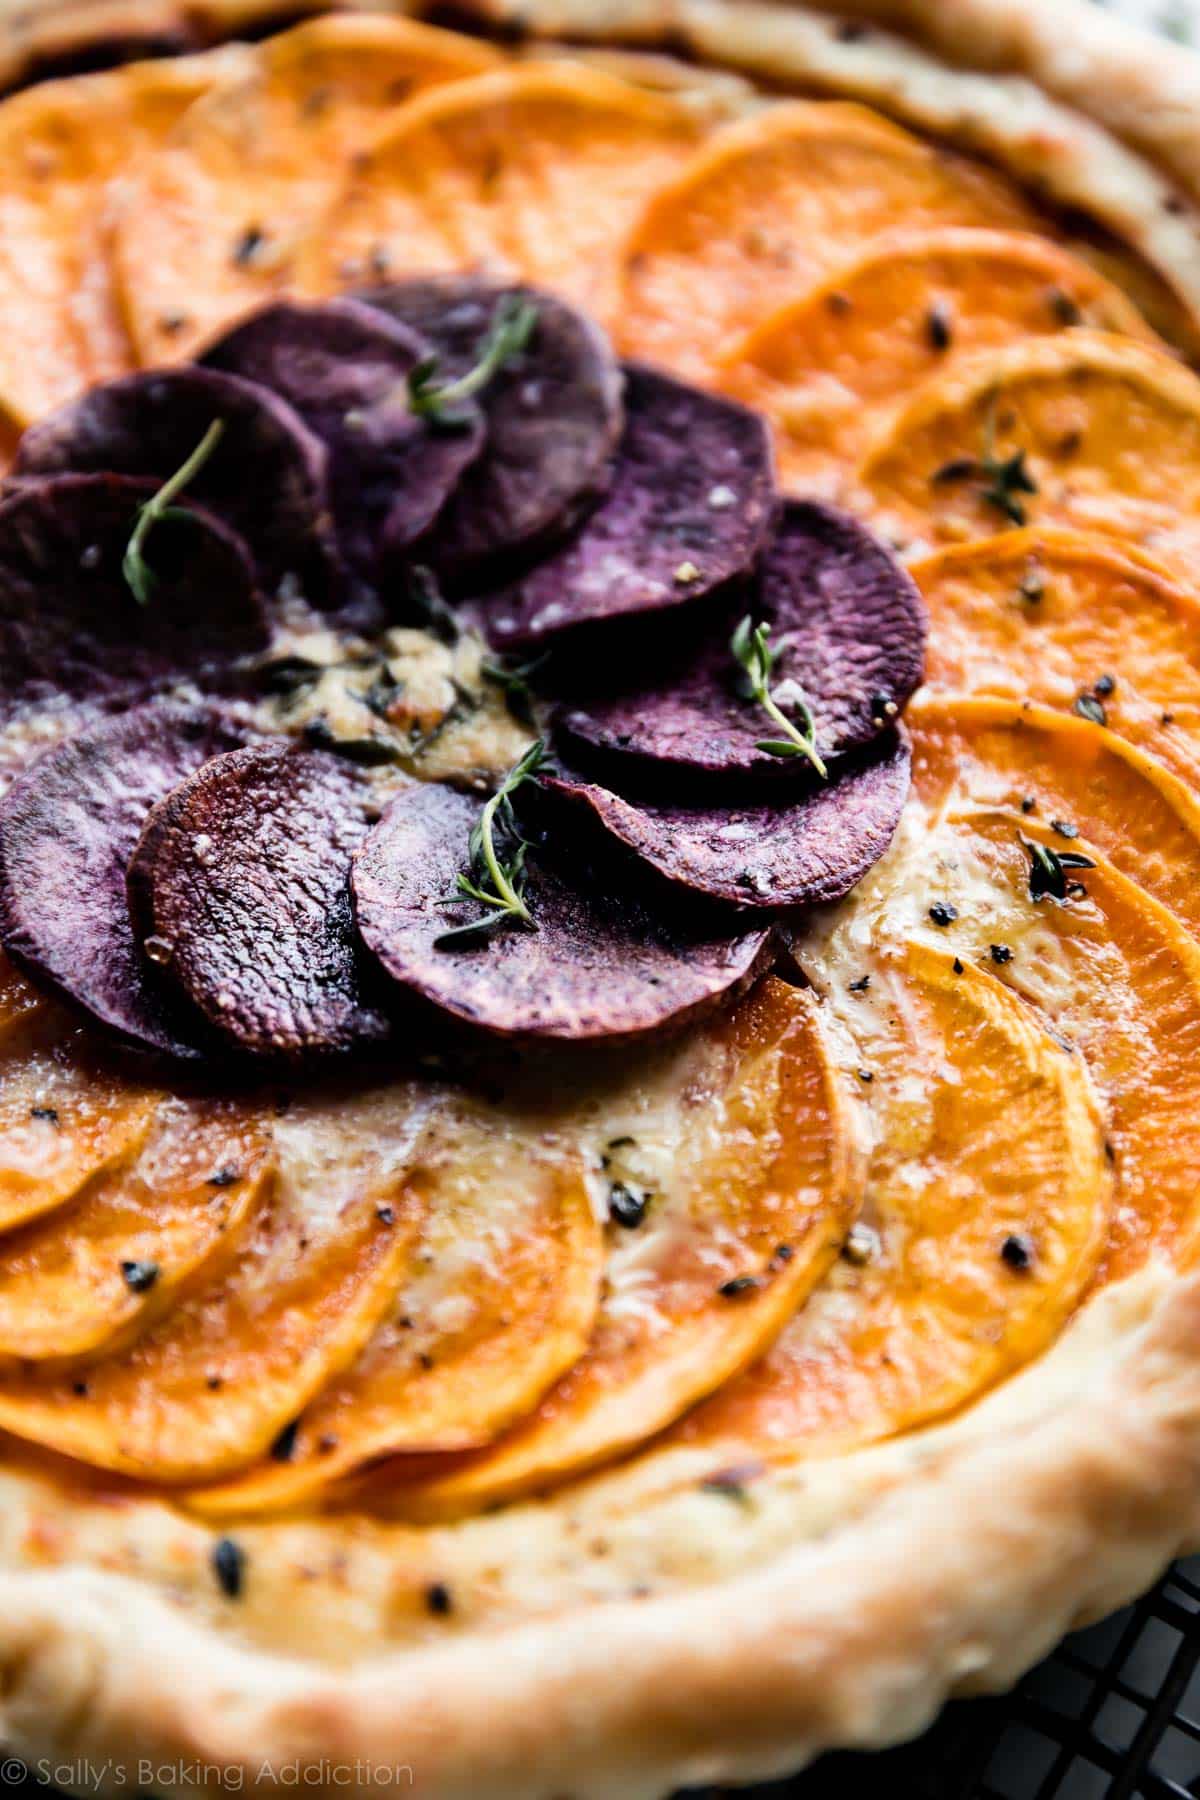
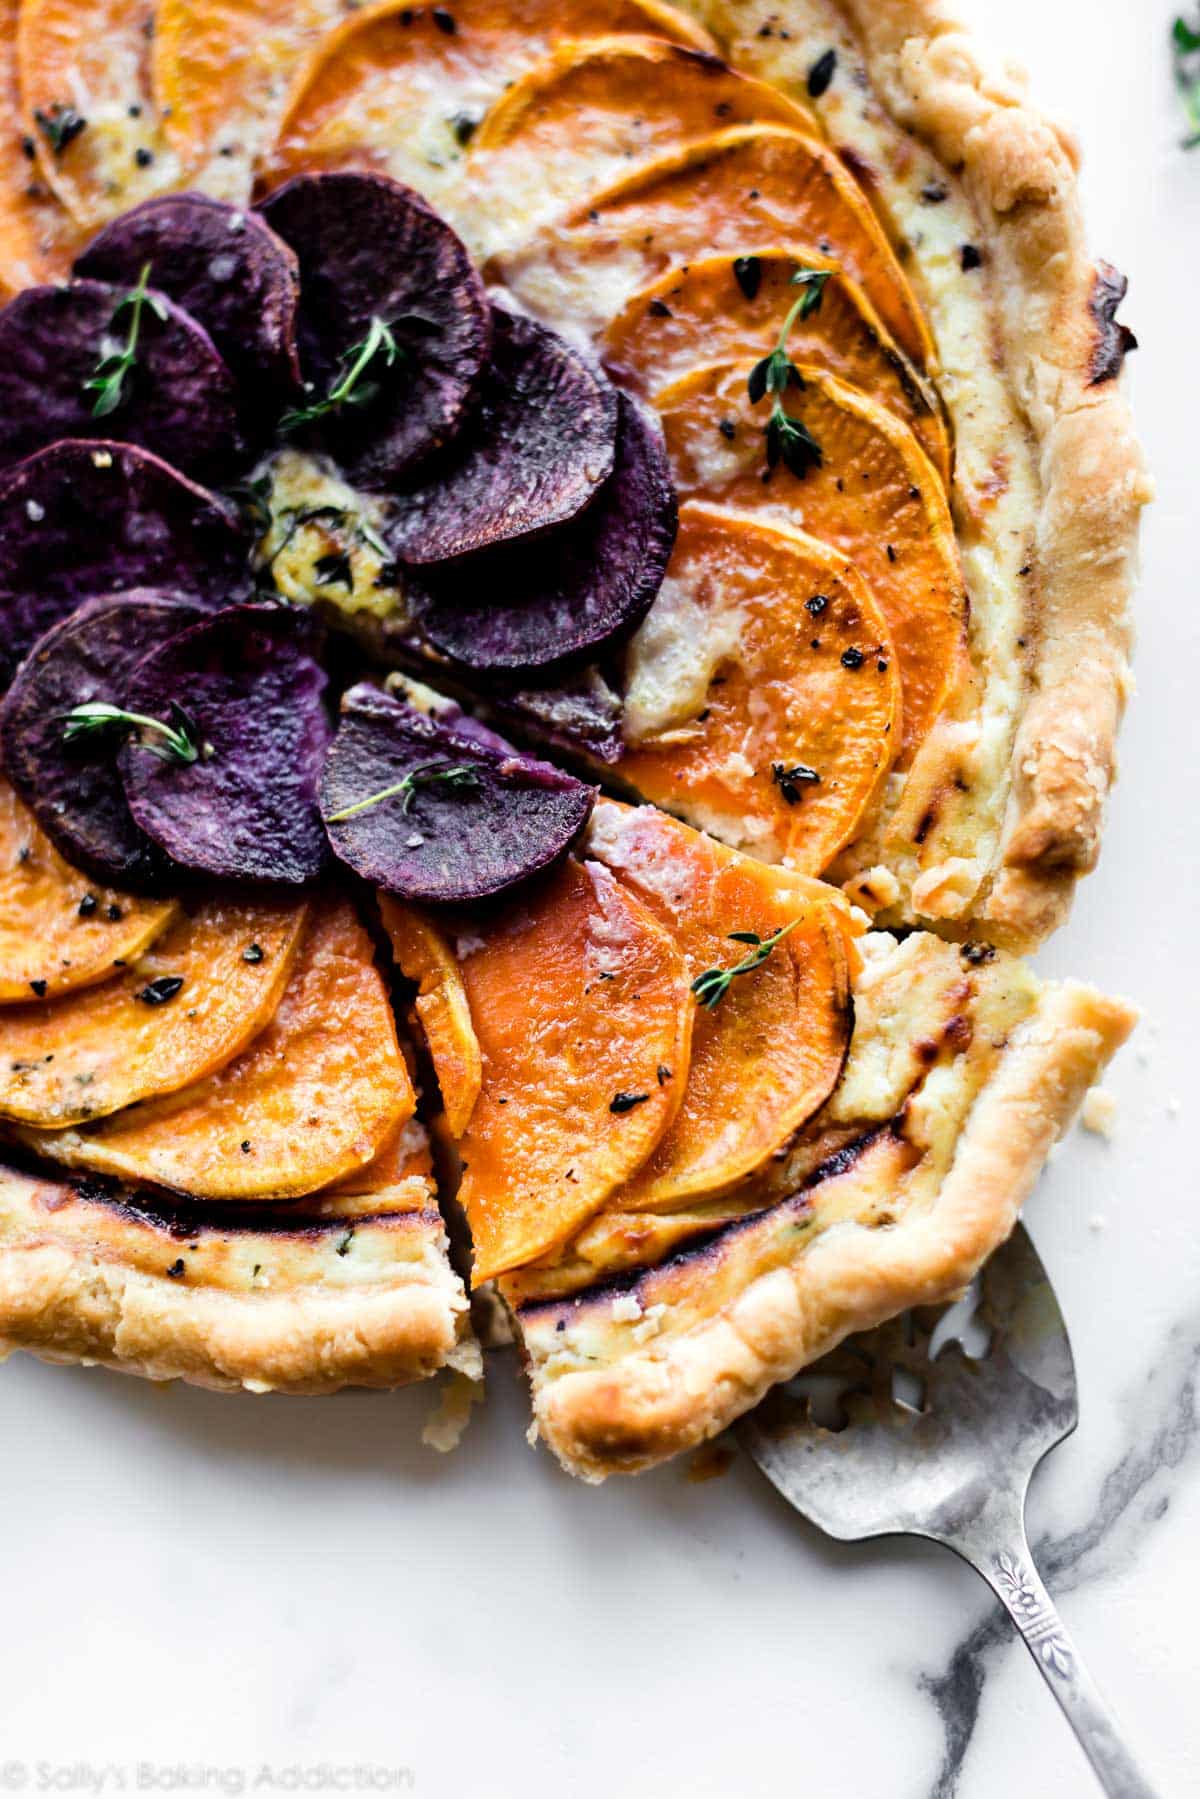
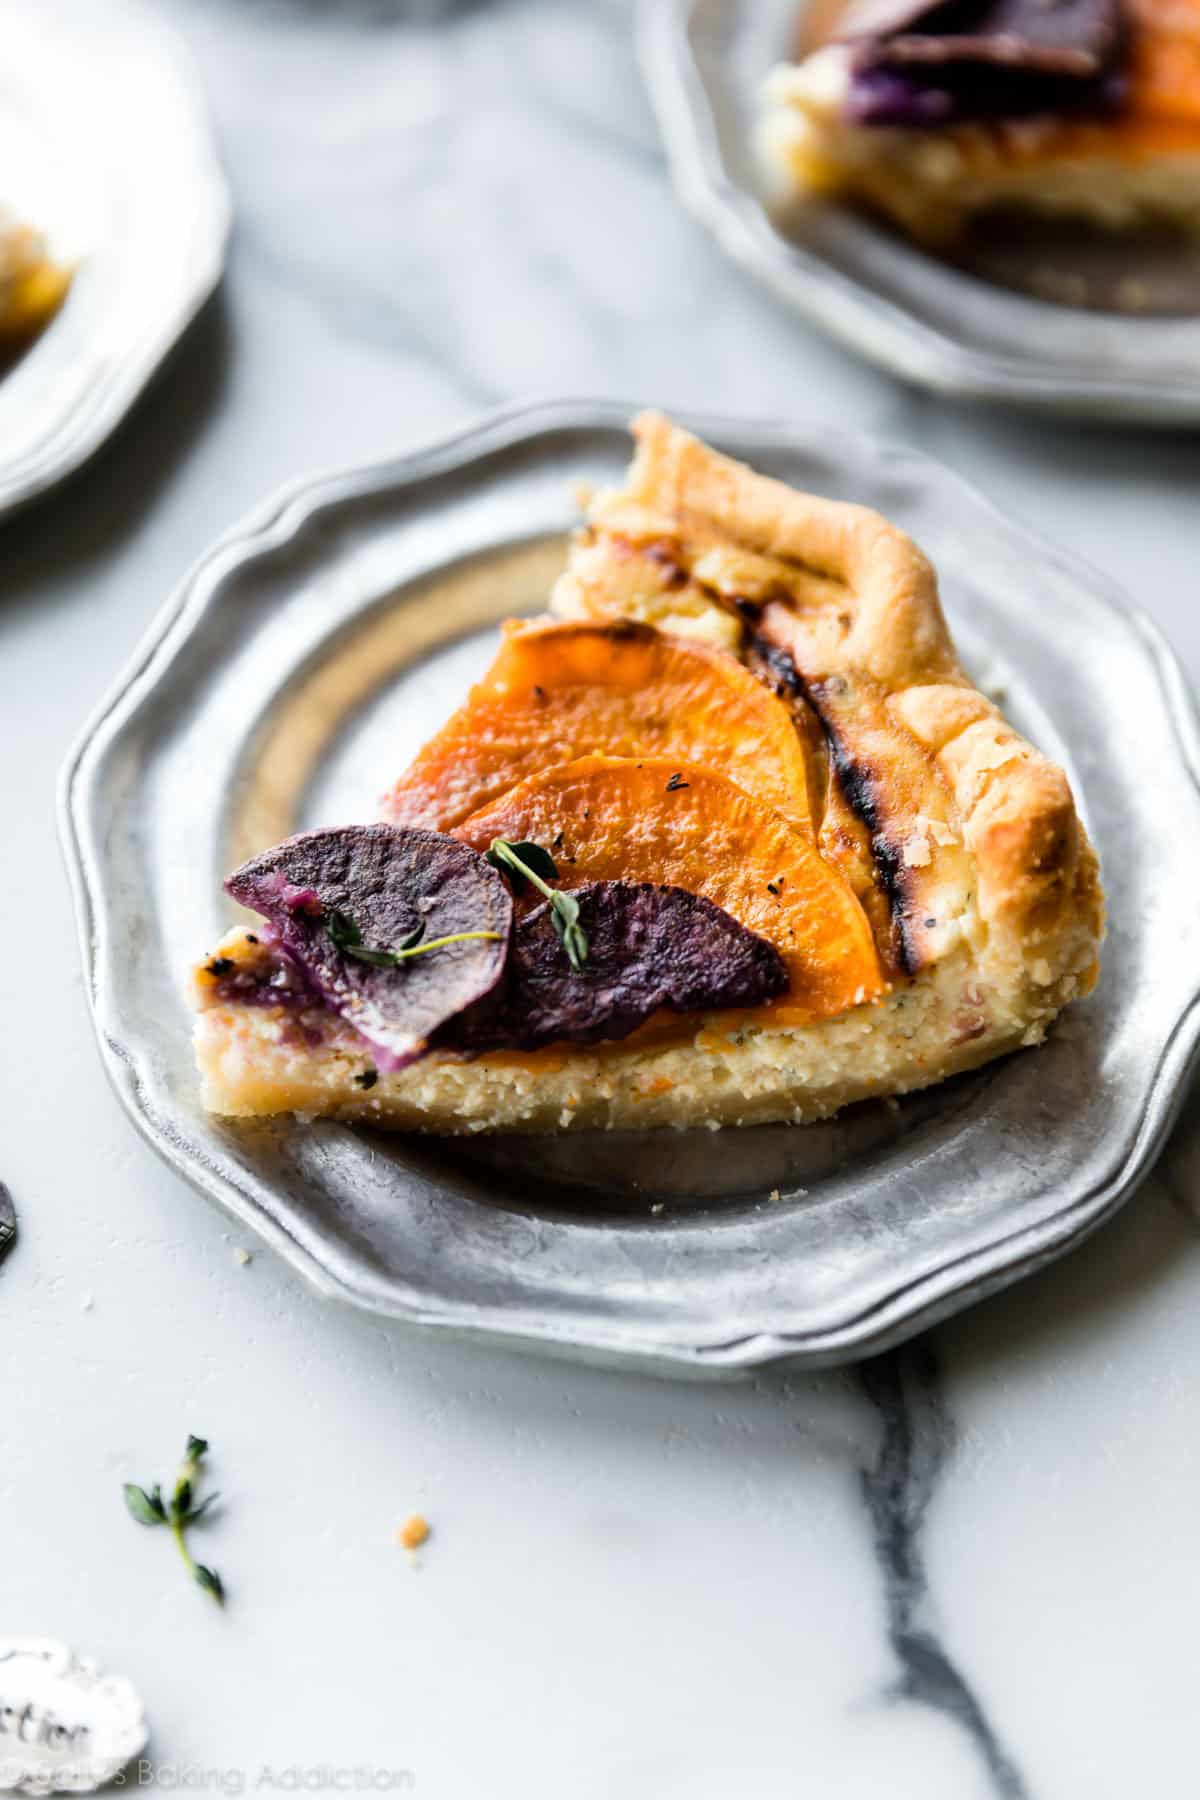
This savory vegetable cheese tart combines a thick buttery crust, a creamy herbed cheese filling, and a beautiful adornment of crisp roasted veggies! Top with fresh herbs and serve as an appetizer, lunch, side dish, or main course.
Welcome to recipe #3 in Pie Week! We’ve had our fill of sugar lately and with Thanksgiving dessert and Christmas cookies on the horizon, I figured now’s the perfect time to hop on the savory bandwagon. This is an absolutely INCREDIBLE savory vegetable cheese tart. The filling tastes like cheesy ravioli. I mean… do I even need to continue?!

Why Bake a Vegetable and Cheese Tart?
- You know those times when you want something, just, different? Completely unique to everything else you make for dinner.
- Or maybe you’re looking for an interesting appetizer to bring to a dinner party.
- You’re hosting a baby or bridal shower.
- It’s Thanksgiving dinner and you’re in charge of a side dish.
- Because you want to bake something PRETTY, but EASY.
Make a cheesy veggie tart. Trust me when I say this vegetable and cheese tart solves all your problems. Sitting in a buttery pie crust, this salty herbed cheese filling is the creamy cushion for a cornucopia of vegetables. Watch me make it:
Tart That’s Not Dessert
So, what is vegetable and cheese tart? Today we’re combining 3 things:
- All Butter Pie Crust (freeze the 2nd half or make pecan pie for dessert!)
- Herbed ricotta + parmesan filling
- Any vegetables you love
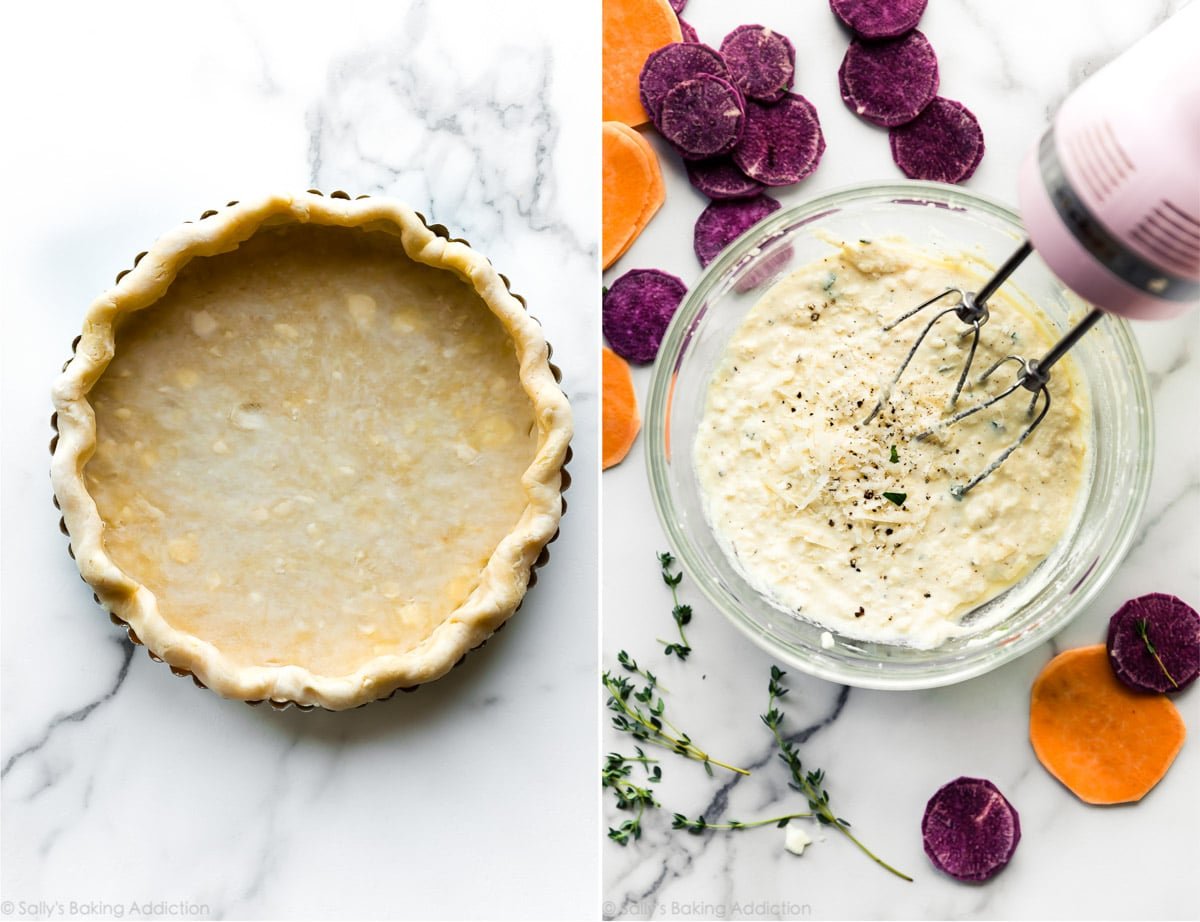
The filling combines ricotta cheese, parmesan cheese, 2 eggs for structure, garlic, salt, pepper, and fresh herbs. Does it taste like quiche? No not at all. It tastes like ravioli filling!! In fact, I’m even thinking of sautéing some spinach and adding that to the filling next time. Let me know if you try that!
Important step: Blind-bake (pre-bake) the crust before adding the filling, otherwise the crust will taste soggy. Pie weights are ideal for when we blind bake pie crust. Without pie weights, the pie dough will puff up, then shrink. Line the crust with parchment or aluminum foil, then fill the empty pie crust with the weights. You can watch me do this in the video above.
What Toppings Can I Use?
I used orange and purple sweet potatoes, but the options are seriously endless:
- Mushrooms + peppers + onions (and crumbled cooked sausage!)
- Tomatoes + basil + add fresh pesto after it bakes
- Zucchini + tomatoes
- Sweet potato + eggplant + add goat cheese after it bakes
- Chopped asparagus + add a drizzle of balsamic after it bakes
- Butternut squash + mushroom + onion
- Shaved brussels sprouts
- Fresh lump crab + asparagus (with lots of Old Bay seasoning!)
Add lots of fresh herbs and switch up the parmesan cheese in the filling. As long as you stick to the basic butter crust + ricotta filling, you can truly make this vegetable and cheese tart your own by playing around with the flavors.
If you love this recipe you’ll want to try my butternut squash tart and mushroom puff pastry tarts next.
What to Serve with Vegetable and Cheese Tart?
I’m including this because as I pulled a test veggie and cheese tart out of the oven, Kevin and I looked at each other and both said “what should we eat this with??” I have some ideas!
- Side dishes like corn on the cob, a big crunchy green salad, or corn black bean & avocado salsa which also serves as a side salad
- Soup such as minestrone soup or even fresh tomato soup
- For some meat: baked chicken meatballs
- A lighter option like baked lemon garlic salmon
- For lunch—a colorful fruit salad
Lots of options, but let me know how YOU enjoy this veggie tart!
See Your Savory Vegetable Cheese Tarts!
Many readers tried this recipe as part of a baking challenge! Feel free to email or share your recipe photos with us on social media. 🙂
This recipe is part of Sally’s Pie Week, an annual tradition where I share a handful of new recipes that fit into the pie/crisp/tart category. Join the community below!
Print
Savory Vegetable Cheese Tart
- Prep Time: 2 hours, 30 minutes
- Cook Time: 45 minutes
- Total Time: 3 hours, 15 minutes
- Yield: serves 8
- Category: Appetizer
- Method: Baking
- Cuisine: American
Description
This savory vegetable cheese tart combines a thick buttery crust, a creamy herbed cheese filling, and a beautiful adornment of crisp roasted veggies! Top with fresh herbs and serve as an appetizer, lunch, side dish, or main course.
Ingredients
- Buttery Flaky Pie Crust or All Butter Pie Crust (my recipes both make 2 crusts; freeze the 2nd half for later use)
- 1 cup ricotta cheese, at room temperature
- 2 large eggs, at room temperature
- 3/4 cup shredded parmesan cheese (or other favorite cheese)
- 2 teaspoons minced garlic
- 1 Tablespoon favorite fresh herbs or 2 teaspoons dried herbs (I use a mix of thyme, rosemary, and parsley)
- 1/2 teaspoon salt
- pinch black pepper
- 1–2 cups thinly sliced vegetables such as sweet potatoes, zucchini, carrots, mushrooms, asparagus, brussels sprouts*
- topping: 2 Tablespoons olive oil, coarse sea salt, more pepper + herbs
Instructions
- The crust: Prepare my pie crust recipe or all butter pie crust through step 5.
- After the pie crust has chilled, preheat the oven to 350°F (177°C).
- Roll out the chilled pie dough and blind bake: On a floured work surface, roll out one of the discs of chilled dough (you can freeze the 2nd for later use, see note). Turn the dough about a quarter turn after every few rolls until you have a circle 12 inches in diameter. Carefully place the dough into a 9-inch tart pan.* Tuck it in with your fingers, making sure it is smooth. Fold the overhang edges back inward. See video above for a visual. Flute the pie crust edges. Chill for 20 minutes in the refrigerator or freezer. (Crust will shrink otherwise!) Line the chilled pie crust with parchment paper or aluminum foil. Fill with 2 sets of pie weights or dried beans. Bake for 15 minutes. Remove tart from the oven and carefully lift the parchment paper/aluminum foil (with the weights) out of the crust.
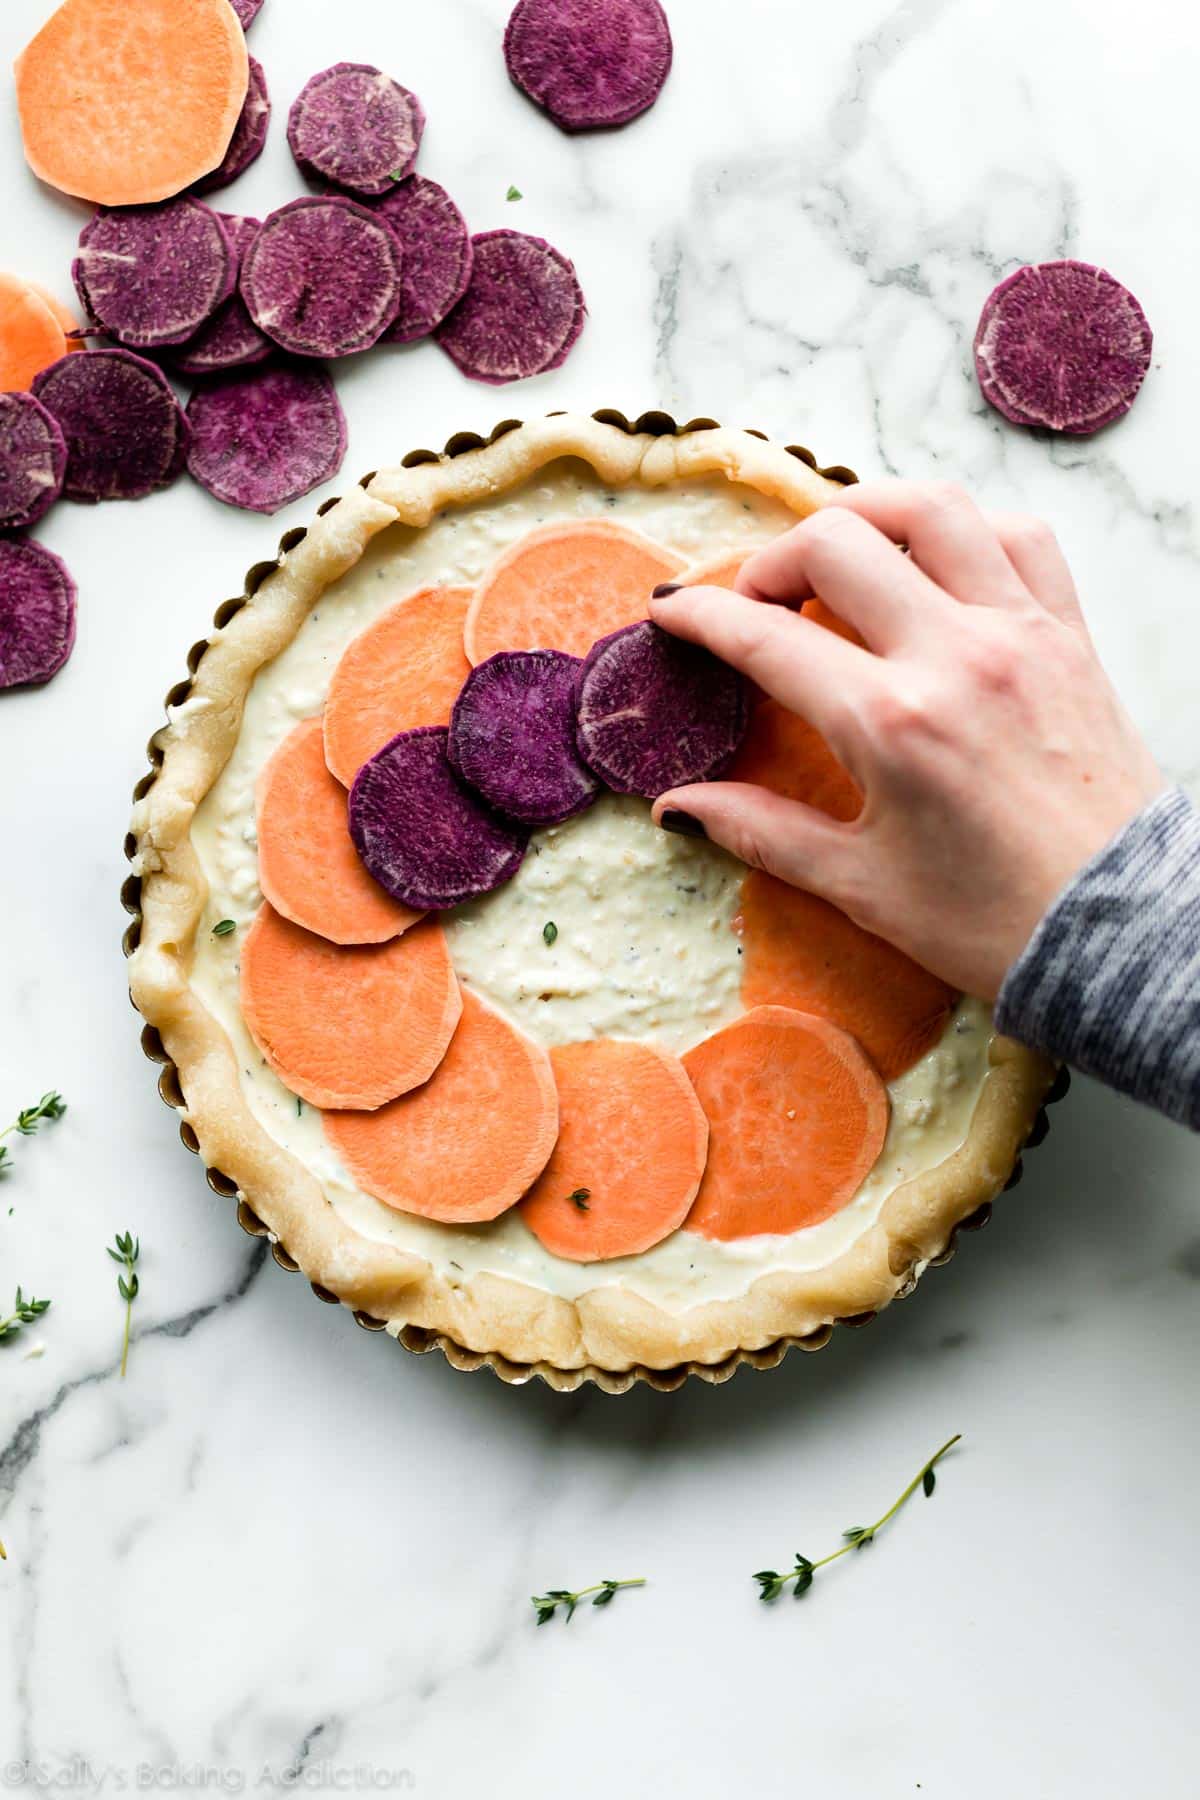
- The filling: Using a handheld or stand mixer fitted with a whisk attachment, beat the ricotta, eggs, parmesan cheese, garlic, herbs, salt, and pepper together until completely combined. Pour into warm crust. Arrange vegetable slices on top. Brush the vegetables and edges of the crust with olive oil, then sprinkle with sea salt, pepper, or more fresh herbs.
- Bake for 30 minutes or until the vegetables and crust are lightly browned and crisp. After the first 15 minutes of bake time, place a pie crust shield on top of the tart to prevent the edges from browning too quickly. You can also tent a piece of aluminum foil over the whole tart if the top is browning too quickly.
- Slice and serve tart warm or at room temperature. Cover and store leftover tart in the refrigerator for up to 1 week.
Notes
- Make Ahead Instructions – 1-5 Days Ahead: You can get started by combining all the filling ingredients one day ahead of time. Keep filling covered tightly in the refrigerator until ready to assemble tart. You can also make the pie dough 1-5 days in advance since it needs to chill. If you want to bake the tart 1 full day in advance, bake it as directed, allow it to completely cool, then cover tightly and keep in the refrigerator overnight. Bring to room temperature before serving.
- Make Ahead Instructions – Freezing: The baked and cooled tart freezes well for up to 3 months, tightly wrapped in a couple layers of plastic wrap or aluminum foil. Thaw overnight in the refrigerator and allow to come to room temperature before serving.
- Special Tools (affiliate links): Rolling Pin | 9-inch Tart Pan | Pie Weights | Electric Mixer (Handheld or Stand) | Pie Crust Shield
- Freezing Pie Dough: You can freeze the 2nd pie dough for up to 3 months. Thaw overnight in the refrigerator before using.
- Pie Dish: A 9-inch pie dish works instead of a tart pan.
- Mini Tarts: Roll out the pie dough as instructed above. Cut the dough into circles and press tightly into the mini tart pan. You’ll want the circles to be about 1 inch larger in diameter to your mini tart pan. Use a round cookie cutter for perfect circles. No need to blind-bake the crust. Pour filling evenly into each crust and bake at 350°F (177°C) until crust edges are lightly brown.
- Different Vegetables: Thinly sliced tomato, zucchini, potatoes, onion, sweet potatoes, and peppers can be arranged on the tart without cooking first. (Though you certainly CAN cook first, read on…) Thinly sliced or chopped brussels sprouts, eggplant, butternut squash, mushrooms, broccoli and any thicker/harder veggies should be softened first: sauté on the stove for a couple minutes in a little olive oil before arranging on the tart. When in doubt, sauté your veggies on the stove first. This step guarantees whichever vegetable you use will be sufficiently cooked on the baked tart.


Reader Comments and Reviews
When I made this yesterday, there was a little bit of liquid/water on top but the cheese/egg mixture seems set just fine. And I actually let it bake for 35 minutes. Serving it today. It looks like the liquid has been reabsorbed. Is this okay? Should I be worried it’s not done?
Hi Ashley, I think it will be fine! It sounds like it was cooked all the way through. Hope you love it!
What could you use instead of ricotta cheese!
Hi Marilyn, we haven’t tested this recipe with any ricotta substitutes. Another soft cheese like cottage cheese, mascarpone, or cream cheese may work, but again, we haven’t tested it to be sure. Let us know if you do any experimenting!
Incredible. This is easy to make and has been a hit at all the gatherings I have brought it to. In addition to tasting great, the potatoes make it lovely, too!
This savory vegetable tart looks amazing and I plan to make for the weekend. My question: Do you peel the sweet potatoes? Thank you for your help.
p.s. I’ve enjoyed all the tips and recipes.
Hi Pat, we do peel the sweet potatoes, but either way would be just fine. Hope you enjoy the tart!
So yummy!
Hi Sally this sounds amazing! I am going to try it with zucchini and eggplant for a dinner I am hosting. Just one question… you mentioned that eggplant should be cooked first, but will it get too soggy?
Thank you!
Stephanie
Hi Stephanie! We haven’t found it to get too soggy at all. Without cooking it first, you run the risk of it not being sufficiently cooked on top of the tart. Let us know how it turns out for you!
I made this yesterday evening (6/23/20) and it was a big hit! I LOVED IT TOO!!! I had a Pillsbury pie crust in my fridge that needed to be used so I put it in a glass pie pan as I lack a tart pan in my small kitchen and pre-baked it according to directions. This was easy to make. I used eggplant and sweet potato thinly sliced and slightly sauteed for the toppings then added some sliced tomato. All was good but in future I will use more tomato as I like that flavor the best. I love the muffin tin or small individual size pies idea someone else posted and I also agree with someone’s post that there could be more veggies. I will definitely make this again! I had so much left over eggplant, (I only bought one) and sweet potato I roasted the cubed left overs and made a chickpea curry.
We treat this recipe like a quiche! Last night we mixed in chicken sausage and broccoli. It’s a serious favorite!
This recipe was delicious! 2 quick questions: you mention 2 different crusts. Which one do you prefer with this recipe? Also, what is the purple vegetable you used in the picture? Purple potato? Thank you! I will be making several of these for Thanksgiving.
Hi Tanyia! Yes, that’s a purple potato. I used the all butter pie crust in this pictured tart. Either crust works.
Made this topped with sweet potato and red onion for lunch with a regular ol’ garden salad with chopped up leftover chicken on the side. So pretty. I think next time I’ll saute the sweet potato & onions first so that I can cut them thicker and still have them cook through. I felt like there needed to be a higher veggie-to-cheese filling ratio, but my family (and visiting friend) had no complaints!! Maybe pre-cooking will also help the veggies to slice more neatly. I will definitely make this the next time I host book group. Thank you for the recipe.
Sally,
What would you think of using Italian sausage?
I think it would be delicious!
This looks wonderful. Can I prepare ahead and freeze for a brunch? I feel so how would I reheat? Thanks!
Sure can! See my freezing instructions.
Thank you for the recipe! I finally took the leap and posted about it! My filling was sweet potato and ricotta with parsley, rosemary and thyme!
Added chopped, raw broccoli and gourmet cheddar and it is absolutely delicious! Thank you for this amazing, flexible recipe.
Hi Sally,
Can you reheat the tart after it has been in the fridge? If so, how would you?
Hi Amy! 300F oven for a few minutes does the trick! For individual slices, 30 seconds in the microwave.
just made and it smells great! I used only sweet potatoes and sliced very thin. cook time was closer to an hour until potatoes were cooked.
that said. it was SO DELICIOUS.
Hi Sally! I’m making this for Thanksgiving with butternut squash and caramelized onions, and I was wondering about the squash – could I roast the slices instead of sauteing? I’m trying to think of the easiest way to soften them and sauteing slices seems like it would be kind of a hassle. Also, how thin do you suggest? Butternut squash can be a little hard to slice so I’m afraid I won’t make them thin enough!
Yes, roasting butternut squash gives it a wonderful flavor! If you can’t slice it thin enough you can cut it into small cubes instead!
I made this tonight with mixed results. The filling was delish – I sauteed some asparagus & arranged them on top – but my pie crust was a bust. In fairness, I haven’t made crust from scratch in more than a decade, and I definitely took a few shortcuts (I know, I was warned). I wish I’d read all the comments beforehand too. I used part skim ricotta which may explain why I had a soggy bottom rust. I’ll be sure to drain it next time. I have the second half of my crust in the freezer, so I’ll be properly chilled and rested before the next attempt. Oh, and I learned it’s best to slice the asparagus before adding to the pie. Very difficult to slice without making it look a mess!
Made this for dinner last night. Huge hit. So yummy. Making another today and freezing for Thanksgiving. Thank you so much for this recipe.
Sally you are the best.
Hi Sally
What other cheeses would be good instead of Parmesan cheese?
Can’t wait to try this!
I’m thinking cheddar, mozzarella, gouda, feta, or pepperjack for something spicy!
How thinly would you recommend cutting the vegetables (specifically carrots)?
Hi Adrienne! About 1/8th inch.
Absolutely!
Hi Katie! Cutting both the onion and pepper into thin rings would be really pretty! Other than that, it’s hard to get very creative with those other than just piling them on top!
Hi Christina! Great question. Yes if using part skim, I recommend draining some of the moisture out.
Awesome. Thanks so much! Will be trying it this weekend, hopefully!!