

You only need 7 ingredients to make these dinner rolls. Flaky, soft, and buttery, these fresh dinner rolls outshine any main dish. If you’re a bread beginner, read this blog post to learn more about the yeast rolls recipe, including how to prep the rolls ahead of time. You can also reference my Baking with Yeast Guide for answers to common yeast FAQs.
This recipe is brought to you in partnership with Red Star Yeast.
- Do you long to bake homemade bread but are too intimidated to start?
- Does yeast dough send you running for the hills?
- Do bread recipes seem overly complicated and confusing?
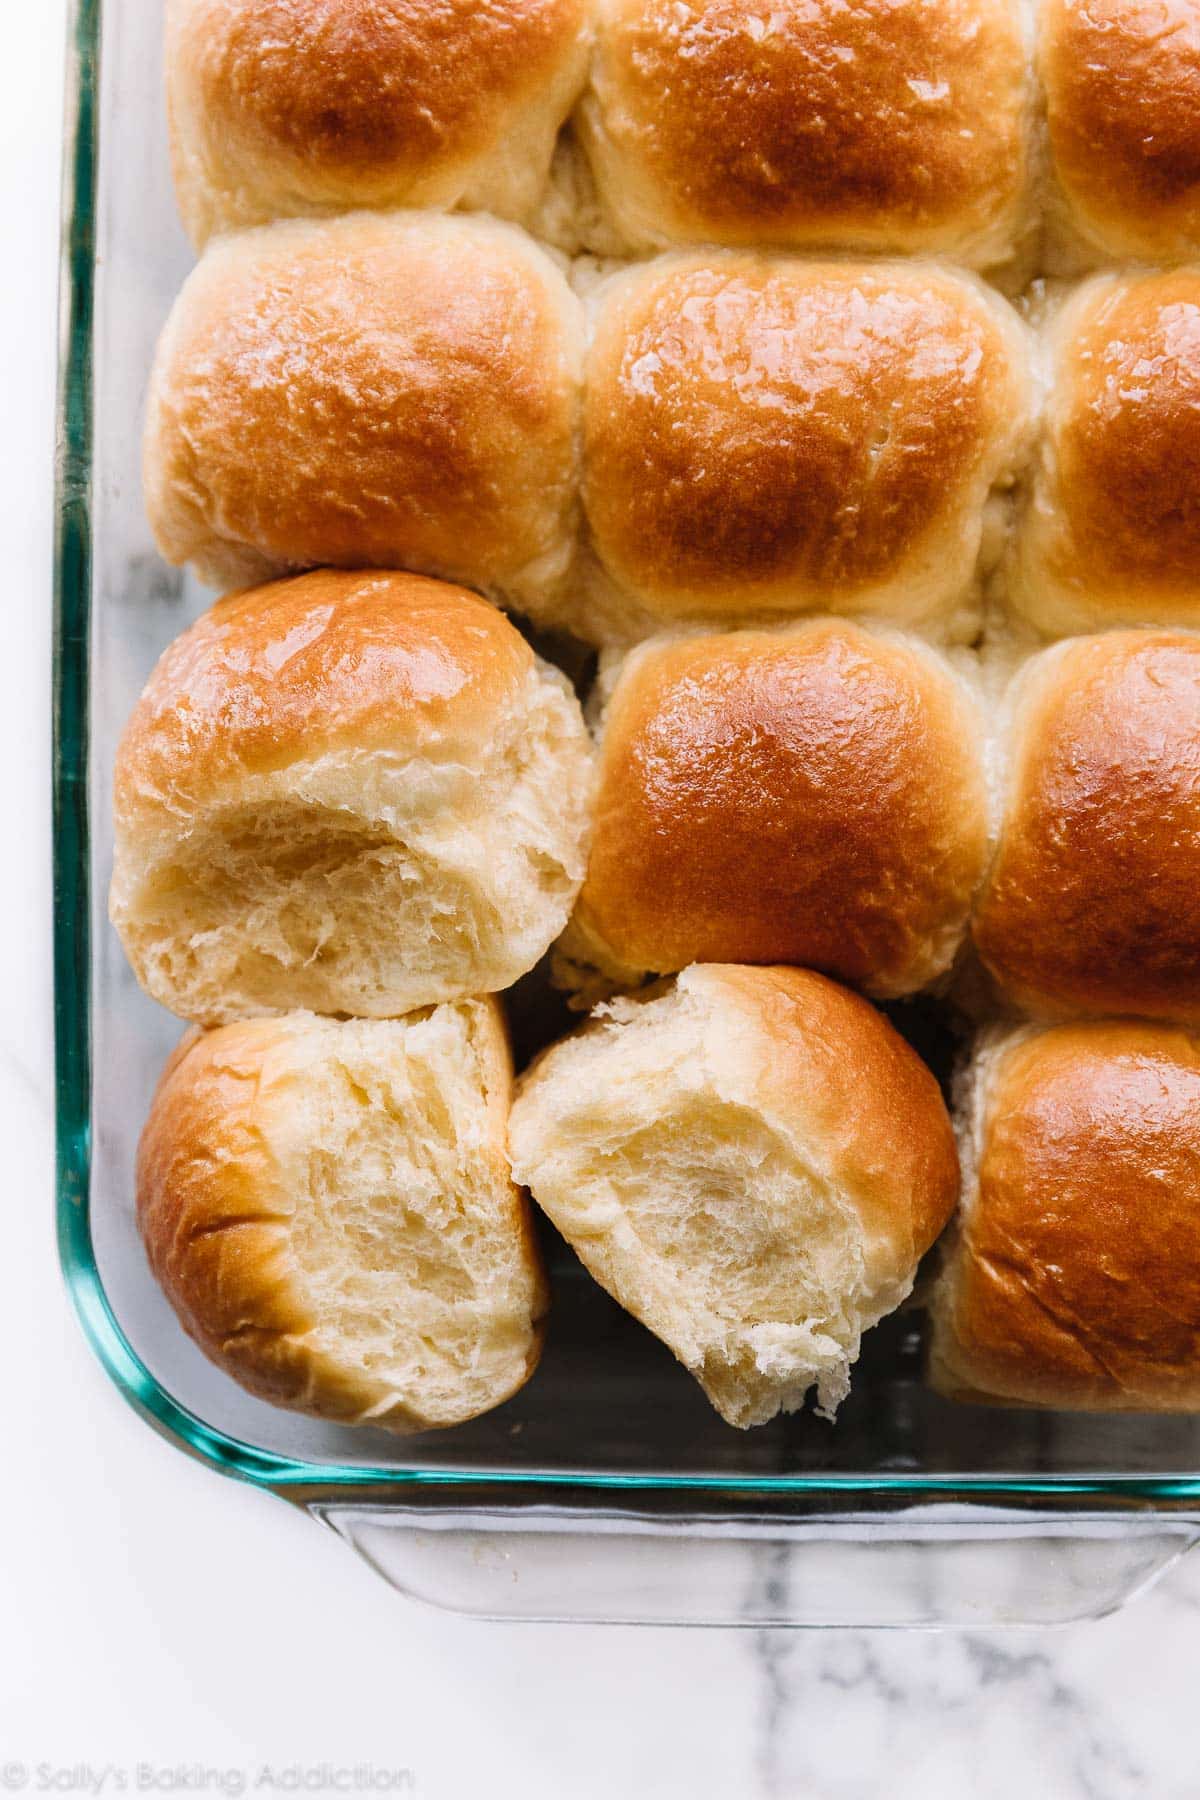
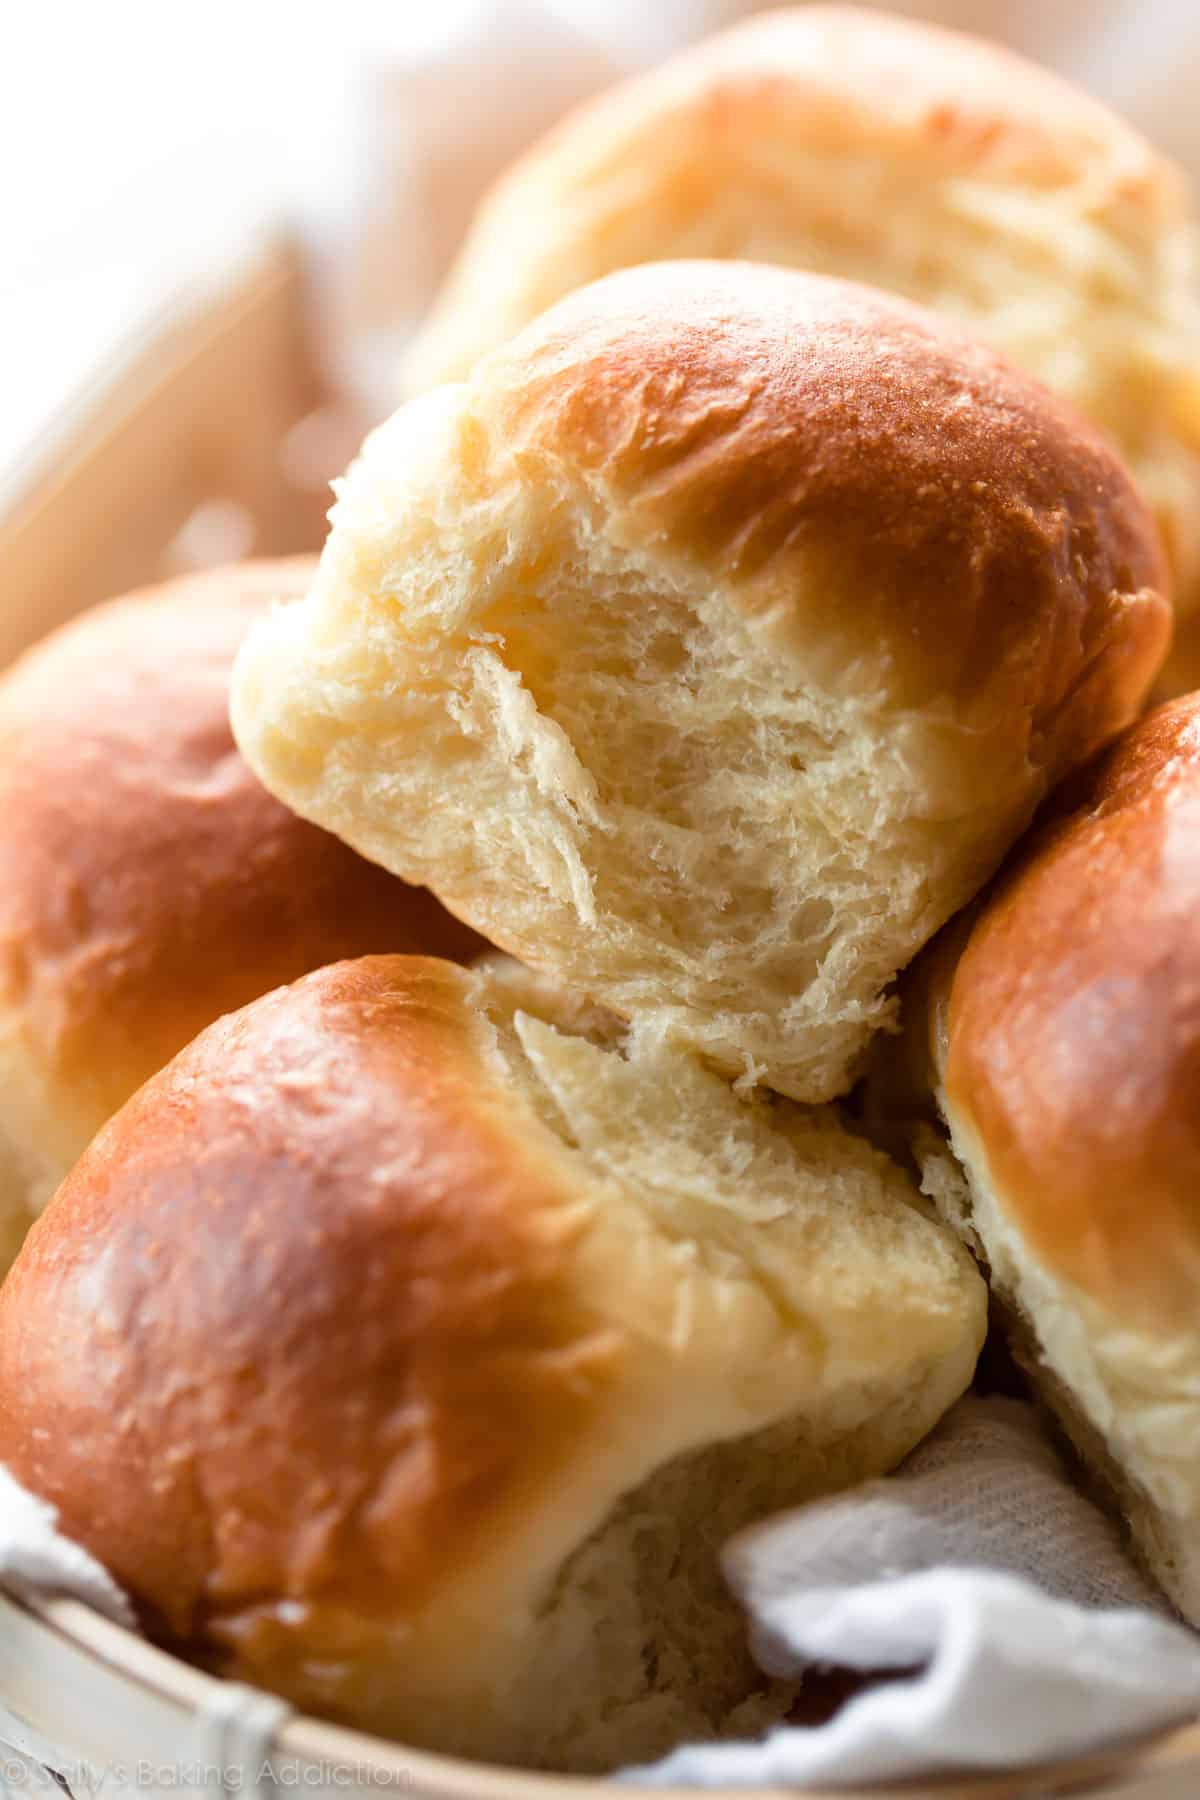
I’m teaching you how to make homemade dinner rolls. These are the best homemade dinner rolls I’ve ever had and it all starts with a straightforward 7-ingredient dough. I make these rolls whenever I get the chance and even brought a pan to our friends who just welcomed a baby. They’re pillow-soft with the most delicious flaky and buttery texture. Everyone will demand you bake them on repeat.
And with this recipe, I guarantee you will finally feel confident baking bread. 🙂
This recipe is such a fan favorite, that it deserved a spot in print! You’ll also find this recipe in my cookbook, Sally’s Baking 101.
Video Tutorial: Dinner Rolls
Let’s start with a video tutorial.
Overview: How to Make Homemade Dinner Rolls
- Make the dough. Continue below to learn more about this dough recipe.
- Knead the dough. Reference my How to Knead Dough video tutorial if you need extra help with this step.
- Cover the dough and let it rise. The dough rises in about 1-2 hours in a relatively warm environment.
- Punch down the dough to release the air and shape into rolls.
- Let the rolls rise for about 1 hour.
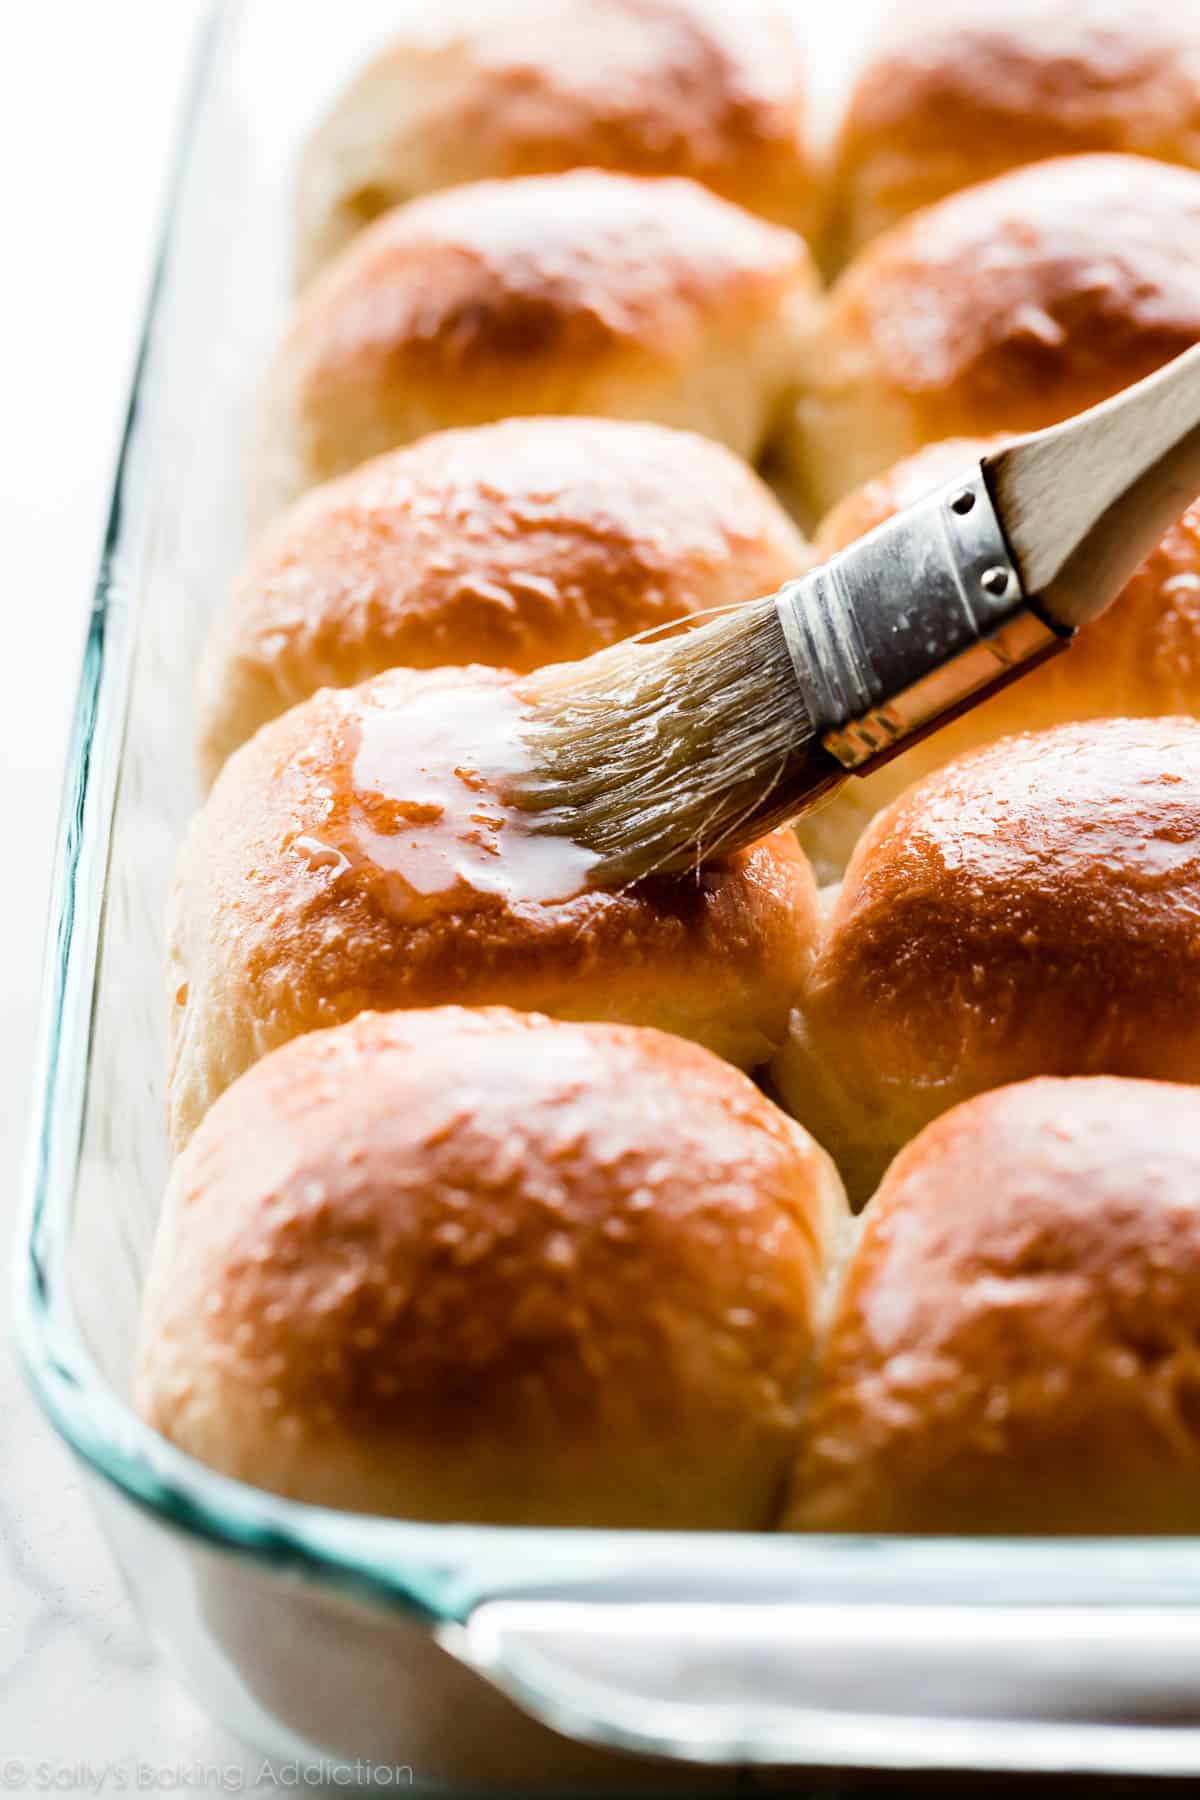
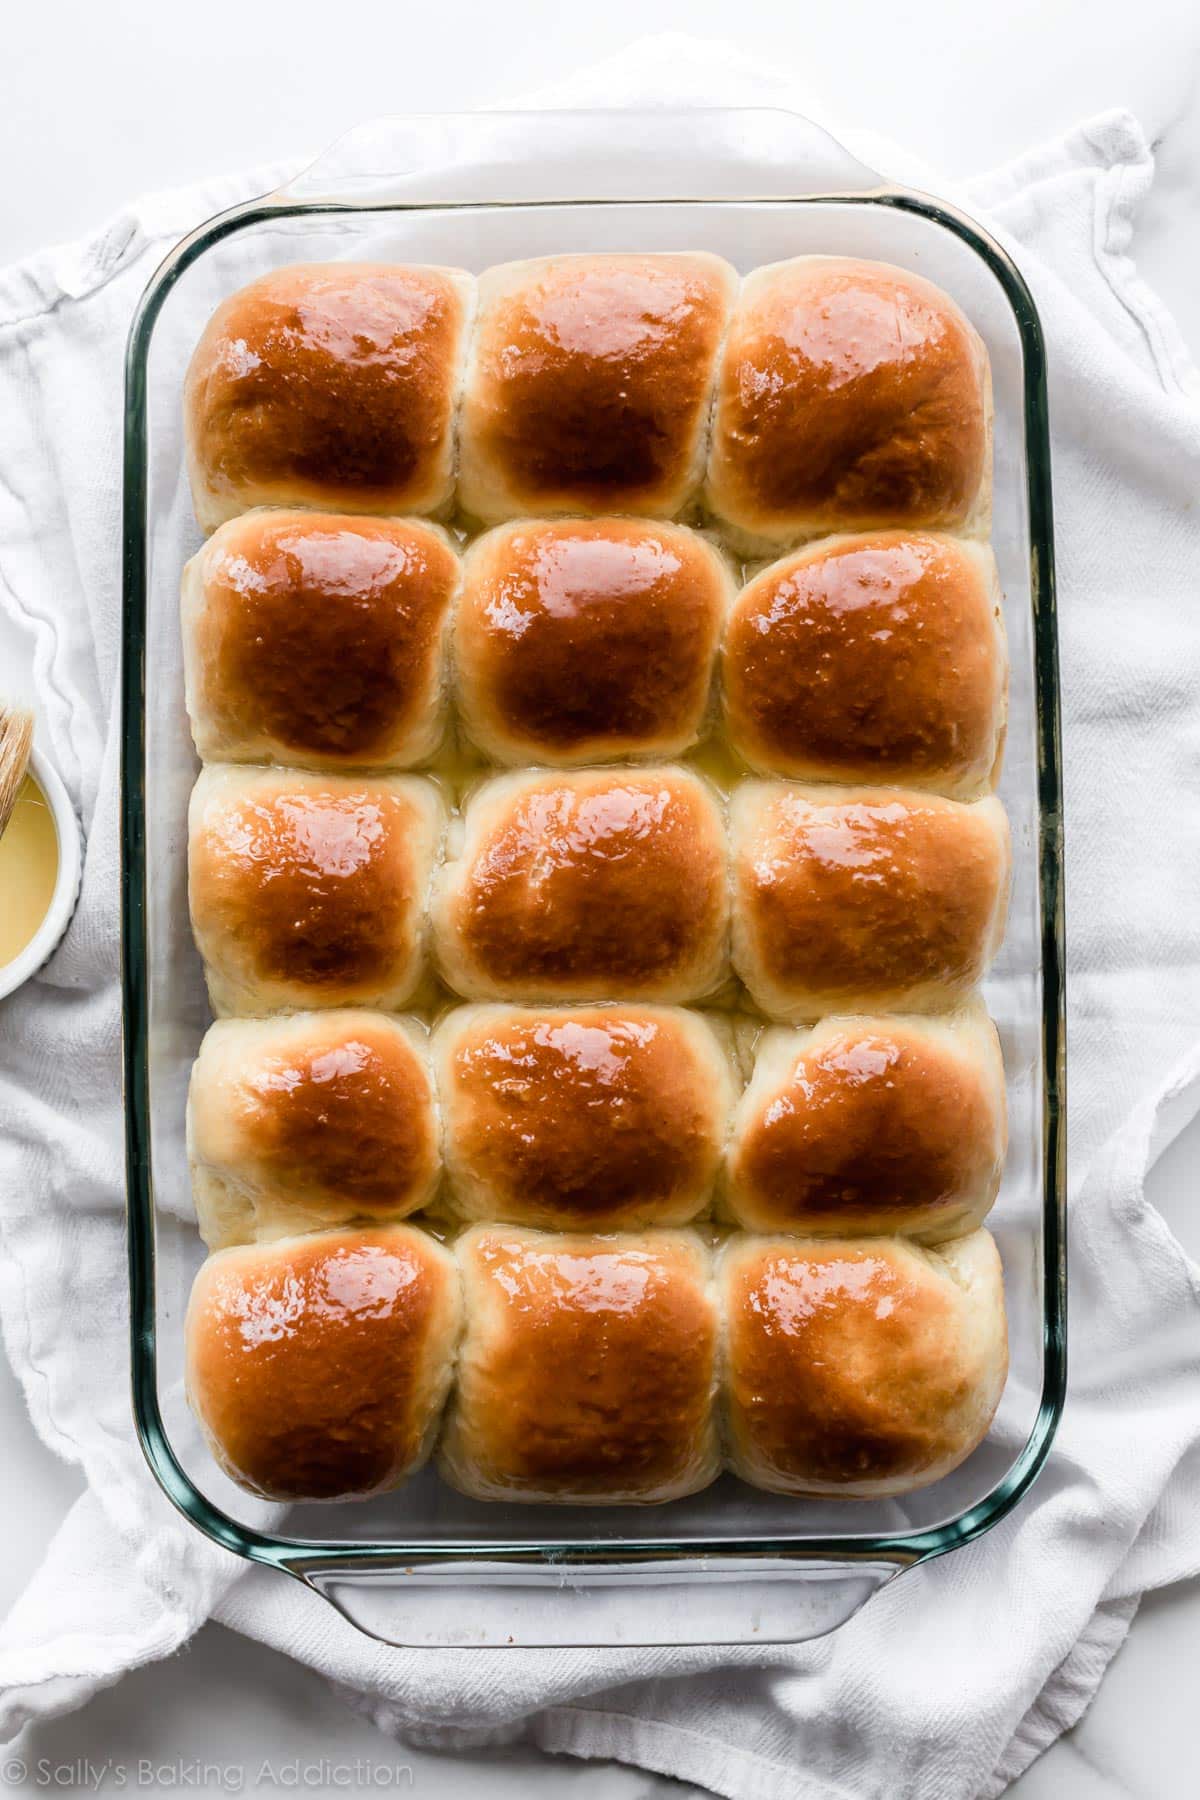
- Bake for 20-25 minutes until golden brown. If desired, brush the warm rolls with a little honey and melted butter for extra flavor.
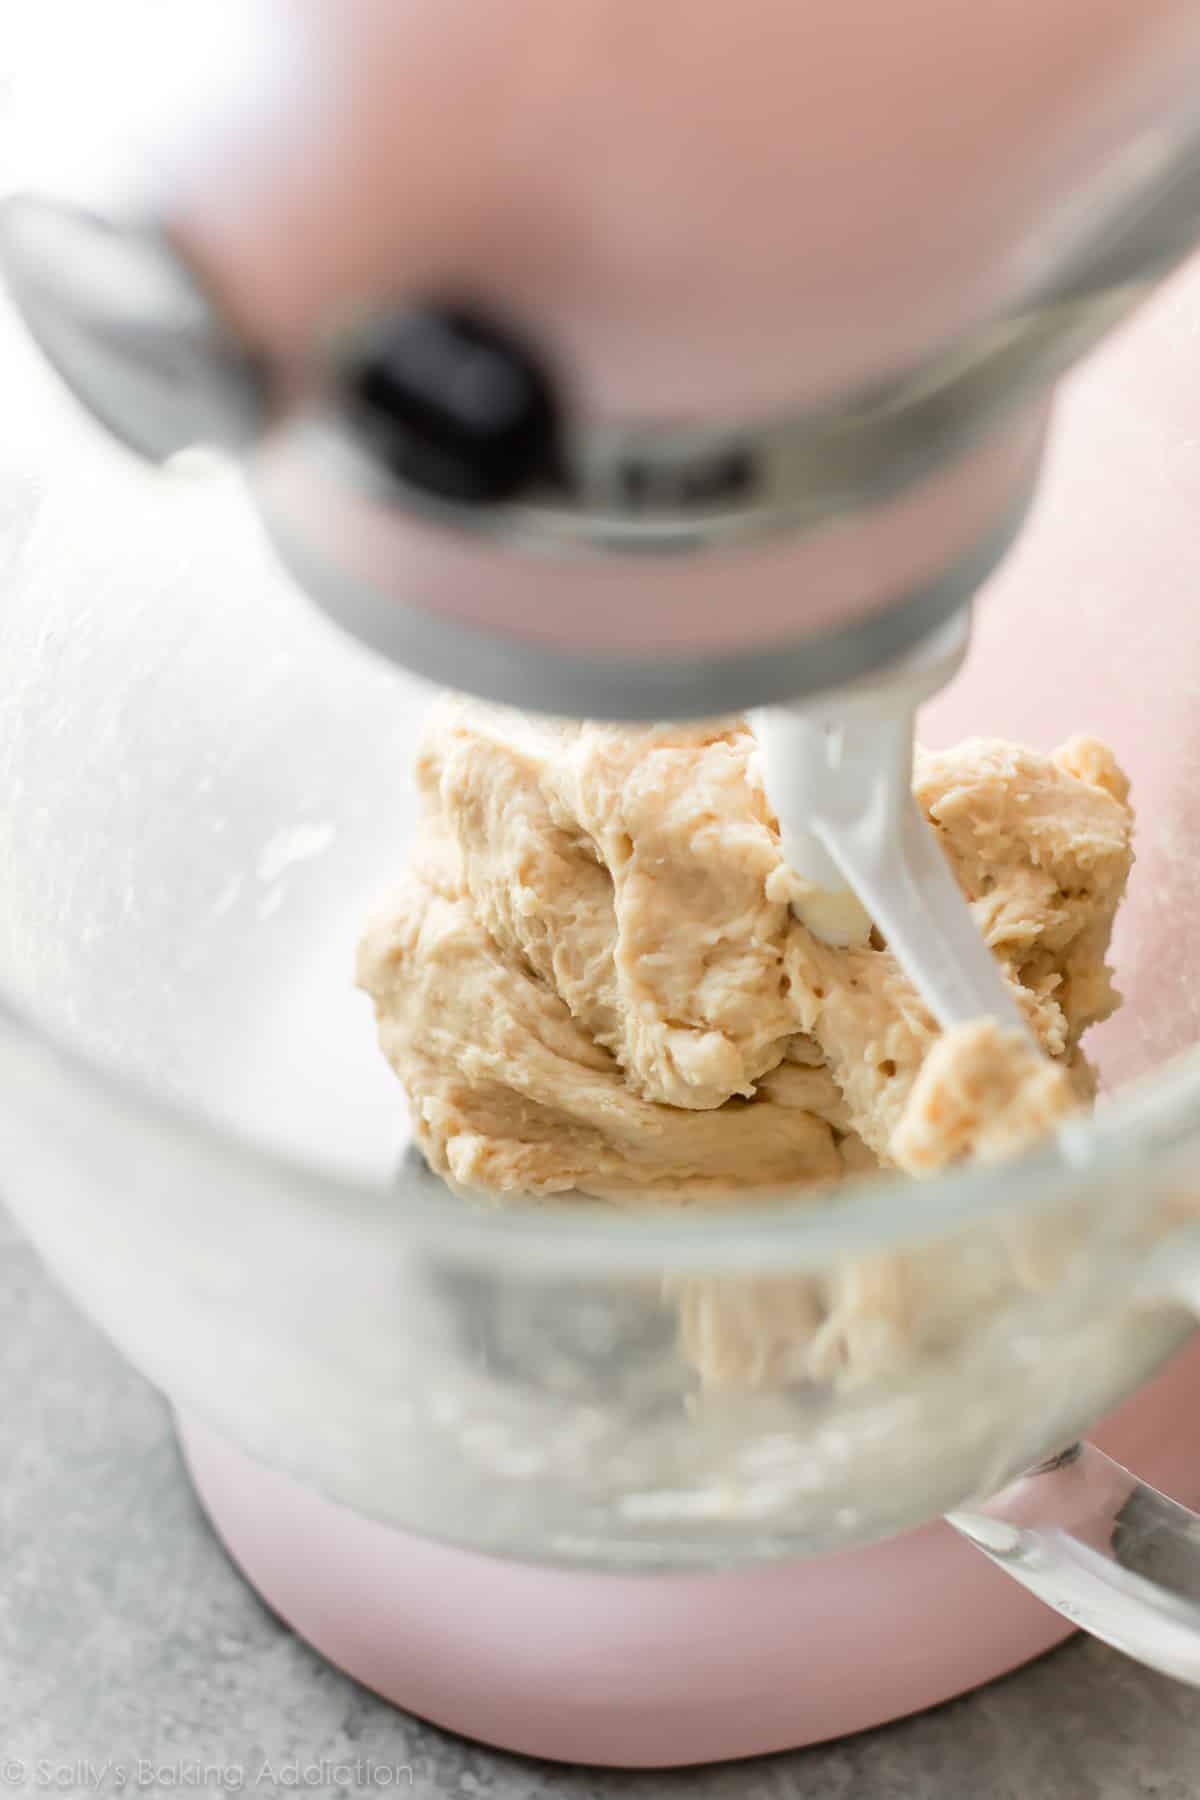
As shown in the video tutorial, the dough comes together with a mixer. You can use a paddle attachment or a dough hook. You can also make the dough by hand, but it requires a bit of arm muscle. After the dough comes together in the mixing bowl, it’s time to knead. You can simply continue beating the dough with the mixer for this step or you can knead the dough by hand. I chose to knead the dough by hand so you can see me doing it in the video above.
If you’re new to bread making, my How to Knead Dough post and video can help even more with this step. And my Baking with Yeast Guide is a wonderful resource for all bread beginners!
Soft Dinner Rolls Require a Rich Dough
The crustier and chewier the bread, the less fat in the dough. This is known as a lean dough. The softer and richer the bread, the more fat in the dough. This is known as a rich dough. Unlike chewy homemade bagels, focaccia, ciabatta, and my artisan bread, soft dinner rolls require a rich dough. Unfortunately, this doesn’t mean that the dough is swimming in cash. Rather, “rich” correlates with the amount of fat. For example, this dough has milk, butter, and egg.
You need 7 ingredients total. They’re the same ingredients in my easy cinnamon rolls and homemade brioche, which are also rich doughs. (Though I use more sugar for sweeter cinnamon rolls, of course.)
- Milk: Liquid activates the yeast. For the softest dinner rolls, use whole milk. Nondairy or low fat milks work too, but whole milk produces phenomenal flavor and texture.
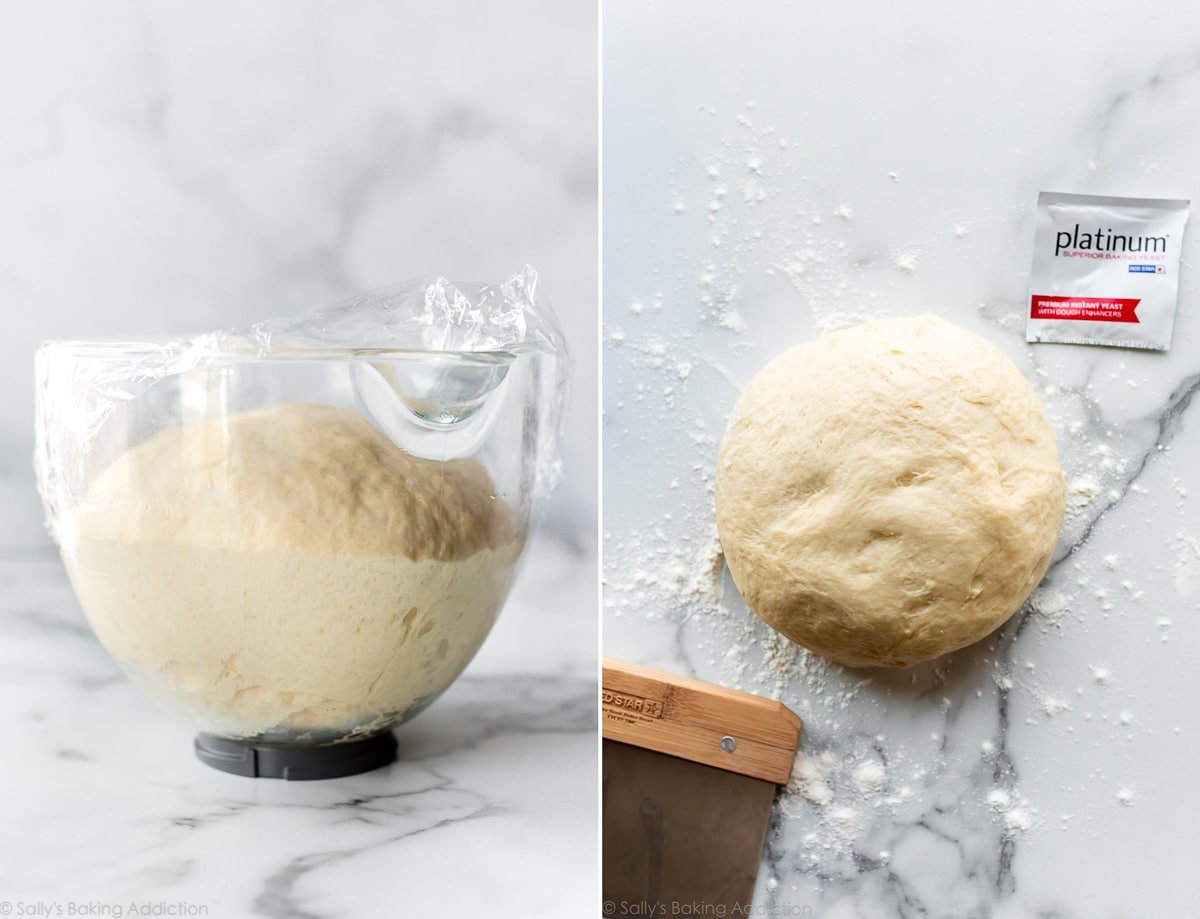
- Yeast: You can use active dry yeast or instant yeast. If using active dry yeast, the rise times will be a little longer. I recommend Platinum Yeast from Red Star, which is an instant yeast blended with natural dough improvers.
- Sugar: Sugar feeds the yeast, increases its activity, and tenderizes the dough.
- Egg: 1 egg provides structure and flavor.
- Butter: Butter promises a flavorful and soft dinner roll. Make sure it’s room temperature.
- Salt: You can’t make flavorful bread without salt!
- Flour: You can use all-purpose flour or bread flour in this recipe. All-purpose flour is convenient for most, but bread flour produces chewier dinner rolls. There are no other changes to the recipe if you use bread flour.
Once you make the dough, let it rise:
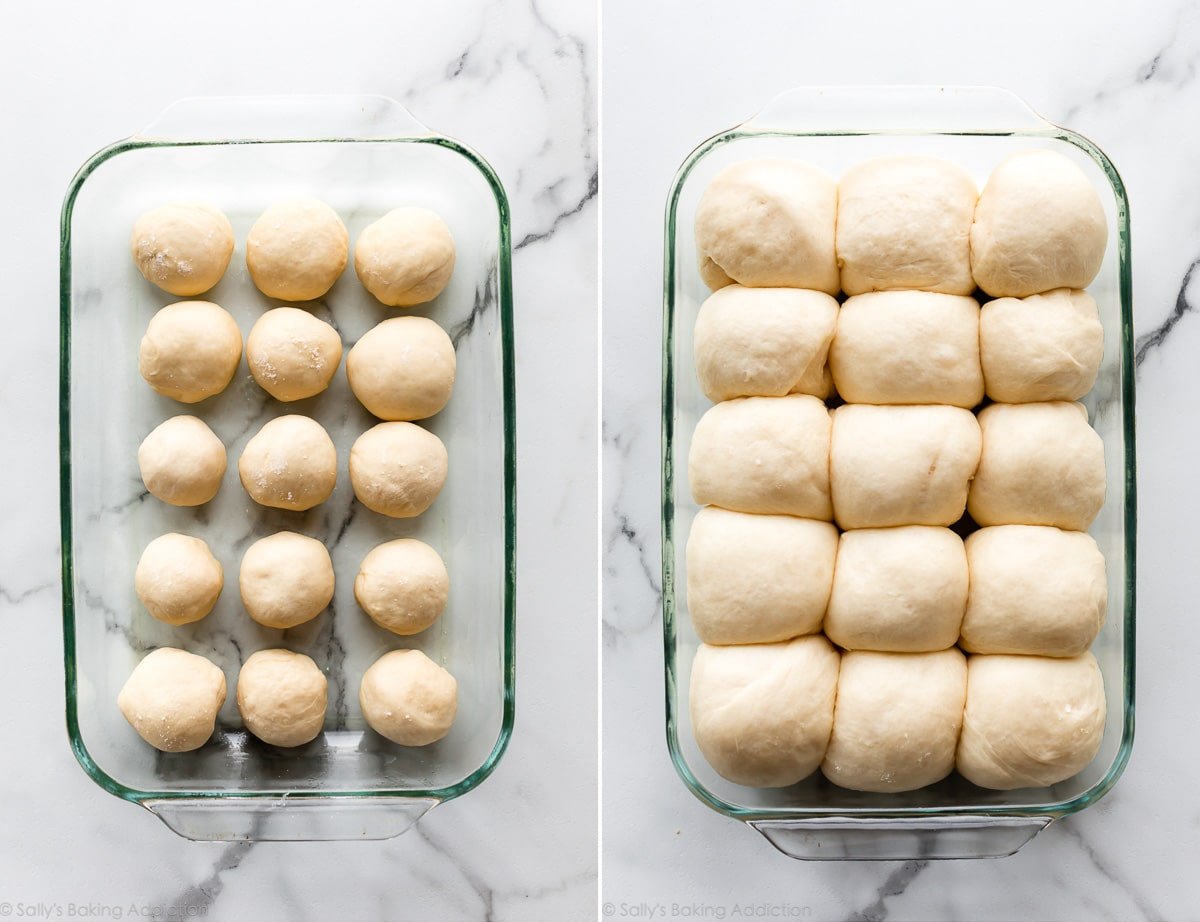
After that, punch down the risen dough. Shape into balls and arrange in a baking pan. Don’t worry if they’re not all uniform in size.
Let the shaped rolls rise before baking. Look how puffy they get after 1 hour of rising:
How to Shape Dinner Rolls
You can shape this dough many different ways including twisted rolls, knotted rolls (how I shape garlic knots), cloverleaf rolls, or even hot dog buns. Let’s stick with the basic round shape. Divide the dough into 14-16 pieces. Take a piece and stretch the top of the dough while pinching and sealing the bottom. Make sure the rolls are smooth on top and sealed on the bottom. I shape hot cross buns the same exact way.
How to Make Yeast Rolls Ahead of Time
The rolls require around 3 hours of rising. Not everyone has 3 hours to spare, so let’s discuss another option! Prepare the dough, let it rise, and shape the rolls. Cover the shaped rolls tightly and refrigerate for up to about 16 hours. At least 3 hours before you need them the next day, remove the rolls from the refrigerator and allow to rise on the counter for about 1-2 hours before baking.
And here’s how to freeze dinner rolls: Follow the make-ahead instructions and instead of refrigerating overnight, freeze the rolls in a baking pan. Once frozen, they won’t stick together anymore and you can place them in a freezer bag. Let them thaw and rise for about 4-5 hours, then bake. You can also freeze the baked dinner rolls. Therefore, if you want a smaller batch, you can make the entire recipe and bake only a few fresh rolls at a time.
These make-ahead options are especially helpful if you want fresh-baked rolls for Easter brunch, Thanksgiving dinner, or on Christmas.
Dinner Roll Flavors
How about some pizazz? Mix in these ingredients when you add the flour.
- Rosemary Dinner Rolls – 2 Tablespoons fresh or dried chopped rosemary.
- Cheddar Dinner Rolls – 1 cup shredded cheddar cheese. Other cheese varieties work, but avoid super soft cheeses.
- Garlic & Herb Dinner Rolls – 2 teaspoons each: dried rosemary, dried basil, & dried parsley, along with 1 teaspoon garlic powder.
- Whole Wheat Dinner Rolls
- Brown Butter Sage Dinner Rolls
- Honey Butter Rolls
- Sweet Potato Dinner Rolls
- Oatmeal Molasses Dinner Rolls
- Multigrain Rolls – Here is my Multigrain Bread recipe that you can turn into rolls.
They’re also fantastic with a simple swipe of homemade honey butter or homemade cinnamon butter.
This dough is not ideal for a big loaf of bread. Instead, I recommend using a leaner dough, such as my sandwich bread or whole wheat bread recipes. If you need an egg free dough, try homemade breadsticks instead. And if you love pizza, try these pizza pull apart rolls next!
3 Success Tips
- Reference my Baking with Yeast Guide, which answers many common yeast FAQs.
- Make sure your yeast isn’t expired. Expiration date is on the package.
- Directly from the pros at Red StarYeast: Measuring flour correctly is key to avoiding a dense dough, which leads to heavy (not soft!) rolls. Spoon and level your flour, do not scoop it out of the package.
My final piece of advice? Don’t limit these rolls to suppertime. They’re welcome anywhere, with any meal, any time of day. Use for sliders, breakfast sandwiches, soaking up your favorite tomato sauce with slow cooker turkey meatballs, alongside salad, or dunking into a bowl of creamy chicken noodle soup. Above all, don’t doubt yourself because you, too, can become a bread baking pro.
Soft Dinner Rolls Recipe
- Prep Time: 3 hours, 25 minutes
- Cook Time: 22 minutes
- Total Time: 3 hours, 45 minutes
- Yield: 14-16 rolls
- Category: Dinner
- Method: Baking
- Cuisine: American
Description
You only need 7 ingredients to make these dinner rolls. Flaky, soft, and buttery, these fresh dinner rolls outshine any main dish. See recipe notes for freezing and overnight instructions. You can also reference my Baking with Yeast Guide for answers to common yeast FAQs. This recipe is also in my cookbook, Sally’s Baking 101.
Ingredients
- 1 cup (240ml) whole milk, warmed to about 110°F (43°C)
- 2 and 1/4 teaspoons Platinum Yeast from Red Star instant yeast (1 standard packet)
- 2 Tablespoons granulated sugar, divided
- 1 large egg
- 1/4 cup (4 Tbsp; 56g) unsalted butter, softened to room temperature and cut into 4 pieces
- 1 teaspoon salt
- 3 cups (390g) all-purpose flour or bread flour* (spooned & leveled)
- optional topping: 2 Tablespoons (28g) melted unsalted butter mixed with 1 Tablespoon honey
Instructions
- Prepare the dough: Whisk the warm milk, yeast, and 1 Tablespoon of sugar together in the bowl of your stand mixer. Cover and allow to sit for 5 minutes. *If you do not own a stand mixer, you can do this in a large mixing bowl and in the next step, mix the dough together with a large wooden spoon/silicone spatula. It will take a bit of arm muscle. A hand mixer works, but the sticky dough repeatedly gets stuck in the beaters. Mixing by hand with a wooden spoon or silicone spatula is a better choice.*
- Add the remaining sugar, egg, butter, salt, and 1 cup flour. With a dough hook or paddle attachment, mix/beat on low speed for 30 seconds, scrape down the sides of the bowl with a silicone spatula, then add the remaining flour. Beat on medium speed until the dough comes together and pulls away from the sides of the bowl, about 2 minutes. If the dough seems too wet to a point where kneading (next step) would be impossible, beat in more flour 1 Tablespoon at a time until you have a workable dough, similar to the photos above. Dough should be soft and a little sticky, but still manageable to knead with lightly floured hands.
- Knead the dough: Keep the dough in the mixer and beat for an additional 5 full minutes, or knead by hand on a lightly floured surface for 5 full minutes. (If you’re new to bread-baking, my How to Knead Dough video tutorial can help here.) If the dough becomes too sticky during the kneading process, sprinkle 1 teaspoon of flour at a time on the dough or on the work surface/in the bowl to make a soft, slightly tacky dough. Do not add more flour than you need because you do not want a dry dough. After kneading, the dough should still feel a little soft. Poke it with your finger—if it slowly bounces back, your dough is ready to rise. You can also do a “windowpane test” to see if your dough has been kneaded long enough: tear off a small (roughly golfball-size) piece of dough and gently stretch it out until it’s thin enough for light to pass through it. Hold it up to a window or light. Does light pass through the stretched dough without the dough tearing first? If so, your dough has been kneaded long enough and is ready to rise. If not, keep kneading until it passes the windowpane test.
- 1st Rise: Lightly grease a large bowl with oil or nonstick spray. Place the dough in the bowl, turning it to coat all sides in the oil. Cover the bowl with aluminum foil, plastic wrap, or a clean kitchen towel. Allow the dough to rise in a relatively warm environment for 1-2 hours or until double in size. (I always let it rise on the counter. Takes about 2 hours. For a tiny reduction in rise time, see my answer to Where Should Dough Rise? in my Baking with Yeast Guide.)
- Grease a 9×13 inch baking pan or two 9-inch square or round baking pans. You can also bake the rolls in a cast iron skillet or on a lined baking sheet.*
- Shape the rolls: When the dough is ready, punch it down to release the air. Divide the dough into 14-16 equal pieces. (Just eyeball it– doesn’t need to be perfect!) A bench scraper is always helpful for cutting dough. Shape each piece into a smooth ball. Arrange in prepared baking pan.
- 2nd Rise: Cover shaped rolls with aluminum foil, plastic wrap, or a clean kitchen towel. Allow to rise until puffy, about 1 hour.
- Adjust oven rack to a lower position and preheat oven to 350°F (177°C). (It’s best to bake the rolls towards the bottom of the oven so the tops don’t burn.)
- Bake the rolls: Bake for 20-25 minutes or until golden brown on top, rotating the pan halfway through. If you notice the tops browning too quickly, loosely tent the pan with aluminum foil. Remove from the oven, brush with optional honey butter topping, and allow rolls to cool for a few minutes before serving.
- Cover leftover rolls tightly and store at room temperature for 2-3 days or in the refrigerator for up to 1 week.
Notes
- Freezing Instructions: Prepare recipe through step 6. Place shaped rolls in a greased baking pan, cover tightly, and freeze for up to 3 months. Once frozen, the dough balls won’t stick together anymore and you can place them in a freezer bag if needed. On the day you serve them, arrange the dough balls in a greased baking pan, cover tightly, then let them thaw and rise at room temperature for about 4-5 hours. Bake as directed. You can also freeze the baked dinner rolls. Allow them to cool completely, then freeze for up to 3 months. Thaw in the refrigerator or at room temperature, then reheat as desired. If reheating the whole pan, lightly cover and reheat in a 300°F (149°C) oven for about 10 minutes or until warm.
- Overnight Instructions: Prepare the recipe through step 6. Cover the shaped rolls tightly and refrigerate for up to about 15 hours. At least 3 hours before you need them the next day, remove the rolls from the refrigerator, keep covered, and allow to rise on the counter for about 1-2 hours before baking. Alternatively, you can let the dough have its 1st rise in the refrigerator overnight. Cover the dough tightly and place in the refrigerator for up to about 15 hours. Remove from the refrigerator and allow the dough to fully rise for 2 more hours. Continue with step 5.
- Special Tools (affiliate links): Electric Stand Mixer or Glass Mixing Bowl and Wooden Spoon / Spatula | 9×13-inch Glass Baking Pan | Bench Scraper | Pastry Brush
- Baking Pan: I prefer baking the rolls in a glass 9×13 inch baking pan because I find they brown a little too quickly in metal. As long as you bake the rolls on a lower oven rack and keep your eye on them, any pan is great.
- Yeast: Platinum Yeast from Red Star is an instant yeast. You can use Red Star Yeast active dry yeast instead. Rise times will be slightly longer using active dry yeast. Reference my Baking with Yeast Guide for answers to common yeast FAQs.
- Flour: You can use all-purpose flour or bread flour. All-purpose flour is convenient for most, but bread flour produces chewier dinner rolls. The rolls are still soft and fluffy no matter which you use. Either flour is fine and there are no other changes to the recipe if you use one or the other.
Adapted from Homemade Bread Bowls and Honey Butter Rolls


Reader Comments and Reviews
I had never made rolls before. I’m a novice bread baker. I tried this recipe and they came out PERFECT!!! SO soft, flaky and tasty!!! Thank you for sharing!
Lori
Why do recipes call for unsalted butter, then add salt as an ingredient? Can’t you just use regular butter, then less salt?
Thank you for ALL these recipes!!
Hi Judy! When you use unsalted butter you know exactly how much salt you’re adding to a recipe. Salted butter salt content can vary. You can read more about using unsalted vs. salted butter in baking in this post!
Tried these for the first time for a Canadian thanksgiving.
They are the best dinner rolls I’ve ever made!
I added cheese and flax seeds for fluffy rolls tonight.
Made these for thanksgiving and they were a hit. The buns came out very soft and fluffy. Everyone loved them!
I had never baked buns before, but these were easy and delicious. I would brush them with only melted butter next time, and leave out the honey.
These were SO delicious and so easy!
I made this recipe for the first time and nailed it! They tasted amazing and had an incredible rise!
That being said, I only realised the next day that I’d forgotten to add the egg lol. I can’t imagine the dough with an egg in it though and can imagine it would make the consistency more batter like. I will definitely make them again but will keep missing out the egg – a happy accident!
These are so good. Next time I will use less sugar but definitely winners
You mention baking rolls in the lower section of your oven. I have a gas oven and the lower section is where the heat generates so its hotter. The oven also has a convection setting. Given this info, do you still recommend baking in the lowest rack? and Would you use the Convection Setting for a more overall heat?
Hi Emily, in that case, we’d bake the rolls more towards the middle of your oven so that the bottoms don’t burn. We always recommend conventional settings for baking (not convection/fan). The flow of air from convection heat can cause baked goods to rise and bake unevenly and it also pulls moisture out of the oven. If you do use convection/fan settings for baking, lower your temperature by 25 degrees F and keep in mind that things may still take less time to bake. Hope you enjoy the dinner rolls!
Not sure what happened- I had a fantastic first rise and decent second rise but they came out so pale and flavorless. More like a soft biscuit. Not sure what I did wrong!
Hi Rebecca, Rolls can turn out biscuit-y if there is too much flour in the dough. How did you measure the flour? Make sure to spoon and level (instead of scooping) to avoid packing in too much flour into your measuring cups – or use a kitchen scale. You can read more about properly measuring baking ingredients in this post.
What do I do if I forgot to warm my milk?
Hi Gracie, we would start again! You want warm milk to activate the yeast.
Can you do this with the dough setting on a breadmaker?
Hi Charles, you could absolutely try a bread maker for this recipe – some readers have and reported back success!
These were so easy to put together, incredibly fluffy and beautiful out of the oven. I used bread flour. Unfortunately, they tasted a little too “yeast-y”. Is that what they’re supposed to taste like or could I have done something wrong? I’d love to make them again, I was just too sensitive to that sour taste. Thank you.
In the top portion, it says you knead the dough. But in the step-by-step instructions and in the video, I didn’t see ‘kneading’. Do you knead the dough for the soft dinner rolls? I just wanted to know for sure before I try!
Hi Mindy, yes, step 3 is the step where you’ll knead the dough.
This recipe was so easy to make and they turned out amazing!!!!
I have been baking for years, this recipe is the easiest ever. Family really loves them. Thank you
Is bread flour not 120g per cup??? I saw it says 390 grams but I’ve always thought it’s 120, my bag of flour nutritional facts have it at 30g per 1/4 cup so multiply by 4 to make 1 cup and it’s 120grams. It comes out great when I make various things with 120grams being equal to 1 cup. Have I been wrong all along or is it a typo? Should I use 130grams as 1 cup for the rest of the wonderful recipes of yours?
Hi Mrs. Silva! We measure 1 cup of bread flour to be 130g. We always recommend sticking with the weight measurements for our recipes for best results!
Tried these tonight. They came out wonderful. I did have to add a little more flour to get the right consistency, but that’s normal and can vary with the weather. Everyone raved about how good they were. Definitely recommend.
I’m having friends over and want to make garlic rolls to go with spaghetti. I need a roll that is soft and not chewy for one of my friends. I am thinking these rolls would be perfect. My question is if I brush a liberal amount of garlic butter on these rolls before baking, will they bake properly.
Hi Darla, you can certainly top with a garlic butter. You might also enjoy these garlic knots. Hope they’re a hit!
Can’t figure out why my dough is so soupy — more batter like. I’ve made multiple times, followed the recipe to a tee, and the dough ends up so batter-like that I end up adding probably a cup more of flour to make the dough tacky enough to knead. It also tastes unsalted (I assume due to the 25% more flour than the recipe calls for.) Is this something anyone else has run into? I am a novice baker at best, but this has happened each time I’ve tried to make these — can’t figure out what I’m doing wrong.
Hi Jennie! Is it quite humid where you are? Humidity can affect dough quite a bit. Our baking with yeast guide will be helpful for you!
Do you weigh your flour or go by “cup” measurement? I’ve started going by weight and had MUCH better results. There’s a lot of variation in volume and the secret is by mass for consistency. As an FYI, I made these this evening and weighed everything to within 1 gram and still added a couple tablespoons flour because it was too gooey / sticky. If you practice a few times you’ll quickly get a feel for it. Don’t be afraid of slightly stick dough, higher hydration is what makes for the good texture.
These rolls are amazing!! I was super nervous to make bread for the first time but the recipe is so well written and easy to follow and understand! Love it sally girl
Love this recipe! These became our contribution to holiday meals. Do you have any tips for doubling the recipe? Thank you!
Hi Morgan, for the best results, we recommend making separate batches rather than doubling. So glad you enjoy these rolls!
What if it doesn’t rise much the second time?
Hi Dan, do they look a little puffy? That’s all you need for the second rise!
The perfect dinner rolls. I have used this recipe multiple times. So easy and I never have to add more flour or moisture. It comes out just right every time!
My family loves them. Thank you Sally!
These are hands down the best rolls I’ve ever made/the best I’ve ever had any type of bread turn out. Followed to a T (aside from using active dry instead of instant) and they made great rolls for sliders.
Dear Sally,
I just made these rolls for my first ever attempt at making bread. They came out great!
I decided to start learning how to make bread because I would like to make my partner gluten-free bread products. Do you know how well this recipe works with gluten-free flours? If you’ve tried it yourself with gluten-free flour, which brand did you use?
Hi Aiden, Admittedly, our team does not have much experience baking with gluten-free flour. Although some readers report using an all-purpose 1:1 gluten-free flour in many of our recipes with success, you should expect slightly different results anytime you substitute ingredients. Let us know if you decide to do any experimenting with this recipe!
I don’t know what happened, but mine came out hard.
Hi Danielle, it sounds like your dough may be over kneaded, causing the outsides to become hard and tough. You can try slightly decreasing your knead time, just until the dough slowly bounces back when poked with a finger. Be sure to also spoon and level (or use a kitchen scale) to measure your flour to ensure it isn’t over measured. Too much flour can cause the rolls to become tough and dry. Thank you for giving these a try.
Sally – what do you prefer- bread flour or all purpose? Thanks for the awesome recipe! I’ve use it many times with bread flour since I use it so much for sourdough. But I was considering trying ap flour 🙂
Hi Kelly, these rolls are delicious either way–you can’t go wrong with either!
I just made these and it’s a bit more humid where I live so I find that bread flour is just much easier to knead into the correct texture than plain flour, it reaches window pane faster.
Pretty easy recipe. Just a lot of back and forth and WAY too many ads on the page for easy navigation.
Next time I’ll add something to give the rolls more flavor. But we’re perfect for the gravy from a pot roast
They taste amazing, it taste the same from a bakery . Also super easy to make.
I made the soft dinner rolls today and was surprised they lacked flavour. I followed the recipe to the letter but they were bland and lacked flavour. This is the first time I had an issue with one of your recipes. I’m a die hard fan and SBA is my go to place for most of my baking!