

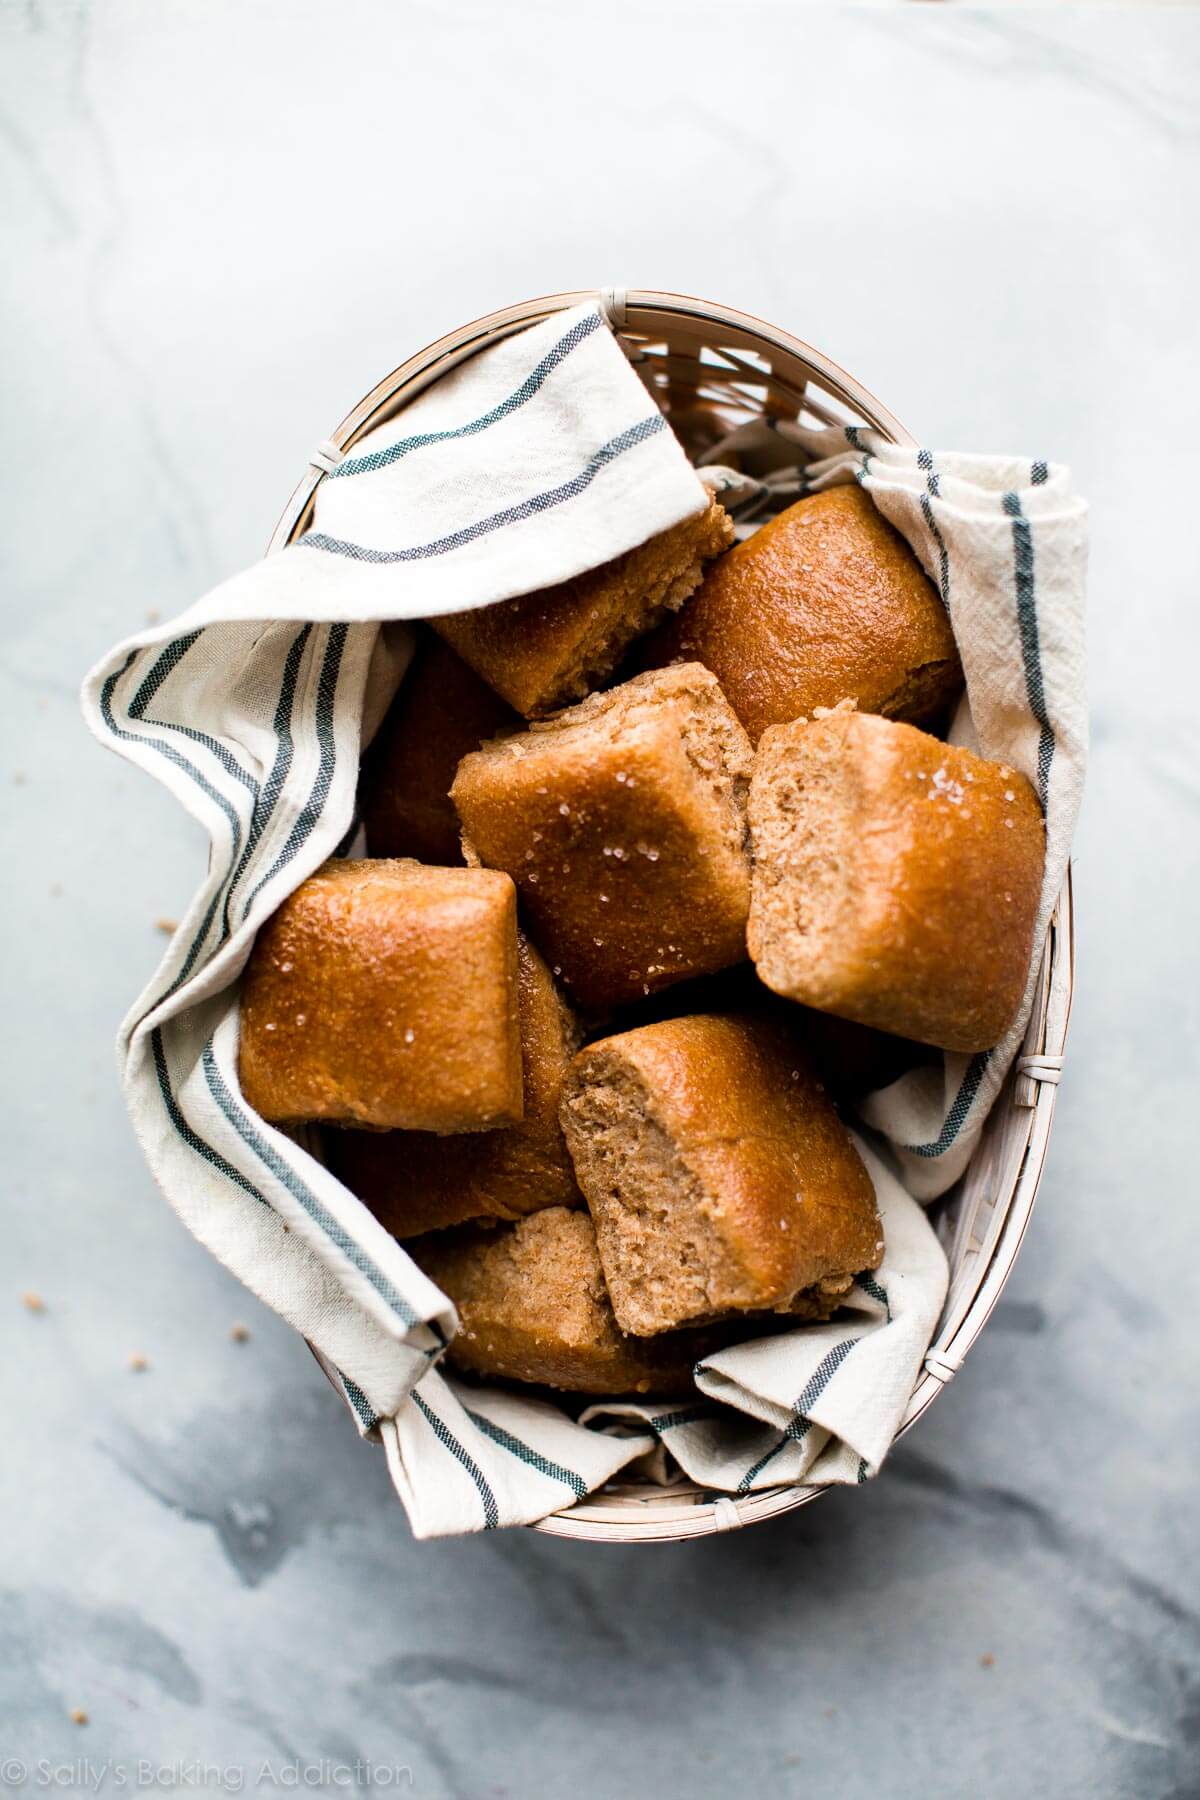
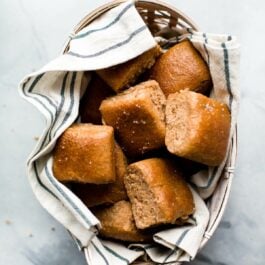
These soft and hearty whole wheat dinner rolls are made with 100% whole wheat flour and sweetened with honey. They have structure, body, texture, and staying power—and hold their own against any white flour rolls.
This recipe is brought to you in partnership with Red Star Yeast.
Baking a batch of whole wheat rolls that are both SOFT and FLAVORFUL feels like winning the lottery. Or, at the very least, winning dinnertime.
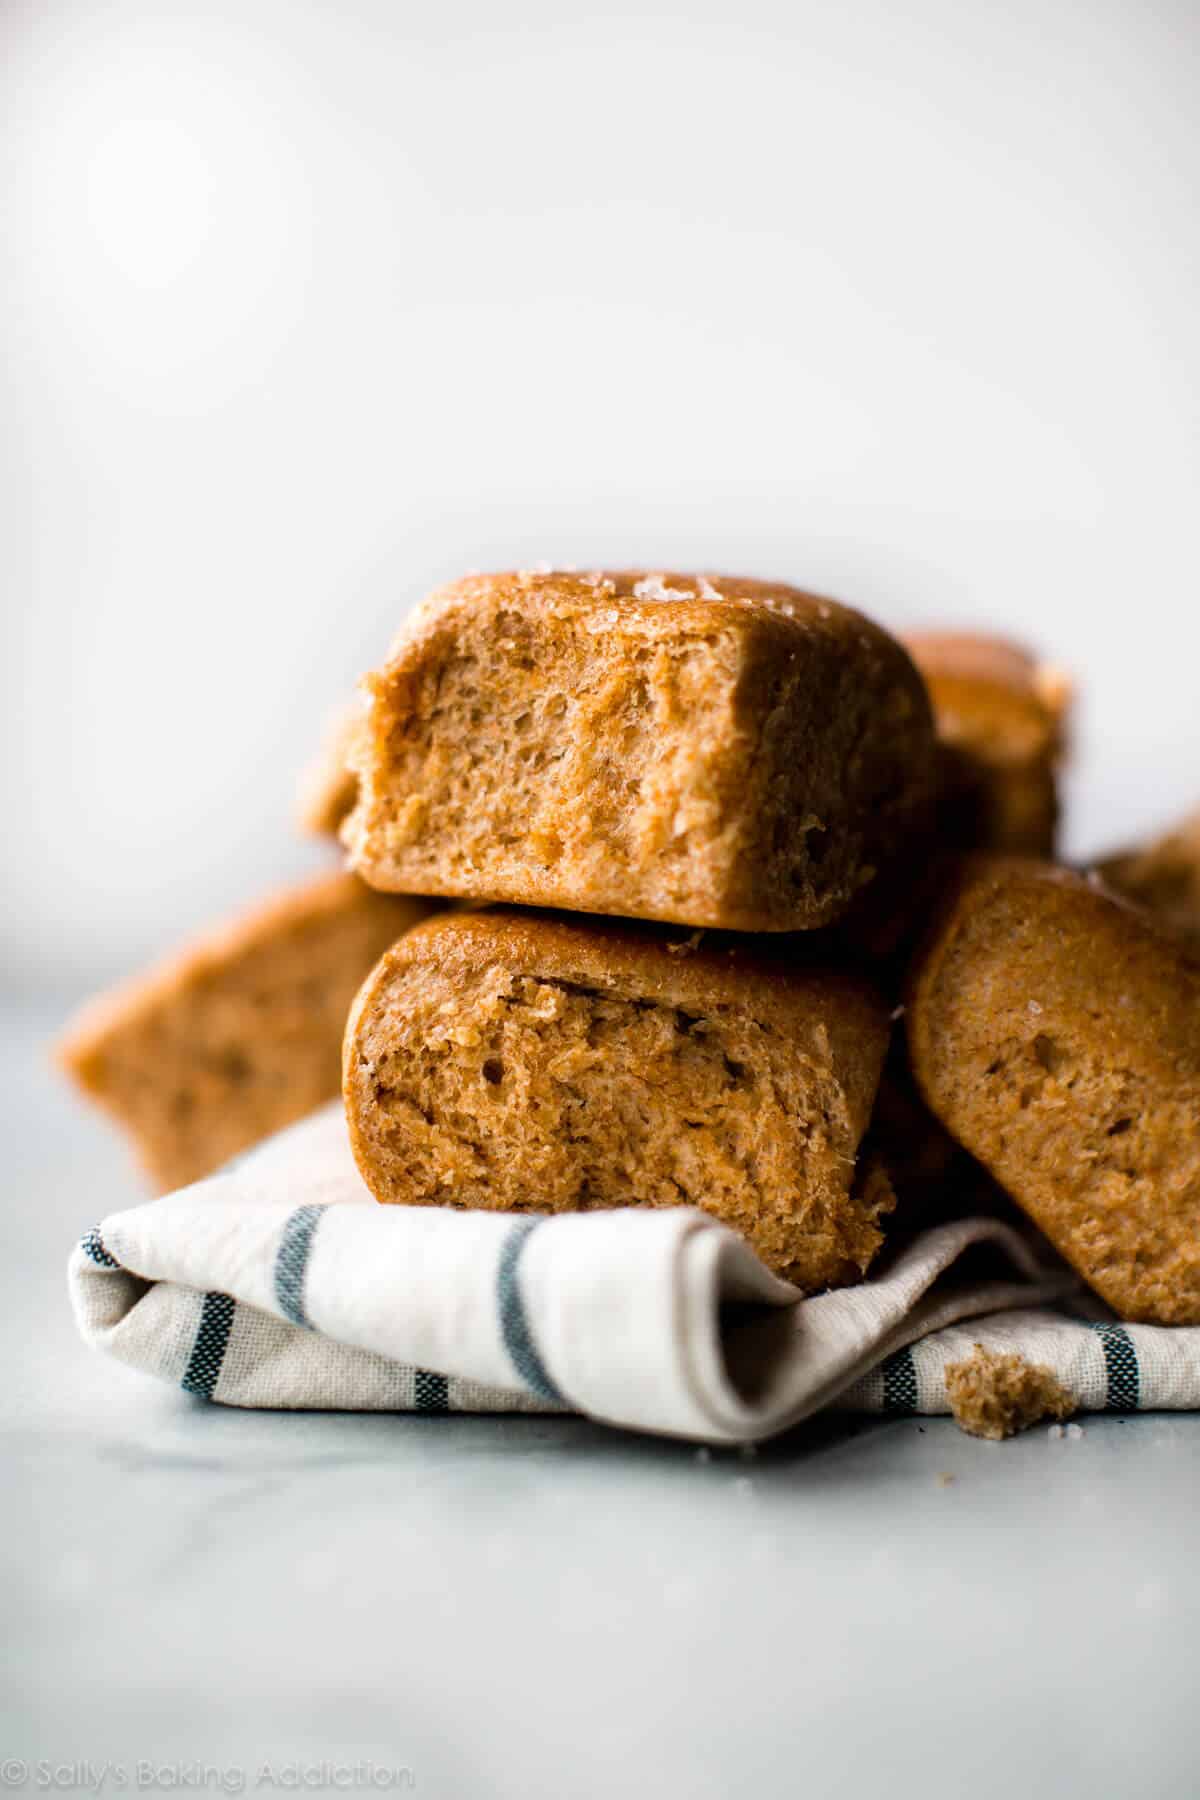
What normally results in hockey pucks can finally grace our dinner tables proudly. These honey whole wheat dinner rolls easily compete with (and beat) the tastiest white flour rolls because they taste nutty, a little sweet, and have a bit more oomph in the texture department. Just like my whole wheat bread, this recipe is 100% whole wheat.
Whole Wheat Flour Is Picky
Whole wheat flour is picky and can be difficult to work with. Why? It’s heavy and doesn’t contain the same level of gluten as white flours. This missing gluten poses a problem when it comes to bread making. Many whole wheat bread recipes call for the addition of vital wheat gluten to make up for it, but I don’t keep that in my kitchen and you may not either. Other recipes suggest subbing some whole wheat flour for all-purpose or bread flour—but then the whole wheat rolls won’t be 100% whole wheat. Keeping this in mind (and after a few failed whole wheat dinner roll attempts), I landed on a recipe and method I loved. And I’m confident you’ll be satisfied too.
Admittedly, these whole wheat rolls aren’t as fluffy and tall as their white flour counterpart, but I like their heartier texture. If you crave extra texture in bread, you’ll love my multigrain bread recipe as well. (You can turn that recipe into rolls!)
Behind the Recipe
I adapted this whole wheat roll recipe from my dinner rolls recipe. We use the same exact ingredients, except we’ll swap the flour for whole wheat flour. A few other differences make up for the heavy and dense whole wheat flour:
- Increase the amount of butter. I tested with more butter in batch #2 and even more in test batch #3. 1/2 cup (8 Tablespoons) produced the best tasting whole wheat rolls.
- Use 2 whole eggs instead of 1 egg. The extra liquid keeps the dough a little more hydrated.
- Add honey for flavor.
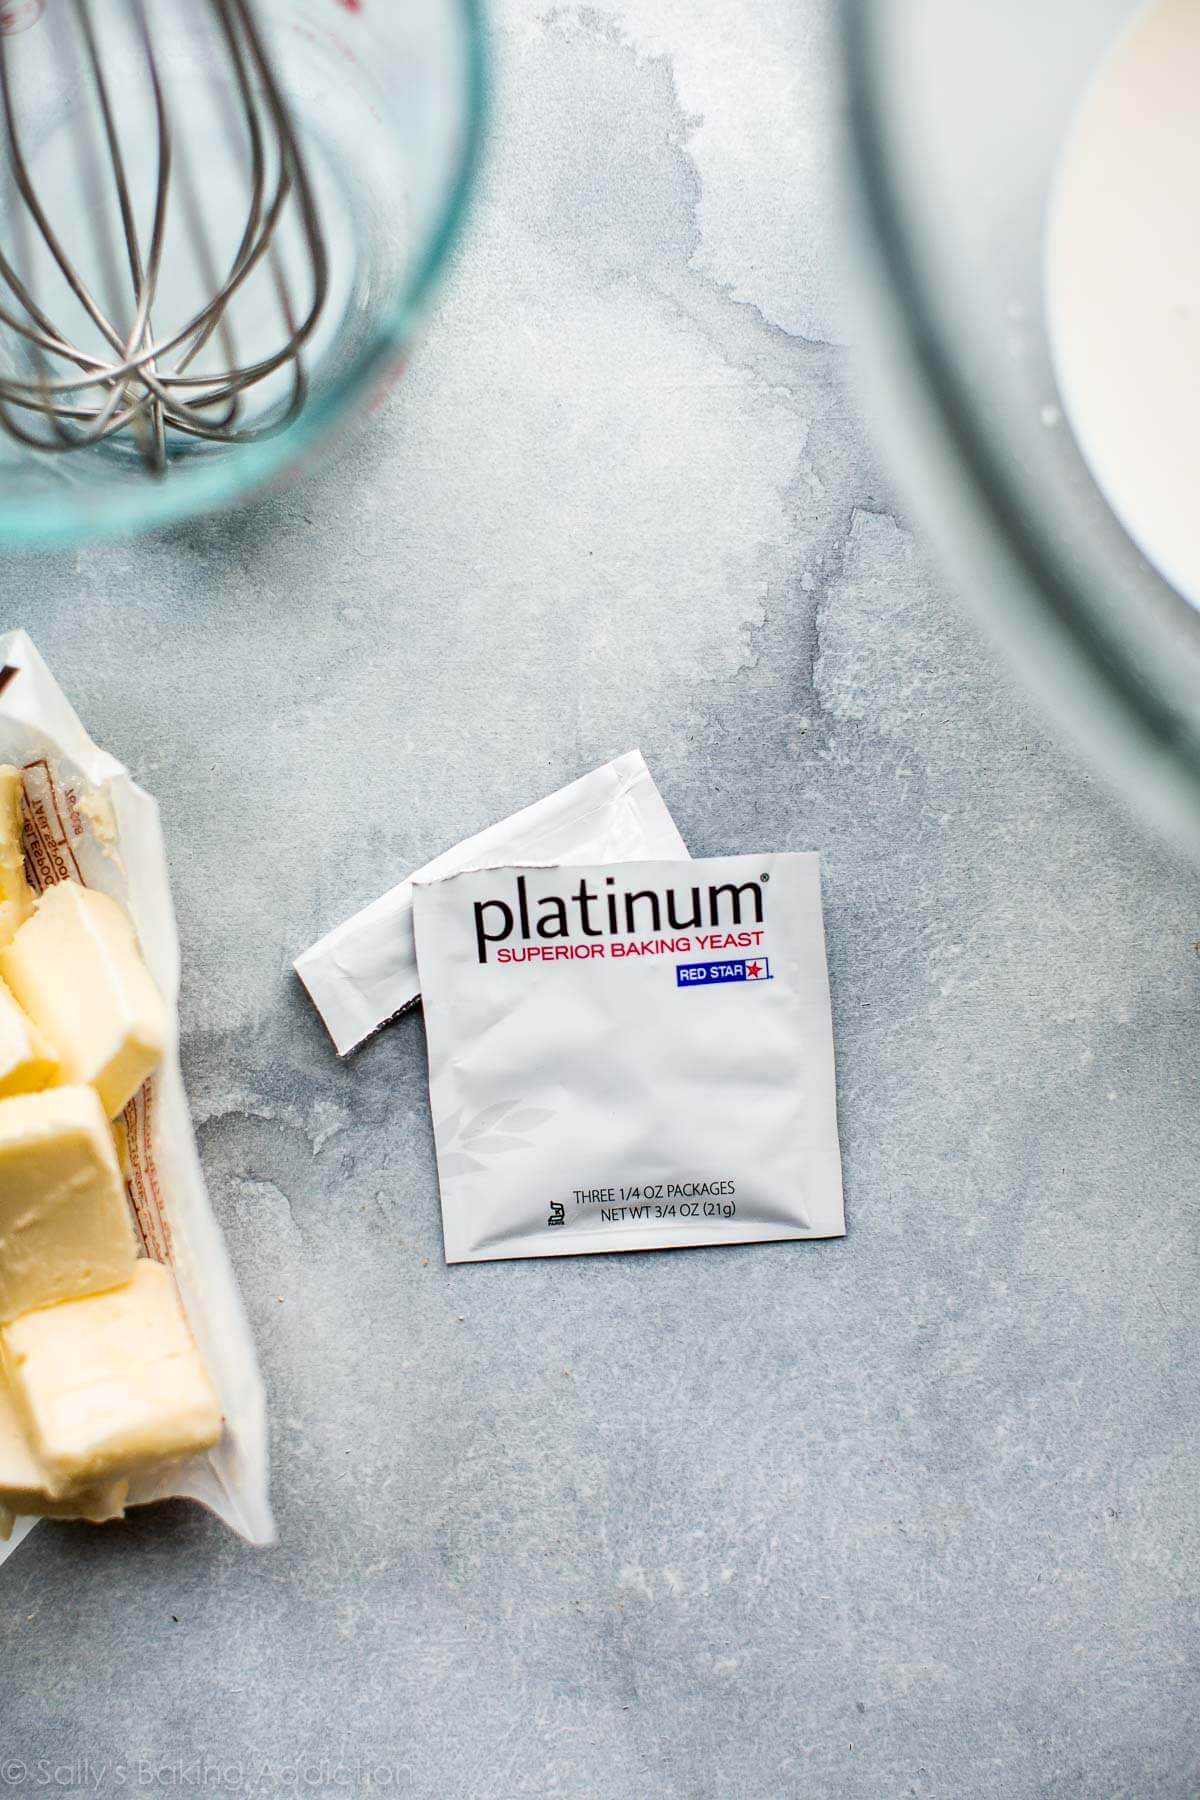
For best results, use a superior baking yeast: Platinum Yeast from Red Star. This is an instant yeast and my preferred brand. I’m a Red Star Yeast fangirl and use it exclusively in my kitchen because it’s always a guarantee.
Baking with Yeast Guide
Reference this Baking with Yeast Guide whenever you work with baker’s yeast. I include practical answers to all of your common yeast questions.
Ingredients in Whole Wheat Dinner Rolls
Like my regular dinner rolls and even my sandwich bread recipe, this dough comes together easily with 7 basic ingredients. Each has an important job to do, so I don’t recommend substitutions.
- Milk: Liquid activates the yeast. For the softest rolls, use whole milk. Nondairy or low fat milks work too, but whole milk produces phenomenal flavor and texture.
- Yeast: I recommend Platinum Yeast from Red Star, which is an instant yeast blended with natural dough improvers.
- Honey: This sweetener feeds the yeast, increases its activity, tenderizes the dough, and adds a welcome sweetness. And if you love honey in your homemade breads, you’ll enjoy this honey oat bread too.
- Eggs: 2 eggs provide structure and richness.
- Butter: Butter promises a soft, flavorful roll. Make sure you’re using room temperature butter.
- Salt: Salt adds flavor and offsets the sweetness.
- Whole Wheat Flour: We can’t have whole wheat rolls without whole wheat flour!
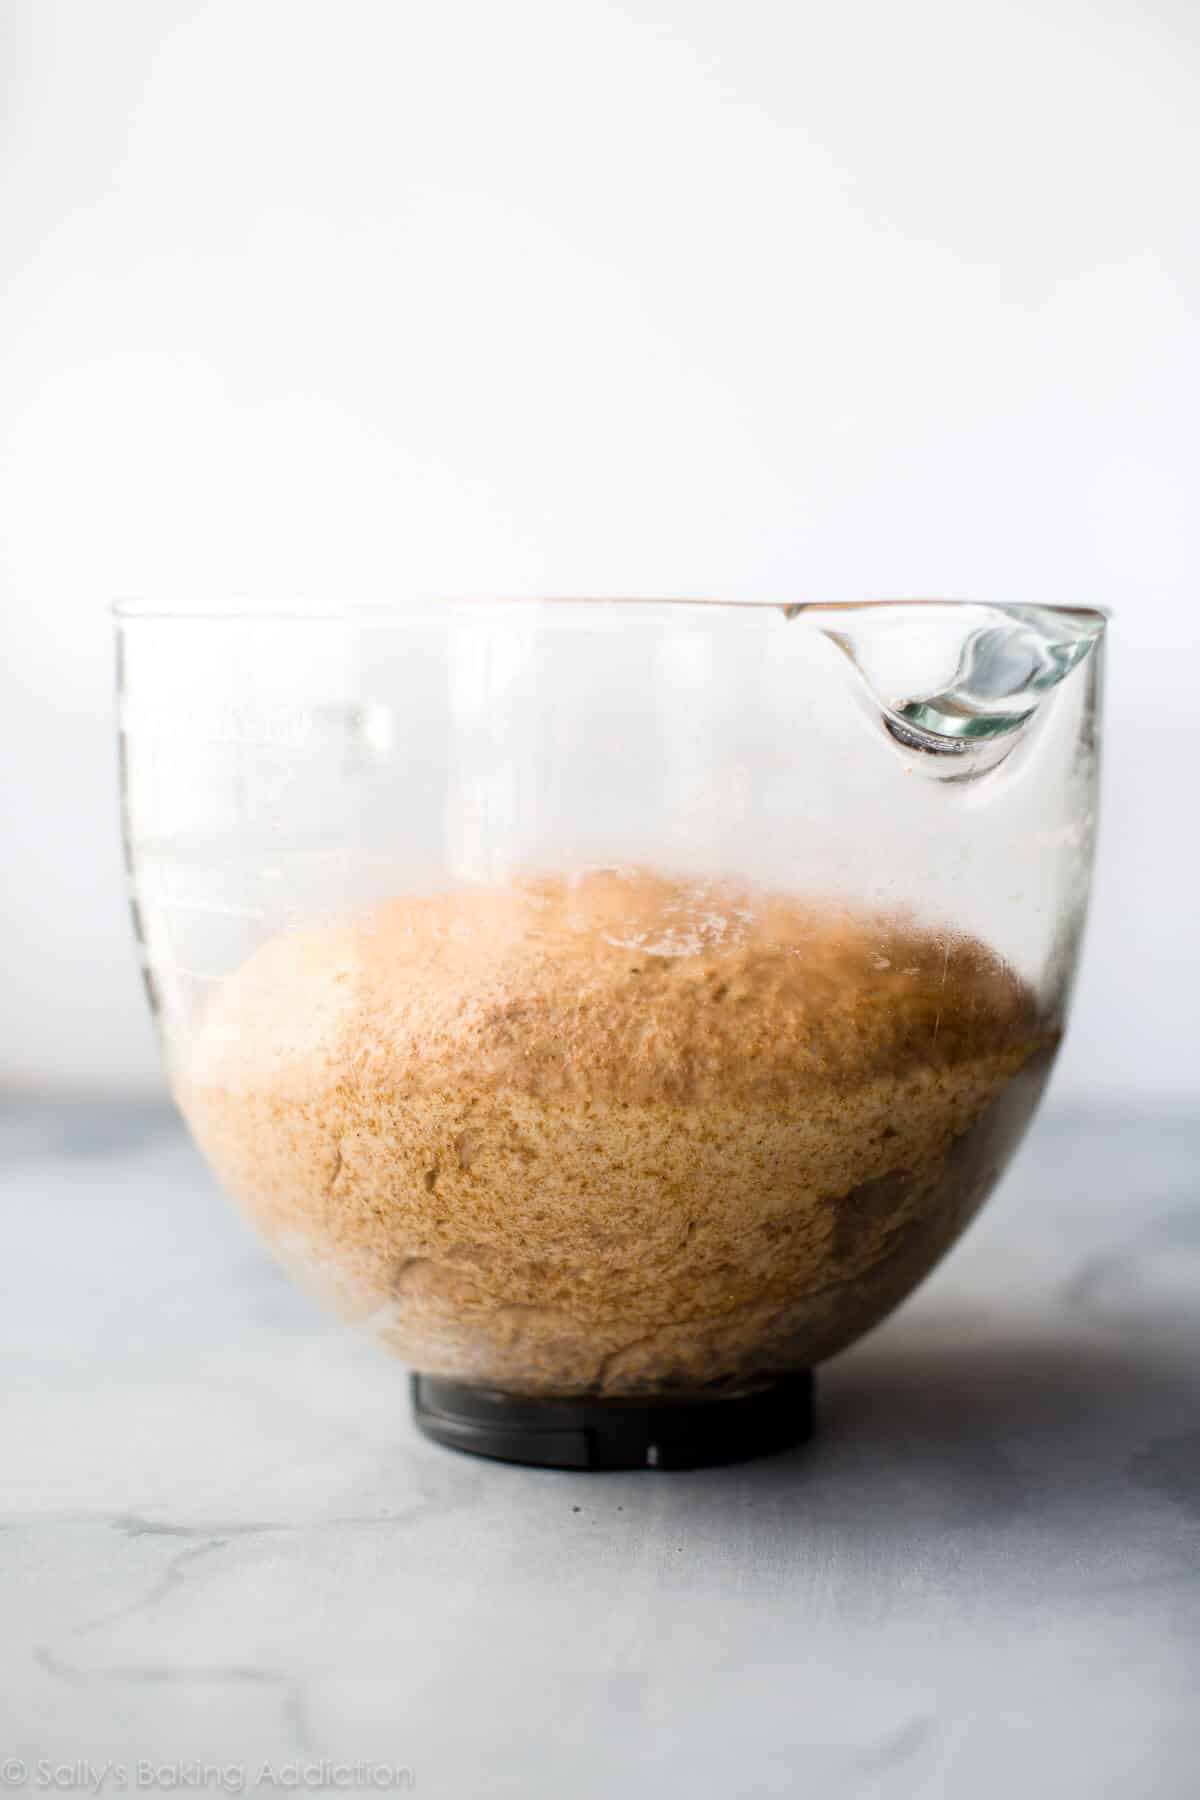
I recommend using a stand mixer with a dough hook attachment (most stand mixers are sold with it), but if you don’t have a stand mixer, mix the dough together with a wooden spoon and knead by hand. (Feel free to reference my How to Knead Dough tutorial if you need extra help with this step.) Whole wheat dough requires a slightly longer rise time since it’s weighed down with wheat germ and bran.
The Best Shaping Trick
When making dinner rolls, I typically divide the bread dough and roll each piece into individual balls. (Just like with my dinner rolls and honey butter rolls.) It works, but this dough never rolls up perfectly. Maybe it’s because I’m impatient, but some of the rolls end up looking a little scraggly and misshaped. It’s frustrating, especially when I want uniform shaped buns. Ha!
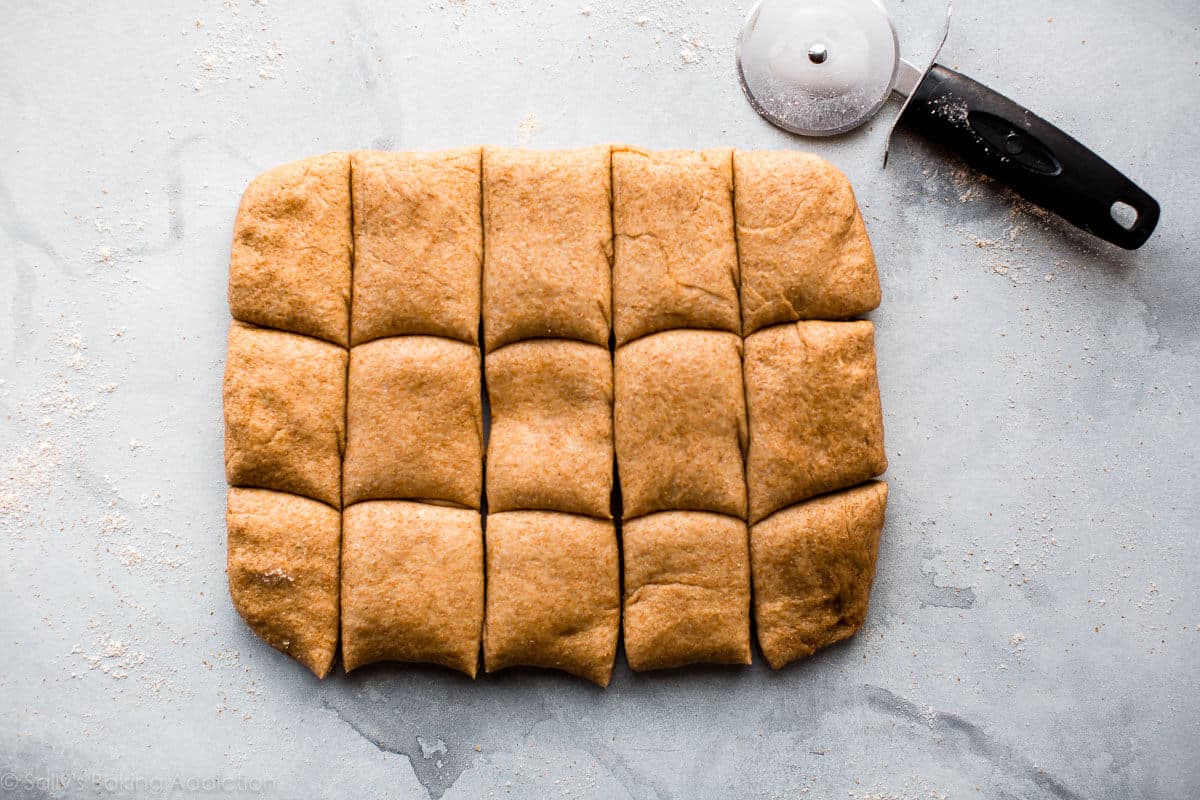
And that brings us to the best shaping trick: Take the risen dough and shape it into a long 9×13-inch rectangle, the size of our baking pan. Almost as if we were making cinnamon rolls, but we’re not stretching the dough out quite that far. It’s pliable, so just use your hands to shape the dough as best you can.
Then, using your pizza cutter, cut into 15 evenly shaped rolls. No individual rolling:


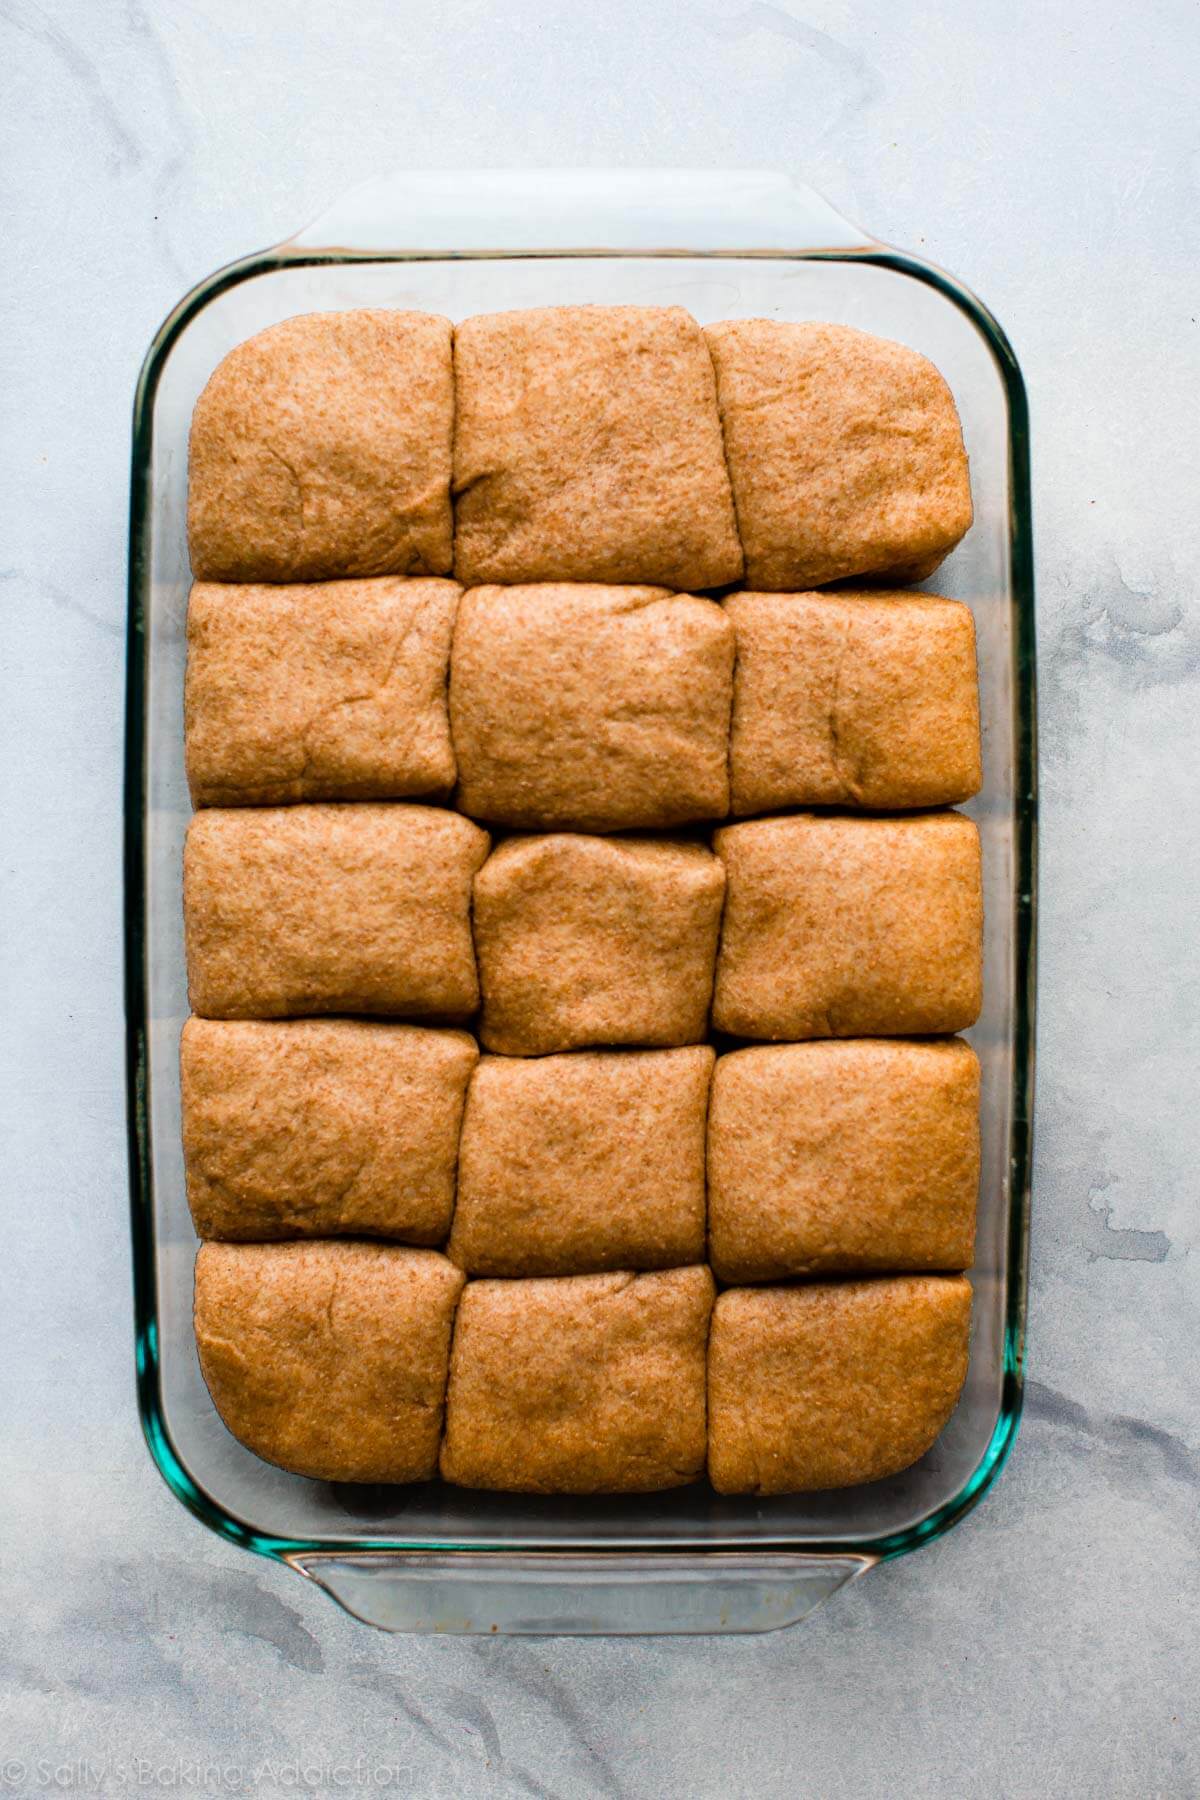
Then it’s business as usual. Loosely cover and allow the rolls to rest and rise one more time. They’ll get nice and puffy in about 1 hour.
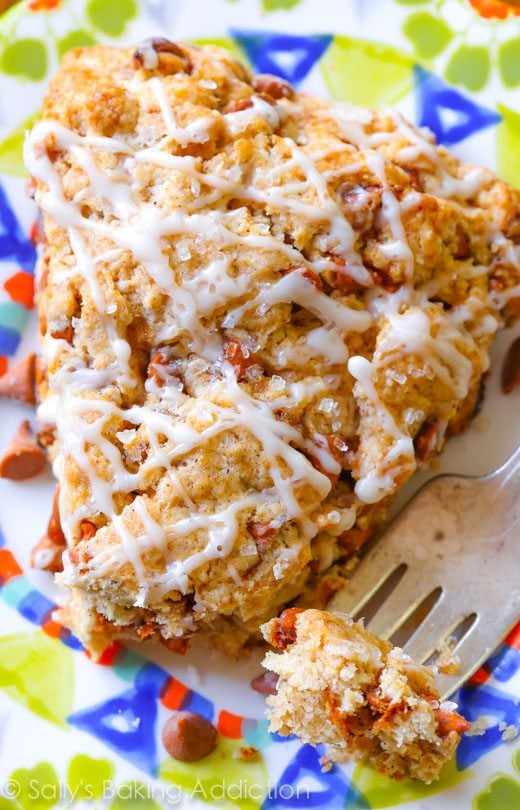
Two Delicious Extras
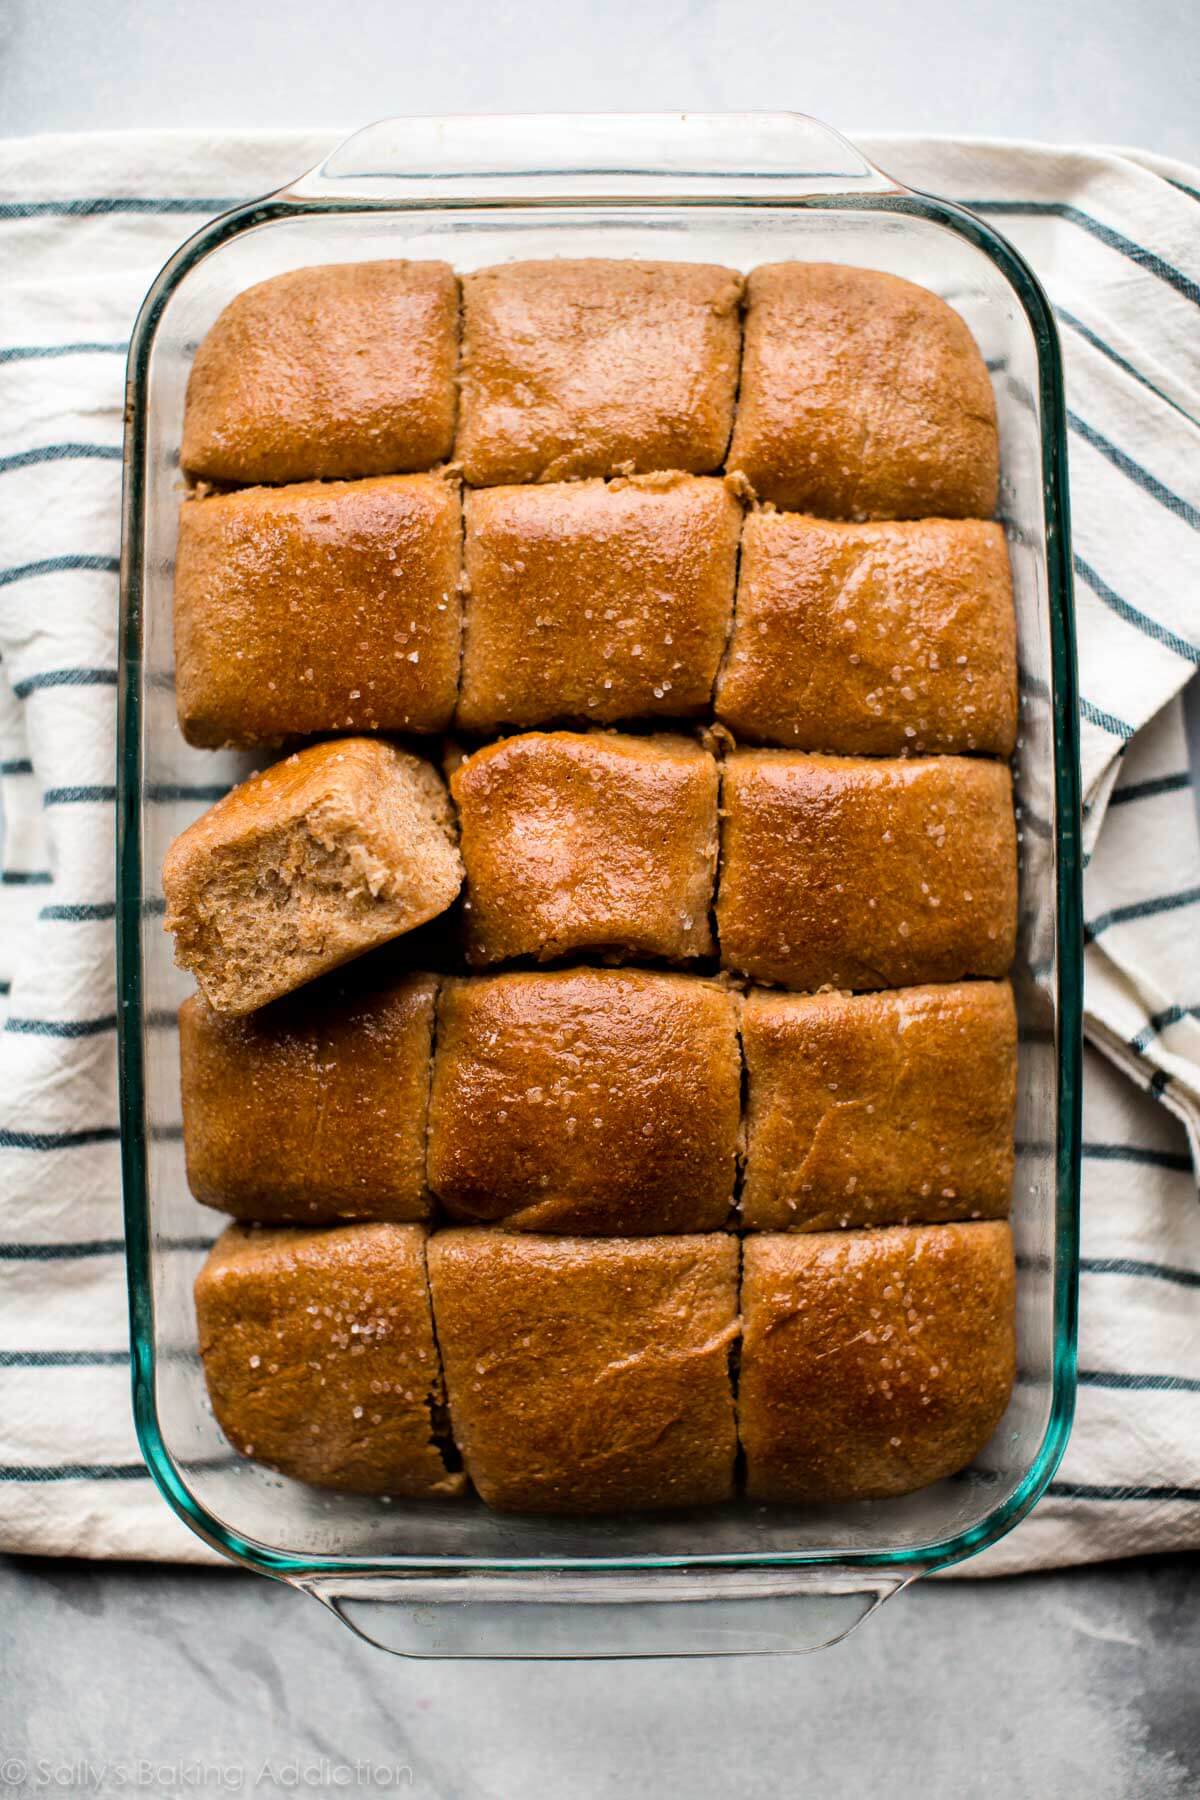
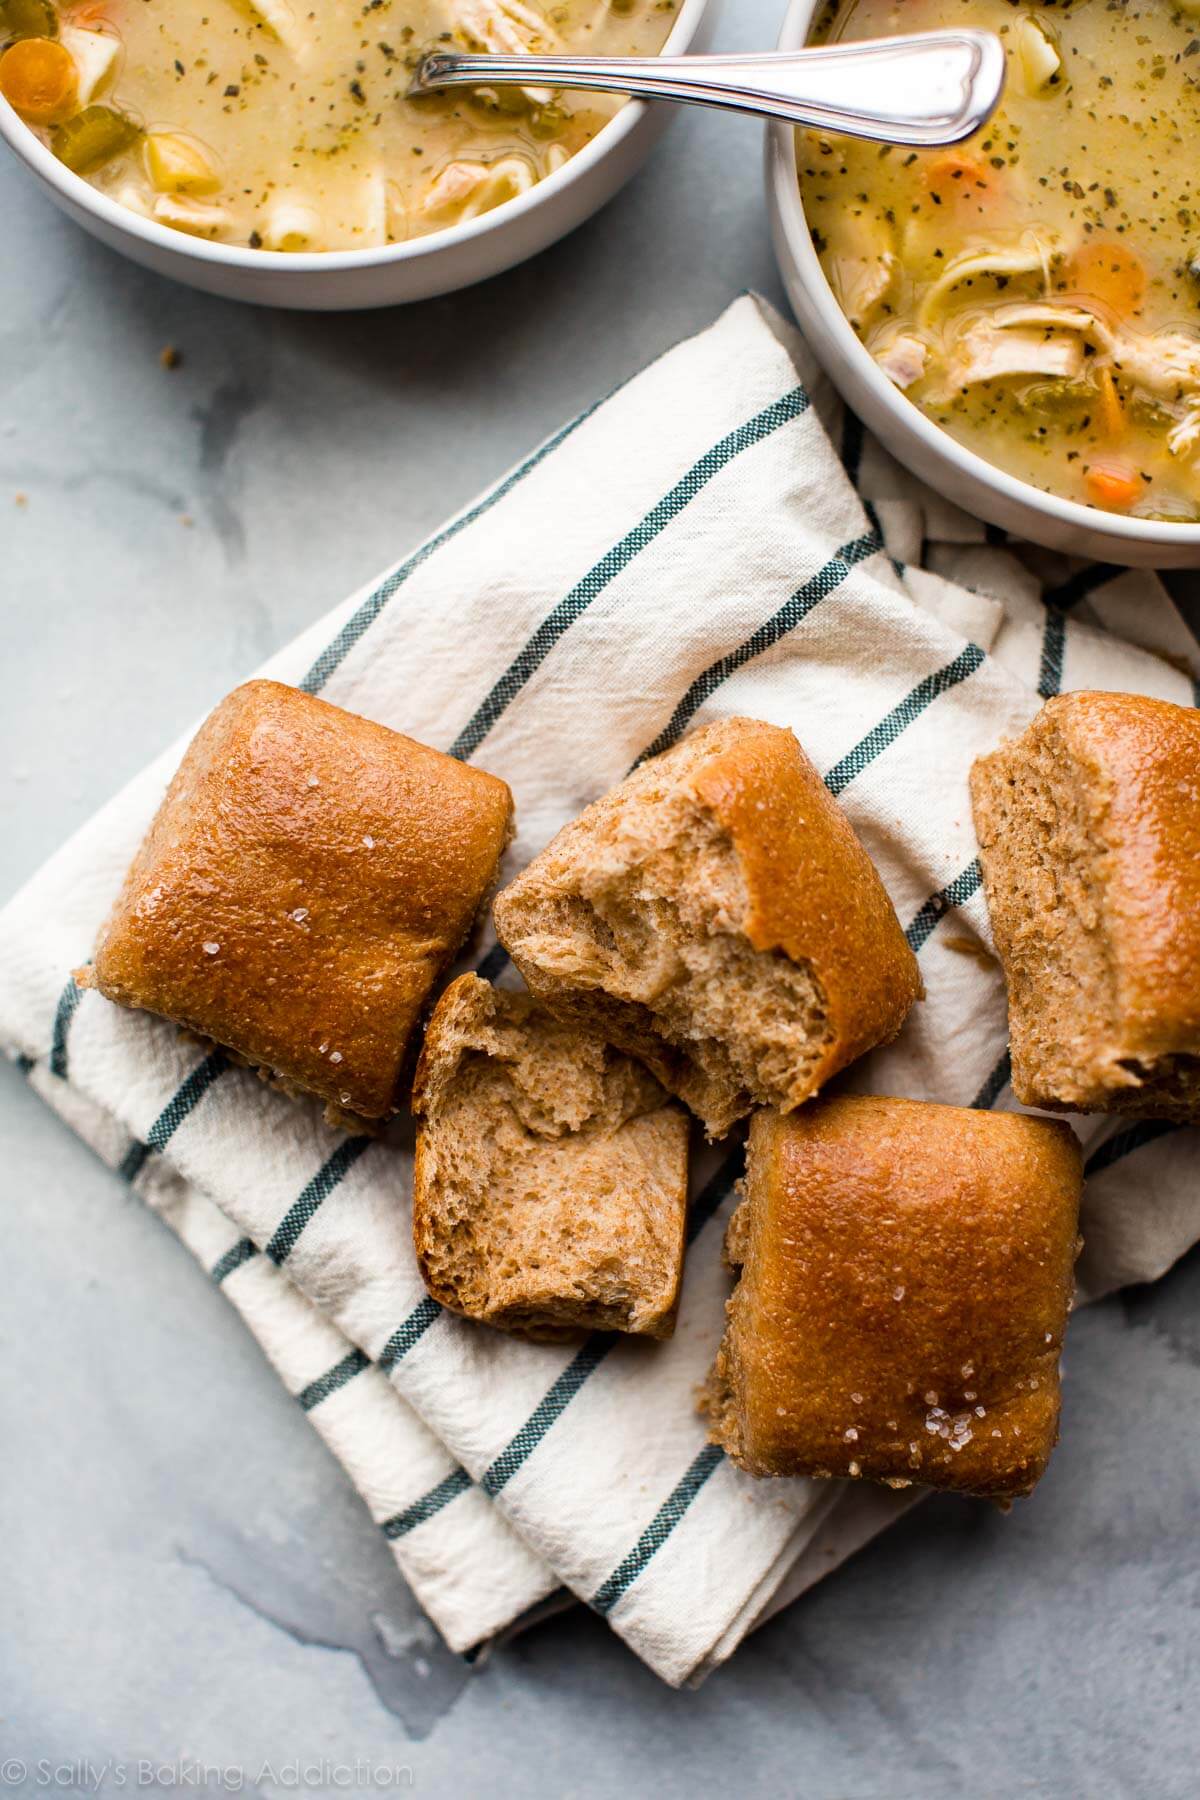
We’ll bake the whole wheat rolls until they’re golden on top and finish them with 2 goodies:
- Brush of honey butter
- Sprinkle of sea salt
You know I’m a big fan of finishing touches and trust me when I say: the brush of honey butter and sea salt are the best. The honey butter soaks into all the cracks and crevices and the sea salt makes that honey flavor pop. You could even take it a step further and make some homemade honey butter for serving with the rolls.
While these whole wheat dinner rolls are soft, they aren’t particularly fluffy. Remember what we learned when we made whole wheat pizza dough? The reality is that whole wheat yeasted dough just cannot rise to the same level as white flour dough. But that’s honestly one of their best qualities. Unlike rolls made with refined flour, these whole wheat rolls are hearty and a little textured.
And if you love rolls with BIG flavor, try these brown butter sage dinner rolls or sweet potato dinner rolls next!
What to Serve with Whole Wheat Dinner Rolls
- Minestrone Soup
- Walnut Crusted Chicken
- Creamy Chicken Noodle Soup
- Baked Chicken Meatballs
- Slow Cooker Chicken Chili
- Baked Lemon Garlic Salmon
Honey Whole Wheat Dinner Rolls
- Prep Time: 3 hours, 30 minutes
- Cook Time: 25 minutes
- Total Time: 4 hours
- Yield: 15 rolls
- Category: Bread
- Method: Baking
- Cuisine: American
Description
Soft, hearty, and sweet homemade honey whole wheat dinner rolls.
Ingredients
- 1 cup (240ml) whole milk, warmed to about 110°F (43°C)
- 2 and 1/4 teaspoons Platinum Yeast from Red Star instant yeast
- 1/2 cup (8 Tbsp; 113g) unsalted butter, softened to room temperature (cut into 4 pieces)
- 1/3 cup (113g) honey
- 2 large eggs
- 1/2 teaspoon salt
- 3 and 1/2 cups (420g) whole wheat flour (spooned & leveled), plus more for kneading/shaping
Topping
- 2 Tablespoons (28g) unsalted butter, melted
- 2 teaspoons honey
- sea salt for sprinkling
Instructions
- Make the dough: Pour the warm milk over yeast in the bowl of a stand mixer fitted with a dough hook attachment. Or, if you don’t have a stand mixer, a regular large mixing bowl. Whisk together, cover bowl with a towel, and allow to sit for 5 minutes. The mixture will be frothy and foamy after 5 minutes.
- On low speed, beat in the softened butter until it is slightly broken up. Then beat in the honey, eggs, and salt. The butter won’t really be mixing into the mixture, so don’t be alarmed if it stays in pieces. On low speed, gradually add the flour. Once it is all added, beat on medium speed until a soft dough forms.
- Knead the dough: Keep the dough in the mixer and beat for an additional 6-8 full minutes, or knead by hand on a lightly floured surface for 6-8 full minutes. (If you’re new to bread-baking, my How to Knead Dough video tutorial can help here.) If the dough becomes too sticky during the kneading process, sprinkle 1 teaspoon of flour at a time on the dough or on the work surface/in the bowl to make a soft, slightly tacky dough. Do not add more flour than you need because you do not want a dry dough. After kneading, the dough should still feel a little soft. Poke it with your finger—if it slowly bounces back, your dough is ready to rise.
- Transfer the dough to a lightly floured surface (if you kneaded with your mixer) and knead it with your hands for 1 minute. Form the dough into a ball, coat your mixing bowl with nonstick spray or olive oil, and place the dough back in and turn it over so all sides of the dough are coated with the oil/spray. Cover the dough/bowl loosely with plastic wrap, a paper towel, or aluminum foil and let sit in a warm place until doubled in size, about 1.5 – 2 hours. Here’s what I do: turn the oven on to 150°F (66°C). Once heated to that temperature, turn the oven off. Stick the covered dough inside the oven and allow it to rise in this warm environment.
- Grease the bottom and sides of a 9×13-inch baking dish. Set aside.
- Shape the rolls: Punch the dough down to release any air bubbles and turn it out onto a lightly floured work surface. Using floured hands, stretch the dough into a 9×13 rectangle (doesn’t need to be exact, it can be a little smaller). Use a pizza cutter and cut into 15 rolls. See photo above for a visual. Round out the edges of the rolls since they stretched a bit as you cut them. Arrange in prepared pan. Loosely cover the rolls and allow to rise in a warm environment again until puffy and double in size, about 1 hour.
- Bake the rolls: Preheat the oven to 375°F (191°C). Bake rolls for about 25 minutes or until they are golden brown. About halfway through the bake time, I like to cover the rolls loosely with aluminum foil so the tops don’t brown too much. Remove pan from the oven and allow to cool on a wire rack for 5 minutes.
- Top the rolls: Meanwhile, mix the melted butter and honey together. Brush over warm rolls. Sprinkle with sea salt. Serve warm.
- Cover any leftover rolls and store at room temperature for a few days or in the refrigerator for up to 1 week.
Notes
- Make Ahead & Freezing Instructions: After dough has risen two hours in step 4, punch it down inside the mixing bowl and cover the bowl tightly with plastic wrap. Refrigerate overnight or for up to 2 days, then remove from the refrigerator and continue with step 5. Or freeze the dough for up to 2 months, then allow to thaw overnight in the refrigerator and continue with step 5. You can also freeze the baked dinner rolls. Allow them to cool completely, then freeze for up to 3 months. Thaw in the refrigerator or at room temperature, then reheat as desired. If reheating the whole pan, lightly cover and reheat in a 300°F (149°C) oven for about 10 minutes or until warm.
- Special Tools (affiliate links): Electric Stand Mixer | Whisk | Pastry Brush | Pizza Cutter | 9×13-inch Baking Pan
- Milk: Lower fat milk can be substituted, but the rolls won’t taste as soft. I strongly suggest whole milk.
- Honey Butter: Don’t leave off that honey butter/sea salt topping. The rolls will be lacking a little flavor without it. I prefer spreading the honey butter on the rolls after they bake as opposed to before they bake. Brushing butter on top of the delicate, airy unbaked roll weighs them down and encourages them to deflate. Best to spread on the honey butter right after baking.
- Reference my Baking with Yeast Guide for answers to common yeast FAQs.


Reader Comments and Reviews
I had given up on whole wheat rolls. Mine were always dense and heavy . These are not. I had some whole wheat bread flour I needed to use up so I gave them a try. They are light airy flavorful.. This is a keeper recipie.
I’m sure I did something wrong because my rolls did not rise in the oven. Dough rose great first time but they were not soft and fluffy. Any ideas what I did?
Hi Jana, did the rolls collapse in the oven? They could have been over-proofed (the dough rose too much during the first rise). Next time you can try shortening the first rise time. Here’s more tips in our baking with yeast guide!
I hope this gets to you in time! I’ve been having fun making this recipe and others of yours, I am baking them a day in advance since ill be baking so much tomorrow, do you recommend still outting the honey butter on after baking today, or waiting until tomorrow and heating them up and putting it on before serving? Thanks !!
Hi Leigha, you really can’t go wrong either way! If reheating the whole pan, lightly cover and reheat in a 300°F (149°C) oven for about 10 minutes or until warm.
I haven’t made these rolls yet but don’t like for bread to be even the slightest bit sweet. If I leave out the honey, will they turn out OK?
Hi Louise, you may prefer these classic soft dinner rolls instead, which call for just a small amount of sugar to activate the yeast.
Made these tonight for the first time. Like others, I ended up adding almost an extra quarter cup of flour and kneaded for an extra 4 minutes in my stand mixer before the the dough even started to come away from the side of the bowl. As that point a finder pressed in came out still attached to dough. As soon as I had it out of the bowl for the last 1 minute knead it started to resemble nice smooth dough. They were soft and delicious. Next time I think I’ll try with just a light brush of butter, or even an egg wash. I think they stand on their own without the extra sweetness or salt.
Great recipe! First try using all whole wheat! And the first time I used the dough hook to do the kneading. I have tried other Recipes from your site and have always enjoyed the results.
Any adjustments for altitude? I’m at 8,000 feet above sea level.
Thanks
Sorry, but I’ve made these 3 times and still did not get something that looked like the photo. I’m not a regular bread maker, so maybe it’s just me. Each time they improved (I literally threw away the first 2 tries), but I will be looking for another recipe. Even though the second rising seemed ok, they did not rise at all in the oven. I baked for 24 minutes, which was definitely too long. We will eat these and they are ok, just not the fluffy roll I’m looking for.
Maybe your milk was too warm and it killed the yeast. Yeast needs a warm environment to activate. Too warm or hot will kill it. Other than that I can’t think of what else it can be. I wish you better luck next time. Making bread does take practise. Don’t be afraid to try again, good luck!
This was my first time using whole wheat flour and this recipe was absolutely fantastic! The dough came together quickly and was really easy to work with. I was so impressed by how well these turned out for me. The texture was just perfect. They will definitely become part of our regular rotation. Thank you Sally for such an easy and successful recipe!
I just pulled these out of the oven and enjoyed one. The rolls turned out fluffy, soft, and delicious. I did adjust the bake time to 20 minutes (every oven is different as you stated). I added a tablespoon of Vital Wheat Gluten because I always do to my bread. That’s the only thing I changed. I will be making these again and again. Delicious! Thank you for sharing. I make a lot of your recipes.
Dough was beautiful, they raised like a dream. Baked them at 375 as directed and covered them half-way through the bake, however the bottoms were overly brown. Next time, should I lower temp a bit or move the rack higher (it was in the middle)?
Hi Patty! Moving the pan away from your heat source should help for next time. Enjoy!
Can you make these into hot dog buns?
Hi Sally, You can certainly try using this dough for different shapes like hot dog and hamburger buns. We haven’t tried it.
Worked perfectly. I followed the recipe and had great success. They looked exactly like yours and were delicious. The Honey/Butter/sea salt topping is a game changer (might have been a little bland without that). They came out very light and fluffy and are rather significant in size, and it makes a lot…I can probably use the extras for small sandwiches. I think next time I need hamburger buns I will use this recipe and just make them a bit bigger and add sesame seeds on top.
So glad you enjoyed them, Tony!
This is a great recipe! I did end up adding almost a whole cup of flour. I baked it for about 19 mins and they turned out perfectly!
I tried this recipe today. The rolls turned out dry and I also felt 1/2 tsp salt to be less for our palette. The end results is – rolls are good but bland and dry. They could turn out great next time by increasing the salt a bit and reducing the baking time.
The flavor of these rolls is perfection! I rolled out the dough and cut into rounds, then used the extra bits of dough to make small loaves. I used the loaves as part of the dressing for Thanksgiving. It added the perfect bit of color and sweetness.
Would this recipe work baked as a loaf of bread? Looking for a bread made of 100% Whole wheat flour.
Hi Sarah, we haven’t turned this whole wheat roll recipe into a loaf of bread before, so can’t be certain. However the bake temperature would be the same and the bake time would be much longer to guarantee it’s cooked through. You might also enjoy our Soft Multigrain Bread, too.
Have you ever used sprouted wheat flour for any of your rolls or bread? I use this flour for all my baking and wondering if it would work using your whole wheat roll recipe. Thanks for recipe.
Hi Fayrene! We haven’t tried sprouted wheat flour, so we’re unsure of the results. If you do try it with this recipe, we’d love to know how it goes.
The bad news: I had a lot of trouble getting the dough into a non sticky state. I’m fact, despite following instructions as closely as possible (and yes, I used a scale for measurements), the dough was at all stages a sticky mess. I must’ve left at least a pound of dough sticking to the bowl and the floured work surface and my fingers. I did what others suggested and added a TSP of flour at a time to the mixer, but it never got less sticky, even after 4-6 TSP. I even mixed it for about 15 minutes.
The good news: the final product, even though it was an ugly, sordid mess with buns of all shapes and dimensions, they still turned out okay taste wise! A lot fluffier and softer than I would’ve thought, especially after how hard the dough felt right before final proofing. Even when I took them out of the oven, I was thinking, yeah, this looks terrible. But I ended up enjoying every bite. They were even softer than the Japanese milk buns I attempted (and failed) at a couple weeks ago.
Oh, like others have mentioned, my milk / yeast mixture did not become frothy at all, but the dough did rise A LOT during both proof stages. So I don’t think it was a yeast issue. But I’m still not sure where I could’ve possibly gone wrong.
I’m having the same issue right now. I’ve added at least a cup more flour for it to “clear the sides and stick to the bottom”. I’ve found this a lot with recipes before. I’m surprised, especially being that I’m in the northern winter right now and would expect my flours to be quite dry and absorbent.
I also had to add quite a bit of flour to alleviate the sticky dough, and I used a scale. Easily added a cup of flour (AP, not whole wheat) between the mixing and kneading steps. They turned out well, and I had enough extra dough to make a mini loaf of bread. I’m in Florida; weather was maybe 76 degrees and not humid at all.
Would this recipe work as a bread loaf? For sandwiches? I assume just the cooking time would change?
Can I add granulated garlic, chilly flakes/dry basil or any other seasoning? I know that honey is required for the yeast to activate but don’t want a sweet bread as an end result.
Question, can I use whole wheat bread flour for this recipe? I have it and am wondering if I would need to adjust anything to use it.
Also, do you still have to bloom instant yeast if it’s the kind you add in with the flour? Thanks!
Hi Beth, Whole wheat bread flour produces chewier dinner rolls, but the rolls are still soft and fluffy no matter which you use. No adjustments needed if you use it! Most modern yeasts are just fine to skip this step if the yeast has not expired and has been stored properly. This step is basically just “proving” that the yeast is alive and active and the above method is what works for us for this recipe!
how would this be with golden raisins or currants added?
Hi Lee, Definitely! You can add 1 cup. If desired you can plump up the raisins first. To do this, soak them in hot water for 5-10 minutes, drain, then pat dry before adding to dough. Add them when you add the flour.
Curious to know if I could use my bread maker for this recipe. Also, when I freeze the dough for future use, do I still refrigerate it for 2 days first?
Hi JTJ, we haven’t tested this dough in a bread maker, but let us know if you do! No need to refrigerate for two days after freezing – simply allow to thaw overnight in the refrigerator and continue with step 4. Enjoy!
Hello May I know what option for baking you used? Oven fan or non fan? Thank you.
Great question. All of the recipes on this site are written for conventional settings. Convection ovens are fantastic for cooking and roasting. If you have the choice, we recommend conventional settings when baking cakes, breads, etc. The flow of air from convection heat can cause baked goods to rise and bake unevenly and it also pulls moisture out of the oven. If you do use convection settings for baking, lower your temperature by 25 degrees F and keep in mind that things may still take less time to bake.
Hi Sally, how could I replace honey in this recipe? We want to use it for pav bhaji, a Indian savory dish and honey flavor would not go well with that.
Hi Cascadia, you can replace the honey with regular granulated sugar in the dough. You may want to add the flour slowly as you might not need all 3 and 1/2 cups since you are removing honey (wet ingredient). You can brush the tops of the rolls with plain melted butter instead of the honey butter mixture.
I was thinking of making 3 ounce hamburger rols with this recipe. Any suggestions on cooking time?
Made these today, absolutely delicious. Very sticky dough, had to add 4-5 tbsp extra flour. The only things I did differently was to not activate the yeast (I was using fast action) and doing the first rise overnight in the fridge. Left it in fridge for 12 hours then took it out and 2 hours later, when the dough was at room temp, I stretched it out and cut out the rolls. Second rise was at room temp. This method worked fine for me though I would try activating yeast next time to see if it makes a difference.
I put these in my bread machine on the dough cycle and they are amazing!!!! I changed up the order of ingredients to match my bread machines order of other recipes. They are perfect and highly requested by my family.
I was wondering about this! So I’m guessing that instead of premixing the yeast and milk, you put the yeast on top of the flour?
Thank you for this!!! I had a bag of whole wheat flour from a loaf recipe I tried a few weeks back, and I wanted to try making dinner rolls. This recipe was perfect! I did have to add 4 tbsps of flour because the dough was a bit sticky, but my rolls still turned out soft and fluffy! The honey butter and flaky sea salt is a must for that extra goodness.
I would also just like to share to others who will try this recipe that the milk + yeast mixture won’t turn frothy at all without sugar. The warm milk activates the yeast but without sugar to feed on, the mixture won’t turn frothy. It should be fine if you’re sure that your yeast isn’t old or expired. Otherwise, to get that froth and to test if your yeast is still alive, you’ll have to add sugar to your mixture. You can probably do this by adding some of the honey from the recipe to the mixture.
Oh I was also able to make 24 smaller rolls. I used a half sheet pan, baked at the same temp for 12 mins!
These rolls were dry when baked for 25 min. I made these a couple more times and found that they bake at 21 min in a glass pan. These are good whole wheat rolls.
I rated these four stars only because they were dry. I cooked them for only 21 minutes as recommended by a previous reviewer and they were still overdone. So I cooked the next batch at 20 min and this time I covered them w/ tin foil for the last 11 minutes. This batch was less dry. I think next time I’ll cover w/ tin foil for the last 12-13 and only cook for 19 min.
Baking times vary depending on your oven and the type of pan you’re using.
Also, make sure too much flour didn’t sneak in. A kitchen scale is best.