

Reference this Baking with Yeast Guide whenever you work with baker’s yeast. I include practical answers to all of your common yeast questions.
Welcome to your complete guide to Baking with Yeast.
Many of you have responded to a question I asked recently… what baking recipe intimidates you the most? A majority say yeast breads.
Baking with yeast used to intimidate me too. Something about yeast seems really scary! And, what’s worse, some yeast recipes are complicated and arduous. But once I began to understand that yeast is simply another ingredient in the bowl, my fears subsided. And if you begin with easy yeast recipes, your confidence builds.
Whether you’re a beginner baker or pro, it’s important to understand how yeast works. I urge you to read through this guide where I answer many common yeast questions. I wrote this in partnership with Red Star Yeast, so you can be confident the information is very helpful. I’ve worked with Red Star Yeast for years because it’s my preferred brand!
It’s time to tackle your fear of yeast and bread baking! 🙂
What Is Yeast?
Yeast is a living organism. It needs food and moisture to thrive. There are 2 main forms of yeast: brewer’s yeast and baker’s yeast. Brewer’s yeast is used primarily in beer making and baker’s yeast is used in baking. Yeast feeds on sugar and converts it into alcohol and carbon dioxide through fermentation. Alcohol is useful in beer making and carbon dioxide is responsible for stretching and expanding the dough, something we see as the dough rises. Yeast fermentation also provides the flavor and texture you expect in yeast-raised recipes.
There Are 2 Main Types of Baker’s Yeast
- Wet Yeast – Also known as Cake Yeast, Fresh Yeast, or Compressed Yeast
- Dry Yeast – Sold as Active Dry and Instant Yeast
Cake Yeast vs Dry Yeast
Cake yeast is wet yeast sold in block or “cake” form. It’s active and highly perishable. To use cake yeast, crumble over dry ingredients or dissolve in the liquid used in the recipe. Today, cake yeast is only available in limited stores.
Dry yeast, on the other hand, has a longer shelf life because it’s been dried out. It’s granulated and sold in little packets or loose in a jar. It is in a dormant state and if the package isn’t opened yet, can be stored at room temperature. Dry yeast requires different liquid amounts and temperatures than cake yeast.
Here is a helpful cake yeast & dry yeast conversion table.
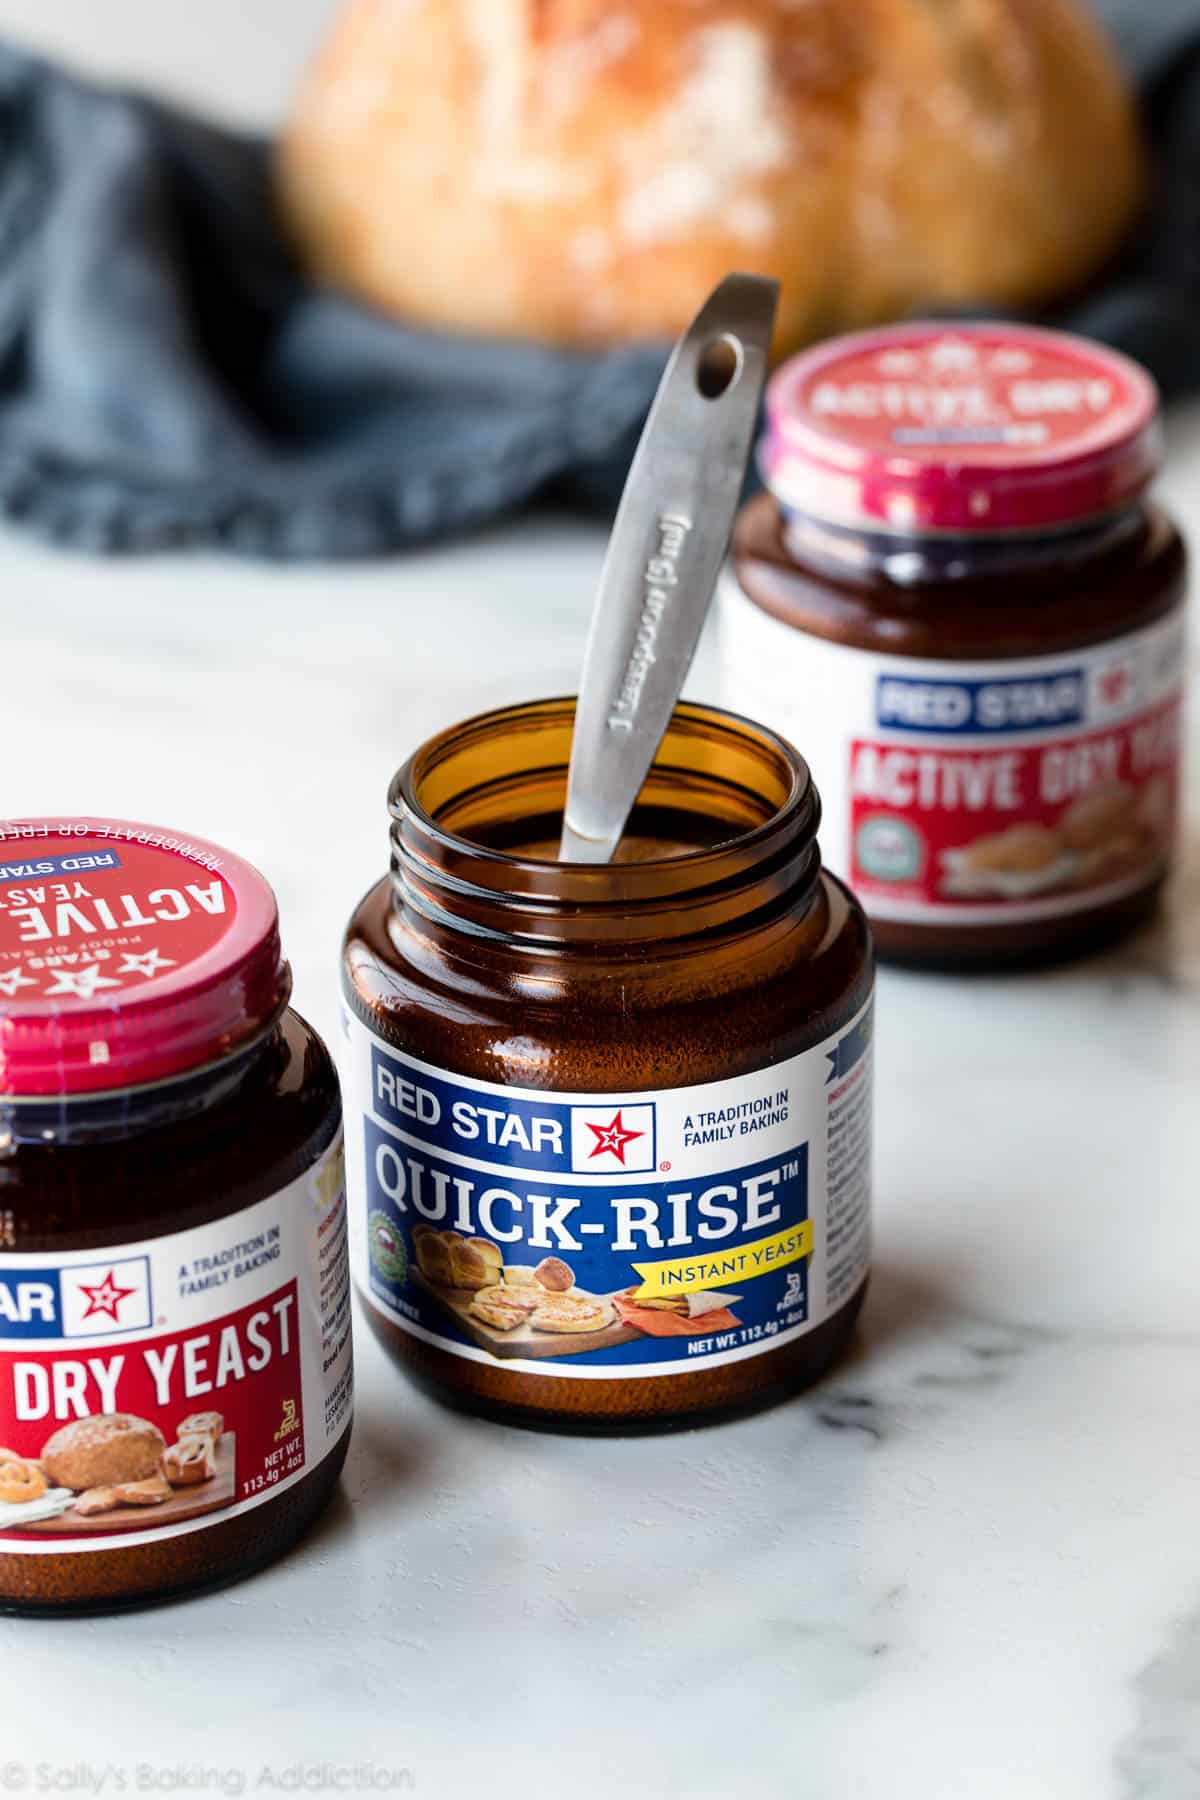
Types of Dry Yeast
Because it’s most common, we’re focusing on dry yeast in this Baking with Yeast Guide. There are two types of dry yeast available: active dry yeast and instant yeast. They both require liquid to “wake” out of their dormant state.
- Active Dry Yeast
- Instant Yeast – Also known as Fast-Rising Yeast or Fast-Acting Yeast
Red Star Platinum Yeast
This is, by far, my preferred yeast! Platinum Yeast from Red Star is an instant yeast blended with natural dough improvers. These dough improvers are naturally occurring enzymes derived from protein in wheat flour. They strengthen the dough and build tolerance to variations in flour strength and the baking process (kneading, rising, etc.) As a result, the dough traps more of the leavening being produced by the yeast for an overall better rise and better volume in the finished baked good. Most of the yeast recipes on my website are made with Platinum Yeast from Red Star. It’s fantastic for yeast beginners.
Can I Substitute Active Dry Yeast for Instant Yeast and Vice Versa?
Yes. Active dry yeast has a moderate rate of rising and instant dry yeast has a faster rate of rising. Active dry and instant yeast can be used interchangeably in recipes (1:1); just keep an eye on your dough so it doesn’t rise too much.
Can I Store Dry Yeast in the Freezer?
Yes, you can store dry yeast in the freezer. The experts at Red Star Yeast actually recommended it! Place the yeast towards the back of the freezer so it’s not exposed to temperature changes when you open the door. To thaw, measure the amount you need and set it on the counter for 45–60 minutes before using. The colder it is, the longer it will take to “get going.”
Do I Refrigerate or Freeze Dry Yeast After Opening?
Dry yeast is perishable. Once your package is opened, the yeast must be refrigerated or frozen in an airtight container. Use within 4 months if refrigerated and 6 months if frozen.
What Is Proofing Yeast?
Proofing dry yeast is sometimes a step in a recipe. This step is basically just “proving” that the yeast is alive and active. You dissolve the contents of the packet in warm water or milk with some sugar. After 5–10 minutes, the mixture should be foamy and frothy on top. If not, the yeast is dead and should be tossed. However, if used before the expiration date, this step isn’t really necessary with modern active dry or instant yeast. Still, some recipes call for it, just to be extra certain the yeast is alive. (If using quality, unexpired yeast, it usually is!)

How Is Yeast Used in Baking?
When combined with liquid and sugar, yeast makes dough rise. Yeast, while also providing flavor, creates carbon dioxide in the dough. This stretches and expands it. Yeast thrives in warm temperatures, which is why warm liquid is usually used to make yeasted bread dough. However, hot liquid can kill the yeast—around 135°F (57°C) or higher. A good rule of thumb: if it’s too hot to touch, it’s too hot for the yeast.
Yeast is also effective in cooler temperatures, but it requires more time to expand the dough. In some cases, a slower rise time is preferred because more flavor is produced in the process. In some of my bread recipes, we use cooler liquid and a long rise time, and may even require the dough to rest in the refrigerator, to purposely slow the yeast’s activity and develop the flavor and texture. For example, this artisan bread, seeded oat bread, olive bread, and no-knead pizza bread.
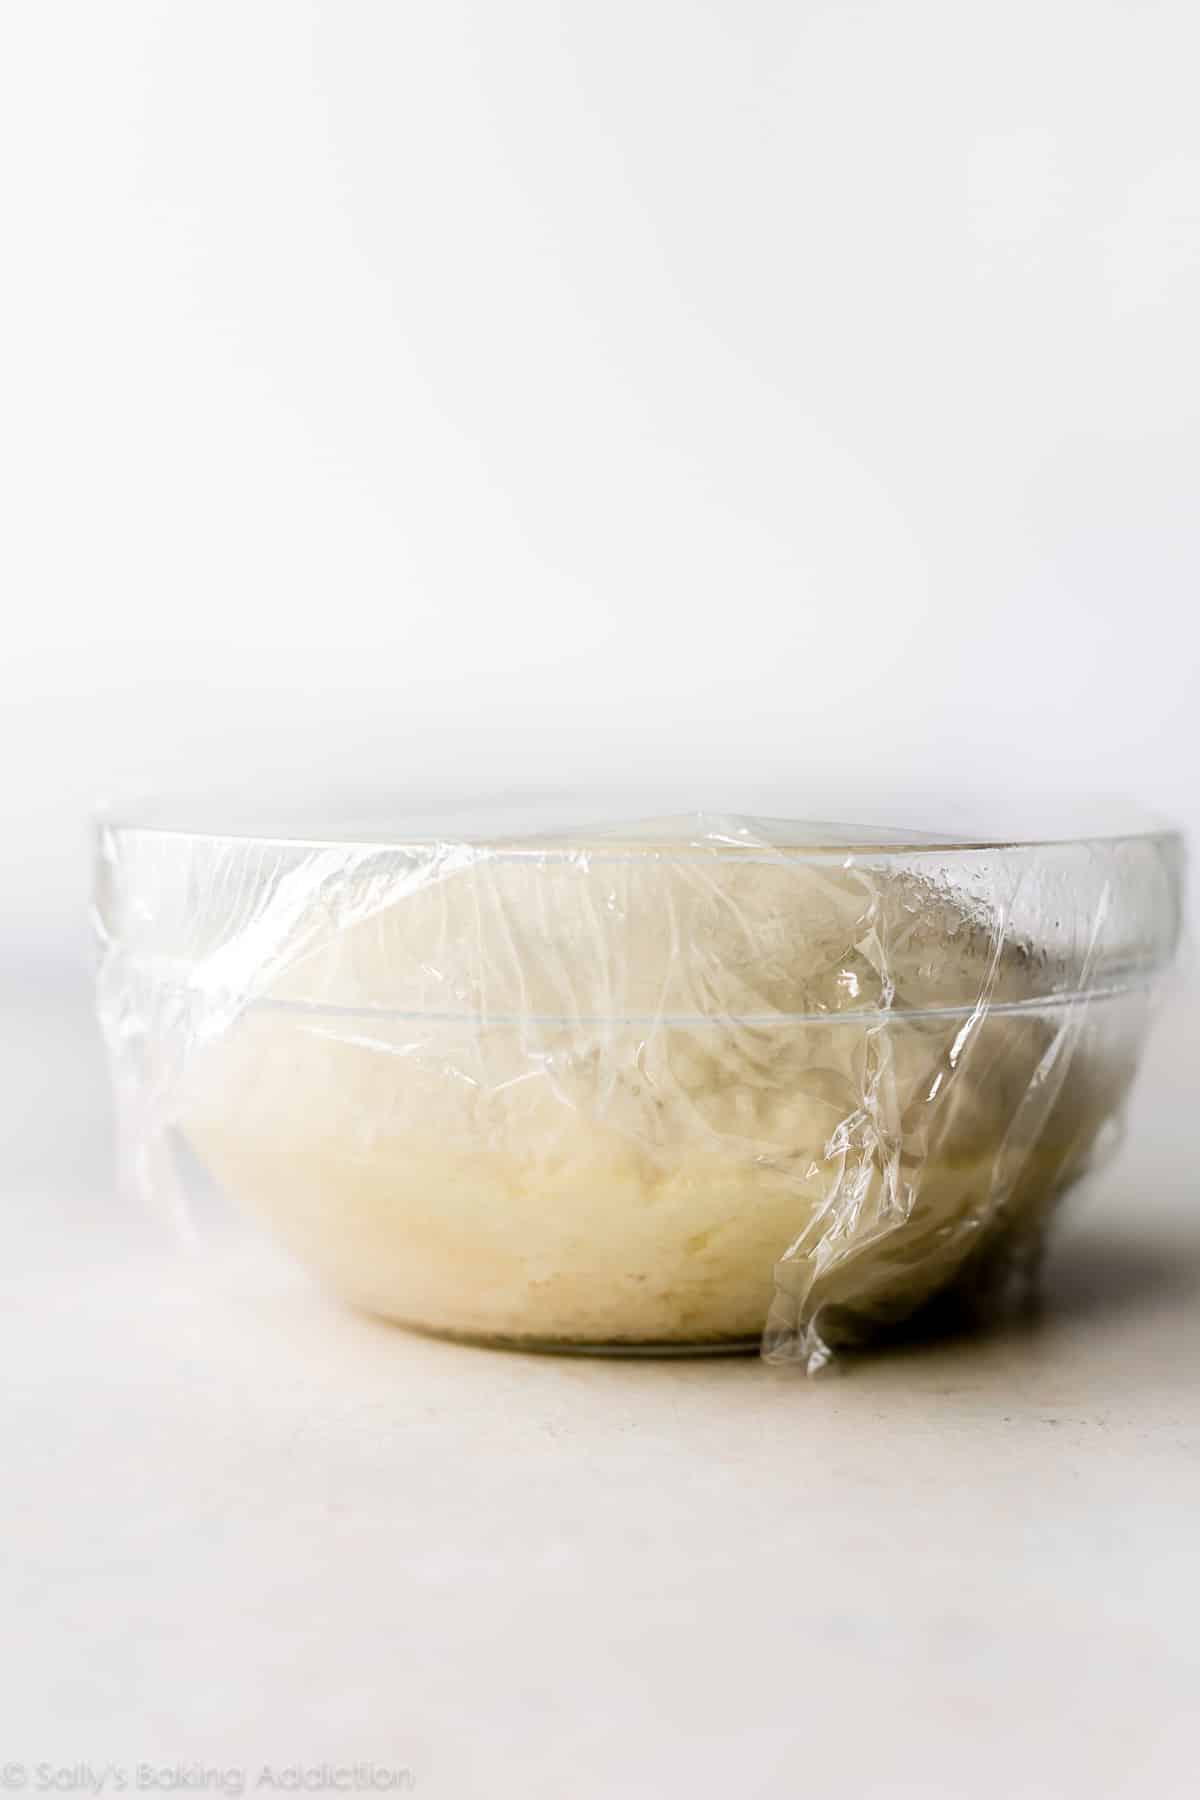
Where Should Dough Rise?
Most yeasted bread recipes will instruct you to cover your bowl of dough and place it in a warm, draft-free place. This crucial time is when the yeast ferments the sugar into carbon dioxide and alcohol. The kitchen counter is fine, but if you’re pressed for time, you can speed up the rising process by placing the dough in a slightly warm oven. Here’s how:
Preheat the oven to 150°F (65°C), then immediately turn the oven off. Wait a few minutes, then place the covered bowl of dough inside the oven with the door cracked open. This will be a warm environment for your dough to rise. After about 30 minutes, close the oven door to trap the air inside with the rising dough.
Here is more information on dough rising.
What if My Dough Isn’t Rising?
There are a few factors that prevent your dough from rising:
- Temperatures are too cold. Place dough in a warmer environment.
- Yeast is expired or dead. Start over with new yeast.
- Liquid in the dough was too hot, which killed the yeast. Start over with new dough.
- Too much flour or sugar in the dough. Be mindful of your measurements and remember that it’s ok for dough to be a little sticky. Don’t over-flour.
- Type of flour. Flours with higher protein content have superior dough (gluten) forming and rising properties. Here is more information on flour types.
- Kneading not enough or too much.
How Do I Knead Dough?
Kneading dough is a common step in bread baking. You can knead dough with your hands or in a stand mixer with a dough hook. A stand mixer obviously makes the job hands-off and easier, but kneading by hand is gratifying… and a great stress reliever too! I have a full tutorial with a video about how to knead dough that can help with this step.
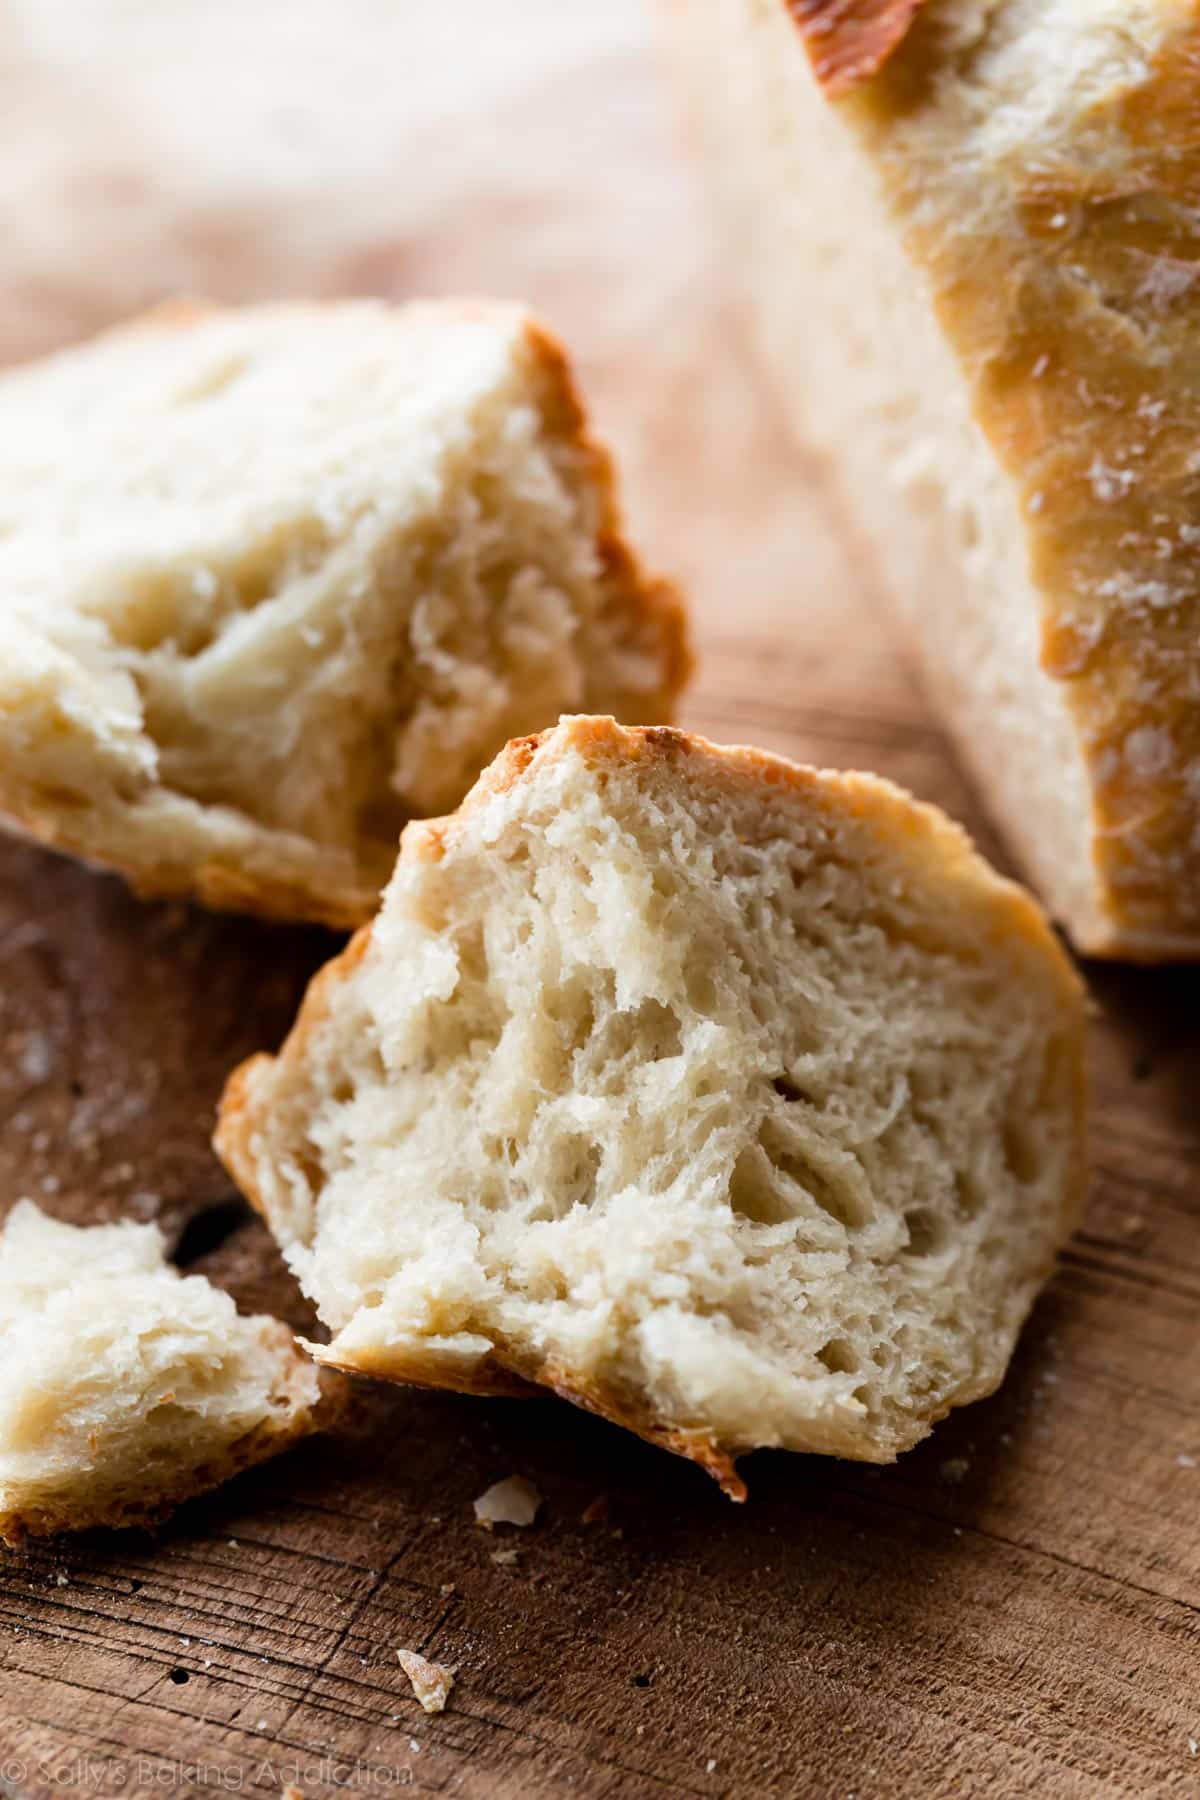
Kneading the dough serves a couple purposes. First, it incorporates air into the dough. It also encourages the proteins in the flour and moisture in the dough to link together, forming a strong gluten network, which is essential for retaining the gas produced by the yeast. Gluten is what makes bread deliciously chewy.
What Is a Typical Yeast-to-Flour Ratio?
One packet of dry yeast (2 and 1/4 teaspoons, or 7g) will raise up to 4 cups (500g) of flour.
What Does It Mean to Let Dough Rest?
It’s beneficial to let dough rest after working or shaping it. Cover the dough with a clean towel or plastic wrap and set it aside. This little “nap” allows the gluten to relax and settle, and makes dough easier to shape.
For example, if you’re trying to roll out dough to certain dimensions for cinnamon rolls and the dough keeps shrinking back as you try to roll it out, cover it and let it rest for 5–10 minutes, then try rolling it out again. It should be easier to get it to the dimensions you’re aiming for after it’s had a rest.
Where Do I Begin?
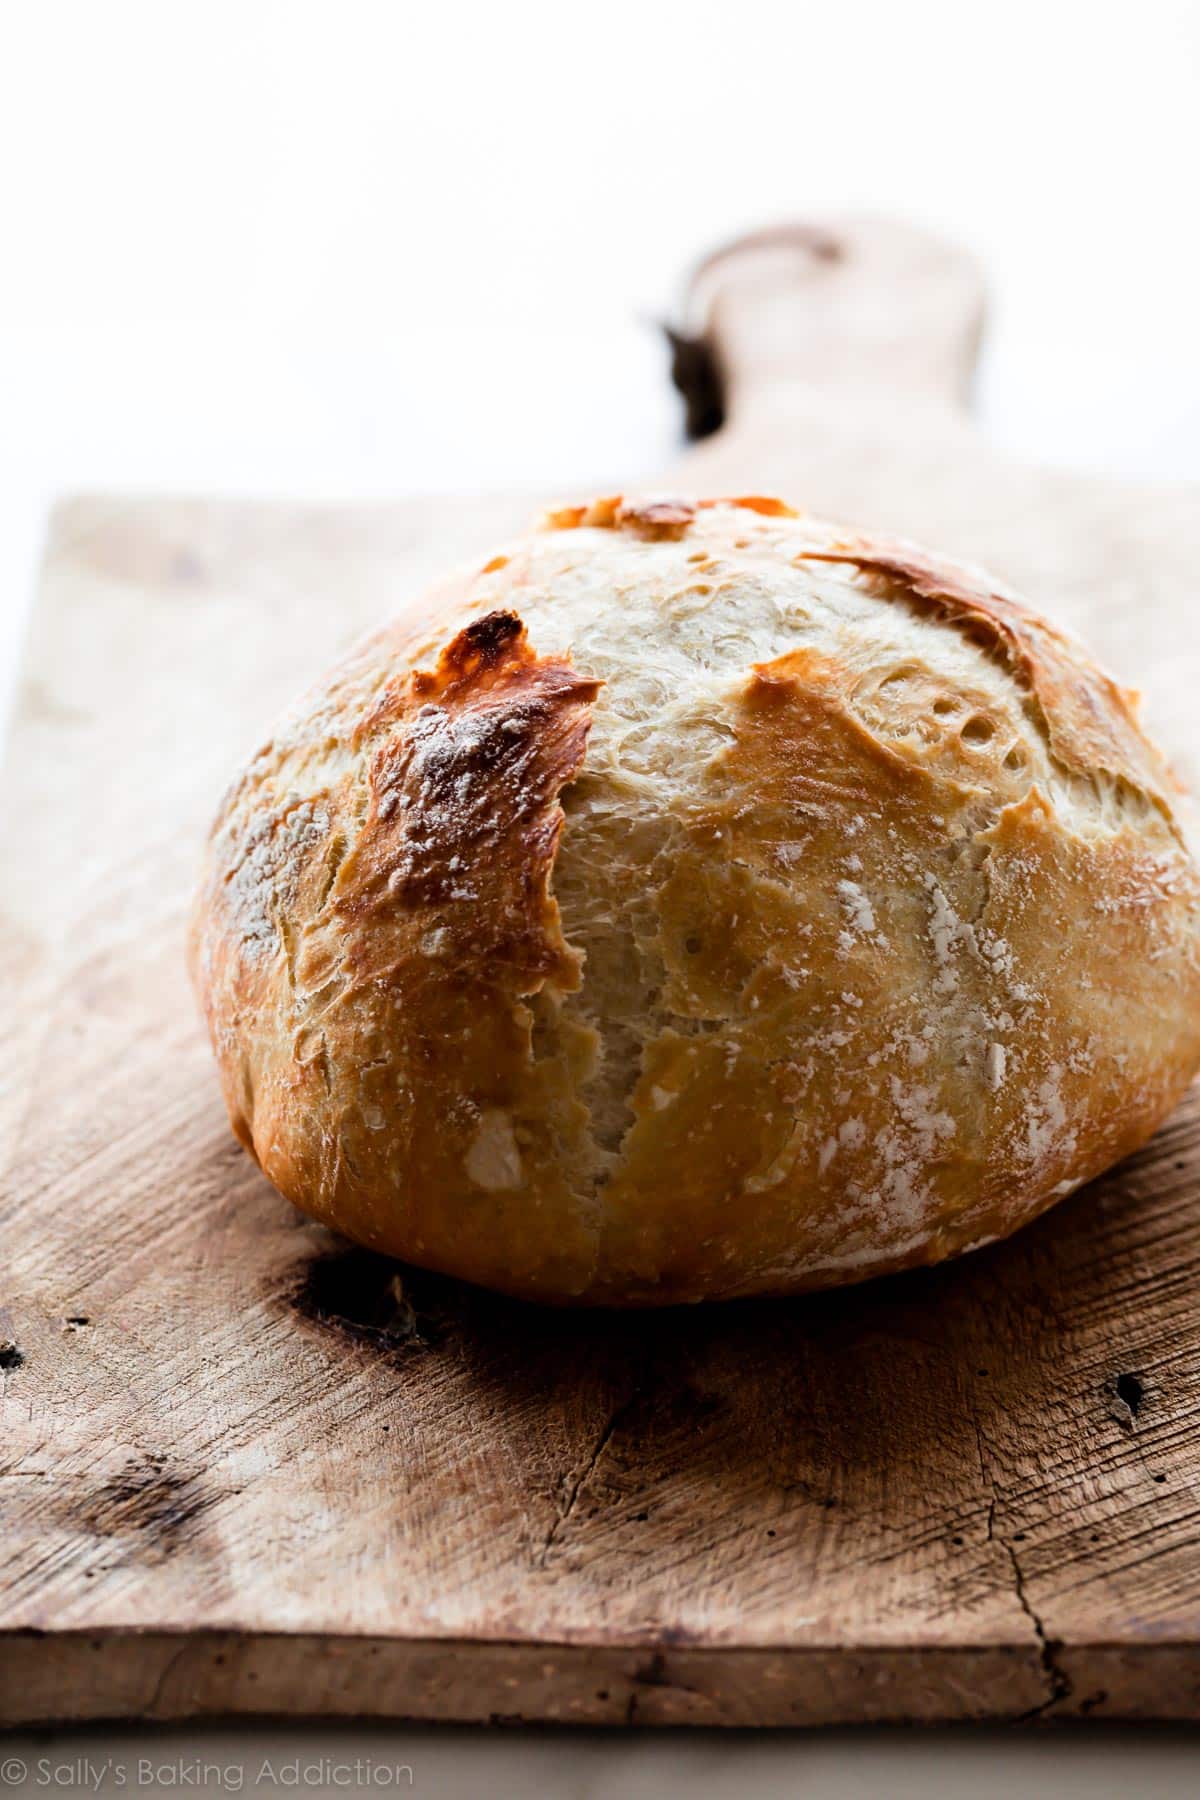
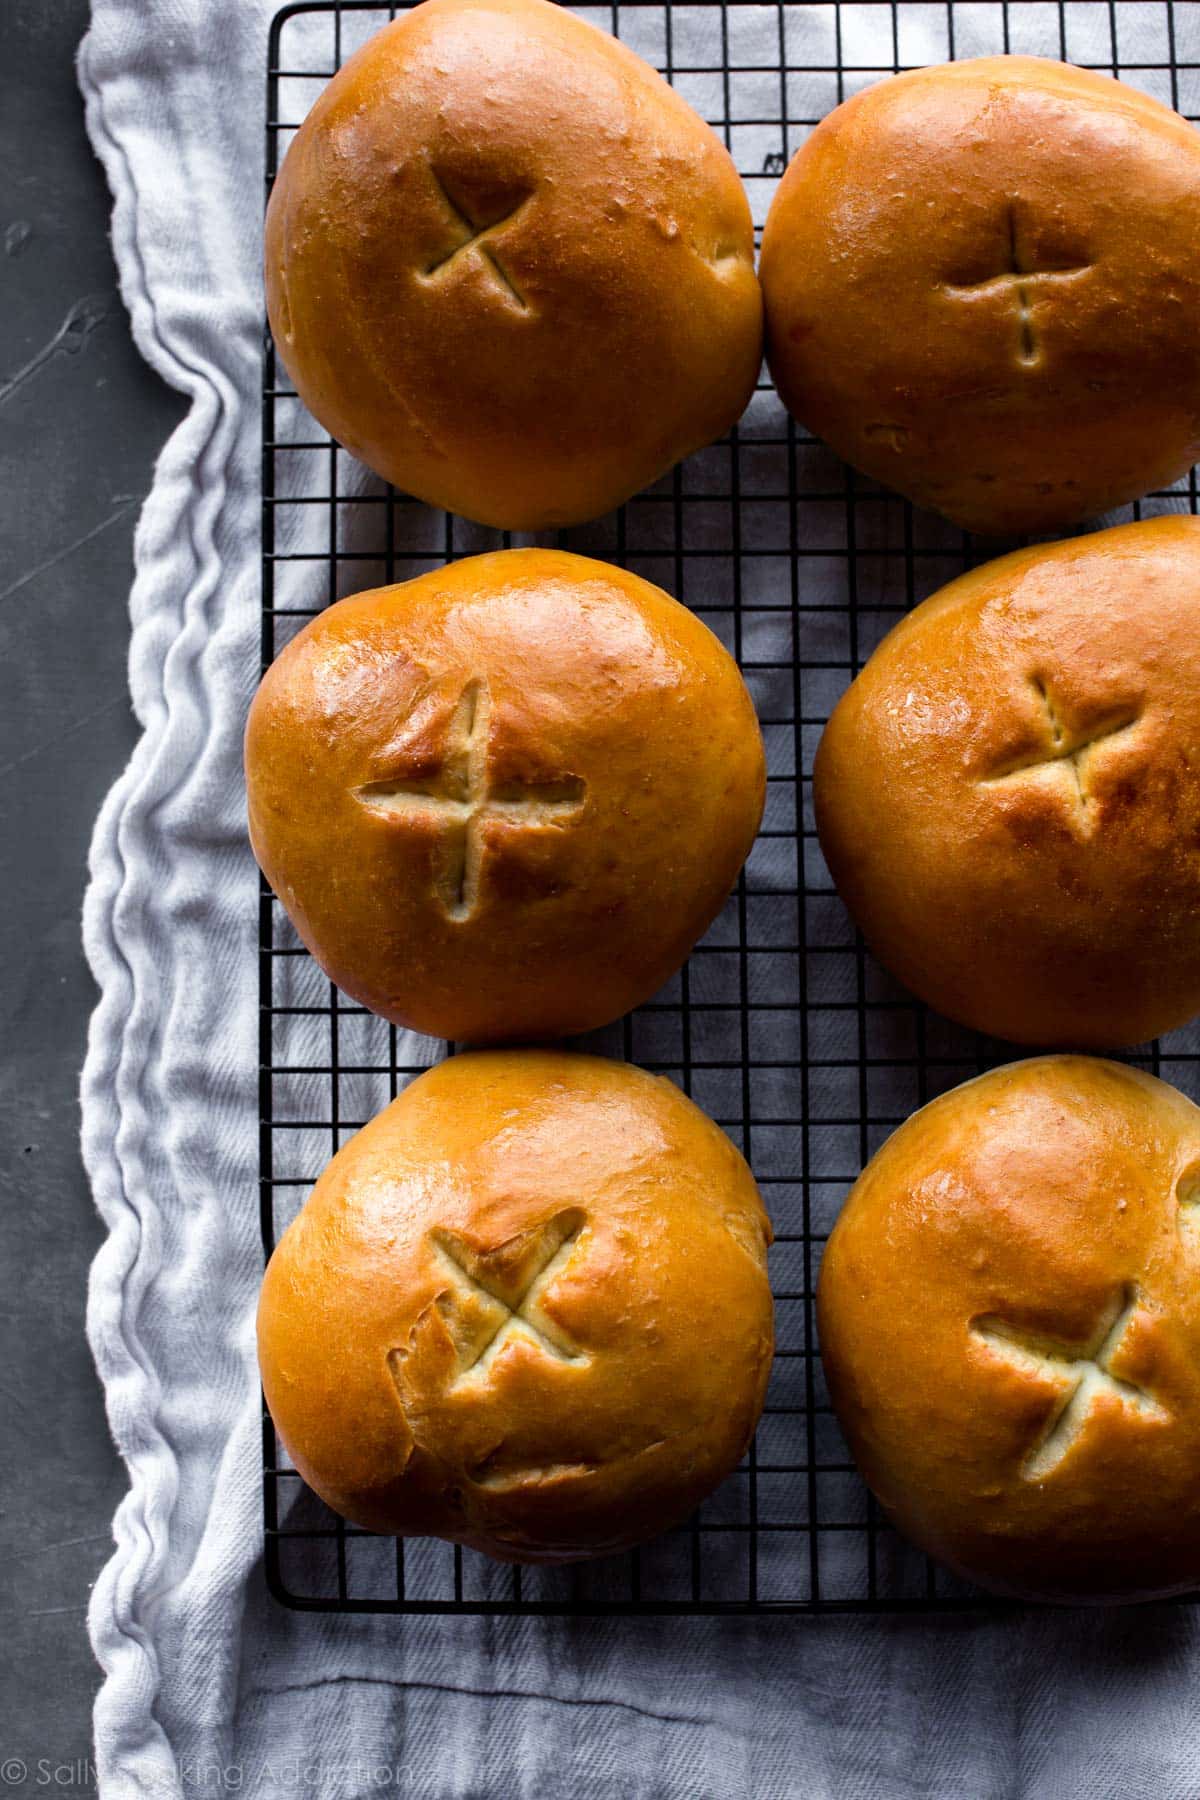
Now that you have a better grasp on baking with yeast, start with an easy recipe: Cranberry Nut No-Knead Bread. (Pictured above without the cranberries and walnuts.)
This no-mixer, no-knead bread recipe comes together in 1 bowl with very little hands-on work. It’s a great recipe to begin the day before because it requires at least 12 hours to raise the dough, so just let it sit on your counter.
I also have a 4-ingredient homemade artisan bread that requires very little hands-on work and a 4-ingredient homemade ciabatta bread for more of a challenge.
More Favorite Easy Yeast Recipes:
- Cinnamon Rolls: Shaped yeast doughs, such as cinnamon rolls, lemon blueberry babka, and dinner rolls, usually require 2 rises. This easy cinnamon rolls recipe skips 1 rise, so it cuts the time in half. I also have a recipe for traditional overnight cinnamon rolls.
- Flatbread Dough: Make thin-crust-style pizza with this 45-minute flatbread dough. My homemade pizza dough is also very easy, though it’s thicker and requires a slightly longer rise time. Both have great flavor.
- Homemade Bread Bowls: Pictured below. This is a very basic bread dough that you can flavor and use for many recipes. See the recipe Notes.
- Soft Pretzels: This pretzel dough only needs to rest for about 10–30 minutes before shaping, so you can have homemade soft pretzels in under an hour!
Q: Was this guide helpful to you?
More Helpful Baking Tips


Reader Comments and Reviews
I do a lot of baking for a child with food allergies. I would like to make some homemade cake and brownie mixes to have on hand. Most store bought mixes are not safe. Even sprinkles have to be special ordered! Do you have recipes for such a thing?
Hi Marjorie, the only baking mix recipe we have is for Christmas cookies in a jar. Sorry we can’t be of more help!
Hi, Sally! Thank you so much for this info session! I do have a question. I plan to make pumpkin cinnamon rolls next weekend. After the first prove and forming the log yet just before cutting the log into 1-inch portions, I’ll be traveling about 2 hours to a family member’s house. My question is, at this point, can I place the log into the refrigerator (or freezer) to stop the rising and transport to my destination in a cooler?
(My thought process was that I would bring the roll back to room temperature upon arrival, cut into portioned sizes and complete the second prove, then bake.)
Hi L. Demery! Great question. For the pumpkin cinnamon rolls, we would cut the rolls, place them in the pan, then refrigerate/transport in a cooler until you reach your destination. Once there, allow to rise until puffy, then bake. This method is similar to the overnight method detailed in the recipe notes – just with a shorter time frame.
Thank you soooo very much! I absolutely LOVED your regular Cinnamon Rolls, I know these will be a hit!
-L’Oreal
I’m just getting into baking with yeast so this article is perfect – but it’s currently summer and humid so the house is pretty warm, and my doughs consistently double in size within thirty minutes instead of 1-2 hours. The only cooler place is out near the air conditioner which isn’t draft free. Is it ok if it only takes 30 minutes? Or is that too fast to let the yeast properly work?
Hi Samantha! It should be fine – just bake as soon as the dough doubles in size.
When I was a little girl, my family stayed in an inn on Pawleys Island, SC for a week in the Summer…heaven! We were served three meals a day family-style (all homemade). The cooks made a loaf bread that came sliced to the table. The crust was hard/crunchy and the white bread was dense and chewy. Would any of your bread recipes fill that bill? It toasted beautifully, as well.
Sounds lovely! Our homemade artisan bread might be a close match, let us know if you give it a try!
i’m looking to make your recipe for pain au chocolats, it calls for instant yeast but i only have active dry yeast at home. you said that they can be used interchangeably, but do i still need to rise the active yeast separately with water/milk, before adding it to the mix or can i just throw it in as i would instant yeast? thanks in advance!
Hi Kayla, you can add it in as you would instant yeast, the rise time may just be a bit longer. Happy baking!
Everything I have made so far has been wonderful from your chocolate chip cookies, lemon loaf, strawberry rhubarb squares and many more thank you.
I’m new to baking with yeast. I have avoided it. Now I have agreed to try, but my daughter is on a gluten free diet. I see that yeast needs to interact with gluten. What do I use?
Hi Susan, our team does not have much experience with gluten-free baking, particularly when it comes to traditional breads and yeasted recipes. We do not have an gluten free bread recipes at this time. If you’re interested, here are all of our gluten free recipes where flour simply isn’t needed. Hope you can find a few there to enjoy!
i would like to print for my cookbook binder, but it will be 30 pages long. I didn’t know if there is a PDF version available?
Hi Michelle! We do not have a PDF version of this guide at this time, but we can certainly see how that would be helpful and will keep this in mind for the future. To make it a bit shorter, you could try copying and pasting the text into a Word document instead. Hope this is a helpful solution!
We are waiting for the first rise as I write this!
My daughter and I are making these overnight rolls together and neither one of us saw the direction to add the flour in parts. We thought to suggest adding that direction earlier (heads-up style as you did with the sugar) would help other people baking these for the first time. Thanks for supplying your recipes free of charge! All the best, Eliza & Eva
I made your cinnamon rolls. So easy and delicious too!
How much heat do you use to back mini pretzel bites?
Hi Miley, we bake our soft pretzel bites at 400°F (204°C).
This was a nice recipe. I wondererd if you have a sourdough version. I rarely bake with commercial yeast.
Hi Kelly, we haven’t tested our recipes using sourdough starter, but let us know if you decide to try. We’d do a search online to find suggestions on conversion rates. There are many good resources out there!
I have been using your simply sandwich bread recipe. First time I made it I used Fleichman’s rapid rise yeast. It came out perfectly shaped and delicious. Then I bought some of the Platinum Red Star yeast. Now the bread rises to a perfect shape but while baking one side rises up higher and over to the side. It taste fine but looks lopsided. What am I doing wrong?
Hi Sarah, I missed this question before! The uneven rising could be the yeast, but I’ve actually had it happen before to yeasted loaves (using all different brands of yeast!) because of the rolling/shaping process. It could be thicker/taller in that area. Make sure, when patting down/rolling out into a rectangle and before rolling back up, that the dough is pretty even in thickness all over.
Hi ! I’m wondering what could have caused this, my loaf when it baked collapsed, do you know what I may have done wrong? Maybe I let it rise too long?
Thank you!
Hi Kassie! Yes, over proofed dough will quickly collapse when it’s baked. It’s an easy fix for next time!
Hi Sally,
My oven has a “Bread Proof” button and its set to 95°F. I was wondering if that would be good to use while rising breads and other yeast dough?
Hi Jessica! Yes, that can be a great place to allow dough to rise.
Would it be wise to have a thermometer to test the temperature of the water to dissolve the yeast? What type do you buy?
Hi Barb! Yes, an instant read thermometer is great for testing the water temperature (like the one we link in the recipe notes of our seeded oat bread recipe).
I’ve tried to make the cinnamon bun recipe today – did everything exactly as instructed. Put them in my oven in proof mode, and they didn’t rise AT ALL. What did I do wrong???
Hi Penny, did you try the tips from the section of this post, What if My Dough Isn’t Rising?
I did. The yeast was brand new expiry ’24. I proofed in my oven in the bread proof mode. The liquid was just warm – I could dip my finger in. I measured exactly with ingredients. I just don’t know what happened. And then when I baked them – they were hockey pucks. Very hard and not edible. It was an epic fail 🙁
Thanks for your complete explanation on the how’s, what’s & why’s of yeast. Most interesting and useful to understand the principles!
How do you replace wet yeast for dry yeast when used in a recipe?
Hi Nancy, Here is a helpful cake yeast & dry yeast conversion table: https://redstaryeast.com/yeast-conversion-chart/ To use cake yeast, crumble over dry ingredients or dissolve in the liquid used in the recipe.
I only have Fleischmann’s rapid rise instant yeast. Can I use this for your Star Bread recipe?
Thanks
Yes, absolutely.
Hi if I can’t find the platinum yeast is there something else? Red star quick rise?
Hi Sue, you can typically use active dry and instant yeast (any brand) interchangeably. Active dry yeast may have just a slightly longer rise time.
HI, I followed the recipe for artesian bread and the crust was perfect but the inside was too dense. What should I do differently next time? Thanks
Hi Lynnnet, thanks so much for trying the artisan bread recipe. How soon after baking did you cut into the bread? Sometimes cutting it too soon before it’s had time to cool can make the bread a bit gummy and dense on the inside. Also, be sure to spoon and level your flour (or use a food scale) to ensure just the right amount — too much can cause the bread to be overly dense which can also contribute to that gummy feeling. Finally, an extra minute or two in the oven will help as well to make sure the bread is fully baked. Hope these tips help for next time!
I really love your Sandwich Bread recipe. I am having an issue with really big holes (almost a tunnel) in the crust part of the bread. I measure everything by grams, so don’t think that is the issue. Maybe I am working the dough too much when I roll it out to achieve the 8×15 inch rectangle? Love the taste of the bread and my son loves the softness, but with the large holes/tunnel it can’t be used for sandwiches. HELP! I just can’t figure out what I am doing wrong.
Thank you!
Ivie Repich
Hi Ivie! Make sure to roll the dough up very tight to avoid air pockets (that will expand in the oven) from forming.
I am making the soft dinner rolls recipe for Thanksgiving. I have not made homemade yeast rolls in 25 years. How long should i knead the dough? I am doing it by hand and i am doubling the recipe.
Hi Beverly! See step 3 in the soft dinner rolls recipe — knead the dough by hand for 3 full minutes. A note: for best results, we recommend making two separate batches rather than doubling. Doubling the recipe can make it easy to over mix and over knead the bread, which will lead to tough rolls. Hope you enjoy the recipe!
I made the soft dinner rolls and they seem gummy. I baked for 25 min and they were browned. But bread was heavy. All seemed ok and then I shaped balls to rise am I working the dough too much?
Hi Jackie, it sounds like your dough may have been over kneaded. That can over develop the gluten and produce the gummy texture you mention. Thank you for giving the dinner rolls a try — hope this helps for next time!
On your recipe for Easy Cinnamon Rolls From Scratch, on the yeast says: Milk & Butter to 110* whisk in yeast till dissolved.How do I know when this happens ? Is it possible to add this into the Flour Mixture to soon ? Do I stir the yeast into the Milk Mixture, or will that ruin the effectiveness of the yeast ? I’ve never been willing to bake anything when it calls for yeast. Groceries are so expensive and I hate to mess things up and waste ingredients. I will reread your helpful advice about yeast. Hope it takes my worries away. I really want to make your rolls and that they turn out correctly. We are hungry for Cinnamon Rolls. Thanks !!!
Hi Barb, once you notice most of the yeast has dissolved in the warm butter/milk, you’re good to go. A few yeast granules float around the top a bit for me, but as long as it’s mostly all dissolved, you’re fine.
I have been baking breads for a while (although still consider myself a newbie) and your recipes are consistently the best I have found. Your tip on softening butter is worthy of a Beard award. I have been given some hazelnut flour and some coconut flour and have no idea what to do with them. Any suggestions?
Hi Linda, than you so much for making and trusting our recipes! We aren’t experts at baking with specialty/alternative flours. We recommend searching for recipes that use either of those to find recipes specially formulated for coconut and hazelnut flour. Happy baking!
Hello, my rolls were more like biscuit, I let the dough rise two times but they were not soft any suggestions as to what I could have done wrong?
Hi Jennifer, are you referring to this soft dinner rolls recipe? We can better help troubleshoot the specific recipe you tried, but if they are coming out more like a biscuit, it sounds like there may be too much flour in the dough, causing it to dry out. Be sure to spoon and level to measure your flour, or use a kitchen scale. Over kneading can also cause dough to become tough. Let us know if we can help troubleshoot further.
Resting is not the same as rising, correct? I have a proof feature on my oven which gives 90 degrees for rising. When recipe says to let dough rest, I shouldn’t put it in oven, correct? Just leave on counter? Thx.
I tried the artisan bread recipe. I am a novice bread maker. I followed the instructions exactly. My yeast was new. The dough did not rise. I’ve read many explanations and just can’t find a reason. This non rising problem also occurred when I tried a bread dough from America’s test kitchen. I’m at about 2,400 feet so I don’t think adjusting yeast will apply. BTW: I use several recipes from Sally’s Baking Addiction and they turn out perfect every time. Friends and family absolutely love the results. Thanks for any ideas you may have.
Hi Rose, we are happy to help troubleshoot. What kind of yeast are you using–instant or active dry or something else? And how warm is the place where you’re letting the dough rise? If your room is more on the cold side of “room temperature,” you can try this trick: Preheat the oven to 150°F (65°C), then immediately turn the oven off. Wait a few minutes, then place the dough in the bowl inside the oven with the oven door cracked open. This will be a warm environment for your dough to rise. After about 30 minutes, close the oven door to trap the air inside with the rising dough.
Where is your high altitude adjustment advise for over 5000 ft?
Hi Jude, We wish we could help, but we have no experience baking at high altitude. Some readers have found this chart helpful: https://www.kingarthurflour.com/learn/high-altitude-baking.html
I made the artisan bread and sandwich bread. After many years of failure. I now feel like a bread baker. Family love it. What kind of instant read thermometer do you recommend. It’s a must for me. No questing if liquid is tight temperatures or if bread is dine baking. Thank you. I only use your recipes. Never disappointed
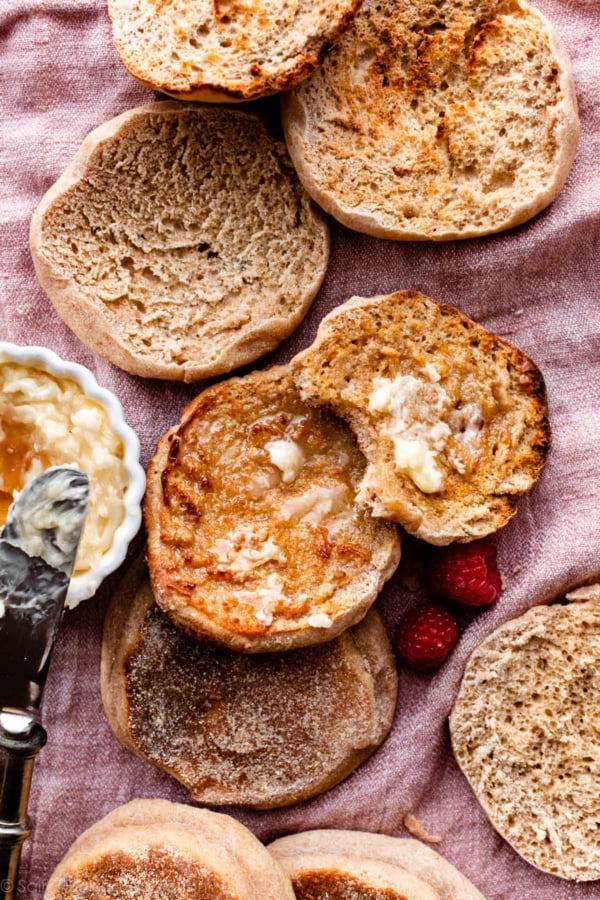
Hi Christine! We’re so happy to hear that you’re enjoying our recipes. Any instant read thermometer should do the trick, we link to one similar to what we use in our Homemade English Muffins post (see step 8 in the recipe). Happy baking!
My dough was wonderful smooth and pliable. I watched a lot of video on U-Tube. I was making buns. I managed to get perfect little balls. The rising all went well. Great aroma while baking. Then twice in one week bird food. The finished product was dry and hard. I live at 7000 feet and extremely dry conditions right now. I think that must be the problem.
I have baked rolls for many years using a recipe that uses water. This time, I decided to to find a recipe that uses milk. I made the dough and it did not rise. The next day, I tried the soft dinner roll recipe again, checked the temperature on the milk, and the dough rose. After the second rising l placed them in the oven and all I got were hard balls.