

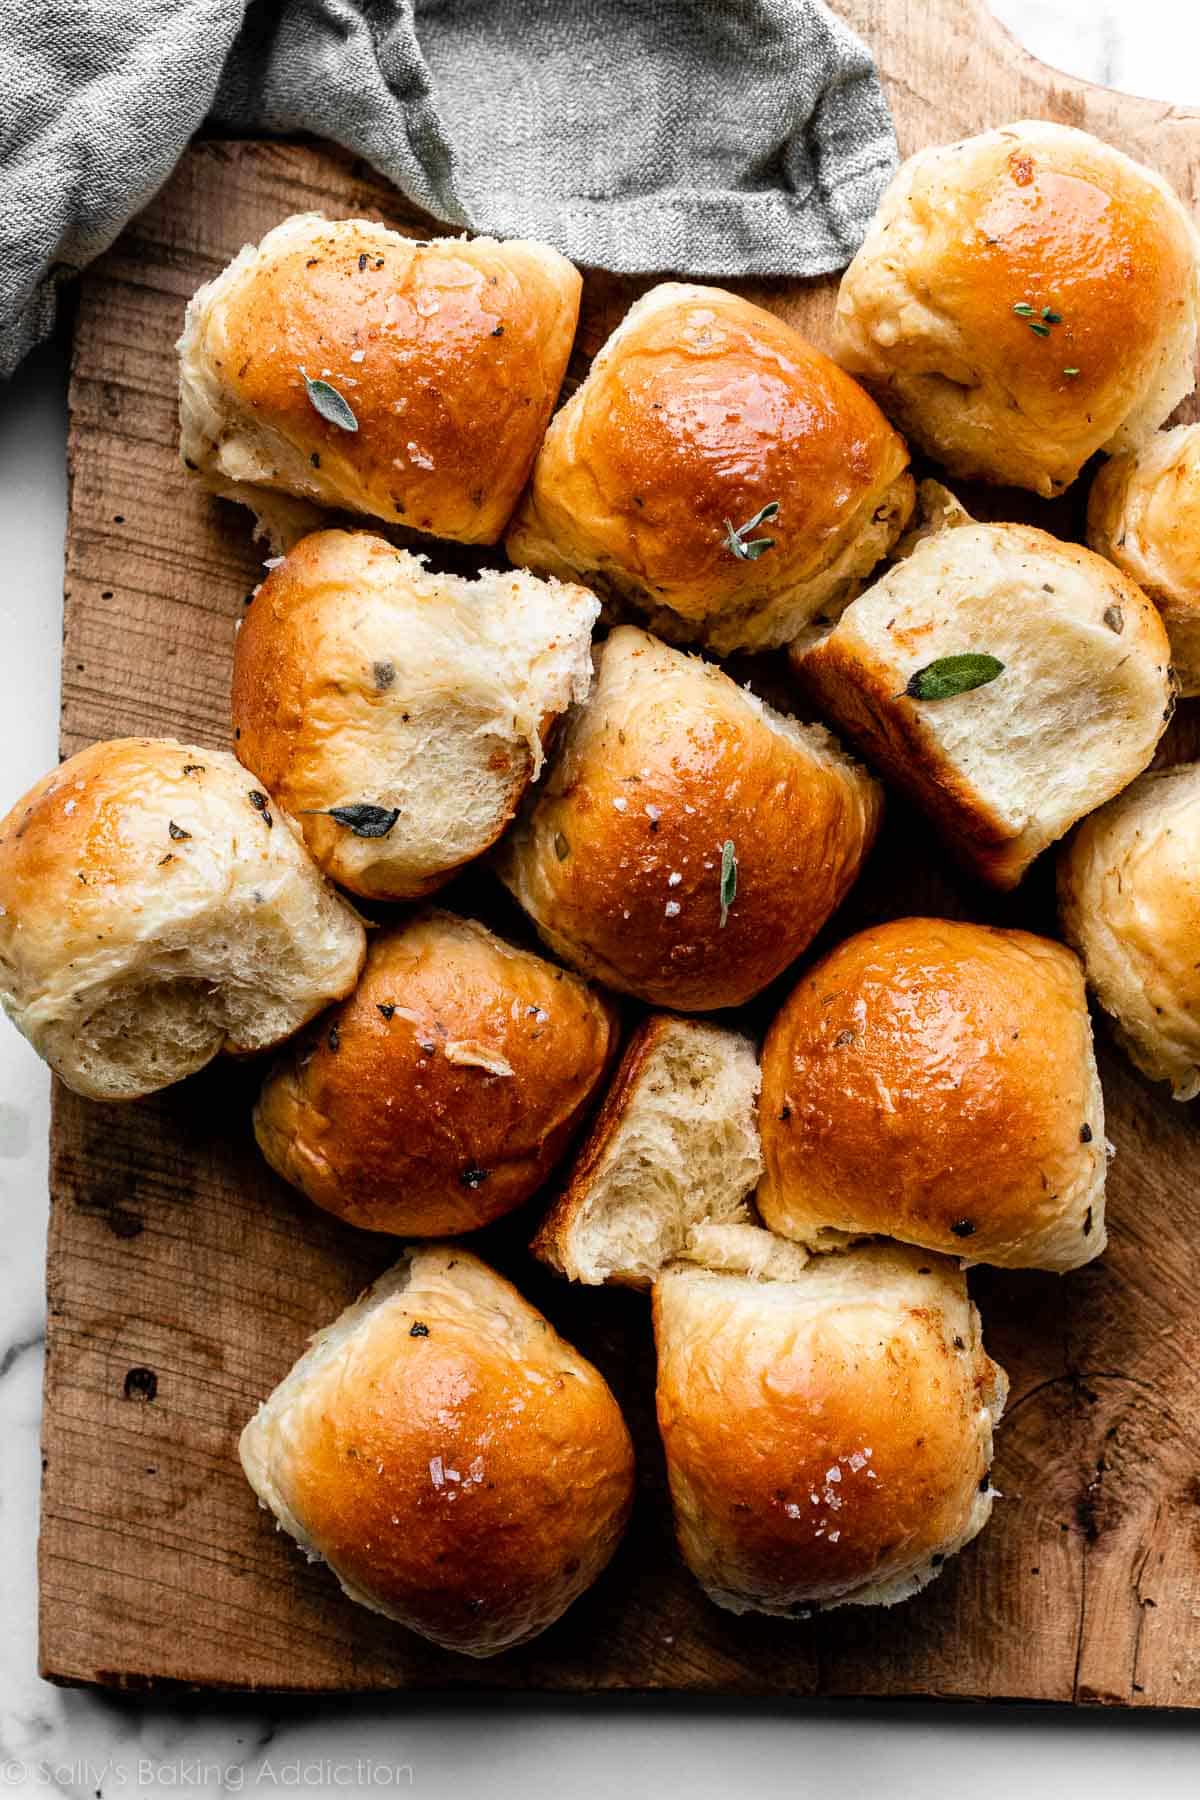
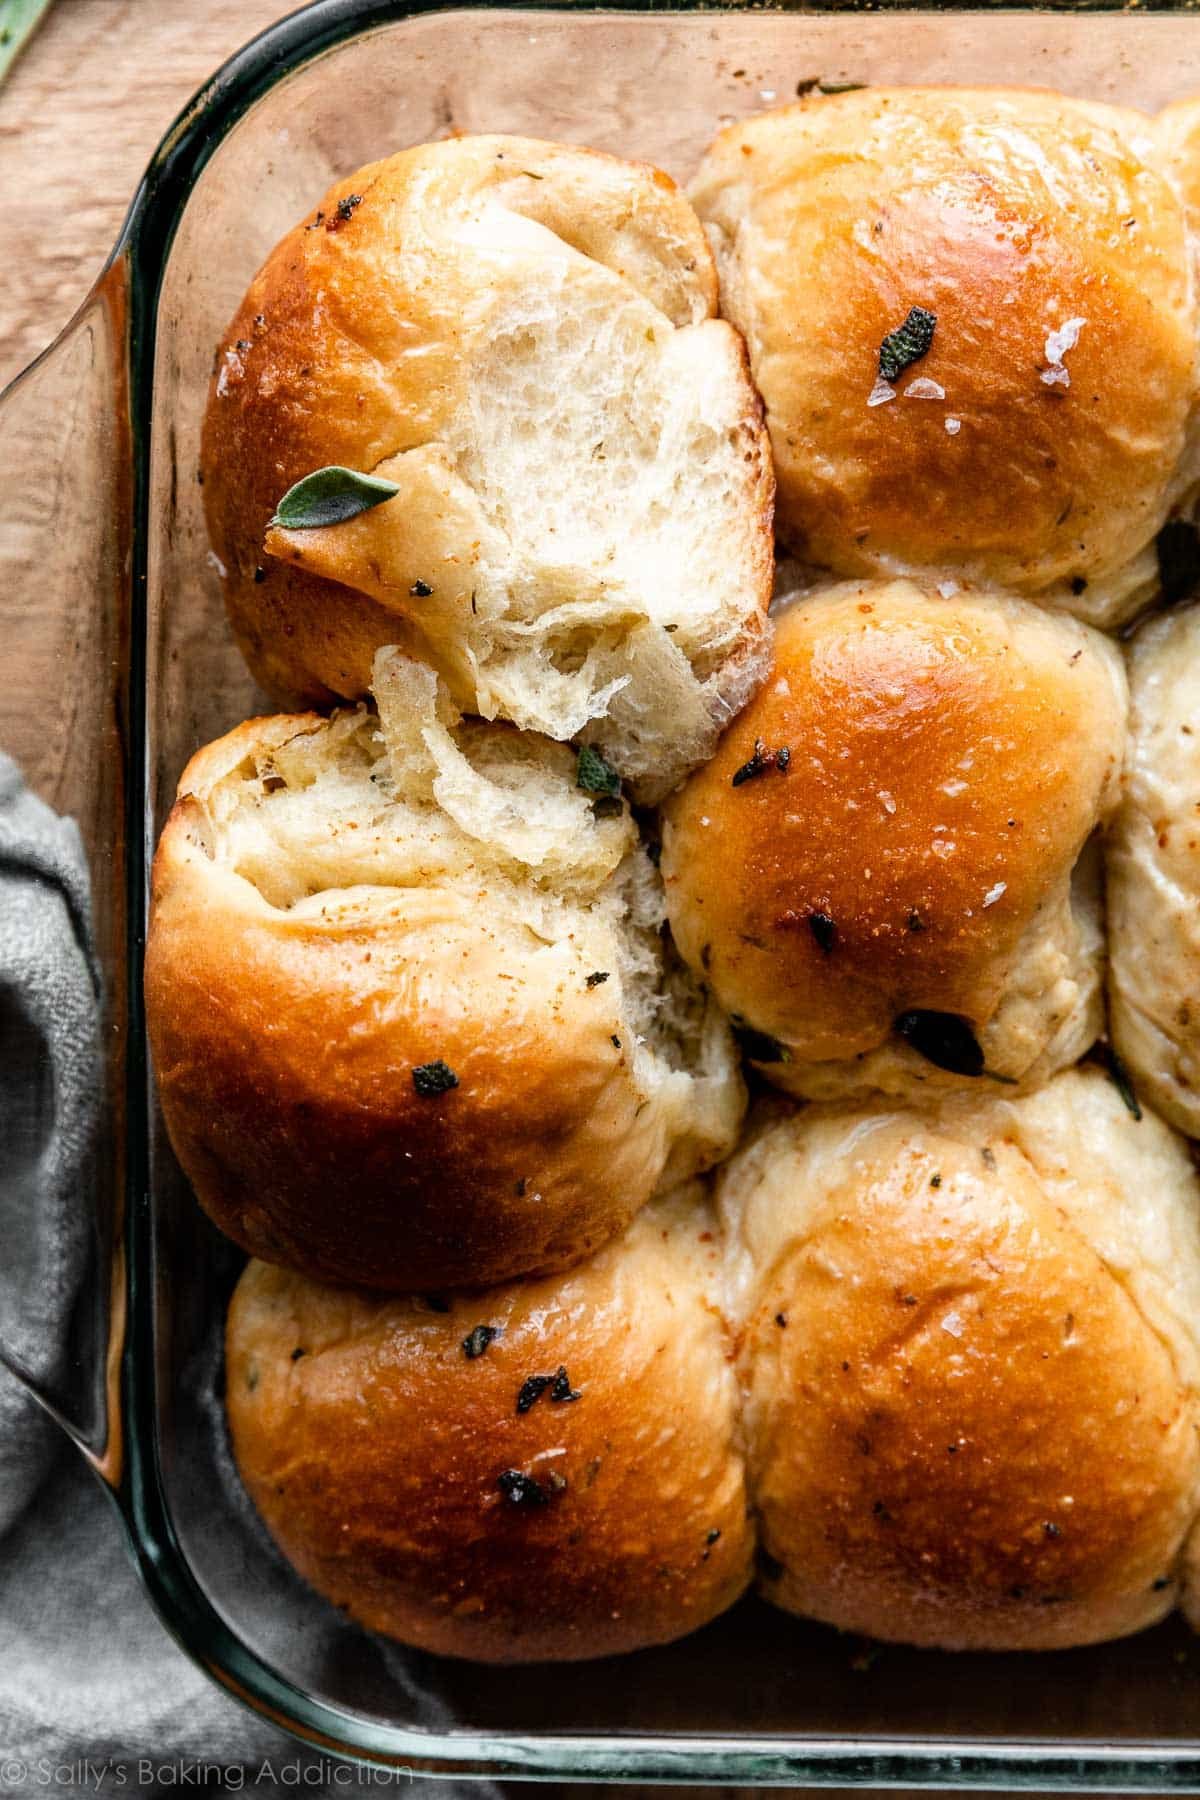
Savory, soft, and flaky, with a delicious dose of caramelized and nutty browned butter, these brown butter sage dinner rolls are a flavorful upgraded version of ordinary dinner rolls. Made from 9 simple ingredients, the rolls make a wonderful aromatic and herb-infused addition to any fall, winter, or holiday meal. (Try them with pumpkin chili!) See recipe Notes for make-ahead instructions.
This recipe is brought to you in partnership with Red Star Yeast.
One reader, Jen, commented: “Made these for Thanksgiving dinner tonight (Canadian Thanksgiving is in October). Everyone raved about them. The browned butter and fresh herbs take these over the top! ★★★★★“
I figured out what side dish should be on every dinner table from now until March. Basically, if it’s sweater weather, we should all be baking these brown butter sage dinner rolls. 😉
More than a side dish, these savory rolls are like a side of comfort for your comfort food!
Here’s Why You’ll Love These Sage Dinner Rolls
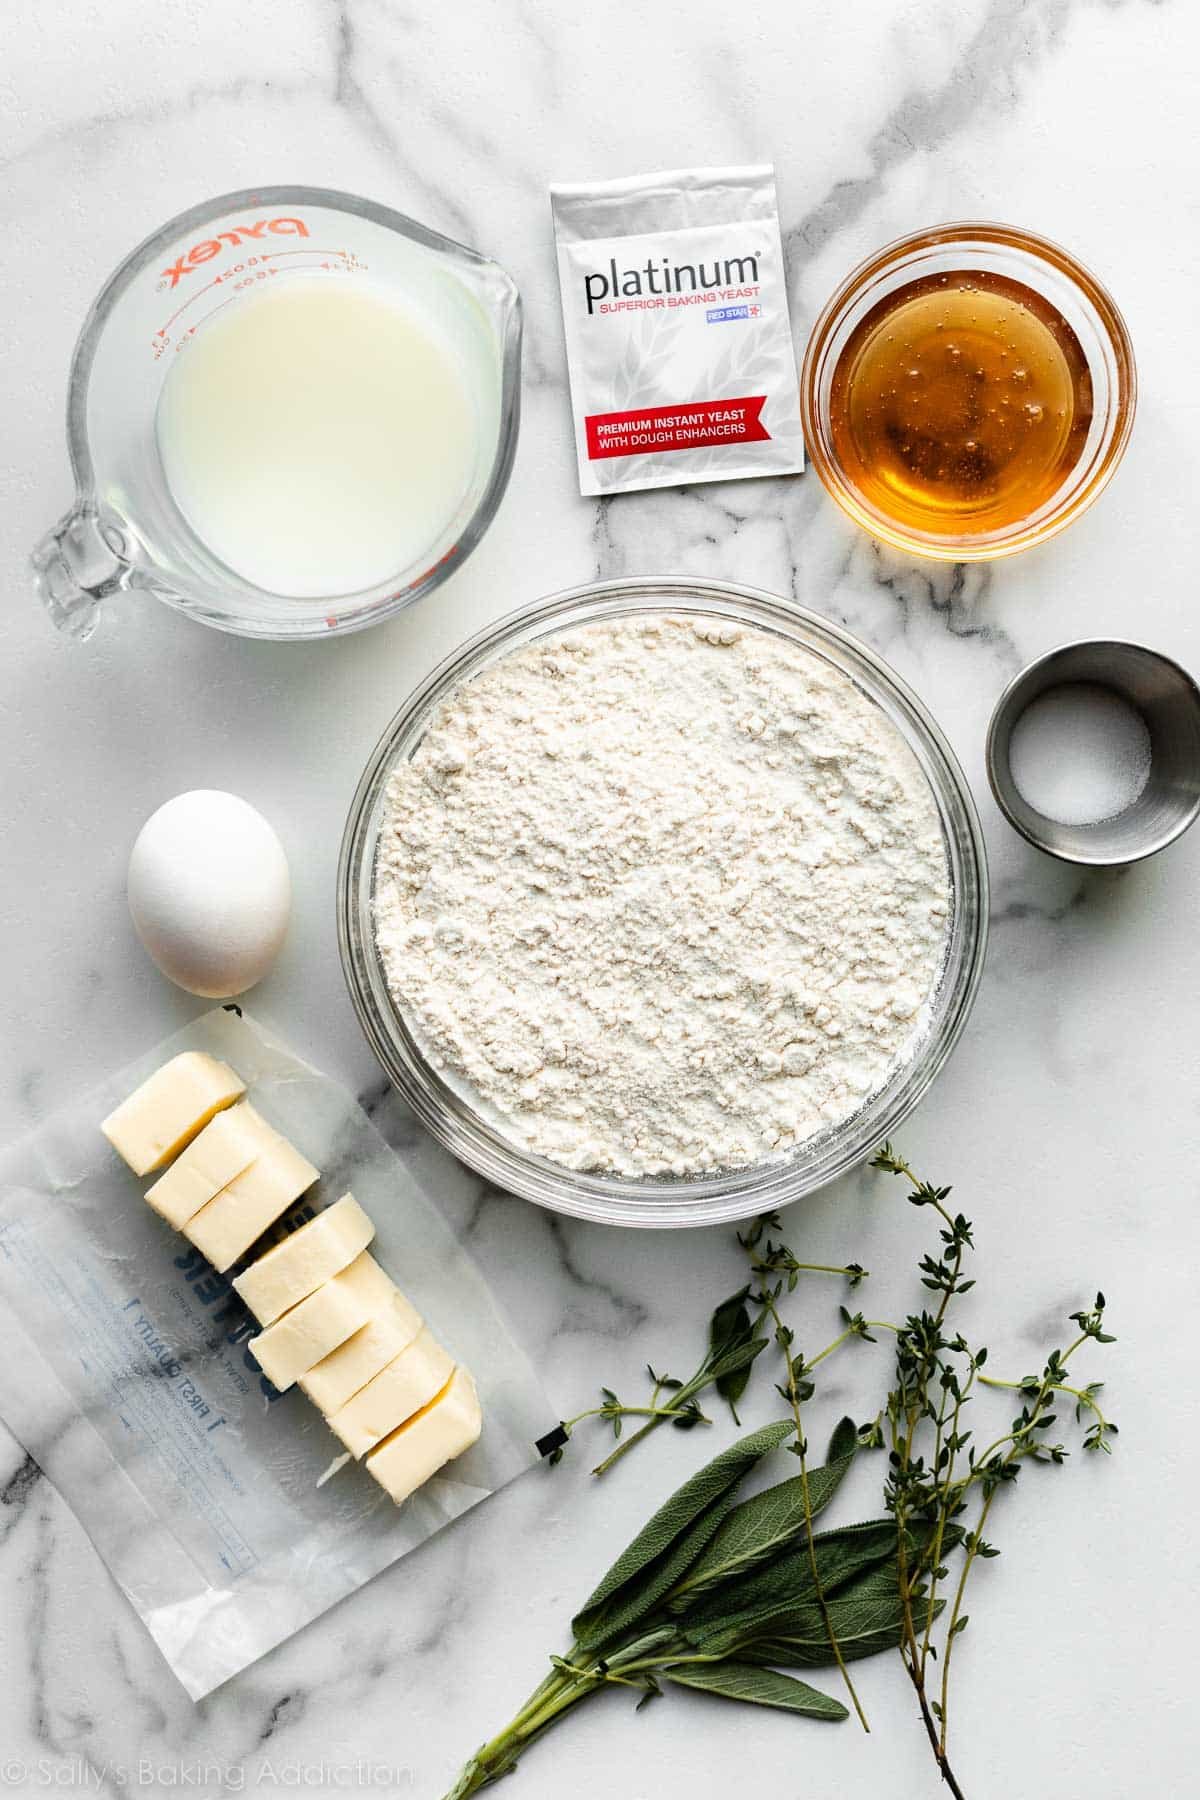
- 9 simple ingredients
- Browned butter adds depth of flavor, without adding too much prep time
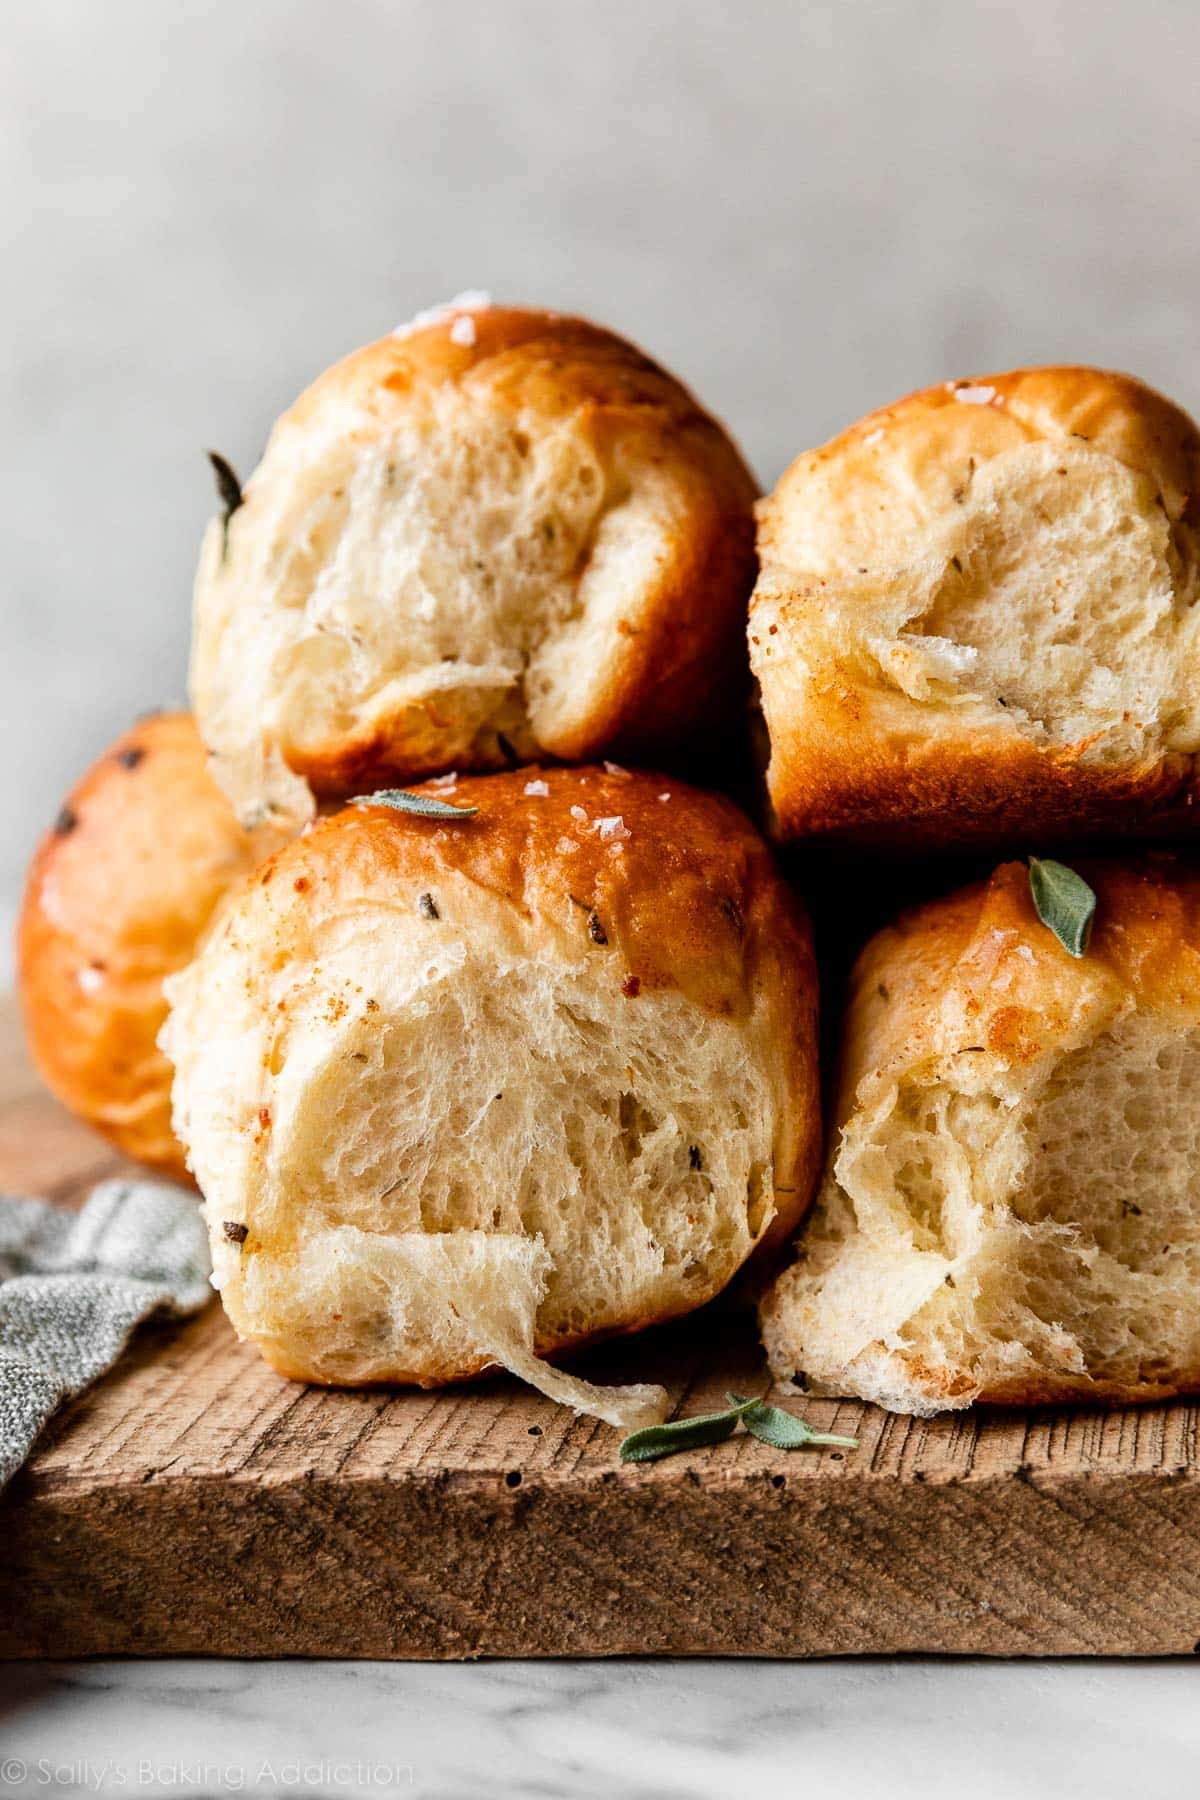
- Rolls are super soft, buttery, & flaky
- Delicious earthy herb flavors from fresh sage & thyme; feel free to switch up the herbs
- Adjust prep time to your schedule—make-ahead options detailed in Notes below
Key Steps in This Recipe
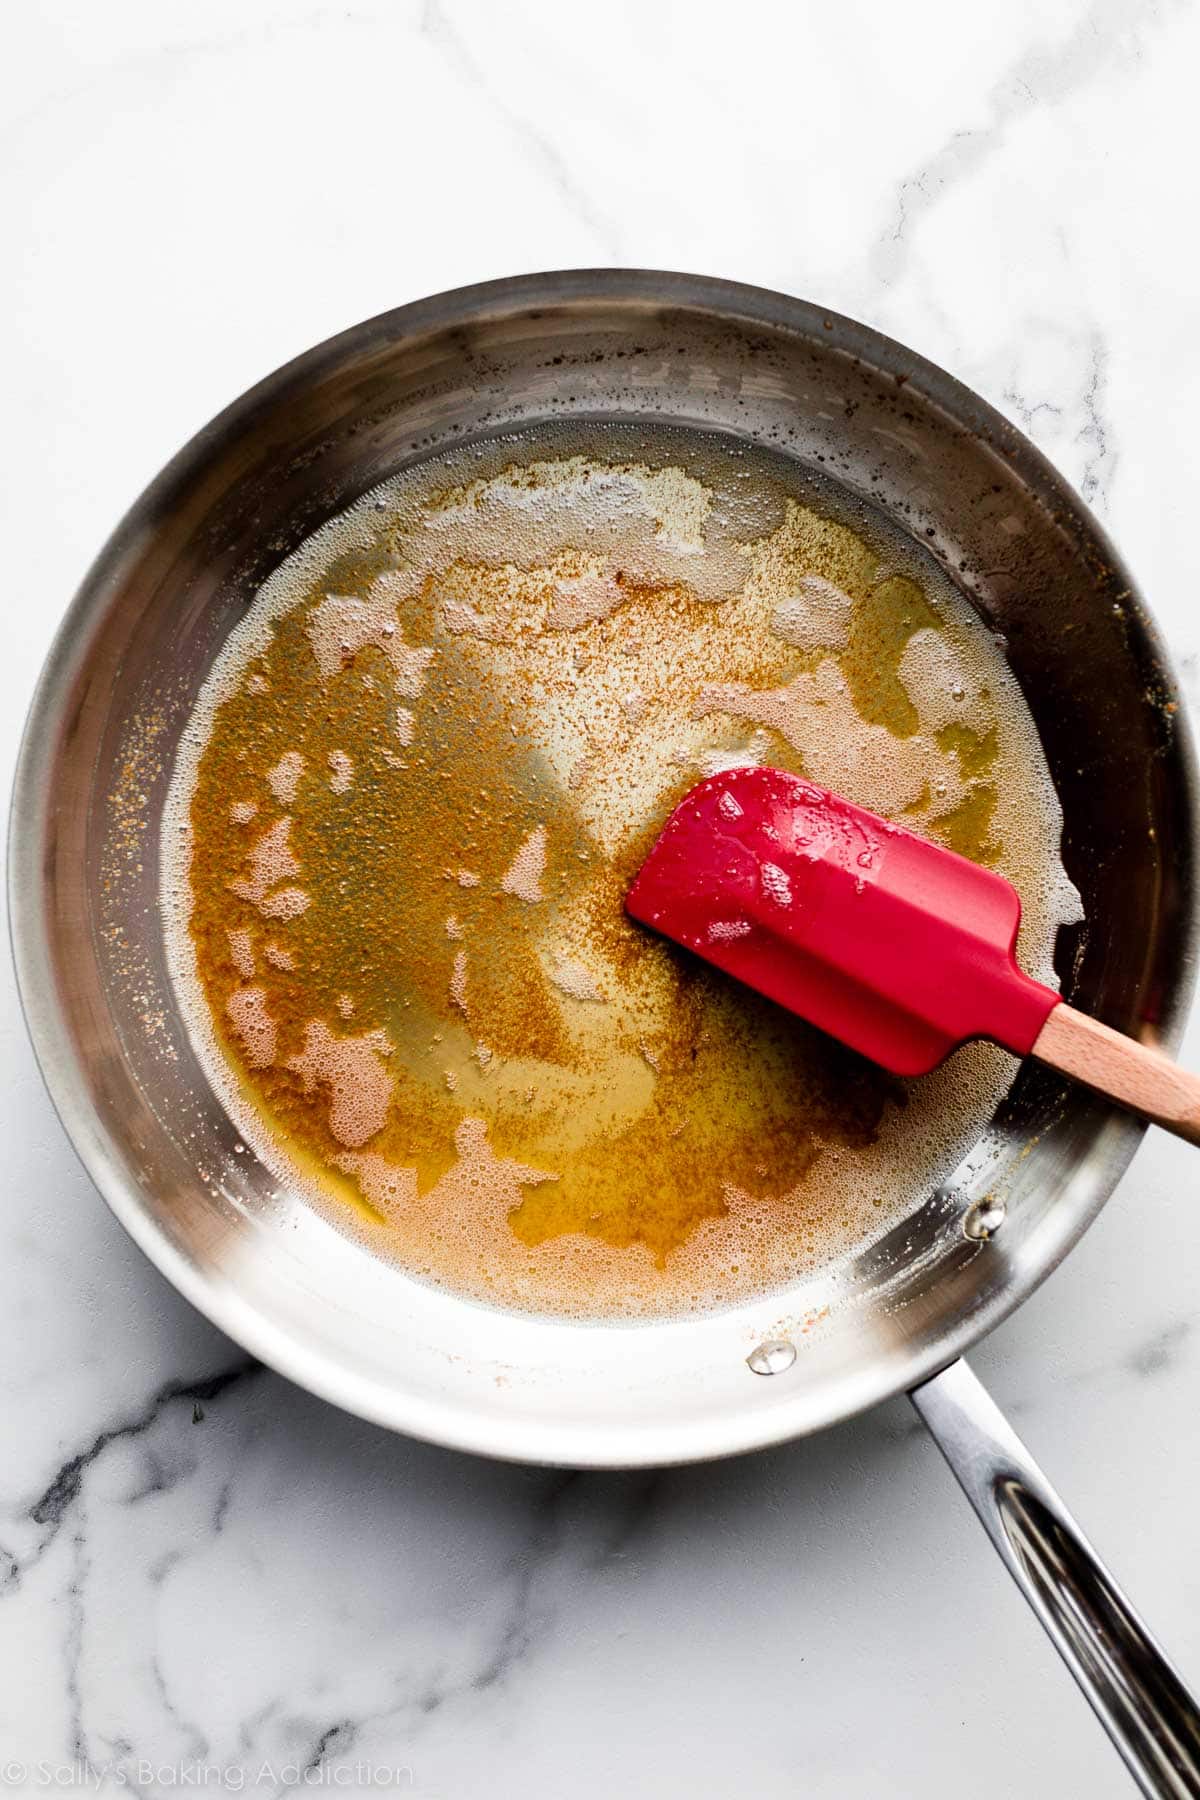
- Browning the butter: Browning butter gives a depth of flavor to an already delicious key ingredient. See How to Brown Butter if you’ve never done it before. (It’s easy!)
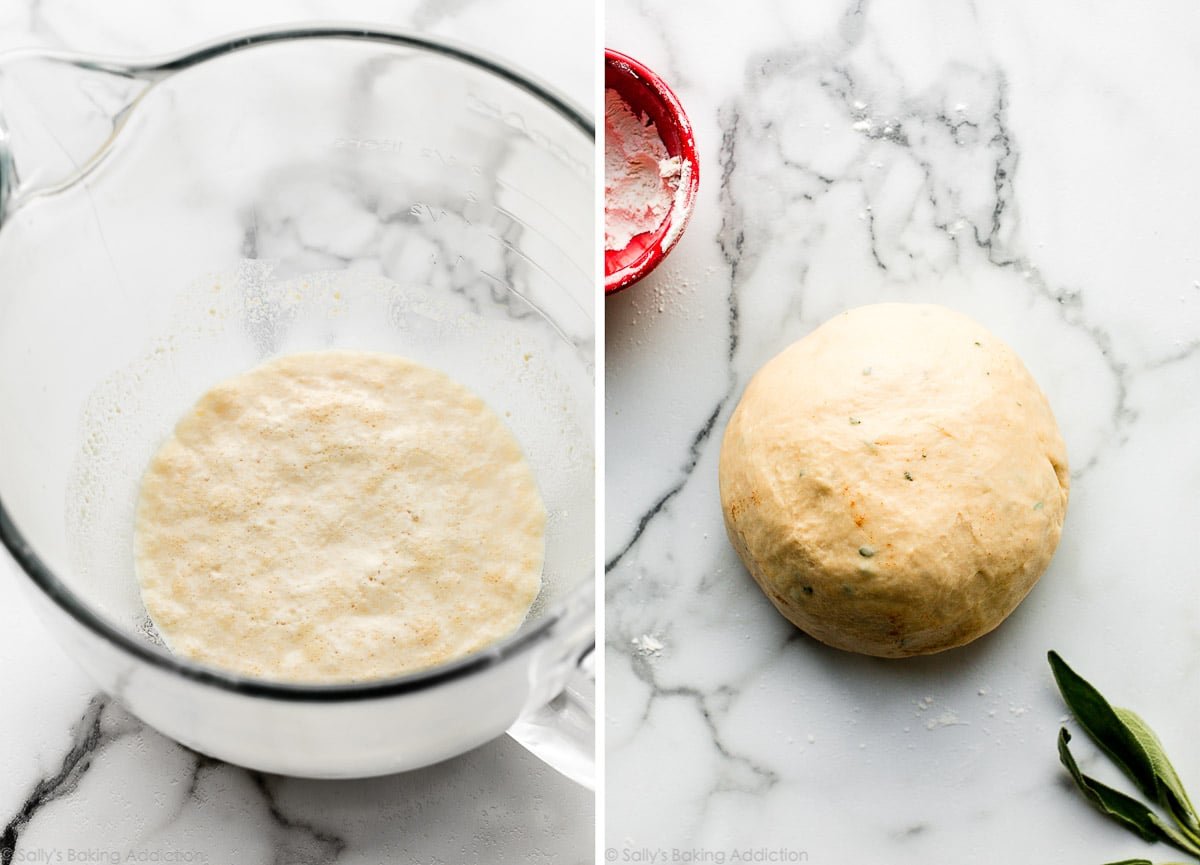
- Proofing the yeast: Proofing the yeast isn’t always necessary when you use instant yeast. However, I recommend doing it anyway to ensure the yeast dissolves and that it’s alive and active. Mix the yeast with warm buttermilk (or regular milk) and a little honey. Cover and let it sit for 5 minutes until foamy on top. Are you a bread-baking beginner? Reference my Baking with Yeast Guide for answers to common yeast FAQs.
- Making the dough: The dough comes together with milk, yeast, honey, egg, brown butter, salt, fresh sage and thyme, and flour. The honey feeds the yeast and tenderizes the dough. You can use all-purpose flour or bread flour in this recipe. You can use a stand mixer or a spatula to combine the dough ingredients.
- Kneading the dough: Knead the dough with your hands (or a stand mixer fitted with a dough hook) for 3 minutes. My video tutorial for How to Knead Dough is helpful here.
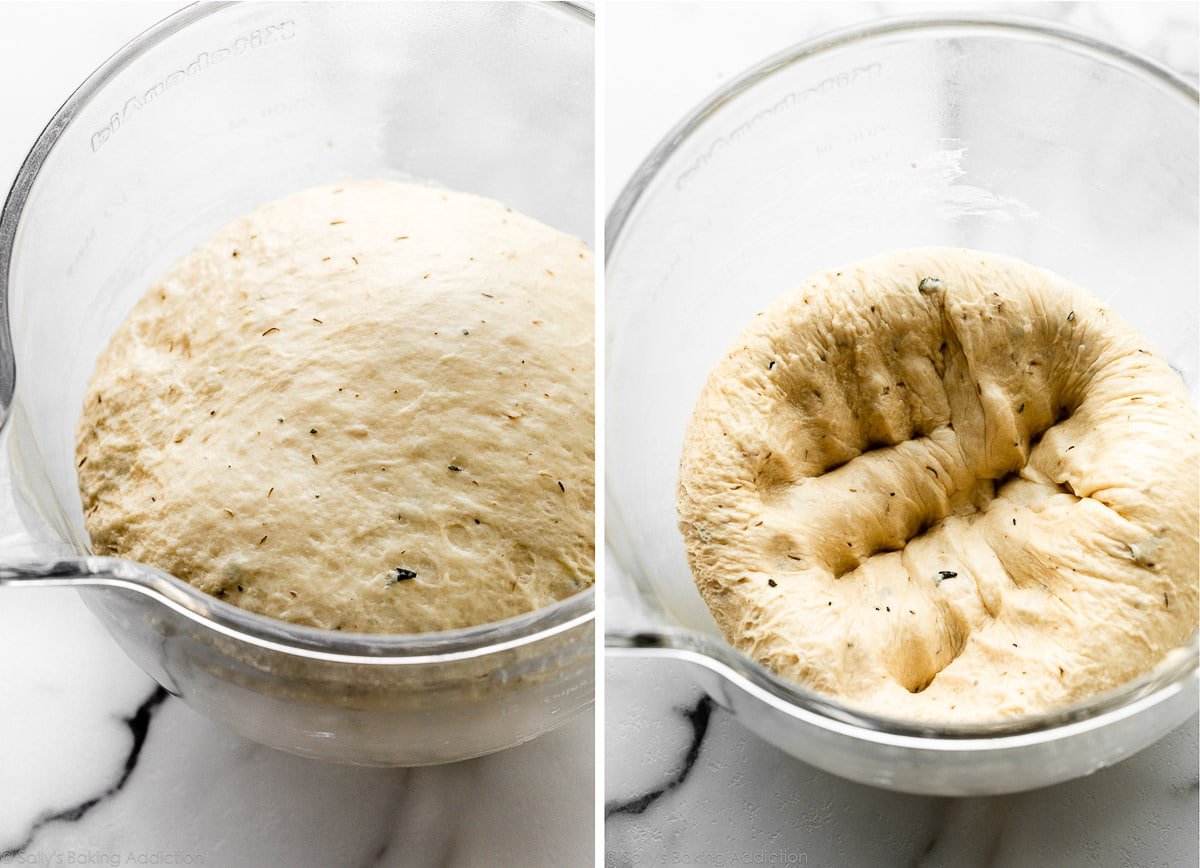
- 1st rise: The dough rises in about 1.5–2 hours in a relatively warm environment.
- Shaping the rolls: Form the rolls into balls as if you were making regular dinner rolls.
- 2nd rise: Let the shaped rolls rise until puffy, which takes up to 1 hour.
- Baking: Bake until the rolls are golden brown, around 25 minutes.
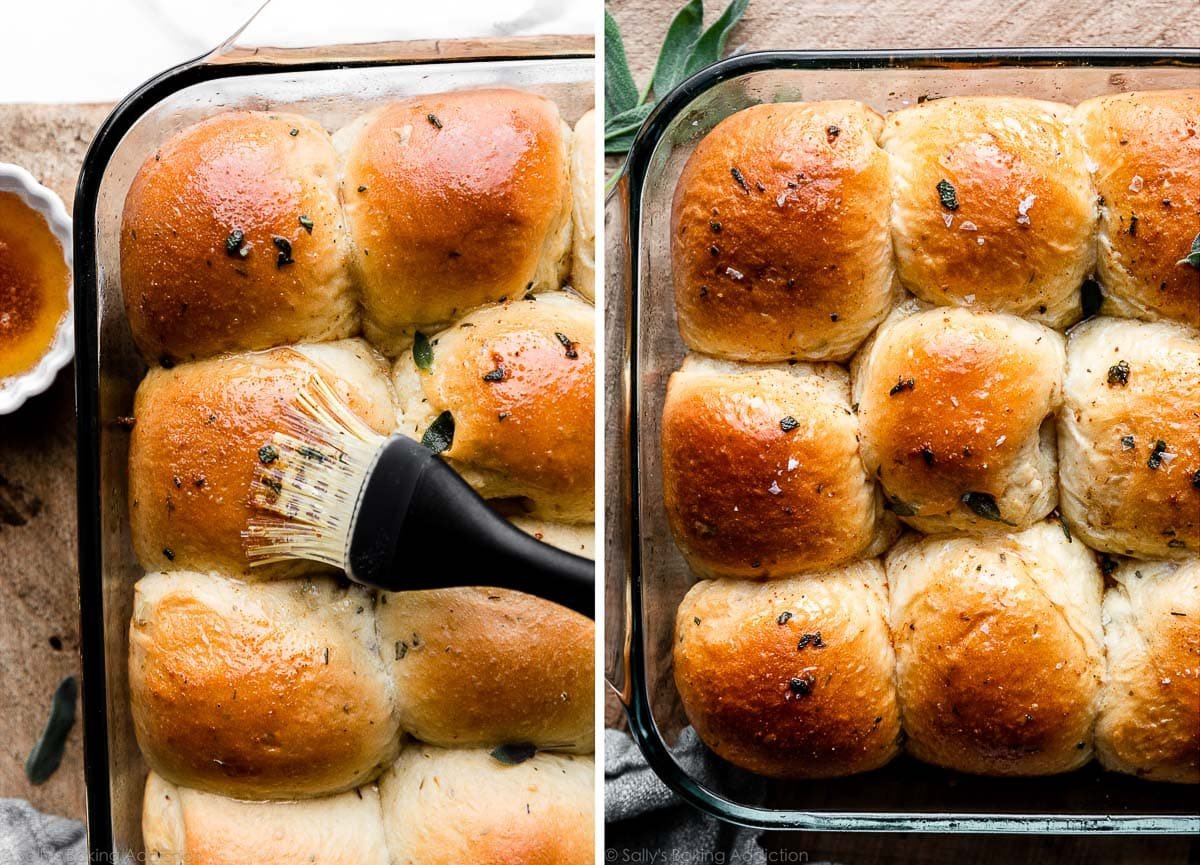
- Finishing: Brush remaining brown butter, mixed with a little bit more chopped sage, on the warm rolls, and sprinkle some sea salt on top, if desired.
Brown the butter on the stovetop first. You’ll use 6 Tablespoons of brown butter in the bread dough and reserve whatever you have left for brushing on top of the warm rolls.
All of the browned bits at the bottom of the pan hold so much flavor; do not omit!
Sage Dinner Rolls Require a Rich Dough
The crustier and chewier the bread, the less fat in the dough. The softer and richer the bread, the more fat in the dough. Unlike bagels, focaccia, and homemade artisan bread, buttery-soft sage rolls require a rich dough. “Rich” correlates with the amount of fat. For example, this dough has milk, brown butter, and egg.
- Which yeast do I use? You can use active dry yeast or instant yeast in this recipe. If using active dry yeast, the rise times will be a little longer. I recommend Platinum Yeast from Red Star, which is an instant yeast blended with natural dough improvers.
Combine the yeast with warmed milk, a little honey, and your yeast. Let this mixture sit for 5 minutes or until foamy on top (pictured below, left). Then, add the rest of the ingredients to form a soft dough (pictured below, right), and then knead. See my How to Knead Dough video tutorial if you’re new to yeasted dough or would benefit from a visual of this step.
Let the dough rise until double in size and then punch it down to release the air:
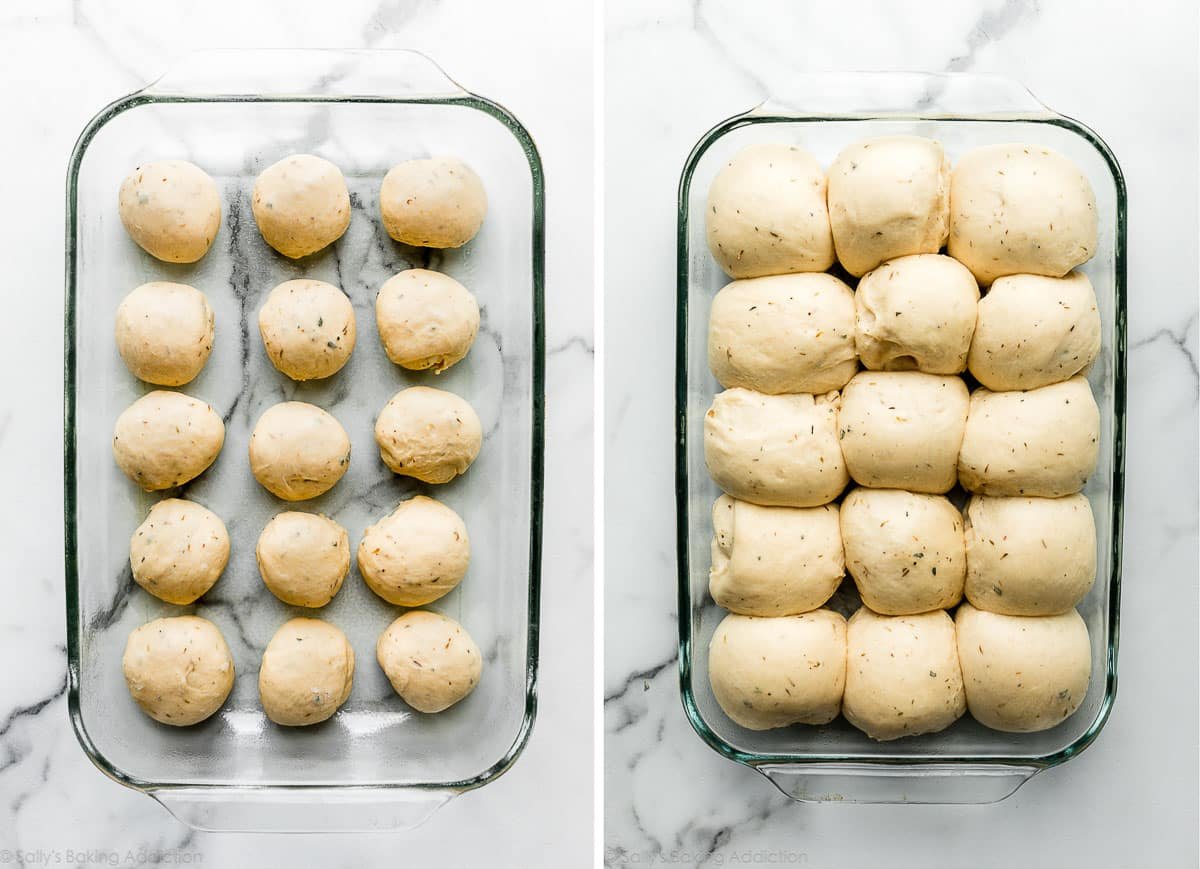
After that, shape into 14–16 balls and arrange in a baking pan. Don’t worry if they’re not all uniform in size. A 9×13-inch pan is ideal for these brown butter sage dinner rolls, but you can bake them on a lined baking sheet or in two 9-inch round or square pans instead.
Let the shaped rolls rise before baking. Look how puffy they get after 1 hour of rising:
Finish With Herbed Brown Butter & Sea Salt
The rolls are done when they’re golden brown… and just wait until you smell these baking!
Brush the warm rolls with the remaining brown butter, mixed with a little more chopped sage, and finish with an optional sprinkle of sea salt. If you’re ever shopping online for sea salt and need a recommendation, I use and love Maldon flaky sea salt.
Thyme & sage work hand-in-hand to produce a deep herb flavor in today’s rolls. If you want to switch it up, substitute rosemary or parsley for one or both or try these garlicky herb skillet rolls instead. I have even more dinner rolls options if you’re looking for inspiration:
- Plain Dinner Rolls
- Whole Wheat Dinner Rolls
- Hot Cross Buns
- Soft Pretzel Rolls
- Homemade Bread Bowls
- Honey Butter Rolls
- Sweet Potato Dinner Rolls
Can I Turn This Into a Loaf of Bread?
No, I don’t recommend using today’s dough recipe for a loaf of bread because it’s not sturdy enough. Instead, try cranberry nut no-knead bread, olive bread, rosemary pull apart bread, or this sandwich bread or whole wheat bread.
Today’s soft dough is best shaped into rolls.
Serve brown butter sage rolls with cold weather favorites like your Thanksgiving dinner, creamy chicken noodle soup, lemon thyme chicken, sausage stuffed peppers, turkey pot pie, or minestrone soup.
Print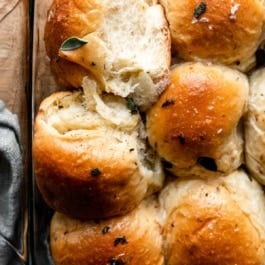
Brown Butter Sage Dinner Rolls
- Prep Time: 3 hours, 35 minutes (includes rises)
- Cook Time: 25 minutes
- Total Time: 3 hours, 50 minutes
- Yield: 14–16 rolls
- Category: Bread
- Method: Baking
- Cuisine: American
Description
Savory, soft, and aromatic, with a delicious dose of the caramelized nutty flavor that comes from browning butter, these flavorful rolls make a wonderful addition to any fall, winter, or holiday dinner. See recipe Notes for make-ahead instructions.
Ingredients
- 1/2 cup (8 Tbsp; 113g) unsalted butter, cut into 8 pieces
- 3/4 cup (180ml) whole milk or buttermilk, warmed to about 110°F (43°C)
- 2 and 1/4 teaspoons Platinum Yeast from Red Star instant yeast* (1 standard packet)
- 3 Tablespoons (64g) honey, divided
- 1 large egg, at room temperature
- 1 teaspoon salt
- 2 teaspoons fresh chopped sage leaves, plus an extra pinch for topping
- 1 teaspoon fresh thyme leaves
- 3 cups (390g) bread flour (spooned & leveled), plus more as needed*
- optional: flaky sea salt, for finishing
Instructions
- Brown the butter: Set out a medium heatproof bowl because you’ll need it at the end of this step. Place the sliced butter in a light-colored skillet or saucepan. A light-colored interior is crucial for determining when the butter begins to brown. Melt the butter over medium heat and stir or whisk constantly. Once melted, the butter will begin to foam. Continue stirring/whisking, keeping a close eye on it. After about 5–7 minutes, the butter will begin browning and you’ll notice lightly browned specks forming at the bottom of the pan. The butter will have a nutty aroma. The color will gradually deepen, from yellow to golden to golden-brown; once it’s a light caramel-brown color, remove from heat immediately and pour into the bowl, including any brown solids that have formed on the bottom of the pan. Cool for 10 minutes.
- Prepare the dough: Whisk the warm milk, yeast, and 1 Tablespoon honey together in the bowl of your stand mixer. Or, if you do not own a stand mixer, a regular large mixing bowl. Loosely cover and allow to sit for 5–10 minutes until foamy and frothy on top.
- Add the remaining honey, the egg, 6 Tablespoons (90ml) of the slightly cooled brown butter (reserve the rest for brushing on top of rolls in step 11), the salt, sage, thyme, and 1 cup bread flour. With a dough hook or paddle attachment, mix/beat on low speed for 30 seconds, scrape down the sides of the bowl with a silicone spatula, then add the remaining bread flour. Beat on medium speed until the dough comes together and pulls away from the sides of the bowl, about 2 minutes. If the dough seems too wet to a point where kneading (next step) would be impossible, beat in more flour 1 Tablespoon at a time until you have a workable dough. Dough should be soft and a little sticky, but still manageable to knead with lightly floured hands.
- Knead the dough: Keep the dough in the mixer (and switch to the dough hook if you used the paddle) and beat for an additional 5 full minutes, or knead by hand on a lightly floured surface for 5 full minutes. (If you’re new to bread-baking, my How to Knead Dough video tutorial can help here.) If the dough becomes too sticky during the kneading process, sprinkle 1 teaspoon of flour at a time on the dough or on the work surface/in the bowl to make a soft, slightly tacky dough. Do not add more flour than you need because you do not want a dry dough. After kneading, the dough should still feel a little soft. Poke it with your finger—if it slowly bounces back, your dough is ready to rise. You can also do a “windowpane test” to see if your dough has been kneaded long enough: tear off a small (roughly golfball-size) piece of dough and gently stretch it out until it’s thin enough for light to pass through it. Hold it up to a window or light. Does light pass through the stretched dough without the dough tearing first? If so, your dough has been kneaded long enough and is ready to rise. If not, keep kneading until it passes the windowpane test.
- 1st Rise: Lightly grease a large bowl with oil or nonstick spray. Place the dough in the bowl, turning it to coat all sides in the oil. Cover the bowl with aluminum foil, plastic wrap, or a clean kitchen towel. Allow the dough to rise in a relatively warm environment for 1.5–2 hours or until double in size. (I always let it rise on the counter. Takes about 2 hours. For a tiny reduction in rise time, see my answer to Where Should Dough Rise? in my Baking with Yeast Guide.)
- Grease a 9×13-inch baking pan or two 9-inch square or round baking pans. You can also bake the rolls in a cast iron skillet or on a lined or greased baking sheet. (See recipe Note.)
- Shape the rolls: When the dough is ready, punch it down to release the air. Divide the dough into 14–16 equal pieces. (Just eyeball it—doesn’t need to be perfect!) A bench scraper is always helpful for cutting dough. Shape each piece into a smooth ball. Arrange in prepared baking pan or a couple inches apart on a lined baking sheet.
- 2nd Rise: Cover shaped rolls with aluminum foil, plastic wrap, or a clean kitchen towel. Allow to rise until puffy, about 45–60 minutes.
- Adjust oven rack to a lower position and preheat oven to 350°F (177°C). (It’s best to bake the rolls towards the bottom of the oven so the tops don’t burn.)
- Bake the rolls: Bake for 23–27 minutes or until golden brown on top, rotating the pan halfway through. If you notice the tops browning too quickly, loosely tent the pan with aluminum foil.
- Remove rolls from the oven. Heat remaining browned butter to melt it since it has likely solidified (you can do this in the microwave for 10–20 seconds) and mix with a pinch of fresh chopped sage. Brush mixture all over warm rolls. If desired, sprinkle tops with coarse sea salt. Cool for a few minutes before serving.
- Cover leftover rolls tightly and store at room temperature for 2–3 days or in the refrigerator for up to 1 week.
Notes
- Freezing Instructions: Prepare recipe through step 7. Place shaped rolls in a greased baking pan, cover tightly, and freeze for up to 3 months. Once frozen, the dough balls won’t stick together anymore and you can place them in a freezer bag if needed. On the day you serve them, arrange the dough balls in a greased baking pan, cover tightly, then let them thaw and rise for about 4–5 hours. Bake as directed. You can also freeze the baked dinner rolls. Allow them to cool completely, and then freeze for up to 3 months. Thaw in the refrigerator or at room temperature, then reheat as desired. If reheating the whole pan, lightly cover and reheat in a 300°F (150°C) oven for about 10 minutes or until warm.
- Overnight Instructions: Prepare the recipe through step 7. Cover the shaped rolls tightly and refrigerate for up to about 15 hours. At least 3 hours before you need them the next day, remove the rolls from the refrigerator, keep covered, and allow to rise on the counter for about 1–2 hours before baking. Alternatively, you can let the dough have its 1st rise in the refrigerator overnight. Cover the dough tightly and place in the refrigerator for up to about 15 hours. Remove from the refrigerator and allow the dough to fully rise for 2 more hours. Continue with step 9.
- Special Tools (affiliate links): Light-Colored Skillet or Stainless Steel Skillet | Whisk | Stand Mixer or Large Glass Mixing Bowl | 9×13-inch Glass Baking Pan | Bench Scraper | Pastry Brush | Flaky Sea Salt
- No Stand Mixer? If you do not own a stand mixer, you can use a large mixing bowl and mix the dough together with a sturdy silicone spatula or wooden spoon. It will take a bit of arm muscle. A hand mixer works, but the sticky dough repeatedly gets stuck in the beaters. Mixing by hand with a wooden spoon or silicone spatula is a better choice.
- Baking Pan: I prefer baking the rolls in a glass 9×13-inch baking pan because I find they brown a little too quickly in a metal pan. But as long as you bake the rolls on a lower oven rack and keep your eye on them, any pan is great. You can also bake these rolls in a large cast iron skillet, or two 9-inch round or square baking pans. Bake time remains the same.
- Milk: Buttermilk or whole milk are ideal for the best, richest flavor and texture. Keeping that in mind, feel free to substitute with a lower-fat or nondairy milk.
- Yeast: Platinum Yeast from Red Star is an instant yeast. You can use Red Star Yeast active dry yeast instead. Rise times will be slightly longer using active dry yeast. Reference my Baking with Yeast Guide for answers to common yeast FAQs.
- Herbs: If you don’t have fresh herbs, you can use dried instead. Simply reduce the amount by half, so 1 teaspoon dried sage and 1/2 teaspoon dried thyme. (Add more if you want extra flavor.)
- Flour: If you don’t have bread flour, you can use all-purpose flour. All-purpose flour is convenient for most, but bread flour produces chewier dinner rolls. The rolls are still soft and fluffy no matter which you use. Either flour is fine and there are no other changes to the recipe if you use one or the other.


Reader Comments and Reviews
This is the most incredible dough to work with. I could tell coming right out of my bread machine after mixing on the quick dough setting, it was perfect and would work beautifully. The rolls rose beautifully on the second rise and you can’t beat the flavor and texture. I would love to turn this into a full loaf of bread. What steps would you recommend (if any) to allow that? Thank you, Sally. You are my “go-to” lady.
We are so happy you enjoy these rolls! We don’t recommend using this dough recipe for a loaf of bread because it’s not sturdy enough. See the section in the post above called “Can I Turn This Into a Loaf of Bread?” for our other suggestions.
Hi! Excited to try this recipe – just have a quick question on the yeast. Do you dissolve the yeast in water before mixing with the milk, or is the idea to dissolve the yeast in the warm milk sans water? Thanks!
Hi Megan, correct, the warm milk takes the place of water for proofing the yeast. No water needed. Hope you enjoy the rolls!
Used rosemary and salted butter so i omitted the salt. Turned out so nice! Will definitely make these again!
These were a huge hit at our Thanksgiving dinner. Good thing I made two batches. They were demolished! They have already been requested for Christmas. Made them as directed through step seven and refrigerated overnight. Second rise for two hours. Perfect!!
Could sugar be substituted for the honey? We have a family member allergic to honey.
Absolutely. Same amount, or reduce to 2 Tablespoons.
Trying these for a second time today, first batch didnt rise much (granted it was a cold day but I gave it extra time) and I know the yeast was working! Anyone have any tips?! I always struggle with enriched doughs.
Hi Kristy, you may find our Baking with Yeast Guide helpful for troubleshooting, including a tip for rising in a warmed oven that can be especially helpful on cold days. Thank you for giving this recipe a try!
I made these rolls about 4 times I love them and they are delicious! I would, however, recommend less flour if your rolls end up tough. I ended up using only 2 and 1/3 cups of flour in my last batch and it was pretty perfect. Also don’t skip the salt on top! It’s huge and even if you just use table salt it makes a big difference.
Can I use whole lactose-free milk with any problems?
Thanks Cat
Hi Cat, the rolls may not be a soft with that substitution, but that should work in a pinch. Enjoy!
Soft and delicious, I just got mine out of the oven and the house smells SO good. Thank you so much for the recipe, I think they would go great with Thanksgiving. I will be using them to sop up gravy tonight lol, we are having baked potatoes w/hamburger gravy and these rolls are perfect.
Will these rolls turn out ok using all purpose flour instead of bread flour
? I have everything else to make them ackkk..help lol
Hi Carmen, If you don’t have bread flour, you can use all-purpose flour. See the recipe note about flour for more details.
I so want these to work! I have tried making them twice now and both times they’ve turned out more like biscuits (dense) and not fluffy buns. They’re still delicious so I have the flavour, just not the texture. Any science ideas as to why this may be happening? I thought maybe I had heated my milk too hot and killed the yeast the first time, but the second time I can’t think of what happened.
Hi Catherine, if your rolls are coming out dense, it sounds like the dough may have been over kneaded. That can over develop the gluten and lead to tough bread. Be sure to also spoon and level your flour to ensure just the right amount — too much flour can dry out the bread and make the texture less fluffy. Hope these tips help for next time!
I have the same issue and am on the second batch hoping to get it to work! I followed the instructions to a T – even forewent kneading by hand and used the stand mixer. Even for the first rise the dough seemed extremely dry so I had a feeling something wasn’t adding up. I double checked to make sure I didn’t skip an ingredient (I also measure/use a scale for ingredients). The second batch the dough seemed a little dry but I didn’t pry too much as the first batch was over kneaded. It’s in the second ride right now but it isn’t puffing up like it should. Every Sally recipe has always worked for me so I am inclined to believe it’s me, I’m the problem haha.
I am in the middle of making this recipe and I must be missing something because I can’t seem to find when to use the eggs listed in the recipe in any of the directions. Please advise
Hi Loni, step 3.
Is there anything I can use to substitute the egg? Love your recipes!
Hi Monica, we haven’t tested this recipe with any egg replacements, but let us know if you do.
I made these for Thanksgiving using this egg substitute. They were very good, a lot of compliments.
To make the 1 flax eggs: Mix 3 tablespoons of cold water and 1 tablespoons of golden flax meal in a small bowl until well combined. Let it rest for 5 – 10 minutes to thicken.
Sally, after the first rise, could I form the rolls and freeze the dough balls?
Hi Wanda! Absolutely, see recipe notes for details.
Okay I tried this recipe 4 times in the last 48 hours and here’s my thoughts… round 1 I doubled the recipe, the rolls turned out small and tough, then I read the note about not recommending doubling the recipe haha. So I scrapped those and tried again, single recipe, followed every step. Didn’t get the puffy second rise, but I baked anyway, still small and tough. Flavor was great, but not the texture that I can tell I’m supposed to get based off the recipe pictures. So I attempt again, this time I opted for whole milk instead of the buttermilk I used the first 2 times. SUCCESS! So puffy! I also did both rises in a slightly warmed oven since my kitchen counter wasn’t warm enough to get the doubling rise. So I replicated for a 4th time and success again with the whole milk! I baked 2 batches so I could freeze them and heat them back up for thanksgiving. Very excited to share these with the family! My main takeaway was that I was far more successful with whole milk than buttermilk, and using the slightly warm oven really helped activate the yeast.
Hi Sally this is awesome!!!!
do you have this recipe with pumpkin?
Hi Elisa, We don’t have a pumpkin dinner roll recipe at this time. Let us know if you find a good one!
While my rolls tastes delicious, they were quite dense. As I am kneading by hand, should I forgo the 3-minute kneading instruction and knead until the dough passes the ‘window pane test’? I’m trying to get them to be as fluffy as yours
Hi Erica, we find three minutes to be just about right, but if yours take slightly shorter that is okay. Be sure to spoon and level or weigh your flour, too, as too much flour can cause the rolls to become dry and dense. Hope this helps for next time!
Hi Sally! This flavor combo is divine and smells so wonderful. I’m wondering however if you’ve experienced this dough becoming stiff and tight? Is this because of the butter? Or not enough liquid? I did sub oatmilk instead of regular milk, but otherwise all ingredients were the same. My dough came together rather tough instead of soft and elastic like other breads I’ve tried making, so I would love any tips! Thanks!
Hi Stacy, we’re happy to help troubleshoot. Over kneading often creates a tough dough. As for the rising, make sure your yeast is fresh and that the milk is not too hot when you combine it with the yeast. If it is, it can kill the yeast and make it ineffective. This Baking with Yeast Guide might also be helpful to review. Thanks so much for giving this recipe a try!
Thank you so much! I’ll give those tips a try! Always love these recipes (-:
I just made these today and had the same issue, but I did use whole milk, and the dough seemed tough and dry already before I started kneading it. I used the spoon and level method and I checked to make sure I added all the liquid and I did. My rolls, now baked, rose okay, my yeast woke up in the first step too, but they didn’t puff up much in the oven. Although they smell delicious!! Any suggestions?
I was wondering about your flour measurements for this recipe- KA and most flours say it is 120 g to a cup but I notice your measurements add between 5-10 g more. Would you recommend sticking with the g measurements you provide or the cup measurements? Thanks! There look so yummy and I want to get it right!
Hi Christina, thank you for asking! I’ve never been able to get 120g from a cup of spooned and leveled flour. It’s always shy of 1 cup. The recipes on my site are tested with 125-130g flour per cup, so I recommend using the grams you see here because that’s how they are tested. Or feel free to use the cup measurements.
My spoon and level measurement always come out to 114g in my measuring cup so I gave up on that and weigh my flour to 120g per cup. It’s perfect for this recipe. While most of my other recipes give me grief at some point, this recipe turns out a perfect dough that is a pleasure to work with. And the rolls are exquisite.
Made for the first time and served to guests. This is totally a keeper recipe. Mine didn’t bake quite as dark but the flavor was exceptional. Perfect for Autumn. I appreciated the tip to use dried herbs. They can be expensive so using dried is more convenient and cost effective for me. You could still really taste the flavors perfectly. Sally, you are my go to for any baking because your recipes always address the questions I come up with. Thank you for making baking easier and fun.
Hi Sally! These look amazing and I’d like to bring them to Thanksgiving. Can the recipe be doubled? Thank you for all you do!
Hi Kelly, For the best results we don’t recommend doubling this recipe. For double the amount of rolls, make 2 separate batches.
This recipe turned out great. My husband has requested these for Thanksgiving. The rolls were very flavorful, soft, but with that perfect bit of resistance.
I made a half batch which requires using half an egg. As a household of two, I’m used to using that half an egg in scrambled eggs the next morning or in a small batch cookie recipe.
These rolls were a big hit! I’ve never browned butter before, and I was nervous, but it worked really well! I loved the unique flavor these rolls had, and they paired so nicely with the chicken sage soup we had tonight. I will say that for some reason I only got thirteen rolls, but that was probably my fault. I loved these! Abigail
Loved these! They’re so flavorful with the sage. And I really liked them with the coarse salt on top.
Hi, thoughts about omitting the herbs and just making plain brown butter dinner rolls?
That would be great! Feel free to omit the herbs.
I love making Brown N Serve rolls. So my question is ‘Can these be par baked at say 225 degrees for about 20-25 minutes, cooled, frozen and when you want to use them take out what you want and bake at 400 dwgrees for about 7-10 minutes?” By the way, I make my Brown N Serve Rolls in muffin pans and when they’re cooled I put, 9-12 depending on size, in freezer zip-lock bags.
Hi Margaret, I haven’t tried this specific method with this dough. However, I don’t expect any issues if you try it. Let me know how it turns out.
I have started using rapid rise yeast for buns and bread. It cuts my time in half ( only really 1 rise ) and sometimes that is all the time I have. Can I use the rapid rise yeast in all yeast recipies?
Hi Susan! Yes, you can use rapid rise yeast.
Do I have to brown the butter?
Hi Kim, you can certainly skip it but you will lose some flavor. Use melted butter instead, same amounts. You’ll need 6 Tablespoons for the dough and 2 for brushing on the warm rolls.
This looks like another great recipe. I need to know if I can make a version with nondairy milk. I read your comment that whole milk or buttermilk is best. We have a family member with a lactose intolerance. Thank you
PS I’m sorry, I accidentally rated the recipe and couldn’t remove it. (Large fingers)
Hi Margaret, buttermilk or whole milk are ideal for best, richest flavor and texture. Keeping that in mind, feel free to substitute with a lower fat or nondairy milk.
Could you use a bread machine to make the dough?
Hi Lora, I don’t have a bread machine and have not tested it… but I can’t see why not.
I use my bread machine to mix the dough on the quick setting and then drop it into a lightly greased glass bowl for the first rise. It turns out perfect every time.
Have you tried this in a whole-wheat version? If so, how did you alter the ingredient list?
Hi Kevin, you could replace up to 1 cup (about 125-130g) of flour with whole wheat flour. Or you can try these 100% whole wheat dinner rolls and add some sage and thyme.
These look amazing! I have a 7-year-old sage plant in my garden that is very prolific, so I’ll make these but freeze half. My teen made your pumpkin spice cupcakes with cream cheese frosting yesterday with friends – they were looking at recipes online, and she knew to steer them to your site! Thank you!
Thanks so much, Sally! I hope the cupcakes were a big hit and that you all enjoy these rolls!
I have shaped the rolls and frozen them and I believe they are too small. After I thaw can I put the dough back in a large ball and re-shape? Thank you
I fear reshaping them after thawing will ruin their texture. It’s fine that they are a bit smaller. The bake time may be a little shorter.