

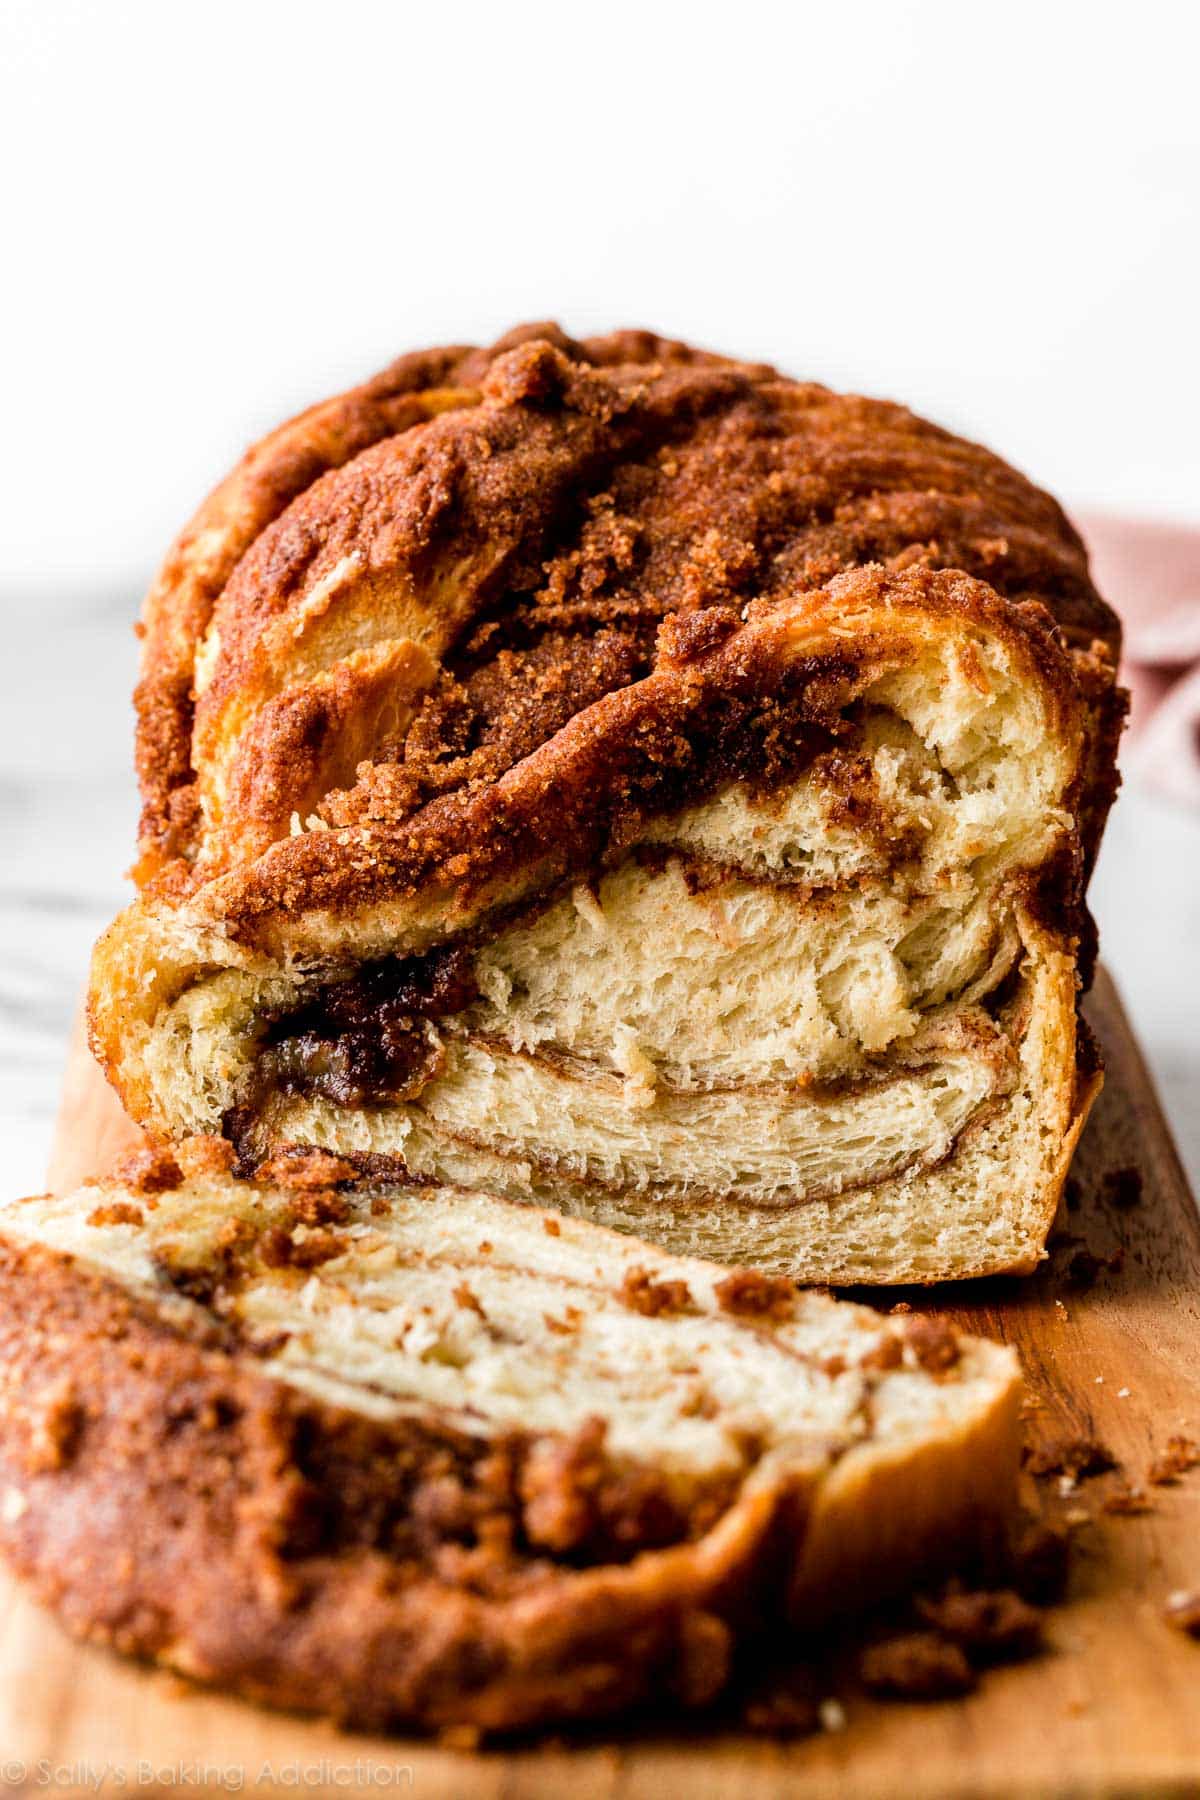
Rolled and twisted, this simple 8 ingredient bread dough transforms into an absolutely irresistible cinnamon crunch bread. Roll the dough up with a butter, cinnamon, and brown sugar filling, then create a crunch topping made from the same ingredients. Each bite is buttery, soft, and flaky with an unbelievable cinnamon sugar crunch crust on top.
When I made my first successful loaf of homemade cheese bread, I knew the recipe would be an instant hit with readers. After publishing it as a Sally’s Baking Challenge recipe few years ago, it’s consistently been the most popular bread recipe on this website—alongside our beloved sandwich bread. I mean, what could be better than cheese and homemade bread?
Well well well…
Readers asked if they can use the same dough to make a sweet version, so I tweaked the recipe and swapped cheese for cinnamon. Then I topped the whole thing with a cinnamon crunch topping. (Ever have a Panera Bread cinnamon crunch bagel? Like that!)
And then I wondered why I’d been making it with cheese for so long. TALK ABOUT AN UPGRADE!
One reader, Joyce, commented: “Positively scrumptious! Everybody raves about it. It is one of the very best things I’ve ever made. ★★★★★”
Another reader, Arlene, commented: “This was hands down the best cinnamon bread I’ve ever had. You’ll need to lock it up to prevent gobbling it up in one sitting. ★★★★★”
Tell Me About This Cinnamon Crunch Bread
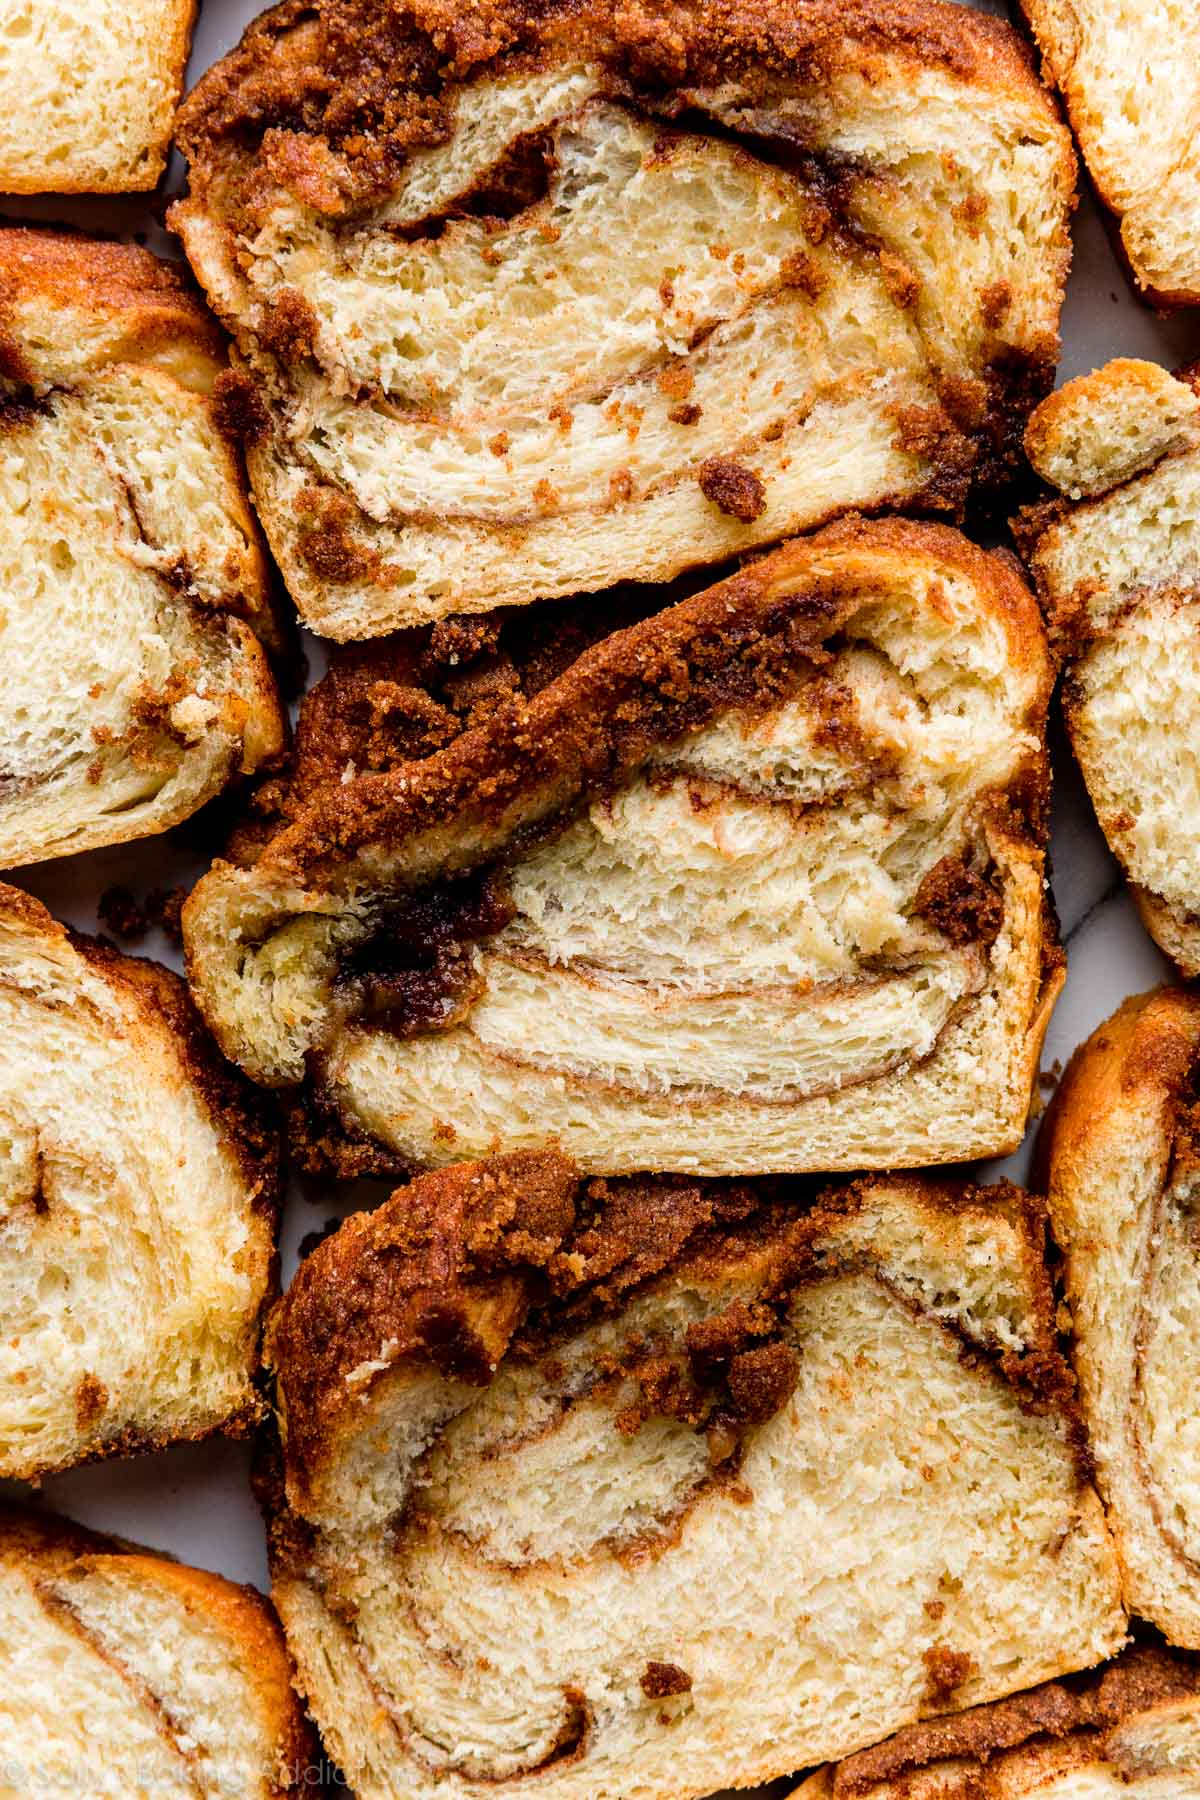
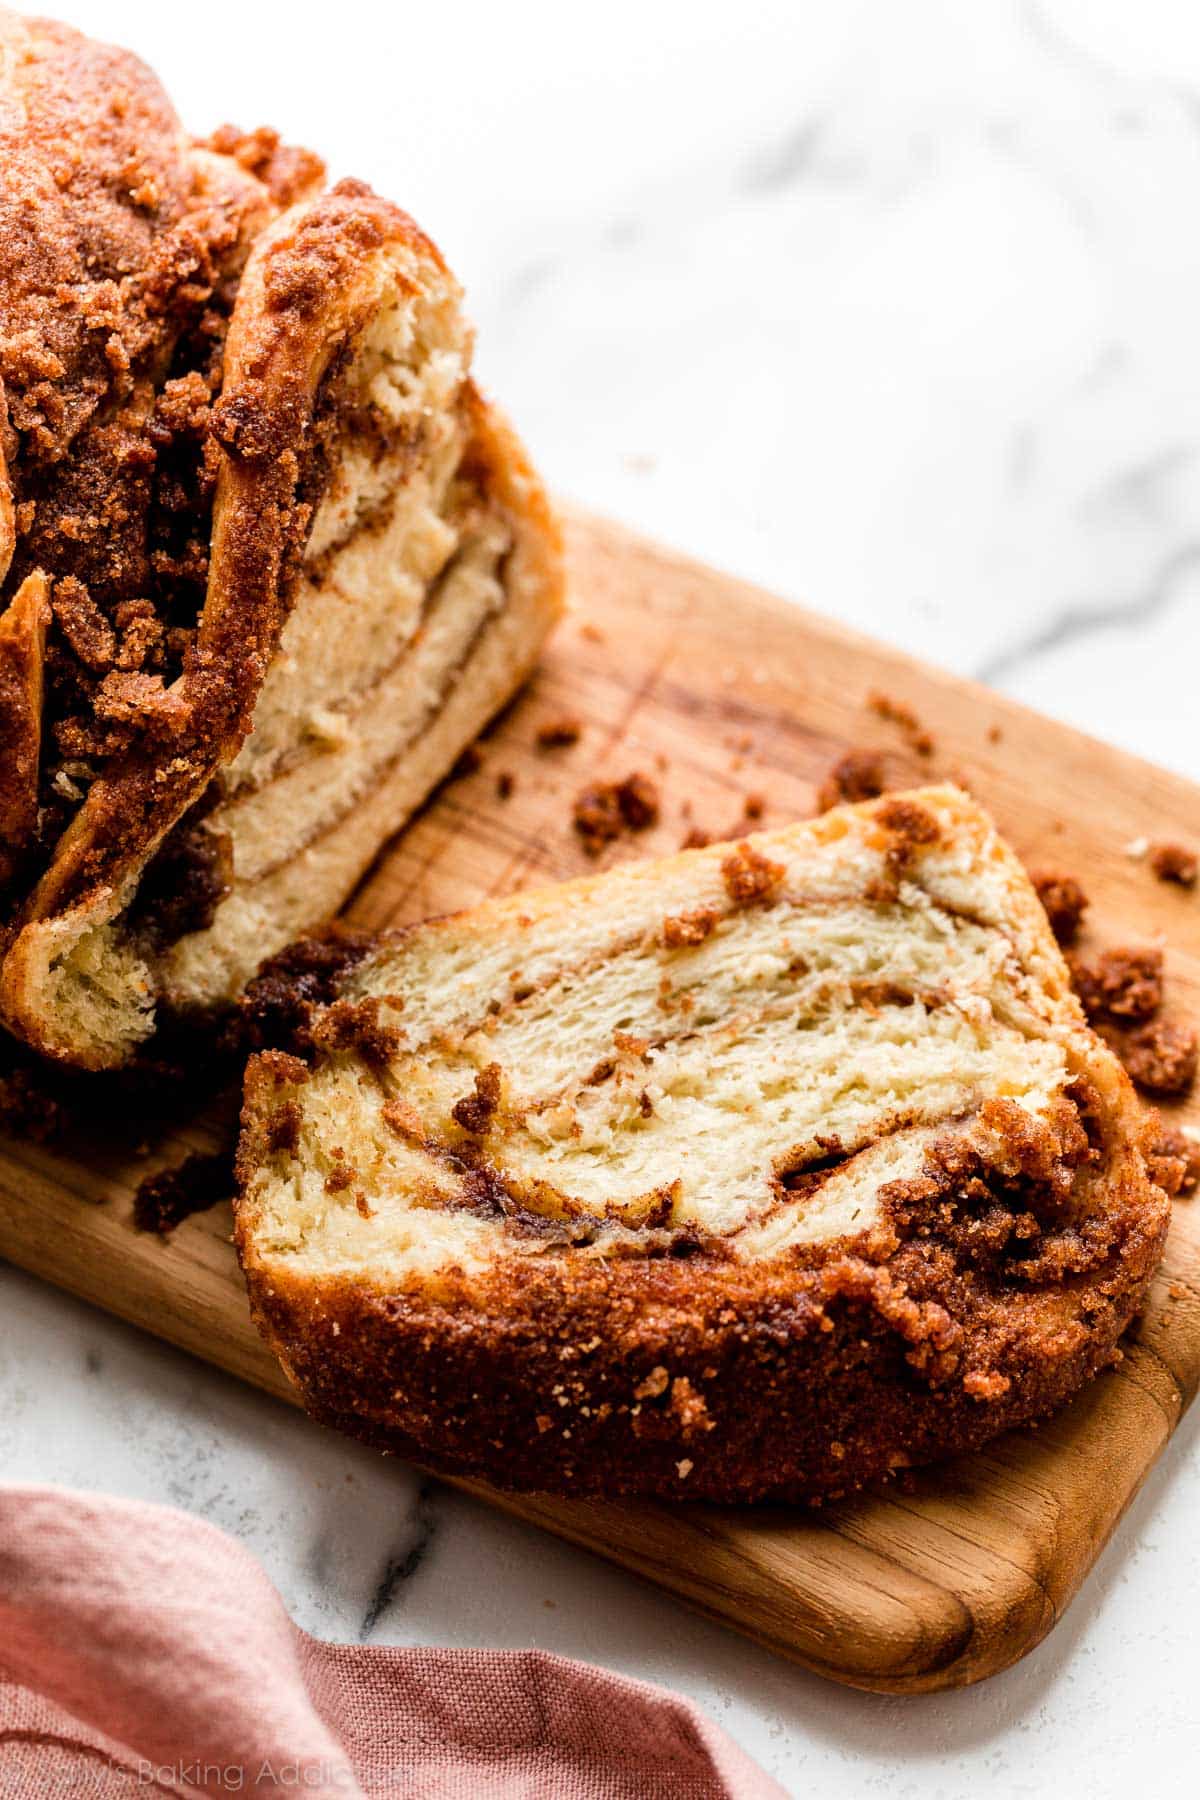
- Flavor: The bread crumb is wonderfully buttery and sweet—definitely a breakfast or dessert bread. This is a lot like homemade cinnamon swirl bread, but we’re using brown sugar and there’s extra twisting so you get more pockets of cinnamon swirl in each slice.
- Texture: Because we have fat in the dough the bread is extra soft and flaky, almost like croissant bread. And using bread flour promises extra chew. These textures are the perfect contrast to the crunchy cinnamon crumbles on top. Each bite has something different—I know you’ll love that. It looks just like babka, but it’s not nearly as rich as, say, our apple cinnamon babka.
- Ease: There’s no arguing that homemade bread takes a little effort. But consider this a fun weekend or afternoon baking project. The dough is pretty straightforward and you use the same ingredients in both the cinnamon swirl filling AND cinnamon crunch topping. If you’re new to baking with yeast, review my Baking with Yeast Guide. Lots of helpful information there!
- Time: This dough requires 1 long rise, then a shorter 2nd rise. Once you understand the assembly process, the recipe moves pretty quickly. Set aside at least 4 hours from start to finish, but keep in mind most of that time is hands off as the dough rises.
If you are craving twisty cinnamon goodness, but don’t have time to let the dough rise, try these no yeast cinnamon rolls.
Overview: How to Make Cinnamon Crunch Bread
The following is an overview to help you understand the process before you get started. You’ll find the full printable recipe below.
- Make & knead the dough. You need 8 ingredients for the dough and I don’t recommend any substitutions. For soft, flavorful, and chewy cinnamon crunch bread, use a combination of buttermilk and water. Nondairy, whole, or low fat milks work too, but buttermilk produces phenomenal flavor and texture. The dough is flimsy and shaping is difficult if you use ALL milk, so that’s why we use some milk and some water. You also need yeast, sugar, butter, egg, salt, and bread flour.
- Let dough rise. This takes about 1.5-2 hours.
- Assemble the bread. If you’re a visual learner, watch me assemble the bread in the above video. It’s exactly how we shape Nutella babka and homemade cheese bread too.
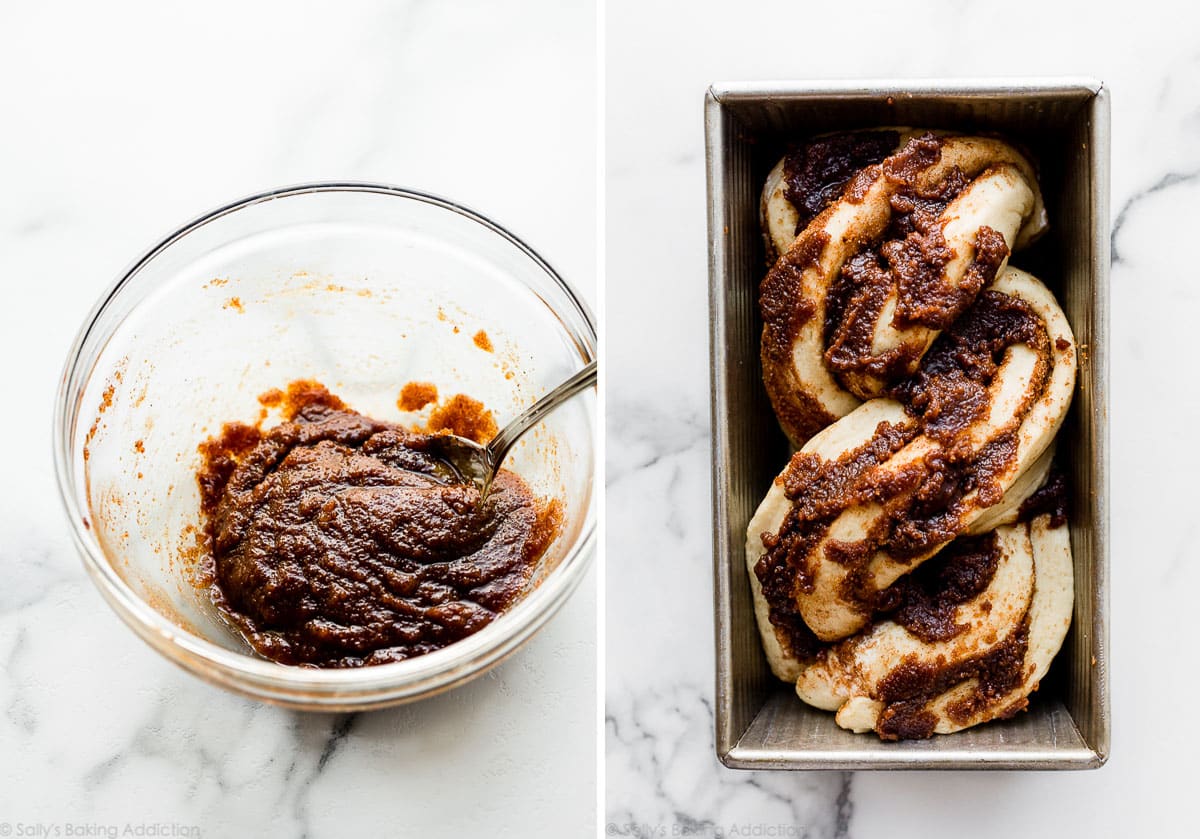
- Let shaped bread rest for about 30 minutes as you prepare the cinnamon crunch topping and preheat the oven. It will slightly rise during this time. For the cinnamon crunch topping, whisk brown sugar, cinnamon, melted butter and a touch of flour together.
- Spoon cinnamon crunch topping all over bread, then bake. In the written recipe below, I recommend placing a baking sheet on a lower oven rack to catch any cinnamon sugar that may drip down as the bread bakes.
Step-By-Step Photos
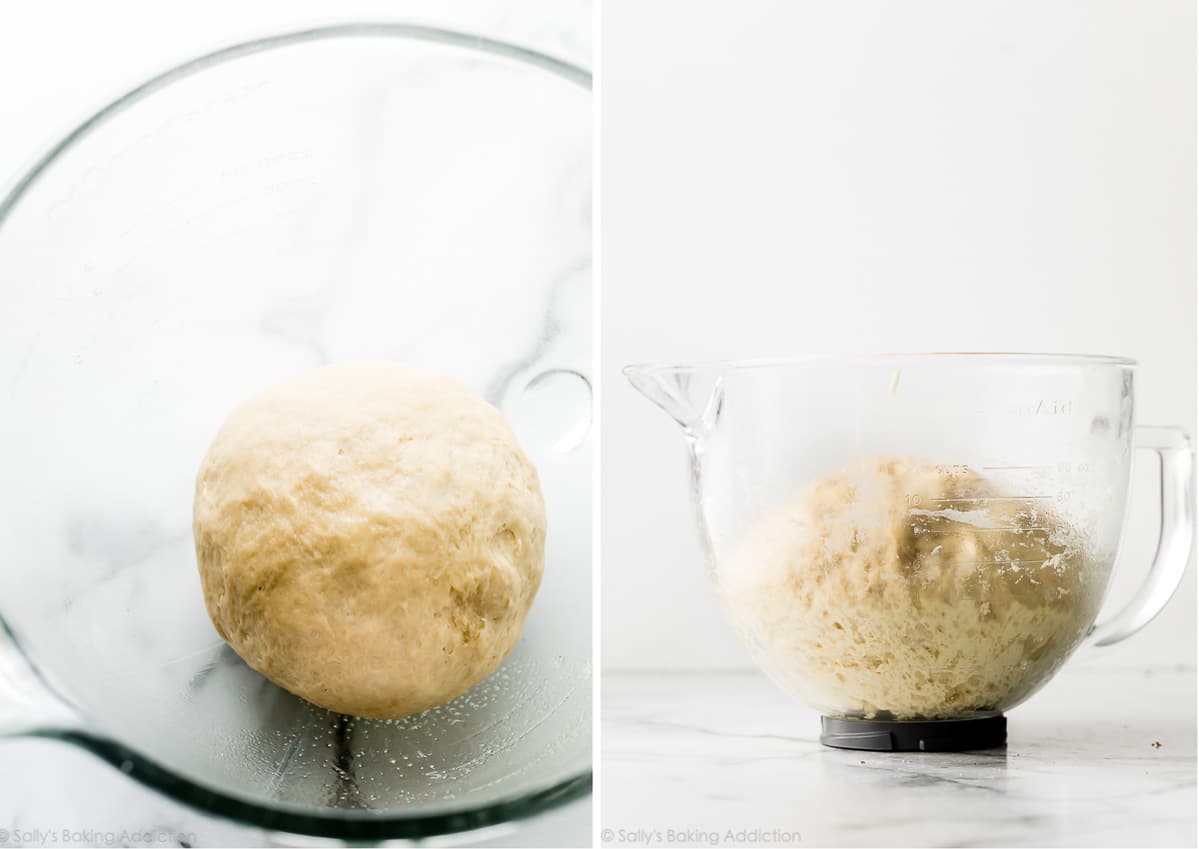
Make and knead the dough, referencing my How to Knead Dough tutorial as needed. Then let it rise:
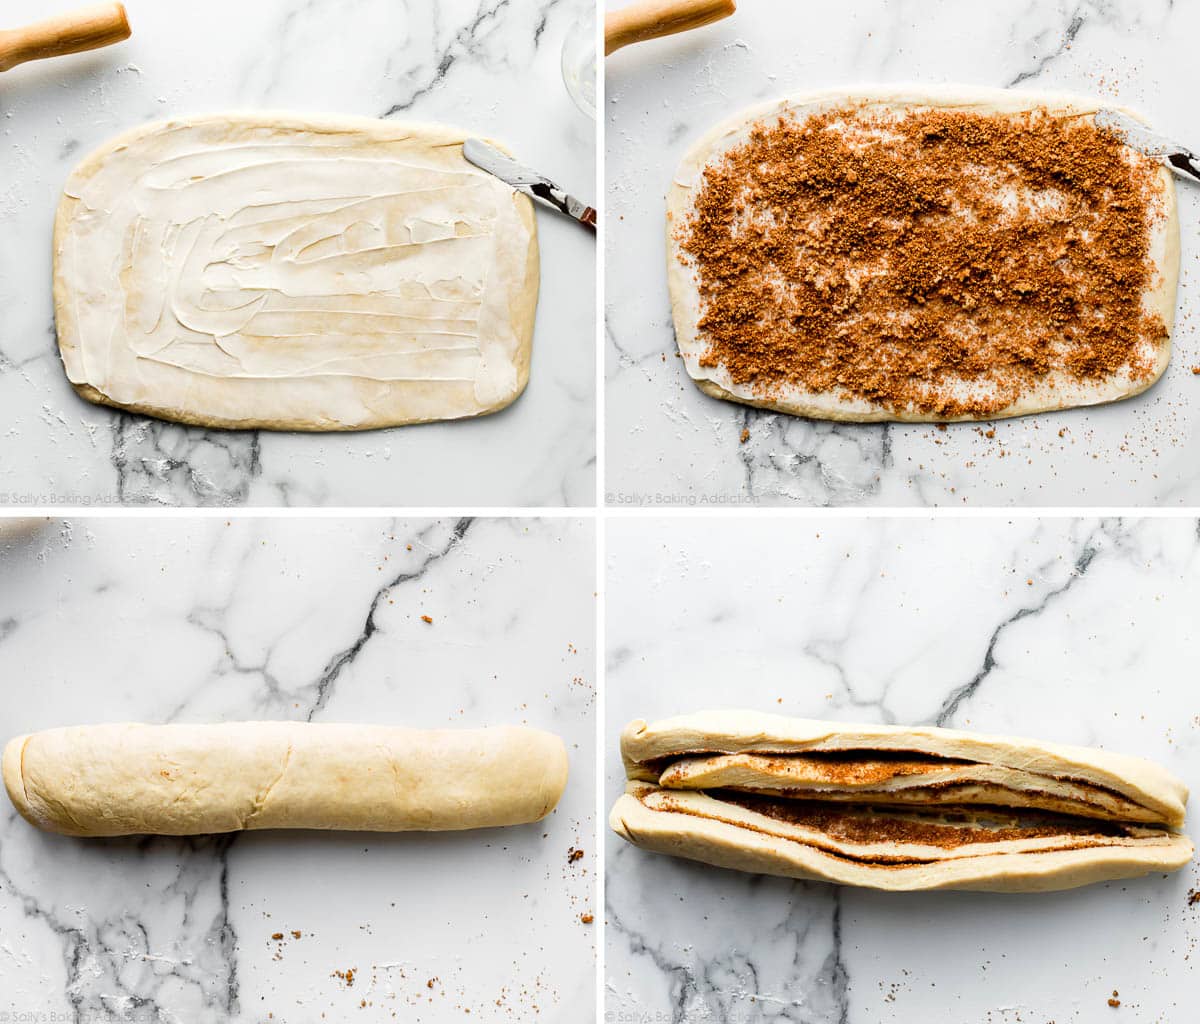
Punch down the risen dough, then roll out into rectangle. Spread extra soft butter on top, then sprinkle with your brown sugar and cinnamon mixture. Tightly roll it up cinnamon roll style. Place the log on its seam, then cut the log in half lengthwise using a sharp knife.
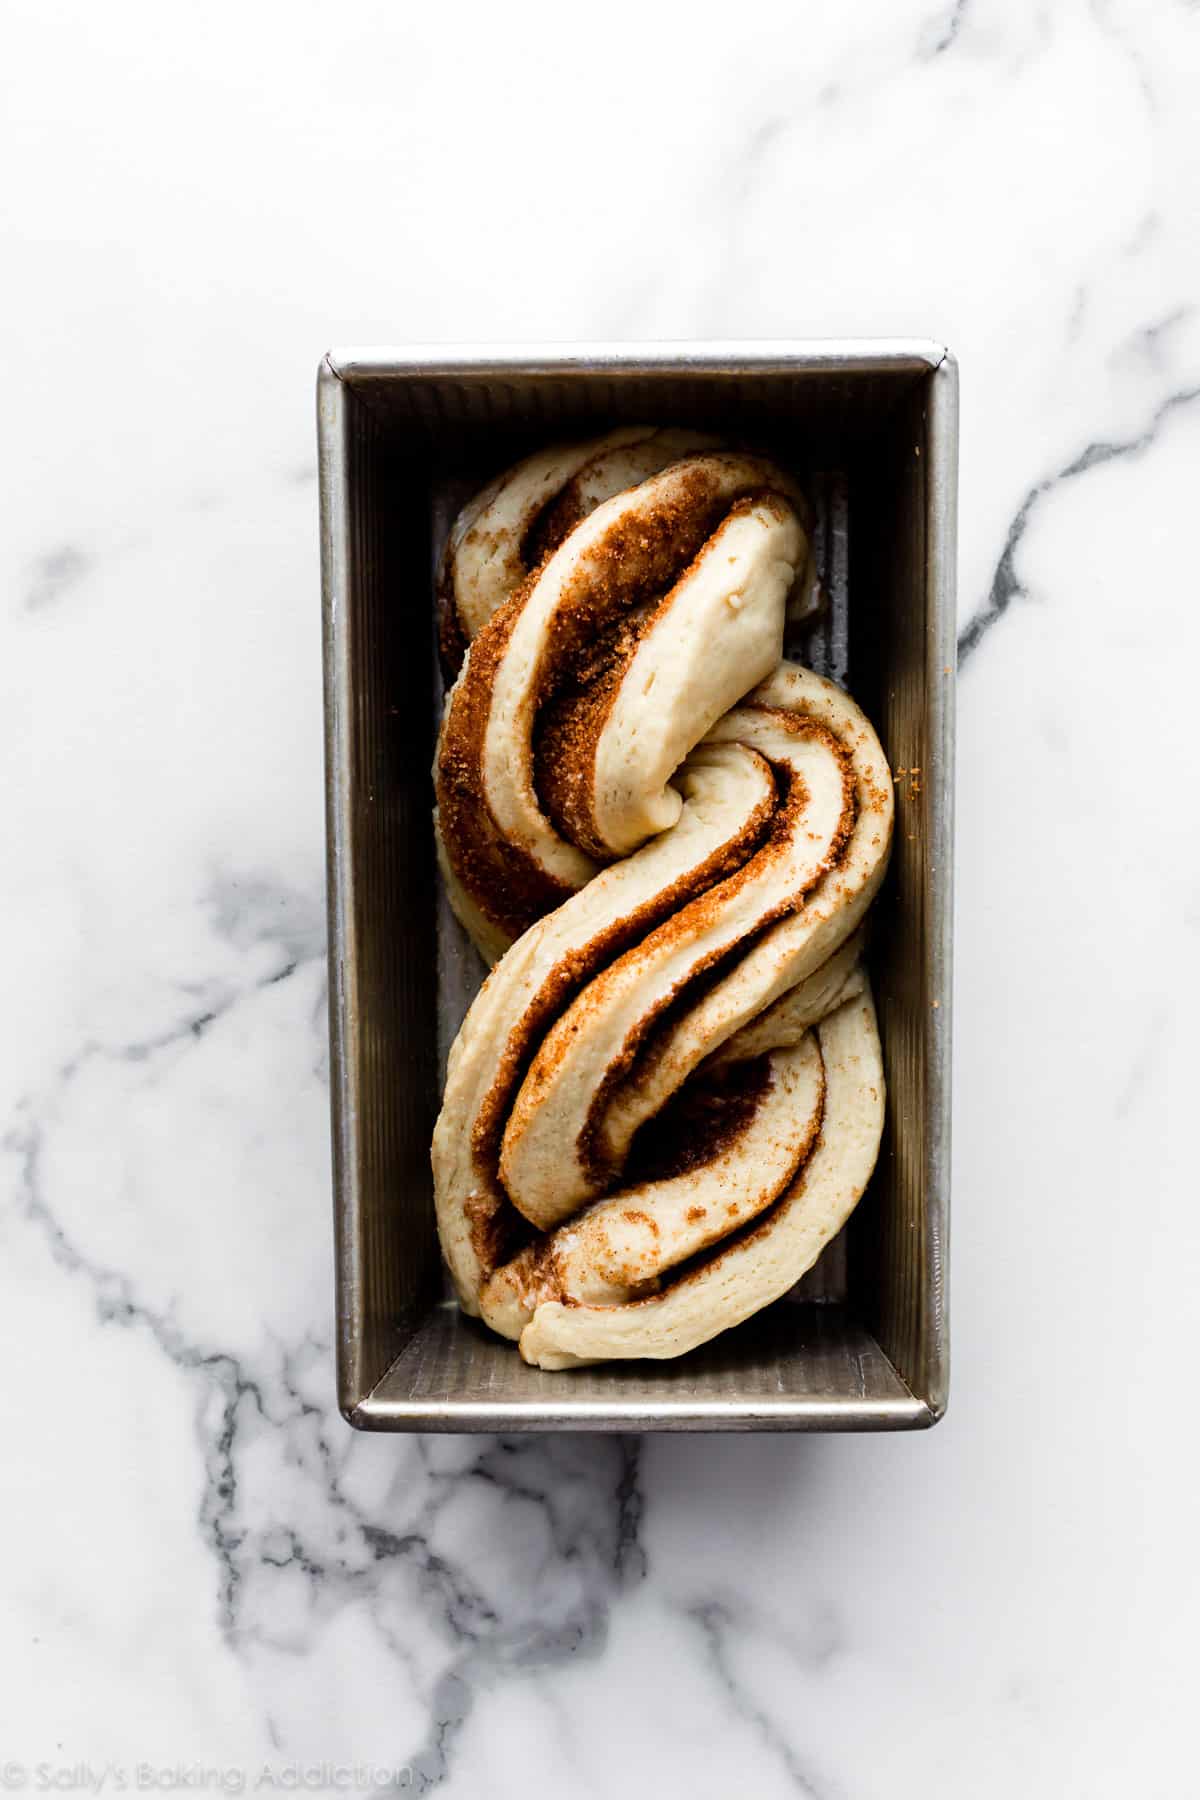
Criss-cross one half on top of the other half forming an X. Tightly twist the two together. Pinch the outer edges to seal as best you can, then place into a greased 9×5-inch loaf pan.
Let the dough rest and prepare the cinnamon crunch topping:
Can I Use This Cinnamon Crunch Topping on Bagels?
Yes yes and yes! This cinnamon crunch topping would be awesome on homemade bagels or cinnamon raisin bagels. Double the cinnamon crunch topping to ensure you have enough for an entire batch of bagels. After brushing the bagels with the egg wash in step 9 in that recipe, spoon cinnamon crunch topping on each before baking.
Testing the limit on “how much cinnamon swirl is too much cinnamon swirl?” Don’t pass up trying this because it’s even more ridiculously good than it looks!! And try this Cinnamon Swirl Cheesecake next!
Print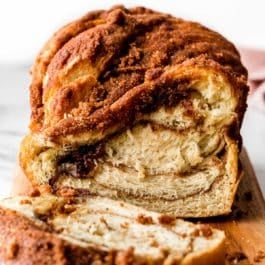
Cinnamon Crunch Bread
- Prep Time: 3 hours
- Cook Time: 50 minutes
- Total Time: 4 hours
- Yield: 1 loaf
- Category: Bread
- Method: Baking
- Cuisine: American
Description
This is a basic soft bread dough that’s rolled, twisted, filled, and topped with butter, cinnamon, and brown sugar. It looks like a lot of ingredients but the filling and topping ingredients are mostly the same. Read the recipe before starting so you’re prepared for the rolling and twisting step.
Ingredients
- 1/2 cup (120ml) buttermilk, warmed to about 110°F
- 1/3 cup (80ml) water, warmed to about 110°F
- 2 and 1/4 teaspoons (7g) instant or active dry yeast (1 standard packet)
- 1/4 cup (50g) granulated sugar, divided
- 5 Tablespoons (71g) unsalted butter, melted + slightly cooled
- 1 large egg, at room temperature
- 1 teaspoon salt
- 3 cups (390g) bread flour (spooned & leveled), plus more as needed for hands/work surface
Filling
- 3 Tablespoons (43g) unsalted butter, extra soft
- 1/3 cup (67g) packed light or dark brown sugar
- 1 and 1/2 teaspoons ground cinnamon
Cinnamon Crunch Topping
- 2 Tablespoons (28g) unsalted butter, melted
- 1/3 cup (67g) packed light or dark brown sugar
- 1 and 1/2 teaspoons ground cinnamon
- 2 teaspoons all-purpose flour or bread flour
Instructions
- Prepare the dough: Whisk the warm buttermilk, warm water, yeast, and 2 Tablespoons sugar together in the bowl of your stand mixer fitted with a dough hook or paddle attachment. Cover and allow to sit for 5 minutes or until foamy on top.
- Add the remaining sugar, the butter, egg, salt, and 1 cup flour. Beat on low speed for 30 seconds, scrape down the sides of the bowl with a silicone spatula, then add the remaining flour. Beat on low speed until the dough comes together and pulls away from the sides of the bowl, about 2 minutes. *If you do not own a mixer, you can mix this dough with a large wooden spoon or silicone spatula. It will take a bit of arm muscle.*
- Knead the dough: Keep the dough in the mixer (and switch to the dough hook if using the paddle) and beat for an additional 5 full minutes, or knead by hand on a lightly floured surface for 5 full minutes. (If you’re new to bread-baking, my How to Knead Dough video tutorial can help here.) If the dough becomes too sticky during the kneading process, sprinkle 1 teaspoon of flour at a time on the dough or on the work surface/in the bowl to make a soft, slightly tacky dough. Do not add more flour than you need because you do not want a dry dough. After kneading, the dough should still feel a little soft. Poke it with your finger—if it slowly bounces back, your dough is ready to rise. You can also do a “windowpane test” to see if your dough has been kneaded long enough: tear off a small (roughly golfball-size) piece of dough and gently stretch it out until it’s thin enough for light to pass through it. Hold it up to a window or light. Does light pass through the stretched dough without the dough tearing first? If so, your dough has been kneaded long enough and is ready to rise. If not, keep kneading until it passes the windowpane test.
- 1st Rise: Lightly grease a large bowl with oil or nonstick spray. Place the dough in the bowl, turning it to coat all sides in the oil. Cover the bowl with aluminum foil, plastic wrap, or a clean kitchen towel. Allow the dough to rise in a relatively warm environment for 1.5-2 hours or until double in size. (I always let it rise on the counter. Takes about 2 hours. For a tiny reduction in rise time, see my answer to Where Should Dough Rise? in my Baking with Yeast Guide.)
- Grease a 9×5-inch loaf pan.
- Roll out the dough: Punch down the dough to release the air. Place dough on a lightly floured work surface and with a floured rolling pin, roll the dough out into a 9×15 inch rectangle (approximately).
- For the filling: Spread softened butter all over the top of the dough, leaving a 1/2 inch border uncovered. The softer the butter is, the easier it is to spread in this step. (Microwave it for a few seconds to soften if needed.) Mix the brown sugar and cinnamon together, then sprinkle evenly all over the butter.
- Roll and twist the dough: If you need a visual, watch the video to see exactly how I do this step. Tightly roll the dough into a 15-inch log. Place the log on its seam. Using a sharp knife, cut the log in half lengthwise. I find a serrated knife works best. Criss-cross one half on top of the other half—forming an X. Tightly twist the two together. Pinch the outer edges to seal as best you can. Place in prepared loaf pan and cover with aluminum foil, plastic wrap, or a clean kitchen towel. (This step can get a little messy!) Allow the covered loaf to rest for 30 minutes. It will slightly rise during this time.
- Adjust the oven rack to the lower third position. Place a baking sheet on the lower rack to catch any cinnamon/sugar that may drip down. Preheat the oven to 350°F (177°C).
- For the cinnamon crunch topping: Whisk the melted butter, brown sugar, cinnamon, and flour together. Spoon over loaf right before baking.
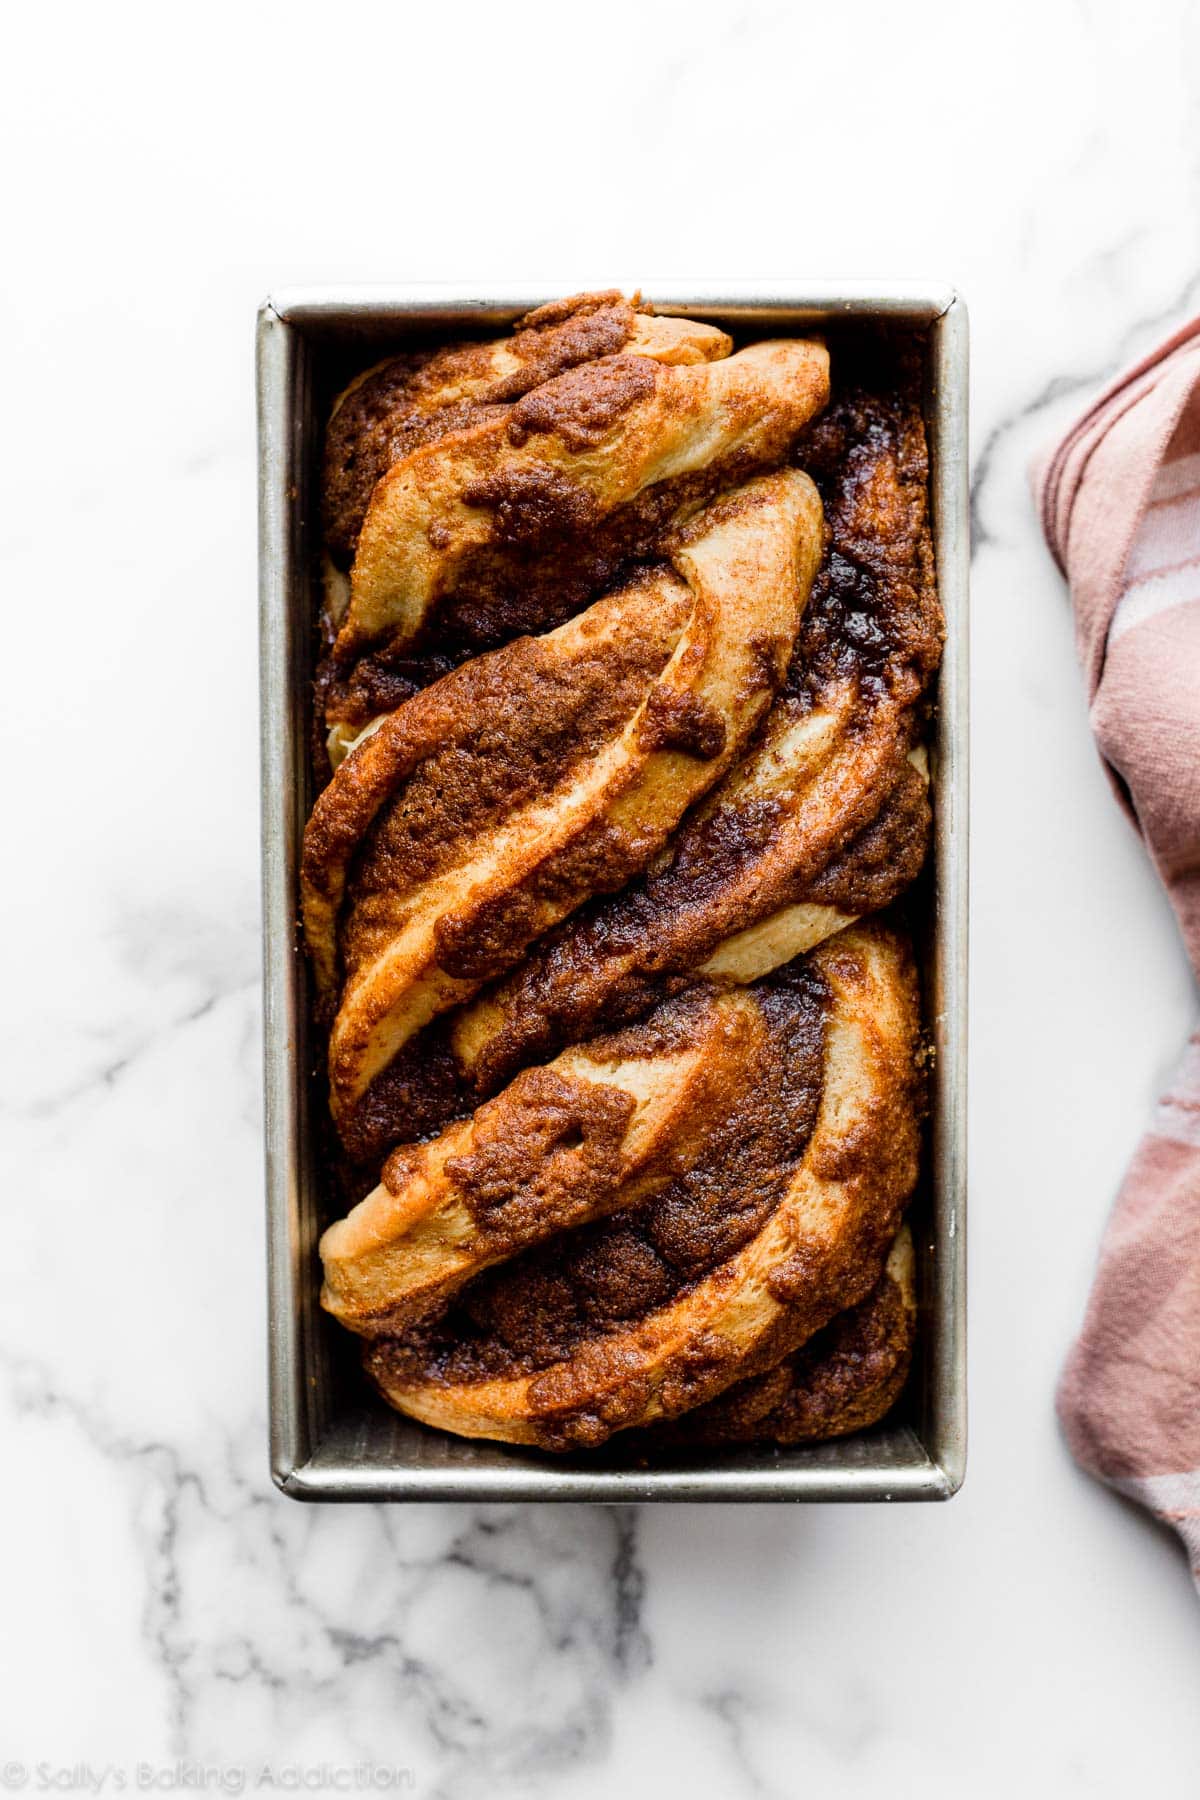
- Bake: Bake until golden brown and, when gently tapped, the top of the loaf sounds hollow, about 45-55 minutes. The top browns quickly as it bakes, so tent the entire loaf with aluminum foil. (I usually place foil on top after about 20 minutes.) Remove finished bread the oven and place on a wire rack. Cool for 10 minutes in the pan, then remove from the pan and cool loaf on the wire rack.
- Slice and serve warm or at room temperature. Cover and store leftovers at room temperature for 2 days or in the refrigerator for up to 1 week. Leftover slices taste delicious when warmed in the microwave for 10 seconds. Topping tends to lose its crunch after a day or 2.
Notes
- Make Ahead Instructions – Overnight: Prepare the dough through step 3. Place into a greased bowl as directed in step 4. Cover the dough tightly and place in the refrigerator for up to 15 hours. Remove from the refrigerator and allow the dough to fully rise for 1-2 more hours. Continue with step 5. I don’t recommend shaping the bread the night before as it will puff up too much overnight.
- Make Ahead Instructions – Freezing: Baked bread freezes wonderfully. Wrap the cooled loaf in plastic wrap, then a layer of aluminum foil. Freeze for up to 3 months. Thaw wrapped bread overnight in the refrigerator or at room temperature, then warm to your liking. You can also freeze the bread dough. After punching down the dough in step 6, wrap the dough tightly in plastic wrap, then a layer of aluminum foil. Freeze for up to 3 months. Thaw overnight in the refrigerator, then punch the dough down again to release any air bubbles. Continue with the rest of step 6.
- Special Tools (affiliate links): Electric Stand Mixer or Glass Mixing Bowl and Wooden Spoon or Silicone Spatula | 9×5-inch Loaf Pan | Rolling Pin | Whisk | Cooling Rack
- Buttermilk: Buttermilk provides the softest texture and unbeatable flavor. In a pinch, you can use whole milk instead. Lower fat or nondairy milks can work too, but the bread won’t taste as moist or rich. Here are other recipes using buttermilk if you purchase a carton and need to use it up.
- Yeast: I usually use instant yeast in this dough, but you can use active dry yeast instead if needed. No changes to the recipe, except the rise time will be at least 2 hours in step 4 if using active dry yeast. Reference my Baking with Yeast Guide for answers to common yeast FAQs.
- Bread Flour: Higher protein flour like bread flour is best for this bread recipe because of its strong gluten formation and high rise. You can use all-purpose flour instead if needed, but for absolute best taste and texture, I recommend bread flour.


Reader Comments and Reviews
Do you think it would be good without the topping, or would it be best to use the Cinnamon Swirl Bread recipe instead? I like the idea of twisting the bread to allow for more cinnamon pockets, but don’t want the crunch topping.
Hi Beth! Yes, you can leave the topping off if you prefer.
I added 1/2 tsp of allspice, 1/2 tsp of nutmeg and a cup and a bit of sultanas to the batter.
I did have to add a couple of tablespoons of flour as well, because it was a bit too sticky. However, my whole house smells like hot cross buns! It also tastes amazing!
Will you still have the crunch after freezing completed loaf?
Yes, it should!
How do I not eat this entire loaf in one sitting? It’s so good. Thank you for another great recipe – easy and delicious.
Five stars all the way! This is my second yeast bread (made your MultiGrain bread first). I’m 60 and have wasted all these years being afraid to make yeast bread -Sally provides the best instructions and encouragement. This was not difficult . The bread is delicious! We made french toast with it this morning! I used all the ingredients as listed. The only mess up I made, was adding the entire 1/4 cup sugar in step one instead of part in step 1, part in step 2. But seems to have made no effect on the outcome. My daughters boyfriend declared it “better than that fancy bakery at home” . thanks so much Sally for sharing your knowledge
We’re so happy to read this, Beth! Thank you for giving this cinnamon crunch bread a try.
This recipe looks great! Could I add raisins to the bread dough?
Hi April, you can certainly add raisins to the dough or filling. We’d say 1 cup total add-ins in each. Let us know how it turns out!
Awesome, thank you! I’ll start by adding in 1/2 cup and see how it goes.
My dough was rubbery. I would roll in out and it would shrink in. Is that the way it supposed to be ?
Fantastic, as usual! I didn’t have buttermilk so I used oat milk instead, which didn’t seem to be a problem. Thanks for another great recipe! 🙂
I’ve made this several times now in double batches and really love it. (Don’t worry, I gave several loaves away.) I like that the cinnamon is not overwhelming, nor is it terribly sweet.
What I’m thinking about is making this as plain bread, because I adore the texture. Would you recommend any changes for a loaf that would make good toast for breakfast or teatime? Thank you!
Hi Catherine, We’re so glad to read how much you love this bread! We recommend following our cheese bread recipe, which is basically this dough but a little less sugar. Same texture.
I made this recipe and it came out perfect. Sliced it thick and made French toast. Next time I will double the recipe.
This is so good! I normally use the king arthur recipe, but this has replaced it. I used platinum yeast and the mixer method rather than letting the yeast proof in advance, and it worked out well. The dough was a bit sticky after rolling, but it’s just going in a bread pan so no one would know. Definitely 5 stars.
This is the third time I’ve made bread, and I’ve used three of your recipes. (Sandwich, then multi-grain, and now this one.) Each one turned out perfectly, and this one is no exception. I love this sweet dessert bread, and my belly thanks you for that!
Makes oh so yummy French toast!
This bread is marvelous. The recipe is easy to follow and making the dough is a cinch. I need practice to get better at shaping but even with my subpar shaping the loaf still turned out decent looking and absolutely delicious. It may be the best texture of any yeasted bread I have made. Brilliant work, Sally!
I’ve made at least 5 loaves in less than a week! I figured out that you can double the dough recipe and it turns out great. HUGE hit!!
Made this yesterday, great tasting with coffee. Recipe is thorough per usual with all of Sally’s recipes!
Hi Sally, this bread is amazing, gosh you’re so amazing with your recipes! Thanks for sharing them with us. If I made these into mini loaves, how long do you think it will need to bake for?
Hi Roosh, thank you so much! For mini loaves– I’m really unsure because it depends on the exact dimensions of the pans and how much dough you squeeze inside each. Keep a close eye on them and tent with foil if the tops are browning quickly.
I was wondering the same thing. They would make sweet little gifts
So much fun to make and an absolute joy to eat!!! Thank you!
This bread is delicious and even better the next day as french toast!
My bread came out a little dry and dense and the outer parts were very hard… not as soft and chewy like the photo… wondering what I could have done wrong because I followed the recipe and instructions exactly. Thank you!!
Hi Kiyomi, if you bread is coming out dense, it’s possible that there was too much flour. Did you use the scoop and level method to measure? We also recommend tenting the bread part way through the bake time to prevent the crust from becoming too hard. Hope this is helpful for next time!
Hi Sally. Just wondering why such a short second rise and why are the rising times different than for the apple cinnamon babka when they have similar amounts of fat and sugar?
Hi Stephanie! This is a great question. The apple cinnamon babka dough is very heavy. If you look at the recipes closely, the babka has more fat with less flour. It’s a very rich and supple dough that takes a very long time to rise. (Yeast has to work harder.) For this bread, the dough is a lot lighter. The 2nd rise is short because we don’t want it to become too puffy and lose the twisty shape.
My son says this must be one of the seven culinary wonders of the world! (I think he liked it.)
Would love to make this without dairy and egg. What do you think? Any substitutes I should do? Thanks!
Hi Tracy, you could use a non-dairy milk in place of the buttermilk, but the dough won’t taste as rich. We haven’t tried any substitutes for the egg, but if you try anything we’d love to know how it goes!
New to baking here and this bread turned out wonderful! I prefer your version but added some walnuts for a friend recently and it was great too! I added it during the roll out part. I discovered this recip last week and I’ve made it 3 times!!!
This was fun to make and came out beautifully! I love spice so I added more cinammon and a dash of allspice as well. I didn’t have buttermilk, so used almond milk, which seemed to work fine. I also used some margarine in place of butter, as I wanted to cut down on some of the fat. It was really lovely and looked quite fancy when it was done. I’ll definitely be making this one again.
Would it be possible to make this as muffins? I have made this delicious bread but I find it gets a little stale.
Hi Christine! We haven’t tested baking this bread recipe in muffin tins, but don’t see why it wouldn’t work. Shaping them may be a little tricky. Let us know if you give it a try!
I will let you know how it works with the next batch I make.
Hi – you are my go to for baking, thank you for sharing 🙂 Can you add apples to this? I am looking for an apple cinnamon bread or pound cake.
Kindly
Hi Deirdre, if you’re looking for an apple bread, we’d recommend our Apple Cinnamon Babka. We’d love to know if you give it a try!
Can I add raisins?
Absolutely. I recommend 1 cup either in the dough (add with the flour) or in the filling.
Hi Sally,
What can I use instead of bread flour? I love your recipes.
Hi Ellen! You can use all-purpose flour instead if needed, but for absolute best taste and texture, we recommend bread flour.
Hi Sally, Can I use in place of the buttermilk, the homemade buttermilk made with made with milk and apple cider vinegar or lemon instead (sour milk)?
Absolutely! However, regular milk works just fine– you don’t need the added acid.