This easy pizza dough recipe is great for beginners and produces 2 soft and chewy homemade pizza crusts. Skip the pizza delivery because you only need 6 basic ingredients to begin!
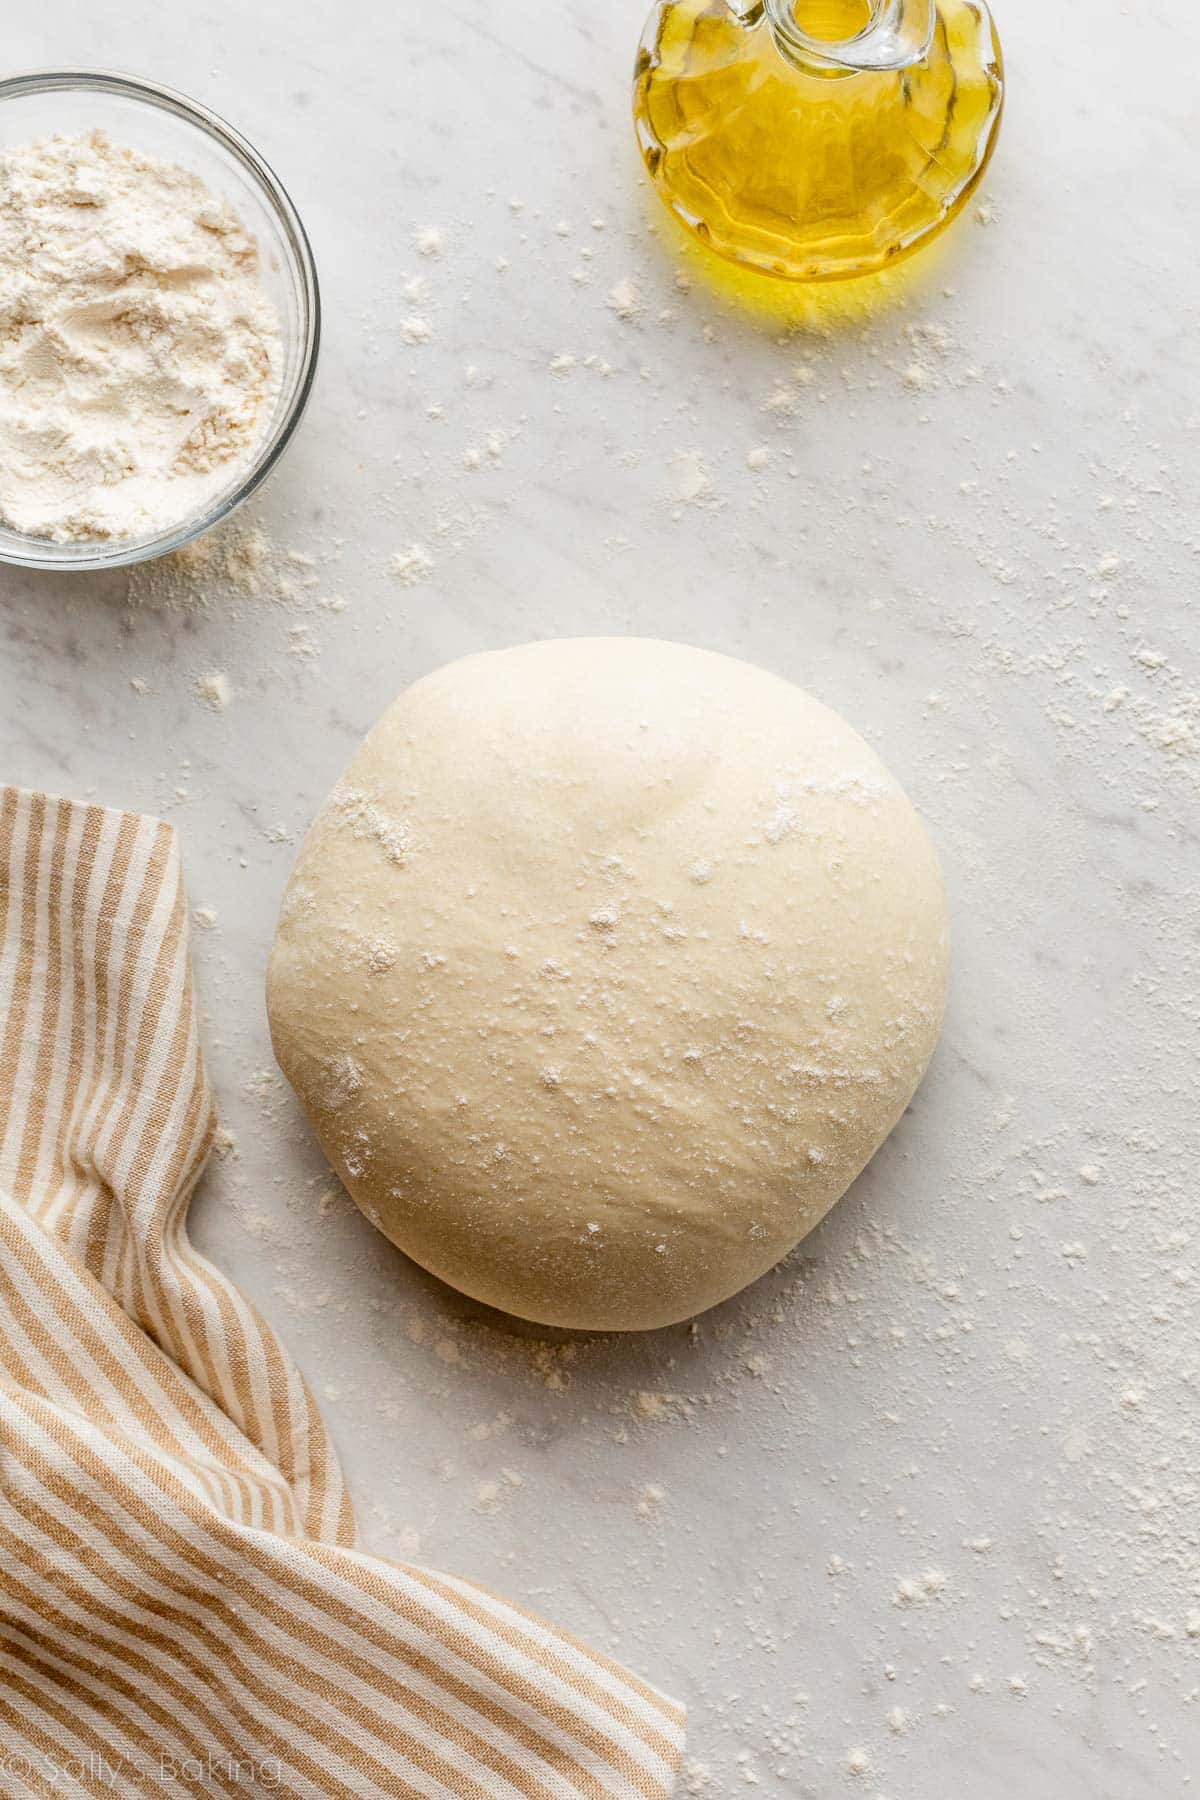
This recipe is brought to you in partnership with Red Star Yeast. Originally published in 2013, this pizza dough recipe is a massive fan favorite and you’ll also find it in my New York Times best-selling cookbook, Sally’s Baking 101.
Every great pizza begins with a great pizza crust. Some like it thin and crispy, while others prefer a thick and soft crust. This homemade pizza crust has it all: soft & chewy with a delicious crisp and AWESOME flavor. It’s my go-to pizza dough recipe and just a glance at the hundreds of reviews in the comments section tells me that it’s a favorite for many others too. In fact…

Easy Dough for Bread Beginners
This is a no-fuss dough recipe for beginners. You need just 6 basic ingredients, plus a little cornmeal for preparing the pan. (You can skip that if needed.) Most of the time is hands off as the dough rises. You might wonder… why waste the time when you can just buy frozen pizza dough? Frozen pizza dough is certainly convenient, but from-scratch crust has unbeatable flavor and texture that only comes from fresh dough. And you can use the dough for cheese breadsticks, too!
If you’ve ever made homemade bagels or sandwich bread, you can easily make pizza dough because it’s quicker, easier, and requires fewer steps.
Reader, Andy, commented: “Super easy, super fast, super good! I don’t like doughy thick pizzas and I find with this recipe that I can make them thin and crunchy, I love how easy it is. I make pizza once or twice a month! Haven’t bought one for quite some time now! ★★★★★“
Overview: Homemade Pizza Dough Ingredients
All pizza dough starts with the same basic ingredients: flour, yeast, water, salt, and olive oil.
- Yeast: I use Platinum Yeast from Red Star. I have the best results when I use this instant yeast. The Platinum yeast is fantastic because its careful formula strengthens your dough and makes working with yeast simple. You only need 1 standard packet of yeast (2 and 1/4 teaspoons) to get the job done.
- Water: I tested this pizza dough recipe with different amounts of water. 1 and 1/3 cups is the perfect amount. Use warm water to cut down on rise time, about 100-110°F. Anything over 130ºF kills the yeast.
- Flour: Use unbleached all-purpose white flour in this recipe. Bleaching the flour strips away some of the protein, which will affect how much water the flour absorbs. You can substitute bread flour for a chewier pizza crust. If you love whole grain bread, try this whole wheat pizza dough instead.
- Oil: A couple Tablespoons of extra virgin olive oil adds wonderful flavor to the dough. Don’t forget to brush the dough with olive oil before adding the toppings, which prevents the crust from tasting soggy.
- Salt: Salt adds necessary flavor.
- Sugar: 1 Tablespoon of sugar increases the yeast’s activity and tenderizes the dough, especially when paired with a little olive oil.
- Cornmeal: Cornmeal isn’t in the dough, but it’s used to dust the pizza pan. Cornmeal gives the pizza crust a little extra flavor and crisp. Most delivery pizzas you enjoy have cornmeal on the bottom crust!
You could also add 1 teaspoon each garlic powder and Italian seasoning blend to the dough when you add the flour.
One reader, Shane, commented: “Excellent pizza dough. I add about 1 tbs of garlic powder and Italian herbs to give the dough more flavor as well as 40 grams of cornmeal for a little crunch. It freezes well and makes a nice thin crust. ★★★★★“
This is a Lean Bread Dough
Pizza crust, like homemade bagels, artisan bread, and focaccia, requires a lean dough. A lean dough doesn’t use eggs or butter. Without the extra fat to make the dough soft, you’re promised a crusty pizza crust. (However, I recommend using some olive oil for flavor and to keep the interior on the softer side.) Recipes like dinner rolls & sweet potato dinner rolls, homemade breadsticks, and overnight cinnamon rolls require fat to yield a “rich dough,” which creates a softer and more dessert-like bread.
Overview: How to Make Easy Pizza Dough
- Make the dough: Mix the dough ingredients together by hand or use a hand-held or stand mixer. Do this in steps as described in the written recipe below.
- Knead: Knead by hand or with your mixer. I like doing this by hand. If you’re new to yeasted doughs, my How to Knead Dough post and video can help with this step.
- Rise: Place dough into a greased mixing bowl, cover tightly, and set aside to rise for about 90 minutes or overnight in the refrigerator.
- Punch & shape: Punch down risen dough to release air bubbles. Divide in 2. Roll dough out into a 12-inch circle. Cover and rest as you prep the pizza toppings.
- Top it: Top with favorite pizza toppings.
- Bake: Bake pizza at a very high temperature for only about 15 minutes.
Young bakers can lend a hand AND have fun in the process. Let the kids help you press down the dough and shape into a circle. They can add their cheeses and make pepperoni faces on top of the pie. Who doesn’t love a smiley pizza? 🙂
Favorite Pizza Pans
Let me share my top choices for pizza pans just in case you’re shopping for a new one. I use and love (affiliate links) this one and this one. If you like baking your homemade pizzas on pizza stones, I’ve used this one before and it’s wonderful.
If you don’t have a pizza pan, use a regular sheet pan. Grease it with olive oil and sprinkle with cornmeal as directed below, and then press the dough into whatever shape that will fit. Make sure the dough is about 1/2-inch thick. For a thinner pizza, stretch the dough out more.

Uses for Homemade Pizza Dough
Here are the many uses for this homemade pizza dough:
- Stuffed Crust Pizza
- Pesto Pizza
- Homemade Ham & Cheese Pockets
- Pepperoni Pizza Rolls
- Stromboli
- Spinach Artichoke White Pizza
- Homemade BBQ Chicken Pizza
- Garlic Knots
- Margherita style (pictured above): For 2 pizzas, when it’s time to top it in step 6 below, top with the following. (Feel free to halve for only 1 pizza.) Make a homemade tomato sauce by blending 1 28-ounce can San Marzano tomatoes, 1 Tablespoon olive oil, pinch of salt, and 2 minced cloves of garlic. Spread on shaped doughs. Top each with 2-3 ounces thinly sliced fresh mozzarella. Bake as directed, and then sprinkle each hot pizza with 2 Tbsp freshly grated parmesan cheese and a handful of roughly chopped fresh basil.
- Apple gorgonzola pizza is a favorite: For 1 pizza, when it’s time to top it in step 6 below, top with 1 and 1/2 cups (6oz or 168g) shredded mozzarella cheese, 8 ounces crumbled gorgonzola cheese, thin slices of apple, then sprinkle with chopped fresh or dried rosemary before baking.
- Or any other pizza topping you love: pepperoni, crumbled sausage, black olives, onions, mushrooms, jalapeños, etc
Here are my flatbread pizza crust, whole wheat pizza dough, Chicago-style deep dish pizza, and cold veggie pizza recipes.
Print
Easy Homemade Pizza Dough
- Prep Time: 2 hours, 15 minutes
- Cook Time: 15 minutes
- Total Time: 2 hours, 30 minutes
- Yield: 2 12-inch pizzas
- Category: Dinner
- Method: Baking
- Cuisine: American
Description
Follow these basic instructions for a thick, crisp, and chewy pizza crust at home. The recipe yields enough pizza dough for two 12-inch pizzas and you can freeze half of the dough for later. Close to 2 pounds of dough total. This recipe is also in my New York Times best-selling cookbook, Sally’s Baking 101.
Ingredients
Dough
- 1 and 1/3 cups (320ml) warm water (about 110°F/43°C)
- 1 Tablespoon (13g) granulated sugar
- 2 and 1/4 teaspoons (7g) Platinum Yeast from Red Star instant yeast (1 standard packet)*
- 3 and 1/2 to 4 cups (438–500g) unbleached all-purpose flour (spooned & leveled), plus more as needed
- 2 Tablespoons (30ml) extra-virgin olive oil, plus more for greasing
- 1 teaspoon salt
- sprinkle of cornmeal, for dusting the pan
Toppings (halve these amounts if making just 1 pizza)
- extra-virgin olive oil, for brushing
- 2 garlic cloves, minced (optional)
- 1 cup (250g) store-bought pizza sauce
- 4 cups (1lb/454g) shredded mozzarella cheese
Instructions
- Whisk the warm water, granulated sugar, and yeast together in the bowl of your stand mixer fitted with a dough hook or paddle attachment. Cover and allow to rest for 5 minutes. *If you don’t have a stand mixer, simply use a large mixing bowl and mix the dough with a wooden spoon or silicone spatula in the next step.
- Add the flour, olive oil, and salt. Beat on medium speed for 2 minutes, until the dough pulls away from the sides of the bowl.
- Knead the dough: Keep the dough in the mixer and beat for an additional 5 full minutes, or knead by hand on a lightly floured surface for 5 full minutes. (If you’re new to bread-baking, my How to Knead Dough video tutorial can help here.) If the dough becomes too sticky during the kneading process, sprinkle 1 teaspoon of flour at a time on the dough or on the work surface/in the bowl to make a soft, slightly tacky dough. Do not add more flour than you need because you do not want a dry dough. After kneading, the dough should still feel a little soft. Poke it with your finger—if it slowly bounces back, your dough is ready to rise. You can also do a “windowpane test” to see if your dough has been kneaded long enough: tear off a small (roughly golfball-size) piece of dough and gently stretch it out until it’s thin enough for light to pass through it. Hold it up to a window or light. Does light pass through the stretched dough without the dough tearing first? If so, your dough has been kneaded long enough and is ready to rise. If not, keep kneading until it passes the windowpane test.
- Rise: Lightly grease a large bowl with oil or nonstick spray—just use the same bowl you used for the dough. Place the dough in the bowl, turning it to coat all sides in the oil. Cover the bowl with aluminum foil, plastic wrap, or a clean kitchen towel. Allow the dough to rise at room temperature for 60–90 minutes or until double in size. (Tip: For the warm environment on a particularly cold day, heat your oven to 150°F (66°C). Turn the oven off, place the dough inside, and keep the door slightly ajar. This will be a warm environment for your dough to rise. After about 30 minutes, close the oven door to trap the air inside with the rising dough. When it’s doubled in size, remove from the oven.)
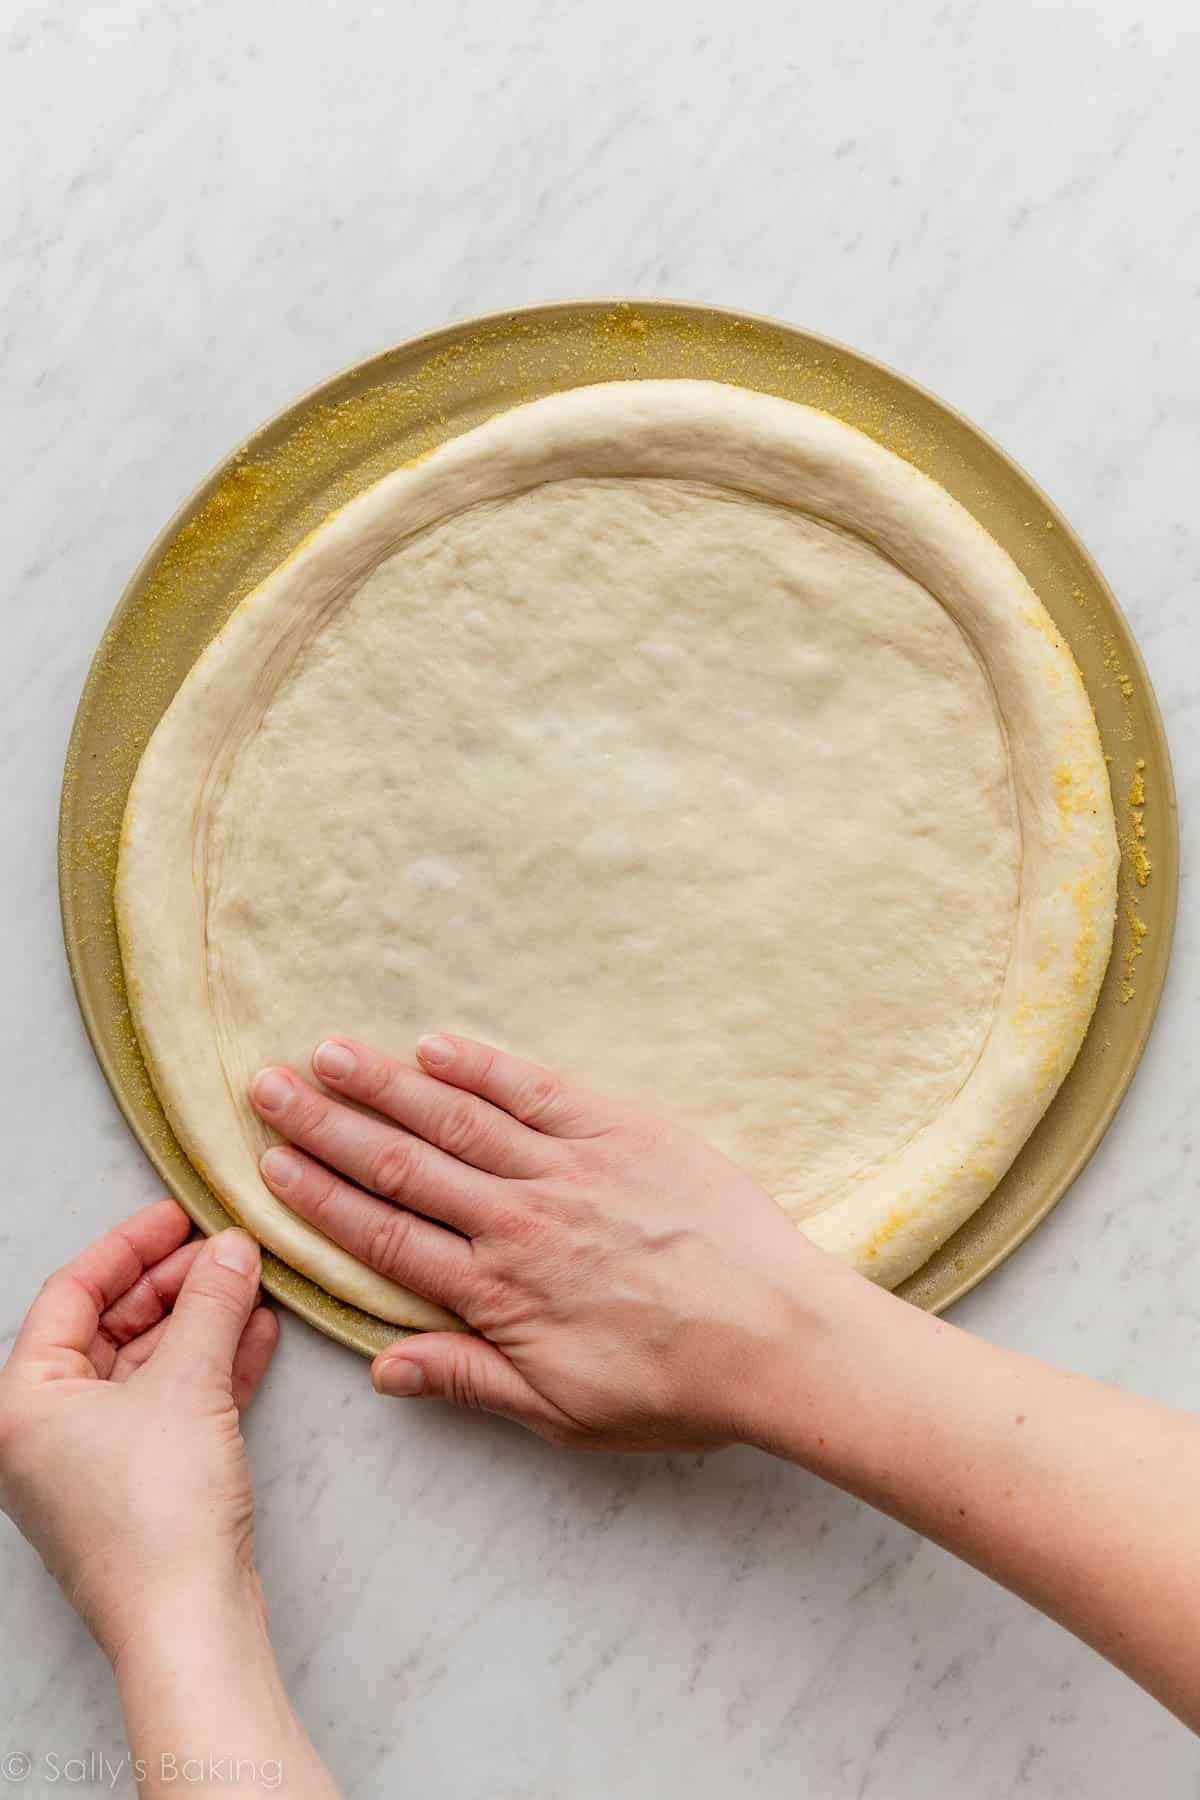
- Preheat oven to 475°F (246°C). Allow it to heat for at least 15–20 minutes as you shape the pizza. (If using a pizza stone, place it in the oven to preheat as well.) Lightly grease baking sheet or pizza pan with nonstick spray or olive oil. Sprinkle lightly with cornmeal, which gives the crust extra crunch and flavor.
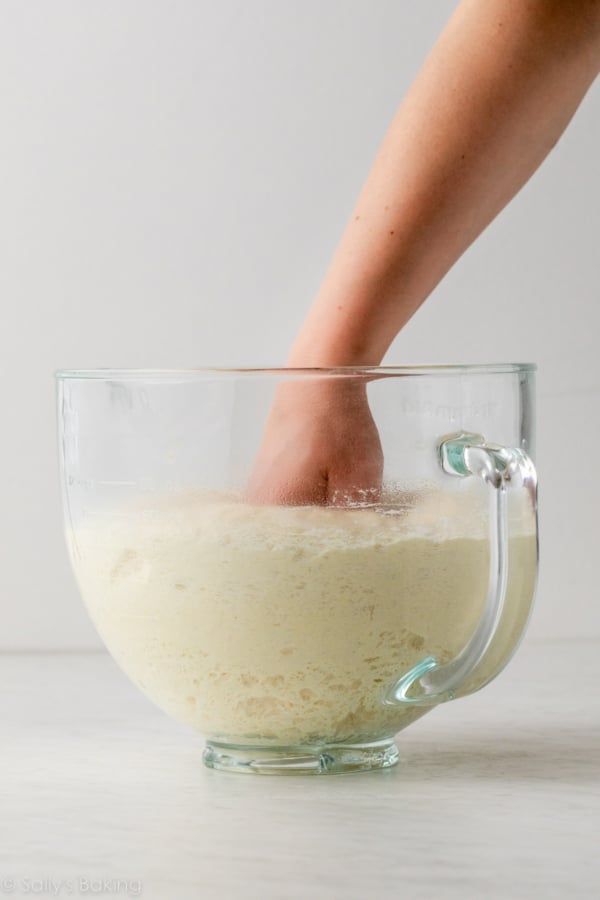
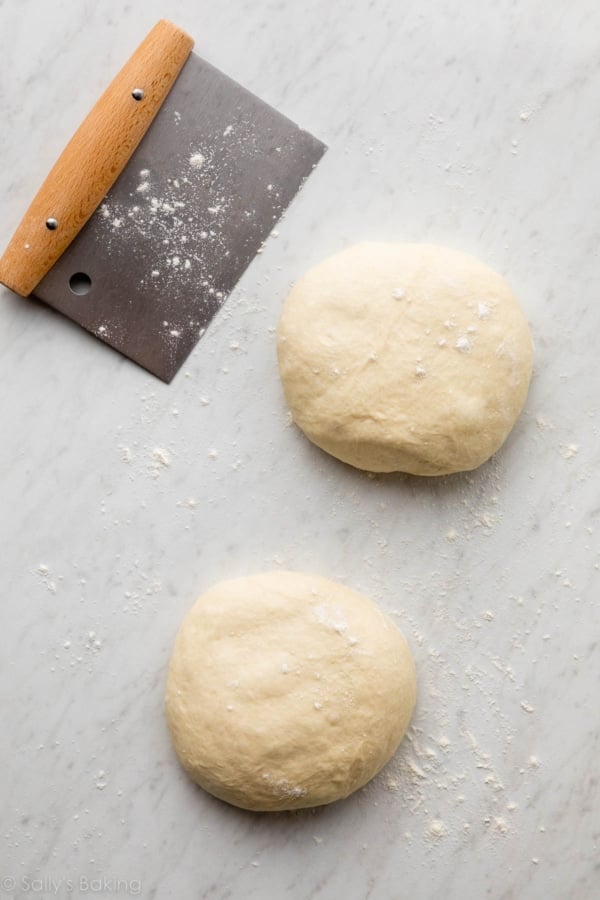
- Shape the dough: When the dough is ready, punch it down to release any air bubbles. Divide the dough in half. (If not making 2 pizzas, freeze half of the dough for another time. See freezing instructions below.) On a lightly floured work surface using lightly floured hands or rolling pin, gently flatten the dough into a disc. Place on prepared pan and, using lightly floured hands, stretch and flatten the disc into a 12-inch circle, about 1/2-inch thick. If the dough keeps shrinking back as you try to stretch it, stop what you’re doing, cover it lightly for 5–10 minutes, then try again. Once shaped into a 12-inch circle, lift the edge of the dough up to create a lip around the edges. I simply pinch the edges up to create the rim. If using a pizza stone, place the dough directly on baker’s peels dusted with cornmeal.
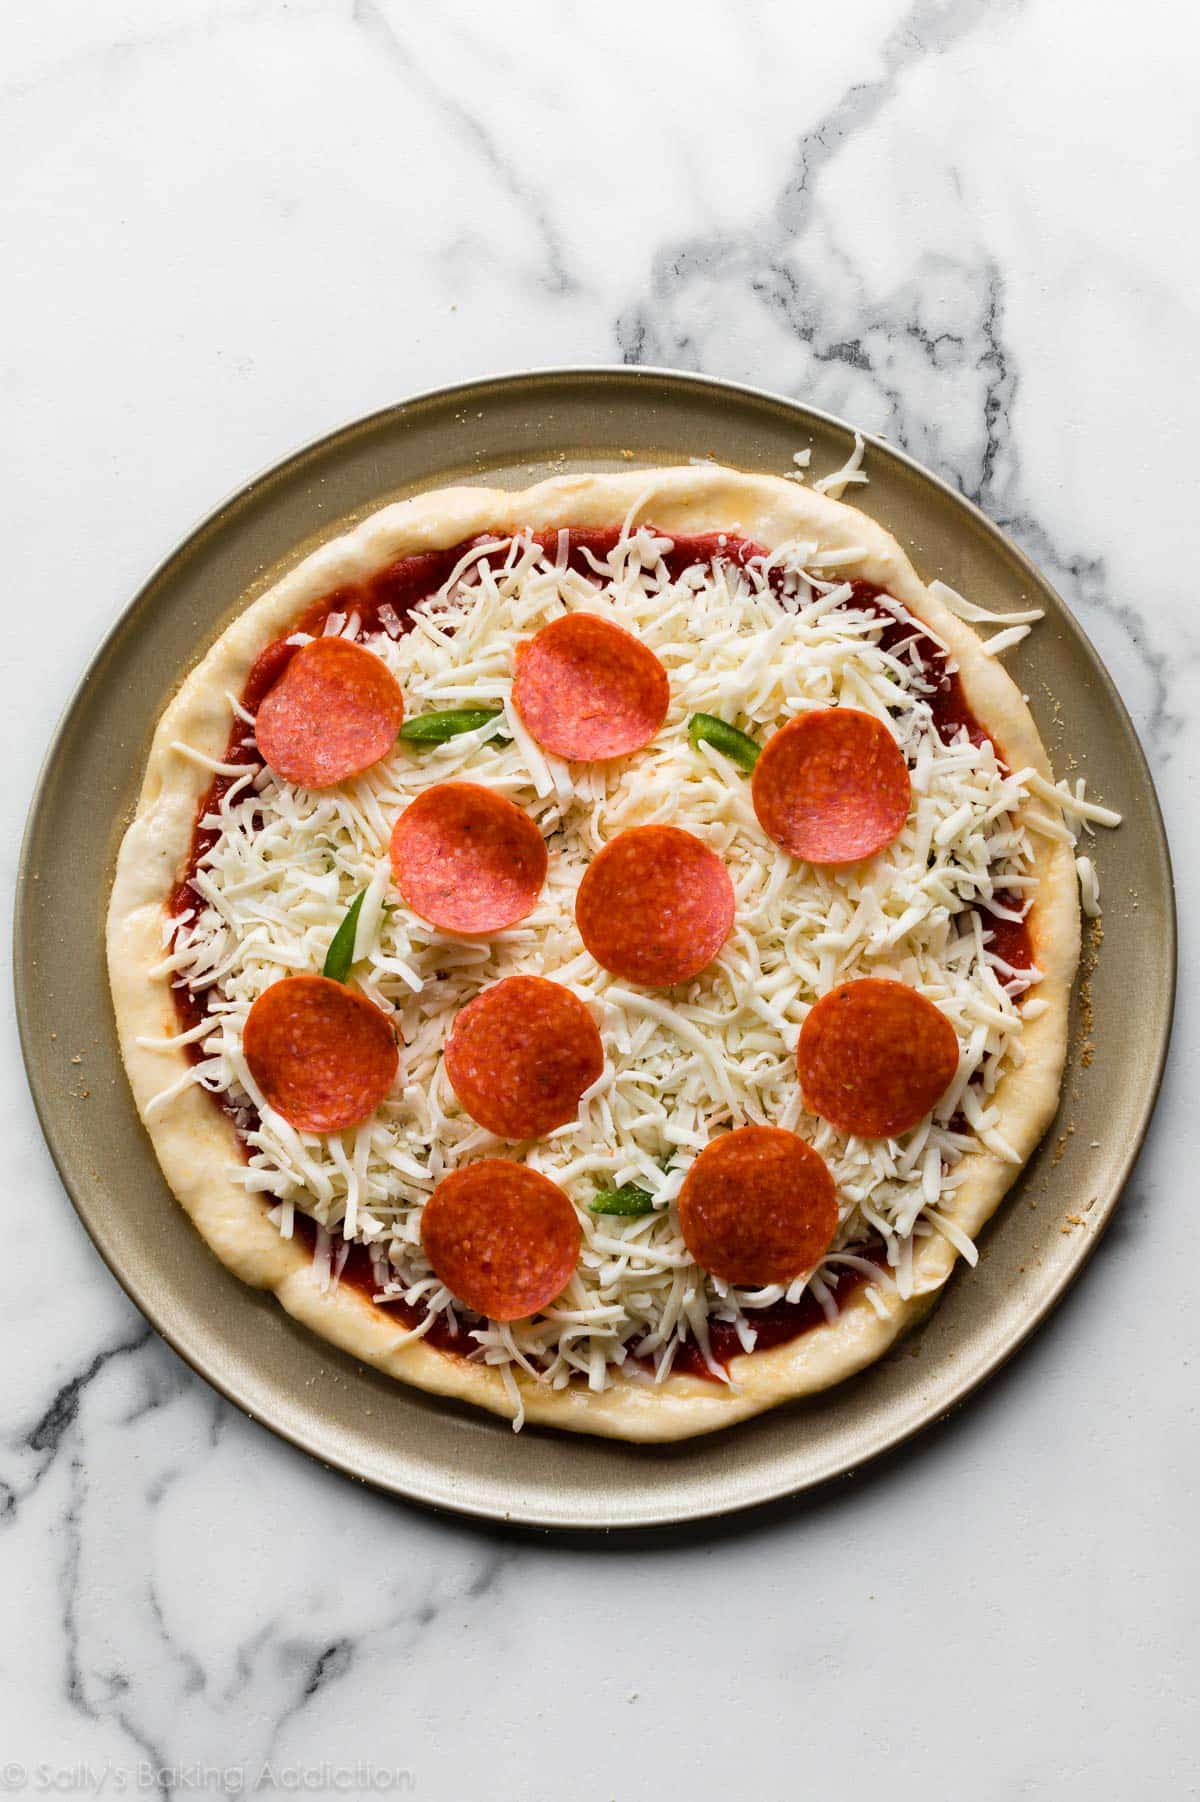
- Cover dough lightly with plastic wrap or a clean kitchen towel and allow to rest for a few minutes as you prepare your pizza toppings. I suggest pepperoni & green peppers or jalapeño slices, Hawaiian pizza, pesto pizza, spinach artichoke white pizza, or homemade BBQ chicken pizza.
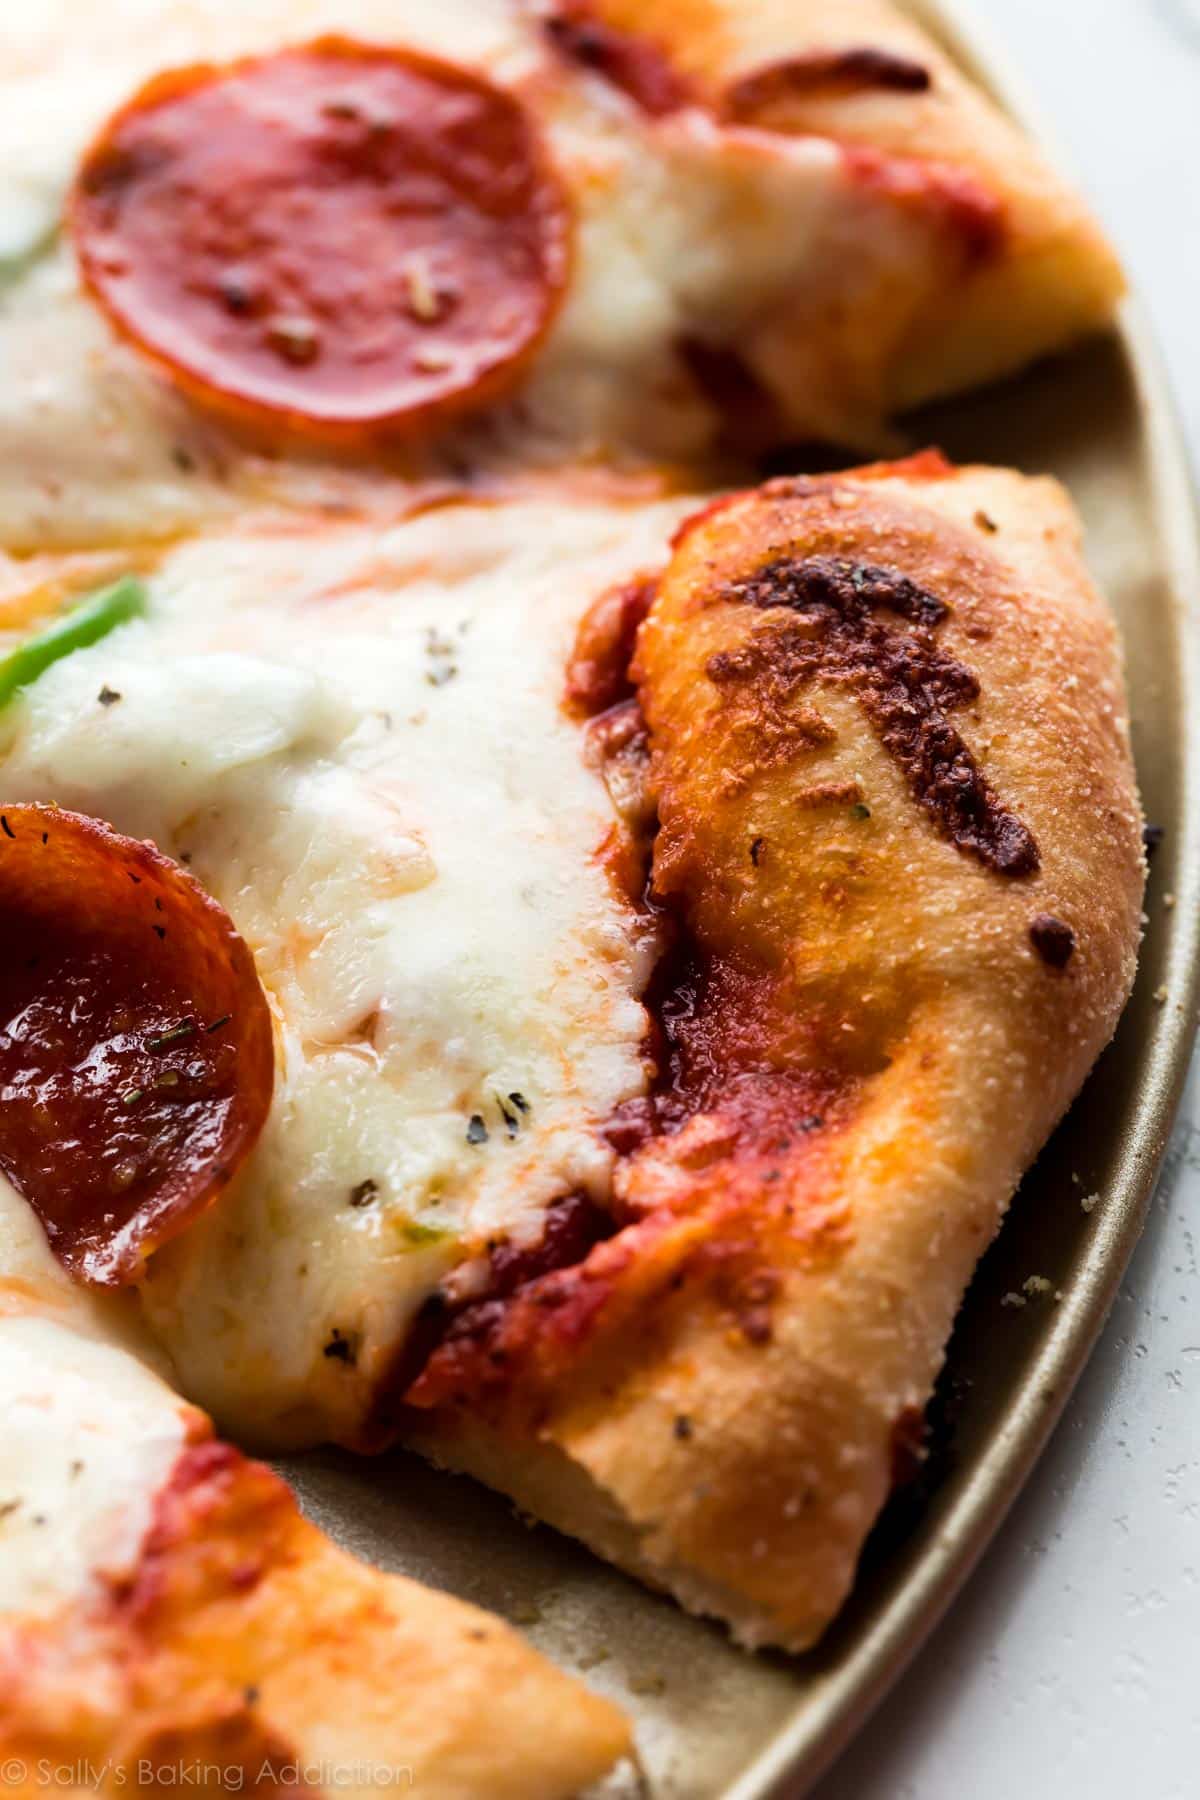
- Top & bake the pizza: Using your fingers, press dents into the surface of the dough to prevent bubbling. Lightly brush olive oil over the top of the crust. Sprinkle with minced garlic (if using), then spread on 1/2 cup (125g) pizza sauce, and top with 2 cups (227g) shredded mozzarella cheese. Top with any additional toppings of your choice and bake for 13–15 minutes or until the crust is golden brown.
- Slice hot pizza and serve immediately. Cover leftover pizza tightly and store in the refrigerator.
Notes
- Freezing Instructions: This recipe yields enough dough for two 12-inch pizzas, a little less than 2 pounds (900g) total. After the pizza dough rises and you divide the dough in half (step 5), you can freeze one of the balls of dough to make pizza at a later time. Or you can simply freeze both balls of dough separately. Lightly coat all sides of the dough ball(s) with nonstick spray or olive oil. Place the dough ball(s) into individual zipped-top bag(s) and seal tightly, squeezing out all the air. Freeze for up to 3 months. To thaw, place the frozen pizza dough in the refrigerator for about 8 hours or overnight. When ready to make pizza, remove the dough from the refrigerator and allow to rest for 1 hour on the counter. Preheat the oven and continue with step 5, punching down the dough to release air if needed.
- Overnight/All Day Instructions: Prepare the dough through step 3, but allow the dough to rise for 8–12 hours in the refrigerator. (If it needs to be in the refrigerator for longer, use cooler water (about 70°F/21°C) in the dough, which will slow the dough’s rise and allow for more time.) The slow rise gives the pizza dough wonderful flavor! When ready, continue with step 4. If the dough didn’t quite double in size overnight, let it sit at room temperature for 30–45 minutes before punching down (step 5).
- Special Tools (affiliate links): Stand Mixer or Large Mixing Bowl and Wooden Spoon or Silicone Spatula | Dough Scraper | Pizza Pan or Baking Sheet | Pastry Brush | Pizza Cutter
- Yeast: Red Star Platinum yeast is an instant yeast. You can use active dry yeast instead. The rise time will be at least 90 minutes. Reference my Baking with Yeast Guide for answers to common yeast FAQs.
- Pictured Pizza: This recipe yields 2 pizzas. For each, top with 1/2 cup pizza sauce, 2 cups shredded mozzarella cheese, pepperoni slices, thinly sliced green pepper or jalapeño, and a sprinkle of Italian seasoning blend or dried basil.
Recipe originally published on Sally’s Baking Addiction in 2013
FAQ: How Can I Make The Dough Ahead of Time?
Prepare the dough through step 3 above, but allow the dough to rise for 8-12 hours in the refrigerator. (If it needs to be in the refrigerator for longer, use cooler water in the dough which will slow the dough’s rise and allow for more time.) As a bonus, the slow rise gives the pizza dough wonderful flavor! When ready, continue with step 5 in the recipe above (the shaping step). If the dough didn’t quite double in size when rising, let it sit at room temperature for 30-45 minutes before shaping.
FAQ: How Do I Freeze Homemade Pizza Dough?
This recipe yields two 12-inch pizzas. After the pizza dough rises and you divide the dough in half (step 5), you can freeze one of the balls of dough to make pizza at a later time. Or you can simply freeze both balls of dough separately. Lightly coat all sides of the dough ball(s) with nonstick spray or olive oil. Place the dough ball(s) into individual zipped-top bag(s) and seal tightly, squeezing out all the air. Freeze for up to 3 months.
FAQ: How Do I Thaw Frozen Pizza Dough?
Place the frozen pizza dough in the refrigerator for about 8 hours or overnight. When ready to make pizza, remove the dough from the refrigerator and allow to rest for 30 minutes on the counter. Continue with step 5 in the recipe above.


Reader Comments and Reviews
Hi. Wondering if I can just make one large rectangular pizza or if it will be too thick. TYIA.
Hi Carol, you can definitely make one larger rectangular pizza. Bake time will vary.
Can I use bread flour for this recipe?
Hi Taycee, absolutely. Same amount.
Perkenalkan nama saya Nana Mulyana tinggal di kota Bekasi Indonesia. Resep adonan pizza sudah saya coba dan anak anak saya suka. Tekturnya lembut walau tidak menggunakan pelembut roti. Tepung terigu menggunakan tepung protein sedang dan olive oil diganti dengan minyak goreng kelapa sawit. Terimakasih resep dan tutorialnya.
Can I use vegetable oil if out of Olive oil?
Hi Katie, We find that olive oil produces the best flavor, but you can try replacing the olive oil with a neutral flavored oil such as canola or vegetable oil if needed. Hope you enjoy it!
I use this recipe all the time! It’s great!
One thing I can never get though… how can I get the crust really toasted and crispy? Is there a technique I can use if my oven can’t get to as high of a temperature as I’d want?
Hi A, we’re so glad you loved this dough! Usually an extra-crispy crust is caused either by baking for longer or simply rolling it out thinner.
Can I substitute gluten free flour for the all purpose flour?
Hi Leila, gluten free flour doesn’t work well in this yeasted dough. We recommend looking for a recipe formulated to be gluten free for best results! Here are all of our gluten free recipes, if you’d like to browse
We have always used your recipe, but this time we are trying to premake the pizza for Halloween the night before. So all I have to do when I get home is slide them in the oven. What’s the best way to do this?
Hi Taiylar, see recipe Notes for our overnight/all day instructions. We don’t recommend fully assembling the pizzas a day in advance because the crust will continue to rise and the toppings will cause the dough to become soggy. If you’re going out for a quick hour or so, you could probably shape and top the pizzas right before leaving and then bake when you return, but we wouldn’t make them much more in advance than that. Hope this helps!
Hi! I want to make mini pizzas with the dough. How many would it make and how long would I bake them?
Thanks!
Hi Samantha, you can certainly make mini pizzas. Bake time will vary on the size—you can make them as large or small as you want. Hope you enjoy them!
If I wanted to make pre-made pizzas with the dough for freezing, how long would I parbake them for? Thanks.
Hi Kelli, for a par-bake and freeze make-ahead option, you could par bake the dough (without toppings) for 5-8 minutes, then freeze. Let it thaw before topping and baking. Make sure you roll the dough/flatten thin as it will puff up without toppings on. We don’t recommend freezing with the toppings on. Hope this helps!
This pizza dough recipe is perfection!! Thank you!
Managed to make 4 12inch pizzas with this after rising for 3 hours
Best pizza dough I have ever made. Awesome!
I tried it and it was absolutely amazing! Sally never disappoints
Thank you, Sally! I made this pizza dough for the first time and it was, impressively, delicious! I watched your video and read your directions carefully due to past failures from other recipes. I had cover the dough and walk a way a couple times because it kept shrinking away from the pan’s edge, but it was WORTH it! This pizza was so good, that it rivaled my favorite pizza restaurant. I’m a fan!
I love the pizza dough ! So easy and no fail .. and delicious
I have a tendency to add a lot of toppings and the bottom of the dough is not quite booked enough but I need to take it out because the top is cooked . Any suggestions? Maybe put it on a lower rung in stove ?
Hi Sharon, you can try a lower position in your oven, yes!
Hi Sharon,
I use a 12” cast iron skillet to make pizza in. It works well for extra toppings. The bottom usually gets nice and crispy, but if it needs more browning you can put it on the stove top and continue to brown the bottom until it’s the color you want. It works well. I double this recipe and make 4 pizzas at the same time in my oven. Just oil the pans well with evo before placing the dough in them.
First time making pizza from scratch and it turned out really well. Used sunflower oil instead of olive oil but still came out delicious!
I wish I could post a picture of my result! This is the best pizza that I have made! Is perfect and fluffy!
Can you store the pre made dough in the refrigerator for 24 hours then use it ?
Hi Jade! See Notes after the recipe for our recommended overnight/all day instructions. The dough can rise in the fridge up to 12 hours, but any longer you risk it over-proofing. The dough can be frozen as well!
What temperature to bake?
Hi Sally, see step 5: Preheat oven to 475°F (246°C).
It’s tasty and the crust soft — not wet. Thank you for that tip.
To add to my other comment. I did use mostly 00 flour and a little bread flour.
I loved this pizza!
LOVE LOVE LOVE THIS RECIPE THANK YOU
What temperature should the water be if rising in the fridge for longer than 24 hours?
Hi Kaitlynn! Up to 12 hours in the refrigerator is really best. We recommend freezing if storing longer than that (see recipe Notes).
I seen to have only Ap unbleached flour , will that work with these proportions?
Hi Doug, all-purpose flour is fine here!
Would double zero flour work in this recipe?
Absolutely.
Hello!! hello how can I adjust this recipe for 4-6 mini pizzas? I have 4
7 inch mini pizza pans.
Hi Trae, You can definitely make mini pizzas. We would use the same heat, but we’re unsure of the bake time so keep an eye on them. Yum!
Sally – You are my go-to for all things baking related but this is my first time leaving a comment. I used this recipe last night (to make your pesto pizza) and it was just so freaking good. My guests LOVED it, but also thankfully (and selfishly) I had a great time making it. Kneading dough might be my new form of meditation lol. Thank you!!!
Hi Sally! Can I use regular bleached AP flour? Do I need to adjust the water? Thanks.
Hi Angelique, using bleached flour should be fine here.
Is there any changes you’d make using stone ground bread flour?
I can’t seem to get it to rise well!
Hi Amy, We haven’t tested the recipe with that particular flour before so can’t say for sure. We would use it as a 1:1 substitution and add a couple teaspoons of water as it’s mixing if the dough seems dry. We’re unsure how the pizza crust will taste with this flour.
Hi, I would try doing 324g of hard white flour and 108g of soft white flour. Sift if you want to but not needed. I make in my grill and it comes out perfect!
The link for How to Knead Dough leads to a cookie recipe video.
Hi Elaine, the link seems to be working.
This dough is so much easier to work with than the pizza dough I used to make. A little planning a few hours ahead we’ve got an inexpensive, delicious dinner.
Sally you have truly never let me down. This pizza dough was so easy and absolutely delicious. Honestly afraid that if I make this too much my boyfriend will propose
We’re so glad you love it, Kayla!
Do I have to use cornmeal on the bottom?