

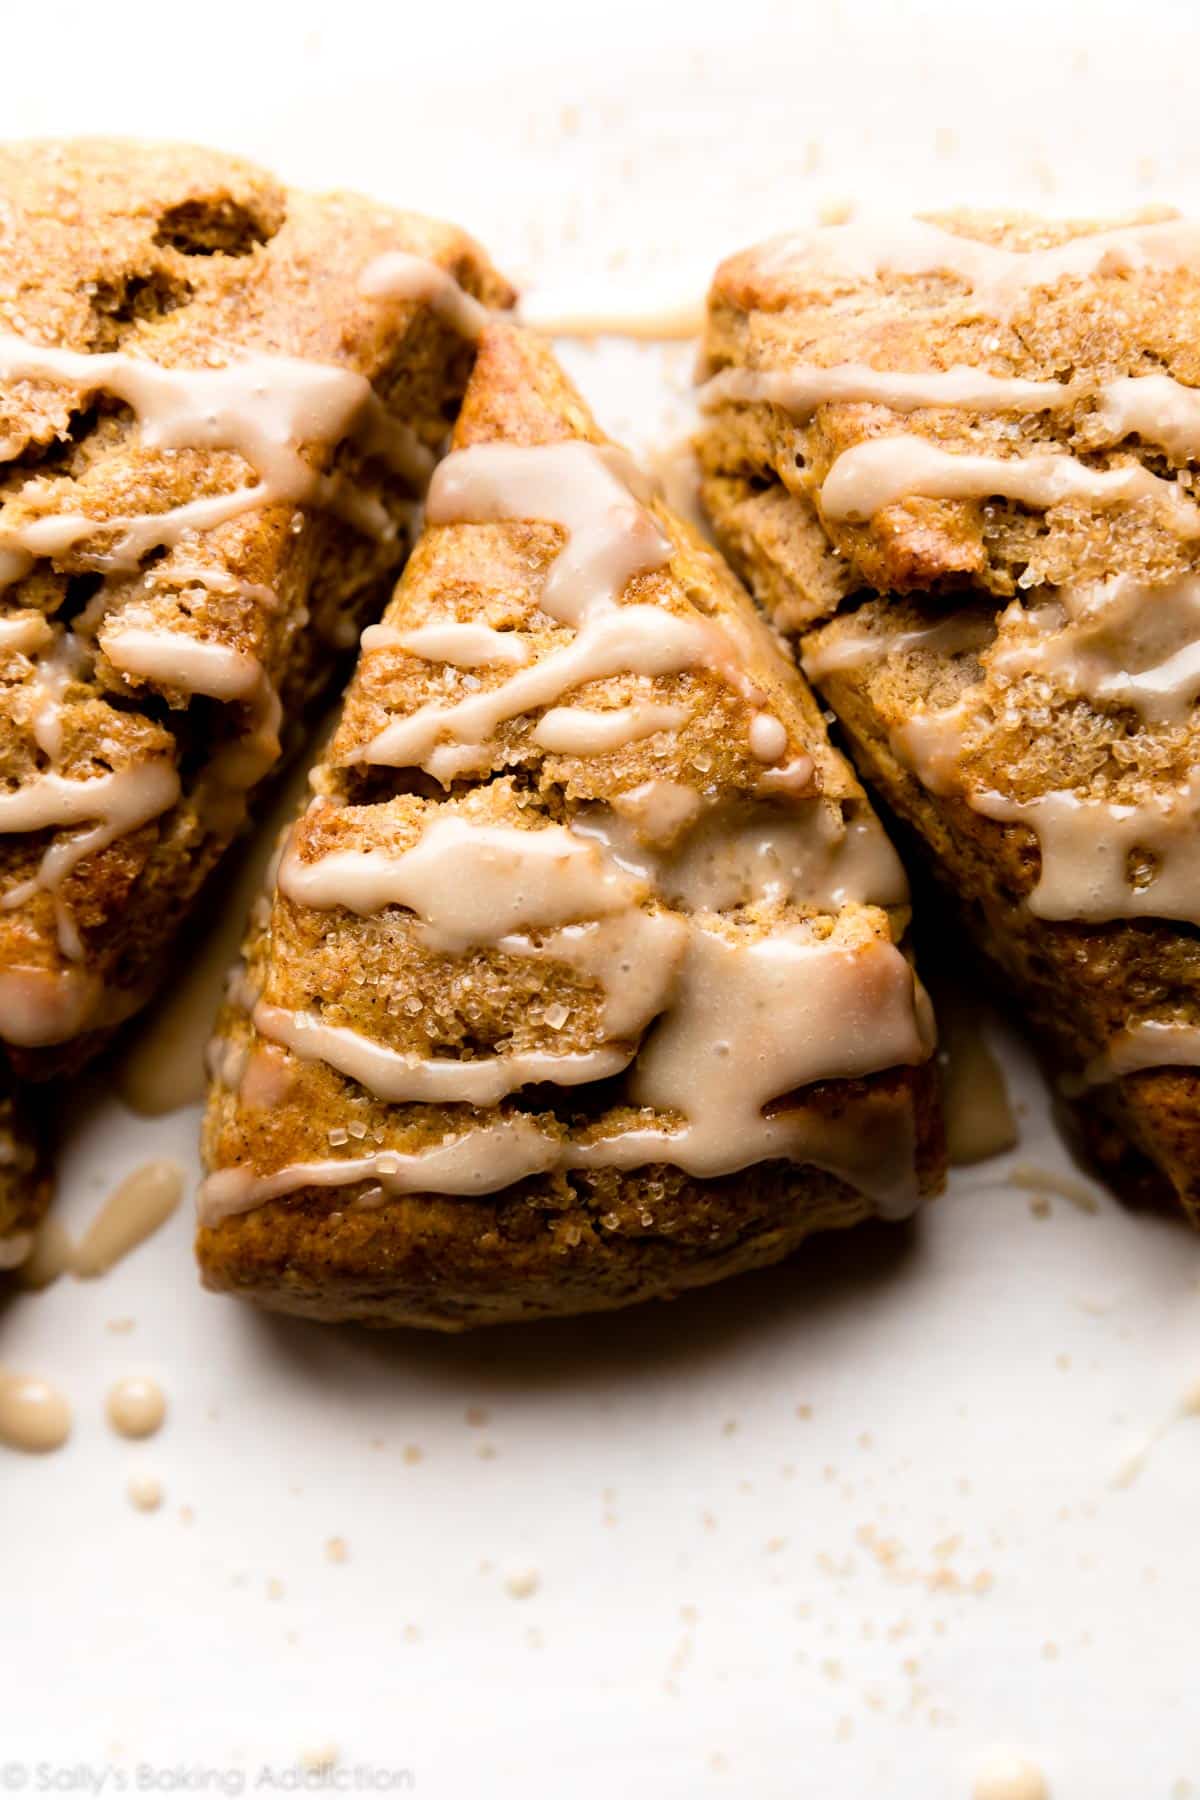
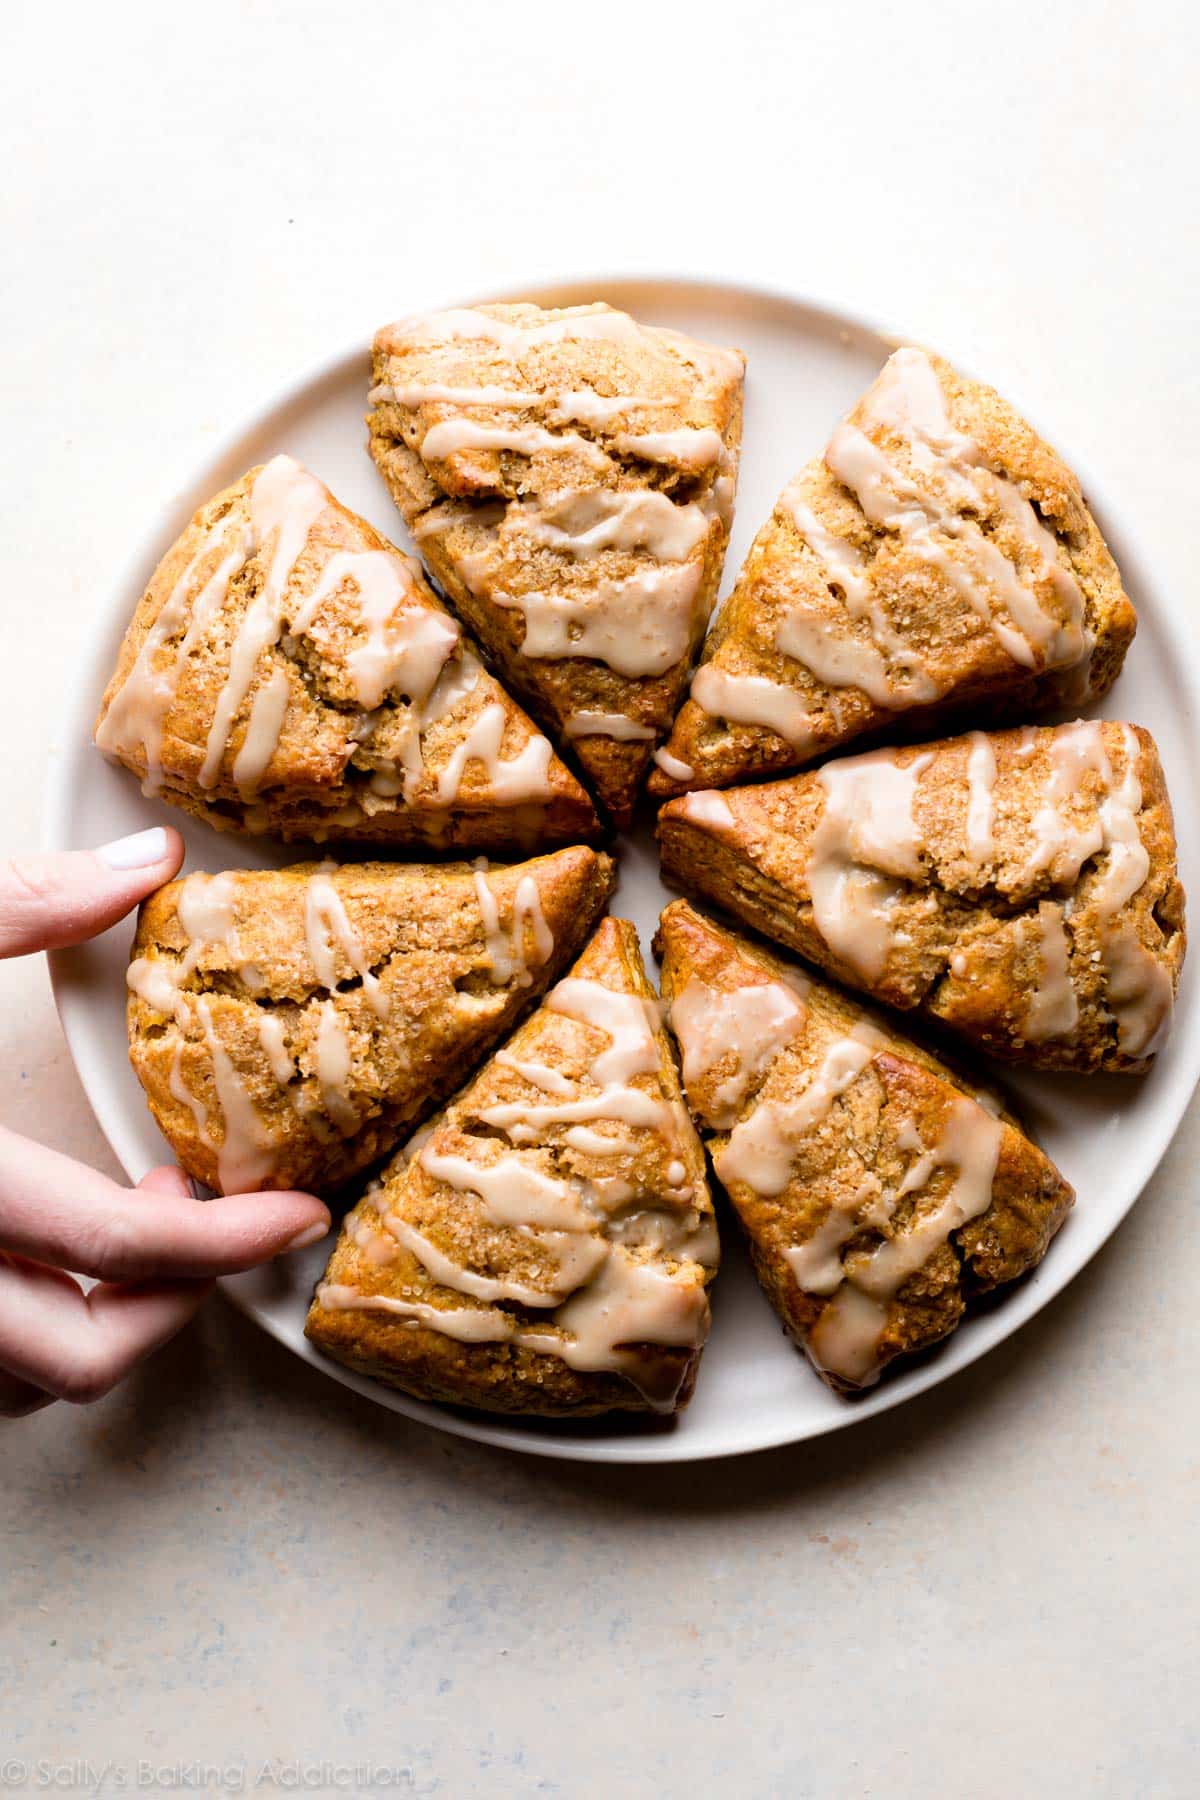
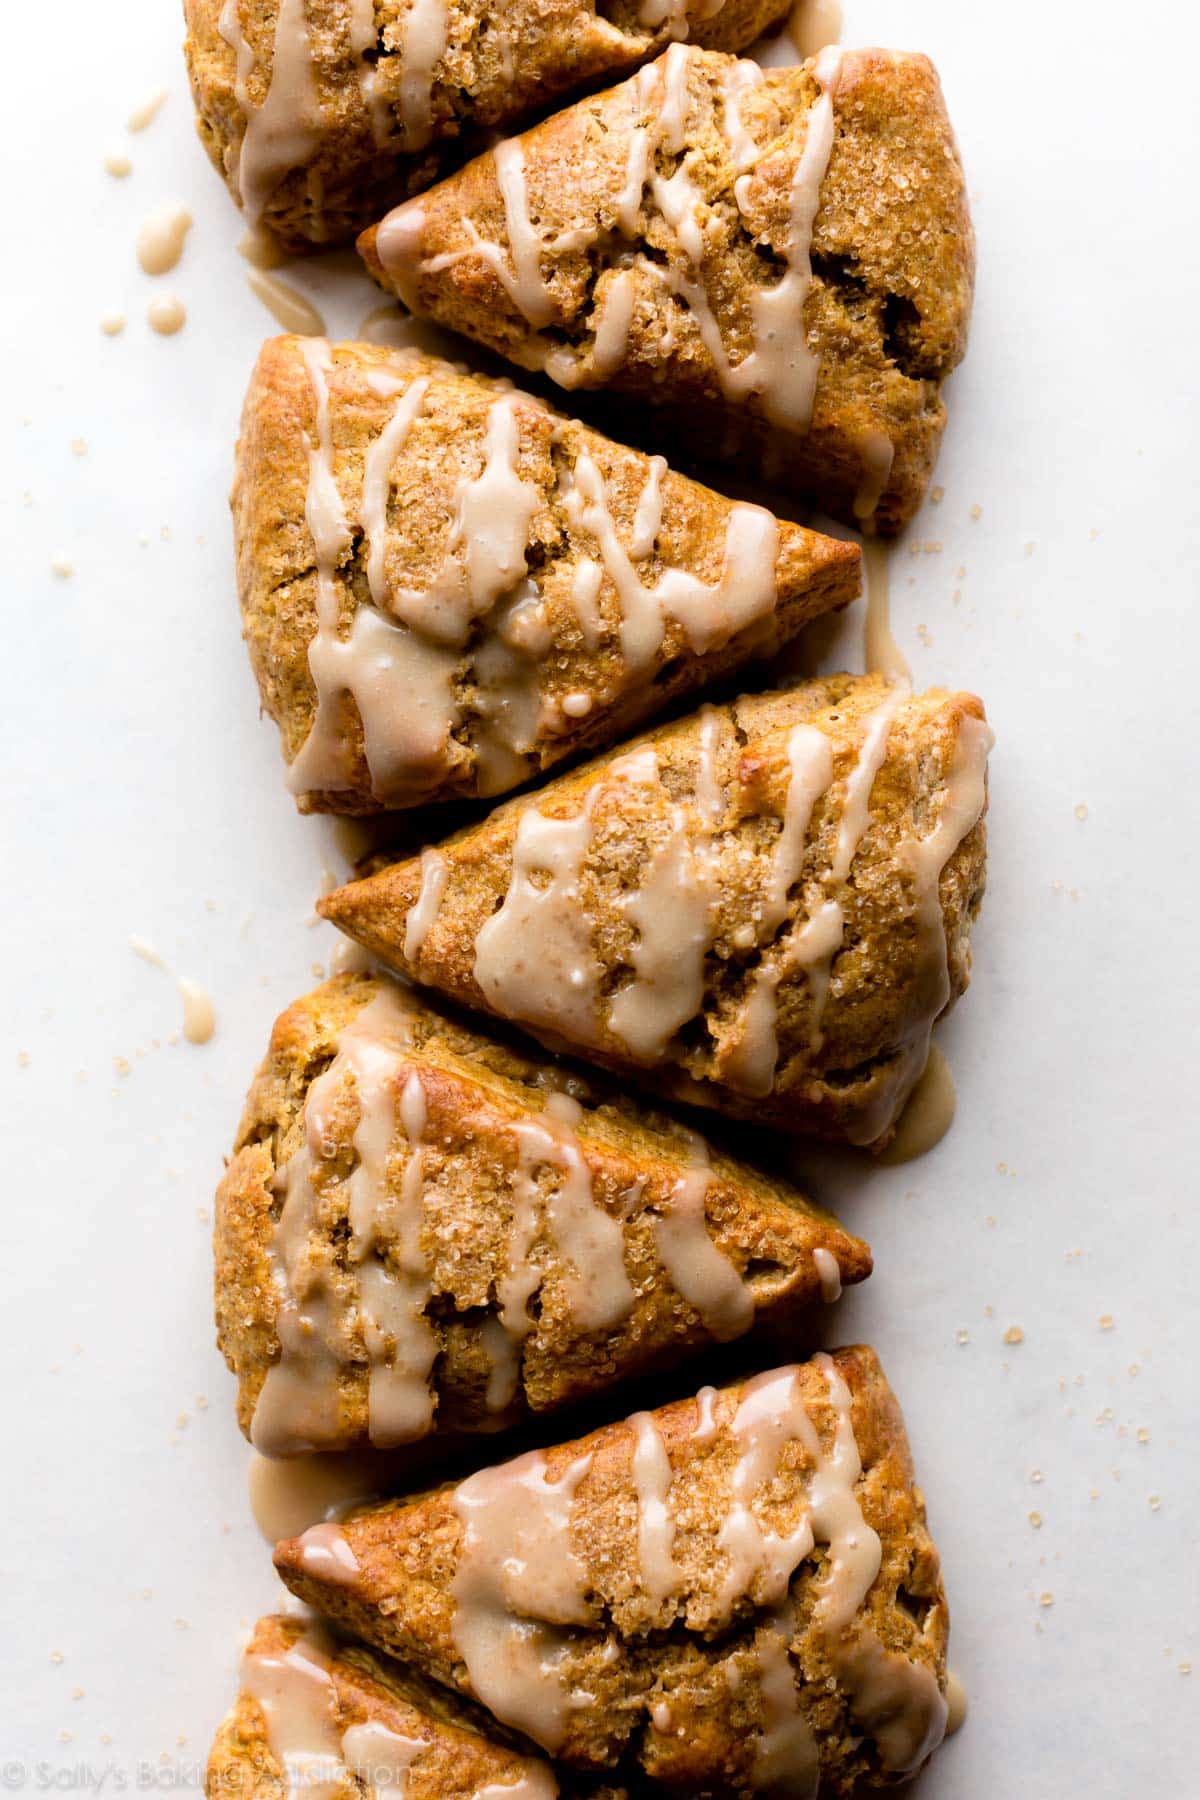
If you love to bake with pumpkin, then don’t go another minute without these flaky pumpkin scones topped with a decadent maple glaze. Perfect with a hot cup of coffee on a crisp fall morning.
Pumpkin: it’s not just for pumpkin pie anymore!
I’ve already made pumpkin coffee cake, pumpkin cream cheese muffins, pumpkin cinnamon rolls, pumpkin bread, pumpkin pancakes….even pumpkin coffee creamer. To be honest though, I was a little nervous to develop a recipe for classic pumpkin scones because the ones at the bakery are just so delicious. After a few tries, though, I created a buttery scone recipe that is perfectly spiced without being overly sweet. And did I mention maple icing?
Tell me About These Pumpkin Scones
- Texture: heavy cream helps produce a freshly-baked scone that is both soft and flaky in the center, crisp on top, and crumbly at the corners.
- Flavor: these buttery scones are the perfect blend of sweet and spice for the pumpkin obsessed. With every bite, you’ll get a delicious shot of pumpkin spice cut with sweet maple frosting. You can use homemade pumpkin pie spice here!
- Ease: if you follow the recipe closely, including my success tips below, this pumpkin recipe is quick and easy to make for breakfast, brunch, or anytime.
- Time: the scone dough comes together quickly in about 20 minutes and then just 25 minutes more in the oven to pumpkin perfection. Serve these scones warm right away for the best taste.
These classic pumpkin scones are inspired by my perfect, no-fail master recipe for scones. Use it to build a scone with your own favorite add-ins like lemon blueberry scones, ham & cheese scones, banana scones, apple cinnamon scones, and more! Here are all of my scone recipes.
Recipe Testing Pumpkin Scones: What Works & What Doesn’t
- Frozen butter = success. As your scone bakes, frozen butter will melt and release steam, creating tender flaky pockets in the middle with crisp and crumbly edges. Butter that hasn’t been frozen could melt before it makes it to the oven, and you’ll lose all that tender, flaky goodness.
- Grate the butter. Weird, right? Fine shreds of cold butter make for an even mix into the dry ingredients. If you don’t own a grater, you can also use a sharp knife to cut the butter into small chunks, but I prefer the teeny shreds.
- Blot the pumpkin. Trust me on this. Pumpkin puree is extremely wet and can cause spreading in your mixture. Blot the pumpkin for 15 seconds with a paper towel before you use it. For more details on blotting pumpkin, see my pumpkin oatmeal chocolate chip cookies or pumpkin snickerdoodles.
- Don’t over-mix the dough. After you add the wet ingredients to the dry, mix with ease until combined. Just like pie crust, over-mixing the scone dough will result in a tough texture.
Heavy Cream for the Win
There are some recipes where substituting similar ingredients is okay, but this isn’t one of them. Rich heavy cream or buttermilk is the secret to these delicious scones.
- Heavy cream or buttermilk is a must. Texture is crucial for the perfect scone, so don’t substitute milk or nondairy milk in this recipe. You’ll lose both the texture and flavor that make these scones irresistible.
- I swear by this trick. Brush the scones with the remaining heavy cream or buttermilk right before baking and sprinkle with a little coarse sugar if you have any. It will help ensure that sweet, crisp exterior.
Overview: How to Make Classic Pumpkin Scones
The full printable recipe is below, but let’s walk through it quickly so you understand each step before you get started.
- Whisk dry ingredients together.
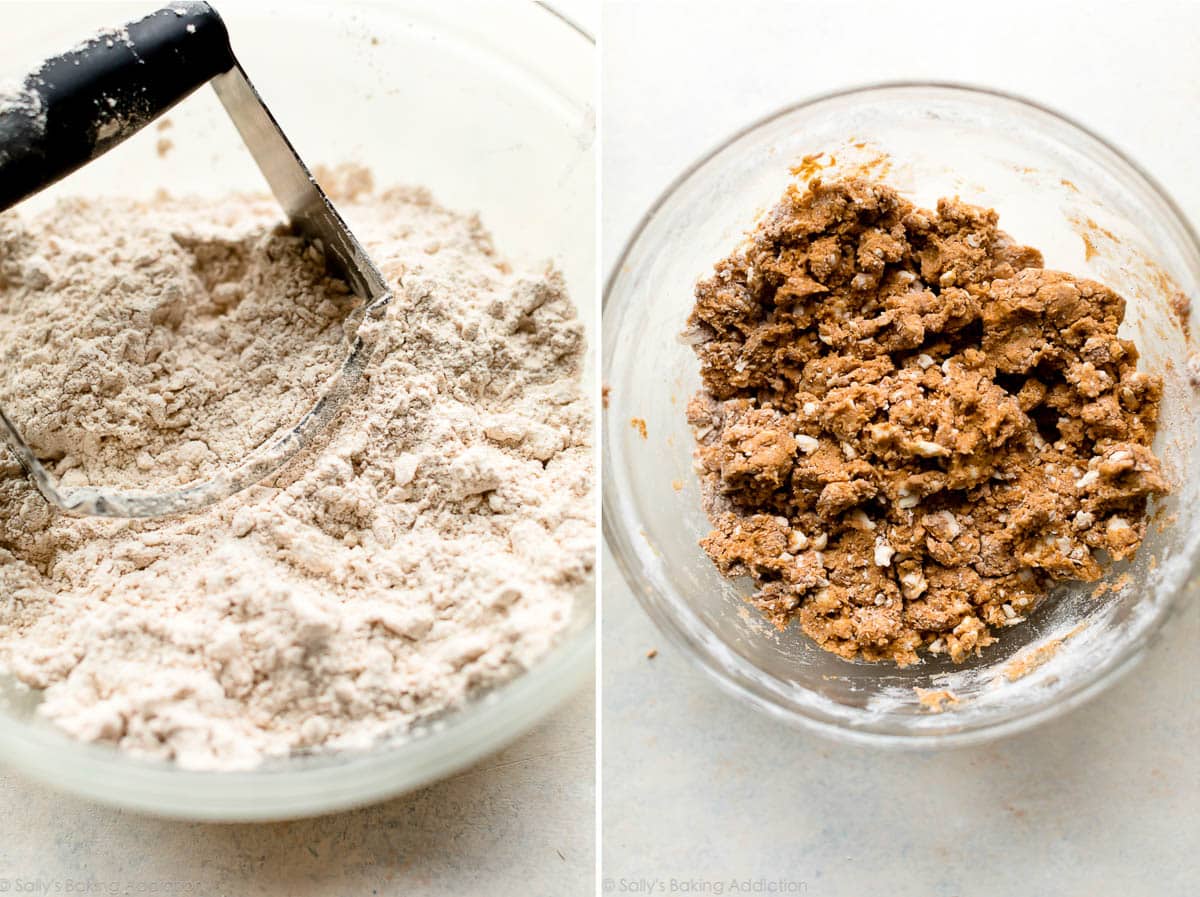
- Add frozen butter to the flour mixture. Grate your butter and add to the flour mixture using a pastry blender, a fork, or your fingers until the mixture comes together in pea-sized crumbs. Remember, you don’t want the butter to melt before you bake.
- Whisk the wet ingredients together. After they are combined, drizzle the wet ingredients into the dry ones and mix until moistened throughout.
- Flour up. Coat your hands in flour and work the mixture into a ball of dough. The dough should be thoroughly combined, but don’t overwork it which could result in a tough texture.
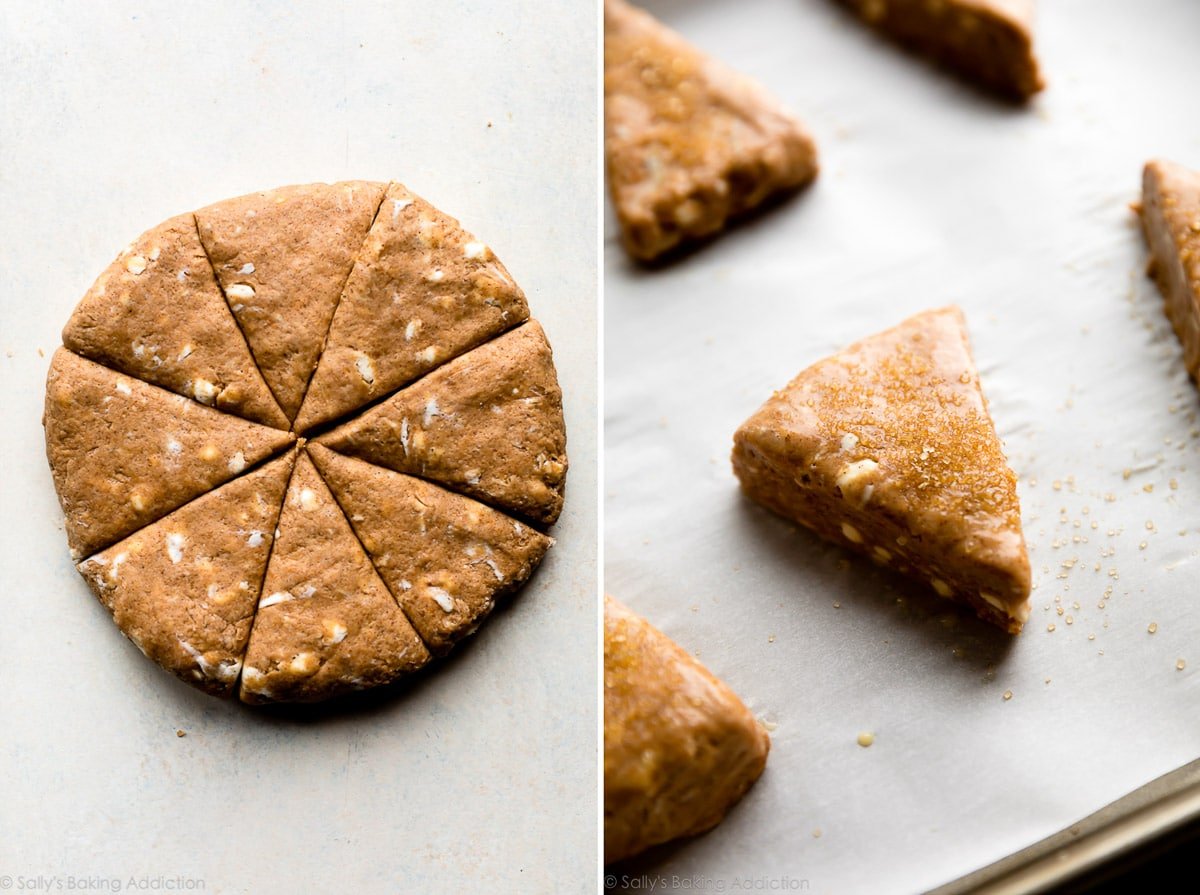
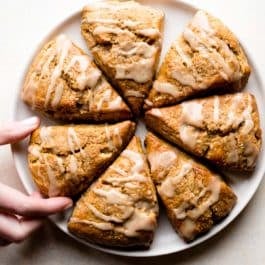
- Flatten dough ball into an 8-inch disc. Use a sharp knife to cut the disc into 8 equal wedges.
- Don’t forget the heavy cream wash. Brush the remaining heavy cream (or buttermilk) onto your scones using a pastry brush right before baking. Sprinkle with coarse sugar for a sweet textured crunch.
- Make the glaze. While the scones are baking, make the maple glaze over low heat by combining the butter and maple syrup until the mixture is completely melted. Remove from the heat and add the sifted confectioners’ sugar and a dash of salt to achieve the perfect glaze consistency.
- Drizzle over the scones. Add the maple icing while the scones are still warm so it melts into every flake, crack, and crevice. You’ll taste melty maple goodness with every bite.
More Fall Recipes
- Pumpkin French Toast Casserole
- Apple Cider Donuts & Mini Cinnamon Sugar Pumpkin Muffins
- Pumpkin Bars
- Snickerdoodles
- Pumpkin Cinnamon Rolls
- Maple Pecan Sticky Buns
- Pumpkin Spice Waffles or Pumpkin Pancakes
Classic Pumpkin Scones
- Prep Time: 20 minutes
- Cook Time: 25 minutes
- Total Time: 45 minutes
- Yield: 8 scones
- Category: Breakfast
- Method: Baking
- Cuisine: American
Description
Deliciously spiced classic pumpkin scones are flaky and soft with perfectly crumbly edges. Top with coarse sugar for extra crunch and maple icing for extra decadence!
Ingredients
- 2 cups (250g) all-purpose flour (spooned & leveled)
- 2 and 1/2 teaspoons baking powder
- 1 teaspoon ground cinnamon
- 1 and 1/2 teaspoons pumpkin pie spice*
- 1/2 teaspoon salt
- 1/2 cup (8 Tbsp; 113g) unsalted butter, frozen
- 1/3 cup + 2 Tablespoons (105ml) heavy cream, divided
- 1 large egg
- 1/2 cup (115g) canned pumpkin puree, blotted*
- 1/2 cup (100g) light brown sugar
- 1 teaspoon pure vanilla extract
- optional: coarse sugar for sprinkling on top before baking
Maple Glaze
- 2 Tablespoons (28g) unsalted butter
- 1/3 cup (80ml) pure maple syrup
- 1 cup (112g) sifted confectioners’ sugar
- pinch salt, to taste
Instructions
- Preheat oven to 400°F (204°C). Adjust baking rack to the middle-low position. Line 1 or 2 large baking sheets with parchment paper or silicone baking mat(s). If making mini scones, I use 2 baking sheets. Set aside.
- Make the scones: Whisk the flour, baking powder, cinnamon, pumpkin pie spice, and salt together in a large bowl. Grate the frozen butter (I use a box grater). Add the grated butter to the flour mixture and combine it with a pastry cutter, a fork, or your fingers until the mixture comes together in pea-sized crumbs. Set aside.
- Whisk 1/3 cup (75ml) heavy cream, the egg, blotted pumpkin (see note), brown sugar, and vanilla extract together in a small bowl. Drizzle it over the flour mixture and then mix it all together until everything appears moistened.
- With floured hands, work the dough into a ball as best you can and transfer onto a floured work surface. Press into a neat 8-inch disc and, with a very sharp knife, cut into 8 equal wedges. To make smaller scones, press dough into two 5-inch discs and cut each into 8 equal wedges. (Larger scones are pictured in this blog post.)
- Place scones at least 2 inches apart on the prepared baking sheet(s). Using a pastry brush, brush scones with remaining heavy cream and sprinkle with coarse sugar, if desired. (Gives a nice crunch!)
- Bake the larger scones for 20-25 minutes or until lightly browned. If you made 16 smaller scones, bake for 18-20 minutes or until lightly browned. Remove from the oven and allow to cool for a few minutes as you prepare the icing.
- Make the glaze: In a small saucepan over low heat, melt the butter and maple syrup together, whisking occasionally. Once the butter has melted, remove from heat and whisk in the sifted confectioners’ sugar. Taste and add a pinch of salt if desired. Drizzle over warm scones.
- Scones are best enjoyed right away, though leftover scones keep well at room temperature or in the refrigerator for 2 extra days.
Notes
- Make Ahead Instructions: Plain baked scones freeze well for up to 3 months. Thaw overnight in the refrigerator then heat up to your liking before icing and enjoying.
- Special Tools (affiliate links): Baking Sheets | Silicone Baking Mats or Parchment Paper | Glass Mixing Bowls | Box Grater | Pastry Cutter | Pastry Brush | Saucepan
- Pumpkin Pie Spice: You can use store-bought or homemade pumpkin pie spice here. If you don’t have either and want to use individual spices, use 1/2 teaspoon each: ground allspice and ground ginger AND 1/4 teaspoon each: ground nutmeg and ground cloves. This is in addition to the 1 teaspoon of cinnamon in the recipe—you will still add that.
- Blotting Pumpkin: Using a paper towel or clean kitchen towel, lightly blot the pumpkin puree to remove some of the moisture before using in the recipe. The more moisture removed, the less moist and muffin-like the scones will taste. We want the scones to be flaky and crumbly, not super moist or muffin-like. I prefer to squeeze lots of moisture out so the scones taste textured and delicious. Do what you prefer!


Reader Comments and Reviews
I am going to make these for the office but would prefer to make dough at night and bake in the morning. Would chilling overnight work ok?
Hi Cynthia, You can shape this scone dough into wedges and refrigerate overnight before baking. Enjoy!
These are amazing. Great texture, plenty of moisture and the glaze should not be skipped! I did make one substitute – used 2tsp pumpkin spice and no cinnamon, but that is just personal preference. Also note the dough is quite sticky – which is part of the magic – use just enough flour to work the shape on the surface and dip your knife in the flour before each cut to keep clean edges. Really great recipe! Best of fall in a bite!
I mixed these up quick for breakfast the other morning. I added about a cup of mini chocolate chips and used yogurt in the batter instead of cream. They were soooo delicious!! My family loved them. I think I’ll need to make another batch before too long
I made these scones for the first time and never stopped making them for family and friends. I make mini version and without any glaze and they are so tasty. This recipe will stay in the recipe vault and it looks like I will be baking all through pumpkin season to accompany my coffee!
Thank you.
As a huge pumpkin fan I had to make these scones! They were very fast and simple to make. They tasted great although I would’ve loved a bit more of the pumpkin flavor to come through though. Suggestions on how to make that happen? They also cooked very quickly on the lower middle rack. My bottoms burnt a bit. I ended up putting my second batch in for only 18 mins. Will try these again though!
Hi Meagan, we’re so glad you enjoyed these! You can certainly try increasing the amount of pumpkin spice in your next batch. Also, feel free to move the scones away from the heating element which should help with the burning.
I was given a jar of pumpkin butter, can I use this for the scones? Maybe reduce the sugar?
Hi Melanie, We recommend sticking to plain pumpkin puree here. Pumpkin butter is made with sugar and other flavors and is a different consistency, which makes it a delicious spread (like you would use jam or apple butter) but not ideal for using in a recipe.
Delicious! They were so good right out of the oven – a cross between a muffin and a scone. I used buttermilk instead of cream and sprinkled sugar instead of the icing. Appreciated the tips to grate frozen butter and to blot up the moisture in the pumpkin. I am already planning on making more!
the texture came out great, but to my taste, a bit too much of salt and spices and not enough sweetness in the butter. I used fresh pumpkin instead of canned puree — measured in grams, grated it, and then let it sit for about 15 min to release extra moisture. Not sure if canned pumpkin has sugar added…if yes, then probably that’s why my scones turned out to be a bit on the unsweetened side.
The Maple Glaze is amazing!! Overall, with a few minor adjustments, the recipe is going to be used a lot! Thank you very much!!
I really hate to ask this, but do you have a calorie count for these?
Hi Pam, We don’t usually include nutrition information as it can vary between different brands of the same ingredients. Plus, many recipes have ingredient substitutions or optional ingredients listed. However, there are many handy online calculators where you can plug in and customize your exact ingredients/brands. Readers have found this one especially helpful: https://www.verywellfit.com/recipe-nutrition-analyzer-4157076
Thank you.
So yummy! My family loved these!
The scones came out absolutely delicious, but the bottoms got burned after only 15 minutes in the oven. I baked them on parchment paper. How can I avoid this?
Hi Emily, so glad you enjoyed them! You can try moving your baking pan/rack away from the heat source in your oven to prevent burning next time (if your heat source is on the bottom, try placing the baking pan in a higher position). Or your oven could simply run a hit hot – you could reduce the temperature by 5-10 degrees next time. We always recommend using an in-oven thermometer for the most accurate temperature reading!
Another fantastic recipe. We did not have heavy cream on hand so use some full fat coconut milk (blended for a few seconds to make it smooth) and did a like for like substitution and they turned out really well. I will have to try the recipe with heavy cream to see the difference.
The maple glaze is is beyond good, I can see it being used a lot in the future.
Thanks!
So moist and delicious! The best on this crisp, cool day!
Do these need to be chilled for 15 minutes prior to baking? I know that your blueberry scone recipe requires that, correct? Thank you in advance! 🙂
Hi Brittany! Chilling scones before baking will never hurt! It helps keep the butter cold.
We have lots of persimmon trees here on our farm, so I took this recipe and switched persimmons for pumpkin. Actually added a few white chocolate chips. Anyway, they were great. This is my third time making this recipe with persimmons.
I’ve made dozens of your recipes, your lemon blueberry scones is one of my favorites! Gave these a try yesterday and, unfortunately, am a bit underwhelmed. Not sure where I went wrong, I’ll have to try them again and see how they go.
The dough seemed way too wet at the end during shaping, much more so than the blueberry scones have ever been — so that was my first hint something may be off.
The spice level is okay, but I’ll probably toss in an extra half teaspoon of cinnamon next time. Unexpected, since there are already 2.5 teaspoons of spice! I expected more of a reaction like I had to your pumpkin cookies… I thought there was way too much spice at first in the cookies, but by the morning after the spice had mellowed with the other flavors and was perfect.
The pumpkin flavor is also very mild. I blotted it quite a lot so I expected the flavor to be concentrated and bold, but that wasn’t the case. I’m wondering if I can/should reduce the cream slightly next time and increase the blotted pumpkin by the same amount?
The maple icing was fantastic though, I will be using that again on these and other pumpkin recipes!
In the end, the scones looked perfect, but were a bit bland and very dense. I know the butter wasn’t an issue, I throw the dry ingredients in the freezer while I mix up the wet ingredients and also allowed the scones to set in the fridge for ~15 min while I preheated the oven. Scones are some of my favorite baked goods, so I’ll definitely try this again and see if the next batch yields better results.
I thought the same thing as it was way too wet in the mixing bowl. I’ve had this happen with other scones Ive made with fresh fruit, so I figured they were going to be more muffin like than flaky scone, and I was right. I thought of adding a little extra flour but didn’t want it to be too dense. The flavor was really good in the scone and glaze though.
I had the same wet batter experience, which was unlike other scones I’ve made. They definitely turned out more cakes instead flakey! Still decent flavor.
These are the best scones I’ve ever made. I think your tips really helped. My fingers were frozen after grating the butter but that was a great tip and putting them into the fridge for 15 minutes before baking them. I made a vanilla bean glaze.
These turned out fantastic on the first try! I’ve tried and failed to make scones a couple of times, but Sally’s tips definitely helped. I added 1 cup toasted pecans with the dry ingredients. Great way to roll into pumpkin season!
I made these this morning and they turned out great! The glaze is lovely on them. They came out just a little bit “muffin-y,” and I think I know why: I wasn’t sure if I was supposed to scoop out 1/2 cup of puree and then blot it, OR blot a bunch and measure out 1/2 cup (which made a really packed 1/2 cup, as I blotted the heck out of it). What do you think?
But a lovely recipe. Spices are wonderful! I did your substitution for pumpkin pie spice…
Bake on!! The best time of year for baking is around the corner! 🙂
I should have said the scones came out just a little bit “cakey” inside, rather than more textured. They truly looked just like your photo!
Next time they’ll be perfect. 🙂
Hi Christine, so glad these scones were a hit for you! We prefer to measure and then blot out as much pumpkin as we can. The more moisture removed, the less moist and muffin-like the scones will taste. Hope this helps for next time and happy fall/pumpkin baking!
Hi there do you have a nutrition chart for these! They’re to die for.
When it comes to scones…you know your stuff! Your tip about the butter is the deal breaker for sure!
These are by FAR one of my best bakes ever. And I bake a lot. Thank you so much for sharing!!!
Thank you for this recipe which I used successfully with the following changes;
1 full cup of pumpkin purée in lieu of the 1/2 suggested in the recipe but this was roasted pumpkin rather than canned, as pumpkin is readily available year round in Australia where I live.
Didn’t have buttermilk or cream on hand but I used full fat Greek style yoghurt which worked out fine.
I wasn’t able to fully seperate the 8 segments ahead of cooking as it was pretty sticky so it became a “pull-apart” after cooking, but again, was fine.
For some reason, Americans make much more effective use of pumpkin than Australians do and so I’ll be interested to look at your other pumpkin recipes.
Thanks again!
First time for making scones. Delicious and easy peasy. Thanks Sally. Will be trying lots of other recipes. They really don’t need the maple glaze … but it just takes them over the top. Yummy!!
I’m going to try making scones first time. Pumpkin loaf is delicious so thought I’d try these. Can’t wait
Unbelievable, so delicious! The first time I made these I goofed and forgot to add the sugar, and you know what .. they were still good, just savory. I ate them with some butter spread on them, even my toddler liked them that way, so not a loss :). But I definitely had to do a redo the correct way, and they are 10x better with the sugar and the maple glaze, the outside has a slight crunch and the inside is firmer than a muffin, but still soft and moist. Since the pandemic started I have been working my way through all your muffin recipes, seems I’ll be on a scone kick next! Also, I’m a completely amateur baker, so I really appreciate how you take the time to add in all of the tips and tricks so that even beginners can get it right.
Excellent recipe !!
Thank You!! Mary
Made these with gluten free flour, and fresh pumpkin, with no glaze just the brushed heavy cream and fructose, and they are AMAZINGLY GOOD. too good to believe! Not too sweet, which is a usual issue for us. Didn’t have to halve the sugar for once.
I have made these scones several times and they are delicious!! A family favorite! Thank you!!
Wow! This was my first time making scones and they came out perfect! So good! The maple glaze was delicious too. The recipe makes about twice too much, but I’ll find a way to use the leftover glaze even though it hardened up (I’m Canadian, after all!)
I used some homemade pumpkin purée that had been sitting in my freezer since October. I made sure to squeeze the liquid out as much as possible using cheesecloth, until the consistency was thick, like canned purée.
I only made one adjustment – I forgot to buy allspice, so I used about 1/8 teaspoon of cardamom instead. I love cardamom and pumpkin together, but not too much of it because it can overwhelm the other flavours.
I’m addicted to your recipes. I’ve tried about a dozen and they never fail! Thank you Sally!
ABSOLUTELY, FABULOUSLY DELICIOUS! I’m blaming you Miss Sally for all my weight gain! Lol To my fellow bakers, I would definitely make two, if you’re having company. If not, say you’re only baking this for one or two, then I say good for it! It’s huge! Yet, it holds together beautifully and is perfectly moist (even my sneaky slice right out of the oven). This is the most delicious scone I have ever made! Of course, I love pumpkin so that helps. I thought I came up with the idea to grate my butter! I do it for my (your) pie crust also. I’ve been making your pumpkin and pecan pies for 2 years now and everyone loves them! I just whipped up a pecan pie for my daughter’s friend to take home, while she was visiting, because she loves it so much! Thank you so much! I have many recipes yet to try.