

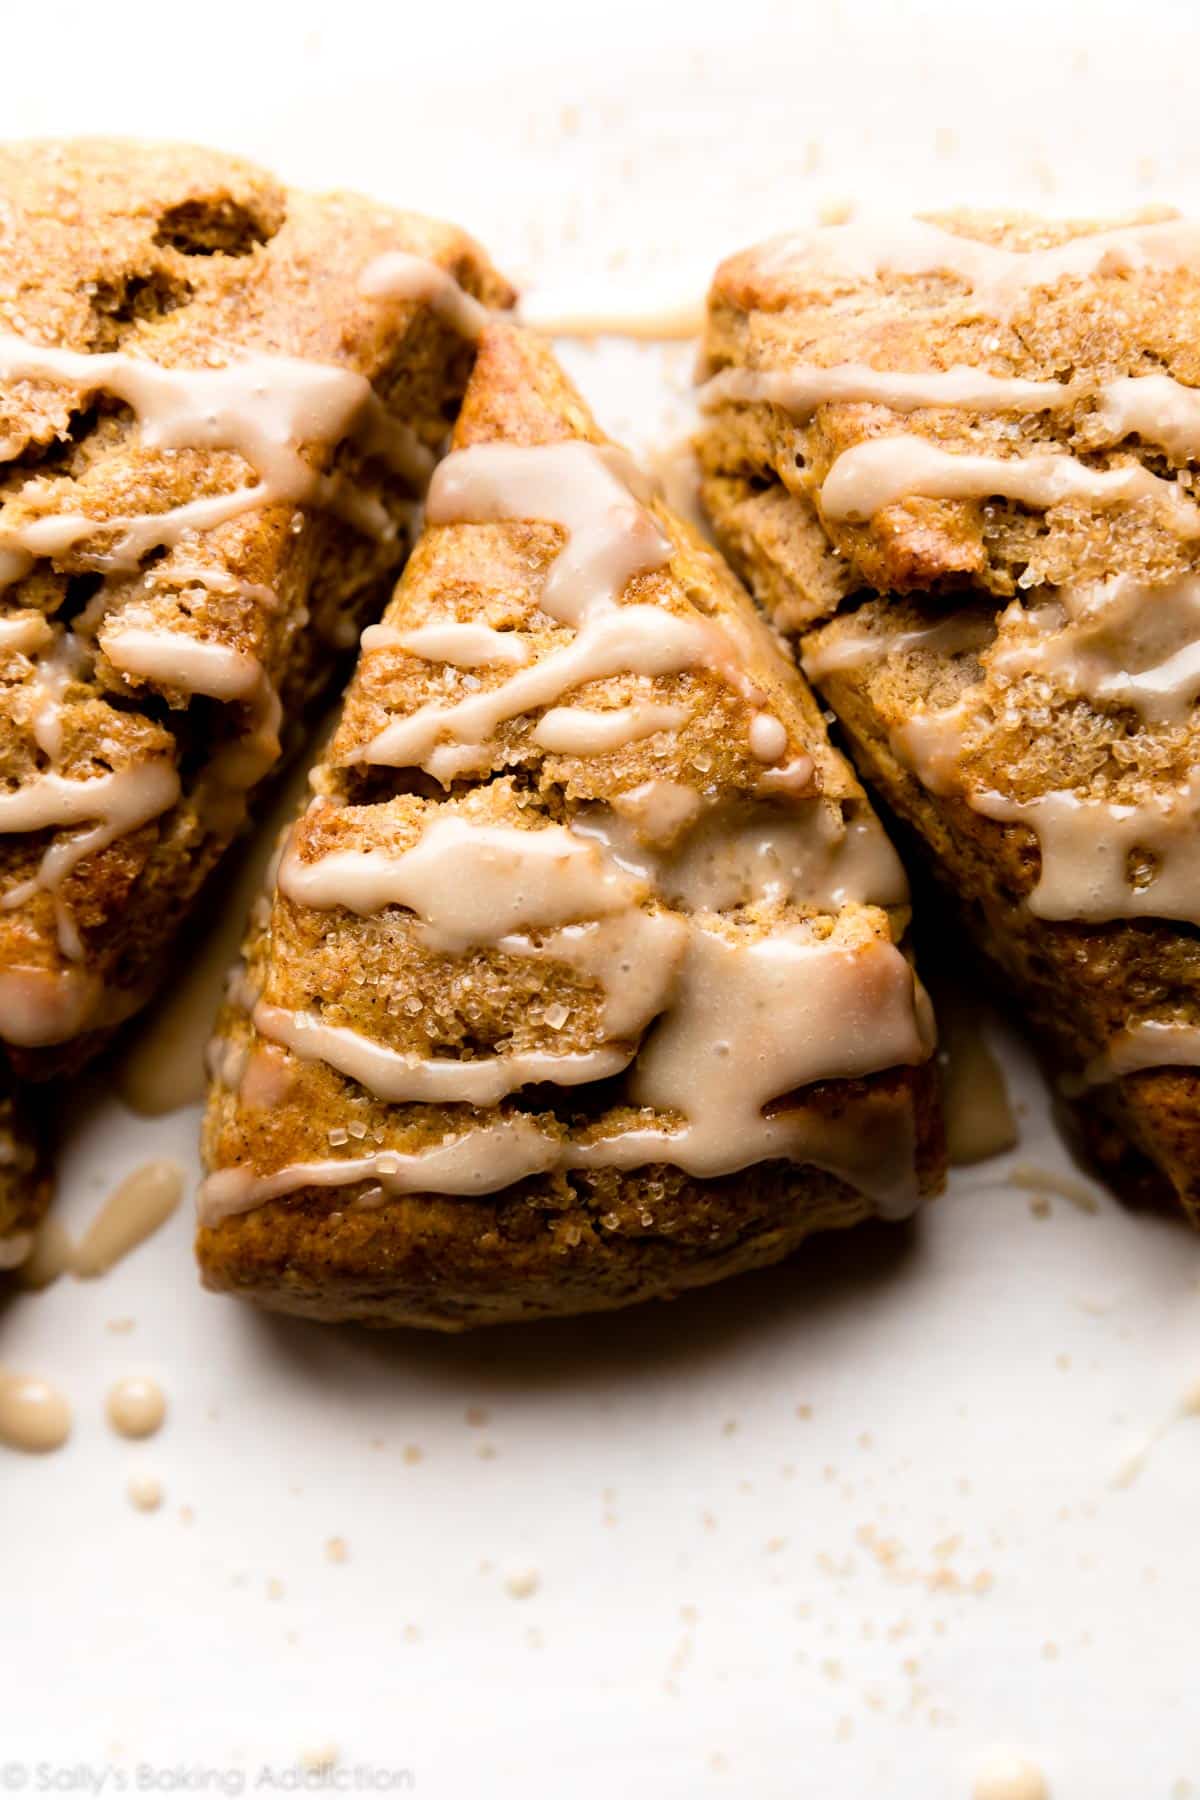
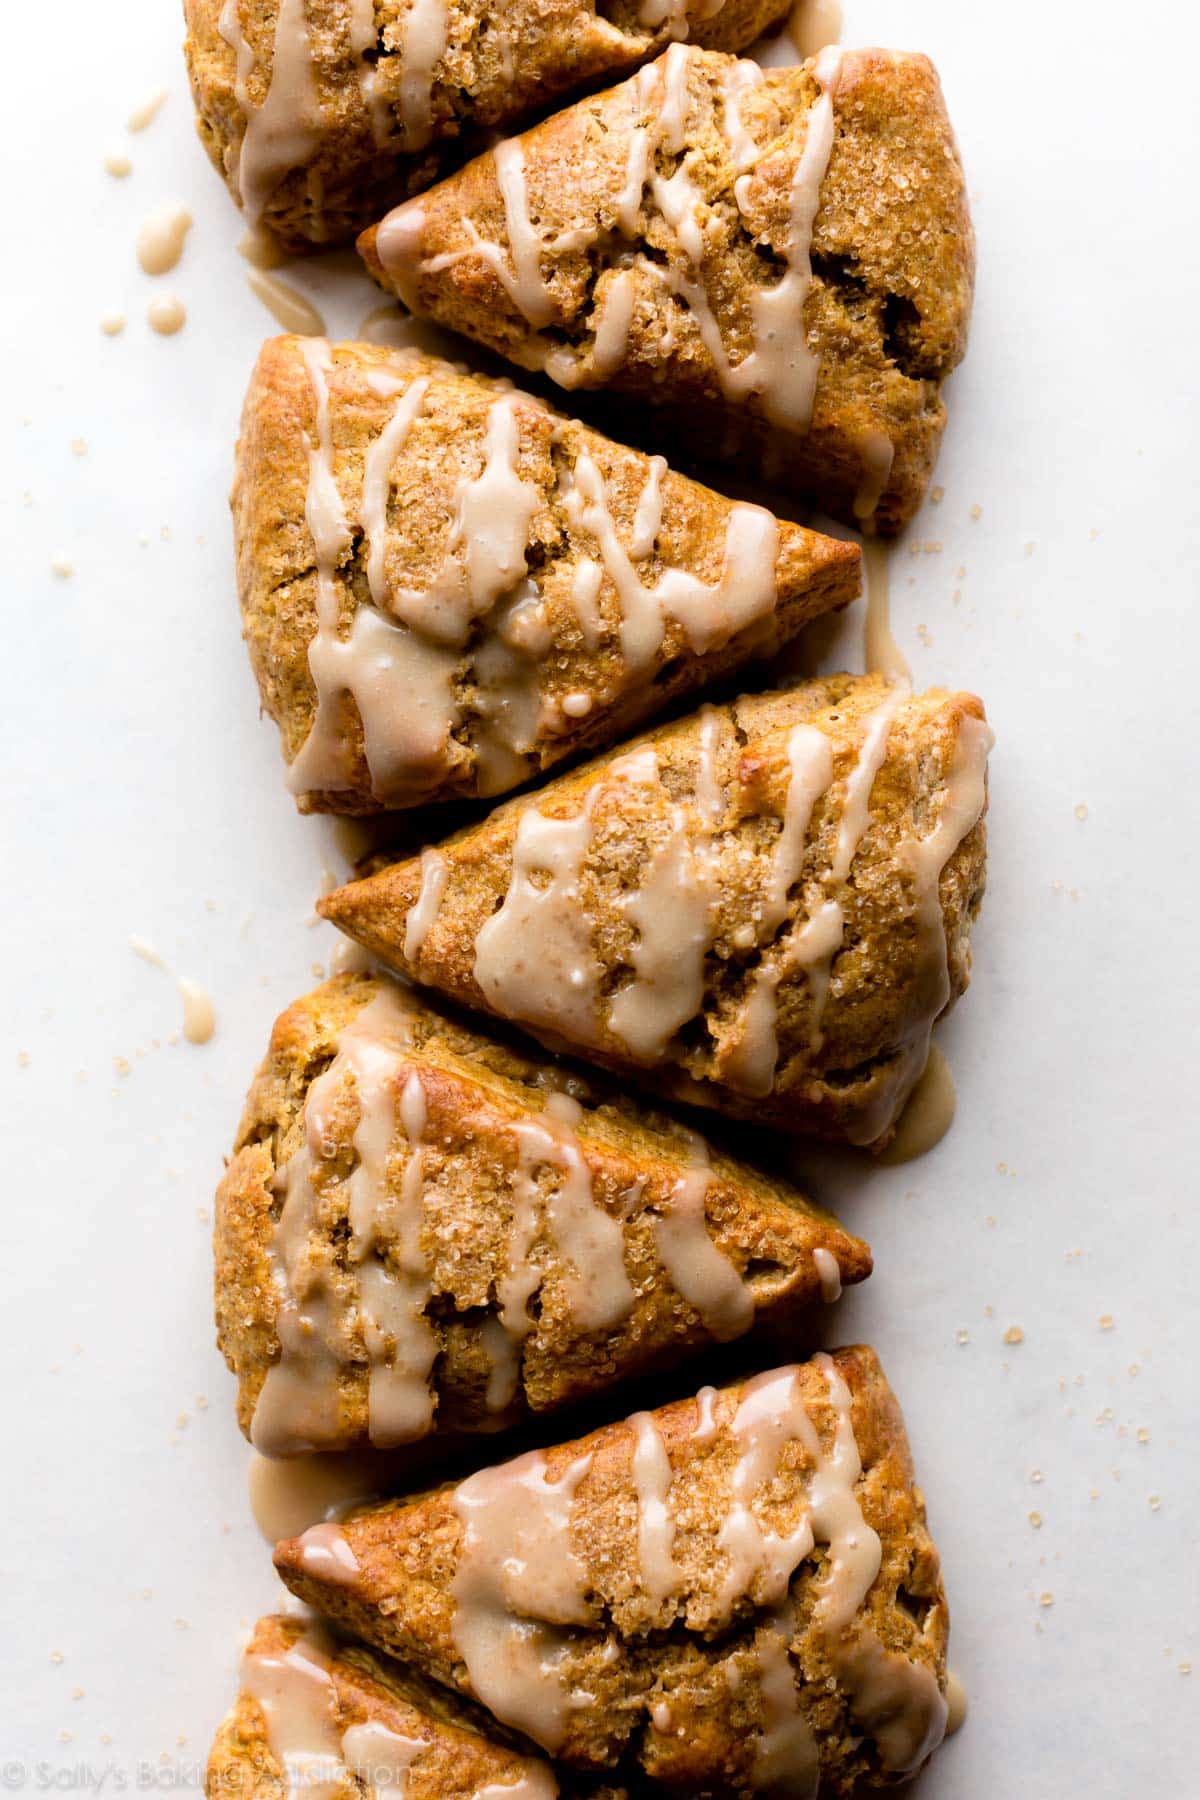
If you love to bake with pumpkin, then don’t go another minute without these flaky pumpkin scones topped with a decadent maple glaze. Perfect with a hot cup of coffee on a crisp fall morning.
Pumpkin: it’s not just for pumpkin pie anymore!
I’ve already made pumpkin coffee cake, pumpkin cream cheese muffins, pumpkin cinnamon rolls, pumpkin bread, pumpkin pancakes….even pumpkin coffee creamer. To be honest though, I was a little nervous to develop a recipe for classic pumpkin scones because the ones at the bakery are just so delicious. After a few tries, though, I created a buttery scone recipe that is perfectly spiced without being overly sweet. And did I mention maple icing?
Tell me About These Pumpkin Scones
- Texture: heavy cream helps produce a freshly-baked scone that is both soft and flaky in the center, crisp on top, and crumbly at the corners.
- Flavor: these buttery scones are the perfect blend of sweet and spice for the pumpkin obsessed. With every bite, you’ll get a delicious shot of pumpkin spice cut with sweet maple frosting. You can use homemade pumpkin pie spice here!
- Ease: if you follow the recipe closely, including my success tips below, this pumpkin recipe is quick and easy to make for breakfast, brunch, or anytime.
- Time: the scone dough comes together quickly in about 20 minutes and then just 25 minutes more in the oven to pumpkin perfection. Serve these scones warm right away for the best taste.
These classic pumpkin scones are inspired by my perfect, no-fail master recipe for scones. Use it to build a scone with your own favorite add-ins like lemon blueberry scones, ham & cheese scones, banana scones, apple cinnamon scones, and more! Here are all of my scone recipes.
Recipe Testing Pumpkin Scones: What Works & What Doesn’t
- Frozen butter = success. As your scone bakes, frozen butter will melt and release steam, creating tender flaky pockets in the middle with crisp and crumbly edges. Butter that hasn’t been frozen could melt before it makes it to the oven, and you’ll lose all that tender, flaky goodness.
- Grate the butter. Weird, right? Fine shreds of cold butter make for an even mix into the dry ingredients. If you don’t own a grater, you can also use a sharp knife to cut the butter into small chunks, but I prefer the teeny shreds.
- Blot the pumpkin. Trust me on this. Pumpkin puree is extremely wet and can cause spreading in your mixture. Blot the pumpkin for 15 seconds with a paper towel before you use it. For more details on blotting pumpkin, see my pumpkin oatmeal chocolate chip cookies or pumpkin snickerdoodles.
- Don’t over-mix the dough. After you add the wet ingredients to the dry, mix with ease until combined. Just like pie crust, over-mixing the scone dough will result in a tough texture.
Heavy Cream for the Win
There are some recipes where substituting similar ingredients is okay, but this isn’t one of them. Rich heavy cream or buttermilk is the secret to these delicious scones.
- Heavy cream or buttermilk is a must. Texture is crucial for the perfect scone, so don’t substitute milk or nondairy milk in this recipe. You’ll lose both the texture and flavor that make these scones irresistible.
- I swear by this trick. Brush the scones with the remaining heavy cream or buttermilk right before baking and sprinkle with a little coarse sugar if you have any. It will help ensure that sweet, crisp exterior.
Overview: How to Make Classic Pumpkin Scones
The full printable recipe is below, but let’s walk through it quickly so you understand each step before you get started.
- Whisk dry ingredients together.
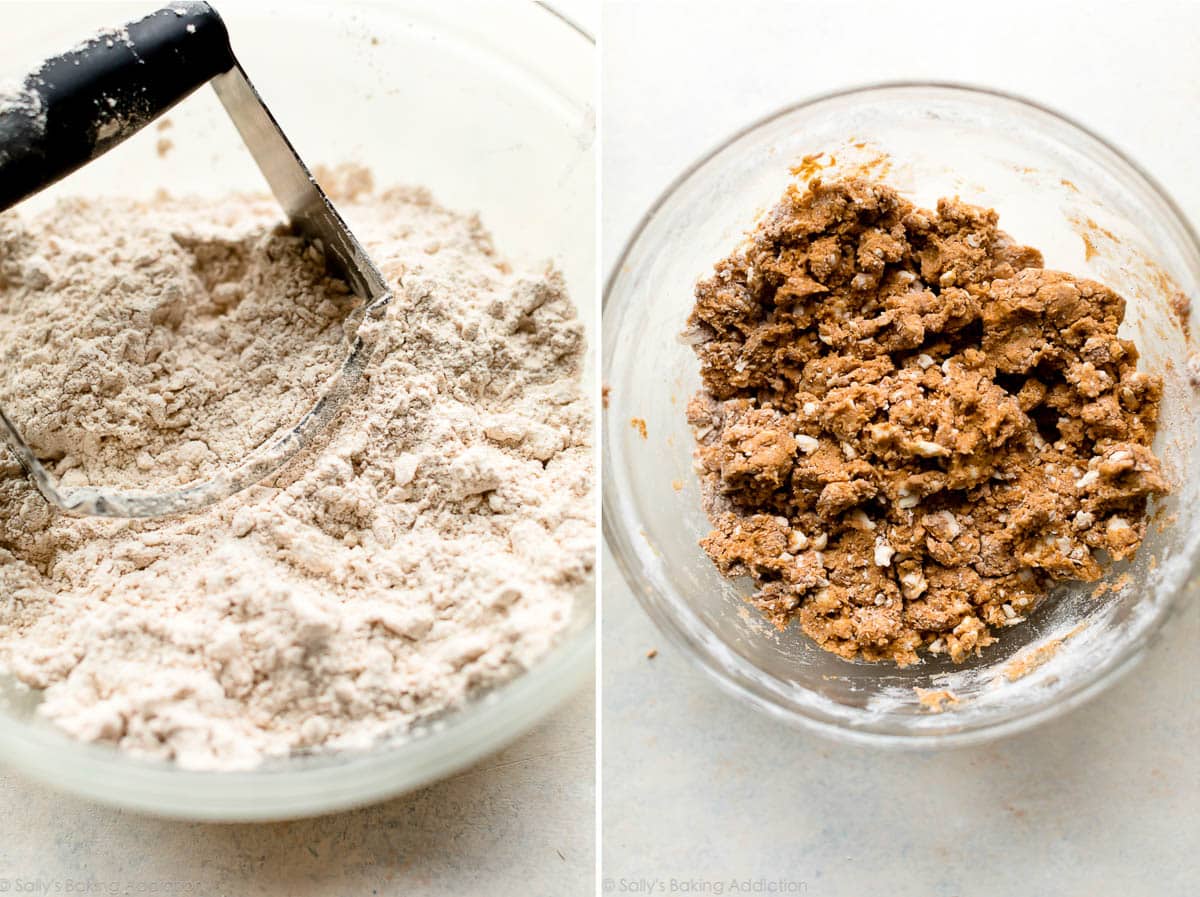
- Add frozen butter to the flour mixture. Grate your butter and add to the flour mixture using a pastry blender, a fork, or your fingers until the mixture comes together in pea-sized crumbs. Remember, you don’t want the butter to melt before you bake.
- Whisk the wet ingredients together. After they are combined, drizzle the wet ingredients into the dry ones and mix until moistened throughout.
- Flour up. Coat your hands in flour and work the mixture into a ball of dough. The dough should be thoroughly combined, but don’t overwork it which could result in a tough texture.
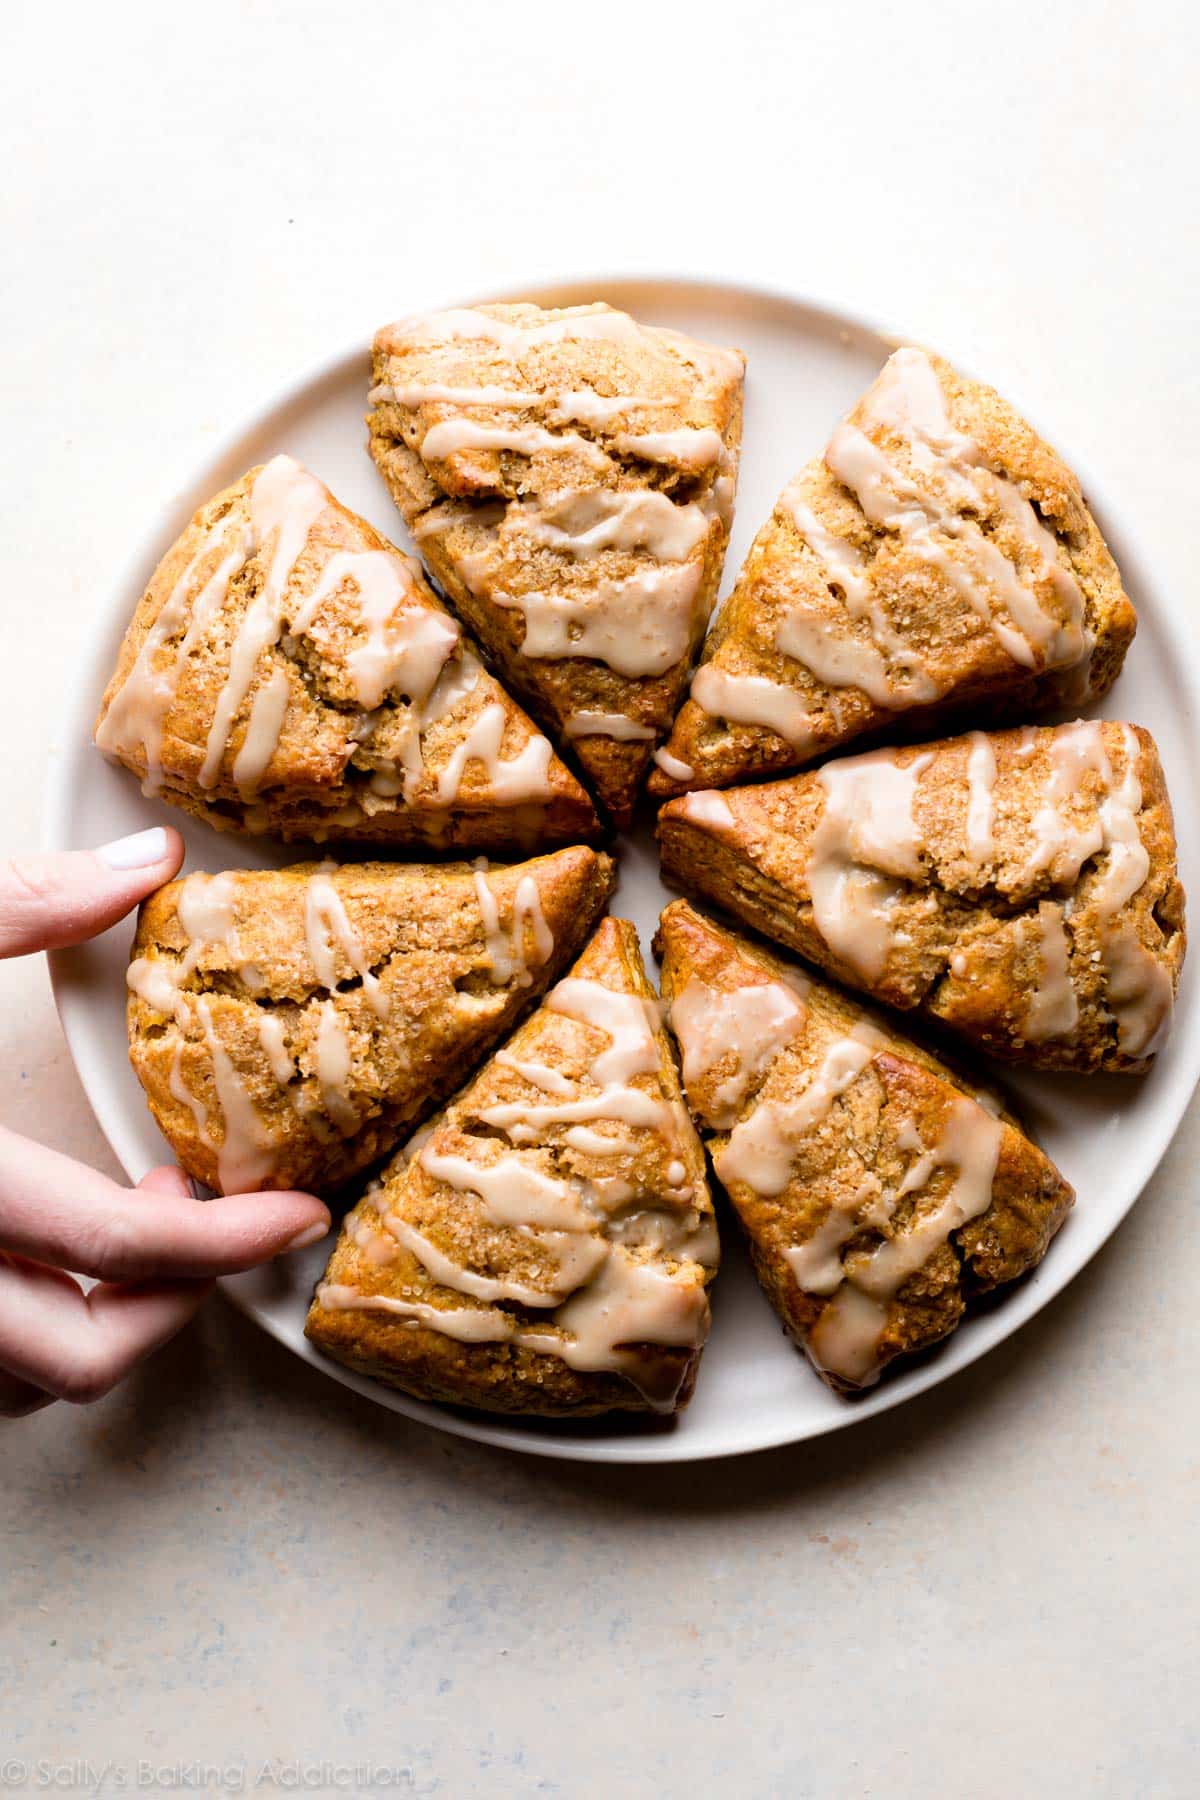
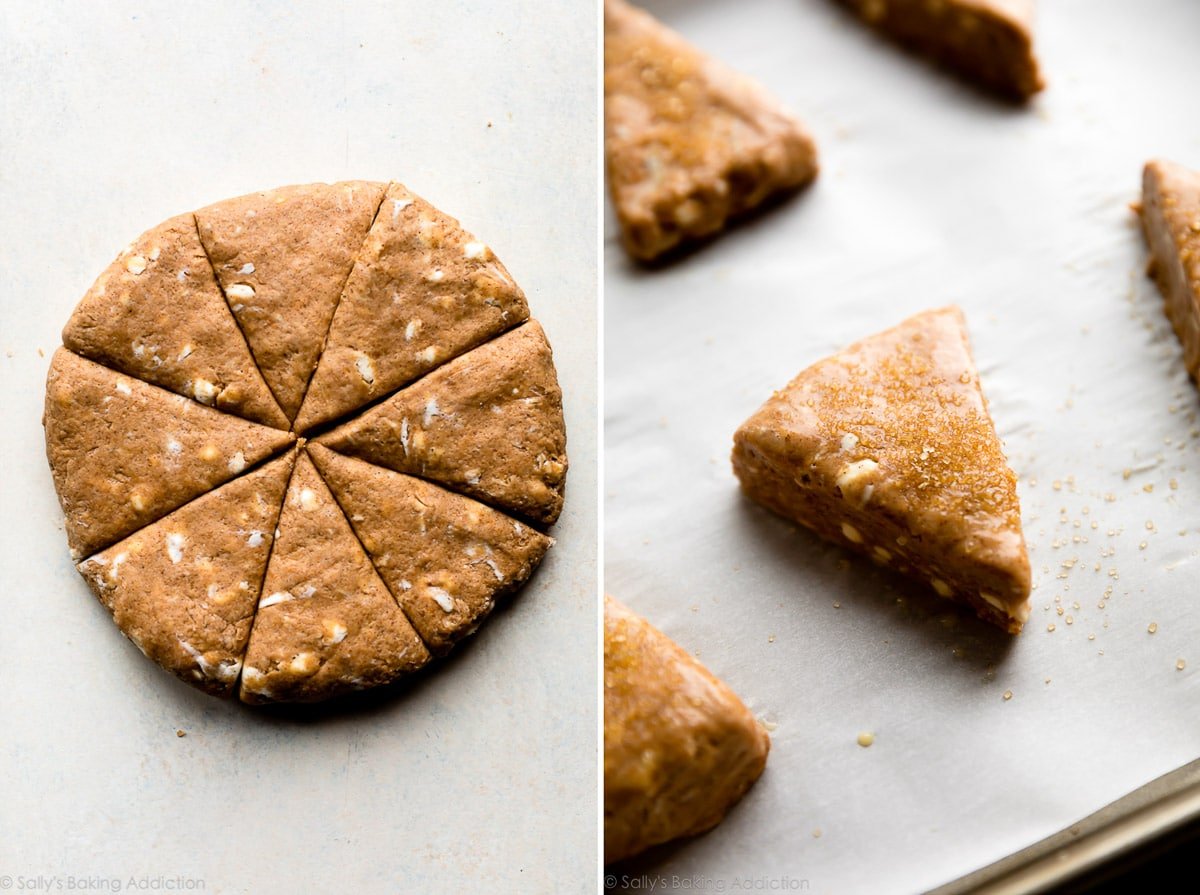
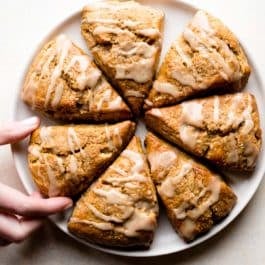
- Flatten dough ball into an 8-inch disc. Use a sharp knife to cut the disc into 8 equal wedges.
- Don’t forget the heavy cream wash. Brush the remaining heavy cream (or buttermilk) onto your scones using a pastry brush right before baking. Sprinkle with coarse sugar for a sweet textured crunch.
- Make the glaze. While the scones are baking, make the maple glaze over low heat by combining the butter and maple syrup until the mixture is completely melted. Remove from the heat and add the sifted confectioners’ sugar and a dash of salt to achieve the perfect glaze consistency.
- Drizzle over the scones. Add the maple icing while the scones are still warm so it melts into every flake, crack, and crevice. You’ll taste melty maple goodness with every bite.
More Fall Recipes
- Pumpkin French Toast Casserole
- Apple Cider Donuts & Mini Cinnamon Sugar Pumpkin Muffins
- Pumpkin Bars
- Snickerdoodles
- Pumpkin Cinnamon Rolls
- Maple Pecan Sticky Buns
- Pumpkin Spice Waffles or Pumpkin Pancakes
Classic Pumpkin Scones
- Prep Time: 20 minutes
- Cook Time: 25 minutes
- Total Time: 45 minutes
- Yield: 8 scones
- Category: Breakfast
- Method: Baking
- Cuisine: American
Description
Deliciously spiced classic pumpkin scones are flaky and soft with perfectly crumbly edges. Top with coarse sugar for extra crunch and maple icing for extra decadence!
Ingredients
- 2 cups (250g) all-purpose flour (spooned & leveled)
- 2 and 1/2 teaspoons baking powder
- 1 teaspoon ground cinnamon
- 1 and 1/2 teaspoons pumpkin pie spice*
- 1/2 teaspoon salt
- 1/2 cup (8 Tbsp; 113g) unsalted butter, frozen
- 1/3 cup + 2 Tablespoons (105ml) heavy cream, divided
- 1 large egg
- 1/2 cup (115g) canned pumpkin puree, blotted*
- 1/2 cup (100g) light brown sugar
- 1 teaspoon pure vanilla extract
- optional: coarse sugar for sprinkling on top before baking
Maple Glaze
- 2 Tablespoons (28g) unsalted butter
- 1/3 cup (80ml) pure maple syrup
- 1 cup (112g) sifted confectioners’ sugar
- pinch salt, to taste
Instructions
- Preheat oven to 400°F (204°C). Adjust baking rack to the middle-low position. Line 1 or 2 large baking sheets with parchment paper or silicone baking mat(s). If making mini scones, I use 2 baking sheets. Set aside.
- Make the scones: Whisk the flour, baking powder, cinnamon, pumpkin pie spice, and salt together in a large bowl. Grate the frozen butter (I use a box grater). Add the grated butter to the flour mixture and combine it with a pastry cutter, a fork, or your fingers until the mixture comes together in pea-sized crumbs. Set aside.
- Whisk 1/3 cup (75ml) heavy cream, the egg, blotted pumpkin (see note), brown sugar, and vanilla extract together in a small bowl. Drizzle it over the flour mixture and then mix it all together until everything appears moistened.
- With floured hands, work the dough into a ball as best you can and transfer onto a floured work surface. Press into a neat 8-inch disc and, with a very sharp knife, cut into 8 equal wedges. To make smaller scones, press dough into two 5-inch discs and cut each into 8 equal wedges. (Larger scones are pictured in this blog post.)
- Place scones at least 2 inches apart on the prepared baking sheet(s). Using a pastry brush, brush scones with remaining heavy cream and sprinkle with coarse sugar, if desired. (Gives a nice crunch!)
- Bake the larger scones for 20-25 minutes or until lightly browned. If you made 16 smaller scones, bake for 18-20 minutes or until lightly browned. Remove from the oven and allow to cool for a few minutes as you prepare the icing.
- Make the glaze: In a small saucepan over low heat, melt the butter and maple syrup together, whisking occasionally. Once the butter has melted, remove from heat and whisk in the sifted confectioners’ sugar. Taste and add a pinch of salt if desired. Drizzle over warm scones.
- Scones are best enjoyed right away, though leftover scones keep well at room temperature or in the refrigerator for 2 extra days.
Notes
- Make Ahead Instructions: Plain baked scones freeze well for up to 3 months. Thaw overnight in the refrigerator then heat up to your liking before icing and enjoying.
- Special Tools (affiliate links): Baking Sheets | Silicone Baking Mats or Parchment Paper | Glass Mixing Bowls | Box Grater | Pastry Cutter | Pastry Brush | Saucepan
- Pumpkin Pie Spice: You can use store-bought or homemade pumpkin pie spice here. If you don’t have either and want to use individual spices, use 1/2 teaspoon each: ground allspice and ground ginger AND 1/4 teaspoon each: ground nutmeg and ground cloves. This is in addition to the 1 teaspoon of cinnamon in the recipe—you will still add that.
- Blotting Pumpkin: Using a paper towel or clean kitchen towel, lightly blot the pumpkin puree to remove some of the moisture before using in the recipe. The more moisture removed, the less moist and muffin-like the scones will taste. We want the scones to be flaky and crumbly, not super moist or muffin-like. I prefer to squeeze lots of moisture out so the scones taste textured and delicious. Do what you prefer!


Reader Comments and Reviews
I found the dough quite wet but they baked up beautifully.
And they smell amazing
Great recipe. I was dubious about the pumpkin plus egg, which my regular scone recipe doesn’t have, afraid they would be too cake-ey. The main reason I chose them for Christmas breakfast was that I had half a can of pumpkin in the freezer left over from Thanksgiving. After I’d thawed it when I went to blot it a LOT of water poured out of it. I ended up squeezing quite a bit of water out, and I suspect the dough was stiffer than intended which made it easy to work with. And the texture was really flaky and delicious. I didn’t try the maple glaze because I was afraid it would be too sweet but they are savory, not particularly sweet, so … I still have some left!
I love pumpkin and ginger together. What would be the best way to add ginger to these scones? Freshly grated or ginger bits I bought from King Arthur? Thnx!
Hi Carmin, ginger sounds like a delicious addition to these pumpkin scones! You could try adding some chopped candied ginger and some powdered ginger to the dry ingredients. The amount really depends on how potent you’d like them — we’d start with about 1/2 teaspoon of dried ginger and some finely minced candied ginger. Let us know what you try!
I’ve made these several times – I use my own roasted pumpkin puree that I drain and blot.
Plus I add extra 1/2 tsp clove spice and a dash of cardamom- dough works well and bakes up nicely. I ALWAYS grate frozen butter into the flour and mix in as you go – so you end up with dough that is spotted with white bits. Never over work it or knead it – just plop onto sheet with floured hands – form into ball and gently flatten to an inch then cut to 8-10 triangles – These are great – thanks Sally
I absolutely love all of your recipes and have shared them with friends and family. For the pumpkin, do you measure then blot, or blot then measure?
Thank you!
Hi Sharon, we measure it, then blot out as much moisture as we can. Hope you enjoy the scones!
I’ve tried making these a couple times and the bottoms are burning so fast – is there anything I can to to avoid this? I’ve checked my oven and adjusted temperature and everything. Other things I bake are baking evenly.
Hi AP! How strange. Are you baking on a silicone baking mat or parchment paper? The bottoms may burn if these are baked directly on a dark baking sheet. You could also try moving the baking sheet away from the heat source in your oven. Hope this helps!
If this helps, I use aluminum baking sheets and line with parchment. I don’t have any problems with the bottoms burning. When I used to use dark baking pans I had that problem all the time.
I had leftover pumpkin from another recipe, which this used perfectly. To blot, I placed it in the fridge overnight in a small tupperware with several paper towels on top. They were all wet by morning and the pumpkin was nearly dry. I also did not grate the butter but cut it into chunks like I always do for scones. I subbed 3/4 t. cinnamon, 1/8 t. cloves, 1/4 t. mace and 1/4 t. allspice for the pumpkin pie spice as I hate nutmeg.
I would recommend doing the smaller scones as mine were still on the moister side when totally done.
Flavor was just delicious; my kids who “hate pumpkin” gobbled them up. Due to the slightly moister texture they were good on day 2 which scones usually aren’t.
If you’re into processing your own pumpkin, go snag an American Tondo pumpkin from your local farmers market, pumpkin patch, or where ever they sell decorative pumpkins. It has large orange ridges with green skin in between them. I roasted one and it baked up INCREDIBLY dry. Which then made me think of these scones. It was perfect! No blotting or squeezing required, and the scones maintained a beautiful flaky, crumbly, *slighty* moist center for two days on the countertop (I froze the rest, so I didn’t test past two days.) They had a delicate pumpkin flavor which paired wonderfully with coffee. Also, grating the butter made layer upon layer of air pockets in the scone. Such a great method! After I grated the butter, I did pop it in the freezer to chill again, which I believe helped get that scone-like consistency. Thanks for the recipe!
This was my first attempt at making scones and my husband said they were “dynamite!” Very easy to come together. I grated my frozen butter the night before and left it in the freezer until ready to use. I put my pumpkin in cone fine mesh sieve with a coffee filter for a day and I had no problem with batter. A couple of girlfriends and I are planning a Zoom “Afternoon Tea” and we are making little gift bags to hand delivery to our friends who will be joining us. Your pumpkin scones and Hazelnut cookies with Milk Chocolate (which are totally delicious and beautiful presentation!) will be our goodies of choice for our gift bags. THANK YOU!!
Delicious! Adding these to my scone collection!
I made these this morning (Happy Thanksgiving!) with the following changes/substitutions:
-Milk in place of cream
-Used 2/3 cup (66 g) brown sugar rather than a cup
-added chopped fresh cranberries – 3/4 cup, approx
-cut into twelve triangular pieces
-sprinkled too with granulated sugar
-baked 18 min
Thank you for delicious recipe that allowed me to use the leftover pumpkin from another recipe! Definitely will make again!
These scones are absolutely delicious ! So moist and good pumpkin flavor. These are my new favorite scone recipe, making them again today! Didn’t change a thing, came out perfect!
I followed the recipe exactly (used heavy cream), except I used half Swerve brown sugar, half regular brown sugar. I did blot the pumpkin (put it in a fine mesh strainer lined with folded paper towels). My canned pumpkin wasn’t overly juicy to start with, and this worked beautifully. I did skip topping the scones with sugar or icing. They were wonderful! Thanks, Sally, for another no-fail recipe!
These are hands down the best!
I’ve changed a few ingredients to make it gluten free vegan, and my goodness are they good, like real good.
No one I share them with notices they are gluten free vegan. Great job Sally
Delicious. I made these without the glaze as maple syrup is difficult to find and very expensive here in the UK but they are absolutely Devine even without. Great scone consistency and the dough was very easy to work with both in the bowl and while shaping into the disc. Blotting the pumpkin is essential to remove the extra moisture. Love all of Sally’s recipes.
Delicious – a new favorite! Followed recipe except that I grated the butter, then put it in the freezer while I gathered and mixed the other ingredients. Also, as others suggested, I made a half recipe of the maple glaze. This is definitely a keeper.
These were so delicious! The maple icing just put them over the edge. Took them to Sunday school and everyone loved them! So delicious!
Could I make these gluten free?
Hi Jessie, we haven’t tested a gluten-free version of these scones, but let us know if you do!
I’ve made Sally’s other scone recipes (blueberry and cranberry) with GF flour (Bob’d Red Mill 1:1) with no changes to her directions and they’ve turned out perfect each time!
So I did not exactly follow these directions ,?and my pumpkin scones are fluffy , moist and to die for delish . I used cold butter not ftizen and didn’t grate it in . Then I added an extra 1/4 c of pumpkin purée . Without the extra pumpkin the taste would have been pretty boring . Of course then I used a couple more TBSP of flour on the board to shape the dough before I cut it up to bake ( 20 minutes exactly at 400 degrees ) . The glaze is awesome but I’d make half the amount next time . So mine are better than any chain or small town bakery hands down , and might be my new scone addiction !
Dough is super sticky for scones. Had to add an extra cup of flour so that I could handle the dough.
These were amazing! My entire family loved them. I thought that the frozen butter thing was so genius, I’m definitely using it in my other recipes.
I love this recipe. I have made them by blotting the pumpkin (more of a traditional scone consistency) and not blotting. This time I did not blot the pumpkin as I wanted a softer texture for my granddaughter. They turned out wonderful, softer for her to chew (she has 3 teeth) and she really liked them. They did not last long as everyone came into the kitchen when they could smell them.
Excellent pumpkin scones! This recipe is perfect as is. The frozen, grated butter is a little time consuming but I could definitely see the bits of butter in the dough. Exactly as described and perfect. This recipe did however make too much glaze. And the scones are definitely best when eaten right away. Day 2 they were soft (due to the pumpkin) but still very tasty.
Tried this recipe yesterday. I blotted the pumpkin thoroughly and added the cream, minus the 2 Tbsp for brushing the top, Andy my dough was also too wet.. after adding several extra Tablespoons of flour ( one-at-a-time) my dough was finally able to shaped into a disc……except I had a new problem. That dough that was supposed to be frozen….wasn’t. Even though the dough was now in a cut disk, it was still WAY too gooey to be cut into neat separate triangles. For those of you struggling but not wanting to give up on this recipe , I’ll share what worked for me. After forming the dough into a flat disc I transferred it to the baking sheet lined with wax paper. Next I brushed on the cream and sprinkled on the sugar. THEN. I put the entire thing in the freezer for 15 minutes. After removing from the freezer I was now able to cut it into 8 neat pieces AND the BUTTER CONTENT inside the dough was frozen again ( and ready to create those airy pockets within. In thee d this recipe came out great! Absolutely delicious,
Thanks for your tips. When I started baking scones using one of Sally’s recipes it did call for the dough to go back into the fridge (can’t remember which recipe that was) and ever since that’s exactly what I do. I bought $.50 plastic plates at Target that have a lip to them. Once my dough has come together I put it into that plate and press till it’s spread out and flattened. I then put it in the fridge for at least 15 mins. Once I’m ready to bake I brush the entire disc with heavy cream, sprinkle on the raw sugar then cut them in triangles using a pizza cutter. Works like a charm. With this dough I’ll do it your way since it seems to be a wetter dough. I’ve made so many variations of scones but I saved the pumpkin recipe for this Thanksgiving. Can’t wait to give it a go. Happy Thanksgivings and baking…
EXCELLENT recipe! For 5 star results, prep ahead! The night before you want to bake these, put your pumpkin puree in a paper coffee filter, suspended over a bowl, in the fridge. Likewise, grate your butter over a plate the night before, and put that in the freezer. Come morning the pumpkin puree is nice and thick, the butter is already grated and frozen. Easy assembly!
Wonderful recipe! I was out of heavy cream so used whole milk instead. The key of using milk is not use whole amount as said for heavy cream, should be less around 80% of a 1/3 cup. Also slowly pour wet ingredients to dry ingredients to avoid the dough become too wet. It’s better to repeat the process of pour and mix two to three times. Since I poured too much at once, my dough was quite wet and had no shape. Then I added more flours by one tablespoon each time until the dough turned to a good shape, and let it sit for 5 minutes. With baking powder used, the dough rised very well. I baked around 23 minutes until scones are golden. I tried a bite after cooling down, they taste great. I’d agree heavy cream or buttermilk adds better flavor than milk, but not a big deal with glaze on the top.
These were so moist! And I got my super picky, skeptical eater to eat part of one (success!)
My mixture was too wet, oh dear! 🙁 You live and learn. If at first you don’t succeed, try, try, again.
Purchased the best none blended Canadian Maple Syrup for these.
They taste ok tough.
Thanks,
Tommy
Hi Tommy, if you decide to try these again, feel free to add more flour (about a tablespoon at a time) to help the dough come together if it’s overly wet. Scone dough (especially with pumpkin like this recipe) can sometimes need more / less flour depending on things like the weather, humidity, etc. Thanks so much for giving them a try!
Very good, not overly sweet but sweet enough to not need jam or glaze. I suspect that reviewers finding the batter too wet may have put ALL the cream into the dough mixture – make sure to note that 2T are reserved for brushing on top of the scones. I found this dough easy to work with, not too wet or too dry. I blotted with about 8 paper towels in a shallow bowl (went from 115g to about 80g) and my scones were definitely scone consistency and not muffin-like. I made mini scones and could smell burning just before the 16 minute mark and luckily took them out just in time, another minute or two and they would have been too burned to serve. I rarely have things burn so make sure to watch for this.
That’s great detail, thank you! I wonder, if people wanted to avoid wet dough/excessive paper towel use/messiness of blotting the puree, could they just cut down on the heavy cream?
115g puree-80g=35g reduction in wet ingredients.
105ml cream (1/3 cup + 2 Tbsp)-35g= 70ml cream, which is about 4 tbsp + 1 tsp I THINK, minus another 2 tablespoons for the topping….
So my GUESS is, if people don’t want to blot, they could try 2 tbsp cream instead of 1/3 cup, adding an additional tablespoon if the dough seems too dry. I haven’t tried this though — if I do I’ll report back.
Hello! I’ve just realized I’m out of powdered sugar for the glaze! No time to get more from the store. Can I sub a different sugar? Would that work?
Perfect! First time making scones and this recipe made for a great first experience! Everything came out great! I even added some matcha to the glaze.
Amazing!! I did take extra care to blot the pumpkin puree. I lined a bowl with paper towels, added puree, and then topped it with a paper towel.
I repeated that process at least 3 times. Then I ran out of time to bake so I reapplied the paper towels combo and put it in the refrigerator overnight.
Sort of a pain, but so worth it to be that true pumpkin flavor.
Thank you, Sally!
Batter was way too wet and had to be discarded. I even froze the butter, as recommended, which I have never done with any of my scone recipes prior to this one. I thought it was silly to then grate the frozen butter, because it ended up melting during the process, which defeats the purpose of freezing the butter in the first place. I even blotted the pumpkin, as recommended, to try to reduce the stickiness of the batter but I also thought this was silly considering it would mute the pumpkin flavor of the PUMPKIN scones. When it was time to eventually roll the dough (which was impossible), I had to add about 2 additional cups of flour and it was still too sticky to even roll so I had to scrap the batter entirely.
Can you use 100% pure canned pumpkin instead of purée for the scones?
Hi Barbara, 100% pure canned pumpkin (NOT pumpkin pie filling) and pumpkin puree are one in the same, so you are all set! Hope you enjoy the scones.
I make scones weekly so I am trying to figure out how you could have needed 2 extra cups of flour – maybe 1/4-1/2. Frozen or cold butter is part of making scones. Grating and dipping the square of butter in the flour works the best as it is not touching your warm hands. There needs to be layers of chilled butter to create the flakiness in a scone. which is why it also reccomended to chill prior to baking. If your scone batter is too wet try freeze triangles and bake from frozen!