

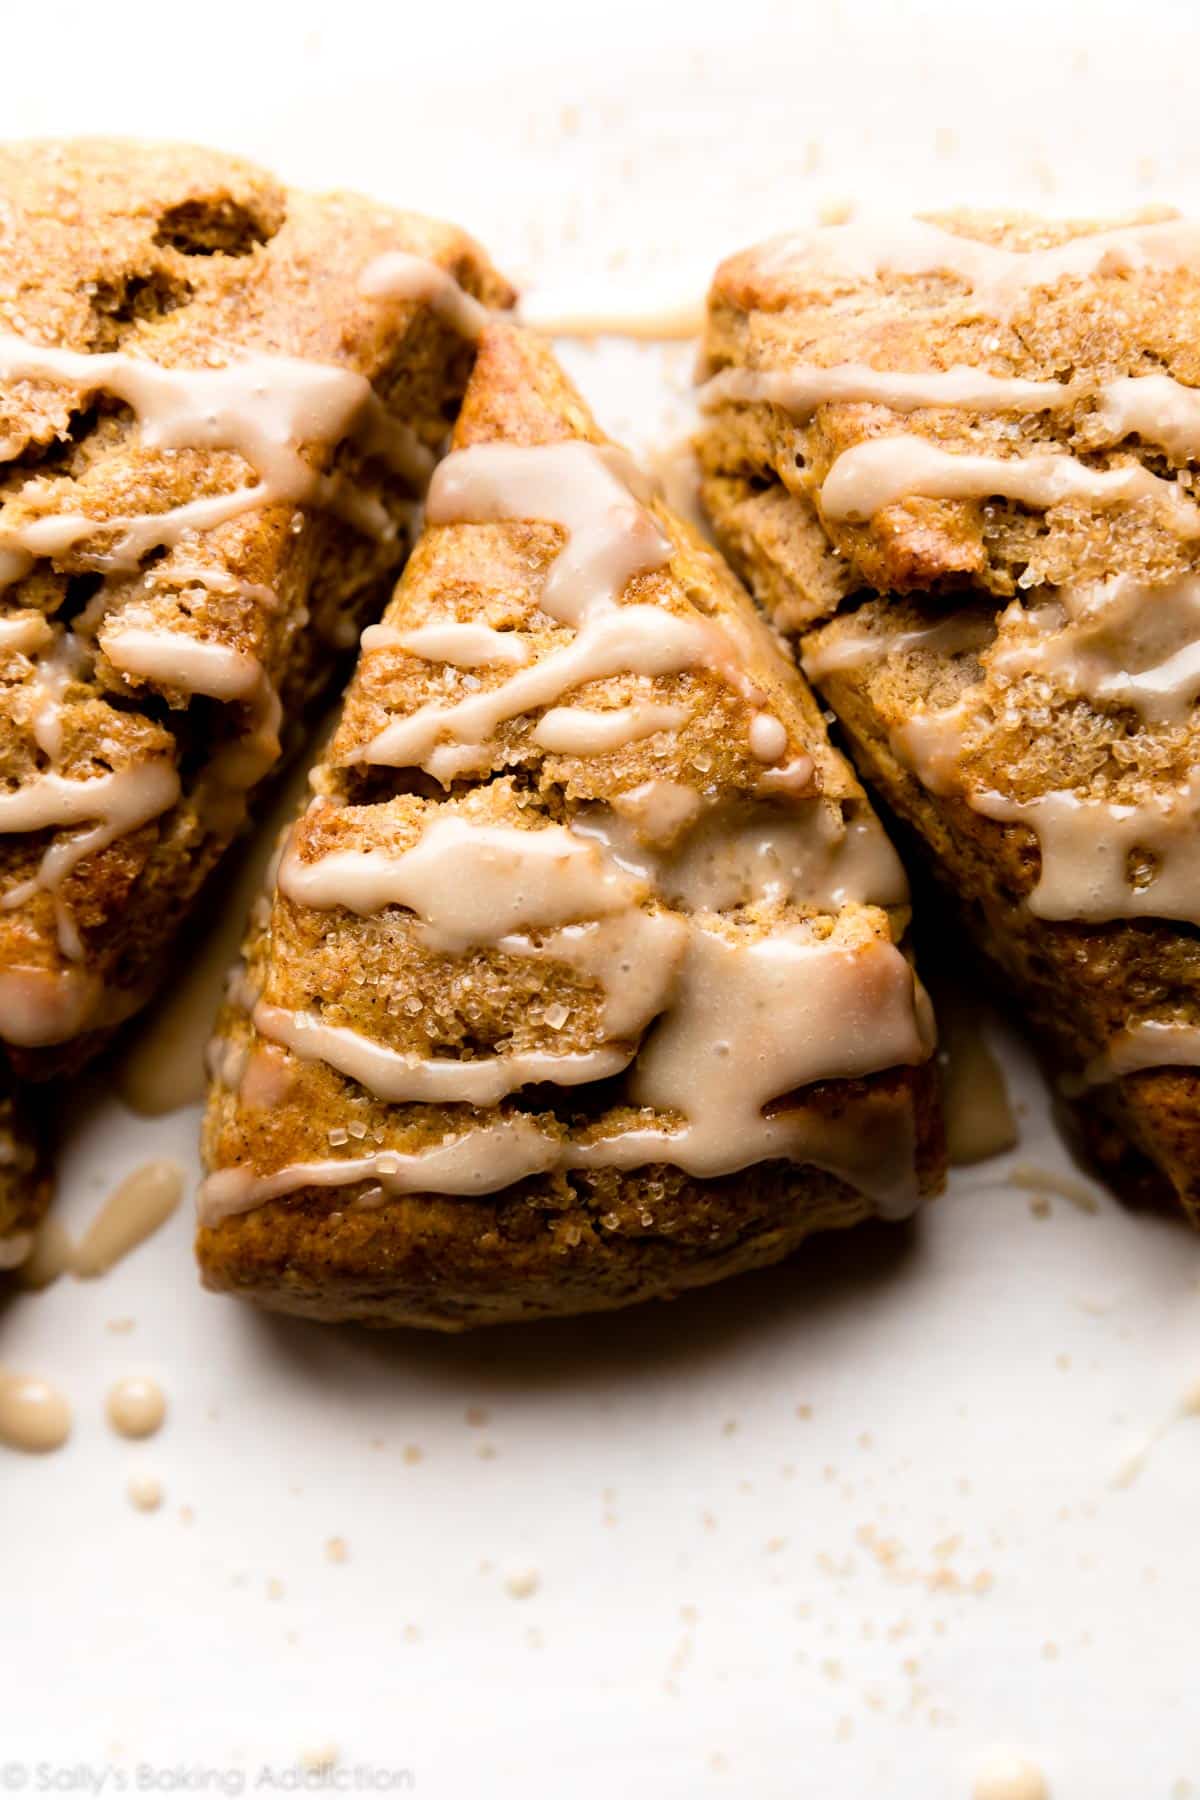
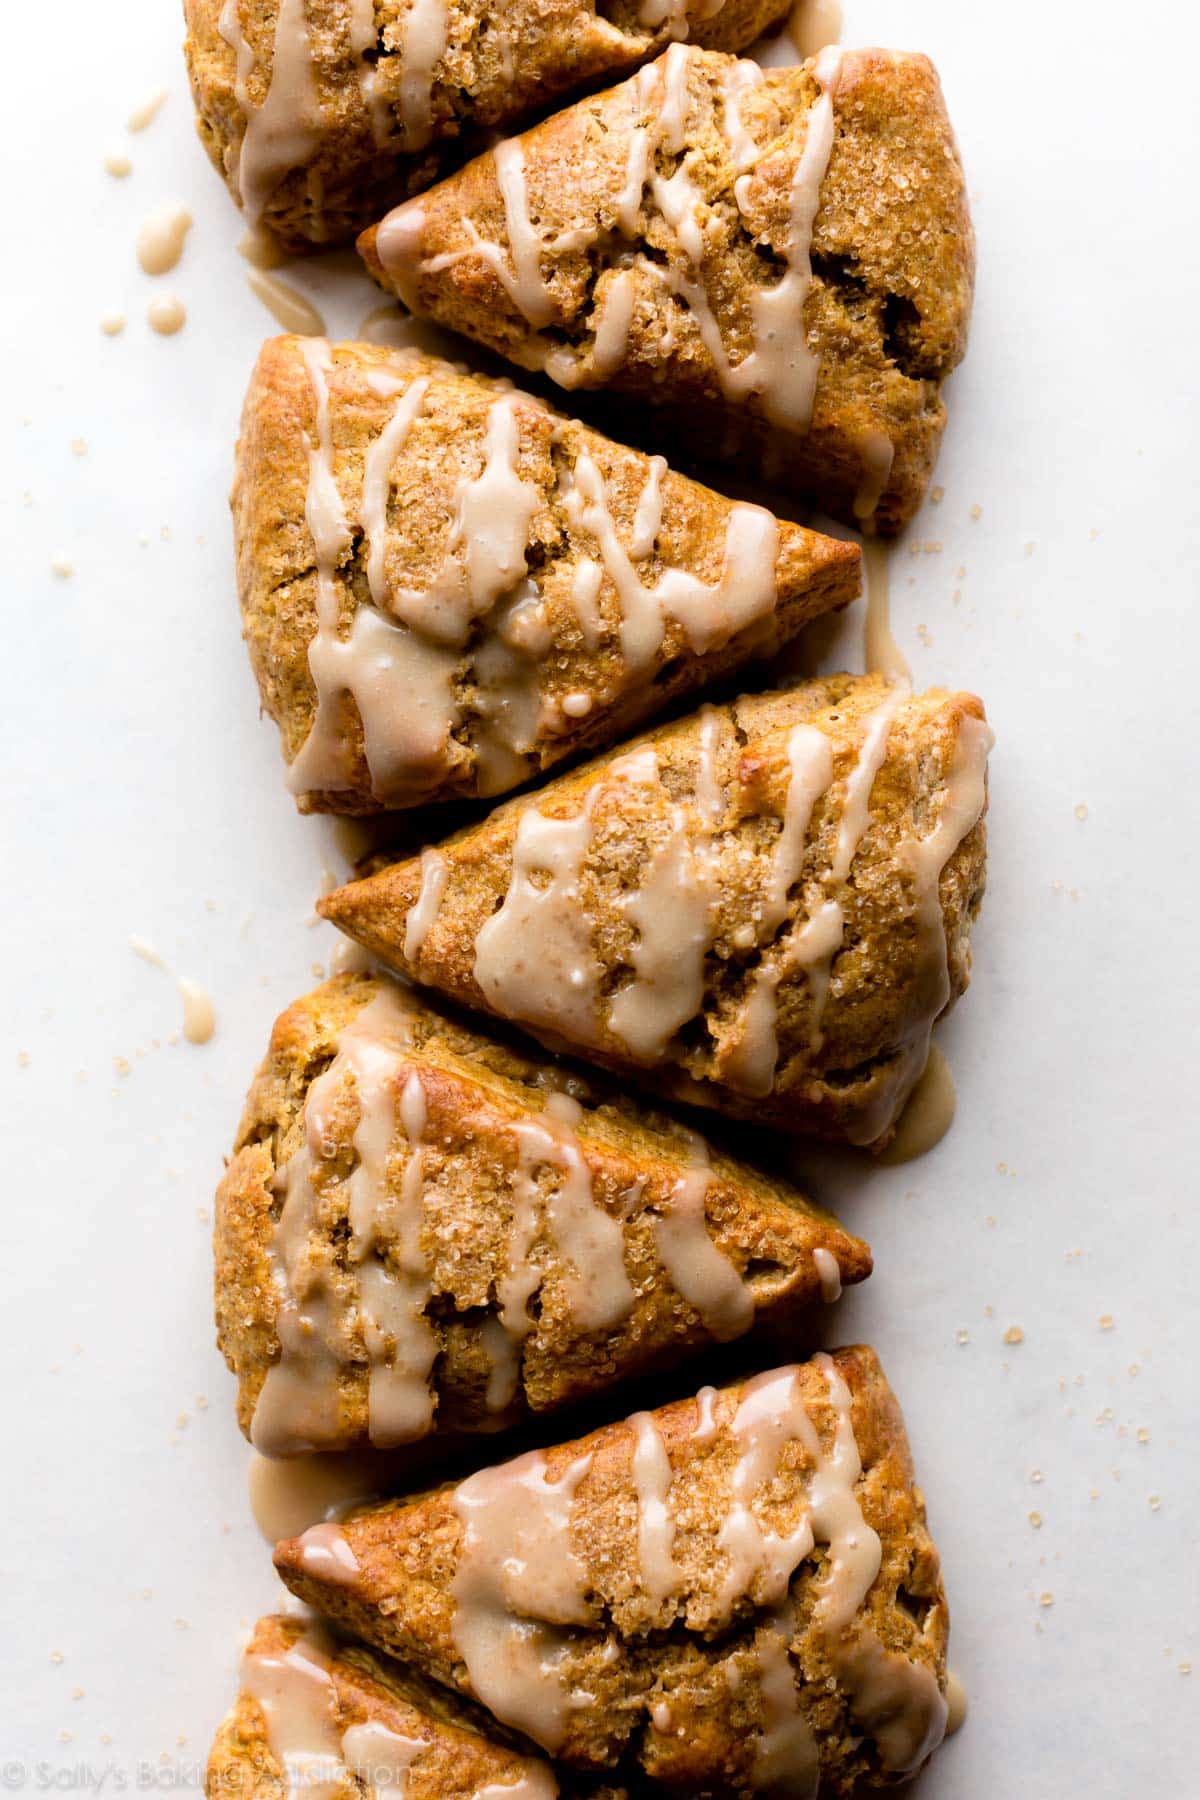
If you love to bake with pumpkin, then don’t go another minute without these flaky pumpkin scones topped with a decadent maple glaze. Perfect with a hot cup of coffee on a crisp fall morning.
Pumpkin: it’s not just for pumpkin pie anymore!
I’ve already made pumpkin coffee cake, pumpkin cream cheese muffins, pumpkin cinnamon rolls, pumpkin bread, pumpkin pancakes….even pumpkin coffee creamer. To be honest though, I was a little nervous to develop a recipe for classic pumpkin scones because the ones at the bakery are just so delicious. After a few tries, though, I created a buttery scone recipe that is perfectly spiced without being overly sweet. And did I mention maple icing?
Tell me About These Pumpkin Scones
- Texture: heavy cream helps produce a freshly-baked scone that is both soft and flaky in the center, crisp on top, and crumbly at the corners.
- Flavor: these buttery scones are the perfect blend of sweet and spice for the pumpkin obsessed. With every bite, you’ll get a delicious shot of pumpkin spice cut with sweet maple frosting. You can use homemade pumpkin pie spice here!
- Ease: if you follow the recipe closely, including my success tips below, this pumpkin recipe is quick and easy to make for breakfast, brunch, or anytime.
- Time: the scone dough comes together quickly in about 20 minutes and then just 25 minutes more in the oven to pumpkin perfection. Serve these scones warm right away for the best taste.
These classic pumpkin scones are inspired by my perfect, no-fail master recipe for scones. Use it to build a scone with your own favorite add-ins like lemon blueberry scones, ham & cheese scones, banana scones, apple cinnamon scones, and more! Here are all of my scone recipes.
Recipe Testing Pumpkin Scones: What Works & What Doesn’t
- Frozen butter = success. As your scone bakes, frozen butter will melt and release steam, creating tender flaky pockets in the middle with crisp and crumbly edges. Butter that hasn’t been frozen could melt before it makes it to the oven, and you’ll lose all that tender, flaky goodness.
- Grate the butter. Weird, right? Fine shreds of cold butter make for an even mix into the dry ingredients. If you don’t own a grater, you can also use a sharp knife to cut the butter into small chunks, but I prefer the teeny shreds.
- Blot the pumpkin. Trust me on this. Pumpkin puree is extremely wet and can cause spreading in your mixture. Blot the pumpkin for 15 seconds with a paper towel before you use it. For more details on blotting pumpkin, see my pumpkin oatmeal chocolate chip cookies or pumpkin snickerdoodles.
- Don’t over-mix the dough. After you add the wet ingredients to the dry, mix with ease until combined. Just like pie crust, over-mixing the scone dough will result in a tough texture.
Heavy Cream for the Win
There are some recipes where substituting similar ingredients is okay, but this isn’t one of them. Rich heavy cream or buttermilk is the secret to these delicious scones.
- Heavy cream or buttermilk is a must. Texture is crucial for the perfect scone, so don’t substitute milk or nondairy milk in this recipe. You’ll lose both the texture and flavor that make these scones irresistible.
- I swear by this trick. Brush the scones with the remaining heavy cream or buttermilk right before baking and sprinkle with a little coarse sugar if you have any. It will help ensure that sweet, crisp exterior.
Overview: How to Make Classic Pumpkin Scones
The full printable recipe is below, but let’s walk through it quickly so you understand each step before you get started.
- Whisk dry ingredients together.
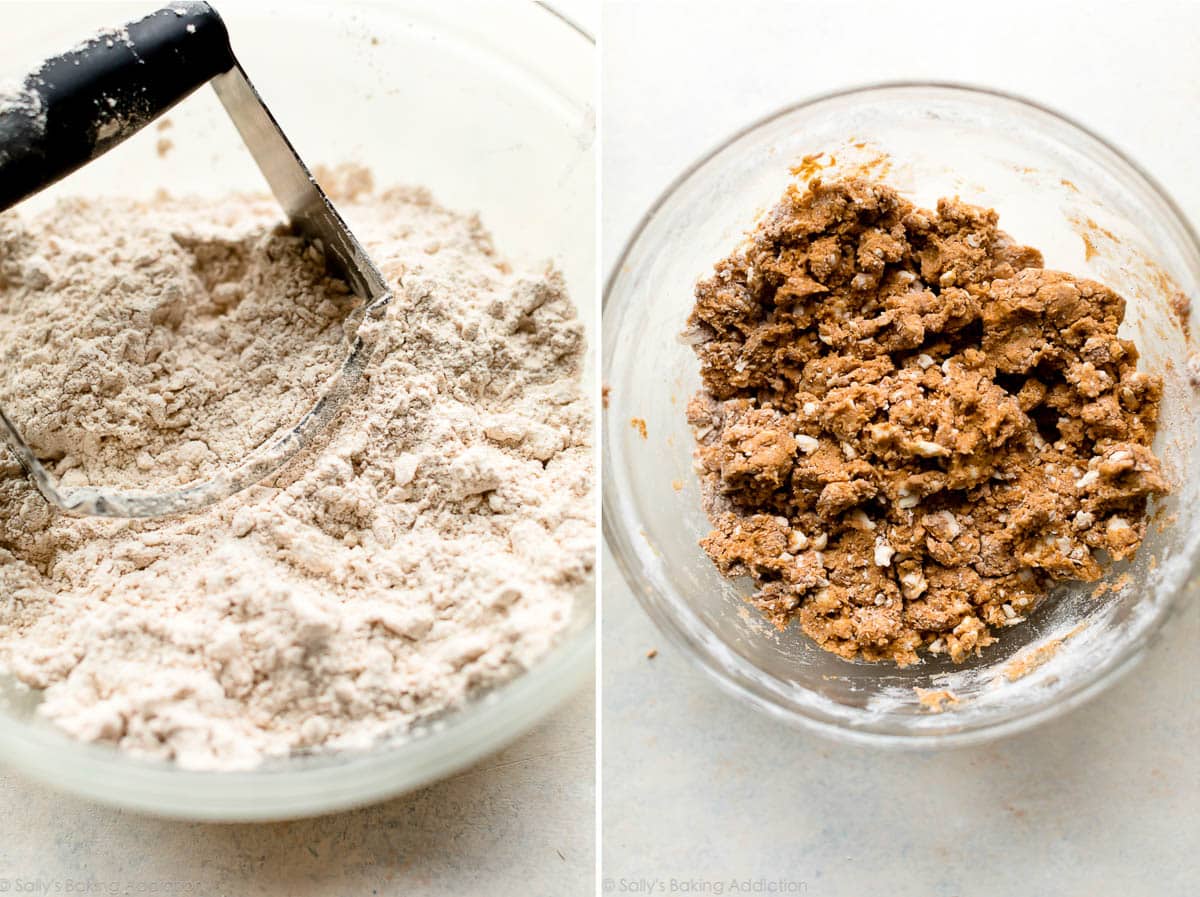
- Add frozen butter to the flour mixture. Grate your butter and add to the flour mixture using a pastry blender, a fork, or your fingers until the mixture comes together in pea-sized crumbs. Remember, you don’t want the butter to melt before you bake.
- Whisk the wet ingredients together. After they are combined, drizzle the wet ingredients into the dry ones and mix until moistened throughout.
- Flour up. Coat your hands in flour and work the mixture into a ball of dough. The dough should be thoroughly combined, but don’t overwork it which could result in a tough texture.
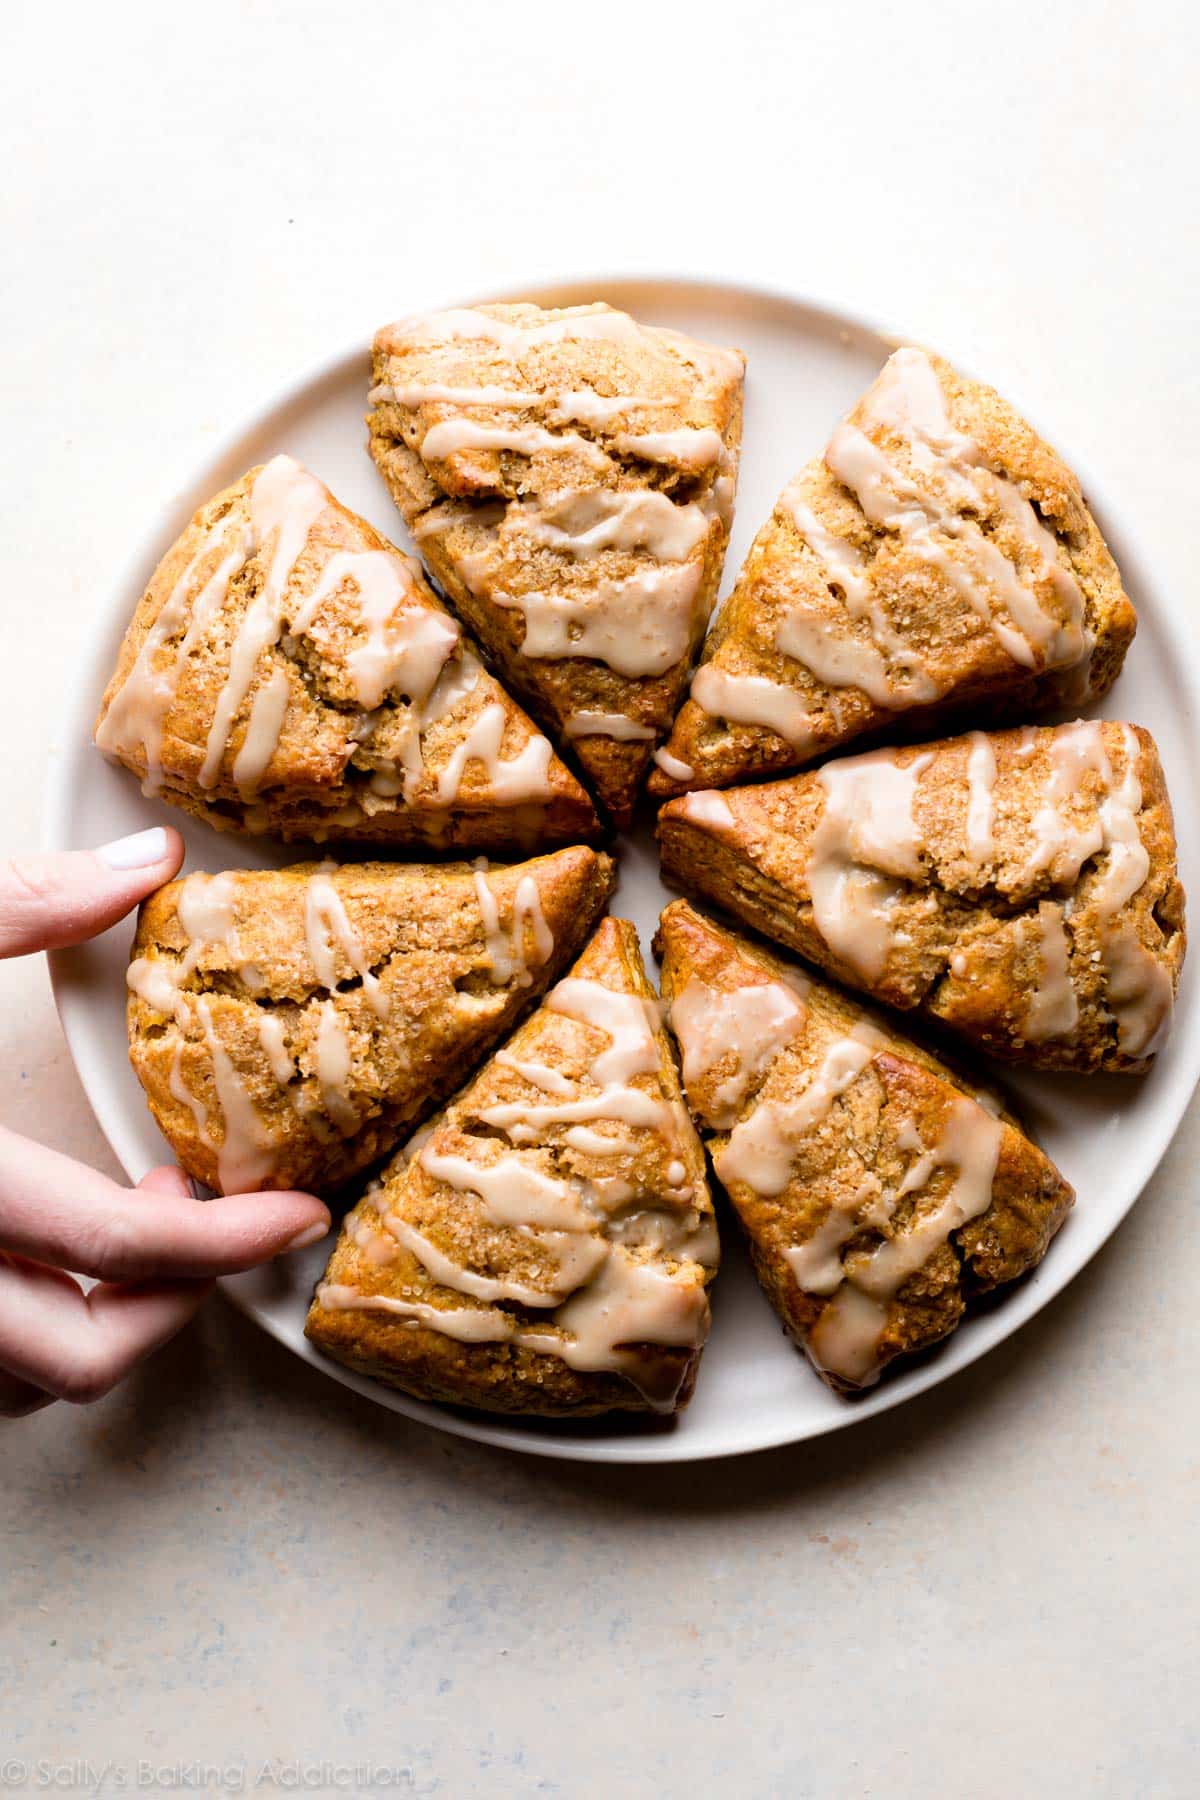
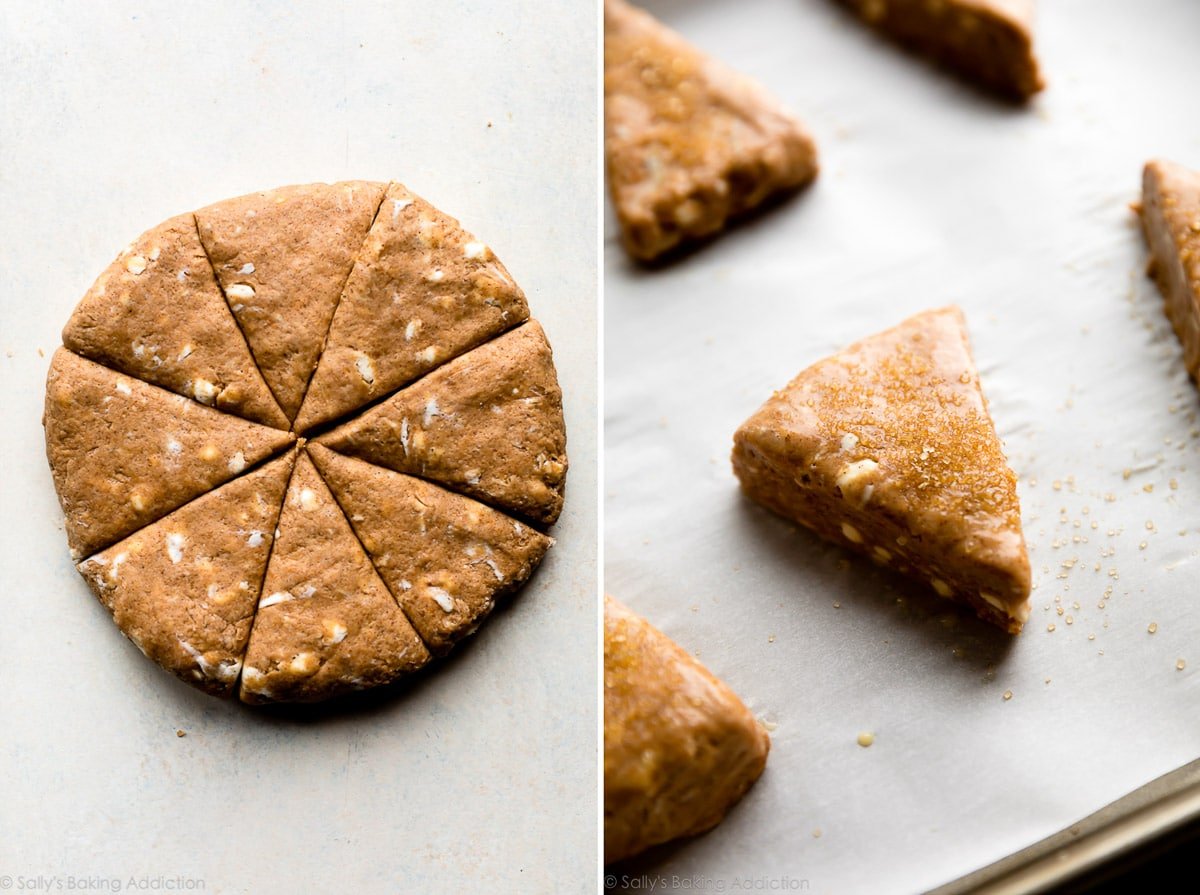
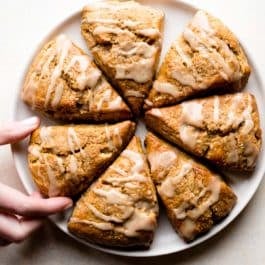
- Flatten dough ball into an 8-inch disc. Use a sharp knife to cut the disc into 8 equal wedges.
- Don’t forget the heavy cream wash. Brush the remaining heavy cream (or buttermilk) onto your scones using a pastry brush right before baking. Sprinkle with coarse sugar for a sweet textured crunch.
- Make the glaze. While the scones are baking, make the maple glaze over low heat by combining the butter and maple syrup until the mixture is completely melted. Remove from the heat and add the sifted confectioners’ sugar and a dash of salt to achieve the perfect glaze consistency.
- Drizzle over the scones. Add the maple icing while the scones are still warm so it melts into every flake, crack, and crevice. You’ll taste melty maple goodness with every bite.
More Fall Recipes
- Pumpkin French Toast Casserole
- Apple Cider Donuts & Mini Cinnamon Sugar Pumpkin Muffins
- Pumpkin Bars
- Snickerdoodles
- Pumpkin Cinnamon Rolls
- Maple Pecan Sticky Buns
- Pumpkin Spice Waffles or Pumpkin Pancakes
Classic Pumpkin Scones
- Prep Time: 20 minutes
- Cook Time: 25 minutes
- Total Time: 45 minutes
- Yield: 8 scones
- Category: Breakfast
- Method: Baking
- Cuisine: American
Description
Deliciously spiced classic pumpkin scones are flaky and soft with perfectly crumbly edges. Top with coarse sugar for extra crunch and maple icing for extra decadence!
Ingredients
- 2 cups (250g) all-purpose flour (spooned & leveled)
- 2 and 1/2 teaspoons baking powder
- 1 teaspoon ground cinnamon
- 1 and 1/2 teaspoons pumpkin pie spice*
- 1/2 teaspoon salt
- 1/2 cup (8 Tbsp; 113g) unsalted butter, frozen
- 1/3 cup + 2 Tablespoons (105ml) heavy cream, divided
- 1 large egg
- 1/2 cup (115g) canned pumpkin puree, blotted*
- 1/2 cup (100g) light brown sugar
- 1 teaspoon pure vanilla extract
- optional: coarse sugar for sprinkling on top before baking
Maple Glaze
- 2 Tablespoons (28g) unsalted butter
- 1/3 cup (80ml) pure maple syrup
- 1 cup (112g) sifted confectioners’ sugar
- pinch salt, to taste
Instructions
- Preheat oven to 400°F (204°C). Adjust baking rack to the middle-low position. Line 1 or 2 large baking sheets with parchment paper or silicone baking mat(s). If making mini scones, I use 2 baking sheets. Set aside.
- Make the scones: Whisk the flour, baking powder, cinnamon, pumpkin pie spice, and salt together in a large bowl. Grate the frozen butter (I use a box grater). Add the grated butter to the flour mixture and combine it with a pastry cutter, a fork, or your fingers until the mixture comes together in pea-sized crumbs. Set aside.
- Whisk 1/3 cup (75ml) heavy cream, the egg, blotted pumpkin (see note), brown sugar, and vanilla extract together in a small bowl. Drizzle it over the flour mixture and then mix it all together until everything appears moistened.
- With floured hands, work the dough into a ball as best you can and transfer onto a floured work surface. Press into a neat 8-inch disc and, with a very sharp knife, cut into 8 equal wedges. To make smaller scones, press dough into two 5-inch discs and cut each into 8 equal wedges. (Larger scones are pictured in this blog post.)
- Place scones at least 2 inches apart on the prepared baking sheet(s). Using a pastry brush, brush scones with remaining heavy cream and sprinkle with coarse sugar, if desired. (Gives a nice crunch!)
- Bake the larger scones for 20-25 minutes or until lightly browned. If you made 16 smaller scones, bake for 18-20 minutes or until lightly browned. Remove from the oven and allow to cool for a few minutes as you prepare the icing.
- Make the glaze: In a small saucepan over low heat, melt the butter and maple syrup together, whisking occasionally. Once the butter has melted, remove from heat and whisk in the sifted confectioners’ sugar. Taste and add a pinch of salt if desired. Drizzle over warm scones.
- Scones are best enjoyed right away, though leftover scones keep well at room temperature or in the refrigerator for 2 extra days.
Notes
- Make Ahead Instructions: Plain baked scones freeze well for up to 3 months. Thaw overnight in the refrigerator then heat up to your liking before icing and enjoying.
- Special Tools (affiliate links): Baking Sheets | Silicone Baking Mats or Parchment Paper | Glass Mixing Bowls | Box Grater | Pastry Cutter | Pastry Brush | Saucepan
- Pumpkin Pie Spice: You can use store-bought or homemade pumpkin pie spice here. If you don’t have either and want to use individual spices, use 1/2 teaspoon each: ground allspice and ground ginger AND 1/4 teaspoon each: ground nutmeg and ground cloves. This is in addition to the 1 teaspoon of cinnamon in the recipe—you will still add that.
- Blotting Pumpkin: Using a paper towel or clean kitchen towel, lightly blot the pumpkin puree to remove some of the moisture before using in the recipe. The more moisture removed, the less moist and muffin-like the scones will taste. We want the scones to be flaky and crumbly, not super moist or muffin-like. I prefer to squeeze lots of moisture out so the scones taste textured and delicious. Do what you prefer!


Reader Comments and Reviews
I made this with gluten free flour as an experiment (and a bit of a pantry cleanout), and albeit a slightly denser texture, still damn tasty! Can’t wait to make them again with regular flour, that maple glaze is crack. Could I add nuts to the batter or would they sink?
Hi Abby, so happy you loved these scones. Yes, you can add nuts, around a cup should be perfect!
Excellent recipe and excellent tips. Have never grated my frozen butter before, and just want to say that is a game changer! Thank you!
how would plumped golden raisins with cinnamon chips be as add ins?
Hi Lee, You can add a total of 1 cup of add ins (for example, half cup raisins and half cup cinnamon chips). Fold them into the dough after you add the wet ingredients. Enjoy!
These scones were delicious the glaze was perfect thank you for posting. Will be making these again
I just adore your site! I ran out of maple syrup so tried molasses instead and a bit of ginger for the glaze! Turned out great, not as sweet which I like better.
I messed these up and they are still excellent! My oven went a little hot and burned the bottoms when I checked at 20 minutes (large scones). Able to salvage the scone tops and glazed them. Still delicious. Will have to check ~15-18 for my oven.
I used fresh pumpkin puree instead of canned.
Also plan to half the glaze recipe next time, and half the sugar in it. Its gorgeous but makes a lot of glaze, and the flavor of the scone is so good I don’t want to hide that.
I’ve made these a couple times and they’re my favorite scone recipe yet. Just put in a batch for thanksgiving morning
Yum! The flavor and texture of these scones are amazing. I couldn’t resist making them again 10 days later. I added cinnamon chips to one batch and they were great. The maple icing is so good I could just eat the whole pan with a spoon. I’m excited to make your maple brown sugar cookies with the same icing soon and I might even drizzle some over the apple crumble pie for Thanksgiving.
Thank you for yet another fantastic recipe!
Hi Sally
I’m a big fan of your scones and many of them are put in fridge prior to baking, was planning to make these at night and bake in the morning, is the pumpkin too watery for the usual method to work? Thanks so much, if have already answered this, such a long list of comments, I apologize.
Hi Robin, You can shape this scone dough into wedges and refrigerate overnight before baking. Enjoy!
Love the recipe. Can I use a 2 1/4″ round biscuit cutter and serve as a biscuit and sub pumpkin with sweet potato?
TY
Delicious!! Turned out perfect! I sprinkled pumpkin spice on top of glaze! Will definitely be making again:)
Sally, I don’t know you but you sure know scones! These are beautiful! Thank you 🙂
These were delicious. I didn’t have heavy cream so used buttermilk. One question on the glaze, did you mean 1 cup of conf sugar, sifted or 1 cup sifted conf sugar? The one cup already sifted didn’t seem like enough, the glaze was way too thin.
We are so happy you enjoyed this recipe, Kristen! We did sift before measuring but you can certainly add more confectioners sugar for a thicker glaze if you wish.
These are outstanding! Just going to make a second batch! Made exactly as written.
These came out fantastic, and were the perfect way to use up leftover pumpkin from the pumpkin cupcakes with cream cheese frosting. Thank you!!
Can I use half and half instead of heavy cream? I desperately want to make these and its all I have!!
Hi Christina, yes, half-and-half works!
These are amazing! I did a mix of my own pumpkin glaze and vanilla glaze! Look so pretty! But taste even better!!!
These scones were fabulous, just like every recipe I try from Sally’s Baking Addiction. Not too sweet, delicate crumble, and the maple glaze as the perfect finish. I had crystallized ginger, so I finely chopped some and tossed it in only because I love ginger and it goes so well with the spices used. I will definitely make these again. Thank you!
Can the scones be frozen prior to baking to bake at a later date? If so, would you cook them from frozen at 400 for a longer time?
Hi April, To freeze before baking you can place the scone dough wedges on a plate or baking sheet in the freezer for 1 hour. Once relatively frozen, you can layer them in a freezer-friendly bag or container. Bake from frozen, adding a few minutes to the bake time in the recipe above. Or thaw overnight, then bake as directed.
With a few mods I did… the scones were good… but the icing… no go.. I should have been paying attention… the fact when you make icing… it is simple as Powdered sugar and Milk… your flavoring will be added at a smaller amount… the icing came out a gooy
Mess and well next time I will pay attention to the process and judge it as I see it.. but otherwise the recipe was good.. thank you
I want to add chocolate chips to make these into a brunch dessert. Is there anything I need to change/add/reduce/etc. in order for the batter to stay the same? What measurement of choc chips would you recommend? Thanks and can’t wait to try them!
Hi Rachel! You can fold 1 cup of chocolate chips into the dough after you add the wet ingredients.
I’ve made these scones twice in the last month. They are so delicious! Great directions for a wonderful recipe!
Excited to bake these tomorrow! I tried some my girlfriend made from your site and they were delicious!
Just made these today and they turned out wonderful! Even if you’ve never made scones before, you can make these I promise! I’m fairly new to baking and I’ve been learning so much just from trying your recipes. Thank you for sharing your knowledge and beautiful recipes with us, they truly bring joy into people’s lives (especially during such hard times)! ❤️
Loved this recipe. I was surprised how fast and easy this was. I did not have maple syrup for the glaze so I used: powder sugar, heavy whipping cream, cinnamon, pumpkin pie spice and ….BSB (brown sugar bourbon)! This is a keeper!
They are in the oven now. I followed the recipe exactly but my dough was very soft and hard to shape. What did I do wrong?
Hi Dolores, Was it very sticky when shaping? Add a little more flour when you are patting down the scone dough into a disc for cutting. That will help prevent excess stickiness. You can also chill the disk in the refrigerator which will make it easier to work with. We hope you enjoy these scones!
Made these for the 1st time today for Canadian Thanksgiving. This was a home run at breakfast! So delicious and a wonderful way to use up extra pumpkin purée from making pumpkin pie. I will definitely make again!
The icing was divine, too. Next time I’ll wait a little longer for the scones to cool more before drizzling.
All in all this is an 11 out 10!
Made these today and they were great! Love the maple icing too and may try it on carrot cake.
I’ve made this 3x in the last 2weeks!
Question-how long can I leave them in the fridge before baking? I premade them then forgot to stick them in the oven last week. How long would you leave them in the fridge before freezing them?
Thanks so much!
We are so happy you enjoy this recipe, Clarissa! You can leave your dough in the refrigerator for up to 12 hours.
These were really good. I don’t usually comment on recipe sites, but these were good enough to do so. Will definitely make again. Followed recipe as written, even the glaze.
When I grate the frozen butter, it seems at least 1 Tbsp. sticks to the box grater. Am I doing something wrong, or any tips on how to avoid that?
Nothing you’re doing wrong– try to scrape off as much of that butter as you can. Placing the box grater in the freezer for a few minutes to solidify that warmer/sticky butter helps. You can easily scrape it off then.