

Red velvet cake is much more than vanilla cake tinted red. This recipe produces the best red velvet cake with superior buttery, vanilla, and cocoa flavors, as well as a delicious tang from buttermilk. My trick is to whip the egg whites, which guarantees a smooth velvet crumb.
This is my forever favorite red velvet cake recipe. I published it on my blog a few years ago and decided it’s time for clearer recipe instructions and a video tutorial. Many of you love this recipe too, so let’s roll up our sleeves and rev up our mixers!
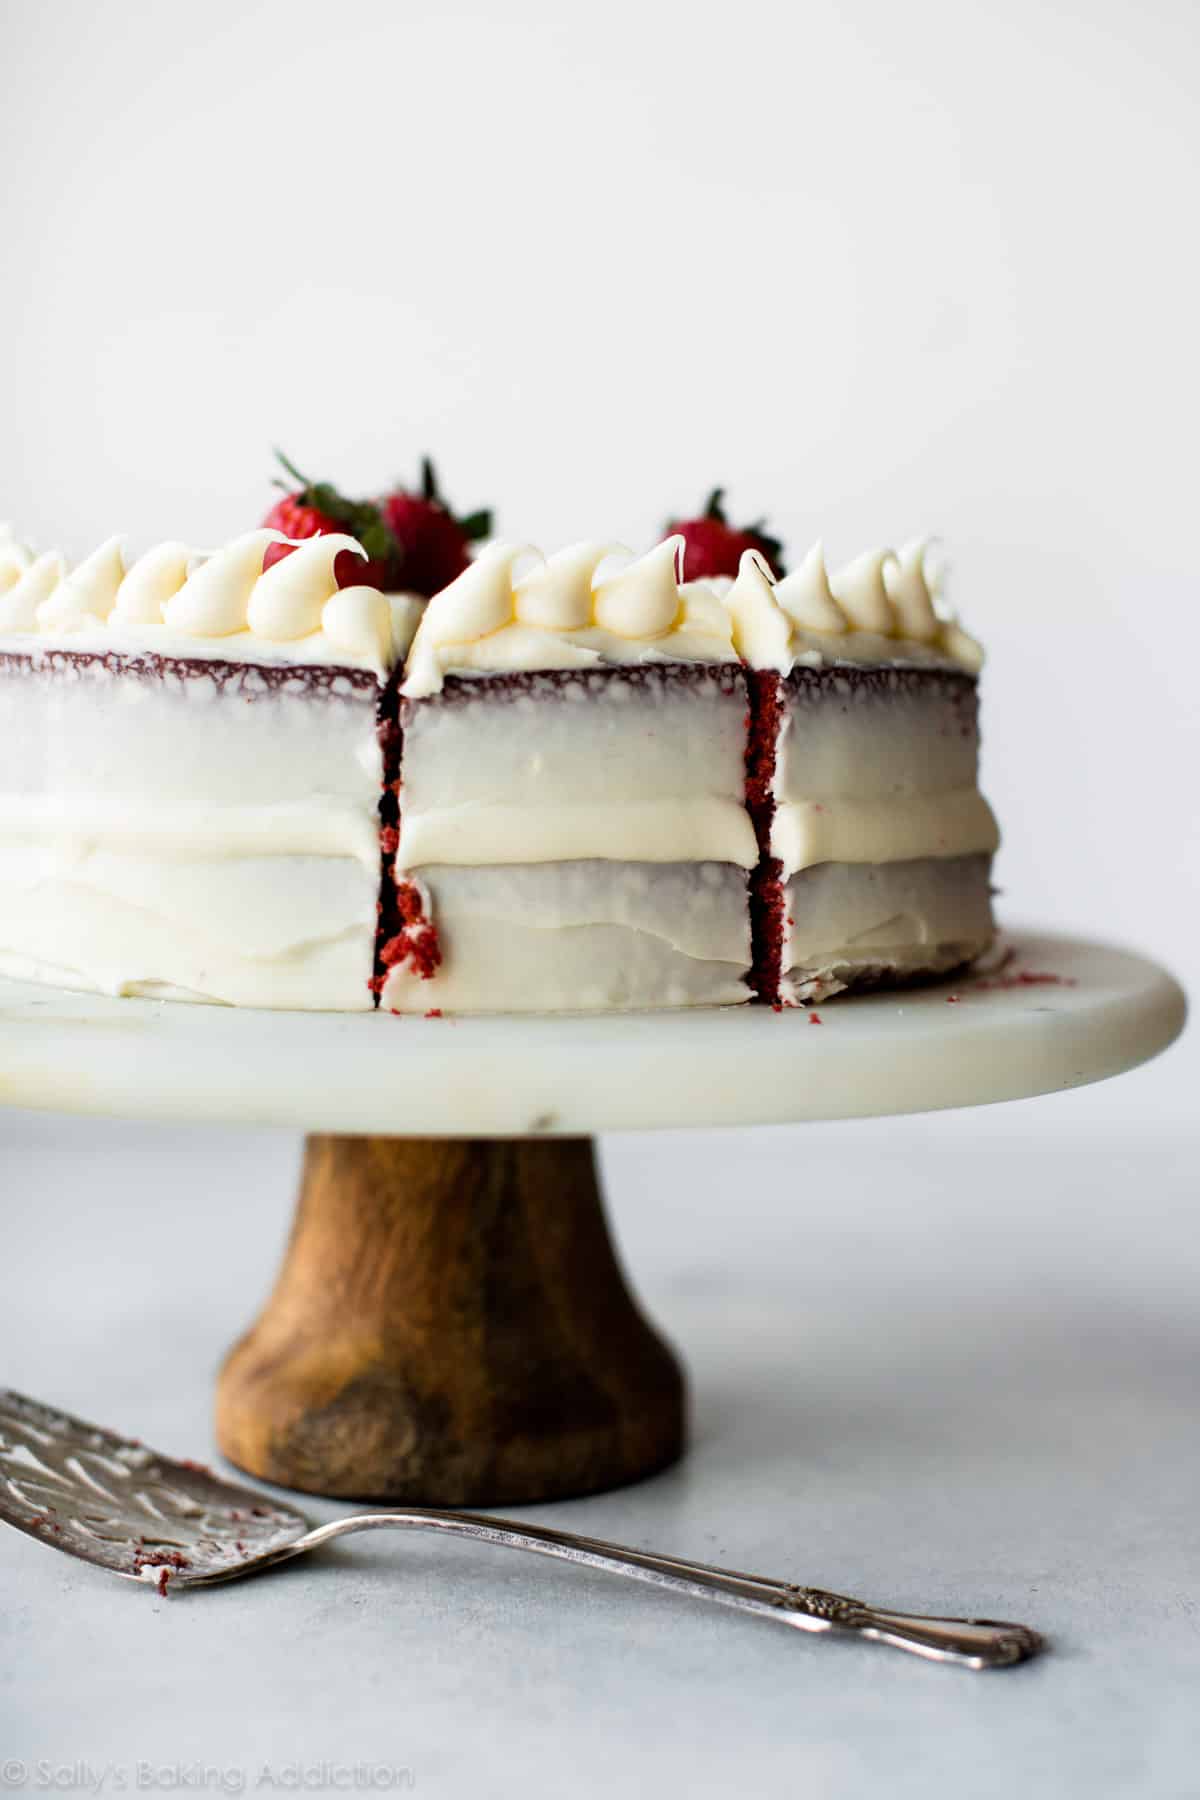
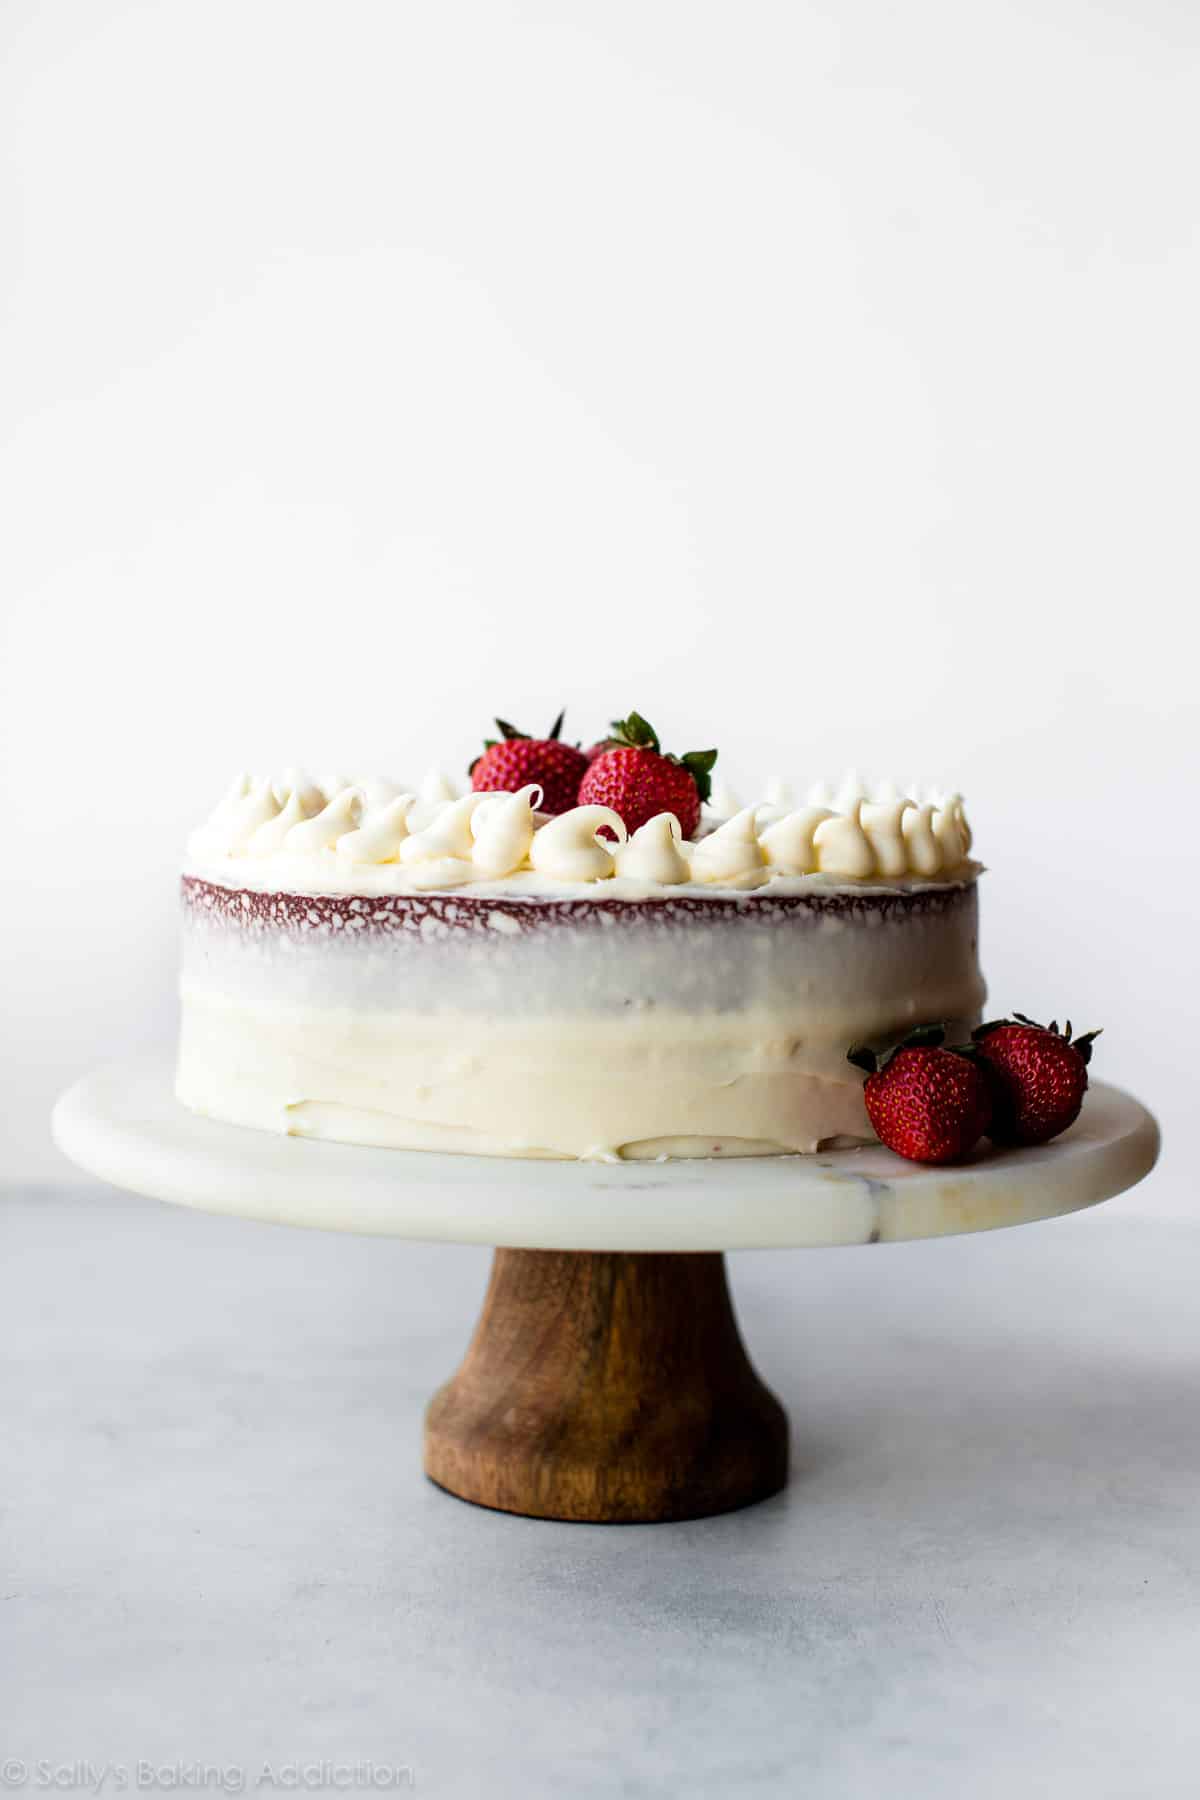
Red velvet cake is the queen of all layer cakes. The “I can’t quite put my finger on the flavor” cake. It’s the sweet marriage of buttermilk and vanilla with a little cocoa for good measure. She’s tall, dramatic, and completely covered in silky cream cheese frosting. This is my best red velvet cake.
What Does Red Velvet Cake Taste Like?
I used to be unsure about red velvet. I don’t really trust a cake that has a mystery flavor. What is red velvet? Is it more like vanilla cake, chocolate cake, or just a butter cake tinted red? From red velvet brownies and red velvet cookies and red velvet cupcakes, I’ve had a lot of fun getting to know red velvet. Red velvet is:
- Mild cocoa flavor
- Tangy buttermilk
- Sweet vanilla
- Very buttery
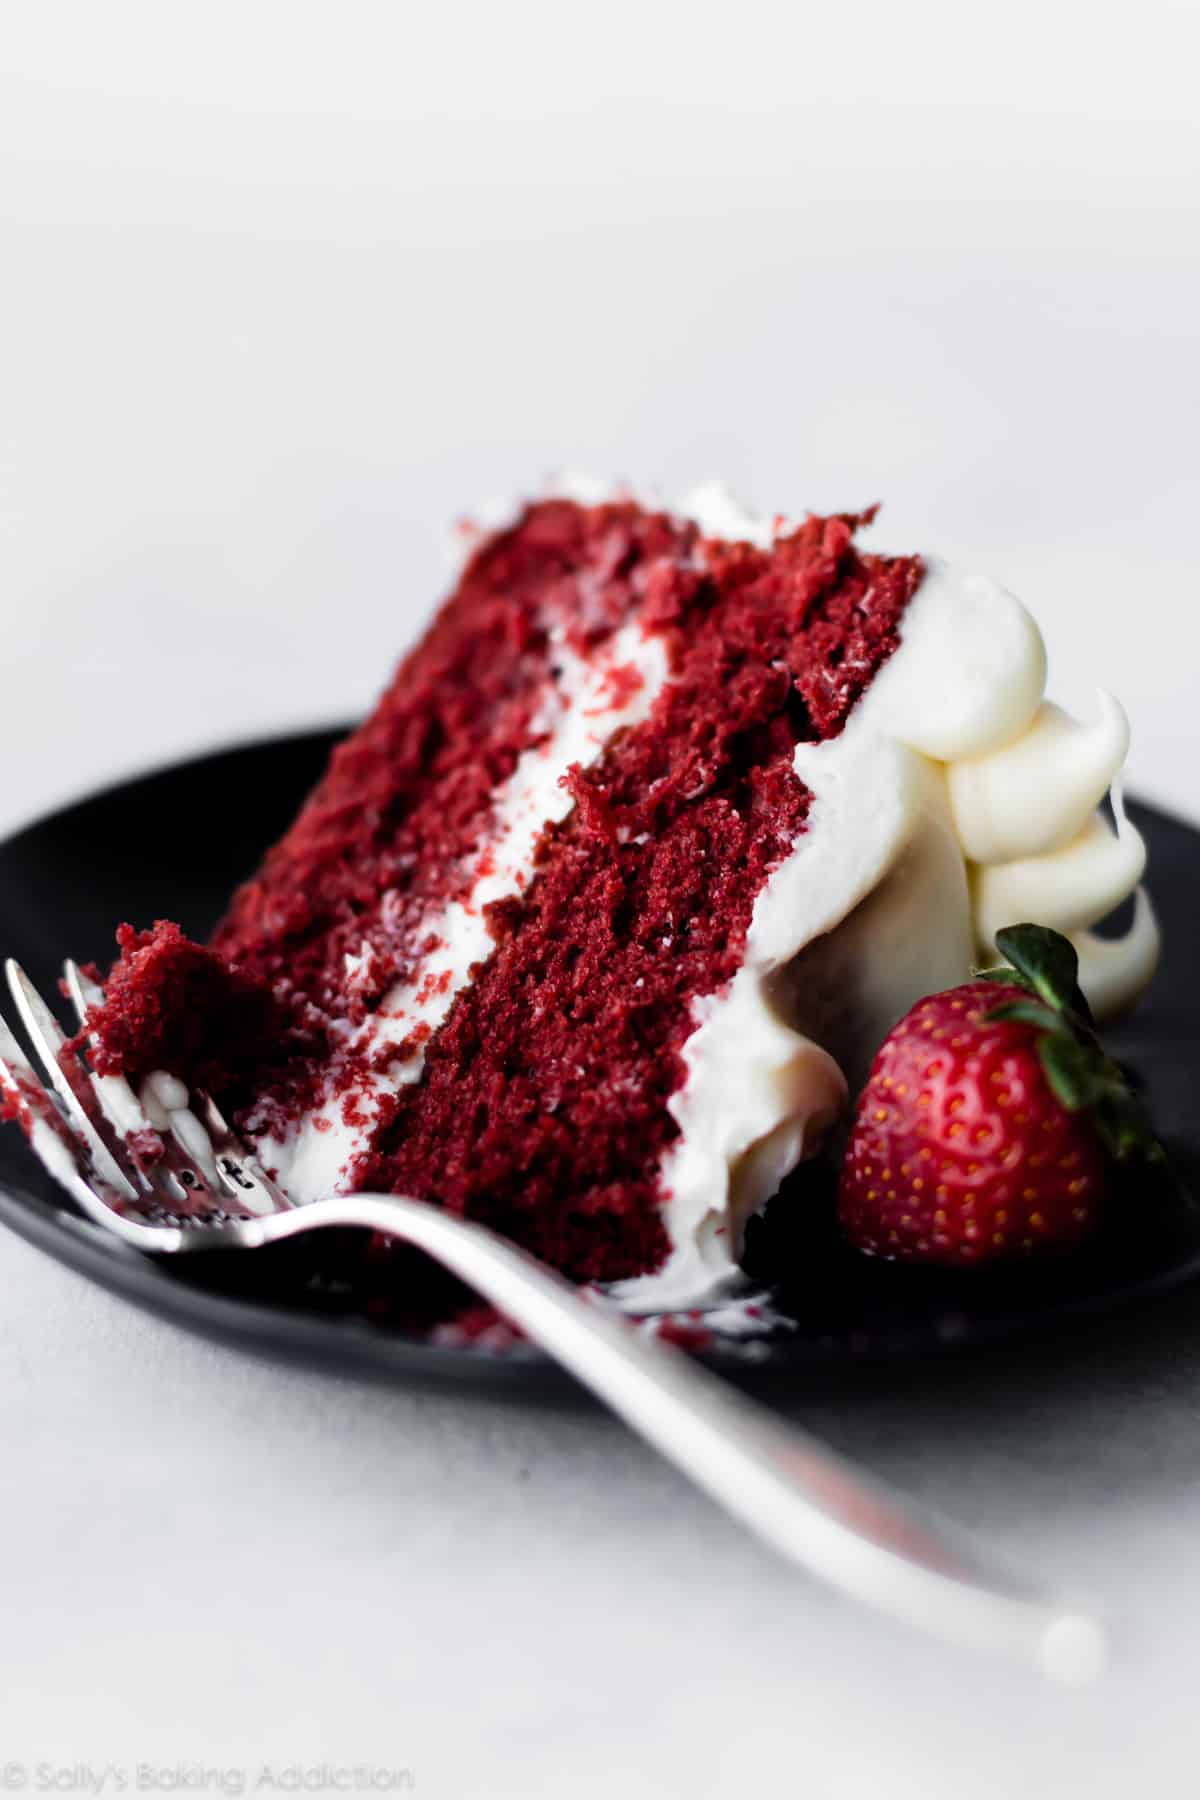
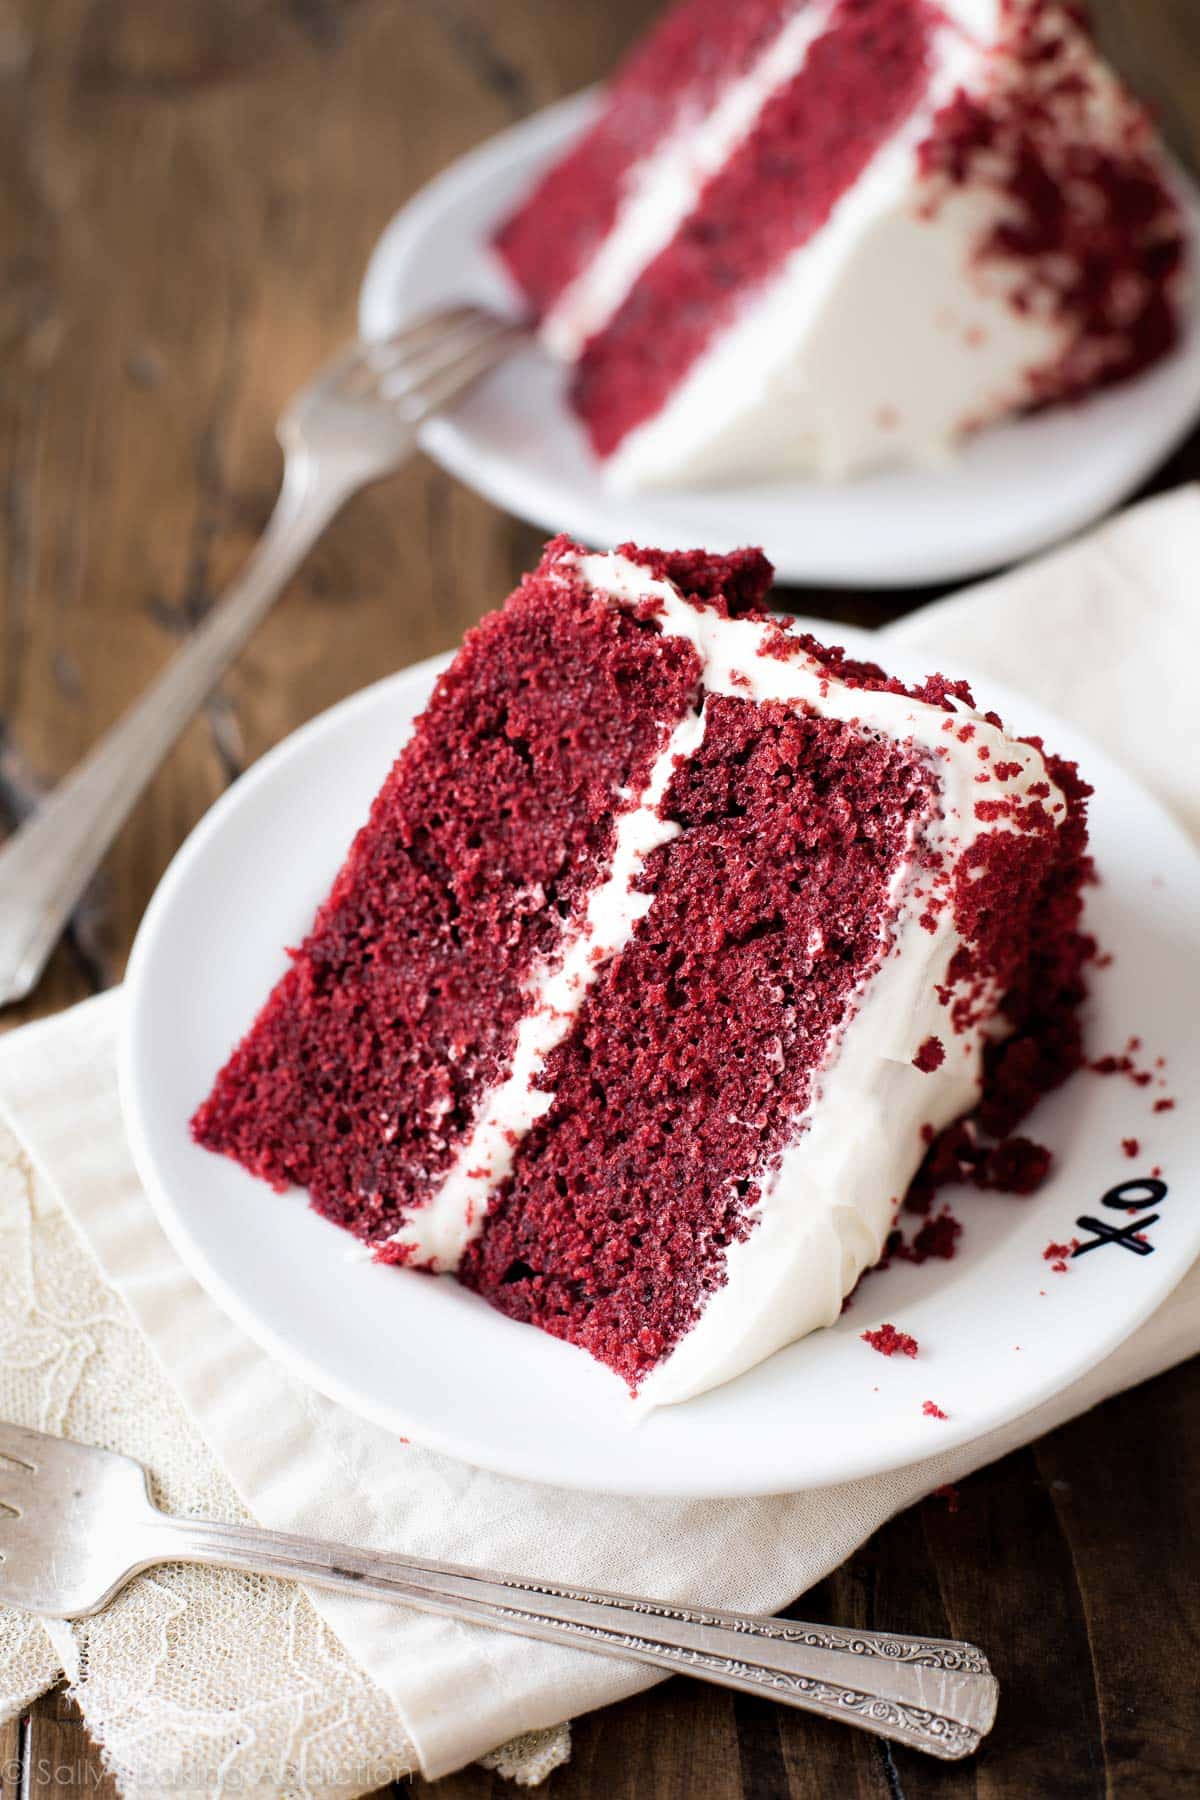
These 4 flavors are essential to the perfect red velvet layer cake. Not only is the flavor outstanding, red velvet cake’s texture is worth writing home about. It’s dense and soft with a moist and velvety crumb. However, the absolute best part about red velvet cake is the cream cheese frosting. Slathered on thick, my cream cheese frosting recipe is delicately sweet and undeniably creamy.
How to Make Red Velvet Cake
I use specific ingredients, certain amounts, and unique mixing techniques to produce my best red velvet cake recipe. Begin by whisking the dry ingredients together, then beat together the wet ingredients. We’ll combine the two, add buttermilk and tint the batter red. More on food coloring below.
- Cake Flour: I highly recommend cake flour. Cake flour is much lighter than all-purpose and the perfect base for a light, soft-crumbed cake texture. Like I mention above, red velvet’s texture is important to the authenticity of the flavor. You will thank me for the recommendation after you taste how incredibly soft this cake is. It’s the texture you find at professional bakeries.
- Unsweetened Cocoa Powder: 2 Tablespoons is plenty for a little cocoa flavor without overpowering the vanilla and butter flavors.
- Butter & Oil: What sets red velvet cake apart from chocolate is its buttery flavor. With only butter, we risk a dry cake. With only oil, we lose the butter flavor and softness that comes with creaming butter & sugar together. So all that’s to say, use both butter and oil. Moist texture, soft and cakey texture, buttery flavor.
- Buttermilk: Buttermilk is tangy, creamy, and makes baked goods extremely moist. You can’t make delicious red velvet cake without it! Additionally, buttermilk helps activate the baking soda to leaven the cake. If you’re interested, I have plenty more on this topic in my Baking with Buttermilk post (including a DIY buttermilk substitute recipe). It’s also a key ingredient in these black velvet cupcakes!
What About the Food Coloring?
Red velvet cake wouldn’t be red without food coloring. I recommend gel food coloring because the color is concentrated, so you need less of it. For natural coloring, use beet powder. If you don’t want to use food coloring, leave it out! The cake will have the same flavor and be a lovely shade of cocoa.
My #1 Trick
I add one simple step to this red velvet cake recipe and it guarantees the BEST texture.
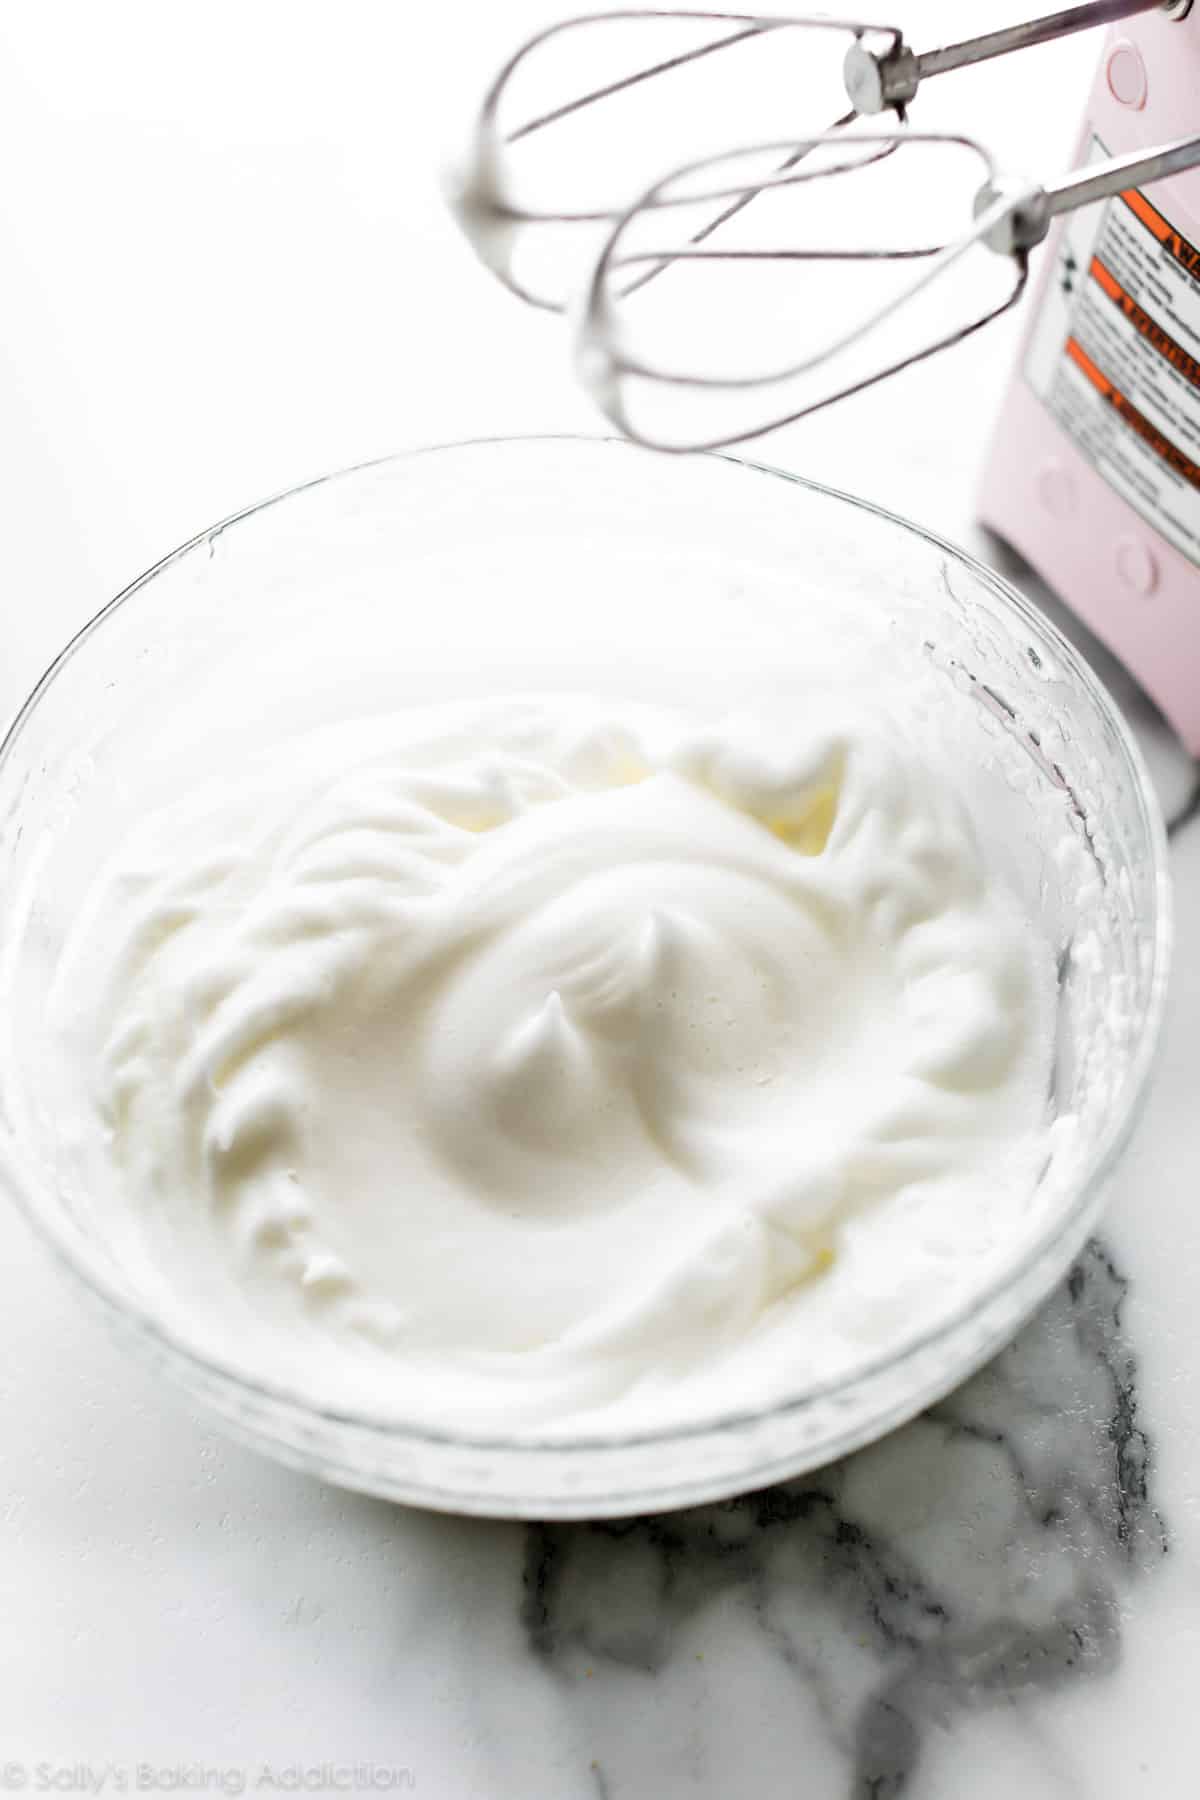
Whip the egg whites separately, then fold into the batter.
This cake recipe requires 4 large eggs. Separate the eggs before starting. Beat the egg yolks with the wet ingredients, then beat the egg whites into fluffy peaks and fold them in last. Beating the egg whites incorporates air and promises a velvet-rich texture.
You will never go back.
Red Velvet Cake Video Tutorial
Cream Cheese Frosting
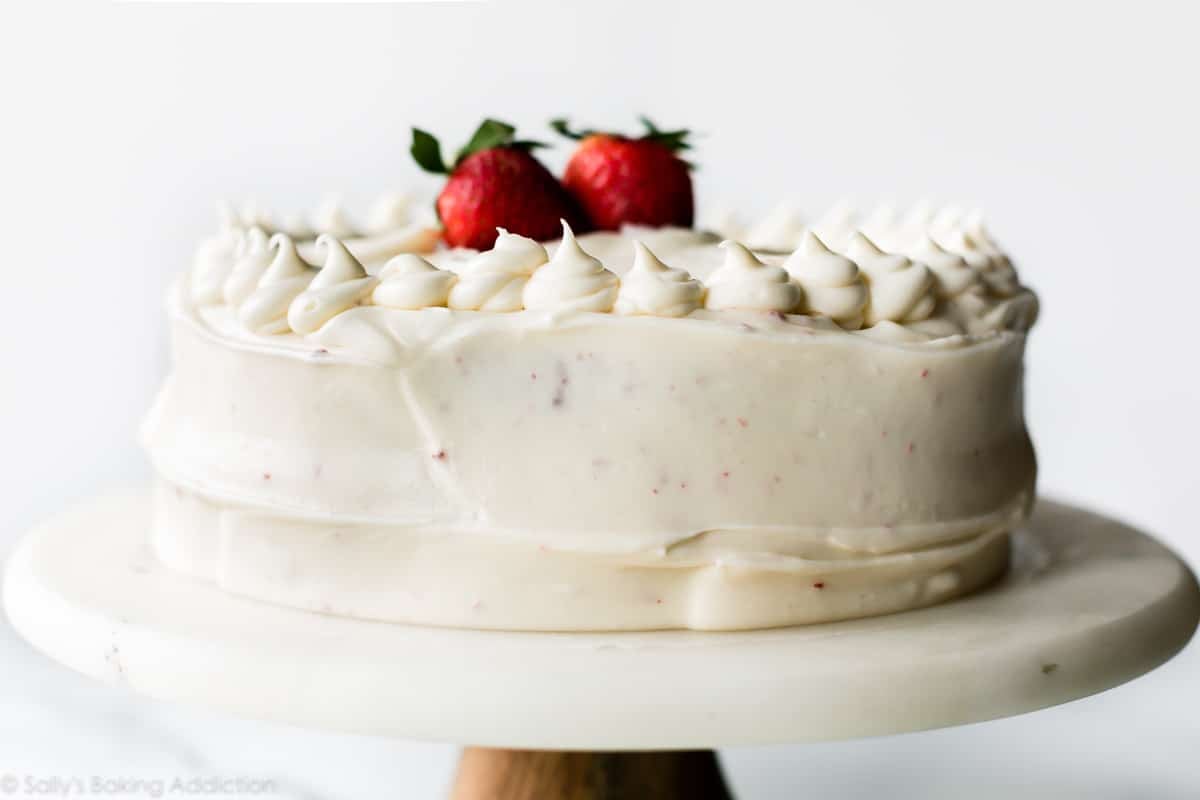
In my opinion, cream cheese frosting pairs best with red velvet’s flavor and this frosting recipe is really simple. You need brick-style cream cheese, butter, confectioners’ sugar, vanilla extract, and a pinch of salt to offset the sweetness. It glides on seamlessly and is silky smooth. If you’re looking to pipe decoration with this cream cheese frosting, chill it in the refrigerator for 20 minutes. This guarantees the creamy frosting will hold its shape.
Of course, feel free to use traditional vanilla buttercream or Swiss meringue buttercream here if you prefer. Or try white chocolate buttercream frosting!
This recipe converts red velvet skeptics. I should know because I used to be one!
Interested in turning this red velvet beauty into a tiered wedding cake? See my homemade wedding cake for details.
More Classic Cake Recipes
- Vanilla Cake
- Banana Cake
- Pumpkin Cake
- Chocolate Cake
- Strawberry Cake
- Lemon Cake
- German Chocolate Cake

Red Velvet Cake with Cream Cheese Frosting
- Prep Time: 30 minutes
- Cook Time: 30 minutes
- Total Time: 3 hours
- Yield: 12 servings
- Category: Dessert
- Method: Baking
- Cuisine: American
Description
Red velvet cake is much more than vanilla cake tinted red. This recipe produces the best red velvet cake with superior buttery, vanilla, and cocoa flavors, as well as a delicious tang from buttermilk. My trick is to whip the egg whites, which guarantees a smooth velvet crumb.
Ingredients
- 3 cups (360g) cake flour (spooned & leveled)
- 1 teaspoon baking soda
- 2 Tablespoons (10g) unsweetened natural cocoa powder
- 1/2 teaspoon salt
- 1/2 cup (8 Tbsp; 113g) unsalted butter, softened to room temperature
- 2 cups (400g) granulated sugar
- 1 cup (240ml) canola or vegetable oil
- 4 large eggs, room temperature and separated
- 1 Tablespoon pure vanilla extract
- 1 teaspoon distilled white vinegar
- liquid or gel red food coloring
- 1 cup (240ml) buttermilk, at room temperature
Cream Cheese Frosting
- 16 ounces (452g) full-fat brick cream cheese, softened to room temperature
- 3/4 cup (12 Tbsp; 170g) unsalted butter, softened to room temperature
- 5 cups (600g) confectioners’ sugar
- 1 and 1/2 teaspoons pure vanilla extract
- pinch of salt, to taste
Instructions
- Preheat oven to 350°F (177°C). Grease two 9-inch cake pans, line with parchment paper rounds, then grease the parchment paper. Parchment paper helps the cakes seamlessly release from the pans. (If it’s helpful, see this parchment paper rounds for cakes video & post.)
- Make the cake: Whisk the flour, baking soda, cocoa powder, and salt together in a large bowl. Set aside.
- Using a handheld or stand mixer fitted with a paddle attachment, beat the butter and sugar together on medium-high speed until combined, about 1 minute. Scrape down the sides and up the bottom of the bowl with a rubber spatula as needed. Add the oil, egg yolks, vanilla extract, and vinegar and beat on high for 2 minutes. (Set the egg whites aside.) Scrape down the sides and up the bottom of the bowl with a silicone spatula as needed.
- With the mixer on low speed, add the dry ingredients in 2-3 additions alternating with the buttermilk. Beat in your desired amount of food coloring just until combined. I use 1-2 teaspoons gel food coloring.
- In a separate medium bowl, vigorously whisk or beat the 4 egg whites on high speed until fluffy peaks form as pictured above, about 3 minutes. Gently fold into cake batter. The batter will be silky and slightly thick.
- Divide batter between cake pans. Bake for 30-32 minutes or until the tops of the cakes spring back when gently touched and a toothpick inserted in the center comes out clean. If the cakes need a little longer as determined by wet crumbs on the toothpick, bake for longer. However, careful not to overbake as the cakes may dry out. Remove cakes from the oven and cool completely in the pans set on a wire rack. The cakes must be completely cool before frosting and assembling.
- Make the frosting: In a large bowl using a handheld or stand mixer fitted with a whisk or paddle attachment, beat the cream cheese and butter together on medium-high speed until smooth, about 2 minutes. Add the confectioners’ sugar, vanilla extract, and a pinch of salt. Beat on low speed for 30 seconds, then increase to high speed and beat for 3 minutes until completely combined and creamy. Add more confectioners’ sugar if frosting is too thin or an extra pinch of salt if frosting is too sweet. Frosting should be soft, but not runny.
- Assemble and frost: Using a large serrated knife, slice a thin layer off the tops of the cakes to create a flat surface. Discard or crumble over finished cake. Place 1 cake layer on your cake stand or serving plate. Evenly cover the top with frosting. Top with 2nd layer and spread remaining frosting all over the top and sides. I always use an icing spatula and bench scraper for the frosting. I used Wilton piping tip #12 for decoration around the top.
- Refrigerate cake for at least 30-60 minutes before slicing. This helps the cake hold its shape when cutting.
- Cover leftover cake tightly and store in the refrigerator for 5 days. Frosted cake or unfrosted cake layers can be frozen up to 2-3 months. Thaw overnight in the refrigerator and bring to room temperature before decorating/serving.
Notes
- Make Ahead Instructions: The cake layers can be baked, cooled, and covered tightly at room temperature overnight. Likewise, the frosting can be prepared then covered and refrigerated overnight. Let the frosting sit at room temperature to slightly soften for 10 minutes before assembling and frosting.
- Special Tools (affiliate links): 9-inch Round Cake Pans | Glass Mixing Bowls | Whisk | Electric Mixer (Handheld or Stand) | Red Gel Food Coloring or Beet Powder | Silicone Spatula | Cooling Rack | Cake Stand, Serving Plate, or Cake Turntable | Icing Spatula | Bench Scraper | Piping Bag (Reusable or Disposable) | Wilton Piping Tip #12 | Cake Carrier (for storing cake)
- Cake Flour: For best texture and taste, I strongly recommend cake flour. You can find it in the baking aisle and I have many more recipes using it. If you can’t get your hands on cake flour, you can make a DIY cake flour substitute.
- Vinegar: The vinegar helps brighten the red color. Don’t get scared, a touch of vinegar is normal in red velvet desserts! You can’t taste it.
- Why is everything at room temperature? When everything is near the same temperature, they mix together easily, evenly, and produce a uniform texture. It’s important!
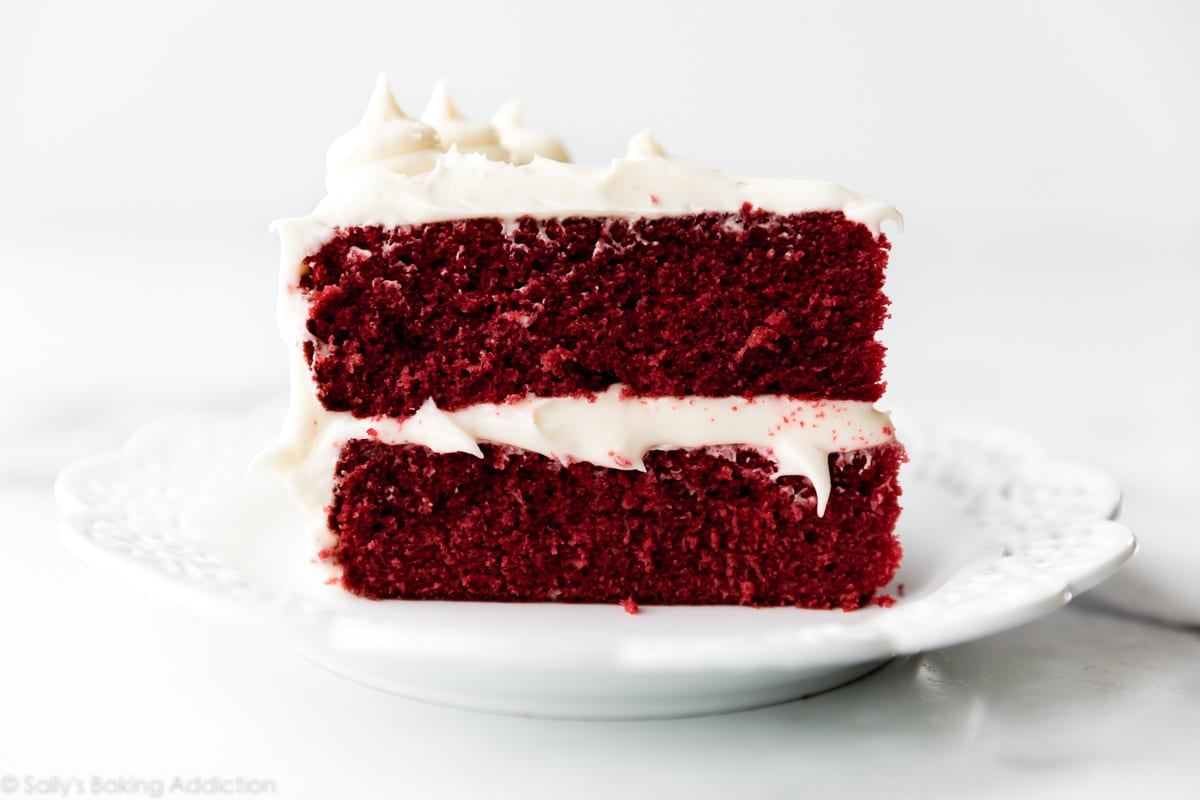
- Food Coloring: The amount of red food coloring is up to you. I tested with varying amounts. To get the dark red color you see here, use 2 teaspoons of gel food coloring. You could use liquid food coloring too, but gel food coloring is more potent. You’ll need at least 1 Tablespoon of liquid. Dye the batter until you are pleased with the color. Use beet powder for a natural alternative (mix 1/2 teaspoon beet powder with 2 teaspoons of water before adding) or leave the food coloring out completely.
- Buttermilk: Buttermilk is a key ingredient and flavor in this recipe. You can use low fat or full fat. If you don’t have buttermilk, you can make your own buttermilk substitute. To do so, add 1 and 1/2 teaspoons of fresh lemon juice or white vinegar to a liquid measuring cup. Add enough regular milk (whole milk is best) to make 1 cup. Stir the two together, then let it sit for 5 minutes before using.
- Sheet Cake: This batter fits nicely into a 9×13-inch cake pan or 12×17-inch sheet pan. Same oven temperature. Bake for about 40-45 minutes or 20-25 minutes, respectively. Keep your eye on the cake and use a toothpick to test for doneness.
- 3 Layer Cake: Prepare 3 9-inch cake pans in step 1 and divide the batter evenly between the pans. Bake for about 22-25 minutes.
- Bundt Cake: This cake batter fits into a 10-cup or larger bundt pan. I’m unsure of the exact bake time (likely around an hour), but use a toothpick to test for doneness. Same oven temperature.
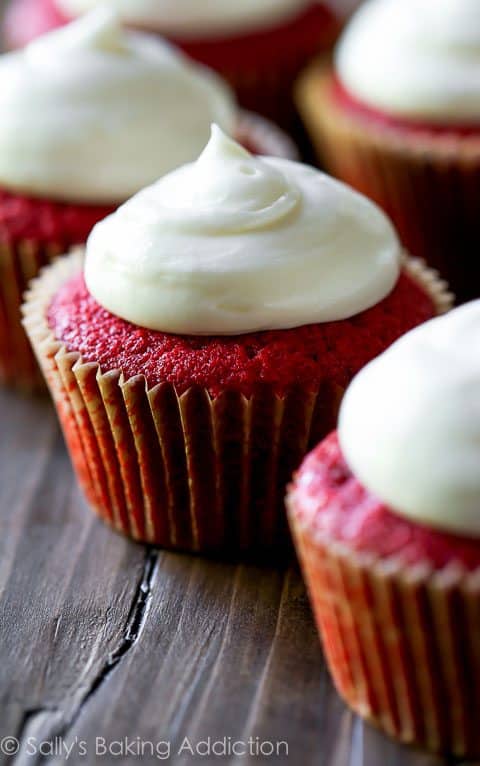
- Cupcakes: You can use this cake batter for 2-3 dozen cupcakes. Fill cupcake liners 1/2 – 2/3 of the way full. Bake for 20-21 minutes or until the tops of the cupcakes spring back when gently touched and a toothpick inserted in the center comes out clean. Use my red velvet cupcakes recipe if you need fewer.
Recipe originally published on Sally’s Baking Recipes in 2015.
Need something smaller? Here are my red velvet cupcakes!


Reader Comments and Reviews
Hi
I want to bake both the chocolate and red velvet cake but I only want one layer of each. Should I half the recipes?
Hi Kamara, that should work just fine.
Looove this cake so much is delicious… i would like to make a black velvet version of it. Can i swap the color? Or should i use a darker cocoa powder instead ??
Hi Yara, black cocoa powder is typically Dutch processed but natural unsweetened cocoa powder is best in this recipe. It would require some testing to properly incorporate—you can read more about the difference between the two here. If you have black gel food coloring, you could use that instead to get the black look. Hope this helps!
I think your coconut cake recipe is perfection. It has the best crumb, it is light but rich and not too sweet.
hi is there anyway i could reduce the sugar in the icing and the cake? how much would I take away?
Hi Jaiya, Sugar is used for moisture and texture in baked goods as well as taste. You can certainly try reducing the sugar, but the resulting texture will be different than intended.
It was incredibly dense and tasted like corn bread
I only have 8 inch pans. How should I adjust cooking time please?
Hi Nikola, you can use those, just expect the bake time to be longer as the layers will be thicker. Use a toothpick to test for doneness.
I used the beet powder instead of red dye. I had to use 1 1/2 teaspoon mixed with water but it still is not red. The taste is great.
how can i substitute the four eggs?
Hi Saihej, we haven’t tested this recipe with an egg substitute, so are unsure what to recommend. If you decide to try something, please let us know how it goes!
Hi Sally, love ALL your recipes. Just have two questions. Would a light olive oil work in this? Also could I use baking powder instead of soda? Thank you!
Hi Anon, we haven’t tested this cake with a light olive oil, so are unsure of the results. We generally do not recommend swapping a liquid for a solid, however. This recipe uses creamed butter and sugar as the base, which is key for its structure. You can learn more about why and how to cream butter and sugar here. We also do not recommend swapping baking powder for baking soda because they have different properties and strengths. You can read all about the differences here: Baking Powder vs. Baking Soda.
I’m baking this is a half sheet pan with 2” sides. I’d like some height. Should I make 1.5x the recipe? What would you recommend for a bake time/temp in a convection oven?
Hi Courtney, here’s everything you need to know about cake pan sizes and conversions. We’re unsure of the exact bake time for a half sheet pan, so keep a close eye on it and use a toothpick to test for doneness. If you do use convection/fan settings for baking, lower your temperature by 25 degrees F and keep in mind that things may still take less time to bake than they would in a conventional oven.
Would I half this recipe if I am only using x3 6 inch cake pans for a 6 inch 3 layer cake?
Hi Haniyyah, We recommend using our red velvet cupcakes recipe instead. It makes the perfect amount of batter for a 3 layer, 6 inch cake.
Hi there how long does this cake stay fresh for? I’m making it for a wedding cake that will be picked up Thursday morning. If I make today, stack and decorate tomorrow will it stay fresh?
Hi Dani, you can cover leftover cake tightly and store in the refrigerator for 5 days, but it will lose freshness over time. For longer storage, here’s everything you need to know about how to freeze cakes.
I just made your peanut butter chocolate cake and it was delicious! Now I want to make red velvet. The only pans I have are 3 8 inch pans. Will that work for this recipe and how would that change baking time? Thank you!
Hi Brittney! For an 8 inch cake, we recommend using 3 8-inch cake pans. The cakes will be very thick using two 8 inch cake pans and may not bake evenly– or may even overflow. Bake for about 23-26 minutes. Or, you can bake 2 layers, filling your pans no more than half way, and use the leftover batter for a few cupcakes on the side.
Could i make an 2 8inch layers? How much do i fill pans
Hi Beh, for an 8 inch cake, we recommend using 3 8-inch cake pans. The cakes will be very thick using two 8 inch cake pans and may not bake evenly– or may even overflow. Bake for about 23-26 minutes. Or, you can bake 2 layers, filling your pans no more than half way, and use the leftover batter for a few cupcakes on the side.
hi! i’d quartered the recipe and followed those measurements closely, but when the cake came out, it was a little dry and tasted like spices. would this be because of incorrect measurements or maybe just a dirty bowl?
Hi there
Approximately how many cups of batter does this Red Velvet cake recipe yield?
Hi Diane, this cake recipe yields roughly 8-9 cups of batter.
Hi Sally, This is easily the best red velvet cake recipe I have tried and continue to go back to it. I was recently diagnosed with Celiac Disease and have to avoid gluten. Will a 1:1 gluten free flour work as a substitute or should I try a different flour?
Hi Lisa, we haven’t tested this recipe with a gluten-free flour blend, so we’re unsure of the results. Although some readers report using an all-purpose 1:1 gluten-free flour in many of our recipes with success, you should expect slightly different results anytime you substitute ingredients. Let us know if you give it a try!
Can I use two 7.5inch cake tins to make thicker layers. Or would this make the whole cake to dry or have to cook longer?
Hi Lula, this is a bit too much batter for those particular pans. However, you could use your pans and fill half way and use the leftover batter for a few cupcakes on the side. Bake time will be a bit shorter for the cake.
Not sure what mistake I made… but the cake is still liquid in the center after baking for more than 35 minutes. I double checked the recipe, and used an oven thermometer. Has anyone else had this issue?
Hi Meredith, are you baking in two 9 inch cake pans? We recommend to continue to bake until the cakes are baked through!
Definitely need to bold print the two 9 inch cakes. The taste was great, just had the same issue with the middle. But I made this mistake and see a lot of others have too. I love your recipes. This is the only one I didn’t 100 like and that’s just because it’s so easy to run over the absolute need for two 9 inch. Because if you don’t, it will not cook in the middle.
I had the same problem! Baked for over 45 minutes, and still liquid in the center of the cake. So sad that this cake ended in the trash because I had high hopes.
Do you have a chocolate frosting recipes that would be delicious sub for the cream cheese frosting? My son is requesting red velvet w CHOCOLATE frosting ! Thanks
Hi Ryan, you could try this chocolate cream cheese frosting! Or you could use the more classic chocolate buttercream from this triple chocolate cake recipe. Hope it turns out great!
How many cups of batter does this recipe make?
Hi Diane, this cake recipe yields roughly 8-9 cups of batter. It is best to make separate batches of batter.
Can you freeze the layers of this cake for a few days then defrost and frost on the day?
Hi Joanne, absolutely. Here’s everything you need to know about how to freeze cakes.
I’m giving this cake 5 stars because I know it would have been if I had not used the wrong cocoa powder. I was wanting to stay away from red dye, but reading about the natural dyes made me fear I would have to use too much to get a nice red color, possibly altering the flavor. Then I read a post on reddit about using Guittard’s cocoa rouge for red velvet cake. I thought I had found my solution! Made the cake and it definitely isn’t red. More of a very light brown and the taste is SO underwhelming. I came back here to see if I could find out if anyone else had this issue, and then realized my fancy cocoa is in fact, Dutch processed. I was lead to read your cocoa powder post and now I know why the flavor of my cake is very underwhelming. I hope someone else learns from my mistake! Your recipes have always been so good, Sally! I knew with all the good reviews, this had to be my error.
Hello,
I’ve used many of your recipes in the past and love your use of yogurt and/or buttermilk (usually I just sub those anyway when recipes don’t have one or the other). Last year I justed your wedding cake recipe for my best friend’s wedding cake. It turned out great! Now I’m going to be making my sister-in-law’s wedding cake and her fiance loves red velvet, but we prefer it to be dye free. How much beetroot powder would you recommend using in this recipe? Thanks!
Hi Marybeth, some readers have used beet/beetroot powder in this recipe instead of food coloring. It’s best to mix the beet powder with a little water first. This combination makes 1 teaspoon of food coloring, but you may want more since this is a lot of cake batter: 1/4 teaspoon red beet powder per 1 teaspoon cold water. Keep in mind that it won’t be as red; some readers have said their cakes come out more brown.
Hello! I plan on making my best friend one of those Pinterest looking vintage cakes and red velvet with cream cheese frosting is her favorite flavor! I plan on using 3 6inch pans for the layers, any tips on if this recipe will be enough? and if so how much should I fill the pan. this is my first time making one of these cakes.
Hi Manuela! We recommend using our red velvet cupcakes recipe instead. It makes the perfect amount of batter for a 3 layer, 6 inch cake.
Hi! Can I use 9×1.5in cake pans for this recipe? Will the batter overfill the pans? Thank you!
Hi AnnMarie, If your pans are 1.5 inches high, it should be ok. If you want to be sure your layers are bit thinner, you can bake this as a three layer cake instead of two. See the recipe notes for details on bake times for three layers.
Four stars only on account of how I [redacted] the [redacted] out of this recipe. My oven has been struggling to keep temp recently, so the beautiful domed centers caved in after adding nearly 40 extra minutes to the bake time…the cake stuck to my pans entirely (I excluded the parchment paper as instructed and I have no excuse lol)…what survived tasted good, but I didn’t get the real experience.
Hello,
I made this cake for my dad for Father’s Day. Everybody liked it but my daughter and I think the icing had a toothpaste taste to it. What do you think I may have done wrong? I did go by the recipe, but I just can’t figure what happened.
Hi Karrie! Different brands of confectioners’ sugar can sometimes have an off flavor. What brand did you use? Could the sugar have been getting a little old?
Not sure what went wrong but the flavor was light, you taste the oil and the texture was dry. I usually put mayo in my cake and forgot this time.
Hi! Can I use coconut oil or avocado oil instead of vegetable/ canola?
Hi Jamie, that will work in a pinch, although the taste may be slightly different than using a more neutral oil like vegetable or canola oil.
I made it with avocado oil and it turned out great.