

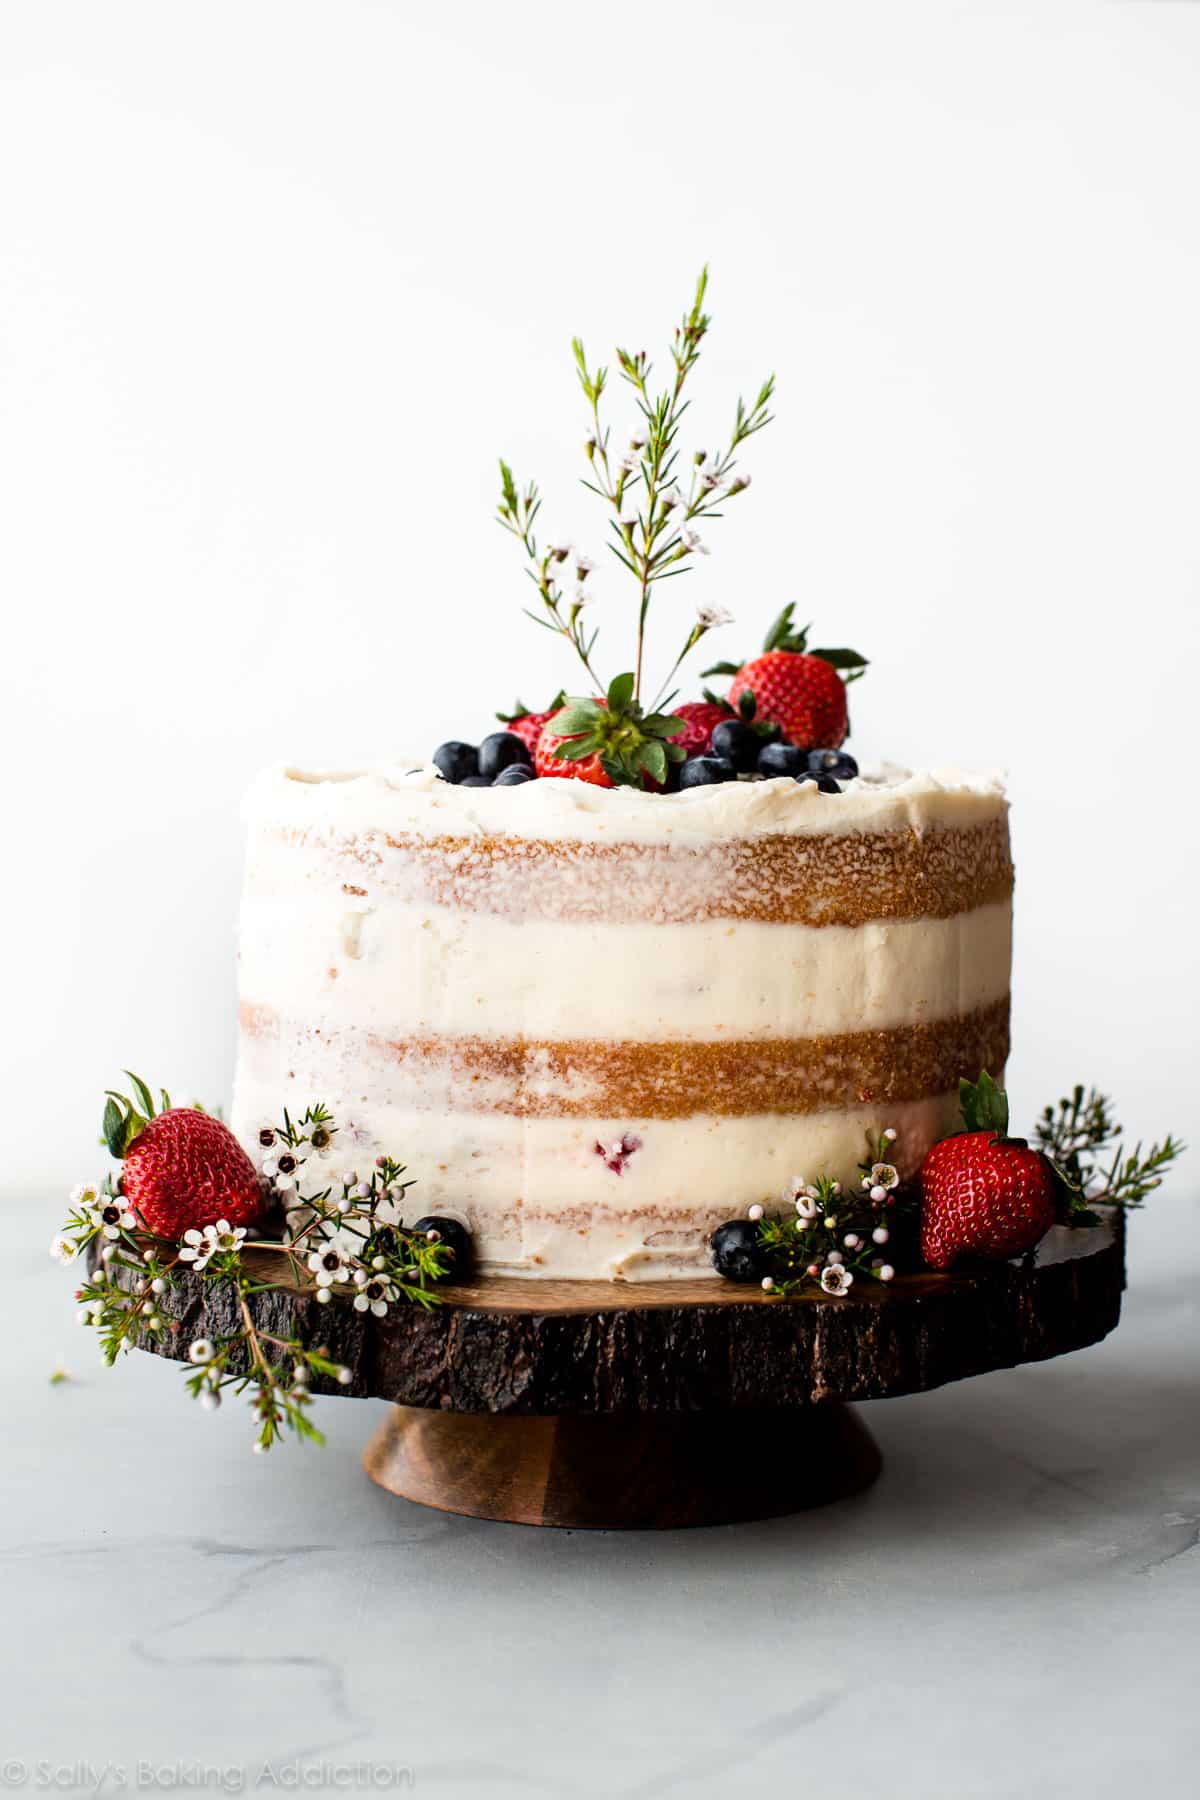
Learn how to make a beautiful naked cake with fresh berries and vanilla buttercream. This chic cake decorating style is much simpler than it looks. Follow my success tips and watch the helpful video tutorial to create your own naked cake.
Today we’re baking, designing, and styling naked cakes. I’m sharing my tips for decorating a naked cake, a video showing you how, the vanilla cake recipe I used, plus plenty of inspiration for you to get started. There’s a lot of ground to cover, so let’s get right to it!
Vanilla Naked Cake Details
- Yield: 3-layer 9-inch cake
- Style: semi-naked / naked cake
- Skill level: intermediate (but approachable)
- Best for: celebrations, weddings, birthdays
- Frosting: vanilla buttercream
What Is a Naked Cake?
A naked cake is a layered cake with minimal frosting on the outside, allowing the cake layers to show through. This simple decorating style creates a rustic yet elegant look, making it popular for weddings, birthdays, showers. It’s also easier to assemble and decorate than fully frosted layer cakes, making it a great choice for beginner bakers.
Milk Bar owner Christina Tosi is credited with starting the trend back in 2013 when she began highlighting the cake layers, instead of just the frosting. Now naked cakes are a bakery staple!
Unlike fully frosted layer cakes, naked cakes use only a thin layer of frosting around the sides—or sometimes none at all—which gives them a lighter taste and a rustic-chic minimalist appearance.
What I love about the style is that you have creative control. You can decorate the naked cake in your own unique way, which makes this recipe 100x more fun.
There are 2 Types of Naked Cakes
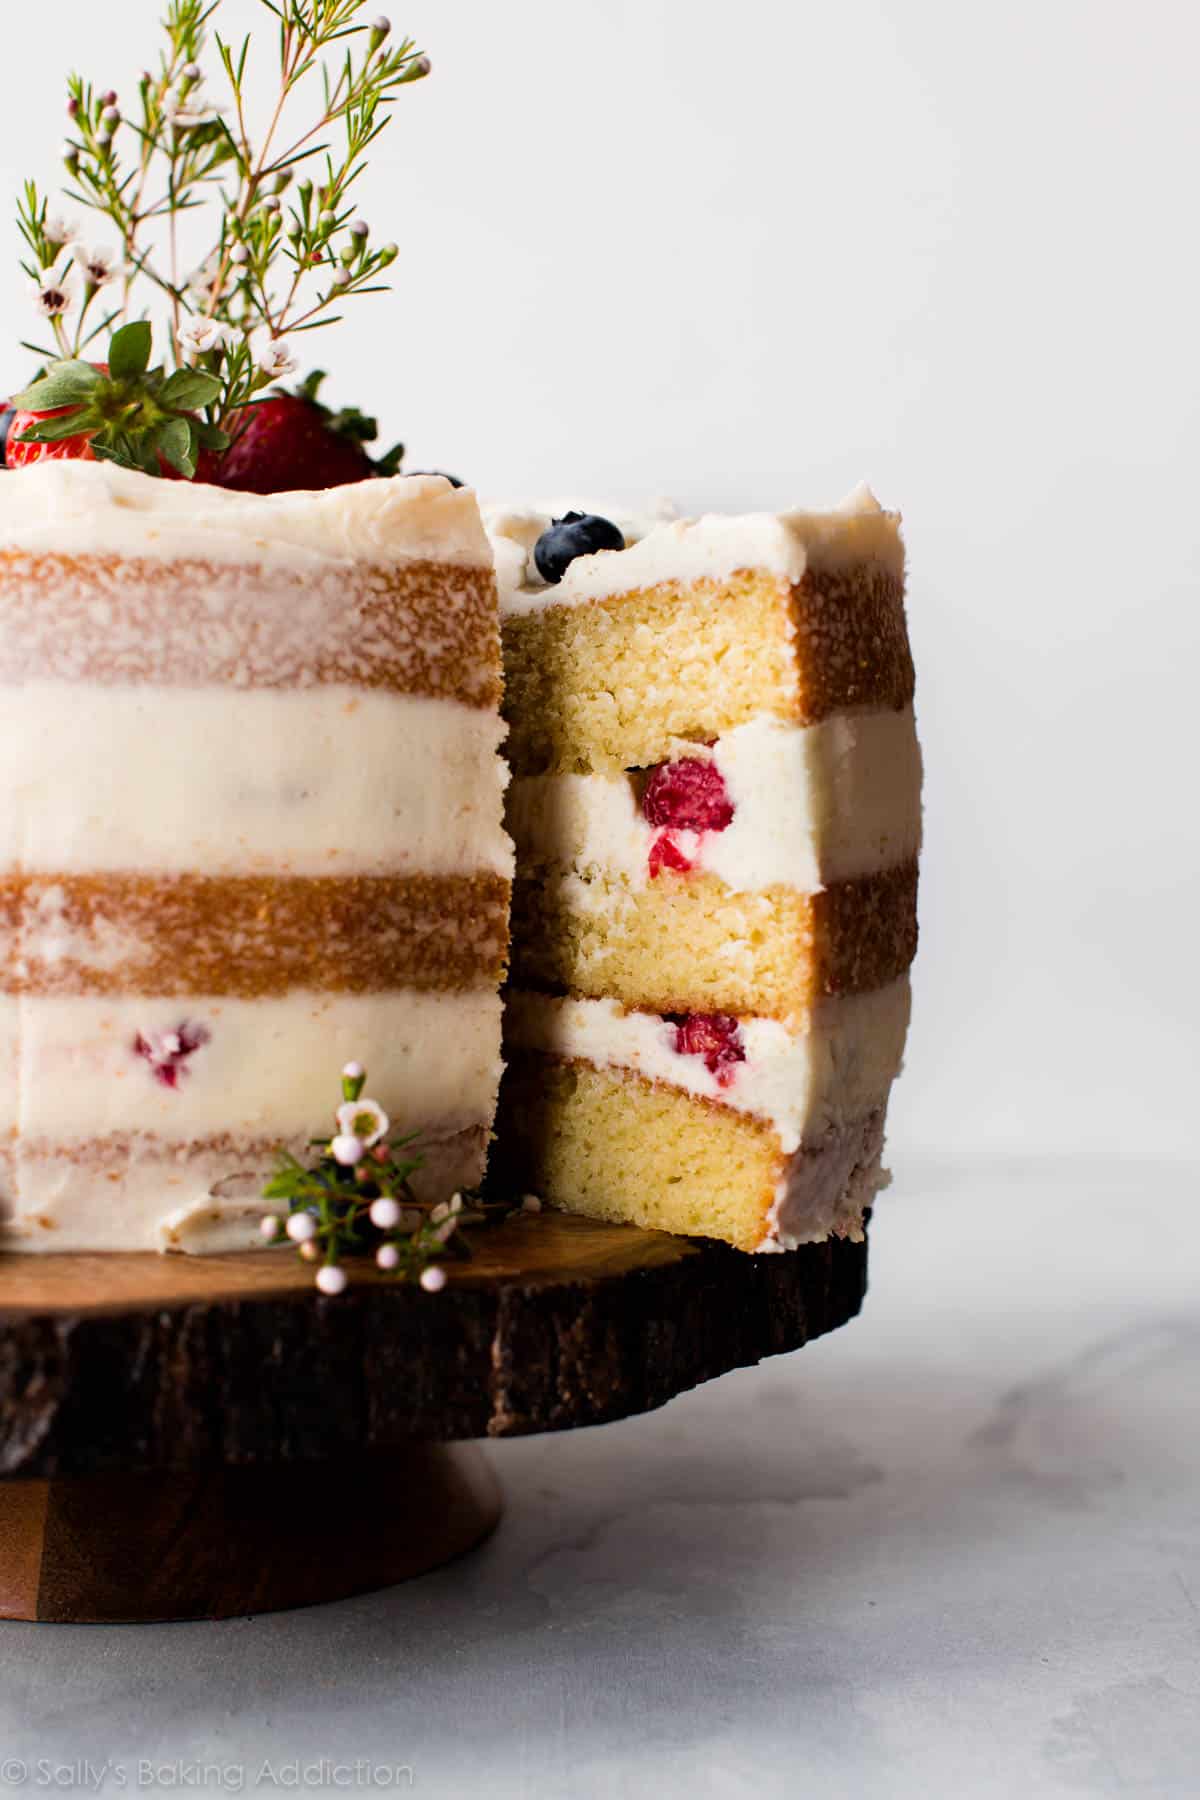
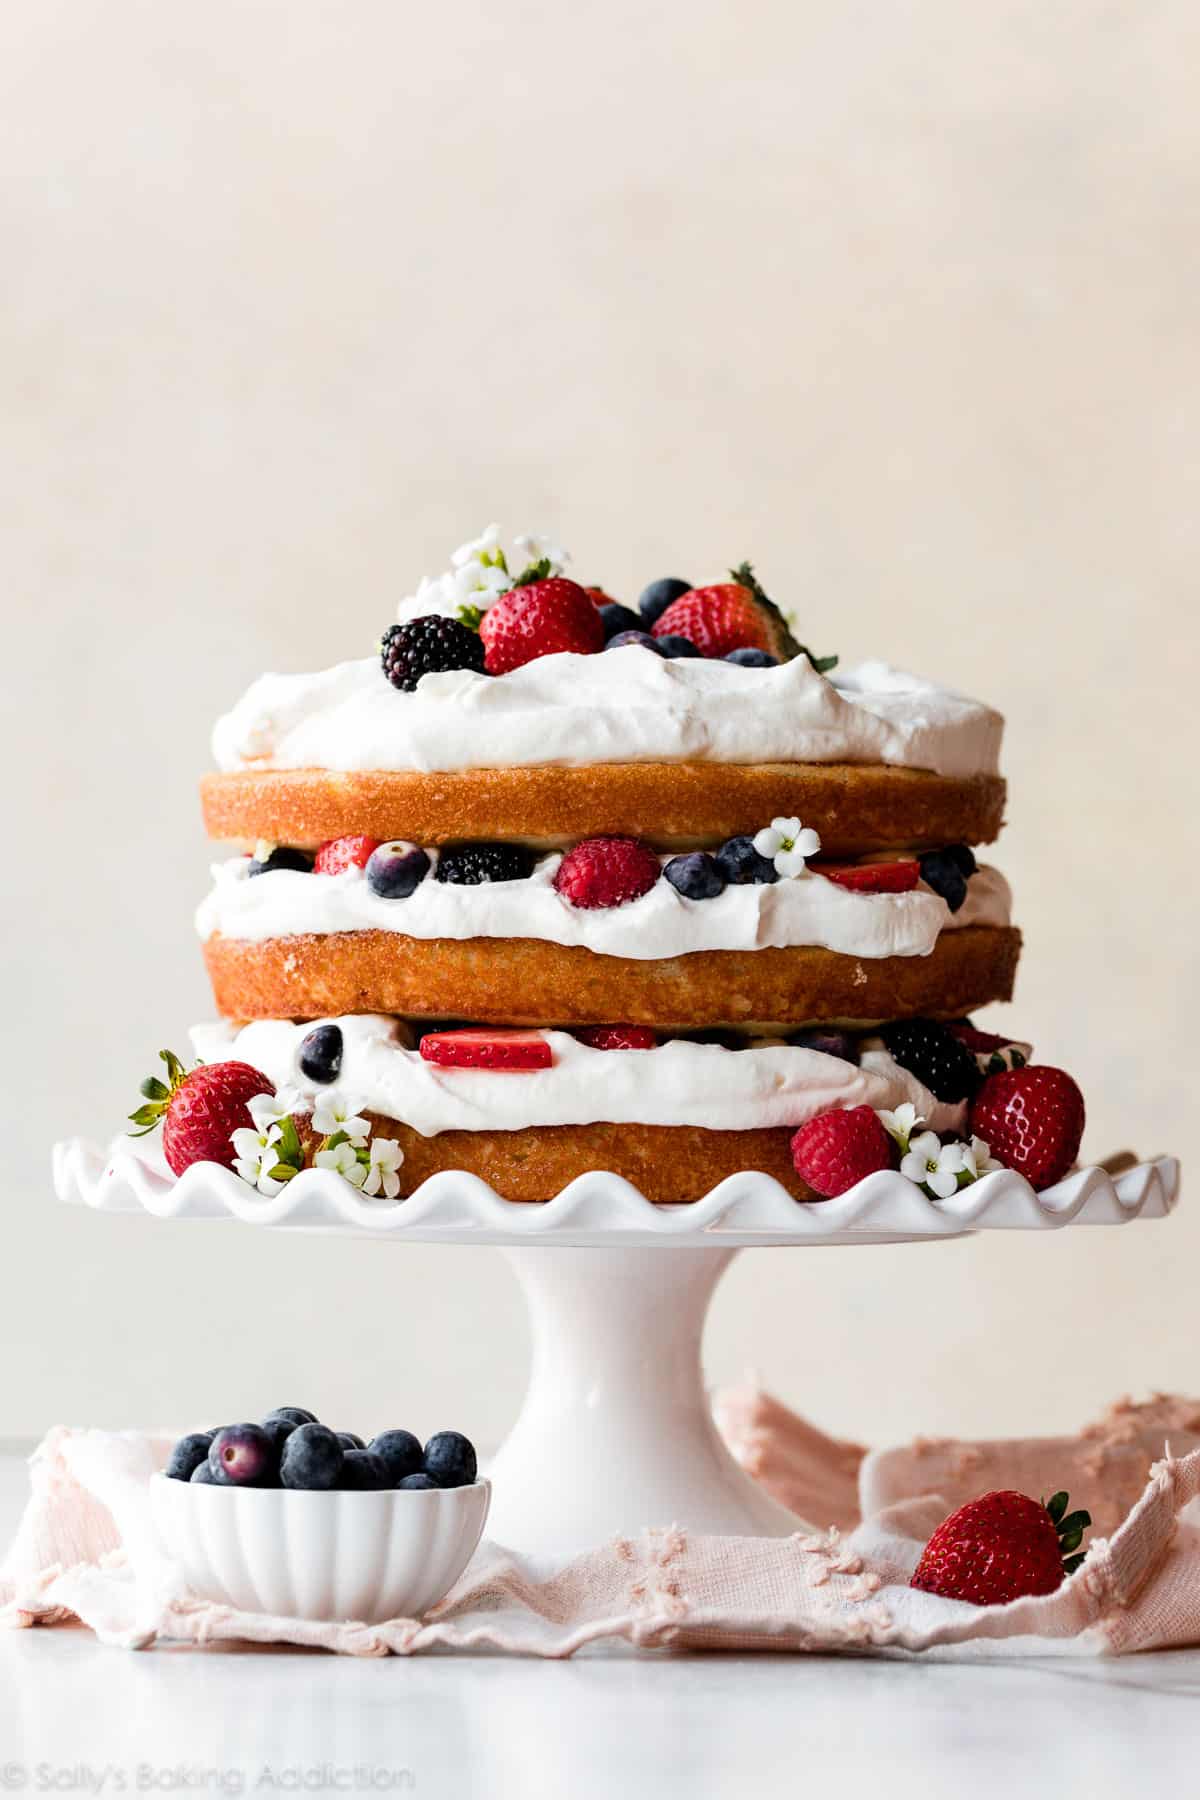
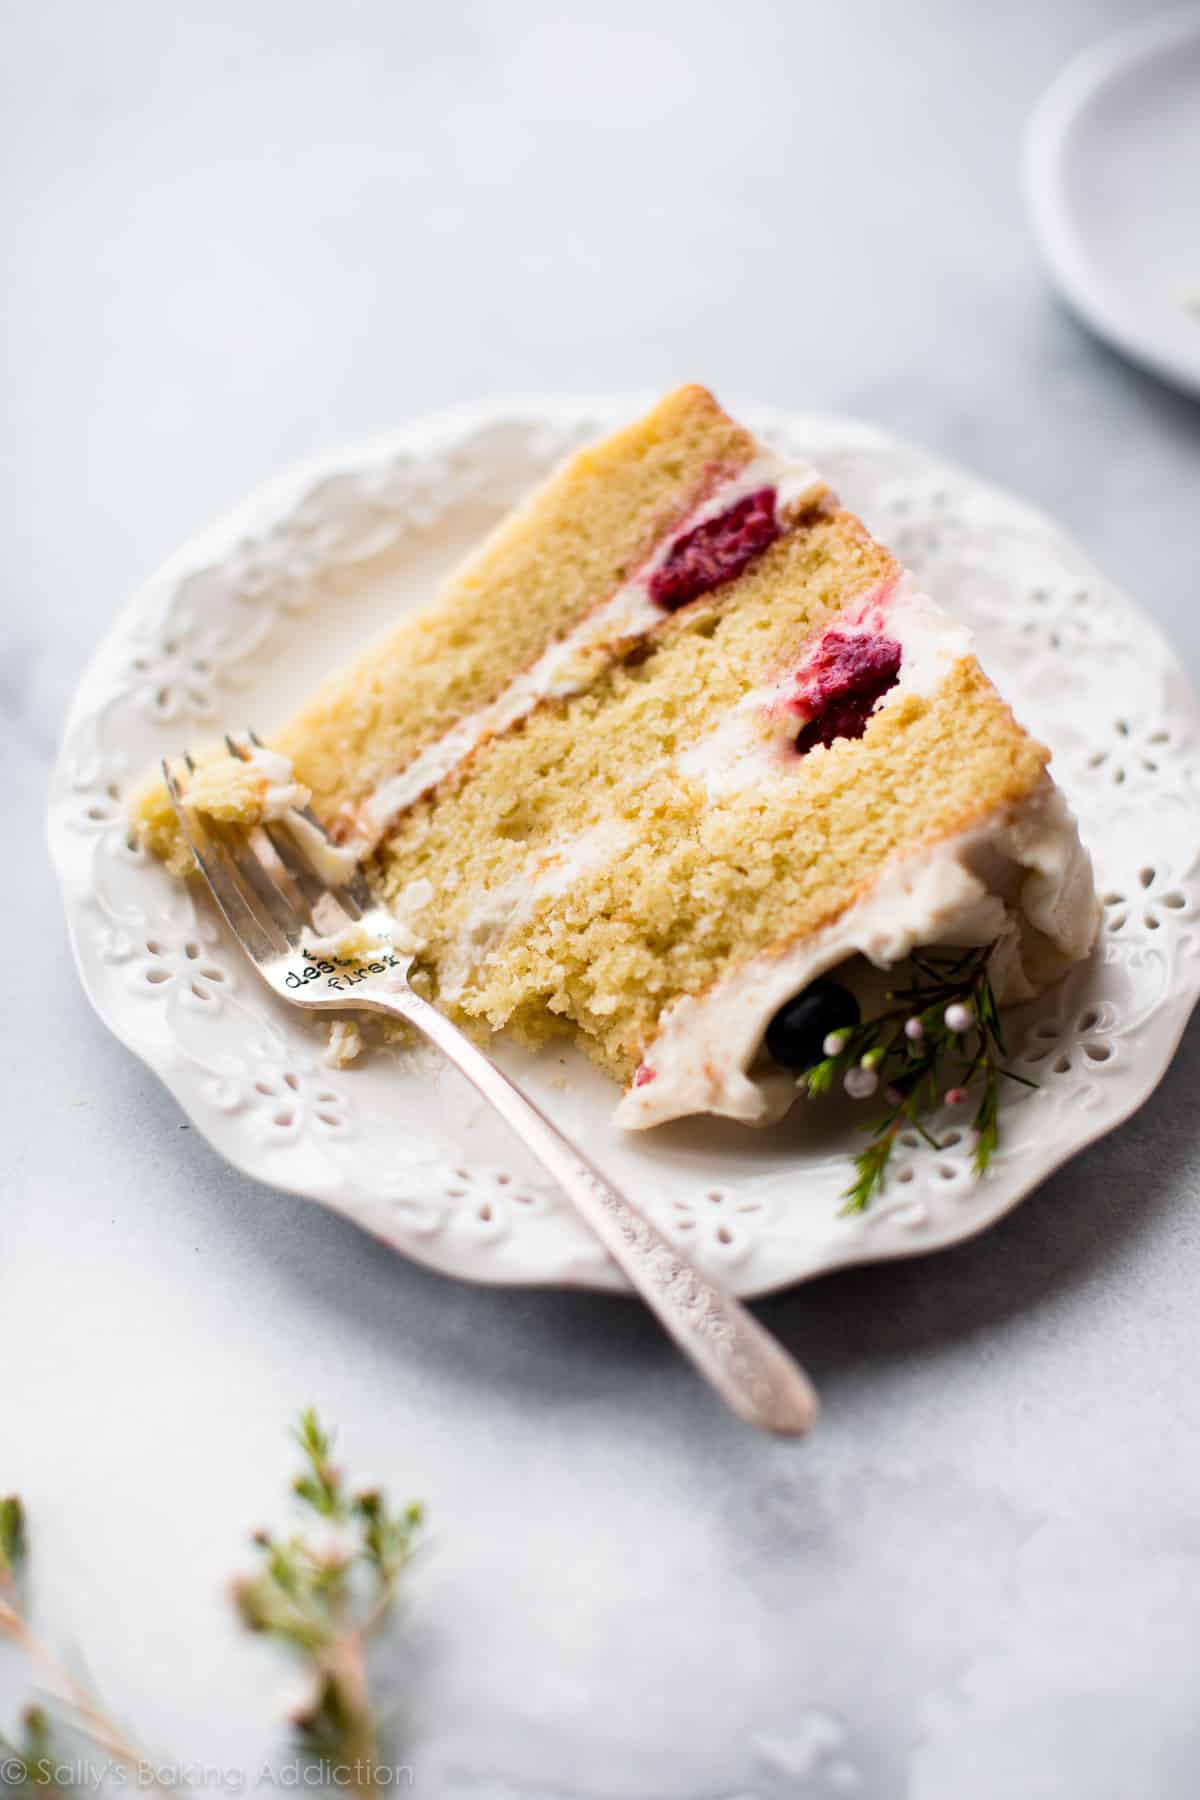
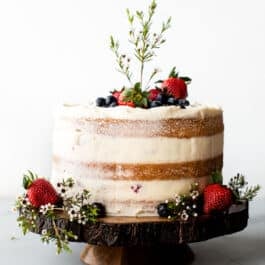
There are 2 types of naked cakes. The cake in today’s photos is called a semi-naked or “half-dressed” cake. There’s a minimal amount of frosting swiped around the sides. So in other words, a semi-naked cake is a crumb-coated cake. Or you can simplify the design even further with a true naked cake. This means the sides of the cake are bare, like my fresh berry cream cake. (Pictured below.)
Both styles are simple, approachable, and beautiful.
Overview: How to Make a Vanilla Semi-Naked Cake
Let’s focus on a semi-naked cake because that’s how I decorated the cake in today’s recipe.
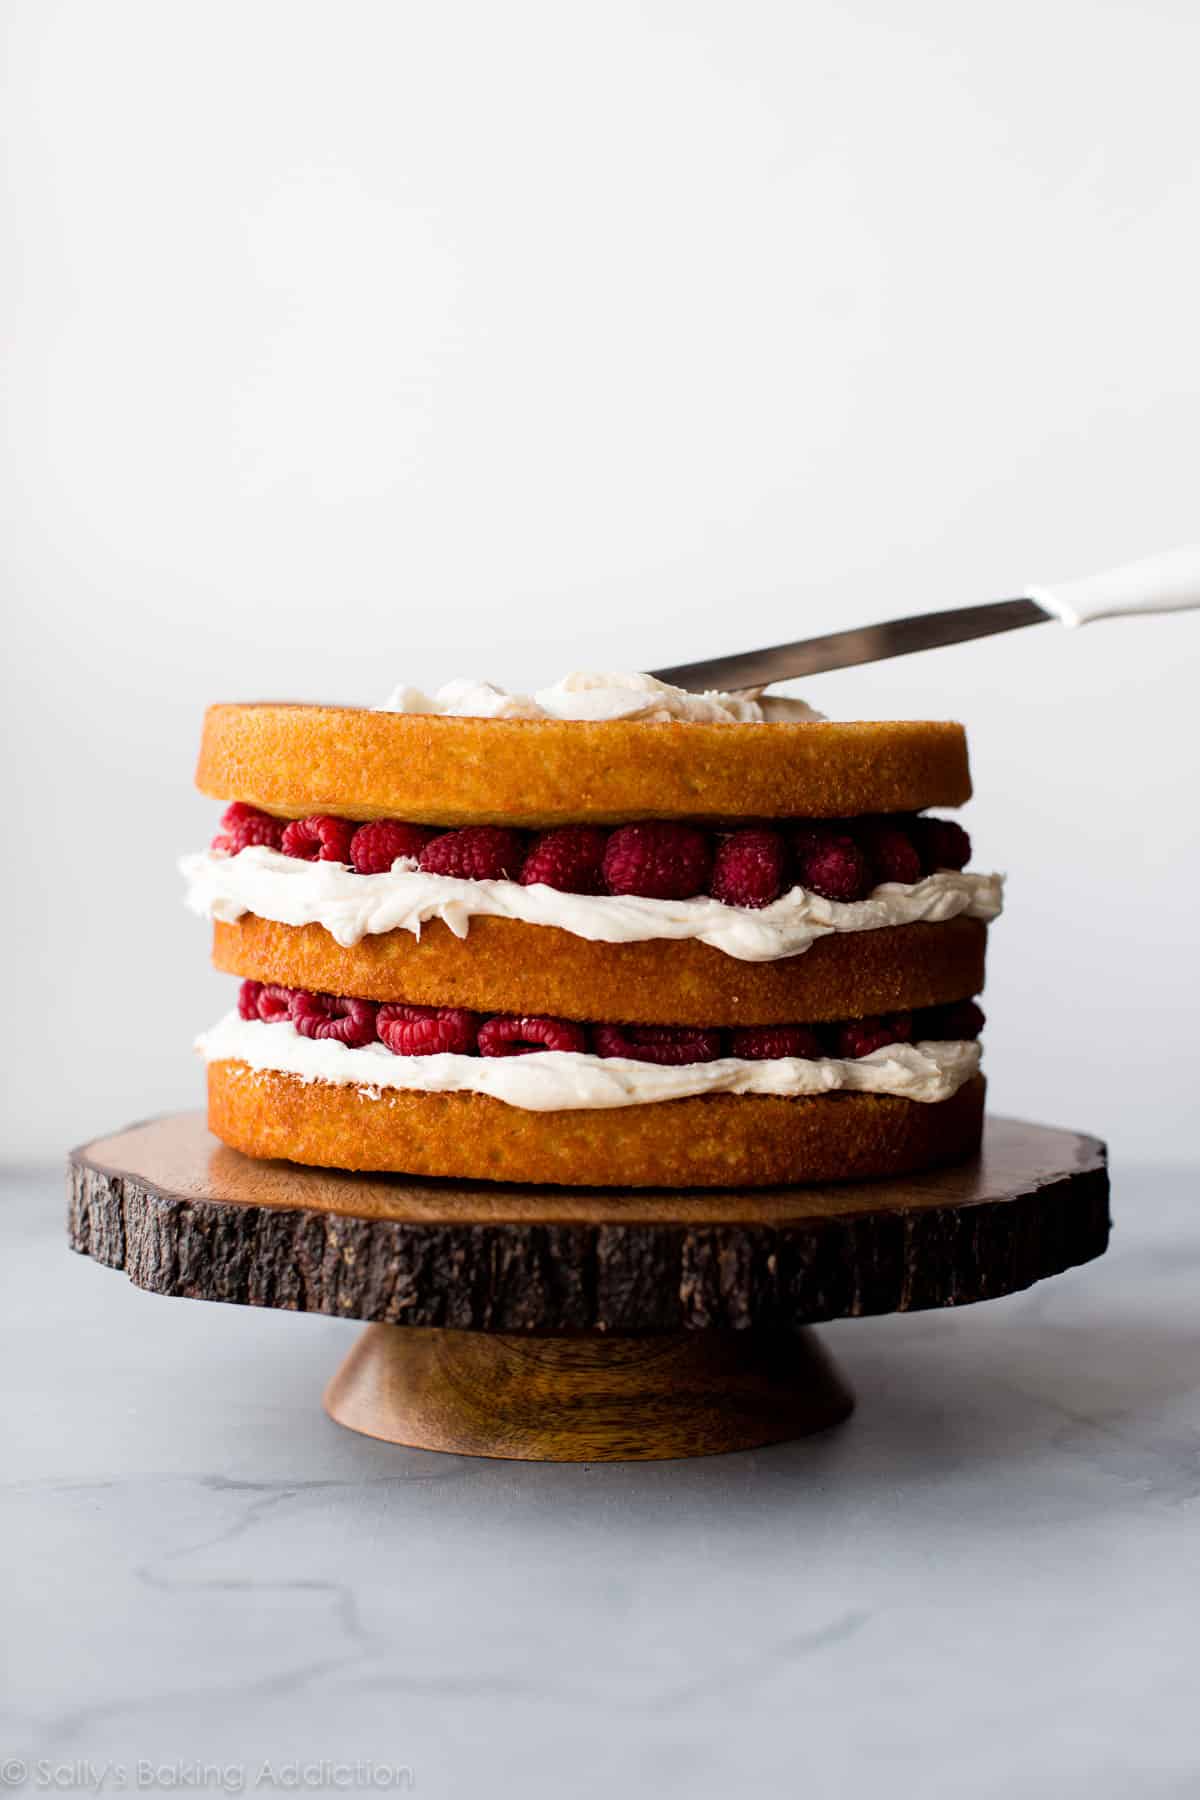
- Make the cake. To begin, you’ll need a layer cake. You can use any of my layer cake recipes, the vanilla layer cake recipe below, or any layer cake recipe you love. The vanilla cake recipe I include below is similar to my vanilla cake recipe, but it has more structure to support the naked cake decorating style. Cake recipes that yield three or four layers provide enough height to work with, but you can easily decorate a two-layer cake this way. Tiered cakes are great too—like my homemade wedding cake.
- Add berries. I dotted fresh raspberries between my cake layers. Admittedly, I only dotted them around the edges because I ran out of raspberries. But I love how they peek out the sides. The fresh raspberries also provide a lovely texture variation. If you decide to do this as well, note that the raspberries will leak some juice around the edges after a day or so. I would leave the berries out if you’re making this cake in advance for a party or celebration.
- Frost the cake. Vanilla buttercream is my favorite for the half-dressed cake style. It’s simple and shows off the semi-exposed cake layers as well as the cake’s decorative pieces. The frosting recipe below is similar to my vanilla buttercream recipe, only with a higher ratio of ingredients to make a larger amount of frosting.
5 Success Tips for Homemade Naked Cakes
- Make a plan. Think about what style of cake you want—naked or semi-naked—as well as how many layers you want your cake to be, and if you’ll want extra frosting for decorative piping on top. This will determine how much frosting you need.
- Prepare your cake pans appropriately. Use quality cake pans and grease them well (I use nonstick spray) so the cakes release easily. I always use parchment paper rounds to line my greased cake pans, and then spray those as well. For even layers, ensure each pan has an equal amount of batter. The easiest and most accurate way to do this is to use a kitchen scale. Place your cake pan on top and begin pouring batter into the pan—repeat for all pans, making sure each pan weighs the same.
- Level your cakes. Level off the top of each cake layer so both sides are flat. This is important because flat and even layers add stability to your finished cake. You can use a cake leveler or large serrated knife. I always use my serrated knife. You can watch me do this in my video tutorial for how to assemble layer cakes.
- Keep it simple. Make it easy on yourself! My recipe and instructions are simple and straightforward. I’ve seen many naked cake recipes that call for a soak in simple syrup to prevent it from drying out. You can absolutely take this route, especially if you’re making a true naked cake, but I don’t find it necessary if your cake is moist to begin with (like my vanilla cake below). Instead of piping frosting between each cake layer, use an icing spatula to spread the frosting—another timesaver and simplified step. The frosting recipe below yields about 4.5 cups (1080g). Use 1.5 cups (360g) between each layer and 1.5 cups on top & around the sides.
- The refrigerator is your best friend. Always chill your naked cake in the refrigerator for a few hours before slicing and serving. Why? This stabilizes all of your hard work! It helps the frosting adhere to the cake, as well as ensures a neater slice. Then you can set the cake out at room temperature for your party or celebration.
3 Helpful Tools for Decorating
Here are a few tools I find especially helpful for decorating a semi-naked cake.
- Straight spatula: A lot of cake decorators use an offset spatula to apply frosting on a cake, but I prefer a straight spatula. Maybe it’s the way my hands work, but it’s just easier for me to use.
- Bench scraper: Use this for running around the sides of the cake to smooth out the frosting.
- Cake turntable: This is optional. I did NOT use it for the cake pictured today, but you can watch me use it in the video tutorial. Transfer your decorated cake to a cake stand by using these cake circles—I use one in the video.
Mix and Match Cake and Frosting Recipes
Mix and match the below cake flavors and frostings to create your own unique naked cake.
Cake Flavors: These cakes are all pretty moist, so I wouldn’t worry about them drying out—especially if you choose the semi-naked/crumb coat look.
- Vanilla cake (below)
- Chocolate cake
- German chocolate cake
- Strawberry cake
- Banana layer cake
- Lemon cake
- Carrot cake
- Red velvet cake
- Spice cake (see recipe note for layer cake)
- Pumpkin cake (see recipe note for layer cake)
Frosting Flavors
- Vanilla buttercream (below)
- Cream cheese frosting
- Chocolate buttercream
- Strawberry buttercream
- Lemon buttercream
- Peanut butter frosting
- Rainbow chip frosting
- Brown butter cream cheese frosting
Helpful tip: Freeze any leftover frosting for up to 3 months and thaw in the refrigerator for next time.
Naked Cake Decoration Ideas
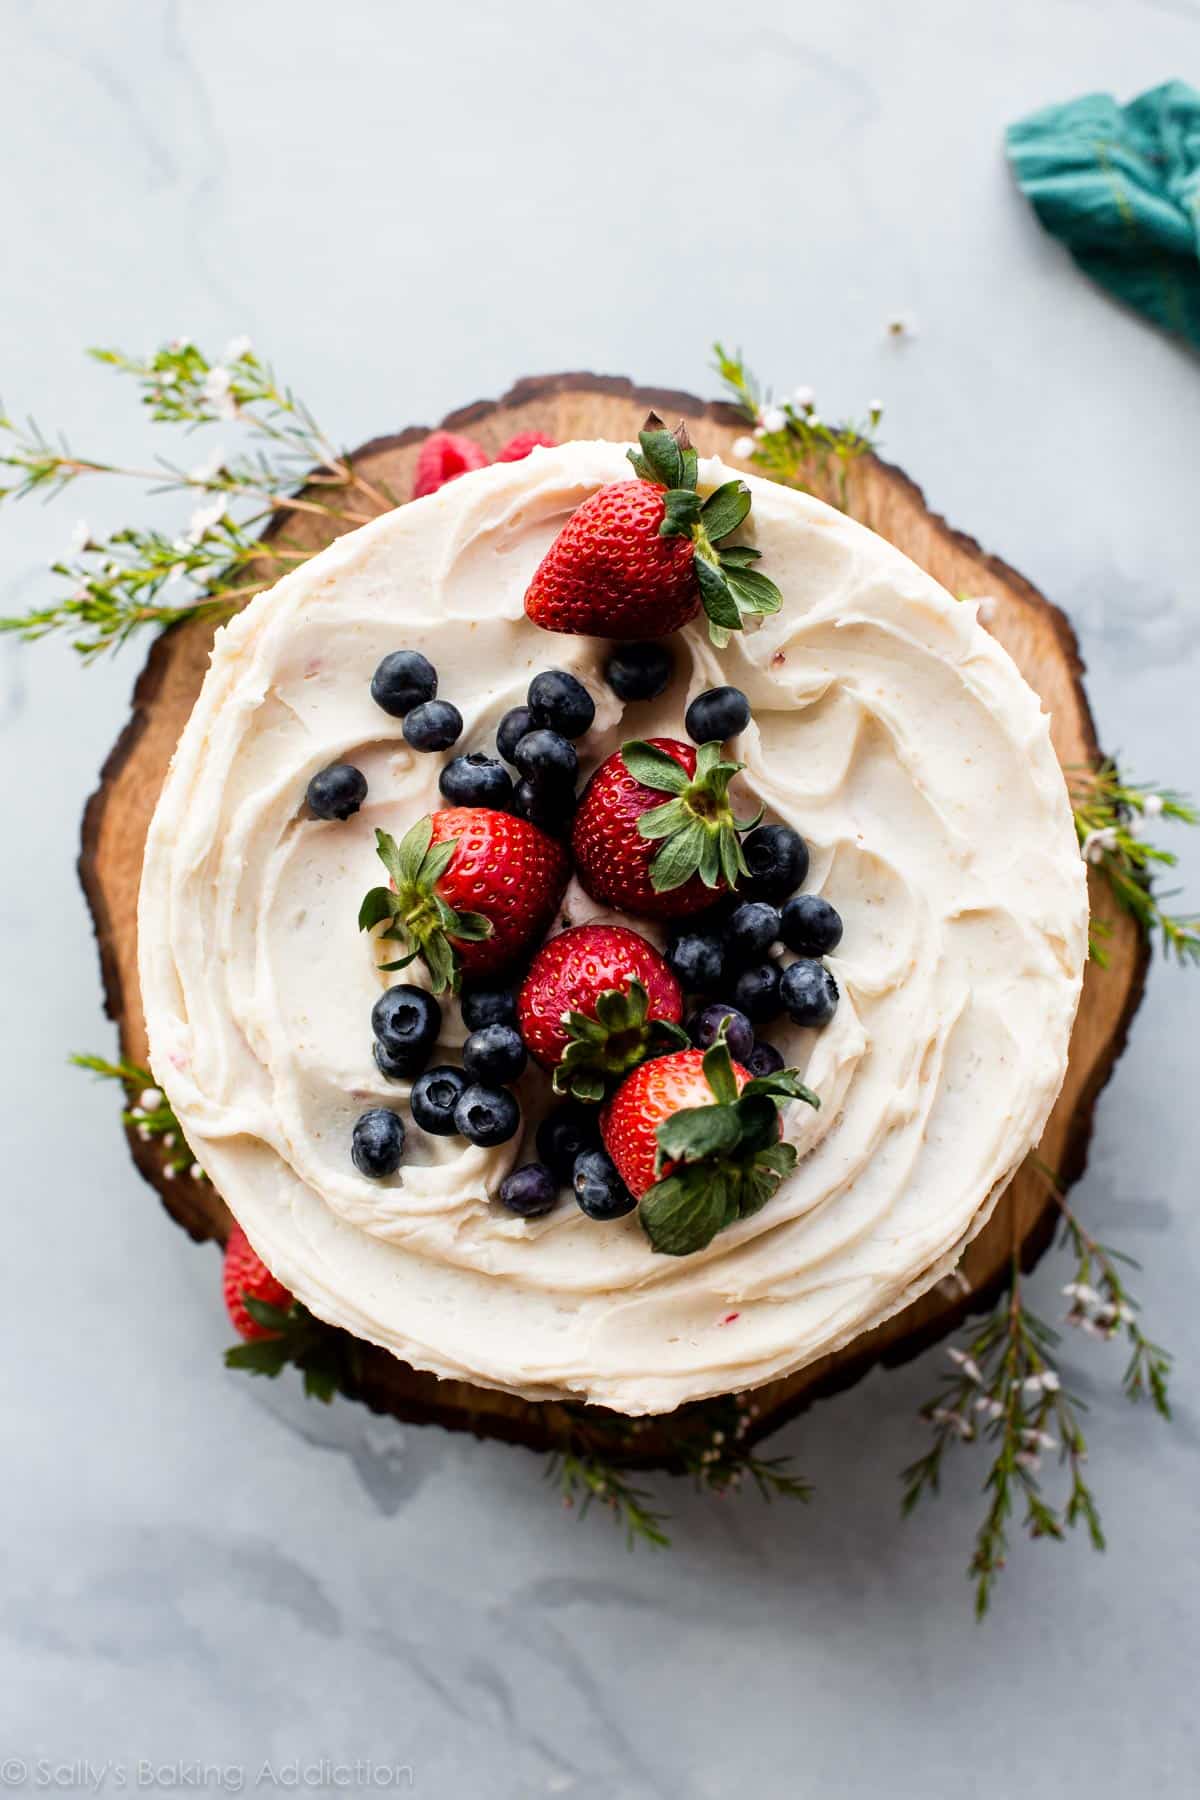
I recommend starting simple, then adding from there. The possibilities are endless! Here are some of my favorite decorations to use:
- Fresh flowers. Use flowers that haven’t been sprayed with pesticides. Avoid strong-smelling flowers as the smell may linger on the cake. And if you can find edible flowers, that’s even better!
- Fresh berries or fruit
- Smaller sweet treats like candies, cookies, meringues, and chocolates
- Candied citrus slices
- Candied pecans
- Fresh herbs, such as mint sprigs
- Cinnamon sticks
- Sugared cranberries
- Sprinkles
- Chocolate or white chocolate curls
Of course you’ll need a cake stand to show off your stunning masterpiece! Here are a few I love: wood slice cake stand (similar to what I have), white cake stand, and marble cake stand.
Get creative, let your inner cake artist shine, and most of all… have fun!
A naked cake is a layer cake with little to no frosting on the outside, leaving the layers partially or completely exposed.
No, not at all. It’s often easier than fully frosted cakes because it requires less precision.
Yes, and here is how I recommend doing so. The cake layers can be baked, cooled, and covered tightly at room temperature 1 day ahead. Likewise, the frosting can be prepared then covered and refrigerated 1 day in advance. Assemble and frost the cake the next day shortly before you are ready to serve. The frosted cake can be refrigerated for up to 1 day. For longer storage, see recipe Notes for freezing details.
You can cover and store leftover cake at room temperature for up to 1–2 days or in the refrigerator for up to 1 week. You can also freeze leftover cake slices for up to 3 months.


Vanilla Naked Cake
- Prep Time: 45 minutes
- Cook Time: 25 minutes
- Total Time: 6 hours
- Yield: 12 servings
- Category: Cake
- Method: Baking
- Cuisine: American
Description
This naked cake is simply stunning with fresh berries, vanilla cake, and vanilla buttercream.
Ingredients
- 3 and 3/4 cups (443g) sifted all-purpose flour* (spooned & leveled)
- 2 teaspoons baking powder
- 3/4 teaspoon baking soda
- 1 teaspoon salt
- 1 and 1/2 cups (340g) unsalted butter, softened to room temperature
- 2 cups (400g) granulated sugar
- 5 large eggs, at room temperature
- 1 Tablespoon pure vanilla extract (yes, Tbsp!)
- 1 and 3/4 cups (420g/ml) buttermilk, at room temperature*
- optional: 1–2 cups (120–250g) fresh raspberries (or other berry, see Note)
Vanilla Buttercream
- 1 and 1/2 cups (340g) unsalted butter, softened to room temperature
- 5.5–6 cups (660–720g) confectioners’ sugar
- 5–6 Tablespoons (75–90g/ml) heavy cream
- 1 teaspoon pure vanilla extract
- 1/4 teaspoon salt
- optional garnishes (see post above for inspiration!)
Instructions
- Preheat oven to 350°F (177°C). Grease three 9-inch round cake pans, line with parchment paper rounds, then grease the parchment paper. Parchment paper helps the cakes seamlessly release from the pans. (If it’s helpful, see this parchment paper rounds for cakes video & post.)
- Make the cake: In a large bowl, whisk the flour, baking powder, baking soda, and salt together. Set aside. Using a handheld or stand mixer fitted with a paddle or whisk attachment, beat the butter and sugar together on medium-high speed until smooth and creamy, about 3 minutes. Scrape down the sides and bottom of the bowl with a silicone spatula as needed. On medium-high speed, add 1 egg at a time, beating well after each addition. Beat in the vanilla extract. Scrape down the sides and bottom of the bowl as needed.
- With the mixer on low speed, add the dry ingredients in three additions, alternating with the buttermilk, beginning and ending with the dry ingredients, and mixing each addition just until incorporated. Do not over-mix. The batter will be smooth, velvety, and slightly thick.
- Pour the batter evenly into the prepared pans and smooth the tops. For even cake layers, use a kitchen scale and weigh the cake pans for accuracy. You should have around 8 cups of batter total (a little over 1800g), so each cake pan should have about 2 and 2/3 cups (a little more than 600g) of batter.
- Bake for 25–26 minutes or until the cakes are baked through. To test for doneness, insert a toothpick into the center of the cake. If it comes out clean, it’s done. Allow cakes to cool completely in the pans set on a cooling rack. The cakes must be completely cool before frosting and assembling.
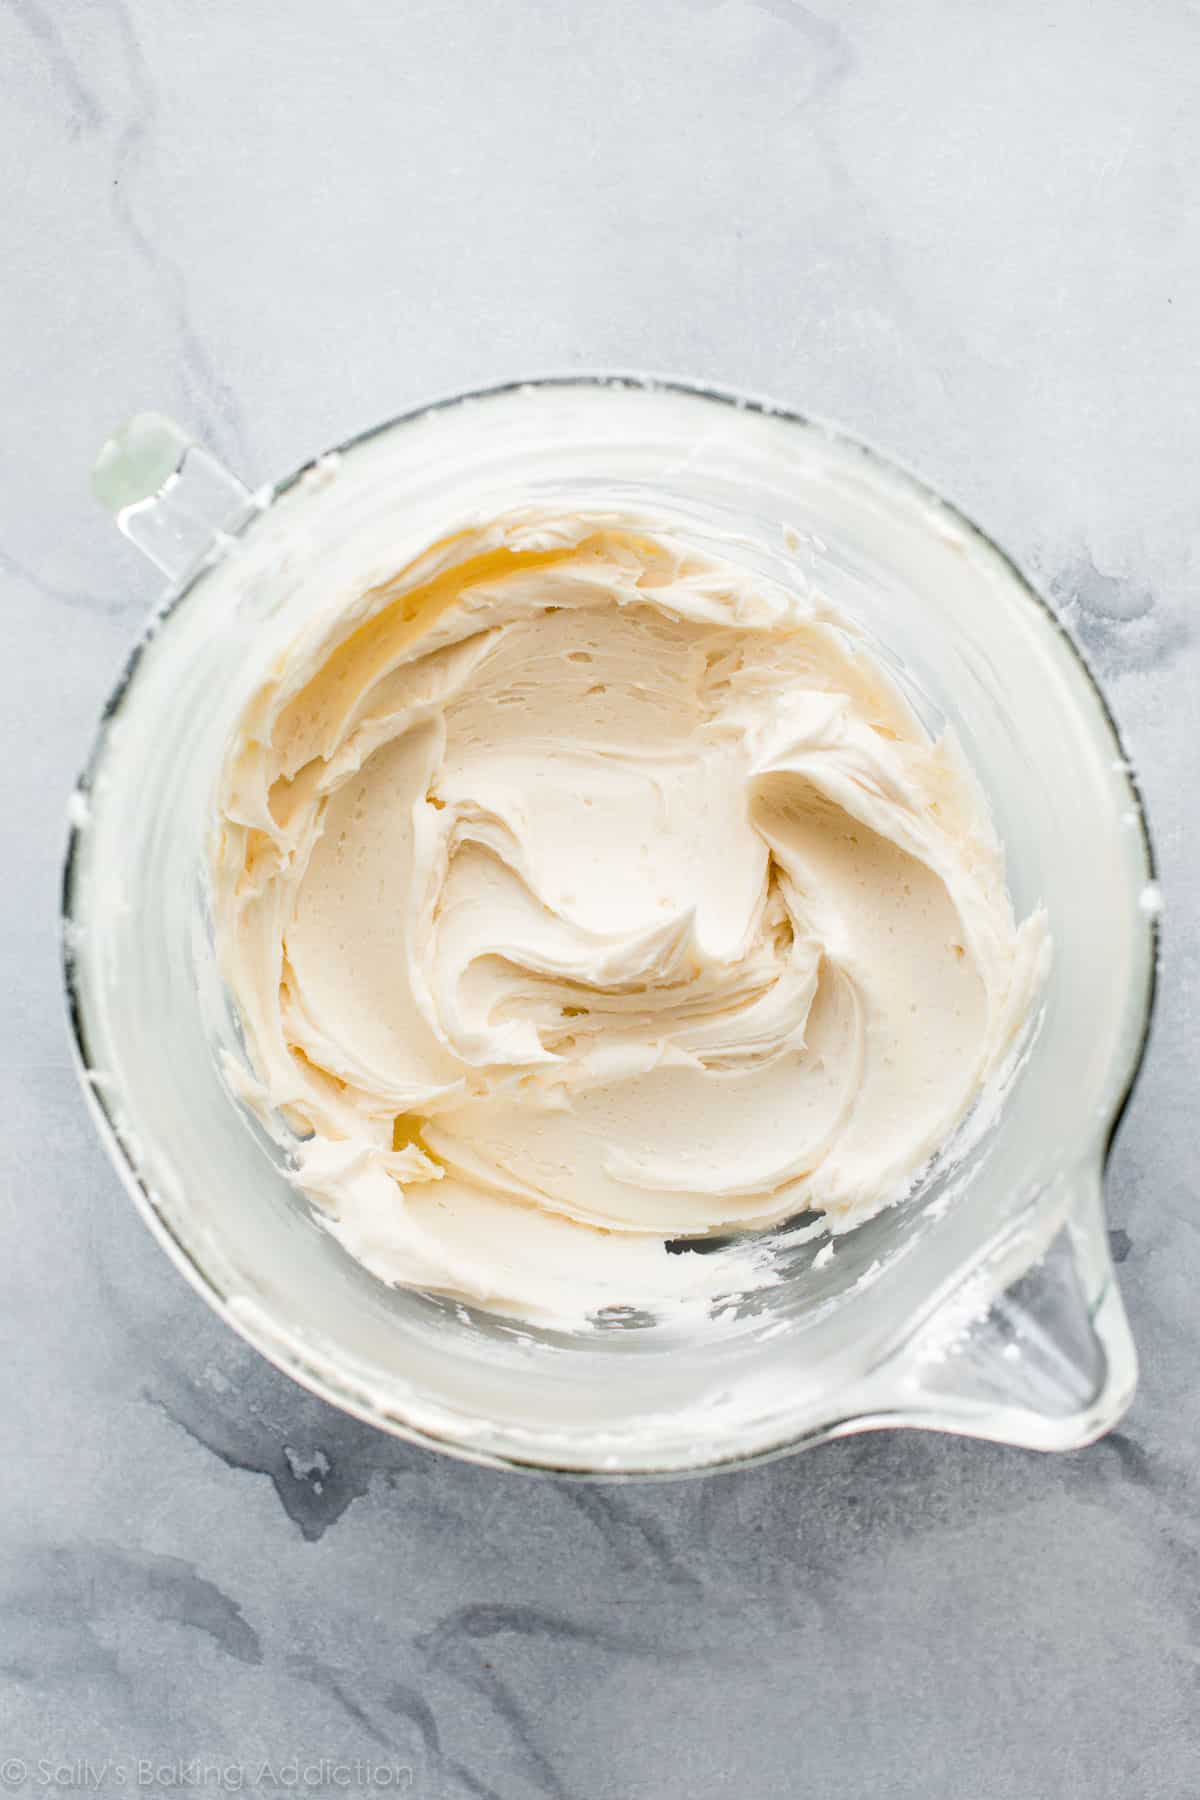
- Make the frosting: In a large bowl using a handheld mixer or stand mixer fitted with a whisk or paddle attachment, beat the butter on medium speed until creamy—about 2 minutes. Add 5 and 1/2 cups (660g) confectioners’ sugar, 5 Tablespoons (75g) heavy cream, vanilla extract, and salt with the mixer running on low speed. Gradually increase to high speed and beat for 3 full minutes. Add 1/2 cup (60g) more confectioners’ sugar if frosting is too thin, 1 more Tablespoon cream if frosting is too thick, or a pinch more salt if frosting is too sweet. Yields about 4.5 cups (1080g) of frosting.
- Assemble and decorate the cake: Watch the video for a tutorial on assembling and decorating this naked cake. First, using a large serrated knife, slice a thin layer off the tops of the cakes to create a flat surface. Discard (or crumble over ice cream!). Place 1 cake layer on your cake stand, cake turntable, or serving plate. Spread 1 and 1/2 cups (360g) of frosting evenly on top. If using, dot half of the raspberries around the rim. Flatten them down into the frosting as best you can so the cake layer on top is sturdy. Top with 2nd cake layer and evenly cover the top with another 1 and 1/2 cups of frosting and more (flattened!) raspberries around the rim. You can sprinkle a few leftover raspberries in the center, too. (Like I did in the video.) Top with the third cake layer. Spread the remaining frosting on top and all around the sides using an icing spatula. Use a bench scraper to smooth out the frosting on the sides of the cake. If you’re making a fully naked cake, spread the remaining frosting on just the top of the cake. If you have leftover frosting, you can freeze it for up to 3 months.
- Decorate the cake with garnishes.
- Refrigerate the cake for at least 2–3 hours or up to 1 day before slicing and serving. If chilling for more than a few hours, loosely cover with plastic wrap (or the lid of a cake carrier) after 1 hour of refrigeration. (The frosting will “set” after about 1 hour and the plastic wrap won’t really ruin your frosting at that point.) And if you’re chilling for more than a few hours, I suggest decorating with garnishes right before serving, so they look fresh.
- Cover and store leftover cake at room temperature for up to 1–2 days or in the refrigerator for up to 1 week.
Notes
- Make Ahead Instructions: The cake layers can be baked, cooled, and covered tightly at room temperature overnight. Likewise, the frosting can be prepared then covered and refrigerated overnight. Assemble and frost the cake the next day when you are ready to serve. The frosted cake can be refrigerated for up to 1 day—see step 8. The frosted cake can also be frozen for up to 2–3 months. Thaw overnight in the refrigerator and bring to room temperature before serving.
- Special Tools (affiliate links): Electric Mixer (Handheld or Stand) | Glass Mixing Bowls | Whisk | 9-inch Round Cake Pans | Icing Spatula | Bench Scraper | Cake Turntable | Cake Carrier (for storage)
- Flour: Sift flour before measuring.
- Buttermilk: If you don’t have buttermilk, you can make a DIY buttermilk substitute. Add 1 Tablespoon (15g/ml) of white vinegar or lemon juice to a liquid measuring cup. Then add enough whole milk to the same measuring cup until it reaches 1 and 3/4 cups (420g/ml). (In a pinch, lower-fat or nondairy milks work for this soured milk, but the cake won’t taste as moist or rich.) Stir it around and let sit for 5 minutes. The homemade “buttermilk” will be somewhat curdled and ready to use in the recipe.
- Raspberries: The raspberries will leak some juice around the edges after a day or so. Leave the berries out if you’re making this cake in advance for a party or celebration.
- Room-Temperature Ingredients: All refrigerated items should be at room temperature so the batter mixes together easily and evenly. Learn more about why room-temperature ingredients are important.
- I used this cake recipe for my checkerboard cake. The cake layers are slightly thicker here because this cake is 3 layers instead of 4. If you want to make the naked cake as a 4-layer cake, divide the batter evenly among 4 cake pans and bake for 23–24 minutes or until a toothpick comes out clean.


Reader Comments and Reviews
Hey Sally! I’m making my nieces birthday cake. I only have one 3 inch pans and I can’t get more as the stores are closed. If I leave the mixture out for too long will it get ruined? – Thank you
Hi Nikki, Do you mean your pan is 3 inches high but still 9 inches in diameter? You will still need to divide this batter into thirds – there is about 8 cups of batter total, so each layer will be 2 and 2/3 cups. You can leave some batter out at room temperature until your pan is ready but you may notice the longer the batter sits out the less it will rise (as the leaveners are activated as soon as the batter is mixed together. If you would like to try a smaller cake I recommend my 2 layer White Cake recipe.
Hi Sally,
I generally prefer a denser cake but also wanted to make it into a funfetti cake- would you recommend this (and just add sprinkles) over your vanilla cake or even funfetti cake recipe?
Thank you in advance – I’ve come to your site for years and have never been disappointed!
Either work wonderfully. The vanilla cake is a bit lighter in texture. You can add 1/2 – 3/4 cup sprinkles to either batter.
I made this cake yesterday for my daughters birthday. It was a huge hit. I will be trying the lemon cake next. Do you think raspberries pair well with lemon ? Thanks for an awesome and easy to follow recipe.
I’m thrilled the cake was a hit, Laurie! I love lemon and raspberries together. I pair lemon cake with raspberry frosting in these cupcakes.
Hi Sally! I am wanting to make this cake as a 2 tier cake- 8 in. and 10 in. tiers. If I double the recipe, will that be enough to make those tiers, 3 layers each?
I also only have 1 of each size pan. Could I leave the batter out at room temp, while waiting for the other layers to cool? Or should I keep it in the fridge?
Hi Sarah, I don’t recommend doubling the batter as it will be too much to work with and you will likely under or over mix which leads to a dense cake. You can see how I made a 2 tier cake in my post for a Simple Wedding Cake. To use other pan sizes I suggest you take a look at my post on Cake Pan Sizes and Conversions.
Hi Sally. Thank you so much for this wonderful recipe. I am going to be making my daughter’s wedding cake in October, so having someone do all the really hard work for me is such a great help and really appreciated. I want to try your recipe and another one I’ve found for a taste testing next week. I plan on making both recipes as two 6 inch x 2 layer cake. Maths was never my strong point so here’s my reasoning for the change in the recipe amounts. I have divided each ingredient by 3 to give the amount for each layer of your 3×9 cake. Then I halve each ingredient to give me the amount of each ingredient needed for a single layer of a 6 inche cake working on the basis of using half the amount going from 9′ to 6′. Does that work? When I worked out the area of the 9 and 6 using the radius squared x pi, a 6 inch cake is actually 2.25 smaller than a 9 inch cake. So, would you use these more accurate values or just go for halving the 9 inch recipe? I really hope that makes sense. Thanks again.
Hi Clare! I’m just seeing your question now and would love to help. To truly test a recipe to see how it turns out for an event, I strongly recommend making the cake as written. Reducing the batter down will definitely impact how the cake turns out– a 6 inch cake simply won’t have the exact same texture as its 3 layer 9-inch cake origination. Does this make sense? You may also find my Cake Pan Sizes and Conversions post helpful, too!
Hi Sally,
Thank you for this detailed recipe and video which was so helpful! I made this cake for my daughters first birthday party yesterday and it was a HIT! All thanks to you!
ps SO happy for your family and your beautiful new addition! I have a rainbow baby of my own so I know how special this time is. Congratulations!
Rachel
Ohmystars…I was asked to make one of these cakes. Never even heard of them. This site made it possible. Used both recipes for the icing and the cake. My cake has a little more coverage, but the cake still pops through.
Hello Sally! I’m going to make this recipe next week for my mum’s birthday, and I’d like to switch the vanilla buttercream with the lemon one; should I use exactly the receipe that’s linked above or I’ll need more?
Thanks!!
Hi Chiara, If you are making a true naked cake then the lemon frosting will be enough. If you want more coverage feel free to increase to the ratios here and add in the lemon juice and zest.
I am making this cake for my daughters wedding in June. I made it for the first time a few weeks ago as my first trial run for a tasting. I made it with a lemon curd filling and a cream cheese icing. It was a HIT! EVERYONE loved it and it is now THE CAKE for the wedding. This will be my first cake to make for an event like this. I have had a baking company but I am a home baker. I am so excited to have found this recipe. Thank you for sharing!
Hi Sally!
First of all I want to thank you for all your recipes and tips! I have made several of your recipes and everything is amazing! I have also learned so much from your tips! So my question, I am making a 3 layer 10″ cake that will be frosted with swiss meringue buttercream. Would you recommend doing 1 + 1/2 the recipe? Or just have thinner layers? I’m just worried that the layers would be too thin. I want some good height! 🙂 also, I am trying to decide between this recipe and your vanilla cake recipe. Which one would be fluffier and more moist? And what is the main difference between the end results with both? I don’t have time to do a trial run or I would! Thank you for any help you can offer!
Hi Michelle! I’m happy to help. This cake and my vanilla cake are a little similar. The vanilla cake is lighter and fluffier, though. Either will work wonderfully. If you want some good height, it would be best to 1.5x either recipe to ensure your layers are nice and tall. (10 inch cakes are large!) Use a toothpick to test for doneness.
Hi, I’m attempting to do very similar to this later this week and have a similar cake stand. How did you transfer the cake from the cake board to the cake stand without ruining the frosting? I’m so nervous!
Hi Lisa, I use a cake round (the round piece of cardboard) under the cake. If you use one slightly larger than your actual cake, it’s very easy to just pick it up off the turn table and move it to the cake stand. If you use one the exact same size as your cake you can slide a flat spatula under it to help you lift it up until you can get your finders under it to pick it up. Have fun!
I made this for our friends surprised engagement party with the day of notice and it was perfect! Everyone loved it!!
Now, I want to make this for a couple of friend’s surprised party, however, I want to use small pans—2.5in diameter. Can I cut the recipe in half? And baking time approx? Thanks!!
Hi! I used this recipe for my fiancé’s birthday but I used cream cheese frosting (from your recipe) instead. But the cream cheese frosting was not enough to make a thick inner layer so I had to compromise and made a thin layer instead so I can cover the whole cake. What do you recommend about this? Also, is using buttercream better than cream cheese frosting for a semi-naked cake? Thank you!
Hi Joy, If you used this link (https://sallysbakingaddiction.com/favorite-cream-cheese-frosting/) it’s enough for a 9×13 sheet cake. If you wish to use it for a layer cake please see the recipe notes!
And for this vanilla naked cake you can absolutely still use cream cheese frosting instead of buttercream if you enjoy it!
I made this cake yesterday and it was awesome, now I need to make a 3 tier cake (3×6, 3×8, 3×10) next week for my nephew’s wedding. I plan to decorate the entire cake night before then refrigerate it without covering up as I dont have anything big enough to cover it up. Will this be ok? Because the other issue is the hot humid weather here in American Samoa, 85 to 90 degrees even at night which is why i need to refrigerate it… hope the frosting will hold up….
Hi Sally,
I’m trying to use this for my little one’s first birthday. I would love to do 3 different 6 inch tiers. If I do this, how much batter would be needed to fill each tin, and would I adjust the bake time? I’m assuming I might also need to half the recipe?
Thanks so much!
Hi Brittany, For a 6 inch vanilla cake I suggest you use this recipe: https://sallysbakingaddiction.com/6-inch-cake-recipes/
You can still frost it naked style! Enjoy!
This is my new favorite cake to make. I made it with strawberries instead of the raspberries. Everybody loved it. Thank you!
Hey Sally I am making a 3 tiered wedding cake and was thinking of using this recipe. Is it strong enough to support itself (I am using dowels) and also, would it dry out if I ice it as semi naked the day before the wedding and leave in the fridge overnight? Thanks!
It should be ok for a tiered cake as long as each layer is properly supported with cake rounds and dowels. If you frost it as a naked cake I would make sure it’s covered well so that it doesn’t dry out. You can also try using a simple soaking syrup to ensure that it stays moist, but I haven’t personally tried this. Let me know how it turns out!
Thank you for this amazing recipe! I made this cake for my daughters baby shower yesterday. It was such a hit! Everyone LOVED it. My daughter is really picky about cake. She said that this was as good, if not better, than her favorite Sprinkles Vanilla Cupcake!
Hi Sally,
I am going to try and make this for my daughter’s first birthday
Can I use vanilla bean paste instead of extract, so that the cake has some of the tiny vanilla beans through it?
Also, will it stack well if I make a double (or triple) mix – we have quite a few people coming.
Many thanks!
Hi Tara, Yes you can use an equal amount of the vanilla paste – I love it! If you properly support the cake it should stack just fine. One tip is to make the recipe multiple times instead of doubling it. Enjoy!
Am I correct based on my reading of the recipe that the flour should be sifted BEFORE measuring?
Correct.
I am going to attempt this cake for my daughters wedding. The venue is outdoor on a farm with lots of mason jar centerpieces, burlap, wood rounds and galvanized buckets..super rustic…This cake looks perfect, just hope I don’t mess it up as I have never attempted a semi naked cake. Also perfect for the bride and groom as they do not like lots of icing 🙂
Hi Sally, I made a practice run of this delicious cake for my sons upcoming 1st birthday party. I’d like to make it the day/night before. My buttercream turned a yellow colour the day after I iced it. Is there any way to avoid this from happening? And do I store it in the fridge or at room temperature over night? Thanks so much!
Hi Simone, For pure white icing it depends on the color of your butter and your vanilla. If it looks a bit yellow you can actually put a *tiny* drop of purple gel food coloring into the frosting and it will whiten it – sounds really weird but it really works! If you cover the cake it is absolutely fine to leave it out overnight at room temperature. If you kitchen is warm you can store it in the fridge. Enjoy!
How dense does this cake turn out? Trying to find a nice vanilla cake that is relatively dense so I can use it for a wedding cake (my own) and would it need a simple syrup once baked ? This will be for my 6inch tier so it will be the top
Thanks x
Hi Emma, This is a light and fluffy cake – not dense like a pound cake. But for a top tier it will hold up just fine – and no need for simple syrup unless you are making it well in advance.
Thanks so much for your reply! 🙂 I’m getting married in a week so was going to bake today/tomorrow and freeze until Thursday, decorate Friday for eating on Saturday, so I guess I’m asking if they freeze well? Thank you again!
Loved the taste but came out almost too dense for me!!! Any thing I might have missed any tricks?
If I’m wanting to use the vanilla cake recipe as a base for making an almond naked cake, what would I do to give it the best favor?
Hi Devon! I recommend 1 and 1/2 teaspoons of almond extract and 1 and 1/2 teaspoons vanilla.
How do I adapt this recipe for a 12 inch pan?
For 3 12-inch pans? You may need 1.5x the batter to yield 3 12-inch cakes. Doubling would likely be too much.
Love this recipe. My mum and sister love it with strawberries!
This is an amazing recipe l. I love it, but only make it if you have a/c. I dont have a/c and was making this cake for my mother in laws birthday and the frosting was melting while i was assembling the cake and the layers started slipping off to the side, lol! Granted i live in michigan and it was 80° with humidity. It still turned out decent, a little lopsided but it tasted great!
Can I use Vanilla Bean Paste in place of. Vanilla bean and if so how much?
Hi Kathryn! You can use vanilla bean paste instead of the vanilla extract. Same amount!
Awesome! Sorry one more question. If I have caster sugar can that be used in place of the granulated on the cakes? Obviously not for the buttercream?
Hi Kathryn! You can use caster sugar in this cake batter.
Hi Sally,
I always go to your recipes for trying something new because they are so reliable! I’m looking for a non chocolate cake recipe that’s particularly sturdy/well suited for being the bottom tier of a two tier cake (my first one!). I know it’ll need supports as well but I was wondering if you think any of your recipes might be particularly good for this?? Thanks for any advice!
Hi Amy! This naked cake batter is my ideal recipe for tiered cakes. You’ll be pleased with it!