

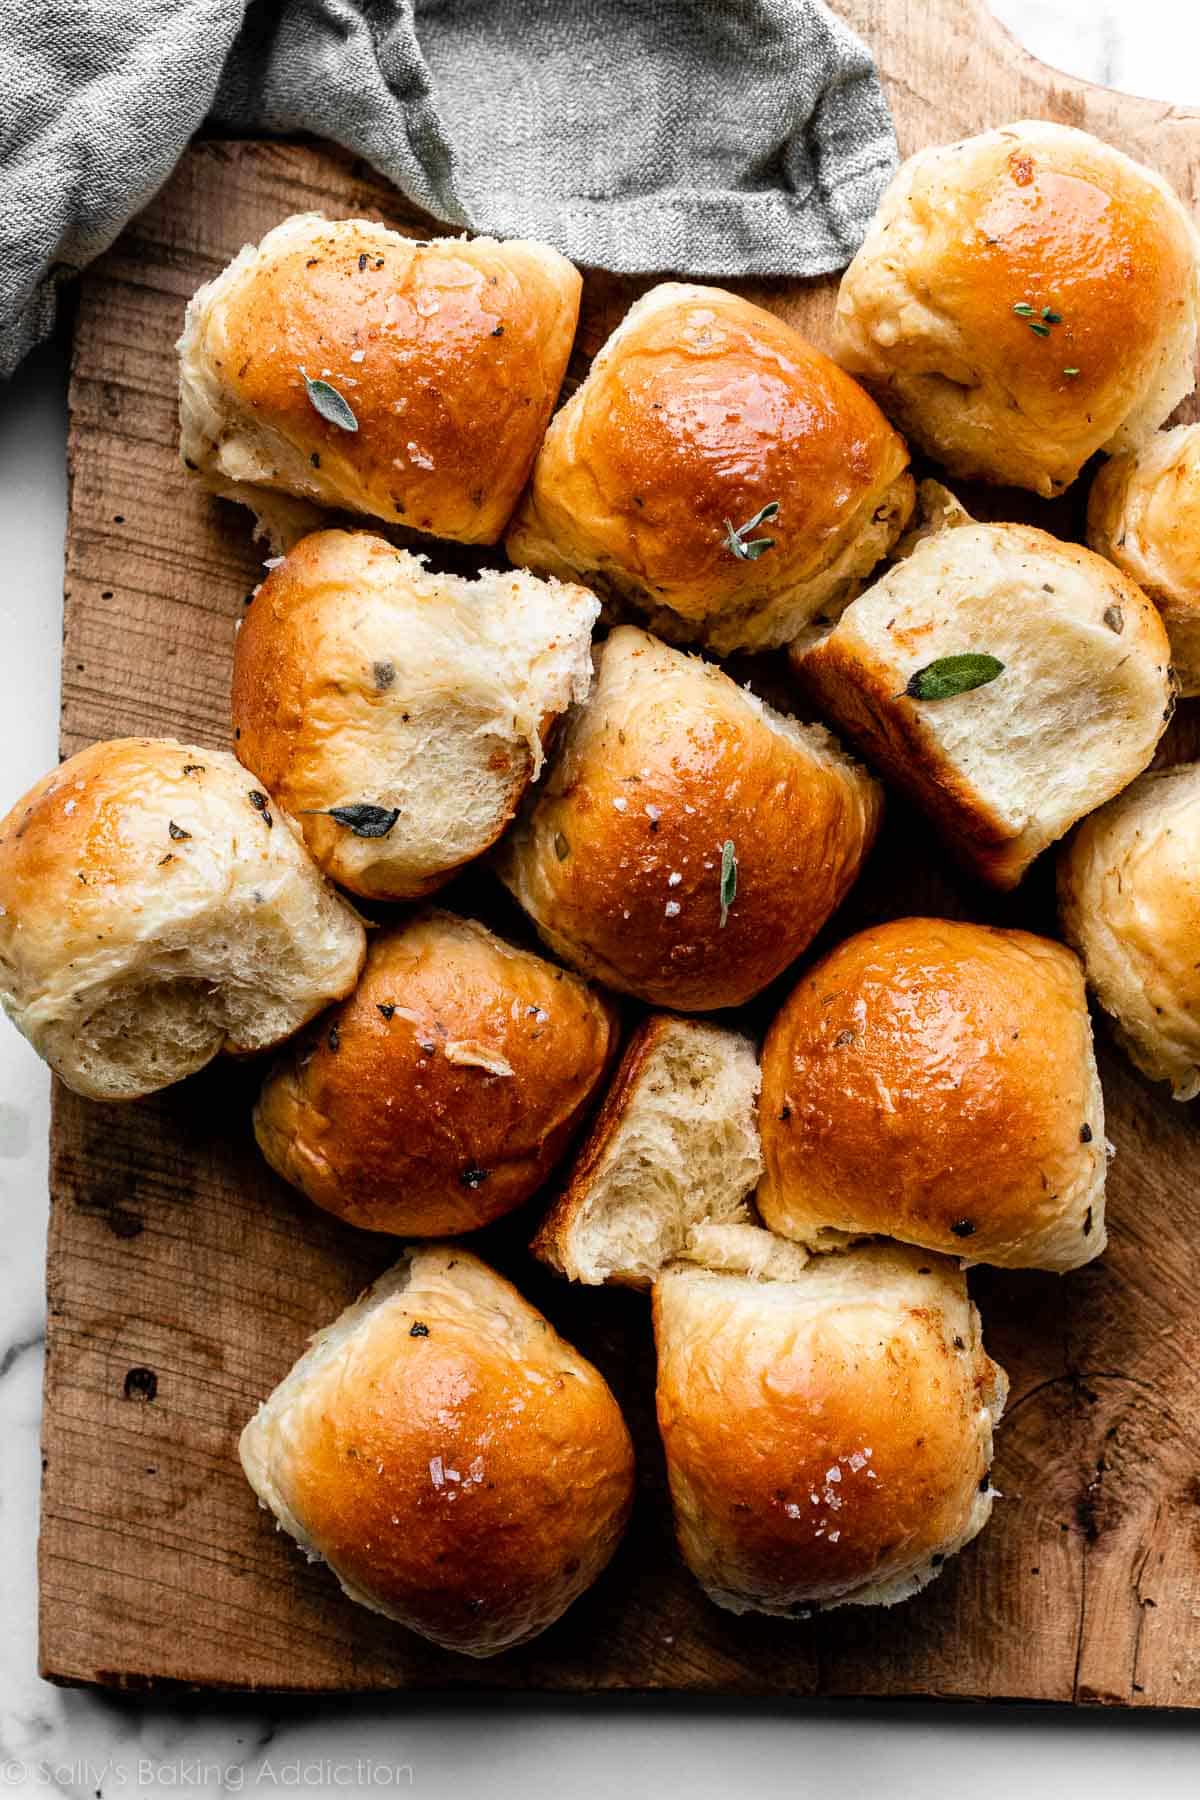
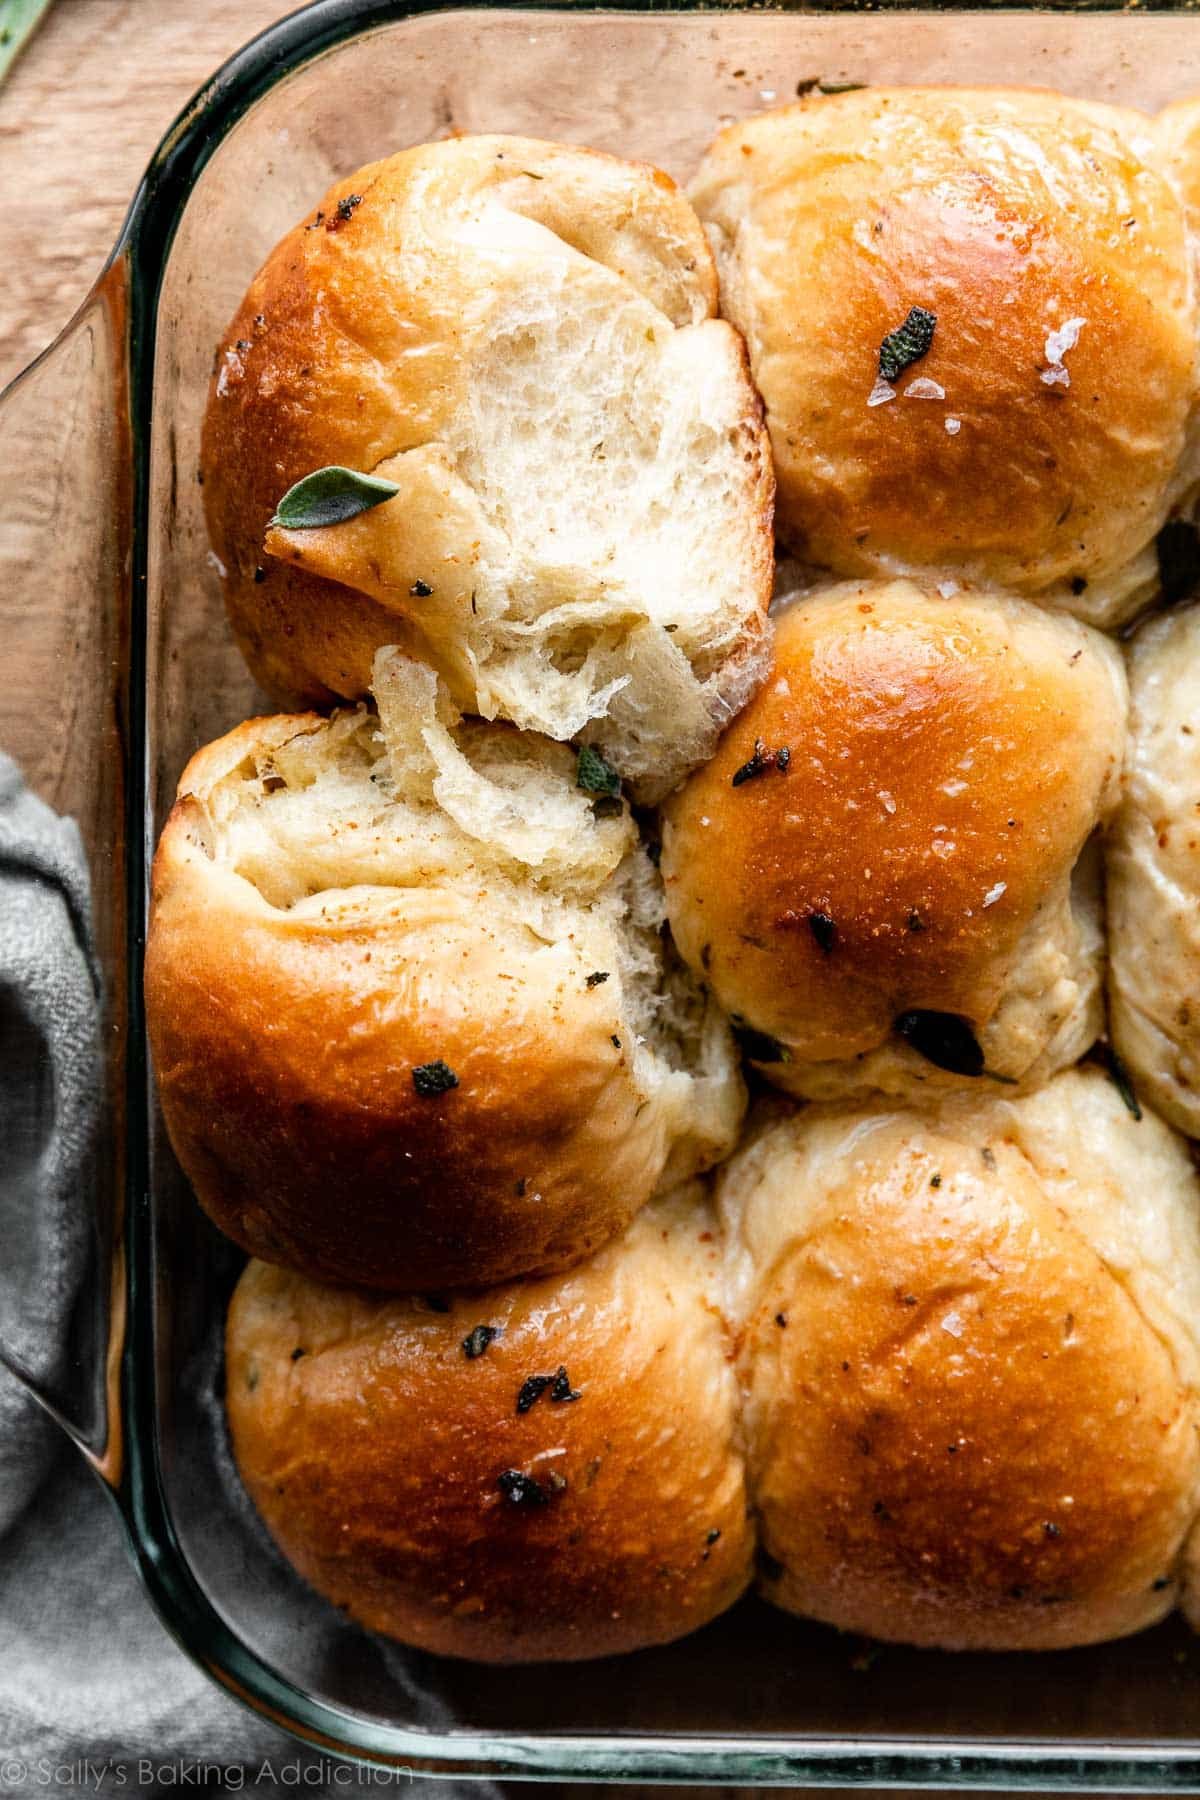
Savory, soft, and flaky, with a delicious dose of caramelized and nutty browned butter, these brown butter sage dinner rolls are a flavorful upgraded version of ordinary dinner rolls. Made from 9 simple ingredients, the rolls make a wonderful aromatic and herb-infused addition to any fall, winter, or holiday meal. (Try them with pumpkin chili!) See recipe Notes for make-ahead instructions.
This recipe is brought to you in partnership with Red Star Yeast.
One reader, Jen, commented: “Made these for Thanksgiving dinner tonight (Canadian Thanksgiving is in October). Everyone raved about them. The browned butter and fresh herbs take these over the top! ★★★★★“
I figured out what side dish should be on every dinner table from now until March. Basically, if it’s sweater weather, we should all be baking these brown butter sage dinner rolls. 😉
More than a side dish, these savory rolls are like a side of comfort for your comfort food!
Here’s Why You’ll Love These Sage Dinner Rolls
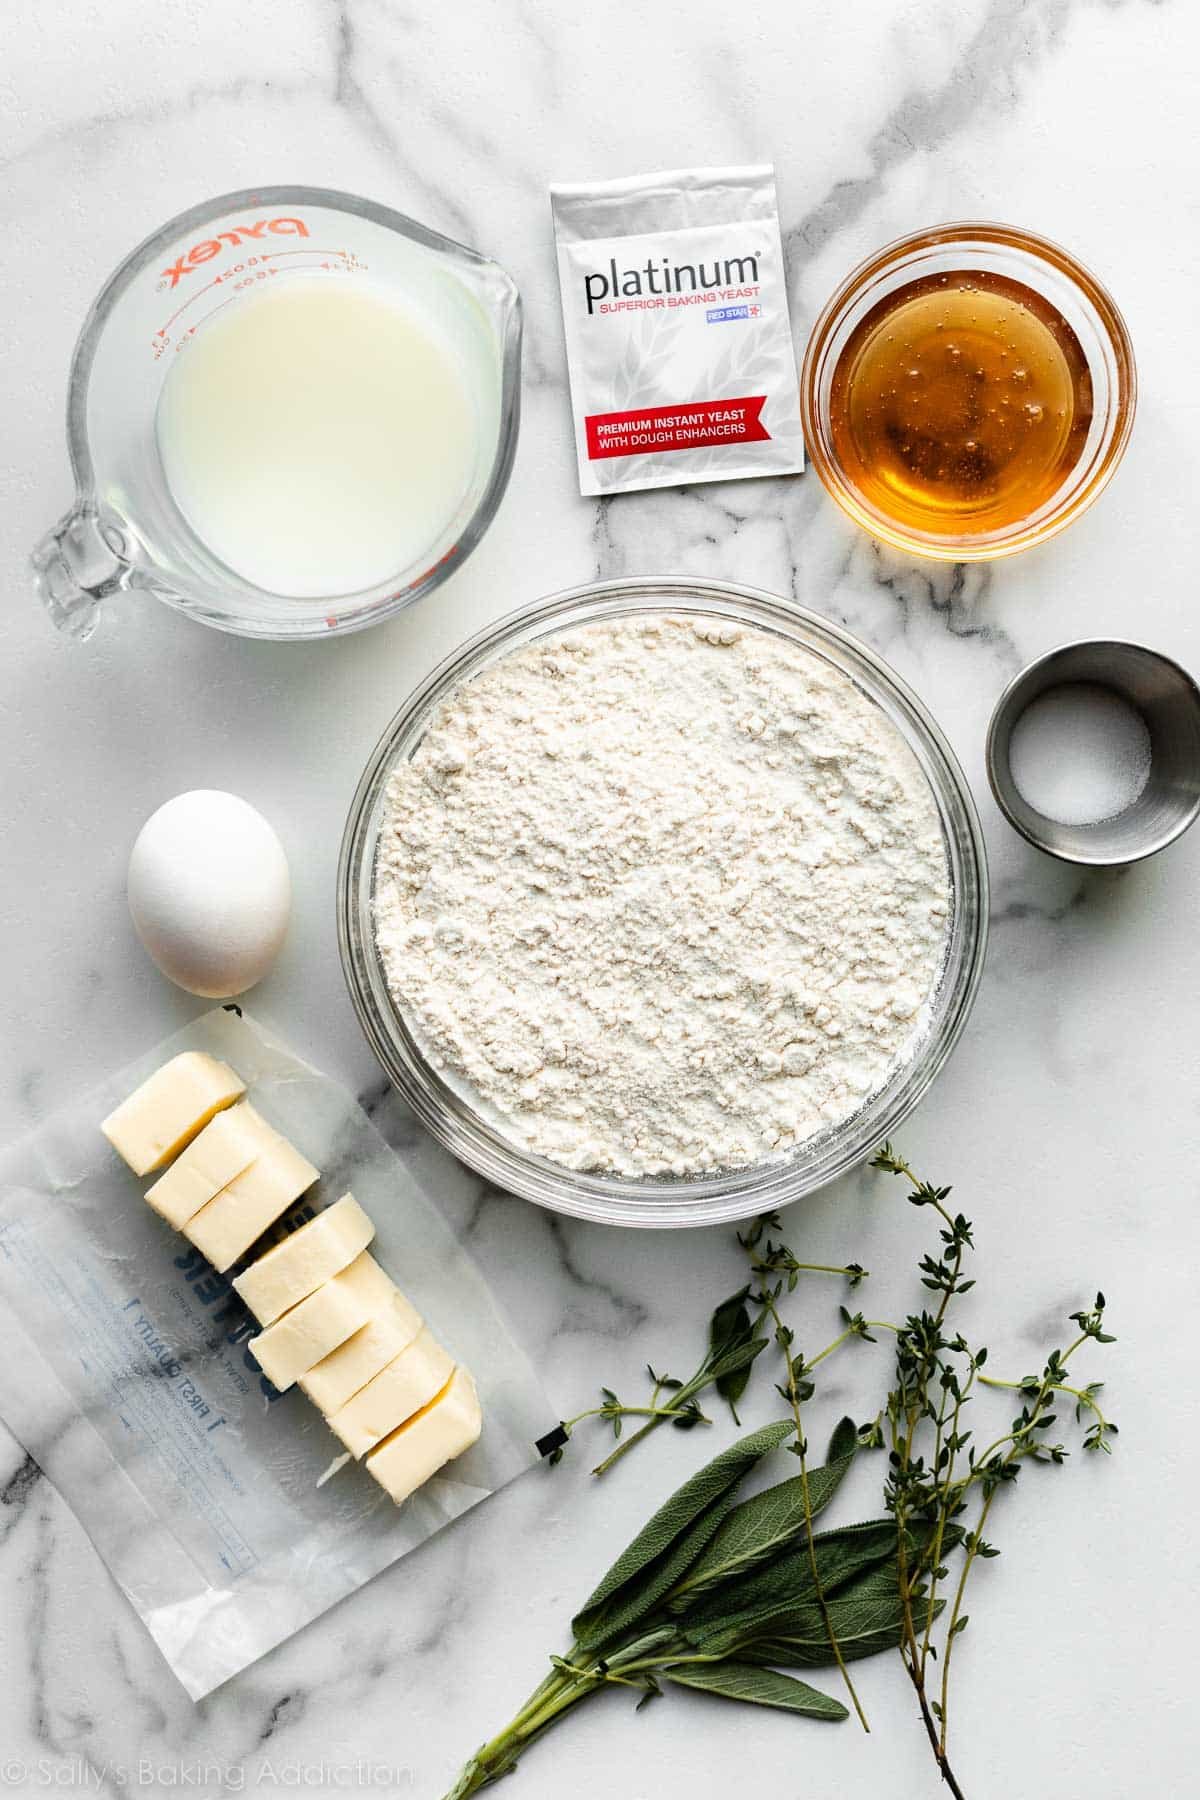
- 9 simple ingredients
- Browned butter adds depth of flavor, without adding too much prep time
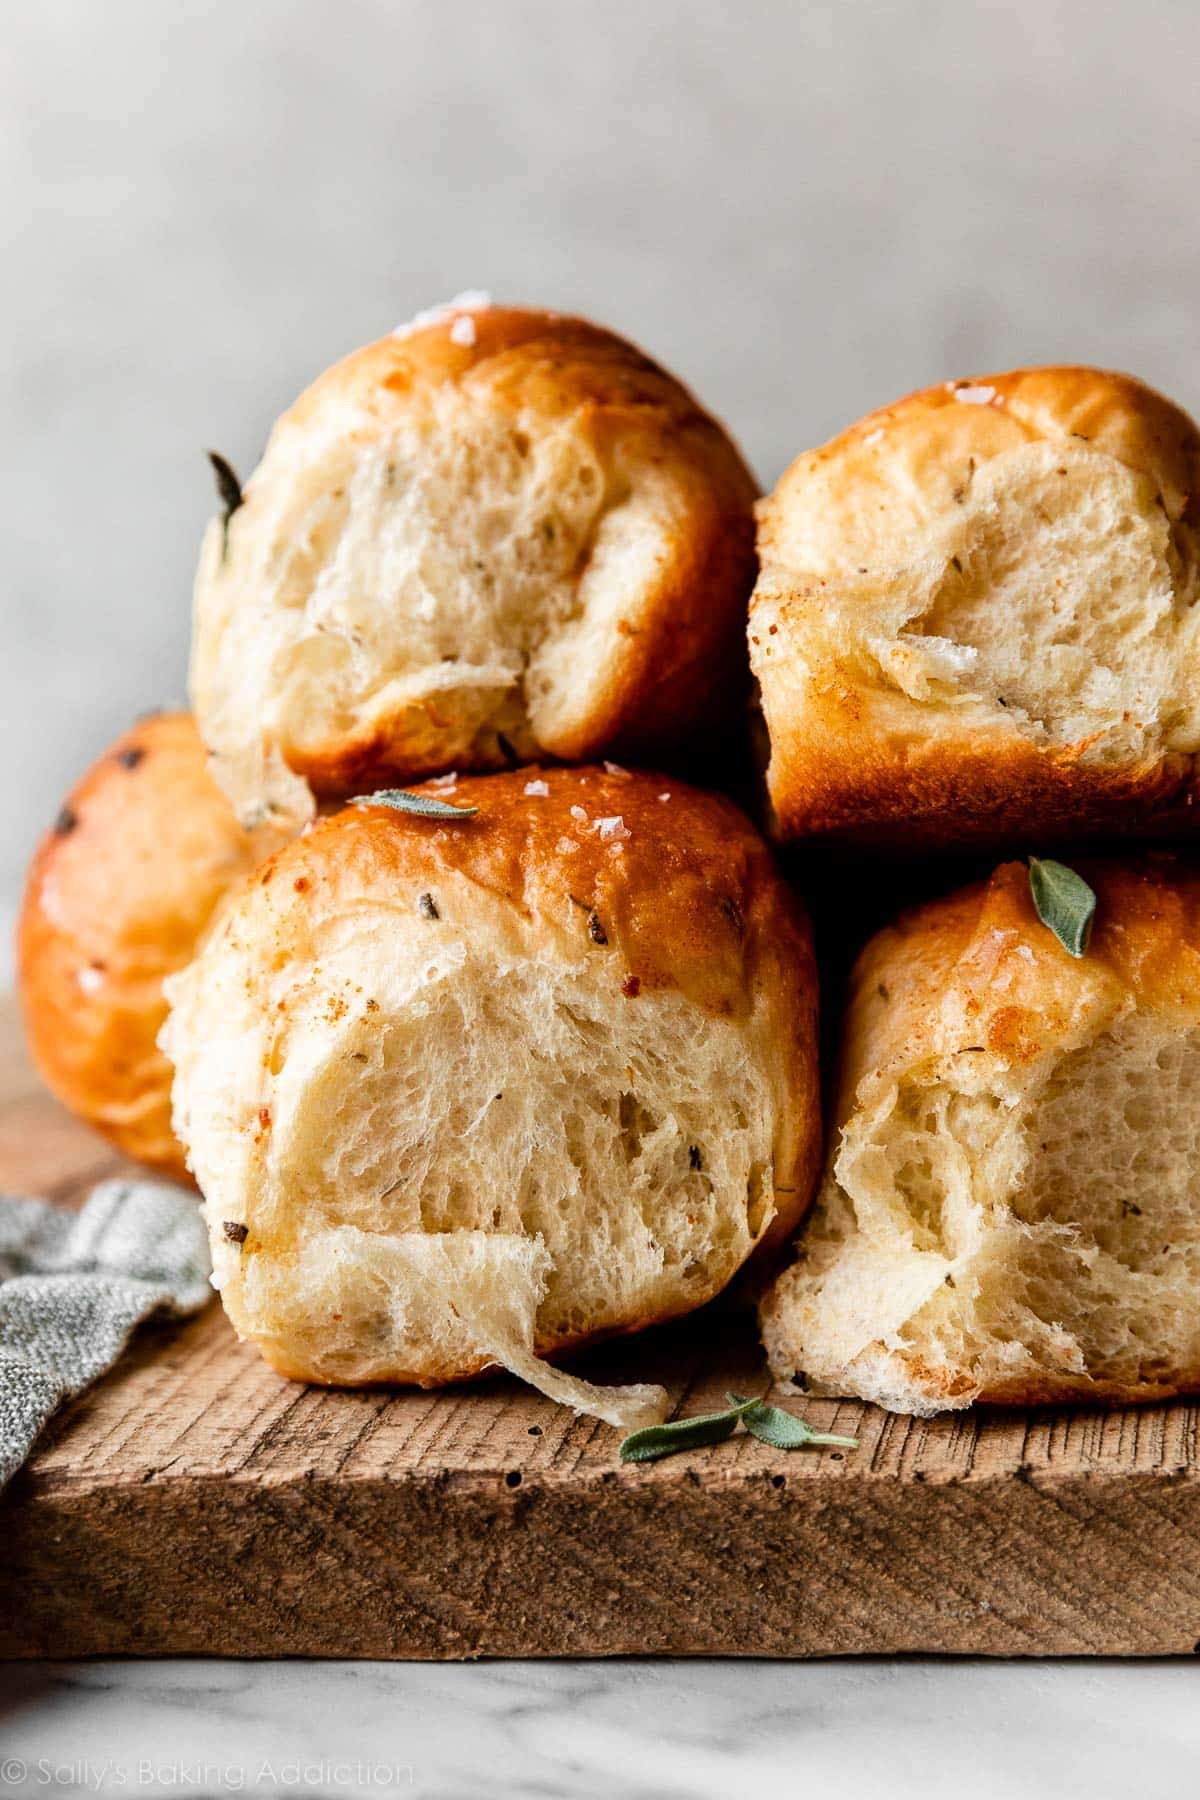
- Rolls are super soft, buttery, & flaky
- Delicious earthy herb flavors from fresh sage & thyme; feel free to switch up the herbs
- Adjust prep time to your schedule—make-ahead options detailed in Notes below
Key Steps in This Recipe
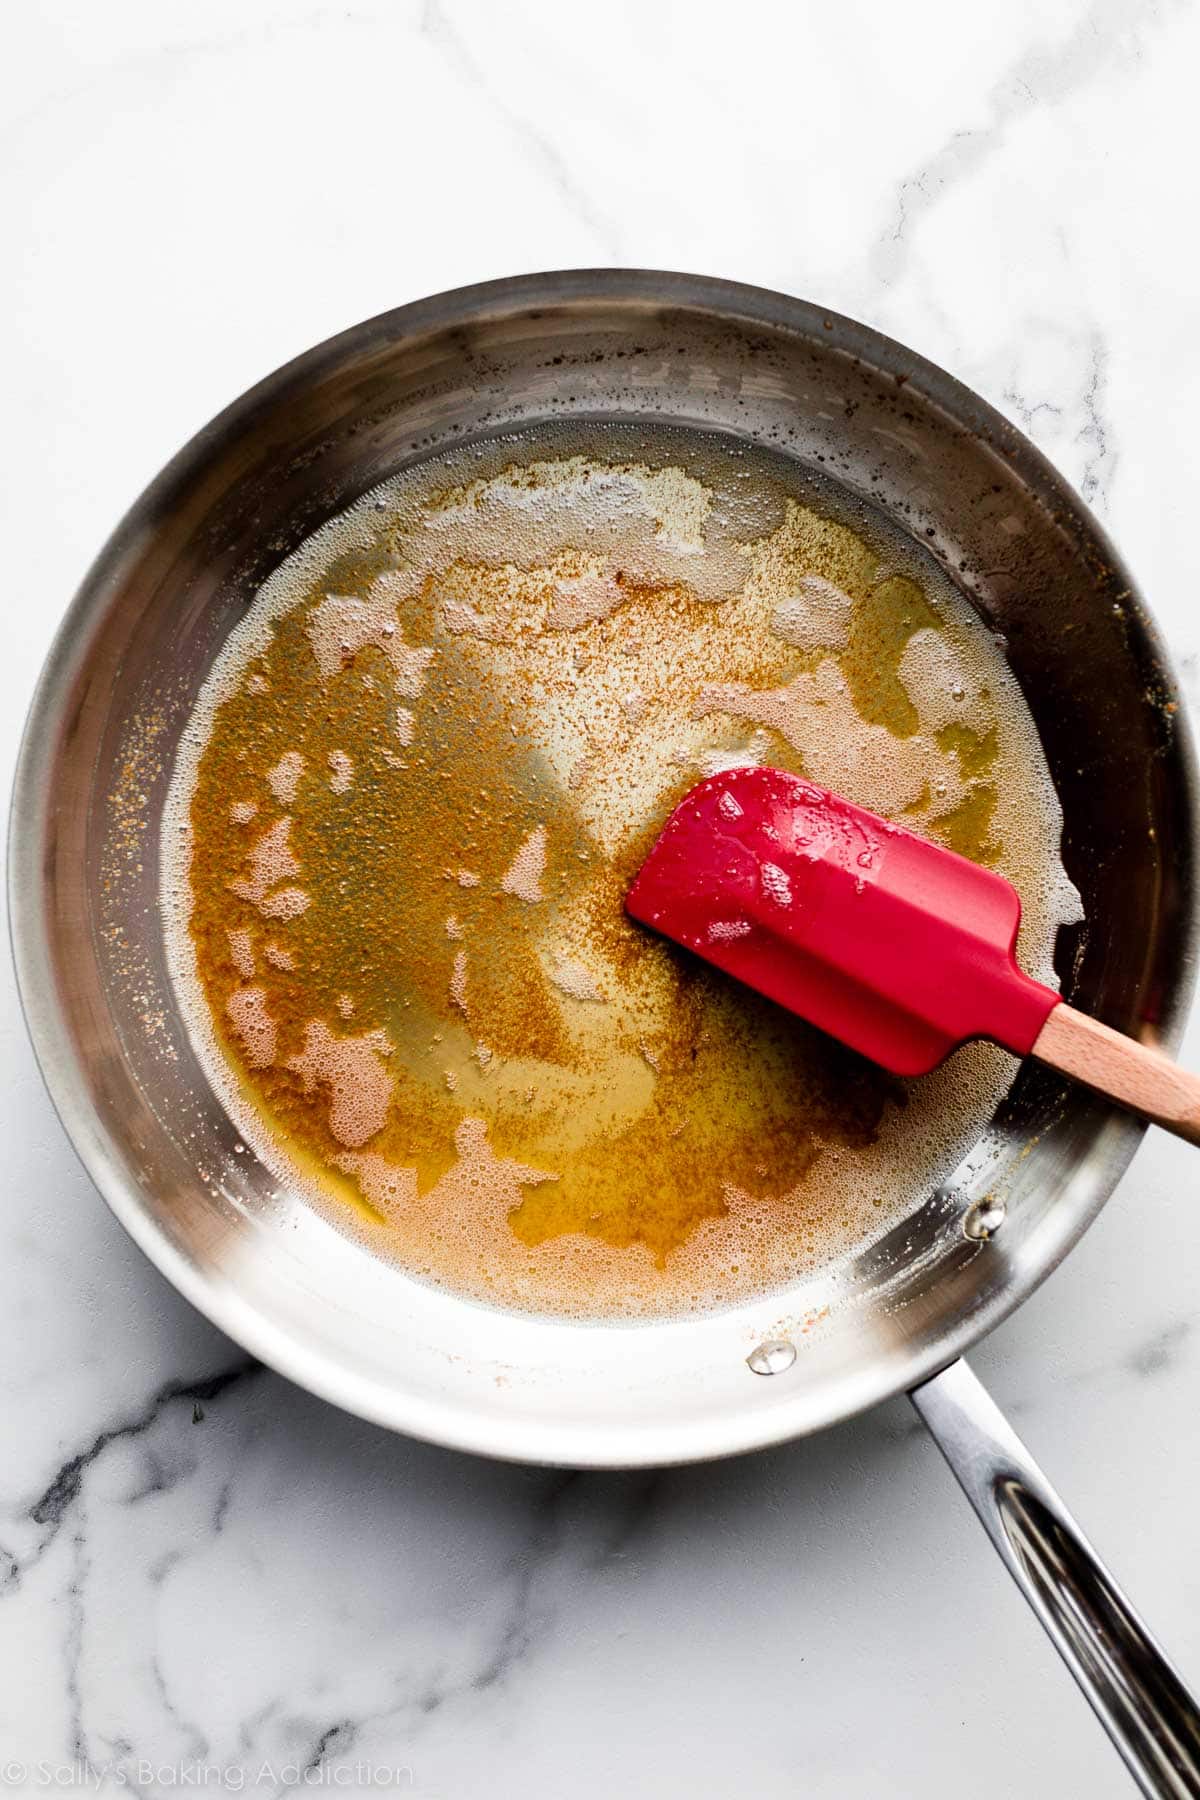
- Browning the butter: Browning butter gives a depth of flavor to an already delicious key ingredient. See How to Brown Butter if you’ve never done it before. (It’s easy!)
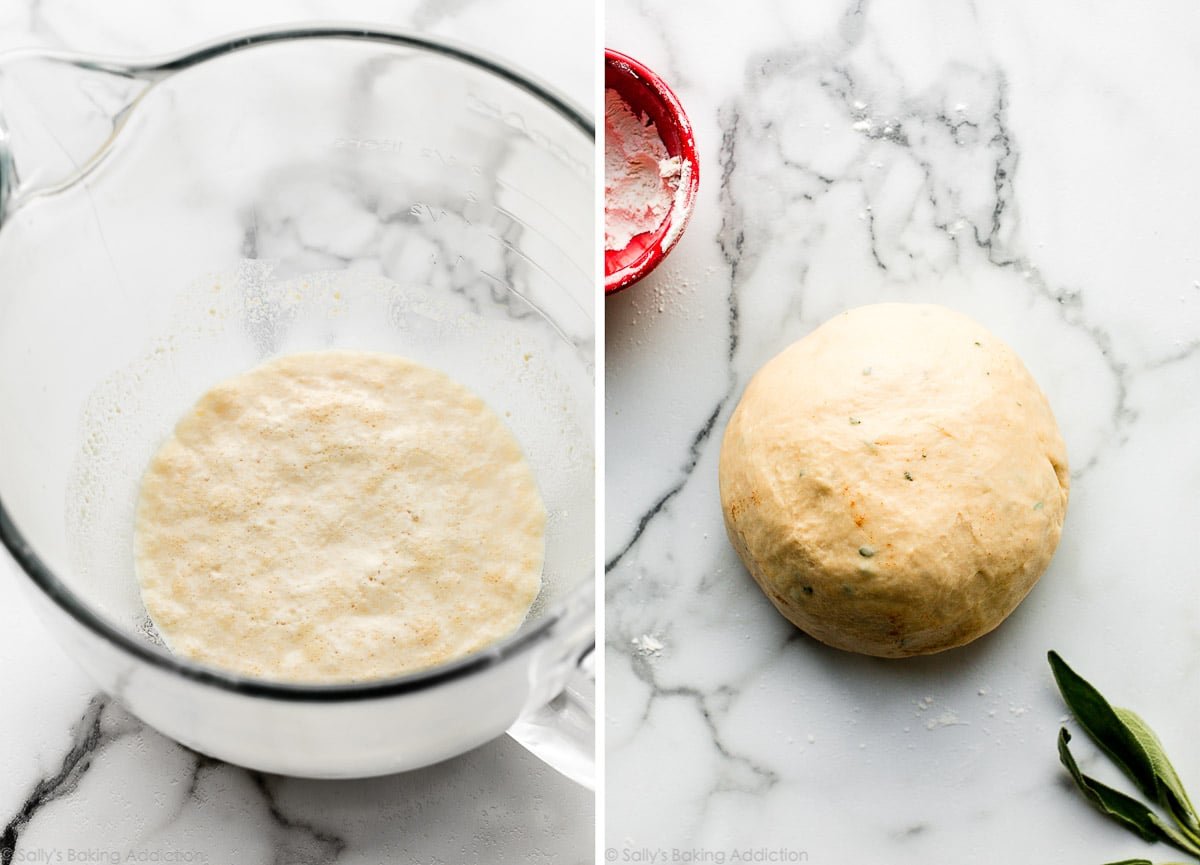
- Proofing the yeast: Proofing the yeast isn’t always necessary when you use instant yeast. However, I recommend doing it anyway to ensure the yeast dissolves and that it’s alive and active. Mix the yeast with warm buttermilk (or regular milk) and a little honey. Cover and let it sit for 5 minutes until foamy on top. Are you a bread-baking beginner? Reference my Baking with Yeast Guide for answers to common yeast FAQs.
- Making the dough: The dough comes together with milk, yeast, honey, egg, brown butter, salt, fresh sage and thyme, and flour. The honey feeds the yeast and tenderizes the dough. You can use all-purpose flour or bread flour in this recipe. You can use a stand mixer or a spatula to combine the dough ingredients.
- Kneading the dough: Knead the dough with your hands (or a stand mixer fitted with a dough hook) for 3 minutes. My video tutorial for How to Knead Dough is helpful here.
- 1st rise: The dough rises in about 1.5–2 hours in a relatively warm environment.
- Shaping the rolls: Form the rolls into balls as if you were making regular dinner rolls.
- 2nd rise: Let the shaped rolls rise until puffy, which takes up to 1 hour.
- Baking: Bake until the rolls are golden brown, around 25 minutes.
- Finishing: Brush remaining brown butter, mixed with a little bit more chopped sage, on the warm rolls, and sprinkle some sea salt on top, if desired.
Brown the butter on the stovetop first. You’ll use 6 Tablespoons of brown butter in the bread dough and reserve whatever you have left for brushing on top of the warm rolls.
All of the browned bits at the bottom of the pan hold so much flavor; do not omit!
Sage Dinner Rolls Require a Rich Dough
The crustier and chewier the bread, the less fat in the dough. The softer and richer the bread, the more fat in the dough. Unlike bagels, focaccia, and homemade artisan bread, buttery-soft sage rolls require a rich dough. “Rich” correlates with the amount of fat. For example, this dough has milk, brown butter, and egg.
- Which yeast do I use? You can use active dry yeast or instant yeast in this recipe. If using active dry yeast, the rise times will be a little longer. I recommend Platinum Yeast from Red Star, which is an instant yeast blended with natural dough improvers.
Combine the yeast with warmed milk, a little honey, and your yeast. Let this mixture sit for 5 minutes or until foamy on top (pictured below, left). Then, add the rest of the ingredients to form a soft dough (pictured below, right), and then knead. See my How to Knead Dough video tutorial if you’re new to yeasted dough or would benefit from a visual of this step.
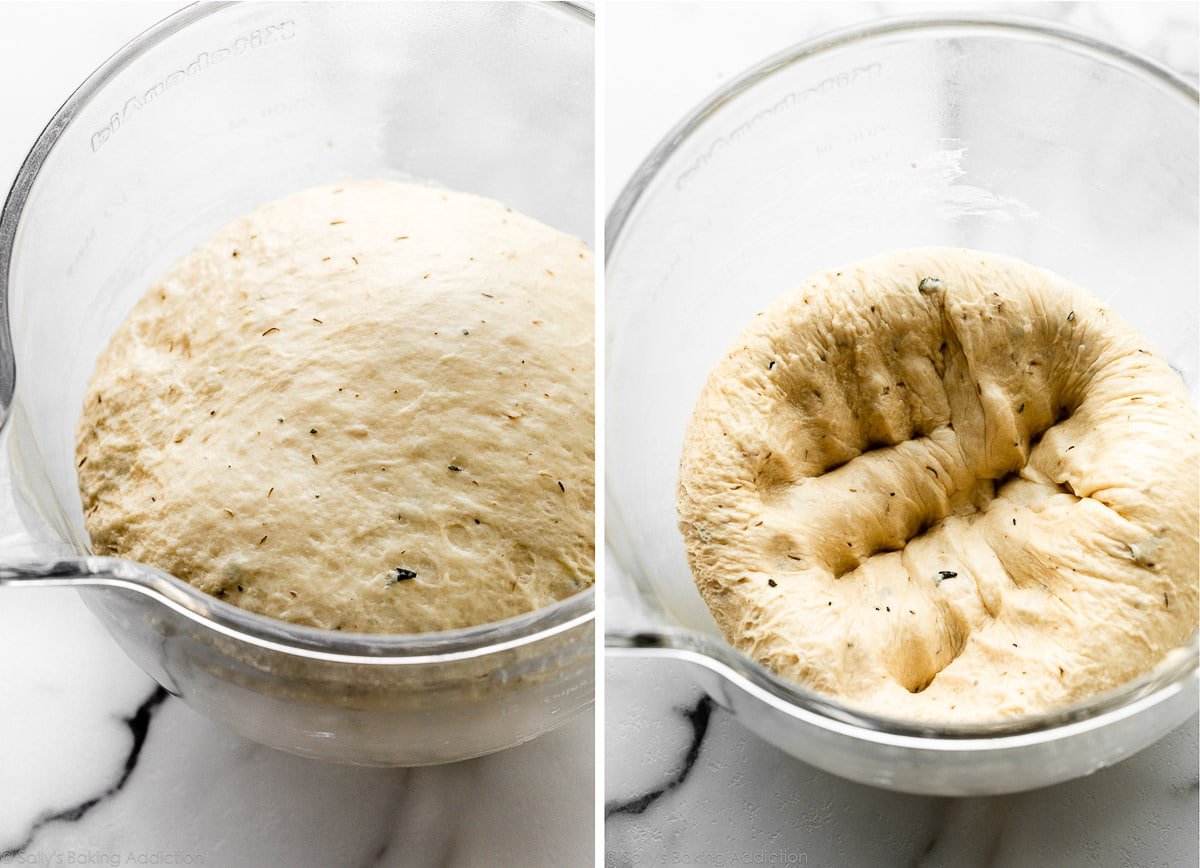
Let the dough rise until double in size and then punch it down to release the air:
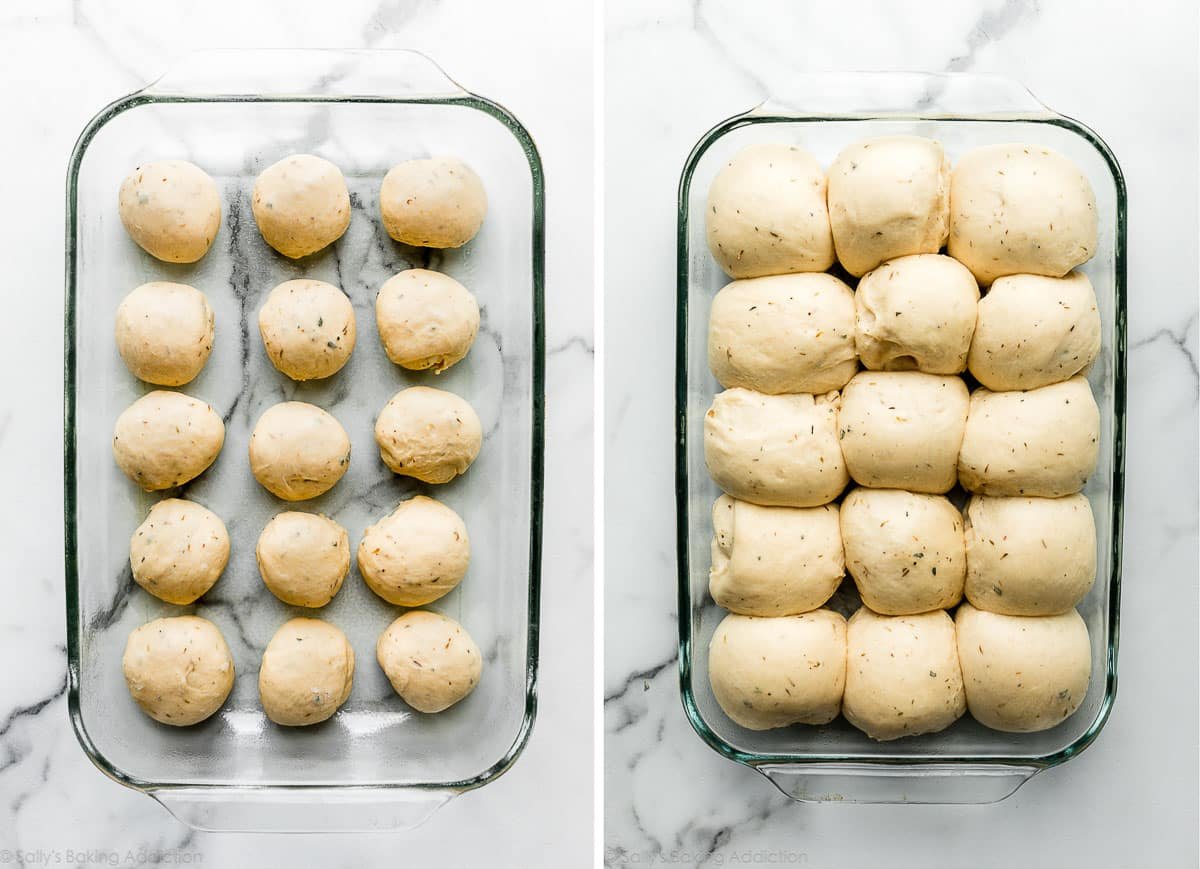
After that, shape into 14–16 balls and arrange in a baking pan. Don’t worry if they’re not all uniform in size. A 9×13-inch pan is ideal for these brown butter sage dinner rolls, but you can bake them on a lined baking sheet or in two 9-inch round or square pans instead.
Let the shaped rolls rise before baking. Look how puffy they get after 1 hour of rising:
Finish With Herbed Brown Butter & Sea Salt
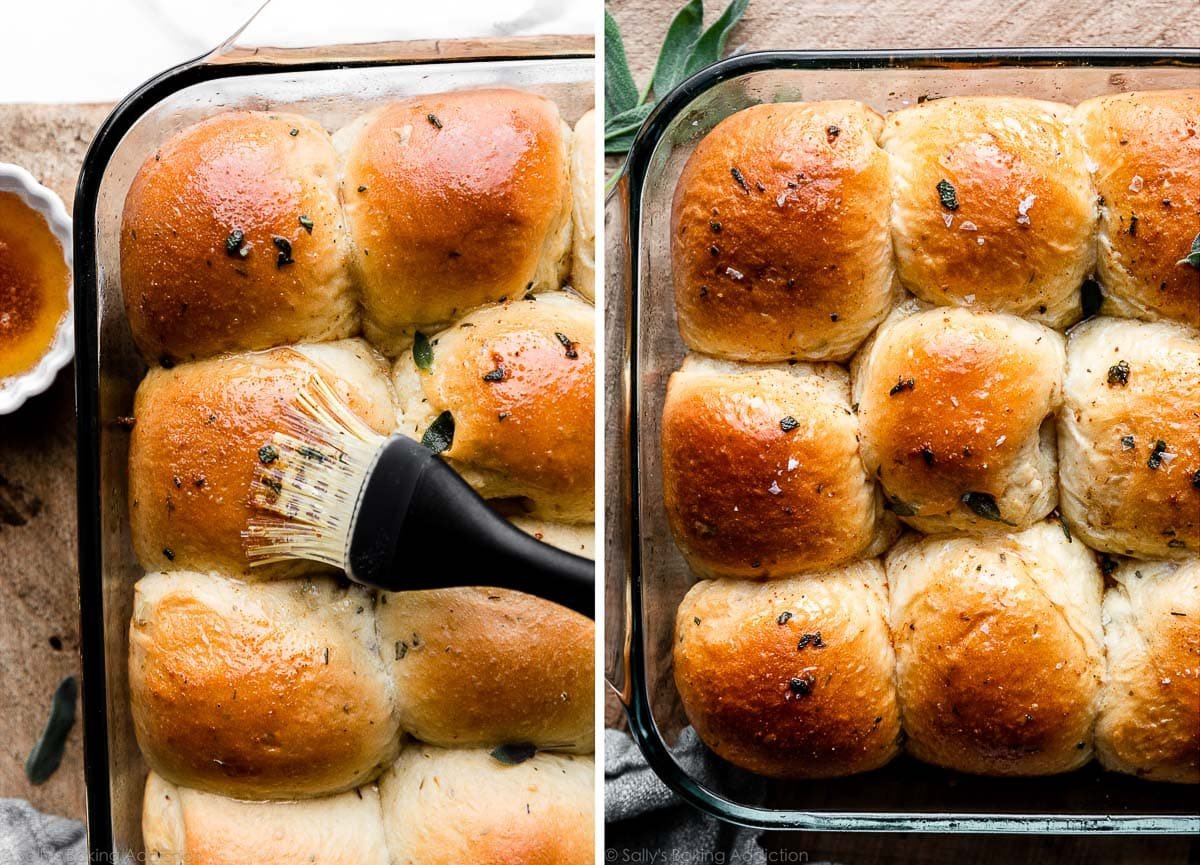
The rolls are done when they’re golden brown… and just wait until you smell these baking!
Brush the warm rolls with the remaining brown butter, mixed with a little more chopped sage, and finish with an optional sprinkle of sea salt. If you’re ever shopping online for sea salt and need a recommendation, I use and love Maldon flaky sea salt.
Thyme & sage work hand-in-hand to produce a deep herb flavor in today’s rolls. If you want to switch it up, substitute rosemary or parsley for one or both or try these garlicky herb skillet rolls instead. I have even more dinner rolls options if you’re looking for inspiration:
- Plain Dinner Rolls
- Whole Wheat Dinner Rolls
- Hot Cross Buns
- Soft Pretzel Rolls
- Homemade Bread Bowls
- Honey Butter Rolls
- Sweet Potato Dinner Rolls
Can I Turn This Into a Loaf of Bread?
No, I don’t recommend using today’s dough recipe for a loaf of bread because it’s not sturdy enough. Instead, try cranberry nut no-knead bread, olive bread, rosemary pull apart bread, or this sandwich bread or whole wheat bread.
Today’s soft dough is best shaped into rolls.
Serve brown butter sage rolls with cold weather favorites like your Thanksgiving dinner, creamy chicken noodle soup, lemon thyme chicken, sausage stuffed peppers, turkey pot pie, or minestrone soup.
Print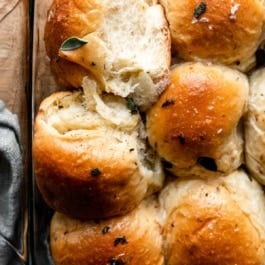
Brown Butter Sage Dinner Rolls
- Prep Time: 3 hours, 35 minutes (includes rises)
- Cook Time: 25 minutes
- Total Time: 3 hours, 50 minutes
- Yield: 14–16 rolls
- Category: Bread
- Method: Baking
- Cuisine: American
Description
Savory, soft, and aromatic, with a delicious dose of the caramelized nutty flavor that comes from browning butter, these flavorful rolls make a wonderful addition to any fall, winter, or holiday dinner. See recipe Notes for make-ahead instructions.
Ingredients
- 1/2 cup (8 Tbsp; 113g) unsalted butter, cut into 8 pieces
- 3/4 cup (180ml) whole milk or buttermilk, warmed to about 110°F (43°C)
- 2 and 1/4 teaspoons Platinum Yeast from Red Star instant yeast* (1 standard packet)
- 3 Tablespoons (64g) honey, divided
- 1 large egg, at room temperature
- 1 teaspoon salt
- 2 teaspoons fresh chopped sage leaves, plus an extra pinch for topping
- 1 teaspoon fresh thyme leaves
- 3 cups (390g) bread flour (spooned & leveled), plus more as needed*
- optional: flaky sea salt, for finishing
Instructions
- Brown the butter: Set out a medium heatproof bowl because you’ll need it at the end of this step. Place the sliced butter in a light-colored skillet or saucepan. A light-colored interior is crucial for determining when the butter begins to brown. Melt the butter over medium heat and stir or whisk constantly. Once melted, the butter will begin to foam. Continue stirring/whisking, keeping a close eye on it. After about 5–7 minutes, the butter will begin browning and you’ll notice lightly browned specks forming at the bottom of the pan. The butter will have a nutty aroma. The color will gradually deepen, from yellow to golden to golden-brown; once it’s a light caramel-brown color, remove from heat immediately and pour into the bowl, including any brown solids that have formed on the bottom of the pan. Cool for 10 minutes.
- Prepare the dough: Whisk the warm milk, yeast, and 1 Tablespoon honey together in the bowl of your stand mixer. Or, if you do not own a stand mixer, a regular large mixing bowl. Loosely cover and allow to sit for 5–10 minutes until foamy and frothy on top.
- Add the remaining honey, the egg, 6 Tablespoons (90ml) of the slightly cooled brown butter (reserve the rest for brushing on top of rolls in step 11), the salt, sage, thyme, and 1 cup bread flour. With a dough hook or paddle attachment, mix/beat on low speed for 30 seconds, scrape down the sides of the bowl with a silicone spatula, then add the remaining bread flour. Beat on medium speed until the dough comes together and pulls away from the sides of the bowl, about 2 minutes. If the dough seems too wet to a point where kneading (next step) would be impossible, beat in more flour 1 Tablespoon at a time until you have a workable dough. Dough should be soft and a little sticky, but still manageable to knead with lightly floured hands.
- Knead the dough: Keep the dough in the mixer (and switch to the dough hook if you used the paddle) and beat for an additional 5 full minutes, or knead by hand on a lightly floured surface for 5 full minutes. (If you’re new to bread-baking, my How to Knead Dough video tutorial can help here.) If the dough becomes too sticky during the kneading process, sprinkle 1 teaspoon of flour at a time on the dough or on the work surface/in the bowl to make a soft, slightly tacky dough. Do not add more flour than you need because you do not want a dry dough. After kneading, the dough should still feel a little soft. Poke it with your finger—if it slowly bounces back, your dough is ready to rise. You can also do a “windowpane test” to see if your dough has been kneaded long enough: tear off a small (roughly golfball-size) piece of dough and gently stretch it out until it’s thin enough for light to pass through it. Hold it up to a window or light. Does light pass through the stretched dough without the dough tearing first? If so, your dough has been kneaded long enough and is ready to rise. If not, keep kneading until it passes the windowpane test.
- 1st Rise: Lightly grease a large bowl with oil or nonstick spray. Place the dough in the bowl, turning it to coat all sides in the oil. Cover the bowl with aluminum foil, plastic wrap, or a clean kitchen towel. Allow the dough to rise in a relatively warm environment for 1.5–2 hours or until double in size. (I always let it rise on the counter. Takes about 2 hours. For a tiny reduction in rise time, see my answer to Where Should Dough Rise? in my Baking with Yeast Guide.)
- Grease a 9×13-inch baking pan or two 9-inch square or round baking pans. You can also bake the rolls in a cast iron skillet or on a lined or greased baking sheet. (See recipe Note.)
- Shape the rolls: When the dough is ready, punch it down to release the air. Divide the dough into 14–16 equal pieces. (Just eyeball it—doesn’t need to be perfect!) A bench scraper is always helpful for cutting dough. Shape each piece into a smooth ball. Arrange in prepared baking pan or a couple inches apart on a lined baking sheet.
- 2nd Rise: Cover shaped rolls with aluminum foil, plastic wrap, or a clean kitchen towel. Allow to rise until puffy, about 45–60 minutes.
- Adjust oven rack to a lower position and preheat oven to 350°F (177°C). (It’s best to bake the rolls towards the bottom of the oven so the tops don’t burn.)
- Bake the rolls: Bake for 23–27 minutes or until golden brown on top, rotating the pan halfway through. If you notice the tops browning too quickly, loosely tent the pan with aluminum foil.
- Remove rolls from the oven. Heat remaining browned butter to melt it since it has likely solidified (you can do this in the microwave for 10–20 seconds) and mix with a pinch of fresh chopped sage. Brush mixture all over warm rolls. If desired, sprinkle tops with coarse sea salt. Cool for a few minutes before serving.
- Cover leftover rolls tightly and store at room temperature for 2–3 days or in the refrigerator for up to 1 week.
Notes
- Freezing Instructions: Prepare recipe through step 7. Place shaped rolls in a greased baking pan, cover tightly, and freeze for up to 3 months. Once frozen, the dough balls won’t stick together anymore and you can place them in a freezer bag if needed. On the day you serve them, arrange the dough balls in a greased baking pan, cover tightly, then let them thaw and rise for about 4–5 hours. Bake as directed. You can also freeze the baked dinner rolls. Allow them to cool completely, and then freeze for up to 3 months. Thaw in the refrigerator or at room temperature, then reheat as desired. If reheating the whole pan, lightly cover and reheat in a 300°F (150°C) oven for about 10 minutes or until warm.
- Overnight Instructions: Prepare the recipe through step 7. Cover the shaped rolls tightly and refrigerate for up to about 15 hours. At least 3 hours before you need them the next day, remove the rolls from the refrigerator, keep covered, and allow to rise on the counter for about 1–2 hours before baking. Alternatively, you can let the dough have its 1st rise in the refrigerator overnight. Cover the dough tightly and place in the refrigerator for up to about 15 hours. Remove from the refrigerator and allow the dough to fully rise for 2 more hours. Continue with step 9.
- Special Tools (affiliate links): Light-Colored Skillet or Stainless Steel Skillet | Whisk | Stand Mixer or Large Glass Mixing Bowl | 9×13-inch Glass Baking Pan | Bench Scraper | Pastry Brush | Flaky Sea Salt
- No Stand Mixer? If you do not own a stand mixer, you can use a large mixing bowl and mix the dough together with a sturdy silicone spatula or wooden spoon. It will take a bit of arm muscle. A hand mixer works, but the sticky dough repeatedly gets stuck in the beaters. Mixing by hand with a wooden spoon or silicone spatula is a better choice.
- Baking Pan: I prefer baking the rolls in a glass 9×13-inch baking pan because I find they brown a little too quickly in a metal pan. But as long as you bake the rolls on a lower oven rack and keep your eye on them, any pan is great. You can also bake these rolls in a large cast iron skillet, or two 9-inch round or square baking pans. Bake time remains the same.
- Milk: Buttermilk or whole milk are ideal for the best, richest flavor and texture. Keeping that in mind, feel free to substitute with a lower-fat or nondairy milk.
- Yeast: Platinum Yeast from Red Star is an instant yeast. You can use Red Star Yeast active dry yeast instead. Rise times will be slightly longer using active dry yeast. Reference my Baking with Yeast Guide for answers to common yeast FAQs.
- Herbs: If you don’t have fresh herbs, you can use dried instead. Simply reduce the amount by half, so 1 teaspoon dried sage and 1/2 teaspoon dried thyme. (Add more if you want extra flavor.)
- Flour: If you don’t have bread flour, you can use all-purpose flour. All-purpose flour is convenient for most, but bread flour produces chewier dinner rolls. The rolls are still soft and fluffy no matter which you use. Either flour is fine and there are no other changes to the recipe if you use one or the other.


Reader Comments and Reviews
can I sub sour cream/yogurt with buttermilk?
Hi Scarlett, no, you need the liquid in this dough.
Hey! I was just wondering if you had any recommendations for subbing out the honey? I’m planning on bringing them to a Friendsgiving next week and someone has a honey allergy. Thanks so much!!
Hi Melissa, you can use regular sugar instead. Same amount.
This was a fun experience as it was my first time making bread! However the rolls came out a little more dense than I had hoped. I’m going to try again tonight, but do you have any suggestions for troubleshooting?
Hi Chandler, if your rolls are coming out dense, the dough may have been over kneaded. That can over develop the gluten and lead to tough bread. Be sure to also spoon and level your flour to ensure just the right amount — too much flour can dry out the bread and make the texture less fluffy. Here’s our baking with yeast guide with more tips!
If im using all-purpose flour, would adding dough conditioner help to get it back to the ideal chewy texture that bread flour provides?
Hi Sally, I’ve tried making dinner rolls many times, but every time I do, the dough develops a crust after the first rise. I lightly grease the pan and cover it and leave it to rise in a warm place. What am I doing wrong? Thanks!
Hi Meg! What are you covering it with? Plastic wrap may work better than a cloth at preventing a crust on the dough.
Do you have a butter that you would recommend putting on the rolls or do they not need any?
Hi Tara, any butter would be great here, but the rolls are excellent on their own.
I served these with truffle butter and it was next level!
Hi Sally and Team,
Thank you for sharing this wonderful recipe! I’m reaching out to see if you could help me troubleshoot. I followed the recipe without substitutition, but I couldn’t get the rolls to rise or brown. I had a similar issue when making buttermilk biscuits. Any ideas as to what may be causing the issue? TIA!
Hi Audrey! Perhaps your oven runs a bit cold. We always recommend using an in-oven thermometer for best results, as much ovens are not the temperature they say they are. This baking with yeast guide may be helpful for troubleshooting this recipe as well.
Hello, for some reason my rolls turned out more into biscuits with that slightly crispy crust. They super pillowy inside but how can I get the outside to be golden brown without getting crusty or crunchy
Hi Angela, if the outsides seemed a bit too hard, they could be over baked. For next time, you can reduce the bake time slightly and/or move the rolls a rack further away from the heating element. Thanks for giving these a try!
Hmm… maybe there was an issue with the yeast for the rolls. Regarding the issue with browning, whenever I use the time and temp recommenced by Sally, it always works. Just seems to be an issue with bread/biscuits (but when I make Sally’s focaccia, everything’s fine). Any other possibilities?
Loved this recipe, had to try it several times to get it right, only because of a few hiccups. Tried it not using bread flour—never again. The flour made a huge difference for lightness. Had some gooey insides, got an oven thermometer and found out my oven was running 20-25 degrees lower—even if I let it heat for a longer time. I live in Albuquerque, New Mexico where it is dry and Son wanted for Thanksgiving. Had to tweak, but worked out great. Live in desert so had to spray water and put a bowl of water in oven. Once I got those things resolved they were fabulous.
Extraordinary! I know you’re not really supposed to try new recipes on holiday (Cdn Thanksgiving today) dinners in case they don’t work out, but I have complete faith in Sally’s, and as usual, these were a terrific addition. It cracked me up when I noticed that six (!) of the dishes on my Thanksgiving table this year were from this website. I think that makes Sally an honorary Canadian 😉
Cindy, oh my gosh I am honored and thrilled to hear that you used so many of my recipes for your holiday!! WOW! Thank you so much. Which others did you try?
Exceeded expectations.
Hi there, can dried herbs be substituted and if so, do I use less due to higher potency of dried herbs? I am looking forward to trying this recipe. Thank you!
You bet! See recipe Notes for details.
If I want to make these gluten free, can I just substitute GF flour?
Hi Patty, we haven’t tested this recipe with GF flour, but let us know if you do!
Another sensational recipe, Sally! I made this with your minestrone soup. My husband and I enjoyed this with a lovely glass of red wine and wow, what a fabulous way spend the evening.
I always make your regular rolls for holiday and was excited to try this recipe but I could t get the dough to rise. I used a scale for ingredients and milk was to temp. Super bummed
Hi Simone! Could your yeast be old? You can find more tips in our baking with yeast guide!
I always make your dinner rolls, so light, buttery and fluffy! I have been thinking about trying these for a while and got around to it yesterday. The rolls just didn’t proof the way they should. I use a scale and measured everything exactly; I followed all instructions, no substitutions. There was no recommended temp to cool the browned butter, so I waited until it was 110, to be on the safe side. I gave extra time on the first rise, and the second…these rolls just did not puff up. I am an experienced bread maker and make all of your recipes with success…except this one. On the positive side…they smelled amazing!
This happened to me as well… I’ve been making breads for years and have never had this happen before. Unfortunately, I tried this recipe for the first time before a holiday get-together and am now bringing very ugly, small rolls for dinner
These are SO SO GOOD. Seriously. I can’t even overstate how delicious they are. I recommend following the recipe exactly as is (I understand the urge to try your own thing hahaha), because wow. Rave reviews from everyone.
It is Sally’s fault again! After making these for the first time on Thanksgiving Eve, I have been demanded to make these on a regular basis. My poor little fingers. Thanks Sally again for having me almost live in the kitchen. I don’t know whether to hug you or spank you for these delicious recipes. The jury is still out.
Hey Sally, I was wondering if you could double this recipe all at once or would it be better to make 2 different batches? Thank you
Hi Alivea, for best results (and to prevent over or under mixing/kneading), we recommend making 2 separate batches rather than doubling.
Can ghee be used instead of butter?
Shouldn’t be a problem, though we haven’t tested it.
So you can probably make rolls using ghee. It will change the flavor significantly though. It is not possible to make browned butter with ghee as ghee is butter with the milk solids removed and the browned part of browned butter is toasted milk solids.
I was so excited to try this, but my dough just did not rise! The yeast proofed ok. I heated the buttermilk a little to hot, but let it cool down before adding it in. After mixing in the flour, I had no “stickiness” so I didn’t need to add in any extra flour. I set my dough for the first rise, but it didn’t at all! Would love suggestions
Hi B. Patten! Sounds like your roll dough was a little too dry. How did you measure the flour? Make sure to spoon and level (instead of scooping) to avoid packing in too much flour into your measuring cups – or use a kitchen scale. You can read more about properly measuring baking ingredients in this post.
I’m not sure what went wrong. My dough didn’t want to come together and was quite dense. It did rise a bit during the first rise but once they were portioned out they didn’t puff up at all.
Hi Mel! Sounds like there may have been too much flour in your dough. How did you measure the flour? Make sure to spoon and level (instead of scooping) to avoid packing in too much flour into your measuring cups – or use a kitchen scale. You can read more about properly measuring baking ingredients in this post.
I’m not sure what’s supposed to happen when I click the “save recipe”. There doesn’t seem to be any “saved recipes” list I can access. What am I doing wrong?
Love your recipes and I’ve subscribed to your email. Thank you.
Hi Lidia, did you create an account? (This is separate from our email list.) If you’ve created an account, you can find your recipe favorites by clicking on the saved tag again, or the magnifying glass at the upper right hand of the page. Feel free to send us an email at sally@sallysbakingaddiction.com and we can help troubleshoot further there!
I am not a bread baker, but am excited to try these rolls.
I love herbs, too. Very put together pictures and instructions.
Made these for Thanksgiving dinner tonight (Canadian thanksgiving is in October). Everyone raved about them. The browned butter and fresh herbs take these over the top!
Great recipe!
this recipe is the greatest ive ever used. Always a big hit!
Wanting to make this recipe but just wondering what the purpose of the egg is?
Hi Isobel, the egg serves to add structure and bind the ingredients together.
What is brown butter?
Hi Eliana, You can read all about brown butter here.
Made these tonight for a dinner I hosted, everyone raved over them! Another wonderful recipe from you. Thank you
I made these rolls for Thanksgiving and they were great. So when I learned about converting recipes to use the tangzhong method I knew I had to try these! I used an additional 92 mL of water (about 3/8 of a cup) to achieve 75% hydration and used 1/2 a cup of liquid and 3 Tbsp of flour for my slurry. Additionally, I kneaded by hand until the dough passed the windowpane test, which took about 15 minutes for me—but I might just be a slow kneader! 🙂 The rolls were amazing! So fluffy and light, and a great flavor. I will definitely be making these again!
Thanks, Allison!! I had just posted to ask Sally about converting these. You’re awesome!